|
|
Post by wing_nut on Mar 7, 2016 20:02:26 GMT -5
The Stearman is on the shelf and time for my 1st airliner. Zvezdas kits of the A321 with Nazca-Decals for the new lvery American Airlines jets. Braz Models resin sharklet wingtips round out the project. 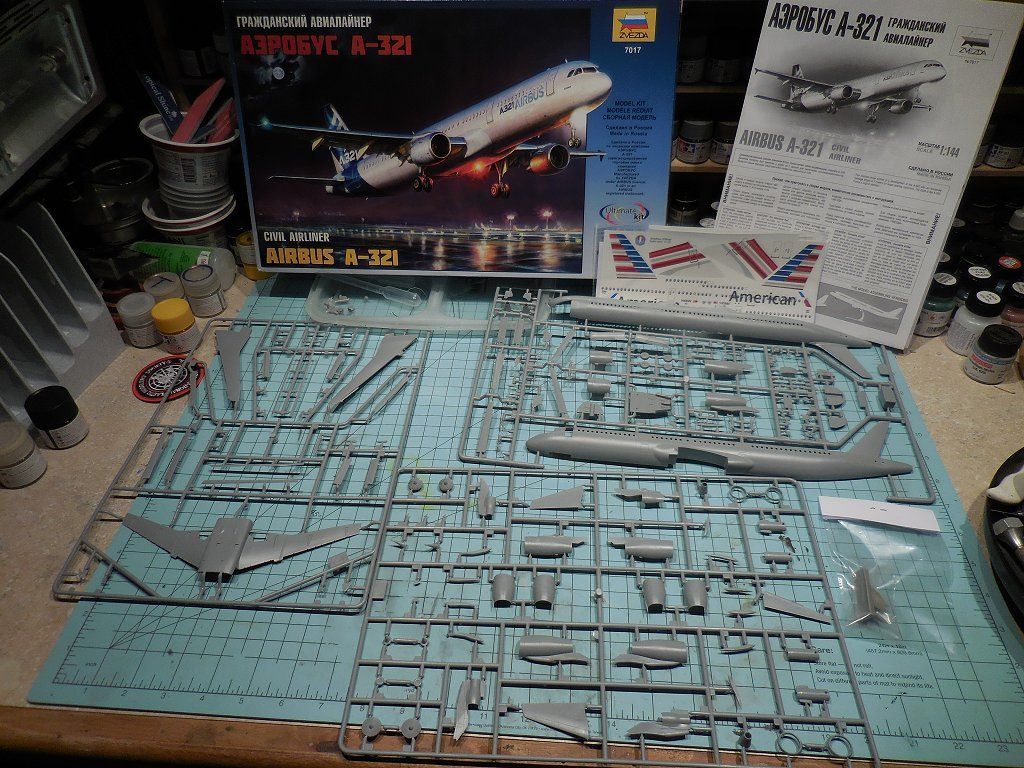 |
|
|
|
Post by wbill76 on Mar 7, 2016 20:11:13 GMT -5
Should be fun! Looking forward to your usual efforts here Marc.  |
|
|
|
Post by wing_nut on Mar 7, 2016 20:23:04 GMT -5
Thanks Bill. It's weird building a 144th scale kit that is more than 10 parts and covers my workbench.  |
|
|
|
Post by dierk on Mar 8, 2016 3:17:20 GMT -5
Modern civilian planes don't really rock my world, but as it's you it should be worth watching  after all, variety is the spice of life. |
|
John Everett
Full Member
  
Member since: January 2012
July, 2016 MoM Winner
Posts: 1,278
Jan 17, 2012 0:53:48 GMT -5
Jan 17, 2012 0:53:48 GMT -5
|
Post by John Everett on Mar 8, 2016 3:52:29 GMT -5
Are you planning flaps up or flaps deployed configuration? I've got Zvezda's A320 in the stash and I'm very impressed by the sprues. I'm curious to see hoe the clear cockpit piece fits and blends with the fuselage.
|
|
Deleted
Member since: January 1970
Posts: 0
Nov 29, 2024 3:35:52 GMT -5
Nov 29, 2024 3:35:52 GMT -5
|
Post by Deleted on Mar 8, 2016 6:53:22 GMT -5
|
|
|
|
Post by wing_nut on Mar 8, 2016 11:33:39 GMT -5
Dierk, it was never mine either but I would say the diversity of markings is 2nd only to WWII German aircraft and armor. John, config is TBA Bruce, Welsomc abourd. Please turn off all electronic divices, and make sure seat backs and trays are upright and in the stowed position... One of the thing I read in the kit reviews was that there was a bit of "texture'" on the part surfaces. I have not inspection all the parts yet but I found that parts of the fuselage has more than a bit. It gets worse as you get closed the mating surfaces. Under the windows is pretty smooth, above the windows you can see that it's starting to get worse. It gets tot he point it looks like the parts were sand cast instead of injection molded. 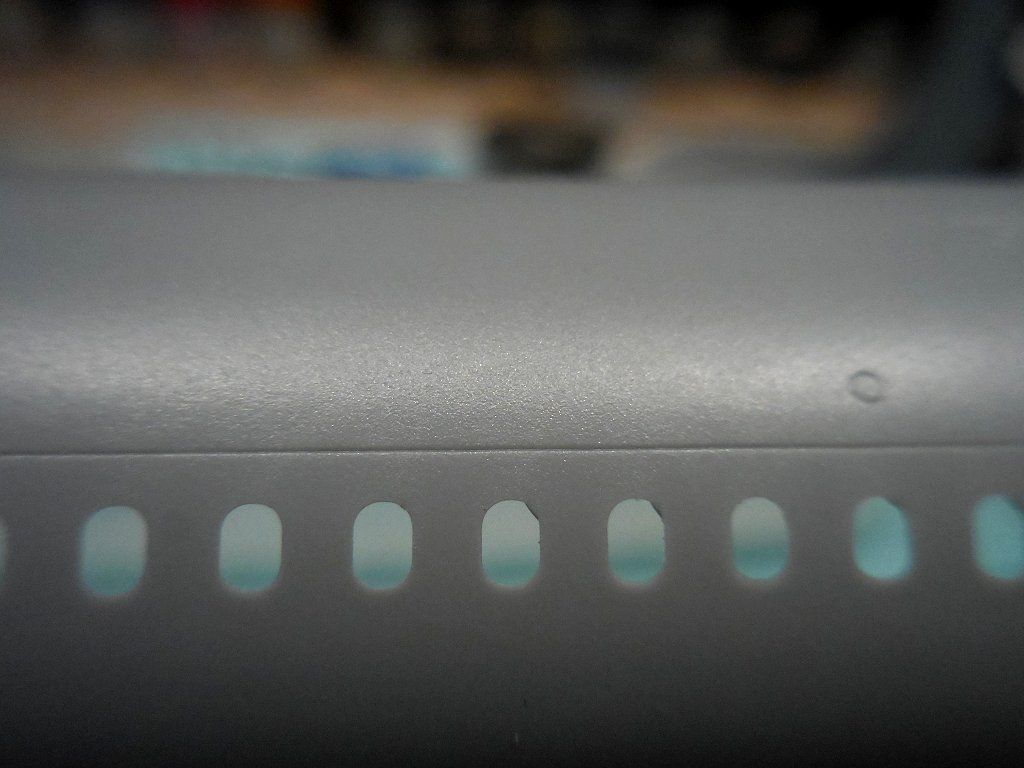 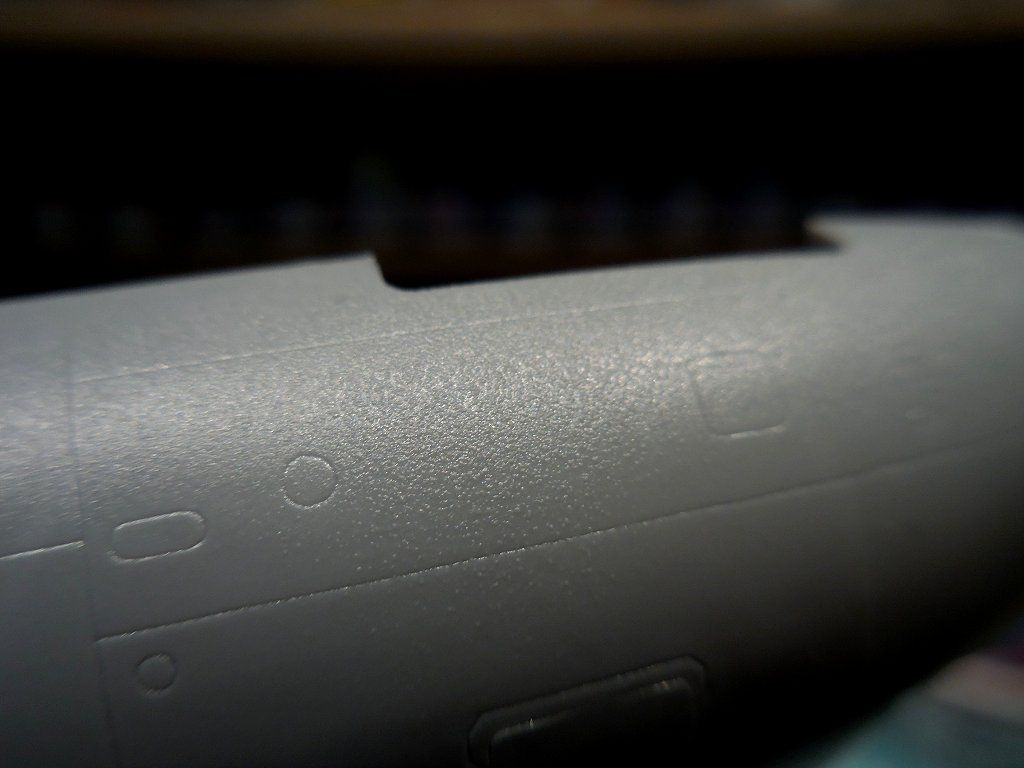 Anytime I think of something "new" I always figure of I could think of it, someone else did already but I came up with this. Gluing a plastic strip on the inside and filling all those holes seemed tedious. This was minutes. the longest part was mixing the resin. Just a few pinhole to fill. 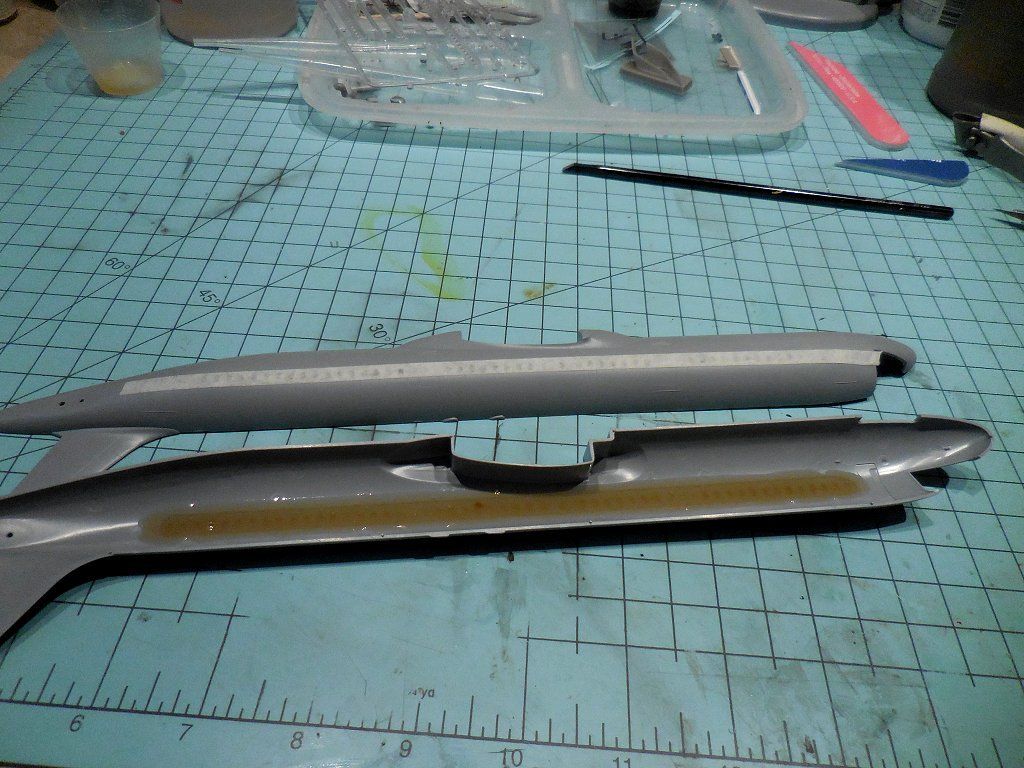 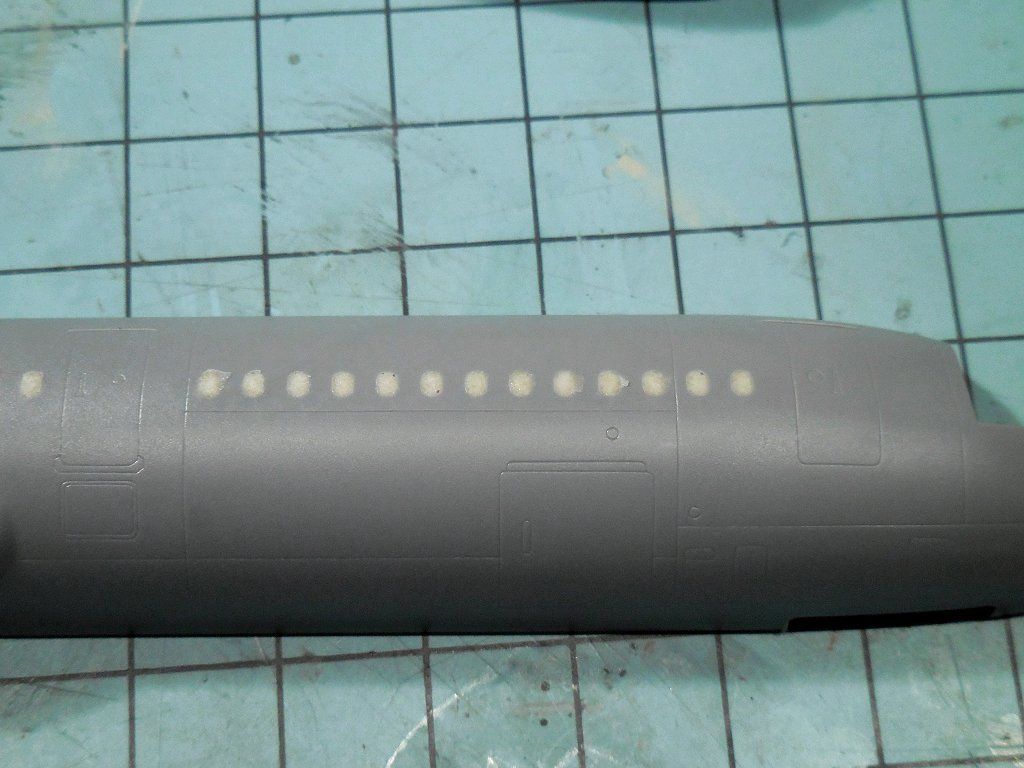 |
|
|
|
Post by dupes on Mar 8, 2016 11:39:12 GMT -5
What the what? You're already done with the Stearman? I'll have to find pics.
And an airliner? What did you do with Marc???
|
|
|
|
Post by wbill76 on Mar 8, 2016 12:53:13 GMT -5
Forgive my ignorance, but why fill in the windows? Is it that they are just provided as openings with no clear glass or something else?
|
|
|
|
Post by deafpanzer on Mar 8, 2016 15:12:25 GMT -5
Civilian plane?!?!? Marc, please tell me you are OK?!?!? Wait a minute! How cool... go ahead and add guns & missiles to it!
|
|
|
|
Post by wing_nut on Mar 8, 2016 16:37:54 GMT -5
Don't worry Marc... it's me  And don't look to hard for the Stearman pics yet. I have not put them, up yet. Andy, if someone bet me who would have a suggestion like that... I would have won. Something that size would have a lot of hard points for lots of Bull Pups. Bill, seems like it depends on the model or the builder and combinations of other factors. How's that for vague.  Some guys will used stuff like Krystal Klear to make the windows. Soem use the decal that have clear for the windows, but that only works if they line up perfectly so i assuming kits declas usually. Most of the AM decals sheets I've seen for airliners have the windows as decals as on the set I am using below. Not every set is kit specific so they may not line up correctly so filling the windows is common, as ell as the engraving hatches since they too are on the sheet. In this case it's kinda cool that some have the shades pulled down. 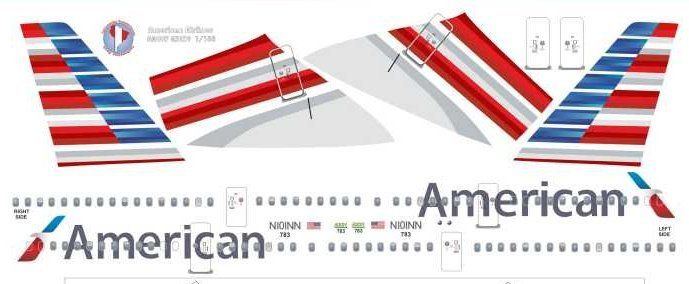 |
|
|
|
Post by wbill76 on Mar 9, 2016 20:09:48 GMT -5
I figured that was probably the reason but wasn't sure. You're right about the shades, that is a nice touch!
|
|
|
|
Post by wing_nut on Mar 14, 2016 17:56:34 GMT -5
The bus is slowly taking shape. Sanding of the fuselage is finally done and will be primed soon to see what needs to be fix. Hopefully nothing... yeah right. Some rescribing to do too. Worrying about the primer. I reworked the stand a bit. I didn't like the recessed sides of the upright so I covered both sides with some .060 sheet plastic and rounded off all the edges. I use Mr. Surfacer 1500 black primer for the "black basing" part of the weathering for my military stuff. Figured I may as well use it here too. The white plastic bits I added were smooth as a baby butt. The primer crazed the Zvezda plastic of the base a lot. 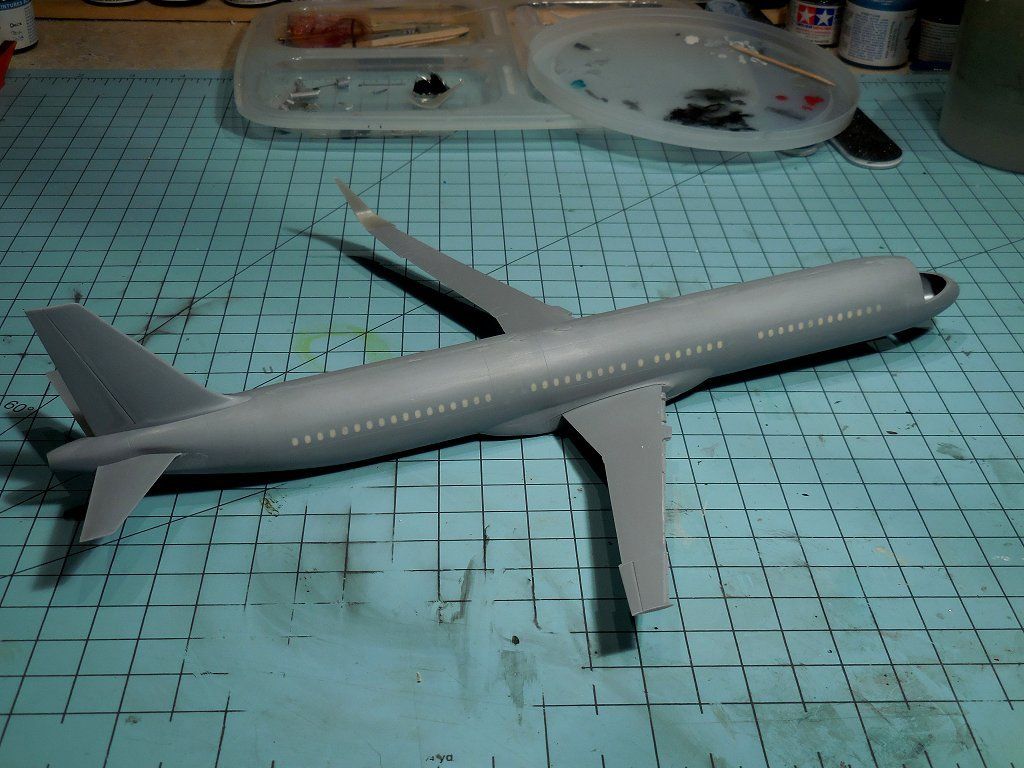 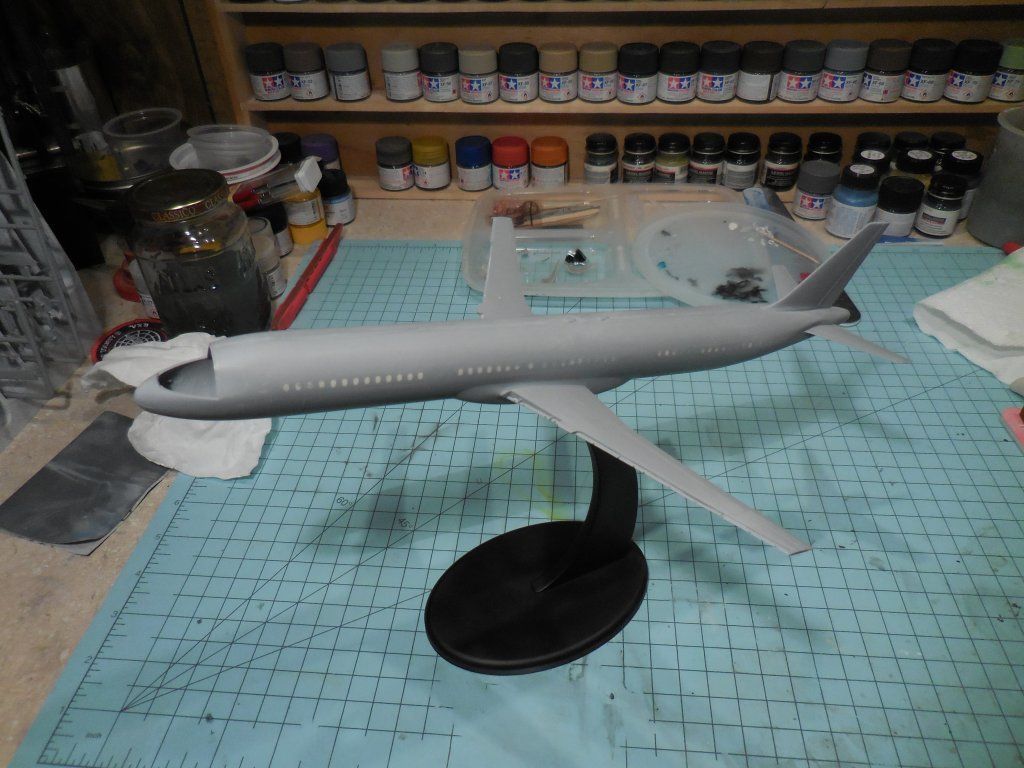 I checked the chord of the sharklet and it's an exact match for the panel just at the end aileron. I darkened it to make it easier to see for the cut with a JLC saw. The sharklet is just held there with some blu tack but the adjustments will be very minor for a perfect fit. 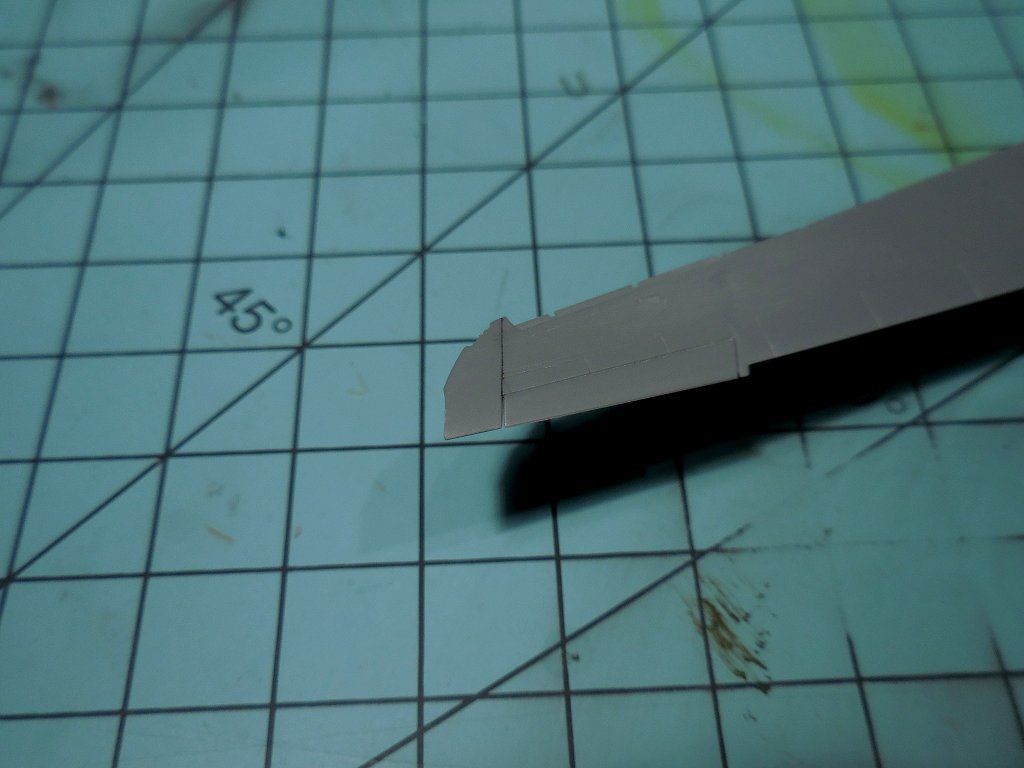 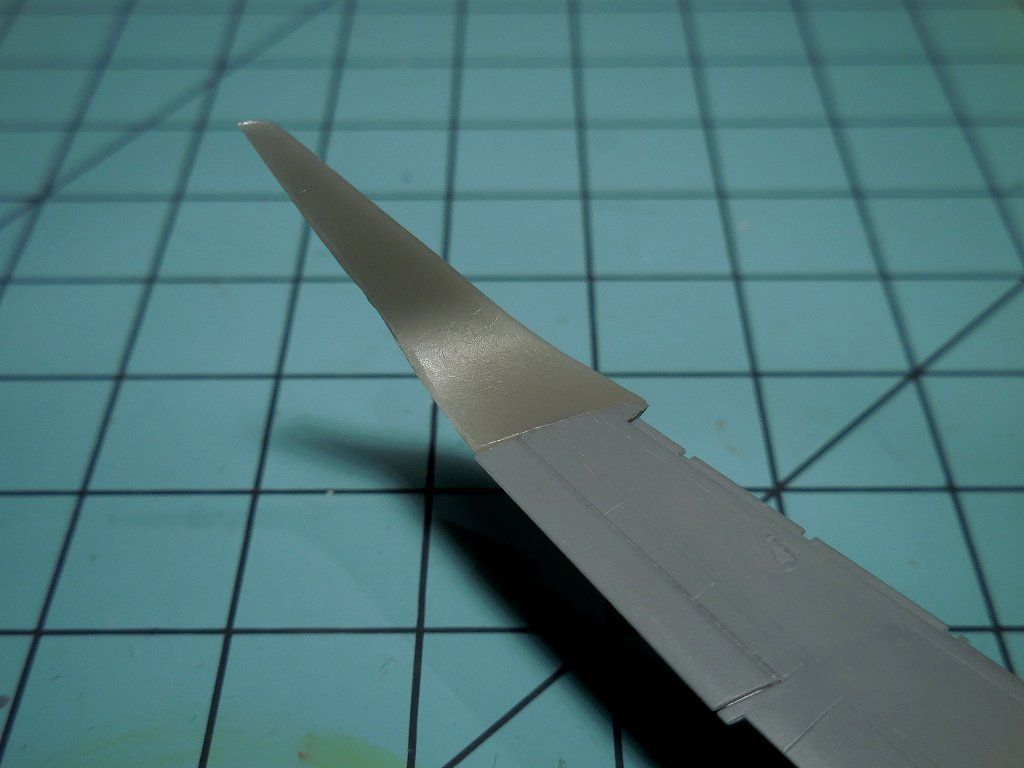 |
|
|
|
Post by Leon on Mar 14, 2016 18:05:50 GMT -5
Nice progress Marc! Looking really good so far.  |
|
|
|
Post by wing_nut on Mar 14, 2016 18:45:21 GMT -5
Jeez Leon, do you have a chip in your head or something? You pounce do fast sometimes. Thanks buddy.
|
|
John Everett
Full Member
  
Member since: January 2012
July, 2016 MoM Winner
Posts: 1,278
Jan 17, 2012 0:53:48 GMT -5
Jan 17, 2012 0:53:48 GMT -5
|
Post by John Everett on Mar 15, 2016 1:07:01 GMT -5
Who made the Sharklet? I'm going to need a set.
|
|
|
|
Post by wing_nut on Mar 19, 2016 7:31:30 GMT -5
|
|
|
|
Post by Leon on Mar 19, 2016 7:56:15 GMT -5
Nice save on the wheel well Marc!  As for the chip in the head,no chip just magicians instinct.  |
|
|
|
Post by wbill76 on Mar 19, 2016 20:04:20 GMT -5
Well that will teach you not skip detail installations in the future!  Nice surgery and fix Marc.  You may need to touch up some of the windows that are on either side of the cut, it looks like the first ones on either side may have lost some of their filler in the process. |
|
|
|
Post by wing_nut on Mar 20, 2016 16:41:52 GMT -5
Thanks Bill. I'm not a surgeon but I stayed in a Holiday Inn.  The resin windows popped out when I was hacking...er... I mean delicately sawing off the nose. Weird wow they don't fit back in prefect. |
|
|
|
Post by wing_nut on Mar 25, 2016 11:59:42 GMT -5
Sorry Andy but you can't take credit for the mid build clean up. The thickness of the sharklet airfoil was a bit more the wing so I lined up the top side since it had the exact right curve to match. The bottom was easy to sand to shape. 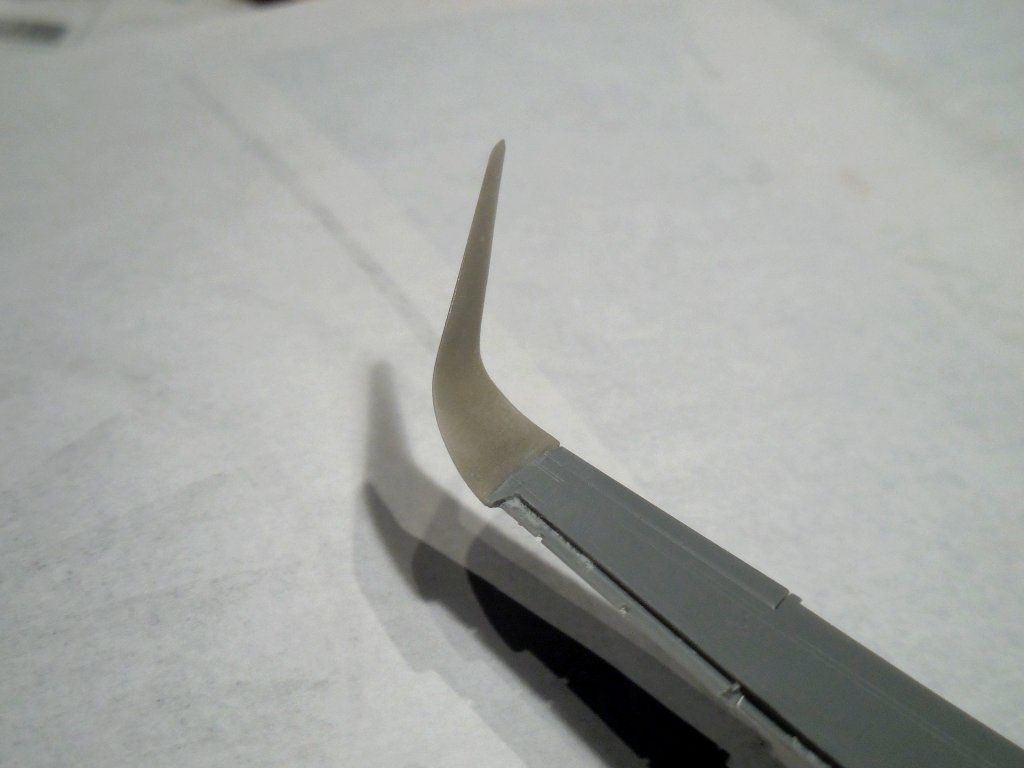 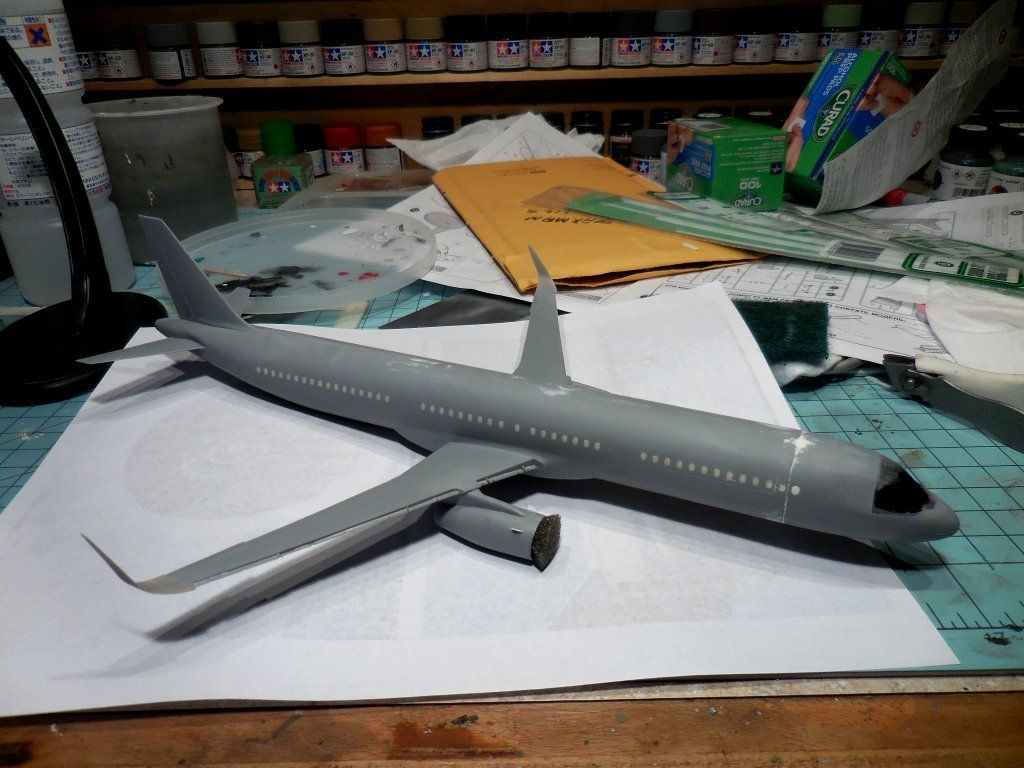 Added some fins to the V2500 engine cowls. 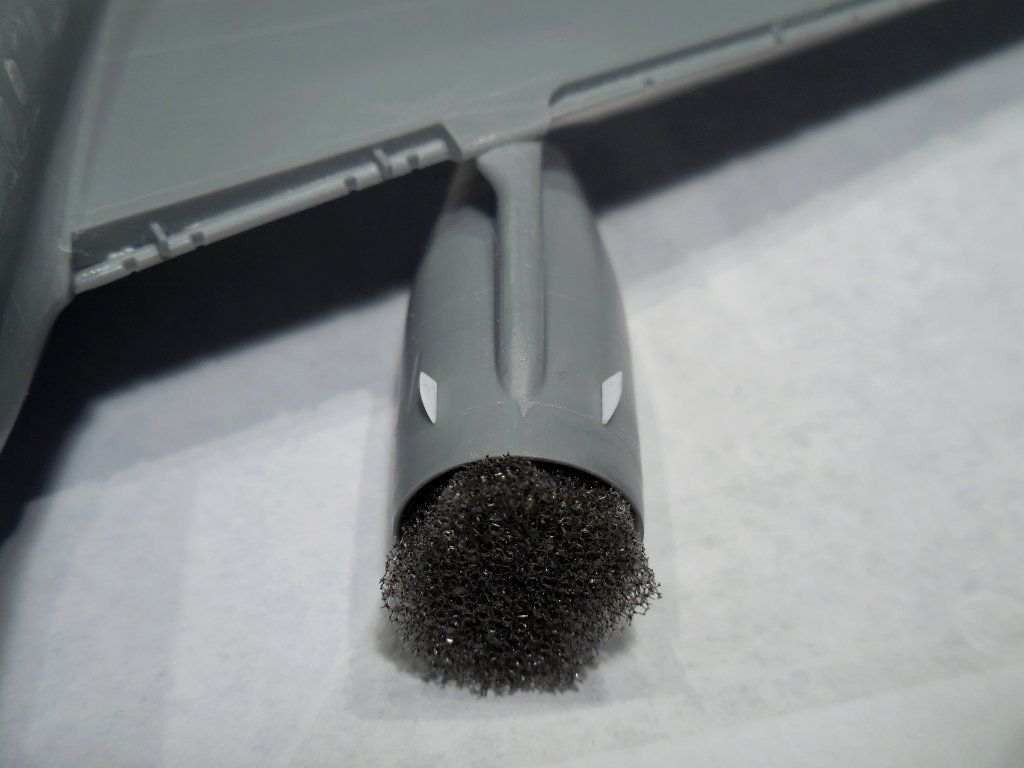 1st coat of primer to see if any fixes are needed and to my surprise 1 tiny little thing and not where the front was chopped. I had been wondering what to use for the final gray color but I think the Mr. Surfacer look like the right shade. 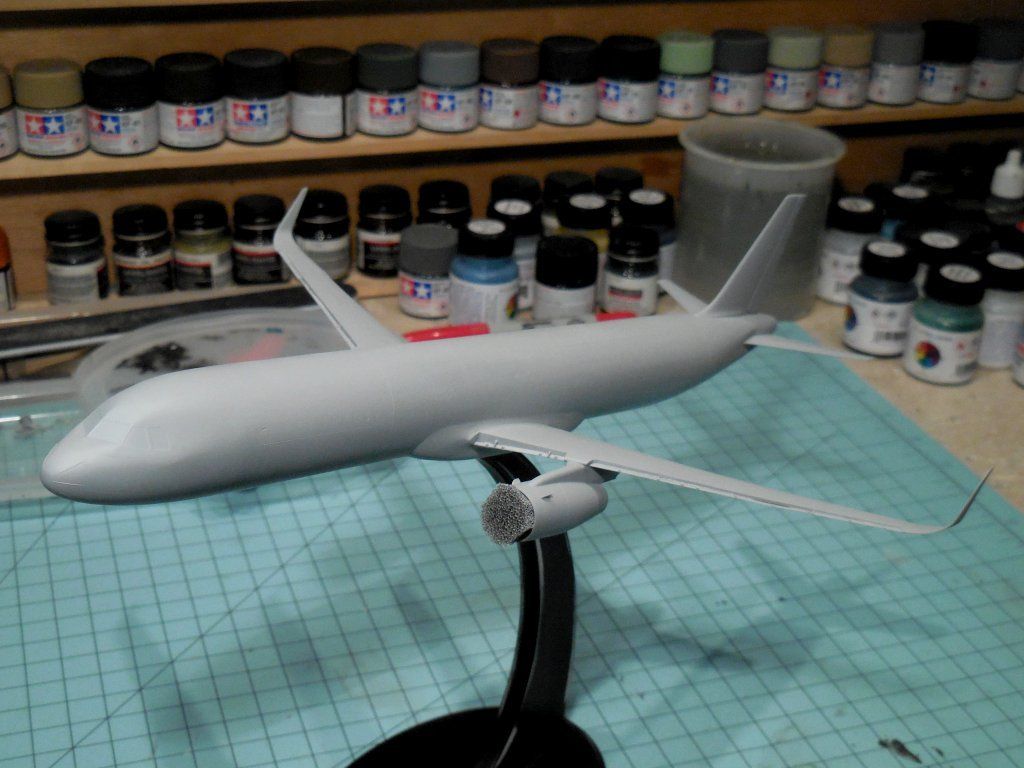 |
|
martslay
Full Member
  
Member since: February 2016
Posts: 1,113 
|
Post by martslay on Mar 25, 2016 12:38:19 GMT -5
Great job!
|
|
|
|
Post by Leon on Mar 25, 2016 13:07:48 GMT -5
Coming along nicely Marc! Primer looks good.  |
|
John Everett
Full Member
  
Member since: January 2012
July, 2016 MoM Winner
Posts: 1,278
Jan 17, 2012 0:53:48 GMT -5
Jan 17, 2012 0:53:48 GMT -5
|
Post by John Everett on Mar 25, 2016 15:10:18 GMT -5
Good add with the vortex generators on the engines.
|
|
|
|
Post by wbill76 on Mar 25, 2016 15:40:53 GMT -5
Nice to see this one headed to the paint booth Marc! Sharklets look good as do the engine cowl bits.
|
|
|
|
Post by deafpanzer on Mar 27, 2016 11:48:44 GMT -5
Man, it is looking real good... Lots of work has been put on it already.
|
|
|
|
Post by wing_nut on Apr 6, 2016 9:33:08 GMT -5
A few tiny little touch ups to do then clear coat and decals. 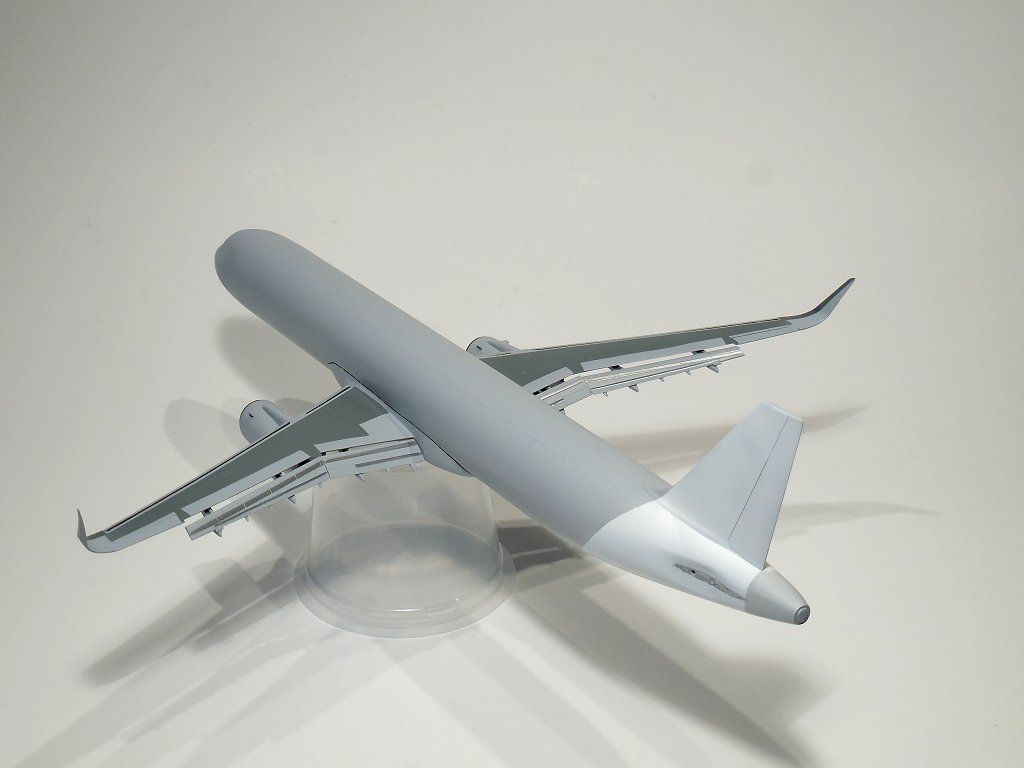 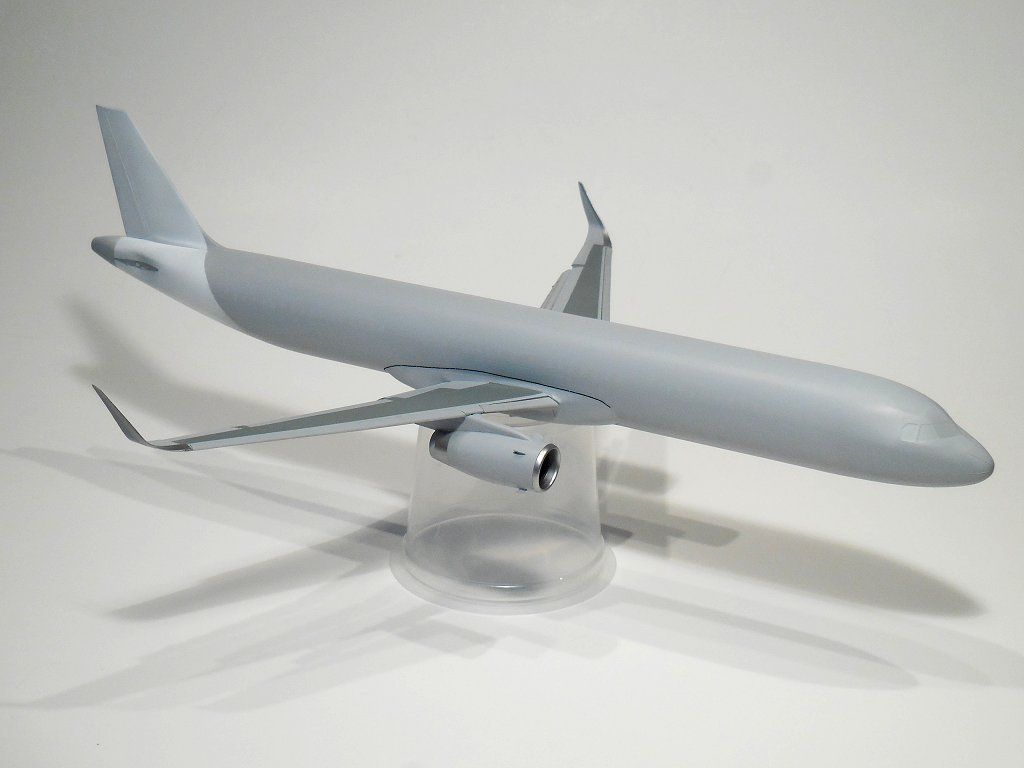 |
|
Deleted
Member since: January 1970
Posts: 0
Nov 29, 2024 3:35:52 GMT -5
Nov 29, 2024 3:35:52 GMT -5
|
Post by Deleted on Apr 6, 2016 14:35:38 GMT -5
Lookin goood! 
|
|
|
|
Post by Leon on Apr 6, 2016 15:41:42 GMT -5
Nice work on the painting Marc!  |
|
|
|
Post by wing_nut on Apr 6, 2016 20:55:20 GMT -5
Bruce, Leon... Thanks fellas
|
|