|
|
Post by TRM on Jun 28, 2016 8:36:20 GMT -5
I know I probably shouldn't, but sometimes there is a real lack of control in the factory here! ) Not too long ago, I managed to get my grubby little paws on one of Serzh's Su-76i Self Propelled Gun conversions....which is offered through Master Club btw. After looking around for a suitable victim to use as a base model, I decided to jump just outside the long list of old kits that were suggested to use with this conversion. There might end up being a little extra work involved in getting things to sit right, but the details to the newer kits are a little bit better. This also save me the trouble of buying a few aftermarket goodies when I don't really need too! As for the tracks...Bill was kind enough to purge his stash recently and I picked up a set of MK's that will replace the winterketten magic tracks in the kit. 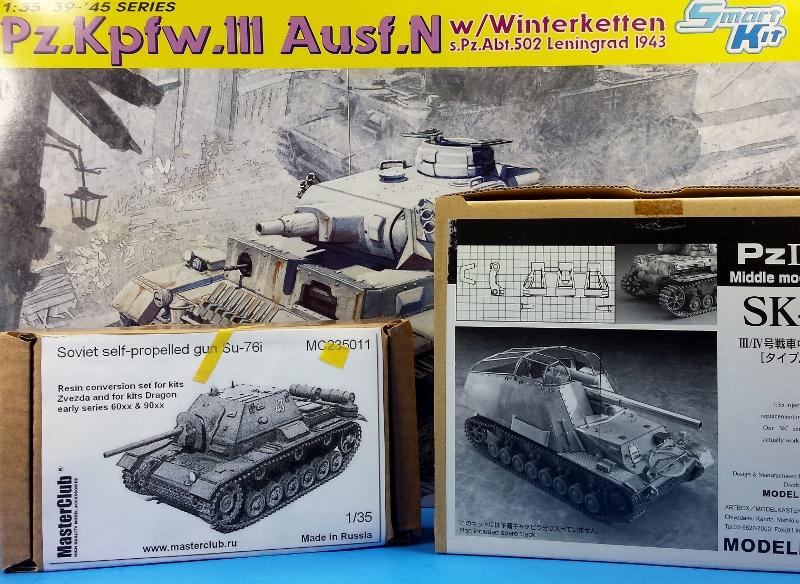 Nothing more than the lower end to the Pz. III will be used for this. I will regulate the turret to a nice test piece for one of my demos I think...LOL!! As for the Su-76i conversion....top notch!    The kit was mastered amazingly well by one of our own right here on MSC, Serzh. His process can be found here - modelerssocialclub.proboards.com/thread/10286/su-76i-ii-new-model?page=4 I should be cracking into this at some point today. It's kind of dank outside at the moment....and I am home, so why not? Thanks for stopping in!  |
|
vlpbruce
Full Member
  
Member since: March 2013
Posts: 1,463 
|
Post by vlpbruce on Jun 28, 2016 10:37:26 GMT -5
I'll be pulling up a chair. I look forward to seeing this one come together.
|
|
|
|
Post by dierk on Jun 28, 2016 11:00:25 GMT -5
Naturally I'll be watching this! Serzh's conversion really is a thing of beauty, and I can't wait to start mine - but the way things are going at the moment, looks like it'll be a while...
|
|
|
|
Post by tobias5555 on Jun 28, 2016 11:11:37 GMT -5
That will be cool, I´m on.
|
|
|
|
Post by Leon on Jun 28, 2016 11:18:05 GMT -5
Got a front row seat! Just need some snacks.
|
|
|
|
Post by Deano on Jun 28, 2016 11:29:38 GMT -5
Waiting patiently for the magic  |
|
S e r z h--Rest In Peace
Full Member
  
Member since: November 2014
RIP- December 2023
Posts: 650 
|
Post by S e r z h--Rest In Peace on Jun 28, 2016 12:19:07 GMT -5
Todd - hello. Successful build! These parts are not used in new sets of Dragon. The remaining photos will be later.  |
|
|
|
Post by TRM on Jun 28, 2016 18:20:31 GMT -5
Bruce, Dierk, Tobias, Leon Deano and Serzh....thanks for climbing on board for this one! Dierk, I am looking forward to seeing you hit this one too! In time my friend! Summer...family and what have you, tends to take a big chunk out of the bench time!  Deano...magic? hee hee!  We'll have to wait and see about that one!  Serzh, thanks for the heads up! Did you design a different bracket for the newer DML kits? I gave these a test fit and looked at a couple pictures and these look to fit the part.  Nothing better than pushing your way through the road wheels to kick things off!  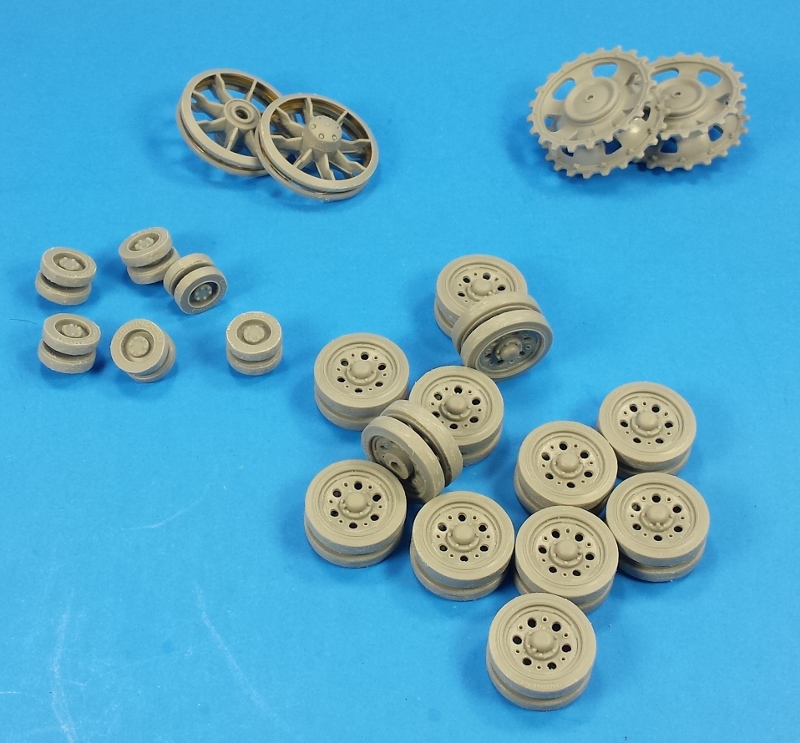 Also hit the suspension, rear and front glacis plates...to a point. I am going to modify the Su top from the conversion to fit the newer hull. At the moment it looks to be similar to what Serzh did with a couple different kits, adding a 1.5mm strip to the bottom of the casemate. With this model though, the fenders actually project through the hull in three spots. I should be able to modify both the fenders and casemate to utilize the holding strength of the tabs on the fenders. 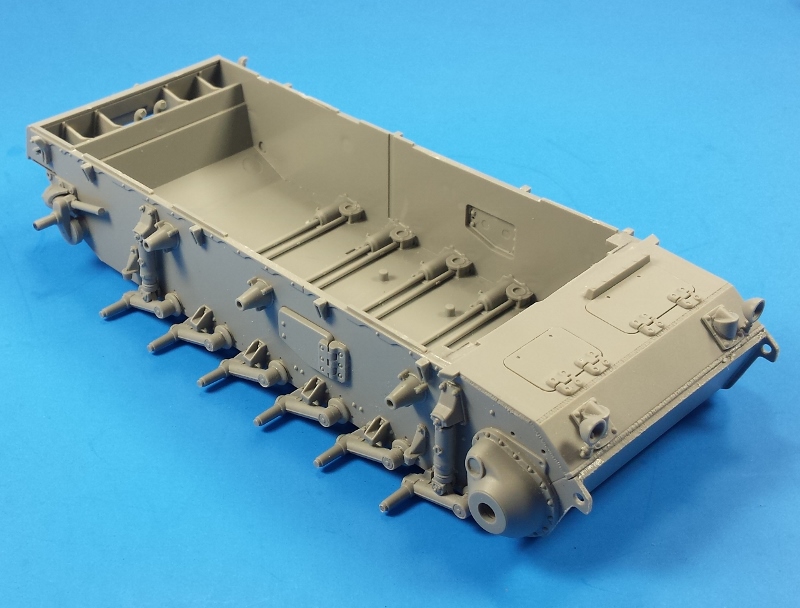 We'll have to see how this goes! Dinner is out of the way and the bench is calling! Back to work!  |
|
|
|
Post by Leon on Jun 28, 2016 18:48:16 GMT -5
Off to a good start Todd!  Looking forward to you tackling the conversion.  |
|
bish
Full Member
  
Member since: January 2013
Horatio Nelson 'I am a Norfolk man, and i glory in being so'
Posts: 555
Jan 13, 2013 8:57:43 GMT -5
Jan 13, 2013 8:57:43 GMT -5
|
Post by bish on Jun 28, 2016 19:17:16 GMT -5
Now this is something I have not seen before. Was this a German vehicle or a Russian one.
|
|
|
|
Post by wbill76 on Jun 28, 2016 22:00:16 GMT -5
Hitching a ride for this one! Off and rolling.
|
|
S e r z h--Rest In Peace
Full Member
  
Member since: November 2014
RIP- December 2023
Posts: 650 
|
Post by S e r z h--Rest In Peace on Jun 28, 2016 23:49:09 GMT -5
Hi to all! Todd - Great start! And fast! Tanks ... It's early, but ... as long as I can))) As can be seen on the only surviving car - fixing tanks was just such a design. Through it passed the steel tape ... In case that you use (later) feed another, larger hatches left little room for the brackets.   But! The second car can be seen the remains of these brackets. I think the design was the same as in the photo above.   I did not do it from a thin metal or plastic and used plastic 1 mm thick. Just have to do a little below, the red marks. 

|
|
S e r z h--Rest In Peace
Full Member
  
Member since: November 2014
RIP- December 2023
Posts: 650 
|
Post by S e r z h--Rest In Peace on Jun 29, 2016 0:10:19 GMT -5
Also note that the second arm is a little closer to the center - well done on both machines.  Serzh, thanks for the heads up! Did you design a different bracket for the newer DML kits? Serzh, thanks for the heads up! Did you design a different bracket for the newer DML kits?Es! Brackets are made of a set for an earlier version, with short stem. For such a set like yours - it is better and more correct to do so in the photo early short   late longest   |
|
martslay
Full Member
  
Member since: February 2016
Posts: 1,113 
|
Post by martslay on Jun 29, 2016 0:57:47 GMT -5
Good start, Todd! I will look?  |
|
|
|
Post by dierk on Jun 29, 2016 2:35:51 GMT -5
Was this a German vehicle or a Russian one. Short answer: yes  Slightly longer answer: the soviets captured numerous Stugs and Panzer IIIs (amongst other AFVs) and modified a few hundered of them with a new casemate and 76mm gun. There is a picture of one that's been recaptured by the Germans. Nice work Todd! |
|
|
|
Post by TRM on Jun 29, 2016 9:16:00 GMT -5
Thanks Leon!  Thanks Bish! She is an interesting piece to say the least! Like Dierk mentioned above, in some cases the Russian converted German armor ended up back in the hands of its previous owner! Happened a lot. Some T-34's were reported to have change hands a few times over the course of the war. Use what you got!!  Thanks Bill! Glad to have you along for the ride! Thanks again Serzh! Seems there were a number of designs used. Some on the top plate, middle glacis and lower...this is good for building purposes though!  Gives me a little room to have at it!  Thanks Martin!  Well, time has kind of been on my side, for building anyway!  I built up the rear deck. This is the basis on which the placement of the casemate goes. The back half of the conversion has a small lip to receive the deck and sits just on top. The front plate seems to be an area where all but a couple of kits, needs to be slightly modified to make it work. The beauty of this is the actual builders of the Su-76i probably encountered similar issues if the casemates were mass produced and set on top!   There is a slight twist to the cast resin casemate. This is most noticeable once the piece is set on top of the hull. There is a slight bow inward to the hull that gets corrected once the rear deck in glued into place. The resin distortion is an easy fix...popped it into some hot water for a few minutes which softened it. Typically resin goes back onto the exact state it came out of the mold in...which would be square. This works excellent with straightening resin barrels and masts on ships. In this case I needed a little nudge. I pulled it from the boiling water and squared it with my fingers...held it in front of the air conditioner to cool it rapidly...bingo! I knew I needed to add some material to the bottom edge to filling the gap which was designed for the older kits. Some sheet stock was used. I chose something thin enough so that the small tabs on the hull that stick up, would actually rest in back of the new styrene. This effectively secured the casemate in place. Because I wanted to use the mounting tabs located on the fenders where it meets the hull, I notched the strip I glued to the casemate allowing the parts to fit through. I will modify the fender tabs slightly as well. This will be only in the front at the outer corners of the casemate. 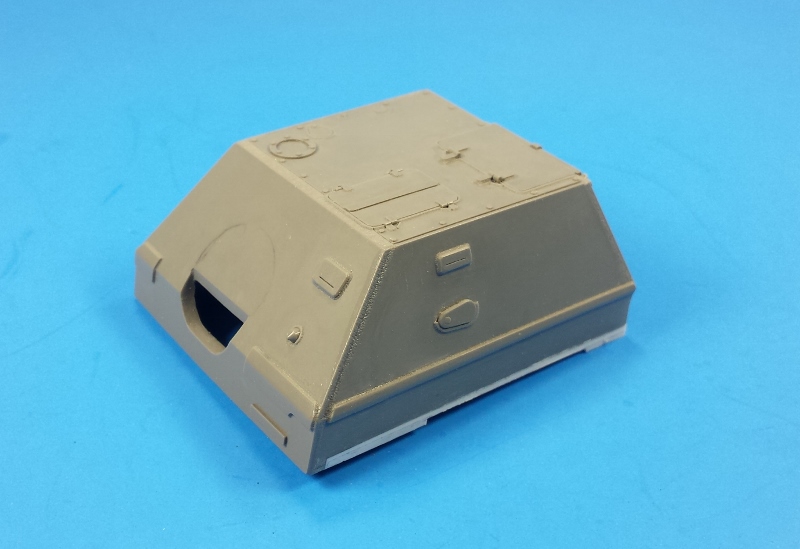 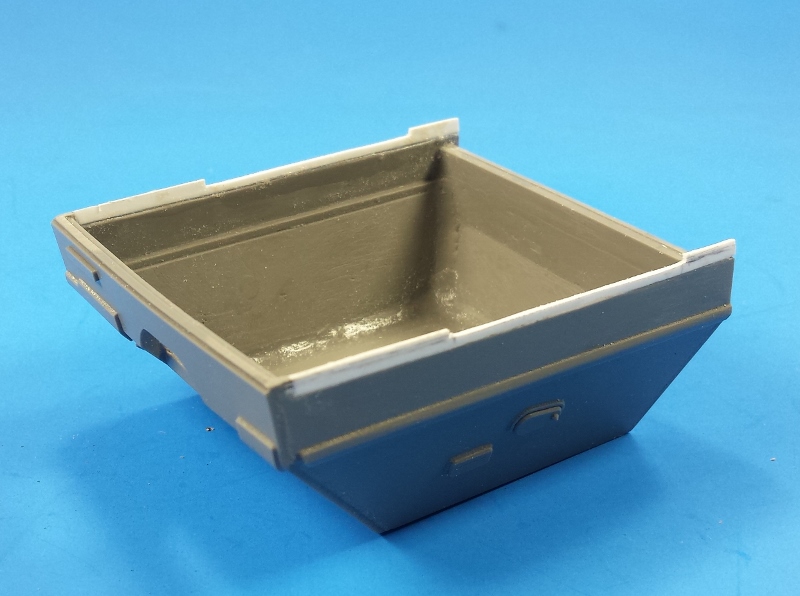 Worked up a dry fit to check things out. Looks like my plan will work out....for now anyway! LOL! 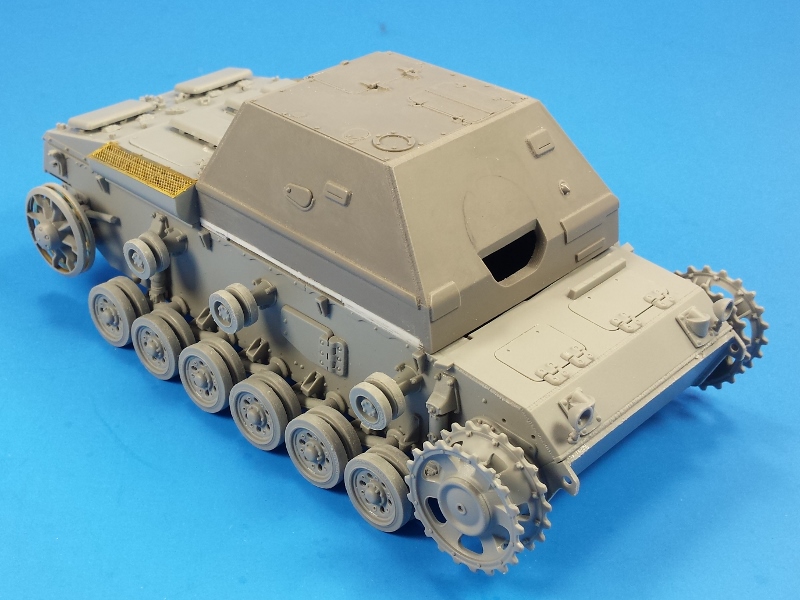 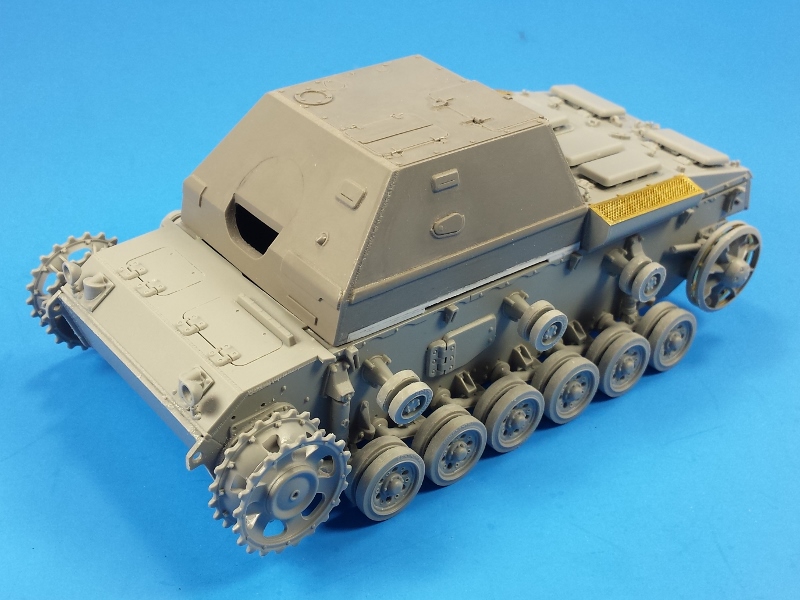 The front edge will get a small strip of styrene to mirror a plate that was installed on the original tank. So that gap get filled!  Back to work. Sadly not on this for the moment.  I need to change the passenger side window motor and regulator in my daughter's car this morning! LOL! Oh well....maybe after lunch I will hit the bench again! Thanks for tuning in!!  |
|
|
|
Post by dierk on Jun 29, 2016 10:48:34 GMT -5
Coming together rather rapidly Todd! Looking good! Must be the season to fix electric car windows - the plastic switch on the driver's side one broke on mine. Went the dealers to get a new one. Can't just get the switch, got to buy the whole unit. I asked him the price, and he was covered in incomprehension when both me and my wife burst out laughing at the mention of €37.50  He asked 'I take it you want to think it over?' 'nah mate, don't even have to think about it - it's not going to happen.' Went home, glued the swith on with some gel CA - works perfectly! |
|
|
|
Post by TRM on Jun 29, 2016 11:00:05 GMT -5
Thanks Dierk! Things are moving along nicely if you ask me...LOL! No problem with that at all since painting is the best part for me!  Window is fixed! I hear you on pricing. Most places wanted over $100 for the regulator with no motor. There is a decent online part store where I was able to get a decent replacement with the motor for $89. Took 20 minutes to install...this time! LOL! €37.50 for a switch is highway robbery! Good call gluing things back together yourself! You still hav the money left to take the Mrs. out for lunch!  |
|
|
|
Post by Leon on Jun 29, 2016 11:15:17 GMT -5
Looking really good Todd!
|
|
|
|
Post by dierk on Jun 29, 2016 11:25:55 GMT -5
I've suspected for a while now that I inadvertently ended up in a parallel universe by stumbling through a rift in the space/time continuum, what with the Brexit and various svivel-eyed loons running for positions of power both in Europe and elsewhere. But now I'm sure of it: suggesting that spare money should be spent on food, not styrene - on a modelling forum?   |
|
|
|
Post by TRM on Jun 29, 2016 11:41:45 GMT -5
Thank you Leon!  Dierk, LOL....suggested food over plastic for ulterior motives brotha'!  Smoke and mirrors! Make them happy for a moment and things are clouded just enough to sneak the plastic extravaganza right in!!  |
|
|
|
Post by armorguy on Jun 29, 2016 11:59:39 GMT -5
Perfect ! It's T(odd) time again, I'm going to enjoy every bit of it !
|
|
|
|
Post by TRM on Jun 29, 2016 13:09:42 GMT -5
Thanks G! Happy to have you riding shotgun for this one!  |
|
|
|
Post by wbill76 on Jun 29, 2016 22:22:27 GMT -5
Making good progress here Todd! Sorry to hear about your detour.
|
|
c3p0.
Full Member
  
Member since: January 2016
The harder you sweat in here the less you gonna bleed on the special project this is a must have.
Posts: 157 
|
Post by c3p0. on Jun 29, 2016 22:34:46 GMT -5
My God man by combining these kits you are making them into something that should not exist except in folklore. You can't play God and them wonder why these machines will turn on you! You really got to stop this sir. with that being said I got a large Papa Johns thin crust meat lover pizza in one hand and my comfortable chair in the other. OK now I'm ready to watch this Todd. LOL
|
|
|
|
Post by TRM on Jun 29, 2016 22:47:34 GMT -5
Thanks Bill! LOL...the fix-it days never end around here!  I did manage to get those track together tonight! Glad that part is done! Thanks Michael! Probably only a few hundred of these were made...but that is the beauty of it...more room to play around with the rules! Nice choice in pizza!!  Glad to have you along for the ride!  |
|
S e r z h--Rest In Peace
Full Member
  
Member since: November 2014
RIP- December 2023
Posts: 650 
|
Post by S e r z h--Rest In Peace on Jun 30, 2016 3:30:26 GMT -5
Wow! More 2-3 day and it is time to paint! Excellent pace!
There is a slight twist to the cast resin casemate. This is most noticeable once the piece is set on top of the hull. There is a slight bow inward to the hull that gets corrected once the rear deck in glued into place. The resin distortion is an easy fix...
Todd - hello. I cannot understand what kind of place are you talking about? Show please pictured arrow
|
|
|
|
Post by TRM on Jun 30, 2016 6:09:13 GMT -5
Thanks Serzh! Closer the I realized I think! I did finish up the tracks last night in a marathon build after supper....LOL!! I have a couple minor things to finish but should be done soon I think. I will try and get some pictures up tonight when I get home. Then the fun can begin! As for the "twist" in the casemate, this it typical with just about all resin castings at one time or another. The Master is square but after the cast copy is removed from the mold, probably when it is still warm, the mold can twist slightly causing the piece to be bent or out of square. You see this with gun tubes all of the time. I dropped the resin into a cup of boiled water and let it sit for a minute or so. It softened it and when it cools, it usually goes right back to the original master's shape. Here I forced the cooling by putting it front of the air conditioner to speed things up!  |
|
S e r z h--Rest In Peace
Full Member
  
Member since: November 2014
RIP- December 2023
Posts: 650 
|
Post by S e r z h--Rest In Peace on Jun 30, 2016 6:41:26 GMT -5
Todd - thanks for the answer. Probably i incorrectly expressed... Interesting place, where there is a distortion  |
|
|
|
Post by TRM on Jun 30, 2016 7:02:52 GMT -5
Could be pressure that cause it. Not typical on such a large piece. It could have been the silicone mold. Often makers just wrap the silicone with a rubber band and pour rather than having something rigid around it. Again, not a big deal at all....and it was not the Master but the casting. Some of the distortion can be seen here...  My 90 degree angle in the corner is not 100% accurate, but it shows what I was talking about with this being slightly out of square. That is the beauty of resin...Hot Water does wonders!  |
|