Whiterook
Full Member

Member since: March 2013
Posts: 837
Mar 13, 2013 15:29:19 GMT -5
Mar 13, 2013 15:29:19 GMT -5
|
Post by Whiterook on Mar 14, 2013 19:54:33 GMT -5
I then put the cockpit on, and then glue on the other half. The tough part on this was making sure the recon camera and the cockpit glued in place properly, at the same time! The cockpit was a tough fit, as it sits on a little plastic 'pin head'....the very end....and in back of the cockpit at the top, it rests on a small nub against the fuselage half. Not a very easy fit. Put on top of that the recon camera placement and it was delicate positioning to say the least! The following picture shows the camera cutout... 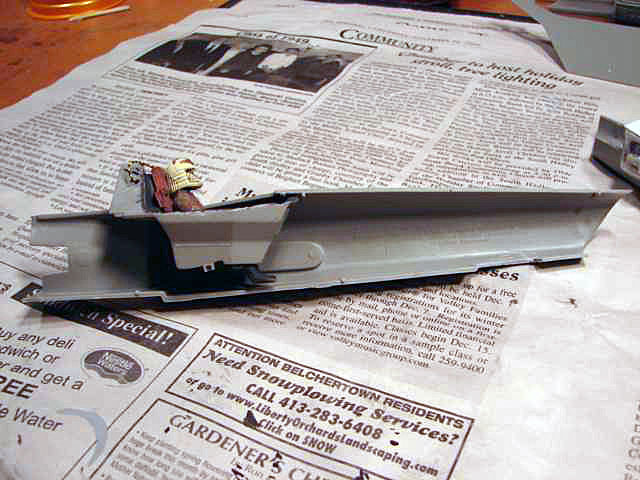 |
|
Whiterook
Full Member
Member since: March 2013
Posts: 837
Mar 13, 2013 15:29:19 GMT -5
Mar 13, 2013 15:29:19 GMT -5
|
Post by Whiterook on Mar 14, 2013 19:57:31 GMT -5
OH! That explains the warp speed on the build!  That Halftrack is a sweet lookin vehicle Rook. I can build pretty quick, but not that quick  actually, I build fairly fast...it's the painting I go painstakingly slow on, as I really go all out when painting. Hope this thread isn't dragging too much...I tend to go into a fair amount of detail. Some of the first words out of my mother-in-law's mouth were, "Doesn't he ever shut up?!?" Person's of Interest is up next. To be continued!!! |
|
|
|
Post by bbd468 on Mar 14, 2013 20:03:50 GMT -5
Hope this thread isn't dragging too much...I tend to go into a fair amount of detail. Some of the first words out of my mother-in-law's mouth were, "Doesn't he ever shut up?!?" Person's of Interest is up next. To be continued!!! Rook my man, you can never go too long or too much here fella. Your doin the same as any other feller here. Great build, details, pics and some great humor is what this place thrives on...your right on track man. Model On!!!  |
|
|
|
Post by deafpanzer on Mar 14, 2013 20:56:53 GMT -5
A lot of good scratch buildin' there... you have made many guys here proud! Looking good buddy...
|
|
Whiterook
Full Member
Member since: March 2013
Posts: 837
Mar 13, 2013 15:29:19 GMT -5
Mar 13, 2013 15:29:19 GMT -5
|
Post by Whiterook on Mar 15, 2013 20:36:33 GMT -5
Nice work indeed WR - one tip when cutting holes into styrene sheet or kit parts - you mentioned that one corner split - one way to avoid this is to drill the corners first - I use a 0.15mm drill it makes cutting the hole simple and completely eliminates the risk of splittage GREAT tip!!!  ...thanks...that makes perfect sense. I'll certainly do that next time. Don't know why I didn't think of that, but I can see how it would relieve the pressure points. |
|
Whiterook
Full Member
Member since: March 2013
Posts: 837
Mar 13, 2013 15:29:19 GMT -5
Mar 13, 2013 15:29:19 GMT -5
|
Post by Whiterook on Mar 15, 2013 21:12:36 GMT -5
Next up came the Main Atmospheric Scoop mounted in the nose..... 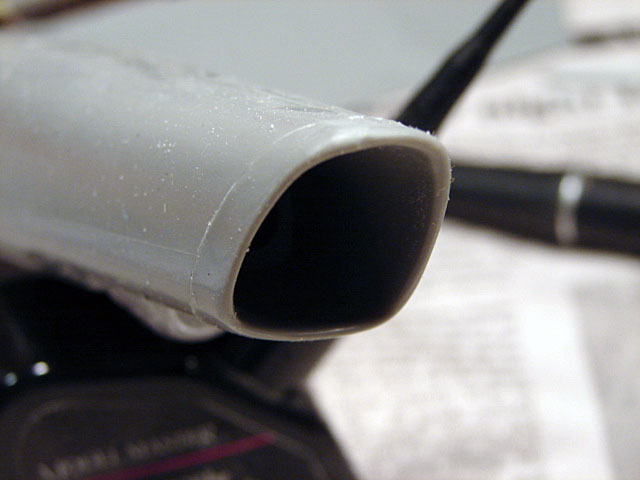 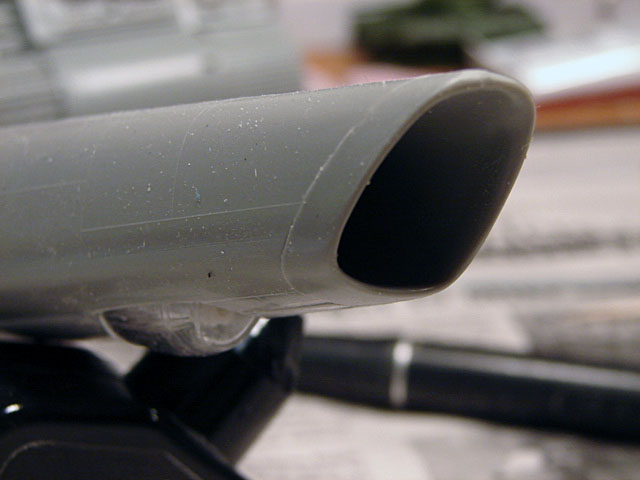 Next, it was back to work on the engines. As shown earlier, the top fin had been mounted to this point in the build, and the wings have added detail to be built on, but let me back track to that bloody fin first! The vertical fin was first glued together, and the fit was a little off and required some dedicated filing to even out, being careful not to take too much off to effect angles in an adverse way; and fortunately, only minor adjustments needed to be made, and therefore it all came out very well. You can see some of the unevenness on this next pic, prior to filing and sanding..... 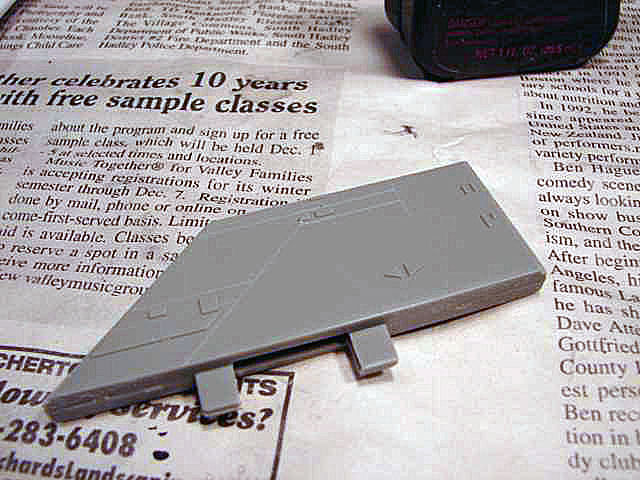 The fin mounts to this location, and another odd fit appeared, as there was a thruster clamp in the way, obviously missed as an obstacle in the design of the model. A little delicate filing and all was well...... 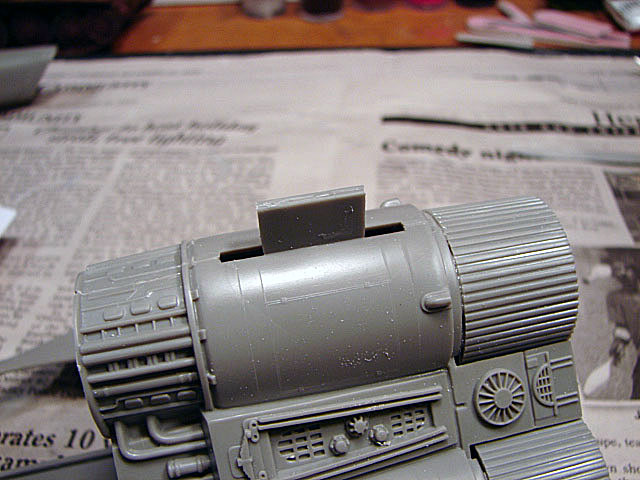 ...so back to where we left of...the wing tips. |
|
|
|
Post by deafpanzer on Mar 15, 2013 21:15:42 GMT -5
Believe me Dicky is the gods of scratch-buildings... always helpful to have him around! Still looking good!!! Wondering if Netflix has the TV series... gonna check it out.
|
|
Whiterook
Full Member
Member since: March 2013
Posts: 837
Mar 13, 2013 15:29:19 GMT -5
Mar 13, 2013 15:29:19 GMT -5
|
Post by Whiterook on Mar 15, 2013 21:19:54 GMT -5
Next came the wing tops and the Kinetic Energy Cannons. The wing tops are gorgeous and really brought the back half of the birds' looks to life. The cannons fit like a glove but they required the most cleaning of pin marks and molding flash of any part on the kit thus far....so much so that my hand actually started to cramp up! But it was worth the effort, because they're a huge part of the 'look' of this bird. That little brush in the background, BTW, is a cast off makeup brush I got from my wife; it's a small little one and works great for small parts and hard-to-get areas! 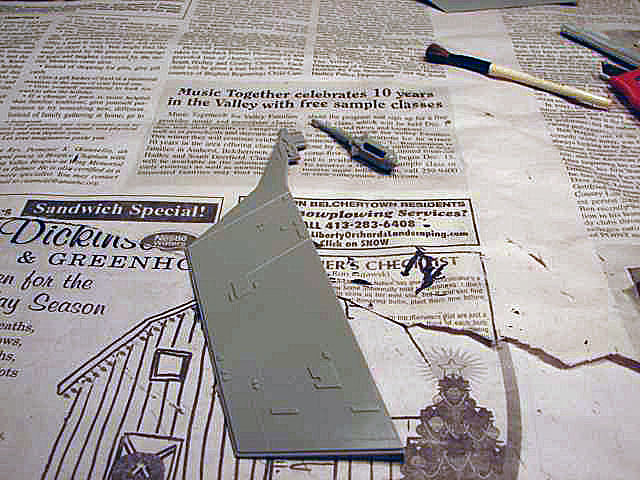 Here is an example of the small nub the cannon fits to..... 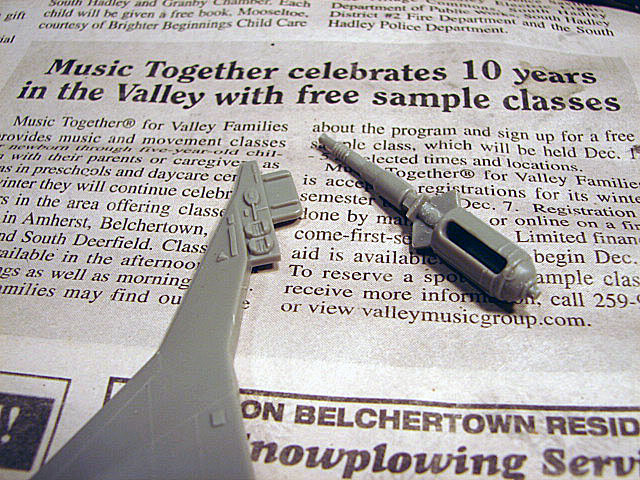  And assembled..... 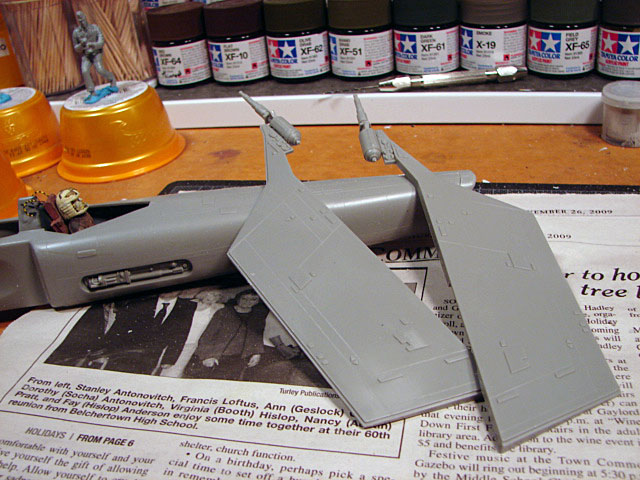 |
|
Whiterook
Full Member
Member since: March 2013
Posts: 837
Mar 13, 2013 15:29:19 GMT -5
Mar 13, 2013 15:29:19 GMT -5
|
Post by Whiterook on Mar 15, 2013 21:34:46 GMT -5
After dryfitting the wing tops on the wing, I noticed the hole and join for the lower half of the ship and wing bottoms was visible and stuck out terribly. Bad design on this part of the kit. I added some Squadron Putty to the area, let dry, and then sanded it down. I wanted this to be finished and ready to go before I glue the wing tops on..... 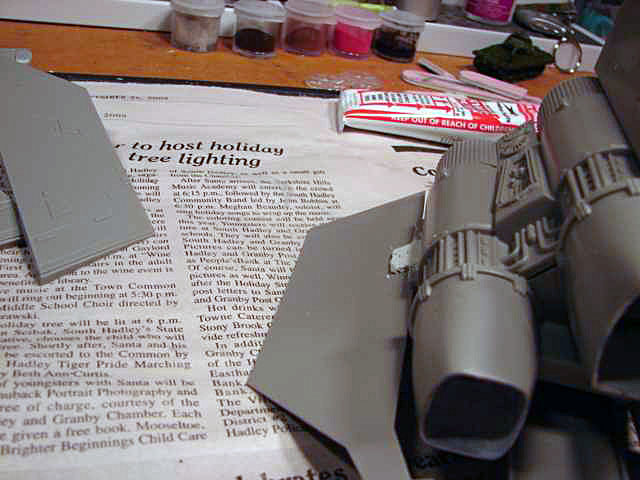 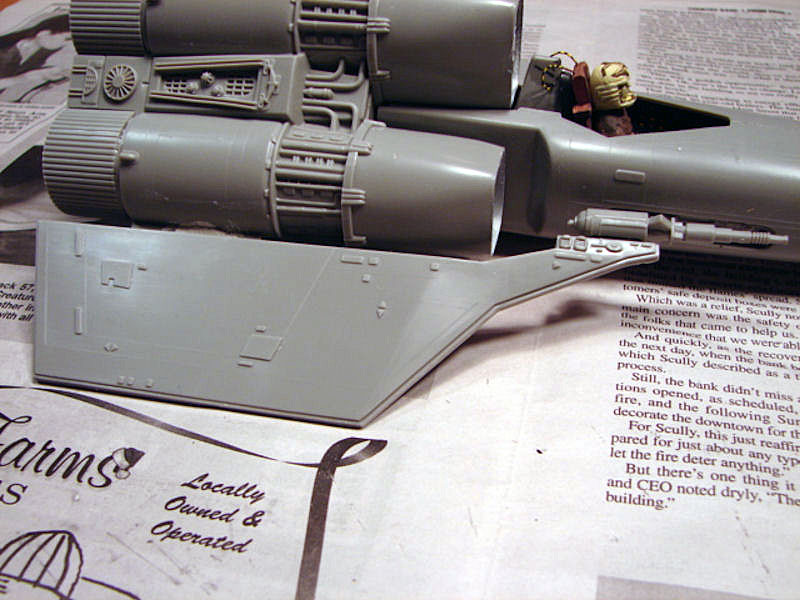 So the main assembly of the Viper was seeing all the major components of the fuselage and engines come together, which only left the cockpit canopy and the stand to assemble. I completed worked on the top half of the wings, attaching them to the lower wings; along with a little more Squadron Putty added to seal up a nasty join. The wings married up nicely, with few gaps. I needed to do a little finish sanding to smooth them off a tad. Also done was attaching the front fuselage to the rear engine/thruster section. This was a little more precarious, as the instruction gave no indication as to what adheres to what, so some eyeballing of the parts and guesstimation resulted in my slapping on some glue and hoping for the best; and luckily, I nailed it first time out! Now, it's starting to look like a Viper at that stage..... 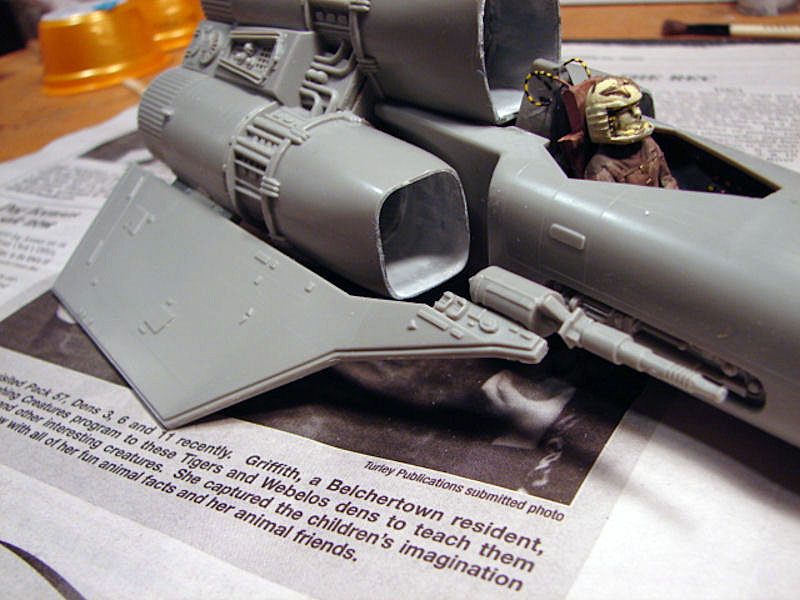 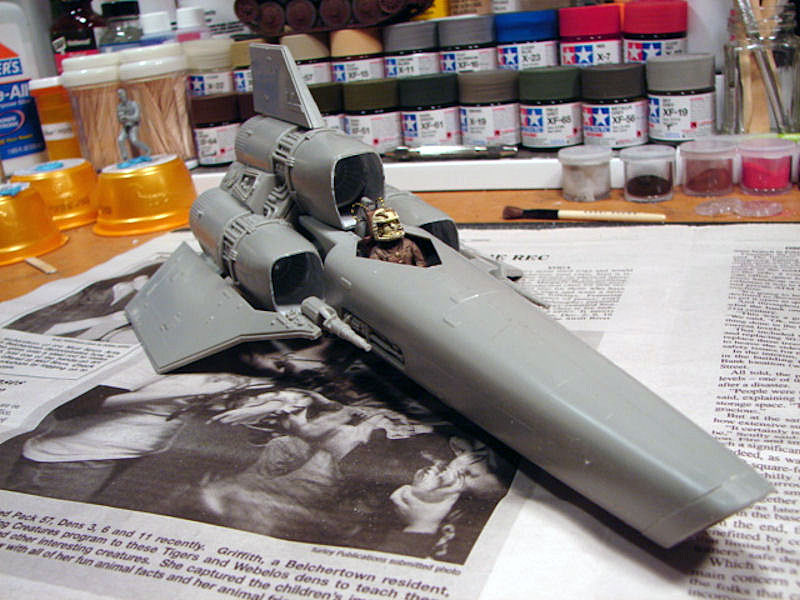 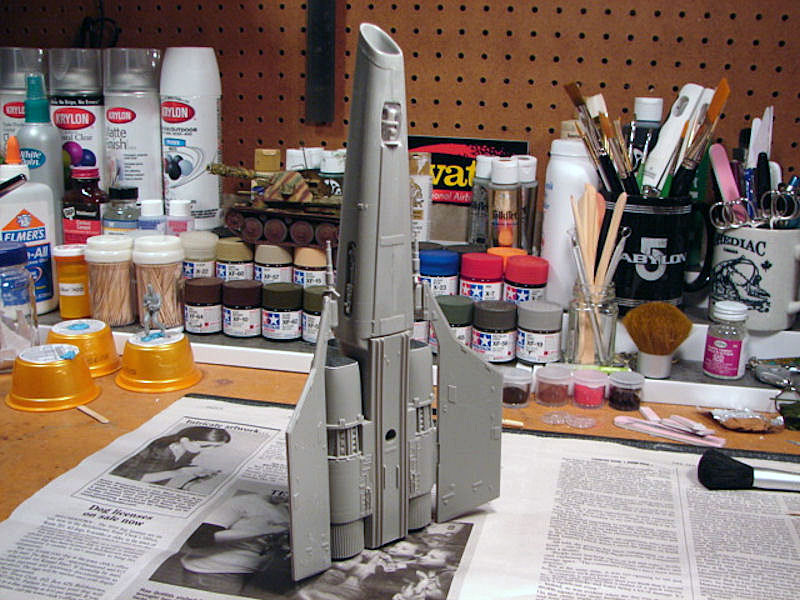 Those kinetic cannons look frakkin' AWESOME! I also really liked the way the camera bay turned out, and inspecting the craft from several angles, it looked like it was meant to be there....a good thing! |
|
Whiterook
Full Member
Member since: March 2013
Posts: 837
Mar 13, 2013 15:29:19 GMT -5
Mar 13, 2013 15:29:19 GMT -5
|
Post by Whiterook on Mar 15, 2013 21:44:12 GMT -5
|
|
Whiterook
Full Member
Member since: March 2013
Posts: 837
Mar 13, 2013 15:29:19 GMT -5
Mar 13, 2013 15:29:19 GMT -5
|
Post by Whiterook on Mar 15, 2013 21:49:47 GMT -5
After cleaning up the ragged edge of the clipped plastic (which is always a bit of a pain), it was time for a little paint before attaching.
I decided to paint the inner portions of the thruster nacelles, and weather. The thought process was, it's naturally easier to paint the portions now, rather than trying to angling in with a brush later. This was another reason to paint the rear half of the canopy as well, done with "FolkArt Acrylic's" White. FolkArt Acrylics is super cheap in price (as well as quality), but remains a favorite of mine for certain paint application decisions. It goes on in few applications and can be somewhat bulletproof, for areas that need to look bulletproof!
It took several coats, which it typically is on this clear plastic. Later on, I would find that Future Acrylic floor polish makes this job much easier, for any acrylic paint applied to clear plastic.
Then it was simply a matter of gluing the canopy to the fuselage. With the canopy lying EXACTLY on the cockpit perimeter, it was preferable to glue plastic to plastic, as the canopy will get a little paint on the 'metal' frame later, with heavy weathering.
|
|
Whiterook
Full Member
Member since: March 2013
Posts: 837
Mar 13, 2013 15:29:19 GMT -5
Mar 13, 2013 15:29:19 GMT -5
|
Post by Whiterook on Mar 15, 2013 21:57:58 GMT -5
Next was cleaning up some panel lines....always fun. Actually, it is! Very Zen. Note that I usually would have used some Squadron Putty to get an ultra smooth 'seamless' look, but most of this area will either be covered with decal or heavy weathering, so all that was required was a nice smooth and even surface. Next, taping! A little Painter's tape did the trick nicely...I love my Tamiya tape, but sometimes the expensive stuff takes a side seat to the cheapo stuff (Hey, I'm from New England...Frugal, remember?),. Also applied to the cockpit canopy and the camera canopy under the nose. 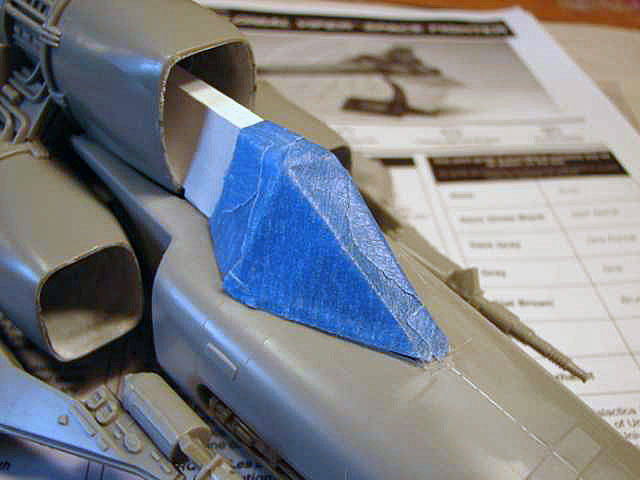 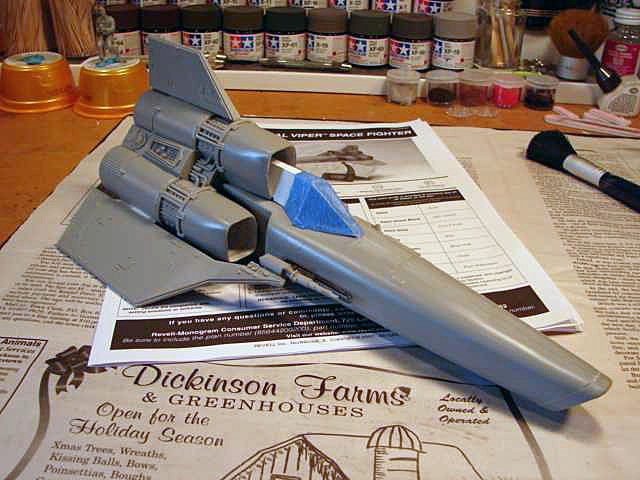 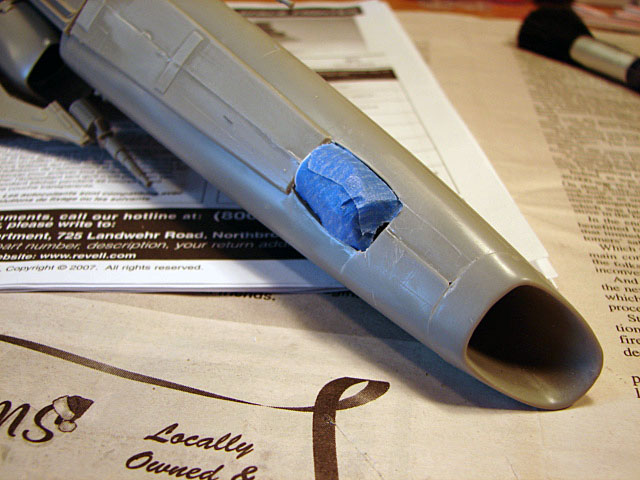 Next up, some airbrushing! |
|
venom1
Full Member
Member since: October 2012
Posts: 1,369
Oct 10, 2012 2:40:03 GMT -5
Oct 10, 2012 2:40:03 GMT -5
|
Post by venom1 on Mar 16, 2013 11:04:14 GMT -5
Great work WR! And don't worry about too much information, around here (when it comes to modelling at least!!  ) there is no such thing!! Cheers, Sam  |
|
|
|
Post by bbd468 on Mar 16, 2013 11:11:39 GMT -5
Lookin good Rook...BRING ON THE PAINT!!! |
|
|
|
Post by Leon on Mar 16, 2013 11:17:11 GMT -5
Looking good WR.Waiting to see the paint flow. |
|
Whiterook
Full Member
Member since: March 2013
Posts: 837
Mar 13, 2013 15:29:19 GMT -5
Mar 13, 2013 15:29:19 GMT -5
|
Post by Whiterook on Mar 16, 2013 16:39:41 GMT -5
Thanks all....I believe, at the time, this was my third model in which I used an airbrush. A magnificent tool!!!
Placed on a Rubbermaid carousel with a cake trivet, all placed in my GORGEOUS, new Pace airbrush spraybooth! (http://www.pacepaintbooths.com/pace/)
|
|
Whiterook
Full Member
Member since: March 2013
Posts: 837
Mar 13, 2013 15:29:19 GMT -5
Mar 13, 2013 15:29:19 GMT -5
|
Post by Whiterook on Mar 16, 2013 16:53:24 GMT -5
Initially, after having taped the clear parts, as shown above, I airbrushed the entire model with Tamiya Acrylics X-2 Gloss White. But, I was being lazy on the cockpit canopy....I knew I should have masked off the canopy so that the 'frame' was exposed, so that I could airbrush it; but again, if you didn't catch it the first time...I was being lazy, and figured I'd hand paint it. Bad idea! After thinking about it a bit, and coming to the realization that hand painting clear plastic is a pain and a half (streaky at first, and having to build up way too many layers); plus, good luck getting even edges, even with a steady Artist's hand!!! Well, I came to my senses and, I re-masked the canopy.... 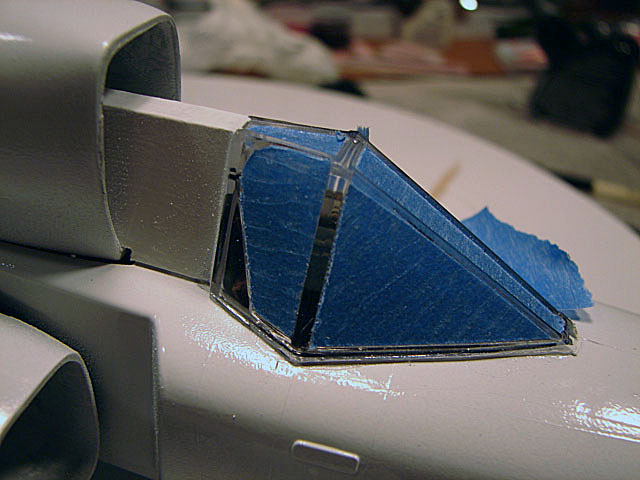 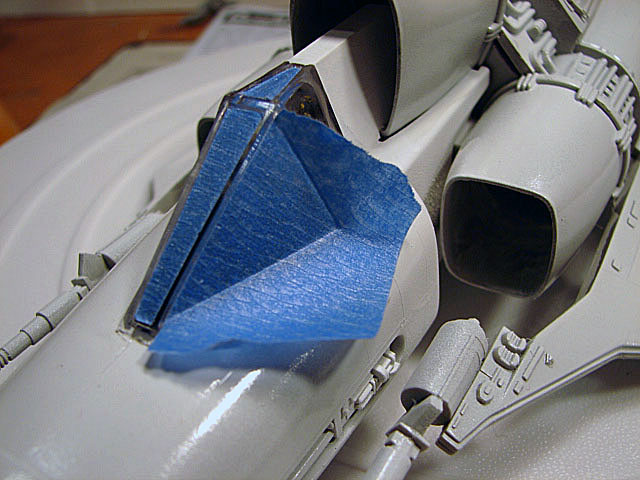 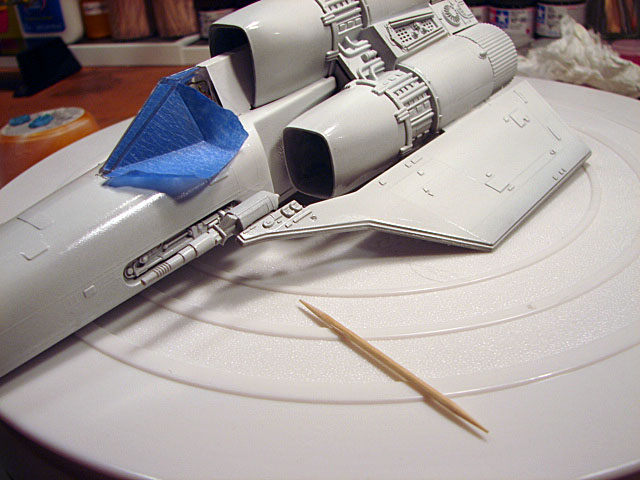 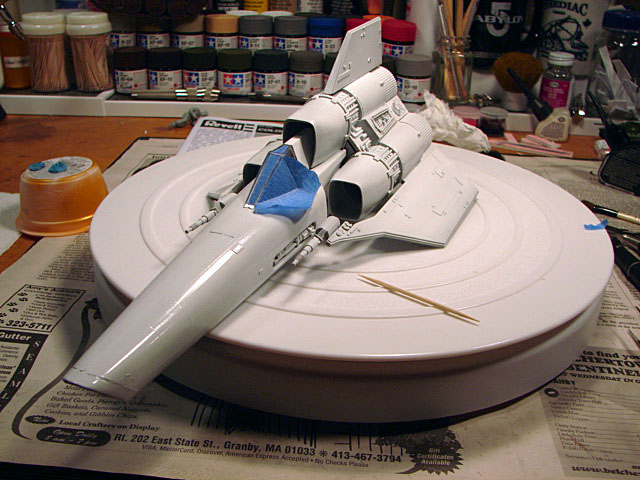 My method on that canopy was simple: Rip a small piece of Painter's tape, and lay it straight edge up just past the molded canopy frame (the model's molded canopy has a raised frame, to be painted and look like the metal frame holding the glass panels in). Then, use a set of tweezers to make sure that edge is positioned right. Next, press down against the other edges slightly with my thumb fingernail to 'find' the valley outline; and then use a toothpick to press the tape into the frame inner face, getting a good strong and clean crease. Next, using an X-Acto craft knife with fresh #11 blade, score against the raised edge several times to cut through the tape in layers. Finally, back to the tweezers, grab a corner and hold the fulcrum of the cut with the toothpick and gently peel the unusable portions of the tape off. 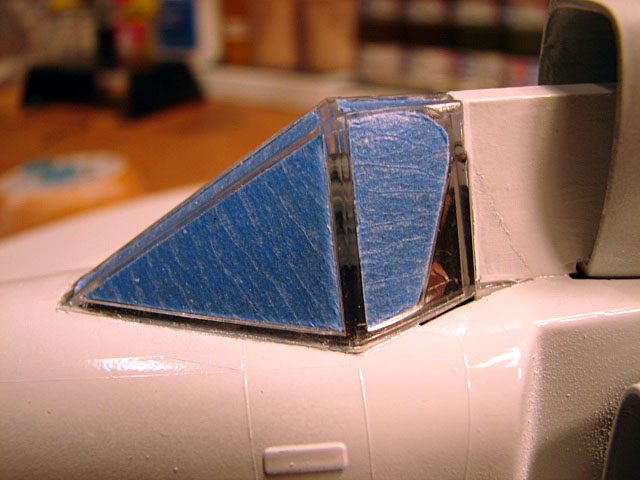  And then re-airbrushed selected areas that needed a little re-touch, and..... the canopy.  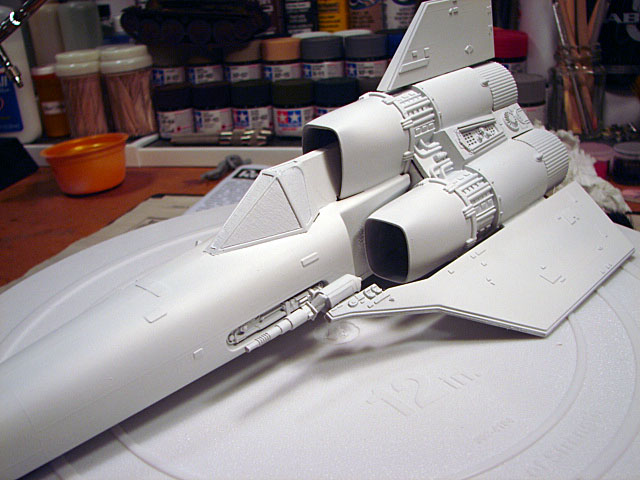 |
|
Whiterook
Full Member
Member since: March 2013
Posts: 837
Mar 13, 2013 15:29:19 GMT -5
Mar 13, 2013 15:29:19 GMT -5
|
Post by Whiterook on Mar 16, 2013 17:04:27 GMT -5
Now it was time for one of my favorite products....Future Acrylic! Unlike a lot of my modeling friends, I don't airbrush it on (maybe in the future... <--- see what I did there?). I brush it straight on my kits with a 3/4 Artist Brush, and then let it sit overnight to cure. It looks like Hell at first application, but then overnight, the weight of the floor acrylic somehow breaks the tension and settles to a smooth finish. Just brilliant stuff!!!
I always use this stuff for decals, and especially when I start the weathering process. I'll lay a coat of Future either just on the areas that need the decals, and when cured, lay the decals; or I'll do the whole model and lay cure, and they lay decals....I just follow my gut on it, dependent on the model and amount of decals to go on.
As for the kit: I know one of the effects I wanted on the weathering was to chip the framework of the canopy. Then, dirty the bird up; paint the thrusters and exposed wiring/pipework; chip up the 'paint' of the decal stripes; some burn marks from energy canon hits. I wanted this Viper used and abused; an on the line Bad Bird. The thrusters need some carbon marks, and the kinetic cannons need some burn marking. Of course, hydraulic oil is a must!!! And I still needed to figure out what to do with the actual engine thrusters in back, with those clear plastic inserts.
BTW...at this stage, all I could think was, how much it looks like Apollo and Starbuck's original series Vipers after meeting the Beings of Light!! WHITE! Remember how, even their Frakking uniforms turned white!??!
|
|
Whiterook
Full Member
Member since: March 2013
Posts: 837
Mar 13, 2013 15:29:19 GMT -5
Mar 13, 2013 15:29:19 GMT -5
|
Post by Whiterook on Mar 16, 2013 17:17:59 GMT -5
Now she looks fairly, 'factory fresh' at the moment, but that would be changing in short order, with oil washes (my first attempt at full blown oil paint washes), details, and then some chalk pastels. As mentioned previously, I am going my own way with this Colonial Viper, and Galactica purists would probably try and shoot me with a Blaster for this. Their issue...not mine. This is a Recon Viper from the Battlestar Galactica, during the First Cylon War. It's part of Colonial Marines Fleet Patrol Squadron, Viper 3, commanded by Captain Gallant. Yup, I made myself a part of Battlestar Galactica lore!!!!! This is what she looks like factory fresh...... 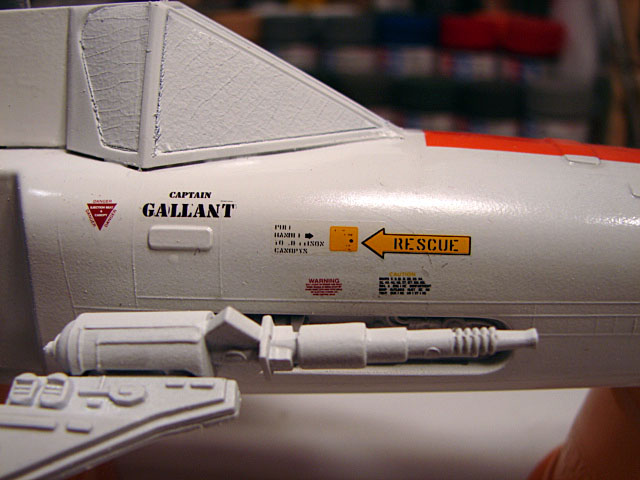  She bears the Galactica colors, and squadron/plane designation. The Pilot name and rank is below the cockpit; there's a Rescue pull handle and designation sign, along with a triangular warning sign that the Viper is ejection seat equipped, with canopy firing mechanisms....all of which that didn't come with the model kit. The main intakes have 'Danger' signs. And you can just make out caution signs above the side nose fuselage mechanics bay. The decals for the 'Captain Gallant' signs were made from the Pilot decals that came with the kit, chopped up to form my name, and the 'Captain' from Apollo's. The rest of the decals were leftovers from an RF-4B Phantom jet build. |
|
Whiterook
Full Member
Member since: March 2013
Posts: 837
Mar 13, 2013 15:29:19 GMT -5
Mar 13, 2013 15:29:19 GMT -5
|
Post by Whiterook on Mar 16, 2013 17:20:34 GMT -5
My call sign 'Bullet' is painted on the nose..... 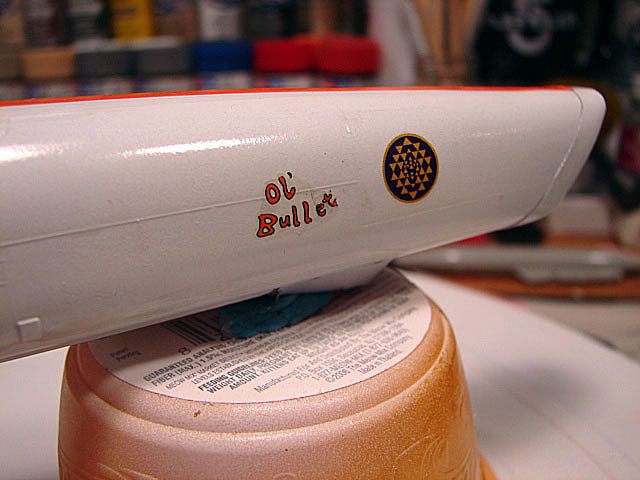 Had some silvering on the decal, but that can be taken care of mostly, in the weathering process. Next up will be the start of weathering, so hang on to your hats ...and stay tuned: Same Bat Time, Same Bat Channel!!! |
|
Whiterook
Full Member
Member since: March 2013
Posts: 837
Mar 13, 2013 15:29:19 GMT -5
Mar 13, 2013 15:29:19 GMT -5
|
Post by Whiterook on Mar 16, 2013 17:59:26 GMT -5
Thanks! I forgot the last bit of decaling.... 'No Step' warnings...... 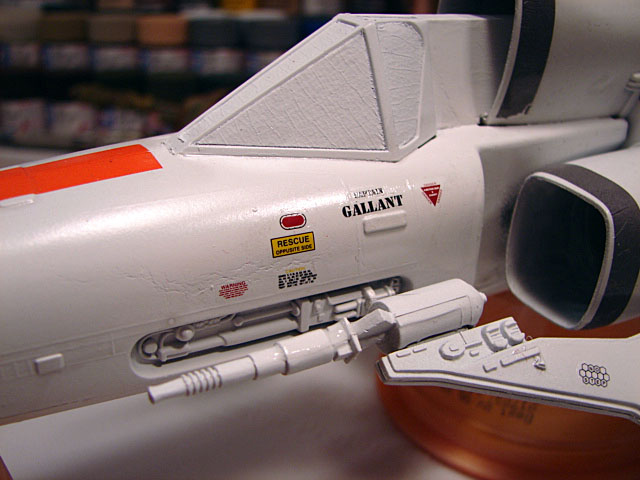 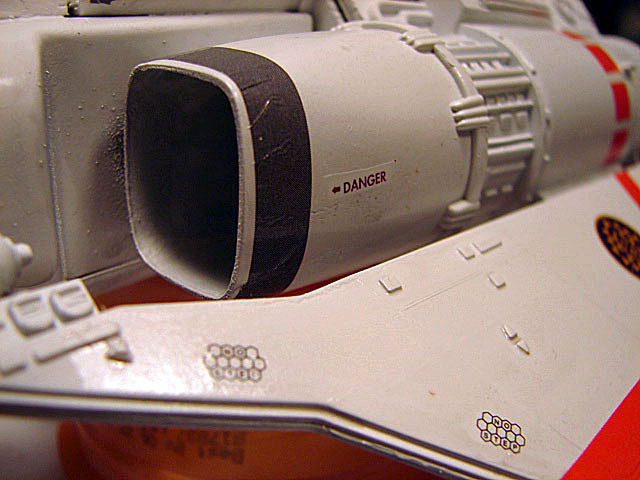 OK....now on to the weathering! |
|
Whiterook
Full Member
Member since: March 2013
Posts: 837
Mar 13, 2013 15:29:19 GMT -5
Mar 13, 2013 15:29:19 GMT -5
|
Post by Whiterook on Mar 16, 2013 18:07:18 GMT -5
This is where a model really takes on a life of it's own, in my view....in what you can do to it to make it speak to you!
I started with chipping. To recapture a thought on the direction I was heading, this is a Recon Viper, which is subject to a lot of abuse due to it's having to scoot and hide in asteroid fields, cosmic clutter filled with debris and nastiness, and also subject to many low-level atmospheric flights through all kinds of planetary weather conditions. What does all this mean? Well, it's going to get a lot bumps and bruises from rock dust and debris.
Done with a #11 blade on my craft knife, it was a matter of some strategic placing where it made sense.
|
|
Whiterook
Full Member
Member since: March 2013
Posts: 837
Mar 13, 2013 15:29:19 GMT -5
Mar 13, 2013 15:29:19 GMT -5
|
Post by Whiterook on Mar 16, 2013 18:16:47 GMT -5
Chipping is done with the point edge of a craft knife with #11 blade, and digging carefully at the decals; and some with the sharp-flat of the blade in a scraping motion. Both methods had the stroke of the blade head, moving in the direction that flying debris would have taken out the 'paint'. Another thing I used was a plain old sanding stick. By the way, this is why I really wasn't horribly concerned with the crummy fit of the thruster nacelle decals, all bunching up on me no matter how I positioned them; because I had planned on roughing up the leading edge anyway, so it all worked out in the end, in my opinion. As with all things weathering, the trick is knowing when to stop. This was new territory during this build, and I basically dared to fail, as the only way to excel is usually through pushing your comfort zone. I especially, like how the weathered wing edges came out. 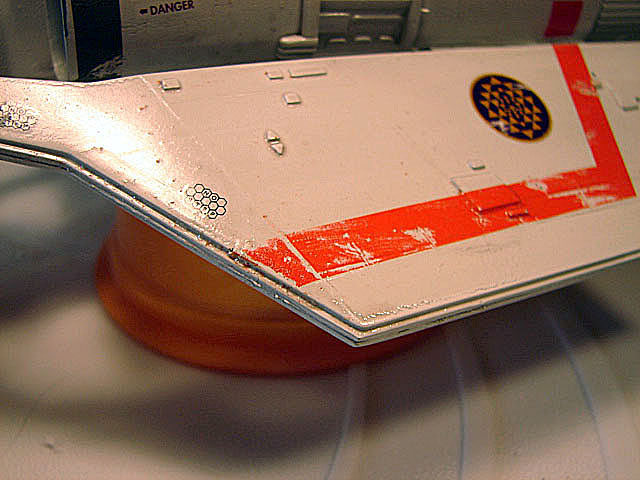 And I love the look of the top wing, which would take quite a licking. On the Nacells, they will get a fair bit of painting chips and grime later. 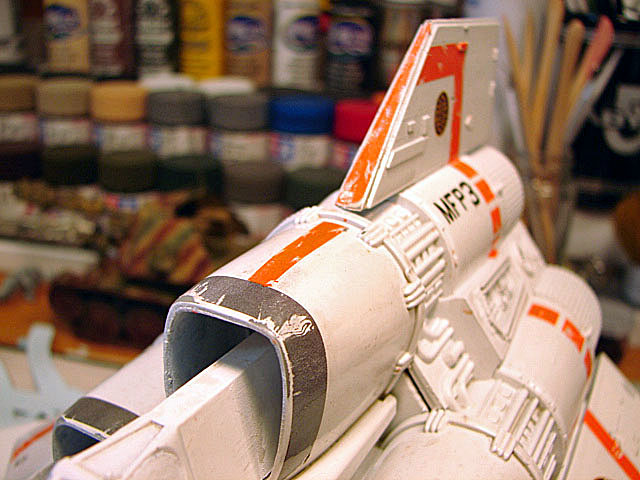 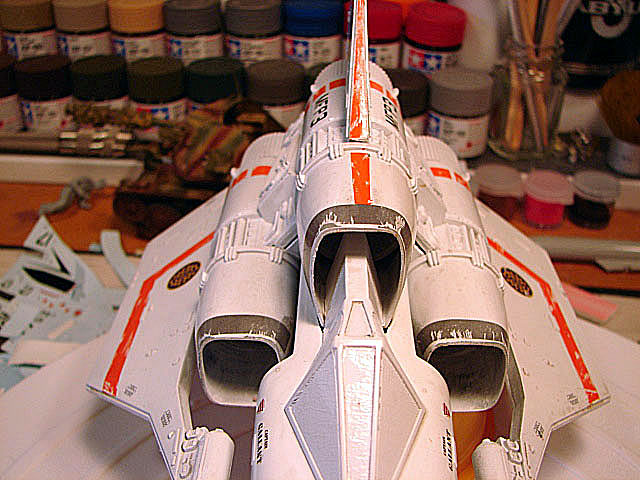 |
|
Whiterook
Full Member
Member since: March 2013
Posts: 837
Mar 13, 2013 15:29:19 GMT -5
Mar 13, 2013 15:29:19 GMT -5
|
Post by Whiterook on Mar 16, 2013 18:20:06 GMT -5
Now, on to the scary stuff....my first oil paint and turp wash. OMG!!!!!!!! The medium of choice for this round was Windsor & Newton Turpentine with Windsor & Newton Winton black oil paint, and also mixing in some Holbein Aqua Duo burnt sienna. The Aqua Duo is a water miscible oil, meaning it thins with water, but you can use it as a traditional oil, as well. 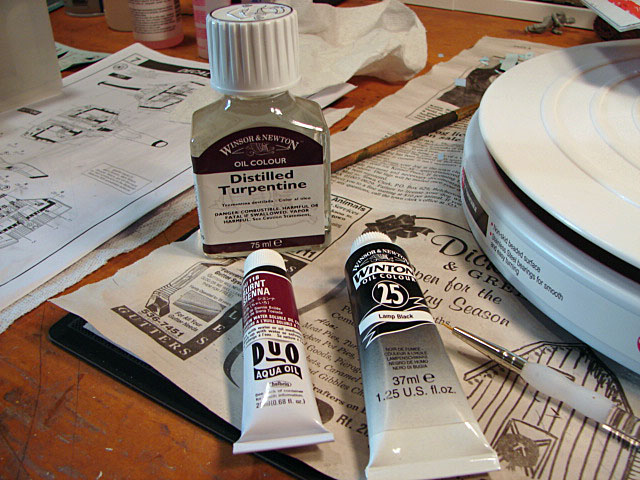 I also bought a new Royal soft-grip Golden Taklon round in 20/0 for the task...... 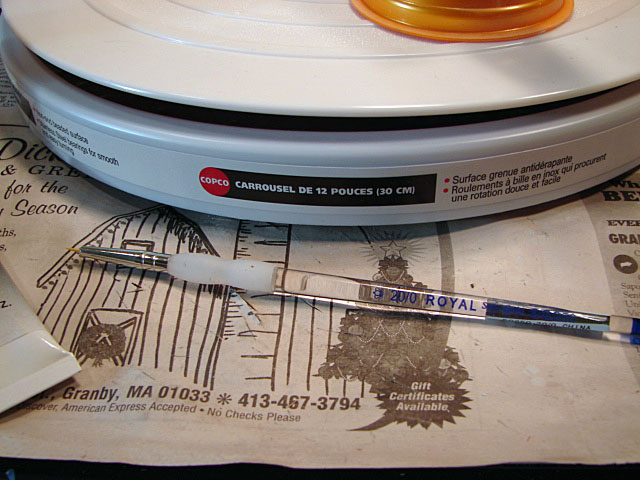 I did the standard method of placing a blob of each on a small sheet of aluminum foil, and then mixed my puddles below; grabbing the paint with the brush and letting capillary draw do its thing..... 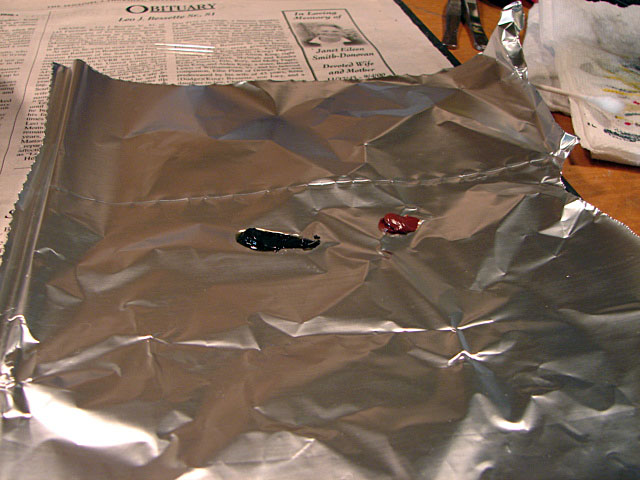 |
|
Whiterook
Full Member
Member since: March 2013
Posts: 837
Mar 13, 2013 15:29:19 GMT -5
Mar 13, 2013 15:29:19 GMT -5
|
Post by Whiterook on Mar 16, 2013 18:27:36 GMT -5
And, the results of my first ever oil and turp wash. Keep in mind, this is just the start, but I gave it a good go (well, 'good' is subjective, of course! Hang on to your seats (and dinners)...... 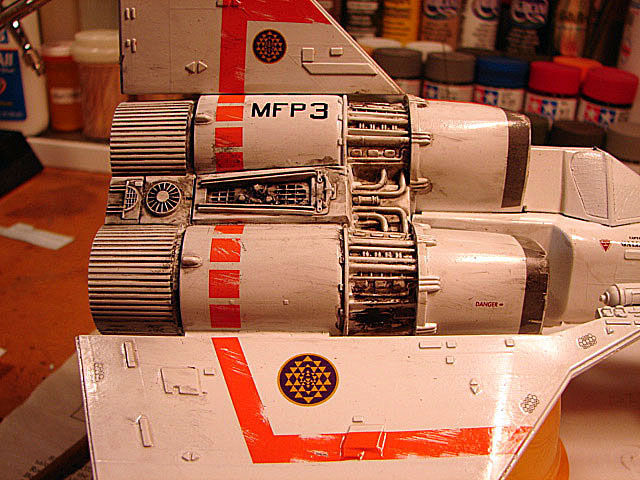 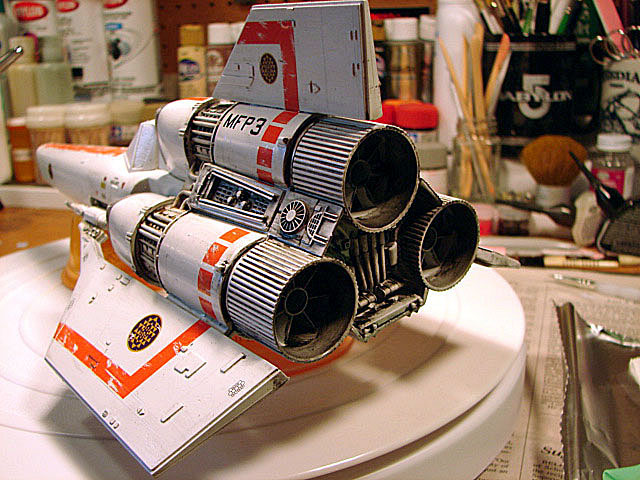 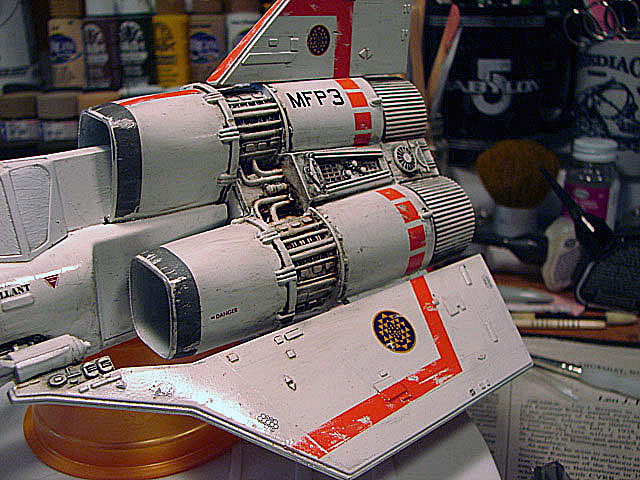 I put a small dab of the new Lamp Black Windsor & Newton paint, and a dab of the Aqua Duo burnt sienna on my palette. Then, using my brush, I made a small puddle of clear water, and grabbed some color from each dab and mixed a real wet mixture. I decided to forgo the dishsoap drop method I'd heard about, as the paint appeared to have a good enough consistency to it; and, thought it might settle in to the creases and ridges fine on it's own....which it did. I'm not saying dishsoap might mot be a bad ingredient....just not sure it's necessary. 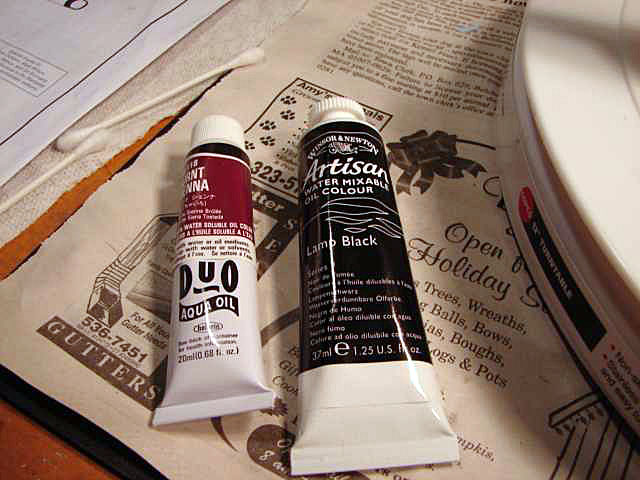 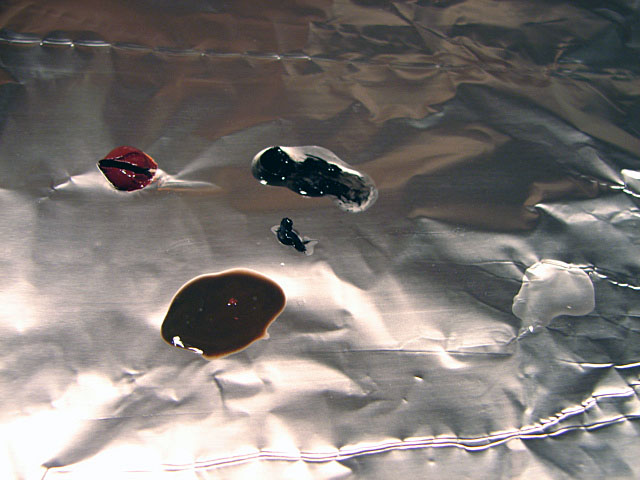 |
|
Whiterook
Full Member
Member since: March 2013
Posts: 837
Mar 13, 2013 15:29:19 GMT -5
Mar 13, 2013 15:29:19 GMT -5
|
Post by Whiterook on Mar 16, 2013 18:40:22 GMT -5
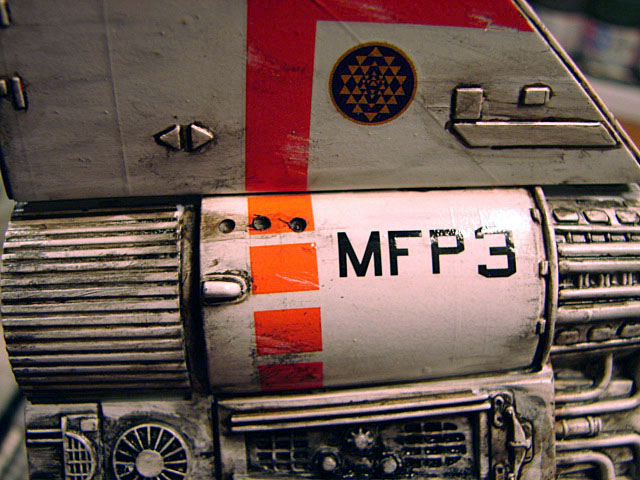
What I really like about this method was, it seemed to have all the benefits that the oil paint and turpentine had, being sucked right into the edges and crevices it needed to go into; but none of the smell or toxicity. The drawback I noticed was, the turp cleaned up off the surface a little easier in the first method. I would dip the 20/0 brush, tip only, into the puddle and then take my time touching against edges and recesses....the extremely watered down paint mixture wicking in with capillary action to where it needed to go. The over-coverage on surfaces cleaned up fairly easily with cotton swabs and a small ball of paper towel. The cotton swab and paper towel also helped to do some staining quite nicely. I even used my rubber-gloved finger to good use in dabbing and coaxing the paint to where it needed to go. And the results! First up, the starboard side.... 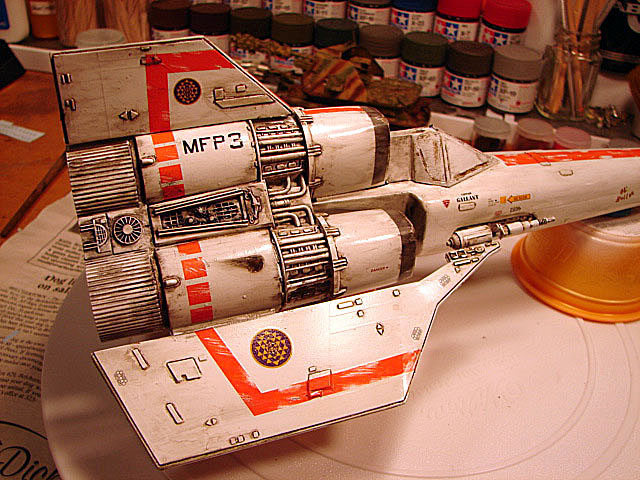 Now don't get too excited over he laser blast, as it will be fussed with a little more coming up. This was the first tome I tried this look, but it is less than stellar (pun intended). At this stage of the build, it was still a work in progress! Some of the raised edges, on the wings for example, still needed to be toned down a tad; but what I love is the dirty-muck look on the exposed engine components on the nacelles..... 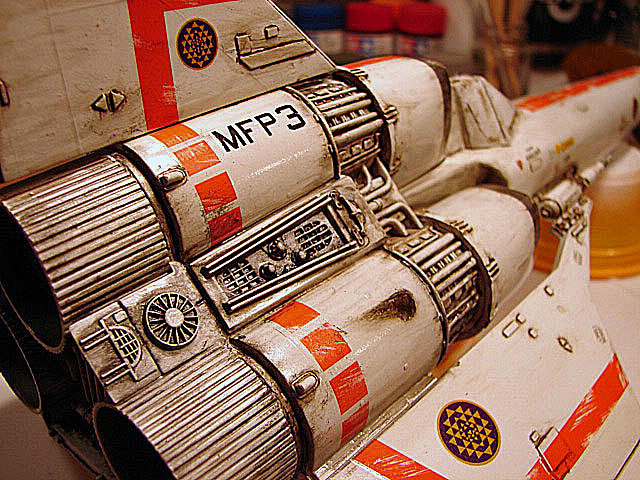 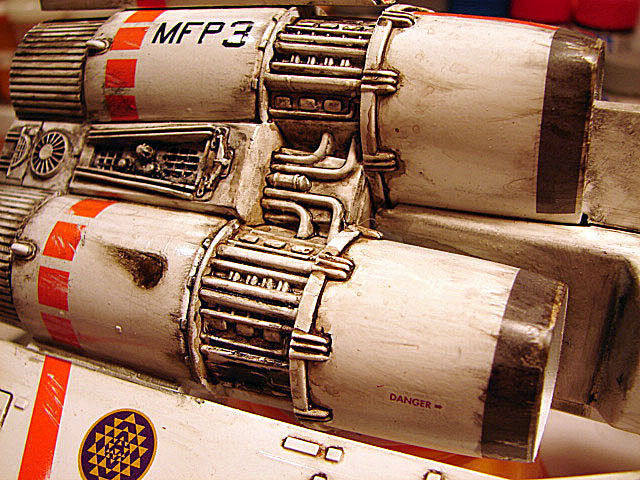 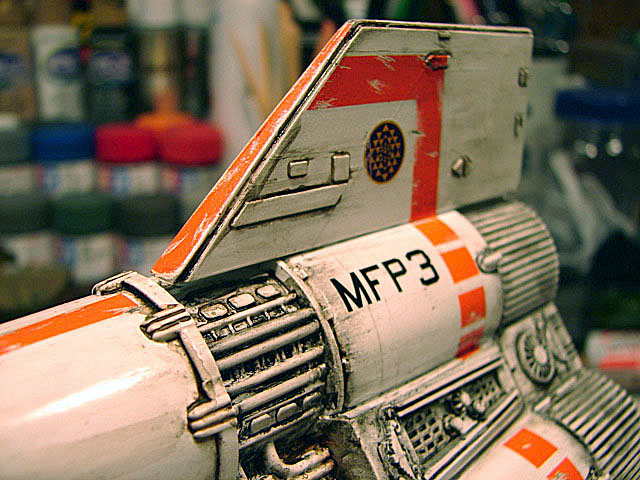  |
|
Whiterook
Full Member
Member since: March 2013
Posts: 837
Mar 13, 2013 15:29:19 GMT -5
Mar 13, 2013 15:29:19 GMT -5
|
Post by Whiterook on Mar 16, 2013 18:45:53 GMT -5
So, this seems to be the the method of choice for me at my current skill level. I have a chalk wash technique which would have worked well also, but in a different way. I liked where the weathering led, and it gave the appropriate look at what I had envisioned in my mind's eye for a service-heavy-use Viper that's been through a lot of extended conditions, though nasty elements. But this wouldn't be where this story ended. I still had some ideas tumbling about in my noodle to make the bird a little more realistic ....retro thrusters!!! Stay tuned! A few more shots I'd taken to this point... 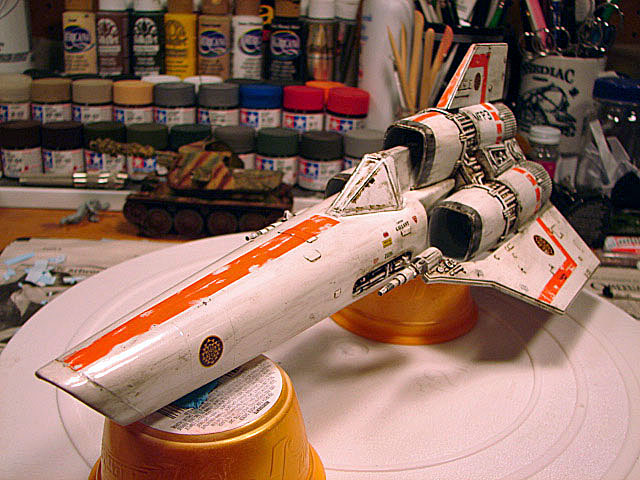 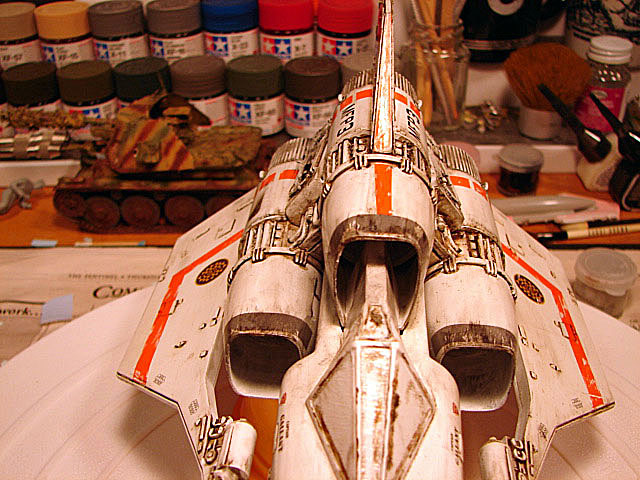 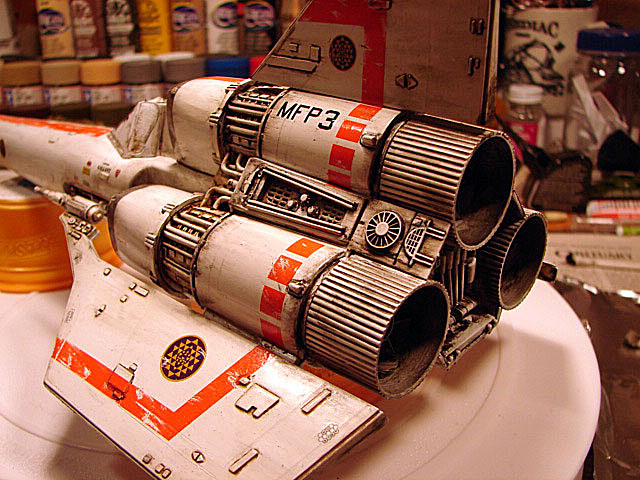 |
|
Whiterook
Full Member
Member since: March 2013
Posts: 837
Mar 13, 2013 15:29:19 GMT -5
Mar 13, 2013 15:29:19 GMT -5
|
Post by Whiterook on Mar 16, 2013 19:00:28 GMT -5
We are now nearing the end in this build. I mainly did the bottom of the Viper, weathering it much as the top. I didn't snap any pics of her belly. I also touched up some of the top and sides, as well. But one of the big things I worked on was the nose. I painted the nose cone exterior a dark gray, and then a coat of lighter gray on top; followed by some chipping. Then some 'dirt' washed inside the nose cone. All done in Folk Art acrylic. Next came the fun part...out came the old pin vice and on went the Retro-thrusters! I drilled so that I broke the surface, but not drilled all the way through. Next, applying some oil paint dark brown almost to black, and then pulled for some streaking effect. 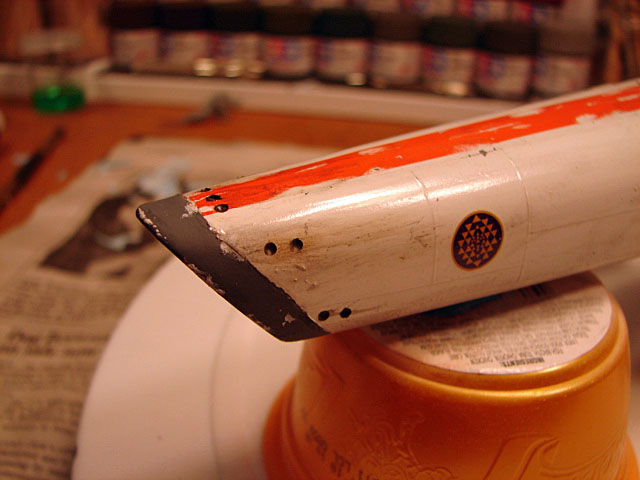 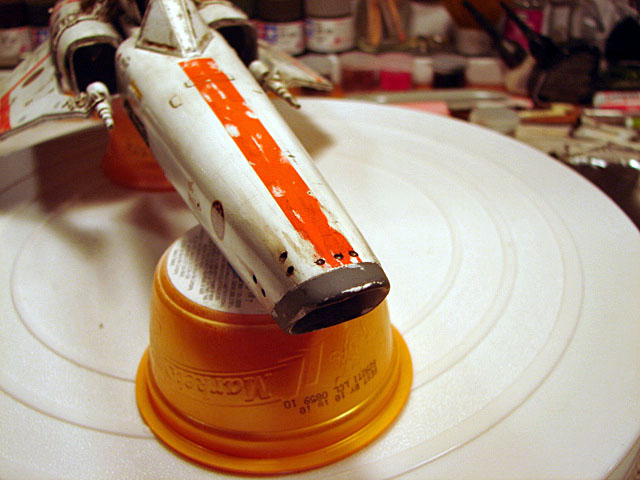 Next came the Reto-thrusters to the port and starboard engines.....and also notice the laser blast was finished up, reducing the size and enhancing the shape..... 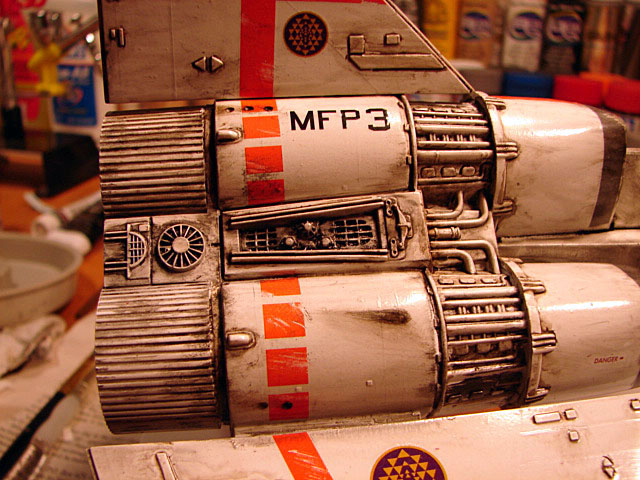
 Near the bottom wing..... 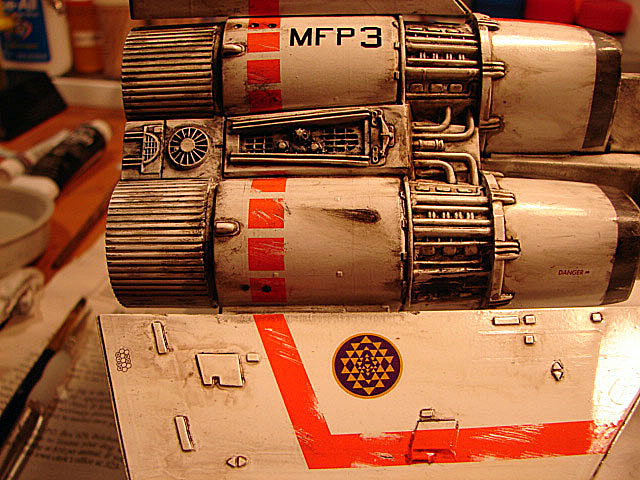 |
|
Whiterook
Full Member
Member since: March 2013
Posts: 837
Mar 13, 2013 15:29:19 GMT -5
Mar 13, 2013 15:29:19 GMT -5
|
Post by Whiterook on Mar 16, 2013 19:02:42 GMT -5
|
|
|
|
Post by Leon on Mar 16, 2013 19:06:02 GMT -5
WR you did a awesome job fella.I'm loving this.Great sbs also. |
|


 actually, I build fairly fast...it's the painting I go painstakingly slow on, as I really go all out when painting.


 ...thanks...that makes perfect sense. I'll certainly do that next time. Don't know why I didn't think of that, but I can see how it would relieve the pressure points.


 ) there is no such thing!!


