[art] MiniArt AEC Mk III -Build review-update 10-23-13 paint
Oct 21, 2013 10:06:24 GMT -5
Thomas_M/ likes this
Post by 406 Silverado on Oct 21, 2013 10:06:24 GMT -5
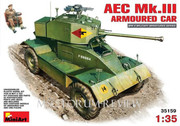
AEC Mk.III Armoured Car
Build Review
Out of box review modelerssocialclub.proboards.com/thread/6048/art-aec-iii-armoured-review
Following the in box review it's time for the Build Review of this beauty of a kit. After studying the kit instructions and looking at the sprue trees I was very tempted to start with the nicely detailed motor and transmission, but I will follow the instruction for this review.
I will be updating this post only, and not posting new posts. Please check here for new updates.
Looking at some of the sprues one can see this kit is made up of lots of teeny tiny parts, which means I'll be using my optivisor for some of the assembly. Included in the kit is a nice PE fret with a good amount of parts, including straps. The instruction call out the PE part number and no option to use a kit part, as is with some other kits.
Step 1
Step 1 deals with all the rounds stored in bins on the body floor. There are 44 rounds (Casings)that need to be cut down to fit the bins in step 2.
Step 2
We start the build with the cab floor. There are ammo bins that glue onto the floor, and in turn get loaded with ammo rounds. Here I decided to leave the ammo out until later as this will help in painting, I hope. the bins have very thin walls so care should be taken when removing these from the sprues, as well as cleaning the gates.

Steps 3-5
These three steps are the assemblies of fuel and water tanks. There are several parts to each tank, with some being very small. Some are easily lost to the carpet monster.
Step 6
This stage is where we start to work on the body sides and adding the tanks built in the previous steps. here is where there is a slight error in the sub assembly numbering. Nothing major but just to point it out. The number 4 and 5 (a three sided tank)are marked wrong and should be 3 and 4. Again, not a major problem as they are quite obvious.
In this step we also add a few other parts to the outside and the front driver area.
Step 7
We now move onto the fire wall and the motor side water tank. This is an easy three part tank and goes together fast.
Step 8 &9
Here is where we start to add a lot of small parts and PE. The cab side of the wall is very well detailed and with the addition of the storage racks and other parts, we ave a well detailed firewall.


Step 10
Parts are added to the other side wall, as well as the crew access hatch. Here is where another glitch was found. The inside hatch handles are marked as parts Ac1, when in fact they are parts Ab1.
So now we have most of the cab/body work done, including the floor and firewall.


Step 11 & 12
These two steps continues the building of the interior body in the form of the driver area. Buildup of the seat is very delicate and some care should be taken in this area to be sure the frame work is square and true. I found the back rest and cross support to be the trickiest area. Other than that the rest just falls together.
So far I must say that all the parts used were very detailed and very little clean up was required. This made for smooth assembly and before I knew it, I had almost all of the interior completed.


Step 13
Step 13 calls for gluing the one side, firewall, cab and driver floors. I decided to just tape these together and actually glue them after the paint is applied. This will allow me to reach all the nooks with the airbrush, and to do some light weathering. I did however glue the driver and cab floor together, and the firewall. This makes for one larger part apposed to three parts/sub assemblies.


These two steps continues the building of the interior body in the form of the driver area. Buildup of the seat is very delicate and some care should be taken in this area to be sure the frame work is square and true. I found the back rest and cross support to be the trickiest area. Other than that the rest just falls together.
So far I must say that all the parts used were very detailed and very little clean up was required. This made for smooth assembly and before I knew it, I had almost all of the interior completed.


Step 13
Step 13 calls for gluing the one side, firewall, cab and driver floors. I decided to just tape these together and actually glue them after the paint is applied. This will allow me to reach all the nooks with the airbrush, and to do some light weathering. I did however glue the driver and cab floor together, and the firewall. This makes for one larger part apposed to three parts/sub assemblies.


Step 14
This step has only 5 parts to glue together, and one is the front plate. Here is also where we see just how fine some details are. Part E38 is thin and has 4 sprue gates, making it hard to remove the part from the sprue tree without breaking it. I managed to break mine but was able to glue it back together after cleaning the nubs.
Part B24 is a similar situation where the stick shift broke. I made a new one from stretched sprue and a lead bead.


Step 15
This step involves gluing the other side panel to the floor and firewall. Again I am leaving this unglued to ease in painting. I have test fitted both sides and floor and there is a very nice fit with no visible gap.
The interior assembly is finished as well as the motor compartment tanks. These sub-assemblies will get a coat of primer followed by the white interior color pointed out in the instructions.


Painting of the interior
Before I continue with the build, the interior needs to be painted, as mentioned above. Assembly will continue once this painting stage is finished, and will pick up with step 16.
I used vallejo White primer and sprayed two light coats. This was followed by some pre shading with Life Color dark gray, followed by misting of the final white color. I will let all this dry and cure for 24-48 hours before picking out details and any weathering.


Details and weathering
After the base white color was dry, I then started picking out some of the details with acrylics, then did some light weathering. Not much of the interior can be see so it's up to the modeler on how much effort in weathering will be done here.


