|
|
|
|
Post by TRM on Jan 22, 2014 17:27:12 GMT -5
Nothing wrong with a little playing around Paul! Love the add-ons...adds a bit of eye candy when you hit the paint!!
|
|
|
|
Post by dupes on Jan 22, 2014 17:46:39 GMT -5
Paul - is that a specific variant you're whipping up there?
|
|
paulh.
Senior Member
   
Member since: November 2011
build, fail, learn, succeed - ENJOY
Posts: 2,389
Nov 15, 2011 15:54:51 GMT -5
Nov 15, 2011 15:54:51 GMT -5
|
Post by paulh. on Jan 22, 2014 18:17:40 GMT -5
Cheers T Dupes- no specific variant just playing around with the idea of field applied armour that you find on these babies. Not going to make any attempt to acurize this either!  P |
|
|
|
Post by wbill76 on Jan 22, 2014 20:48:30 GMT -5
Looks like a fun exercise Paul, really provides a lot of opportunities.
|
|
|
|
Post by deafpanzer on Jan 22, 2014 22:21:44 GMT -5
I agree with guys... love the add ons!!!
|
|
paulh.
Senior Member
   
Member since: November 2011
build, fail, learn, succeed - ENJOY
Posts: 2,389
Nov 15, 2011 15:54:51 GMT -5
Nov 15, 2011 15:54:51 GMT -5
|
Post by paulh. on Jan 23, 2014 3:19:14 GMT -5
Bill, Andy- thanks both.
Can't seem to find the mojo to start something new at the moment so hopin' this might provide the kickstart.
TTFN
P
|
|
|
|
Post by bullardino on Jan 23, 2014 11:58:38 GMT -5
Interesting idea, are you depicting rubber armor?
I love serbian/bosnian field modification and I will surely try to depict the famous bosnian T-34
|
|
paulh.
Senior Member
   
Member since: November 2011
build, fail, learn, succeed - ENJOY
Posts: 2,389
Nov 15, 2011 15:54:51 GMT -5
Nov 15, 2011 15:54:51 GMT -5
|
Post by paulh. on Jan 23, 2014 14:36:15 GMT -5
Luigi , jackwagon -thanks very much for looking in chaps.  I wasn't happy with the front quarter and turret cheek additions, so they both came off  Going to try something else -just don't know what at the mo  P |
|
|
|
Post by Leon on Jan 23, 2014 16:33:20 GMT -5
Paul i really like the look of the add on armor.  |
|
paulh.
Senior Member
   
Member since: November 2011
build, fail, learn, succeed - ENJOY
Posts: 2,389
Nov 15, 2011 15:54:51 GMT -5
Nov 15, 2011 15:54:51 GMT -5
|
Post by paulh. on Jan 23, 2014 17:08:36 GMT -5
Cheers Wizzard!
|
|
Deleted
Member since: January 1970
Posts: 0
Nov 25, 2024 10:37:23 GMT -5
Nov 25, 2024 10:37:23 GMT -5
|
Post by Deleted on Jan 24, 2014 14:09:09 GMT -5
nice additions Paul looking forwards to following this one
|
|
paulh.
Senior Member
   
Member since: November 2011
build, fail, learn, succeed - ENJOY
Posts: 2,389
Nov 15, 2011 15:54:51 GMT -5
Nov 15, 2011 15:54:51 GMT -5
|
Post by paulh. on Jan 25, 2014 11:29:54 GMT -5
Thanks very much Pete. Well I reworked the stand off hull armour using some Evergreen u-channel and I-beam to create a frame to which i added some thin copper sheet. A much better result- and the copper provides a far more realistic scale thickness. The metal is from a packet of garden labels i picked up at my local B&Q- about £2 for 10 copper strips (approx 8 cm X 1.5 cm) that also come with very useful copper wire Apologies in advance for the quality of this pics- I'll sort out some of better quality sometime this weekend.  Things just dry-fitted for the moment: 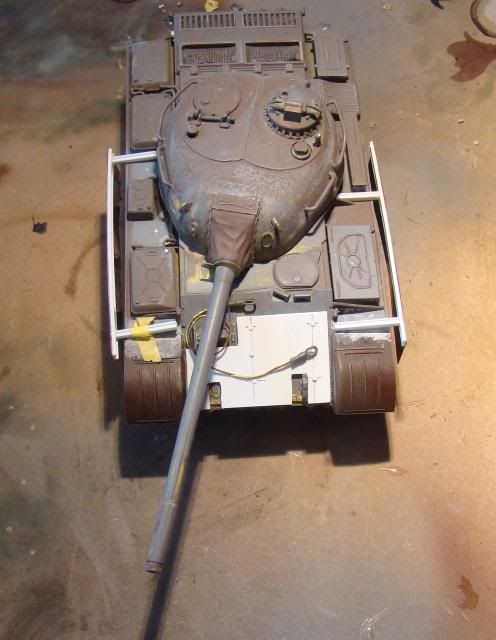 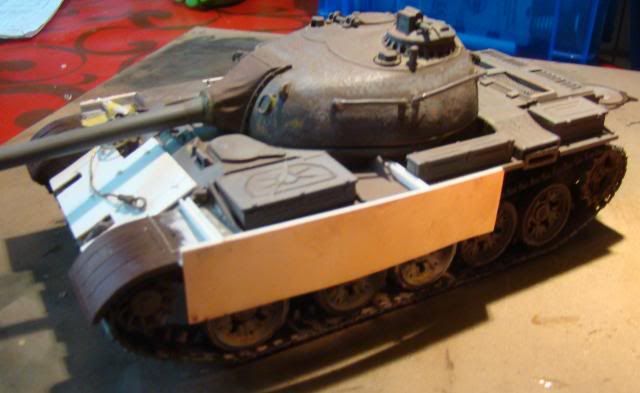 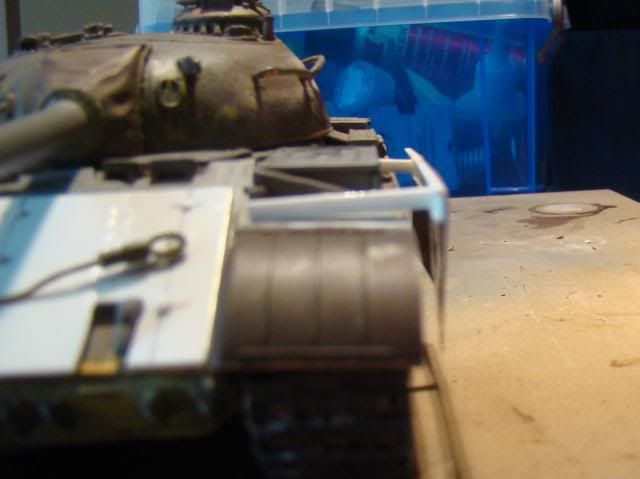 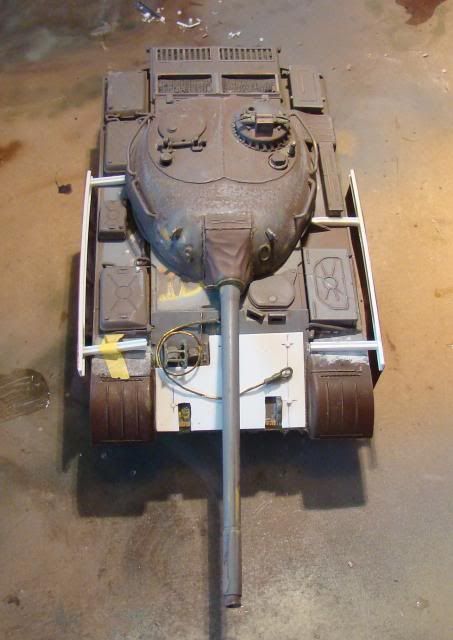 Thinking of a mesh type screen for the A$$ end and still unsure about what to do with the turret. As always folks ACVW  P |
|
|
|
Post by TRM on Jan 25, 2014 11:43:53 GMT -5
Nicely done!!! Bed spring or chain-link would look sweet on the turret...maybe? This will look great under some color soon!!!
|
|
paulh.
Senior Member
   
Member since: November 2011
build, fail, learn, succeed - ENJOY
Posts: 2,389
Nov 15, 2011 15:54:51 GMT -5
Nov 15, 2011 15:54:51 GMT -5
|
Post by paulh. on Jan 25, 2014 11:46:24 GMT -5
Cheers Todd.
I've got plenty of aluminium mesh -so might try the chain-link idea for the turrret.
P
|
|
|
|
Post by bbd468 on Jan 25, 2014 11:47:42 GMT -5
Hey Paul! I love what ya got goin here fella....looks fun too....im in!  |
|
paulh.
Senior Member
   
Member since: November 2011
build, fail, learn, succeed - ENJOY
Posts: 2,389
Nov 15, 2011 15:54:51 GMT -5
Nov 15, 2011 15:54:51 GMT -5
|
Post by paulh. on Jan 25, 2014 12:30:43 GMT -5
Cheers bro !
On this night of Rabbie Burns will the kiltutu be getting an airing?
P
|
|
|
|
Post by bbd468 on Jan 25, 2014 12:32:29 GMT -5
Cheers bro ! On this night of Rabbie Burns will the kiltutu be getting an airing? P Indeed it will!   |
|
|
|
Post by bullardino on Jan 25, 2014 17:04:14 GMT -5
Nice progress, mate. I particularly love this variation:  |
|
|
|
Post by `Boots` on Jan 25, 2014 17:11:42 GMT -5
Nice work Paul...........this is my fav all time tank so it`s nice to see ya giving it it`s own special make over bud, gotta get me another one for the bench at some point...................in fact i do have a special variant in mind waiting in the wings  Love that piccy Lui  |
|
Deleted
Member since: January 1970
Posts: 0
Nov 25, 2024 10:37:23 GMT -5
Nov 25, 2024 10:37:23 GMT -5
|
Post by Deleted on Jan 25, 2014 17:56:00 GMT -5
The best thing about T55's is that yer can pretty much add whatever the ferk yer like and there's a darned good chance yer actually perfickly recreating a real one from somewhere!!!  Nice project here Paul - give it a funky African camo job and yer onto a winner! 
With regards to the T-54/55 this is very very true,
The Iraqi 'enigma' project was in itself nothing more than a quick 'bodge it n leg it' job really tbh, a fairly big upgrade job, but very crudely done.
Balkan T-55's featured some very strange rubber fetish nonsense, plus also some sand bag armor that was very similar in concept to what was done in WW2, with sand bags placed in cages around the turret, (in WW2 the focus was mainly on front and side plates)
In Africa, or Afghanistan, I can't remember which, there were some T-55's 'upgraded' (a loose term,lol) with steel I beams on the front plate, to in effect try and replicate spaced armor.

|
|
paulh.
Senior Member
   
Member since: November 2011
build, fail, learn, succeed - ENJOY
Posts: 2,389
Nov 15, 2011 15:54:51 GMT -5
Nov 15, 2011 15:54:51 GMT -5
|
Post by paulh. on Jan 25, 2014 18:19:05 GMT -5
Luigi- thanks for the picture , it's brilliant!  Who does it belong to? Boots,- glad you're enjoying it  jackwagon - good call on the scoring  kharkov- nice to have you along  Going only slightly off topic; Here's a comparison pic of Eduards generic diamond mesh against the auto repair stuff I found at Halfords 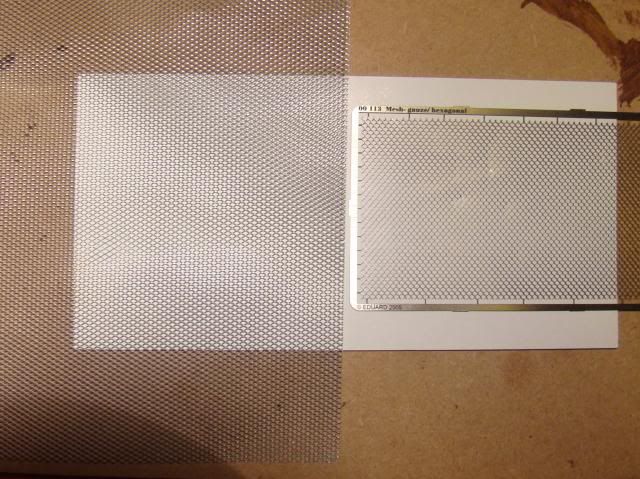 As you can see virtually (if not) the same size and usable for a multitude of things inc chain link fencing etc., more than twice as much for less than half the price. |
|
|
|
Post by `Boots` on Jan 25, 2014 18:23:08 GMT -5
Paul...........the Halfords stuff is all i ever use  |
|
paulh.
Senior Member
   
Member since: November 2011
build, fail, learn, succeed - ENJOY
Posts: 2,389
Nov 15, 2011 15:54:51 GMT -5
Nov 15, 2011 15:54:51 GMT -5
|
Post by paulh. on Jan 25, 2014 18:40:35 GMT -5
Same here tbh- came across the eduard stuff whilst tidying up the stash a while back. I'll end up using it simply because i have it -but Halfords is the moggelers friend.
P
|
|
|
|
Post by `Boots` on Jan 25, 2014 18:43:06 GMT -5
Ya not kidding Paul..............Halfords has some great stuff..............especially for my car and bike builds, some of the paint colours are awesome................just a shame they don`t do the cans in smaller sizes ((LOL))
|
|
|
|
Post by wbill76 on Jan 25, 2014 21:13:19 GMT -5
Neat work Paul, like where this one's headed. Lui's photo though has got to be a dio in the making for sure!
|
|
|
|
Post by bullardino on Jan 26, 2014 6:45:11 GMT -5
Paul, it's an Ugandese T-55 deployed in Somalia as part of the UN contingent from African Union. They brought home with them, didn't they?  |
|
paulh.
Senior Member
   
Member since: November 2011
build, fail, learn, succeed - ENJOY
Posts: 2,389
Nov 15, 2011 15:54:51 GMT -5
Nov 15, 2011 15:54:51 GMT -5
|
Post by paulh. on Jan 26, 2014 17:30:24 GMT -5
And then some Luigi! Looks like a their getting ready for a day on the beach with all them buckets and spades!! Following on from Dicks suggestion I cut through the copper to create a more realistic look to individual side plates. Then I created some attachment bolts. Using a micro-bit (don't know what size- they've all gotten a bit mixed up)I drilled through and then inserted some fine rod. Once it was fixed I cut them back to a reasonably common length- not too exact- its a field addition after all  Here's what it looks like: 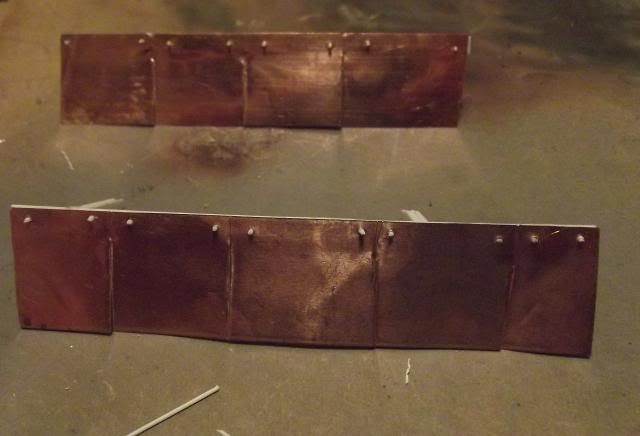 Backside 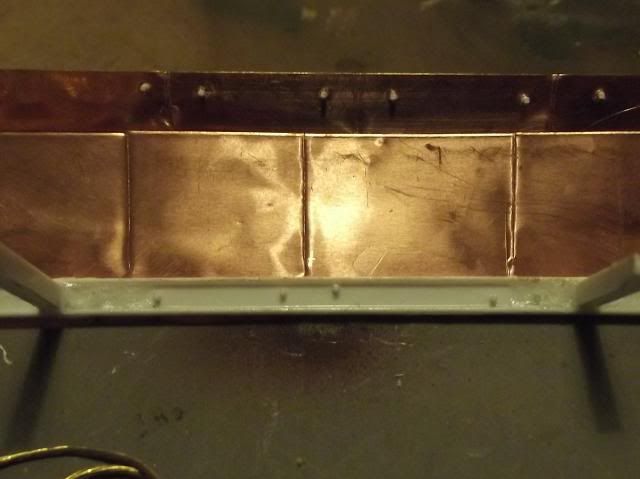 Also to the front I added some mesh to act as a screen for the lower glacis 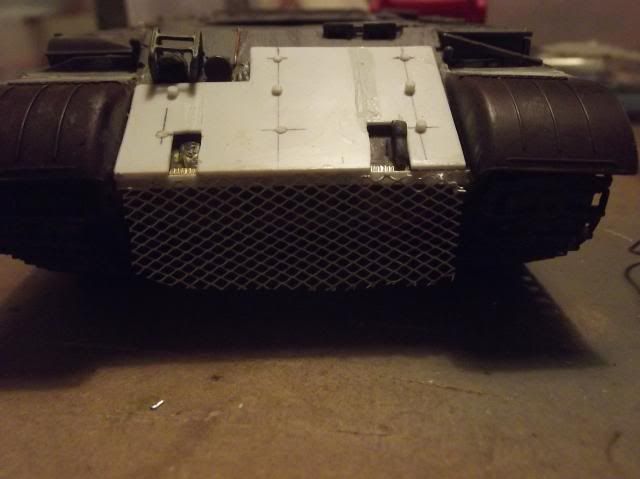 ACVW P |
|
|
|
Post by bullardino on Jan 26, 2014 17:31:37 GMT -5
Mighty fine job, Paul  |
|
paulh.
Senior Member
   
Member since: November 2011
build, fail, learn, succeed - ENJOY
Posts: 2,389
Nov 15, 2011 15:54:51 GMT -5
Nov 15, 2011 15:54:51 GMT -5
|
Post by paulh. on Jan 26, 2014 17:33:16 GMT -5
Thank you kindly sir.
P
|
|