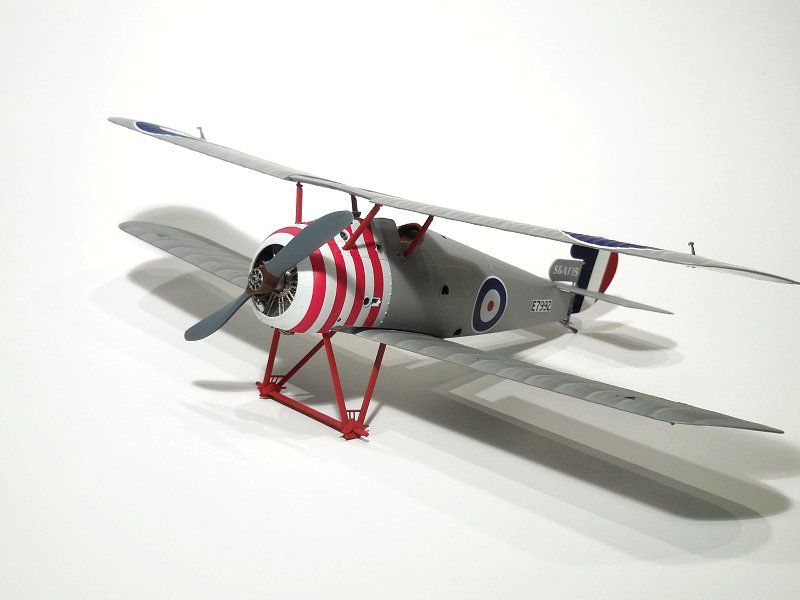
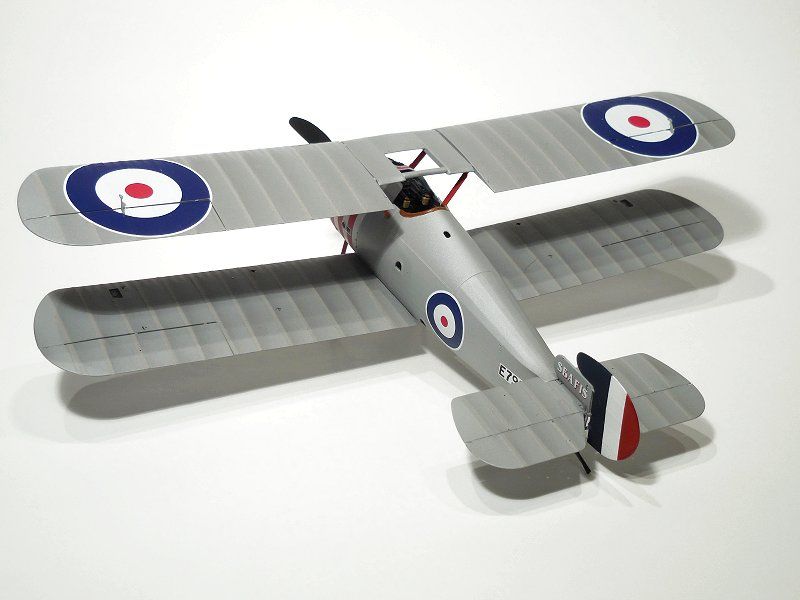
Snipe Hunting-9/3 - #2 in the hanger
Jul 13, 2014 13:30:35 GMT -5
bullardino and Prop Duster like this
Post by wing_nut on Jul 13, 2014 13:30:35 GMT -5
Don't ya just hate it when warped space and black holes bring ya back right where ya stared?
Here's the Snipe builds to date from MHI.
5/21/014
I gotta tell yous guys (remember… I’m from Joisey )... If you are on the fence about building a WWI bird, get a WNW kit, or look at a buddy’s and just open the box. With out a doubt the best kits I’ve yet to build. And it looks like the Snipes are not going to disappoint.
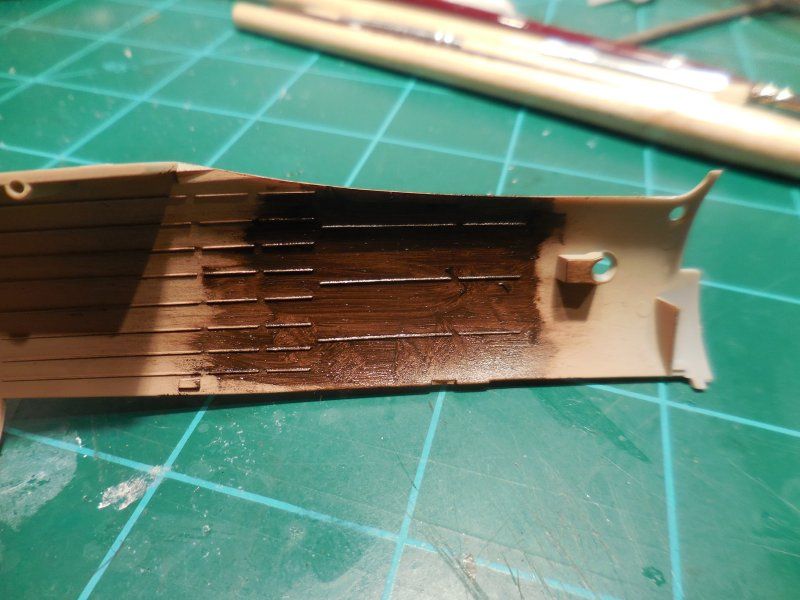
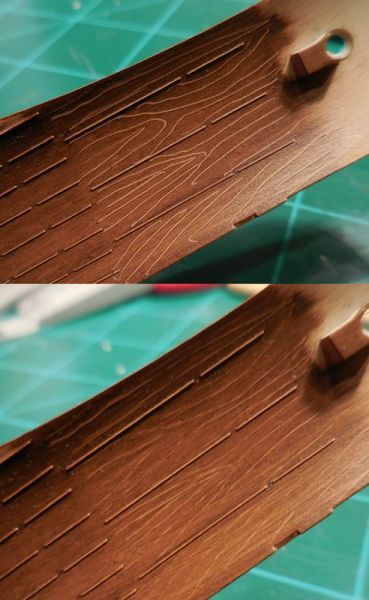
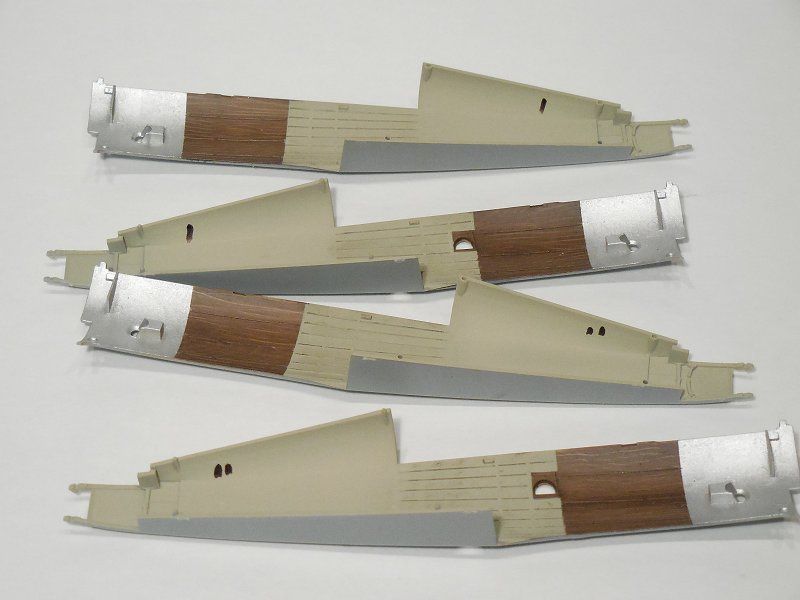
Stated with the fuselage interior cuz I love trying new idea for making wood. And don’t think I don’t know what a few of you are thinking just now. After painted with Tammy wood deck tan it got a coat of bunt umber oils paint with a drop of Japan Dryer so the dry time would be drastically shortened. But it’s still long enough that there a loads of time to clean it off if the idea was a bad one. This was brushed out to a very thin layer. I scratched some wood grain into the paint and this was very lightly blended to leave a hint of the grain. All those years of watching Bob Ross making pretty skies and put trees where ever he wanted in his word has finally paid off.
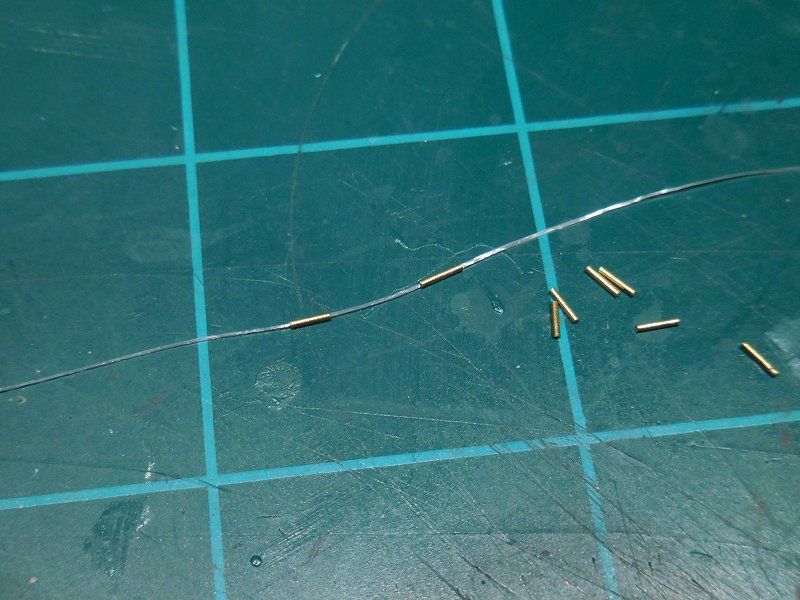
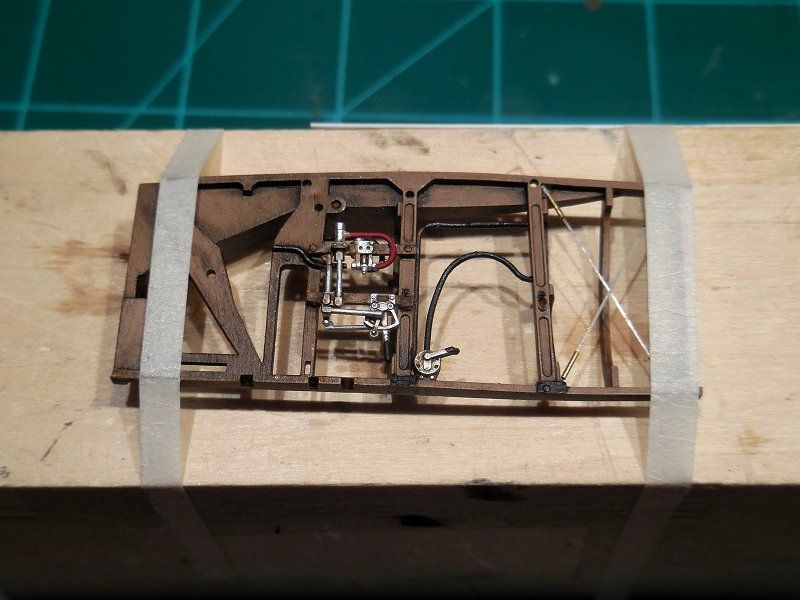
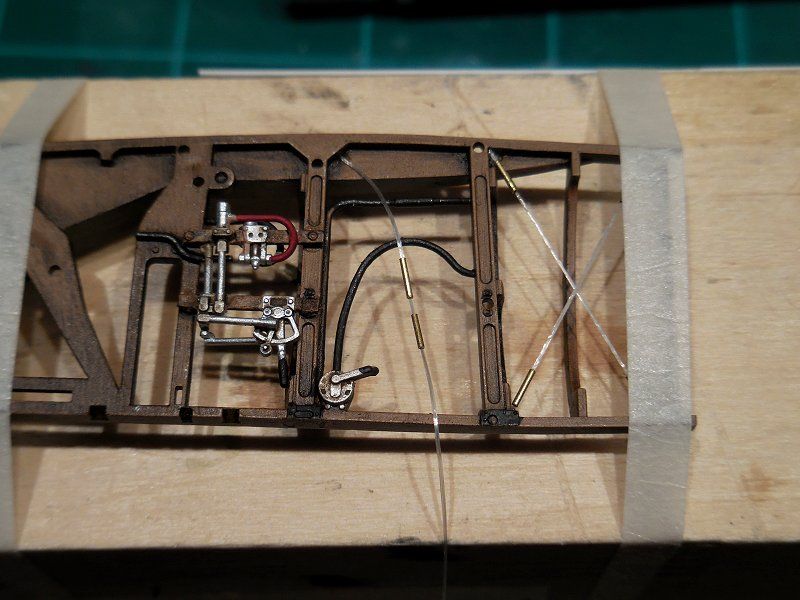
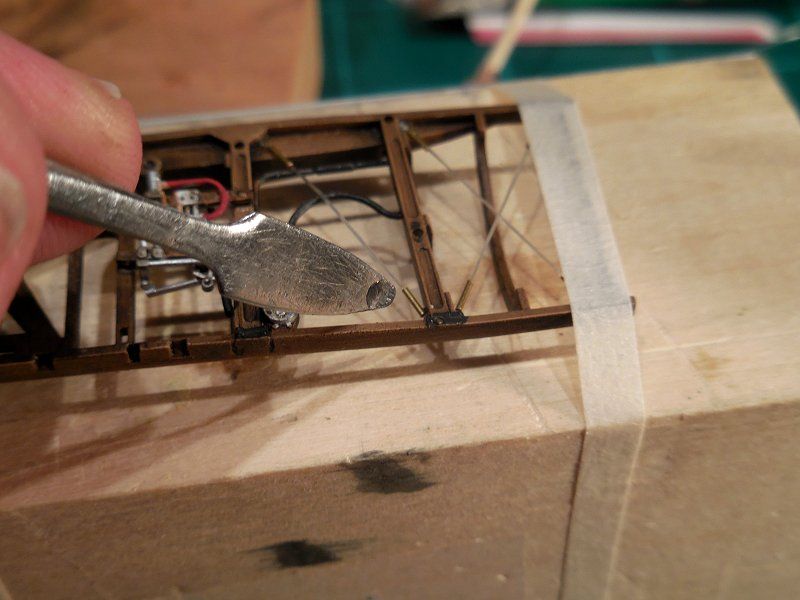
The cockpit framing was painted and let dry so I could start working on the bracing. This is the 1st non-German WWI build so it’s a bit different. The Brits used flat aerodynamic wire for the bracing and wings, not cable. The cable on this is for the control surfaces only. No turnbuckles on the wings but they were on the cockpit bracing. This was easy to do by thread 2 1/8” lengths of 0.5mm brass tube on amounts to clear EZ Line. Glue one end and let it set. Taping the sides down like IO did allow the other hand to be free to set the glue with a bit of zip kicker. Cut it a tad short so it stretches taut. Then just slide the brass tube to end and apply a tiny drop of thin CA. This set the tubes and reinforces the rigging attachments at the same time.
6/1/14
The daylight may be lasting longer but it sure feels like the day are getting shorter. Falling asleep early then waking up at 11 or so and being wide awake seems to be the best bench time for me these days. Whatever... I'll take it.
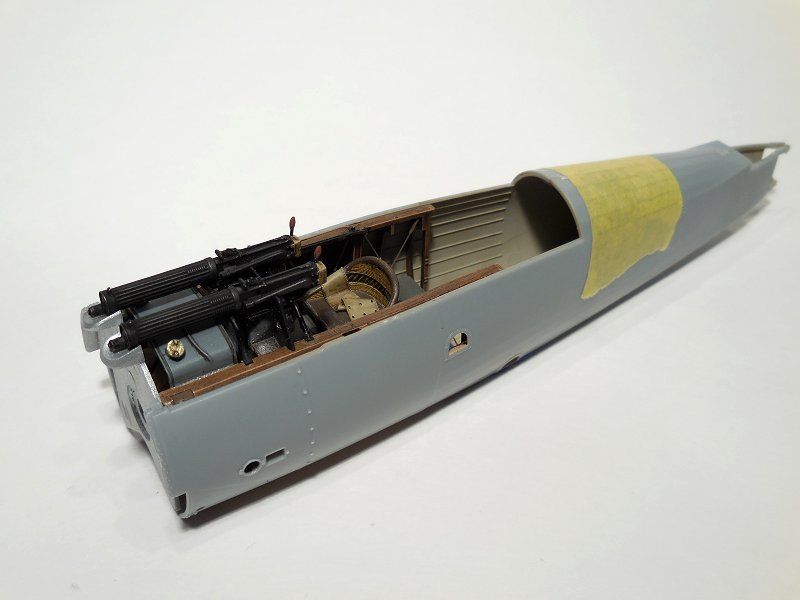
Cockpit is nearly done. Still 1 instrument to add to the IP. Guns are a dry fit at the moment and the ammo chutes are still to come.
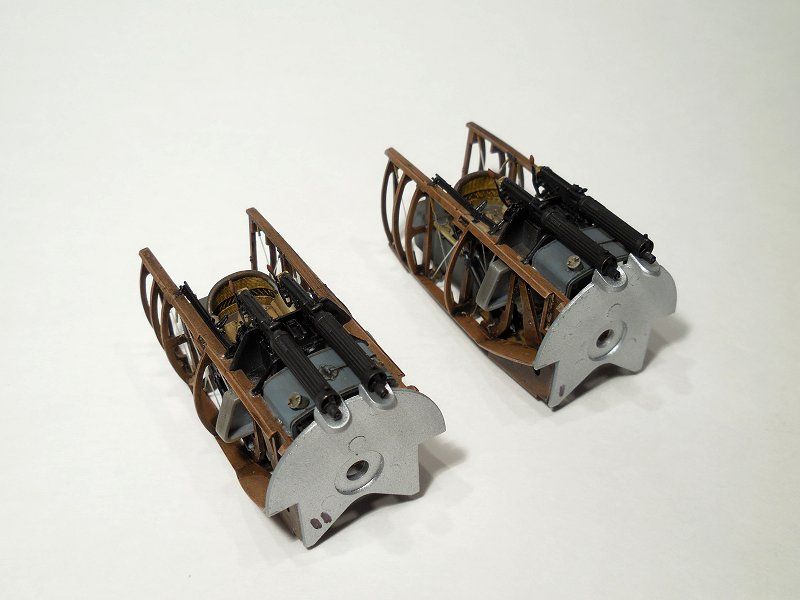
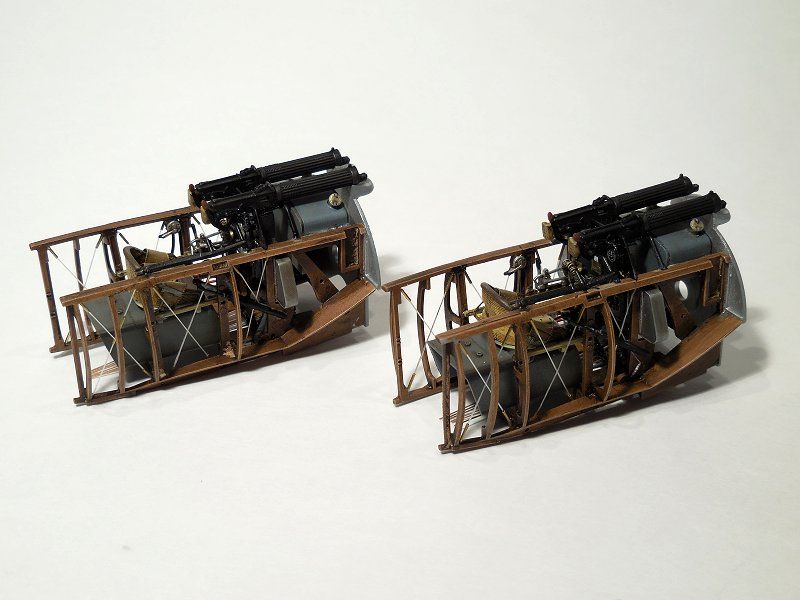
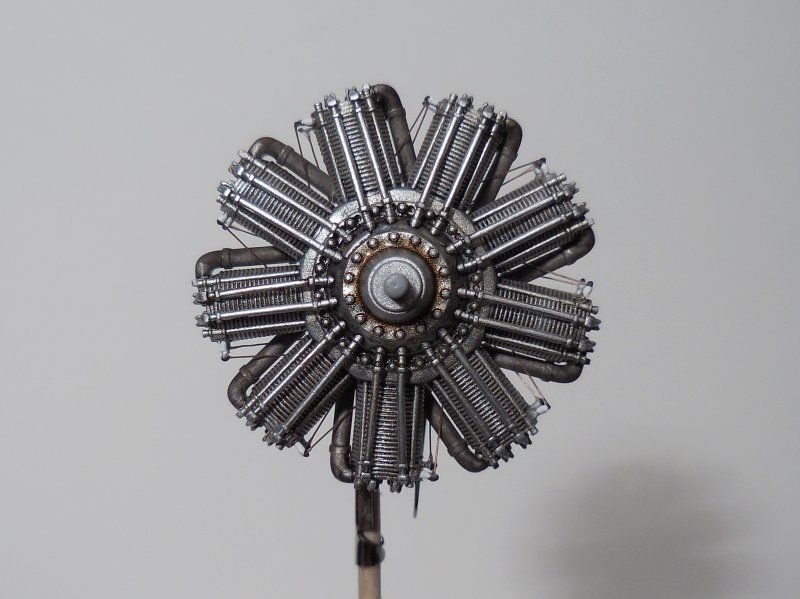
The BR2 engines are really nice looking with some great detail. I cut off the molded spark plugs and added some .5 mm tubing with a some .040” wire inserted for the new plugs. They were washed with some AK Engine Oil and then some bits were picked out with a black oil paint wash. I took some Hawkeye’s Polishing Powder on a finger tip to go over the highlights.
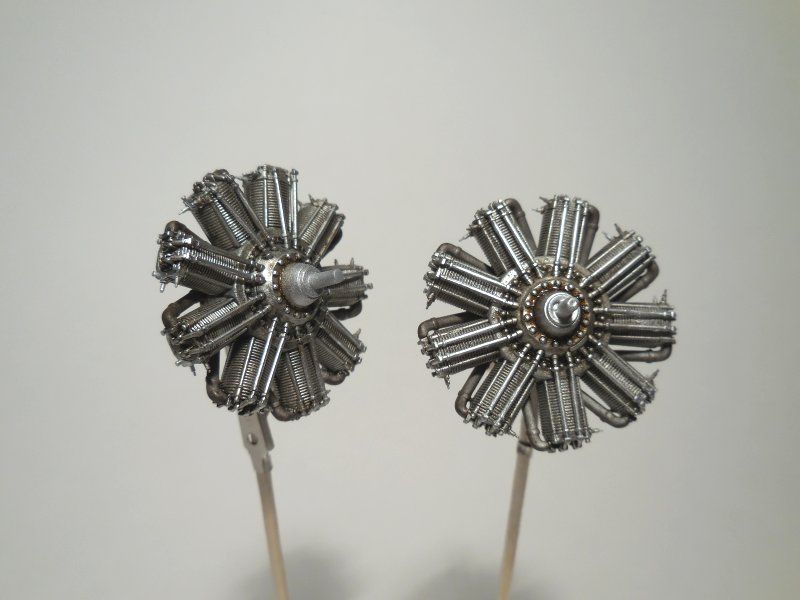
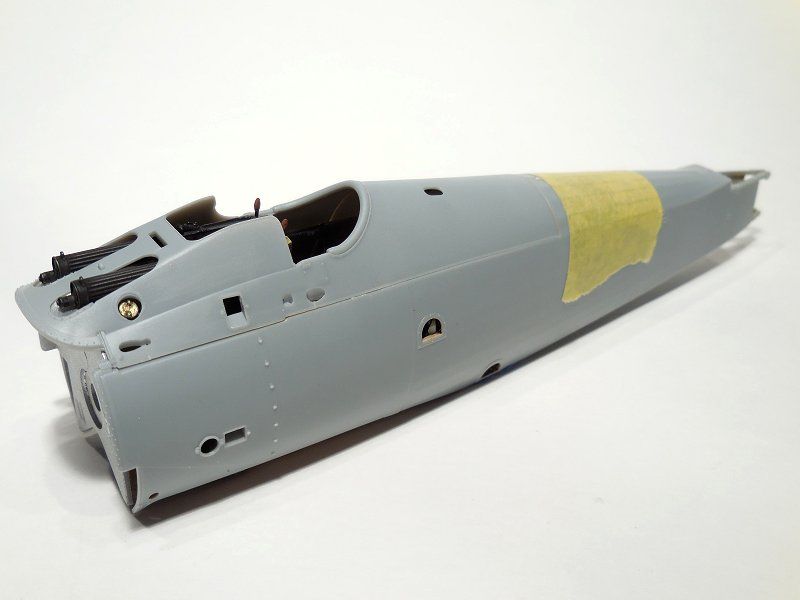
Fuselage section almost ready to go, just need to do some work at the tail end for the skid. A couple of mock up pics of the fuselage so the upper deck is not in its final spot yet. Another modeler said that masking the gun barrels at the front was a real girlie dog. They don’t really fit under the deck when it’s in place so the plan is to cut off the barrels at the back of the cooling jacket with a JLC saw and feed the barrel in from the front. With a blade just .005” thick the difference in length won’t be noticeable.
6/12/14
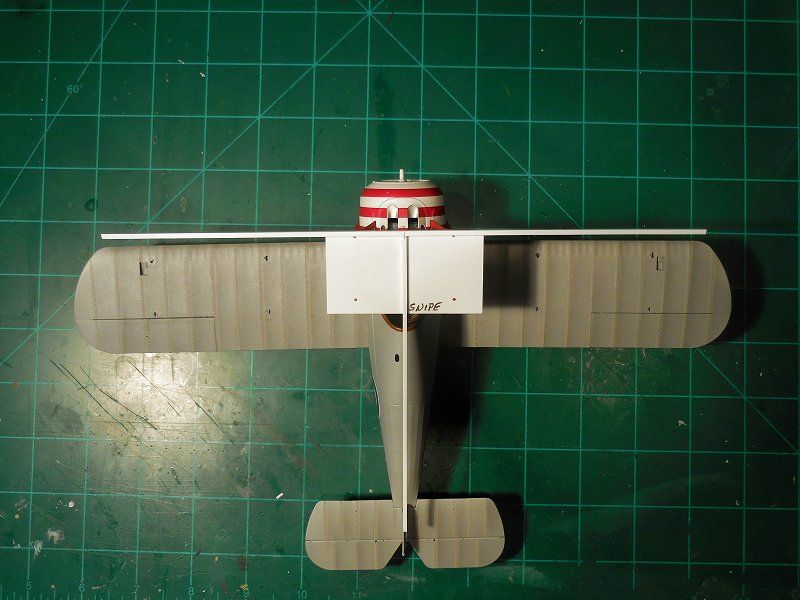
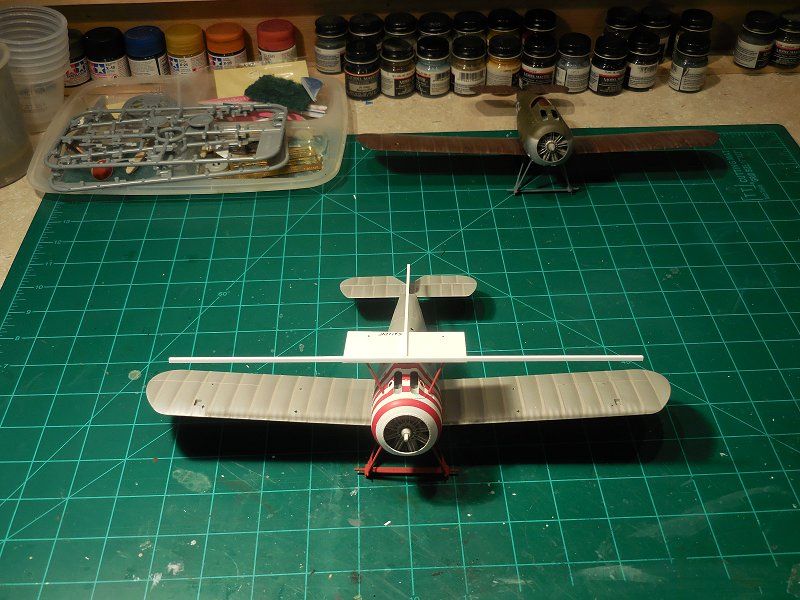
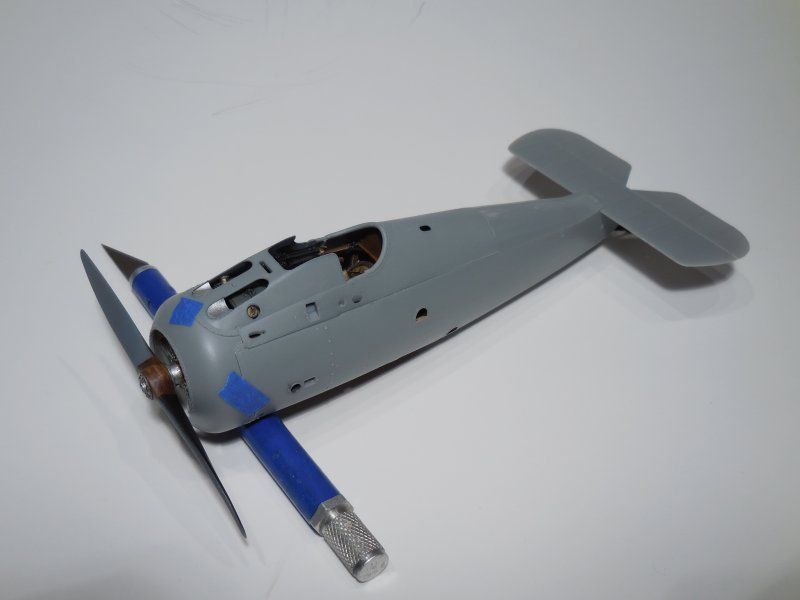
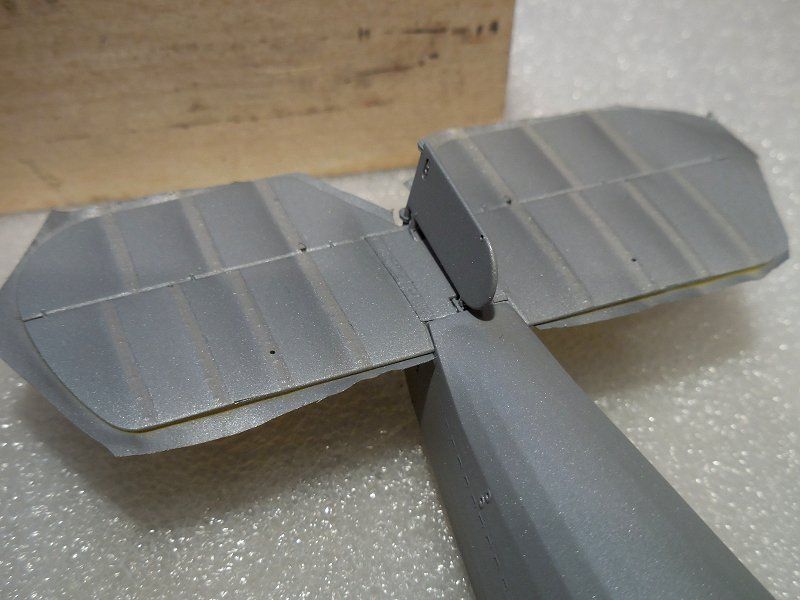
As I was fitting the horizontal tail feathers the instructions were vague compared to their usual perfection. There was a funny little gap at the front edge at the notch in the fuselage. The model is upside down in a couple of pics for the light to get the photo.
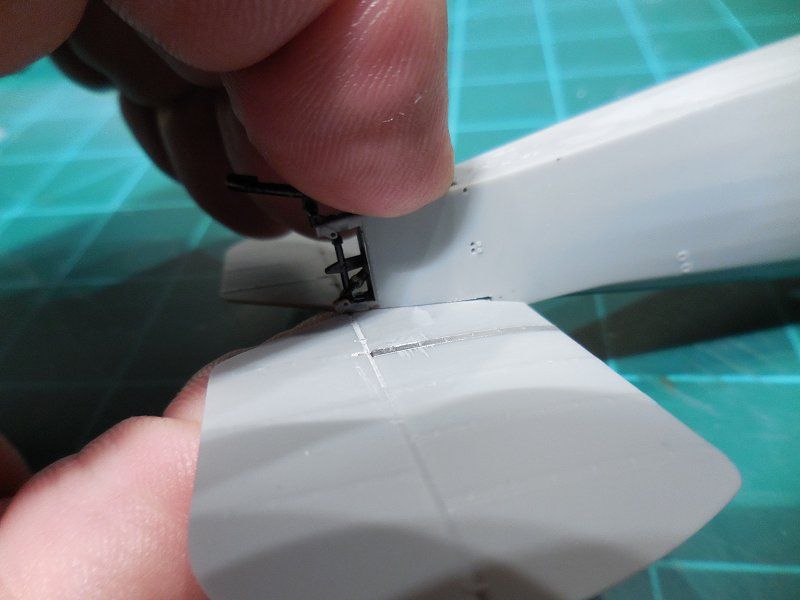
I tried finding some pics of the 1:1 and other models but none showed this very clearly. So I glued the part in and with a just minor pressure the gap was almost gone.
Then I grab the 2nd horizontal stabs and I look and see a pin that was not on the other. Must have broken off. But Now as I fit the part I see there is a HUGE gap that runs the length of the “join”. Finally remembering there are period pics on the WNW site I find one that clearly shows this gap supposed to be there.
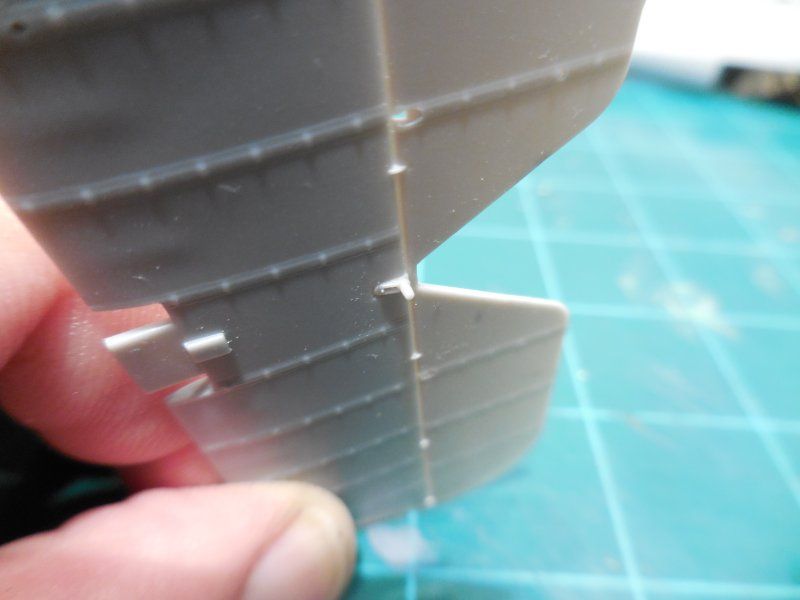
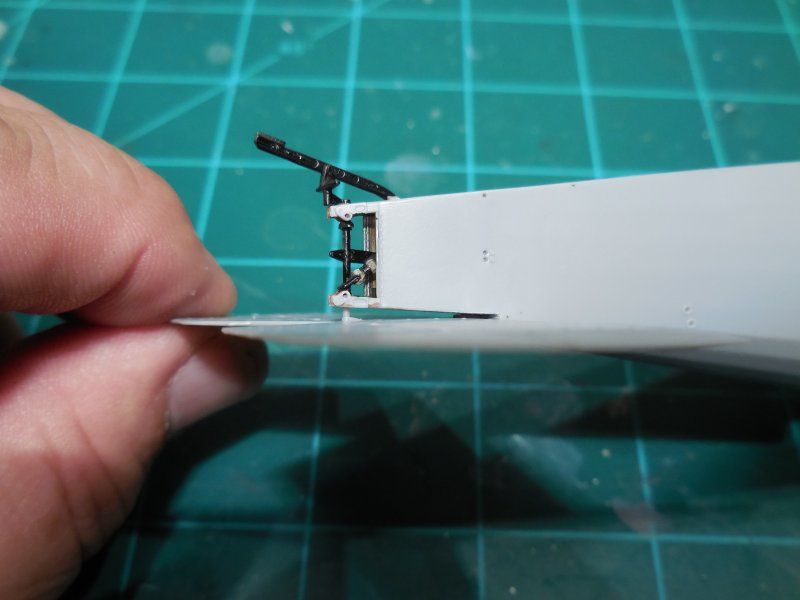
So out comes the Xacto razor saw to cut the stabs off. This left a couple of kerfs tat needed to be filled and the extensions at the back end, that hold the tail skid, cut from it .44” thickness down to .19”. Some Evergreen strips were glued in place and contoured to the curve of the side of the fuselage. To get the correct shape of the gap these needed to be sanded so the front end when down to nothing and the back end kept it full thickness.
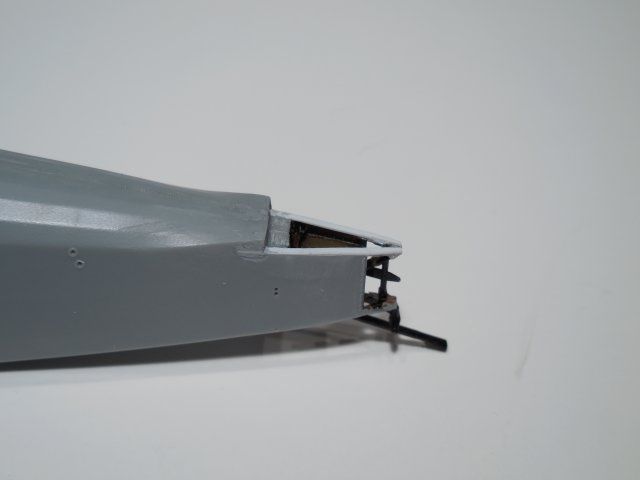
One of the rib tapes was scraped off by the saw. I pushed a micro chisel in the surface and covered that with a strip of bare metal foil. I think it will look fine once it’s painted and weathered.
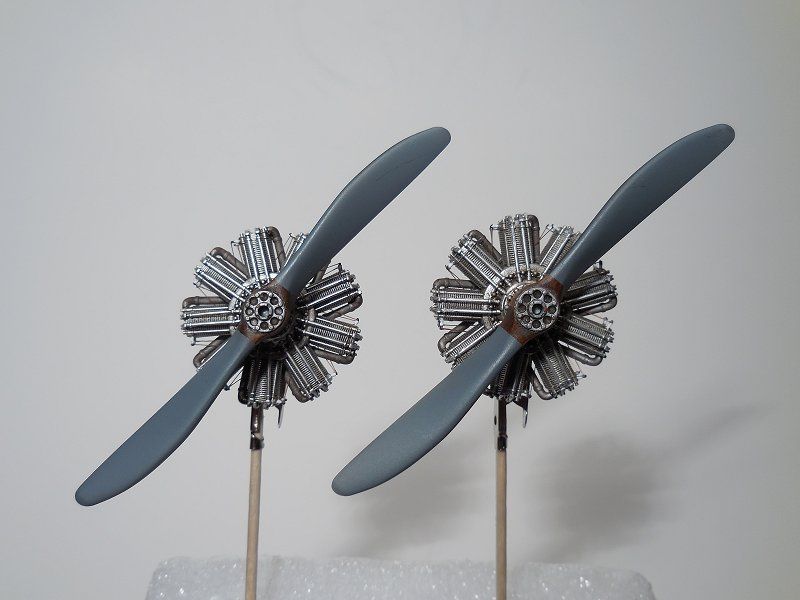
The engine has been wired and the props painted. The mock up in the last pic show the incredible fit on the parts in this kit. So far this has been easier then the Albatros D.Va.
7/4/14
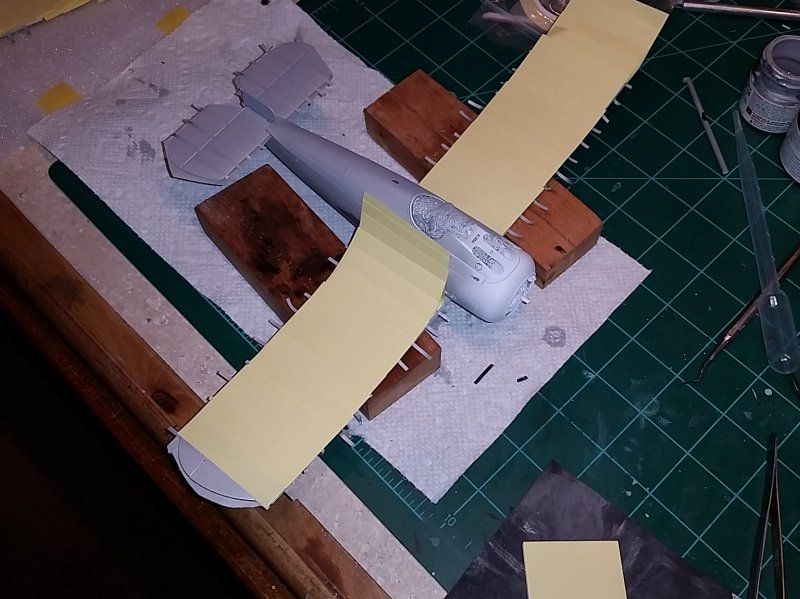
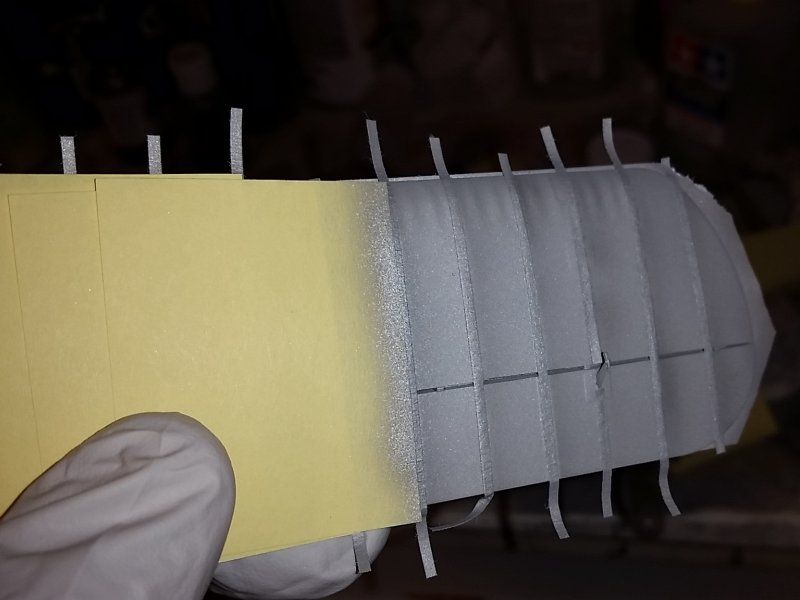
Since the brown wraps around the LE a tiny bit the wings were used to make tape masks.
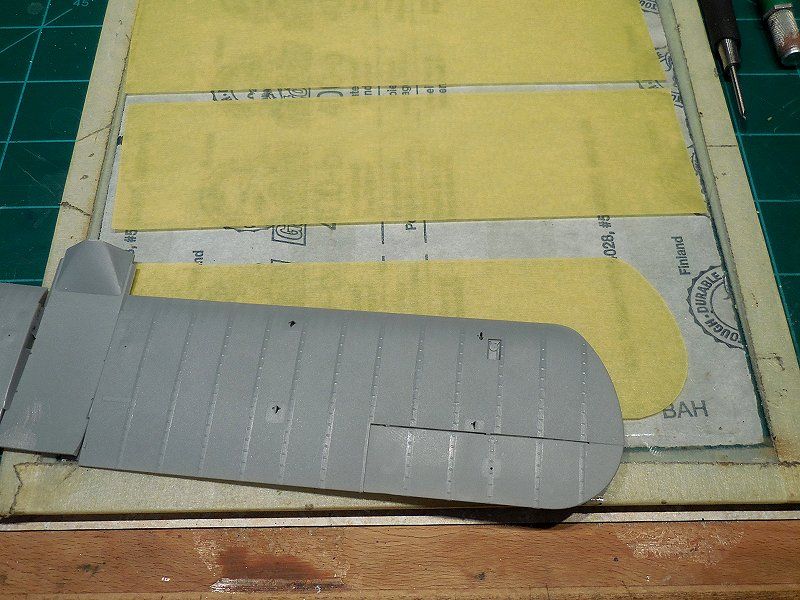
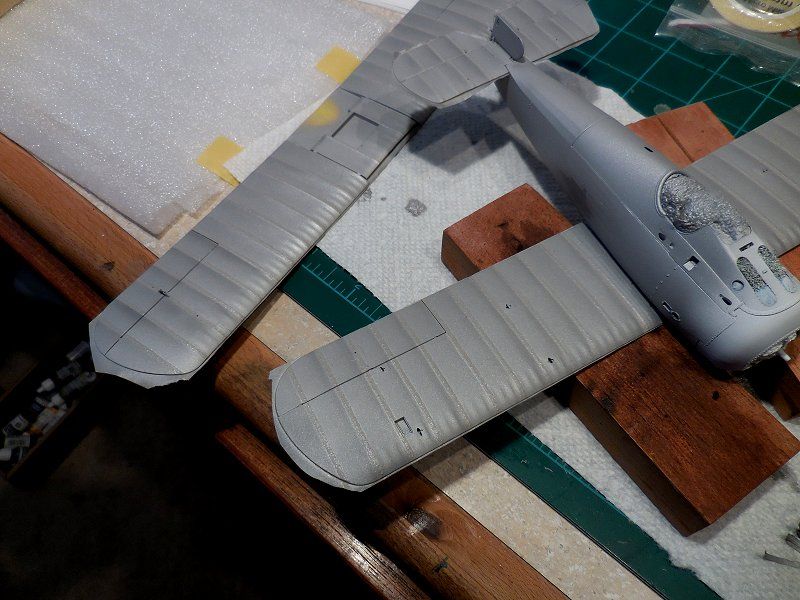
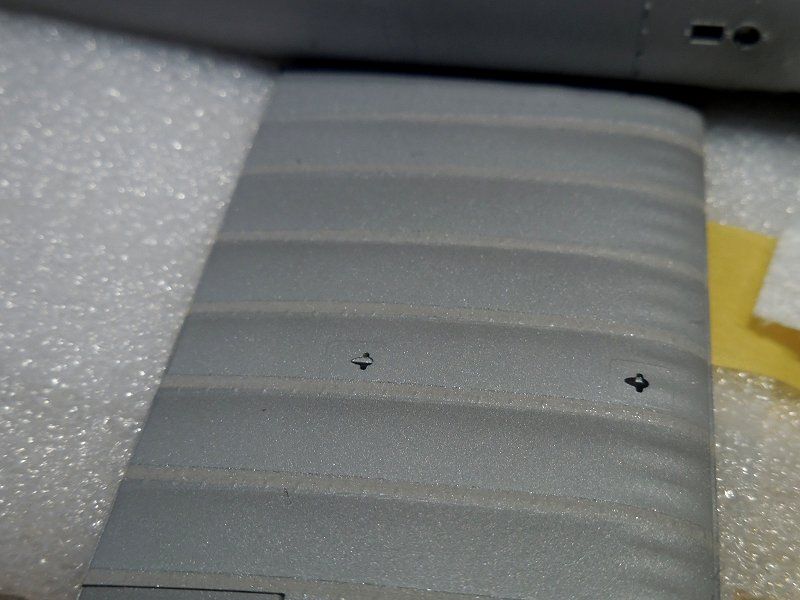
First is a base coat of Tamiya deck tan with the tiniest drop of black to darken. The ribs and spar are taped and an uneven coat of deck tan made fairly light fills in all the spaces. Then some straight deck tan was sprayed following the tape hold the AB far enough away to just straddle the tape with overspray.
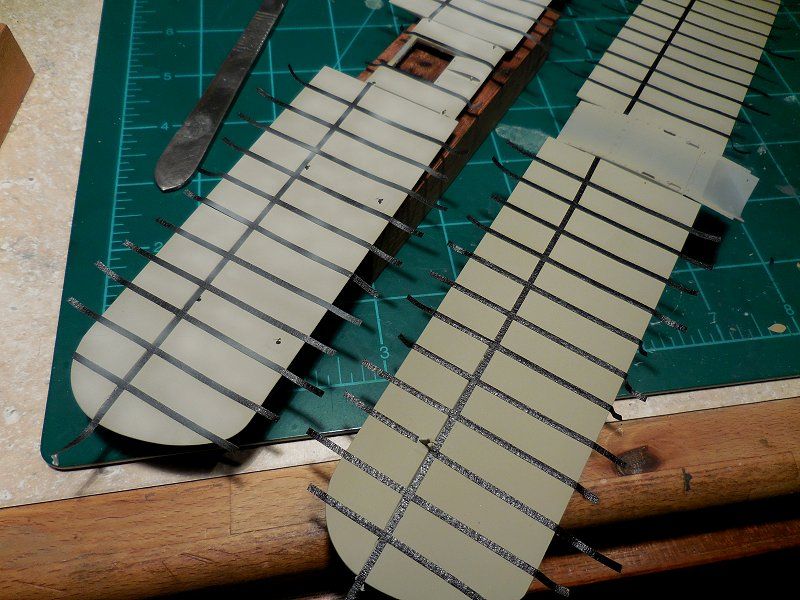
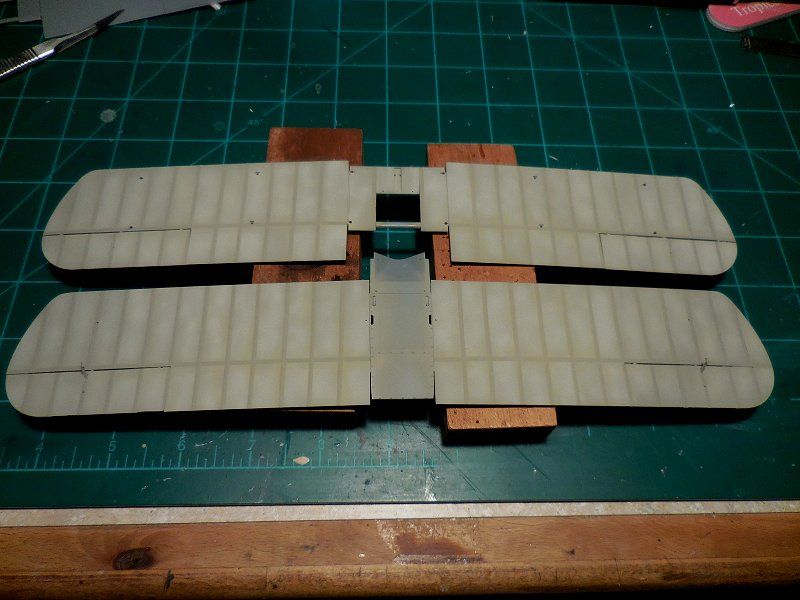
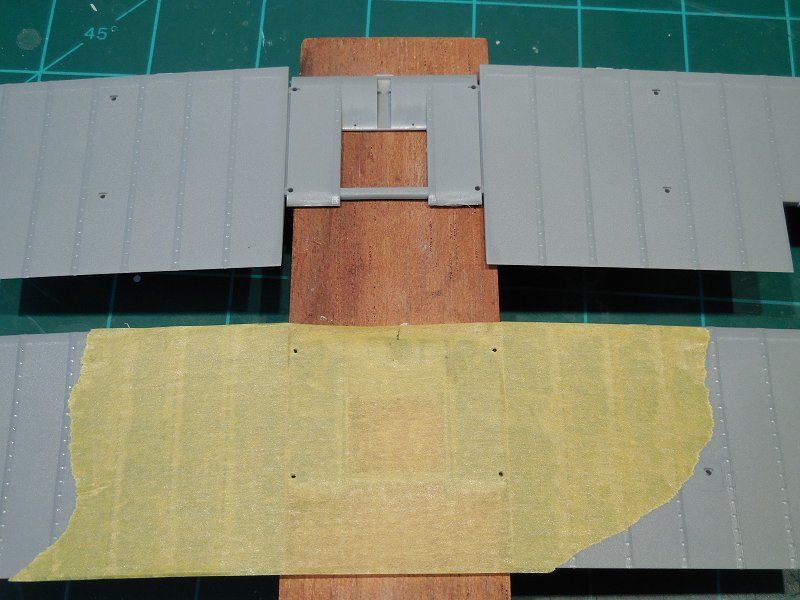
My cabane jig worked so well on the Albatros and the Roland I figured… what the heck. Let’s give it a go again.
Tamiya tape was used to transfer the cabane strut holes to a piece of sheet plastic.
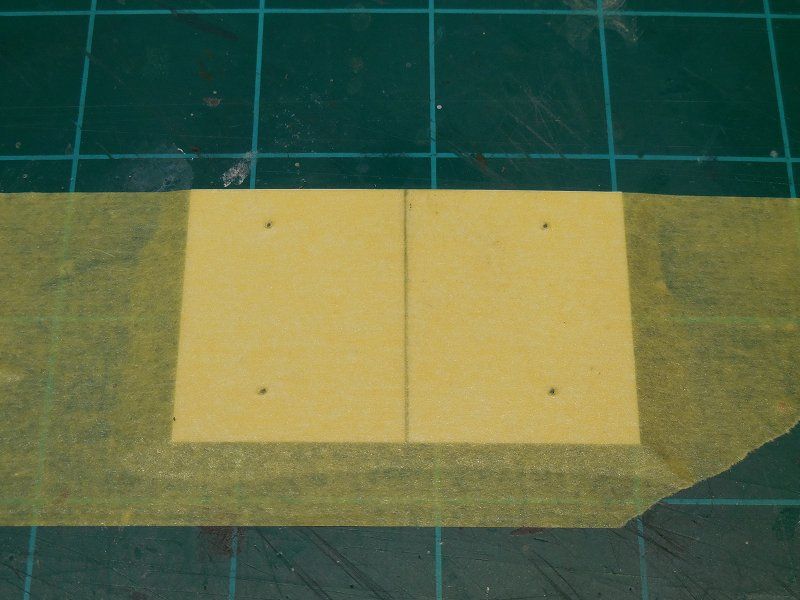
Plastic rod starts the process of keeping everything square.
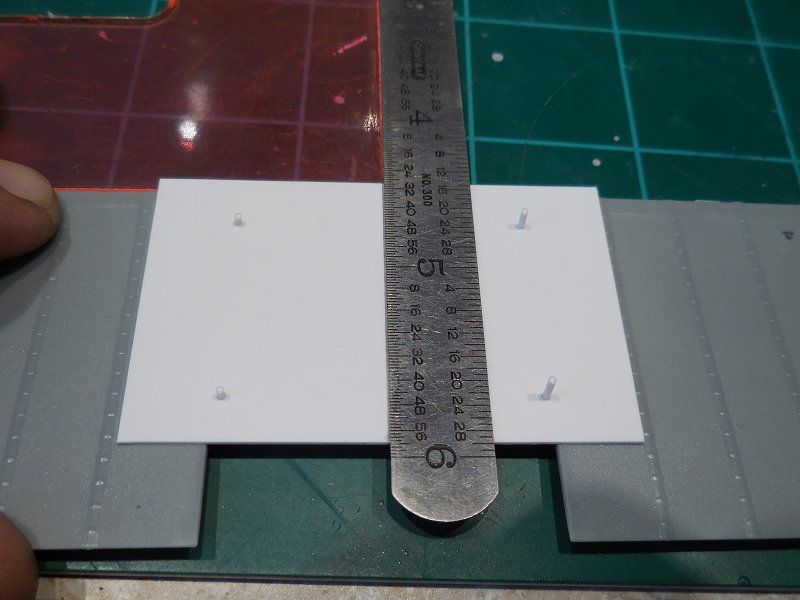
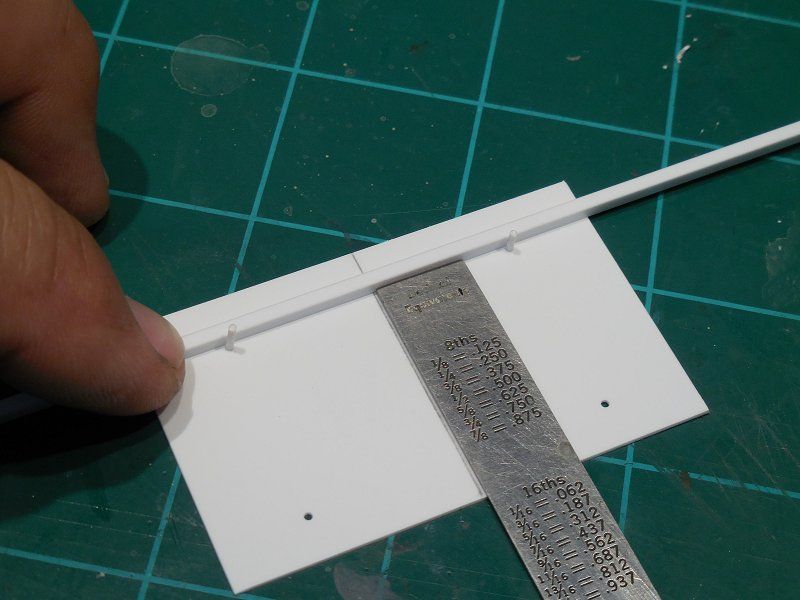
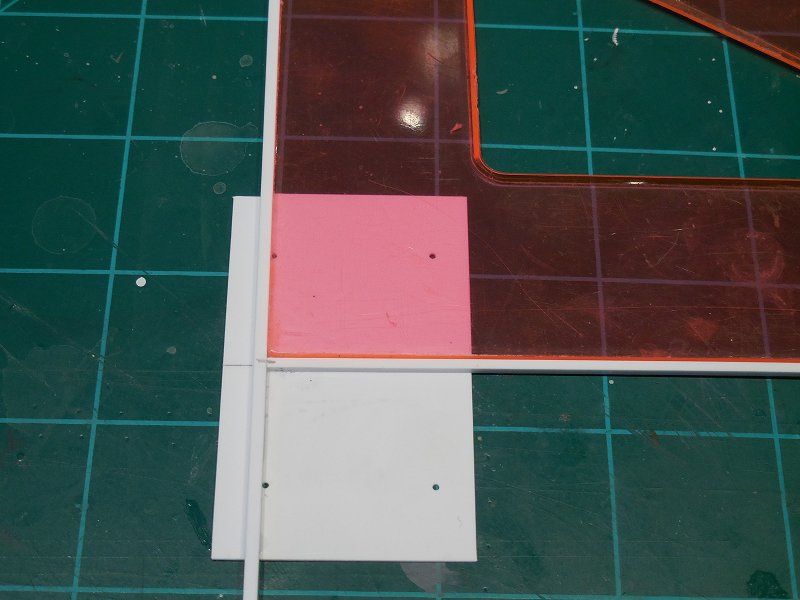
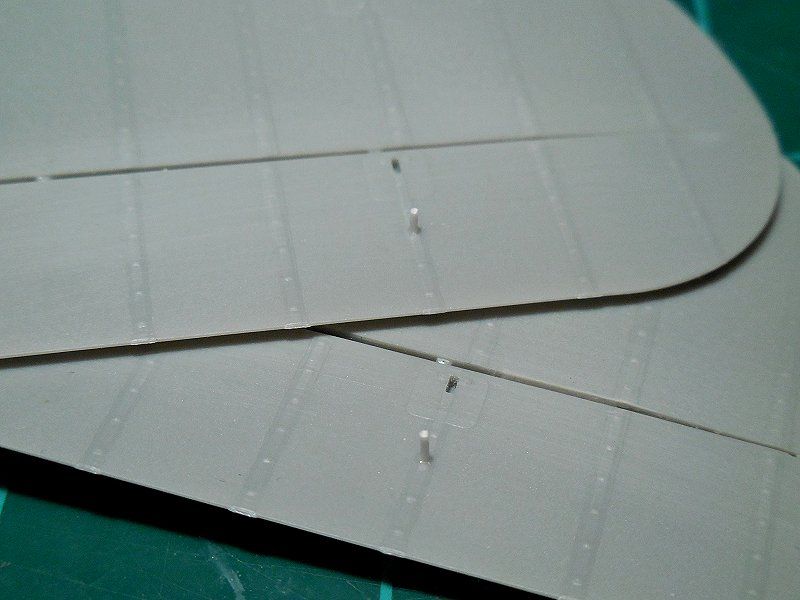
To make the rigging easier I plan to run a single line from wing to wing through the control surfaces. But the hole did not line up when I drilled though 1 of the molded holes. So I filled one side with plastic rod that was chiseled of so only one hole showed after I drilled through.
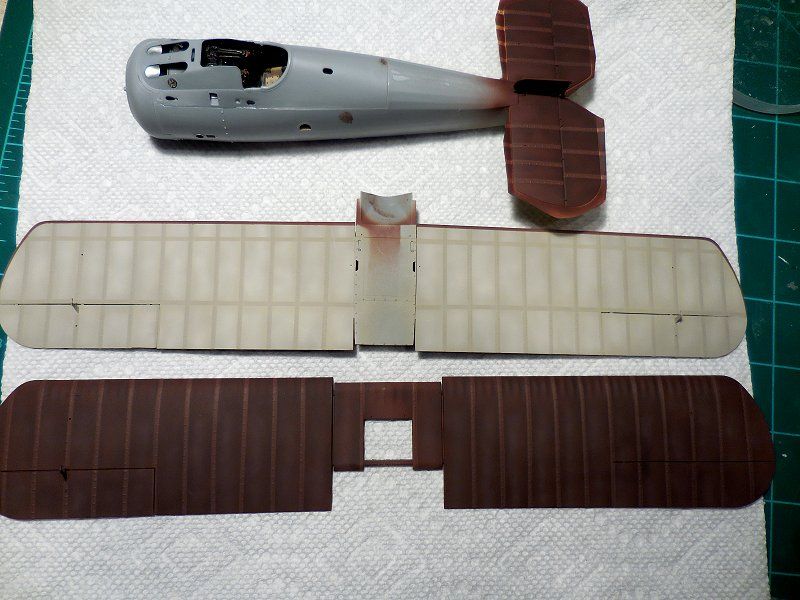
A little bit more painting and the wings will be going on his guy.
Got the upper surfaces done. and I added the forward spar to the bottom of the wings.
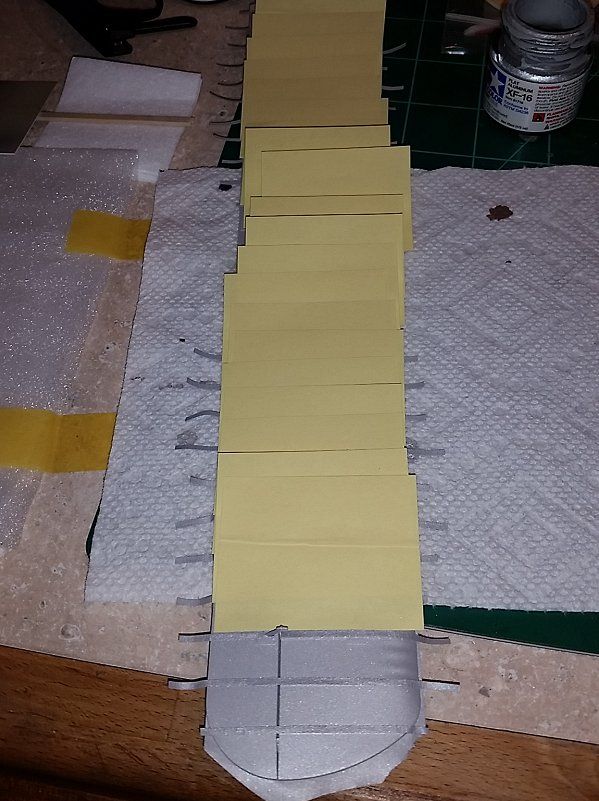
Next challenge is masking all those open "holes" to tackle the fueslage.
Here's the Snipe builds to date from MHI.
5/21/014
I gotta tell yous guys (remember… I’m from Joisey
 )... If you are on the fence about building a WWI bird, get a WNW kit, or look at a buddy’s and just open the box. With out a doubt the best kits I’ve yet to build. And it looks like the Snipes are not going to disappoint.
Stated with the fuselage interior cuz I love trying new idea for making wood. And don’t think I don’t know what a few of you are thinking just now. After painted with Tammy wood deck tan it got a coat of bunt umber oils paint with a drop of Japan Dryer so the dry time would be drastically shortened. But it’s still long enough that there a loads of time to clean it off if the idea was a bad one. This was brushed out to a very thin layer. I scratched some wood grain into the paint and this was very lightly blended to leave a hint of the grain. All those years of watching Bob Ross making pretty skies and put trees where ever he wanted in his word has finally paid off.


The cockpit framing was painted and let dry so I could start working on the bracing. This is the 1st non-German WWI build so it’s a bit different. The Brits used flat aerodynamic wire for the bracing and wings, not cable. The cable on this is for the control surfaces only. No turnbuckles on the wings but they were on the cockpit bracing. This was easy to do by thread 2 1/8” lengths of 0.5mm brass tube on amounts to clear EZ Line. Glue one end and let it set. Taping the sides down like IO did allow the other hand to be free to set the glue with a bit of zip kicker. Cut it a tad short so it stretches taut. Then just slide the brass tube to end and apply a tiny drop of thin CA. This set the tubes and reinforces the rigging attachments at the same time.


6/1/14
The daylight may be lasting longer but it sure feels like the day are getting shorter. Falling asleep early then waking up at 11 or so and being wide awake seems to be the best bench time for me these days. Whatever... I'll take it.
Cockpit is nearly done. Still 1 instrument to add to the IP. Guns are a dry fit at the moment and the ammo chutes are still to come.


The BR2 engines are really nice looking with some great detail. I cut off the molded spark plugs and added some .5 mm tubing with a some .040” wire inserted for the new plugs. They were washed with some AK Engine Oil and then some bits were picked out with a black oil paint wash. I took some Hawkeye’s Polishing Powder on a finger tip to go over the highlights.

Fuselage section almost ready to go, just need to do some work at the tail end for the skid. A couple of mock up pics of the fuselage so the upper deck is not in its final spot yet. Another modeler said that masking the gun barrels at the front was a real girlie dog. They don’t really fit under the deck when it’s in place so the plan is to cut off the barrels at the back of the cooling jacket with a JLC saw and feed the barrel in from the front. With a blade just .005” thick the difference in length won’t be noticeable.


6/12/14
As I was fitting the horizontal tail feathers the instructions were vague compared to their usual perfection. There was a funny little gap at the front edge at the notch in the fuselage. The model is upside down in a couple of pics for the light to get the photo.

I tried finding some pics of the 1:1 and other models but none showed this very clearly. So I glued the part in and with a just minor pressure the gap was almost gone.
Then I grab the 2nd horizontal stabs and I look and see a pin that was not on the other. Must have broken off. But Now as I fit the part I see there is a HUGE gap that runs the length of the “join”. Finally remembering there are period pics on the WNW site I find one that clearly shows this gap supposed to be there.


So out comes the Xacto razor saw to cut the stabs off. This left a couple of kerfs tat needed to be filled and the extensions at the back end, that hold the tail skid, cut from it .44” thickness down to .19”. Some Evergreen strips were glued in place and contoured to the curve of the side of the fuselage. To get the correct shape of the gap these needed to be sanded so the front end when down to nothing and the back end kept it full thickness.

One of the rib tapes was scraped off by the saw. I pushed a micro chisel in the surface and covered that with a strip of bare metal foil. I think it will look fine once it’s painted and weathered.
The engine has been wired and the props painted. The mock up in the last pic show the incredible fit on the parts in this kit. So far this has been easier then the Albatros D.Va.


7/4/14
Since the brown wraps around the LE a tiny bit the wings were used to make tape masks.

First is a base coat of Tamiya deck tan with the tiniest drop of black to darken. The ribs and spar are taped and an uneven coat of deck tan made fairly light fills in all the spaces. Then some straight deck tan was sprayed following the tape hold the AB far enough away to just straddle the tape with overspray.


My cabane jig worked so well on the Albatros and the Roland I figured… what the heck. Let’s give it a go again.
Tamiya tape was used to transfer the cabane strut holes to a piece of sheet plastic.


Plastic rod starts the process of keeping everything square.


To make the rigging easier I plan to run a single line from wing to wing through the control surfaces. But the hole did not line up when I drilled though 1 of the molded holes. So I filled one side with plastic rod that was chiseled of so only one hole showed after I drilled through.

A little bit more painting and the wings will be going on his guy.
Got the upper surfaces done. and I added the forward spar to the bottom of the wings.
Next challenge is masking all those open "holes" to tackle the fueslage.






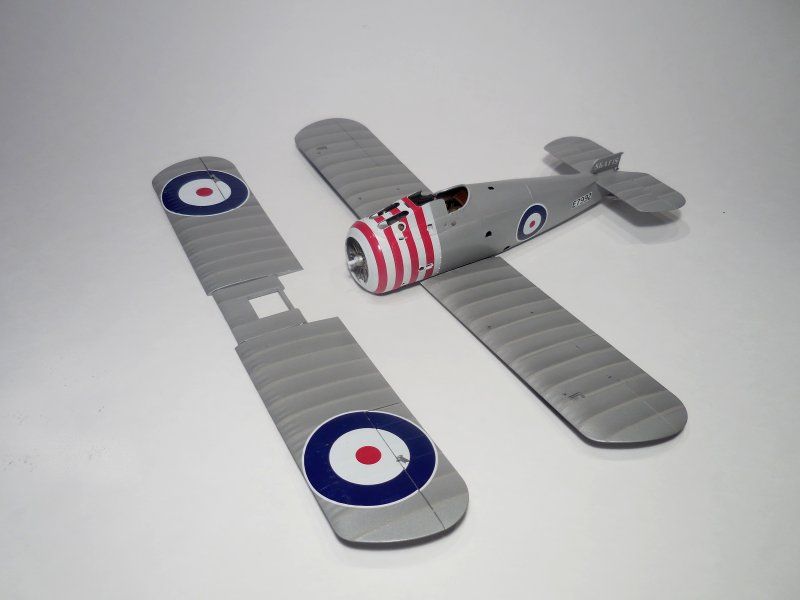
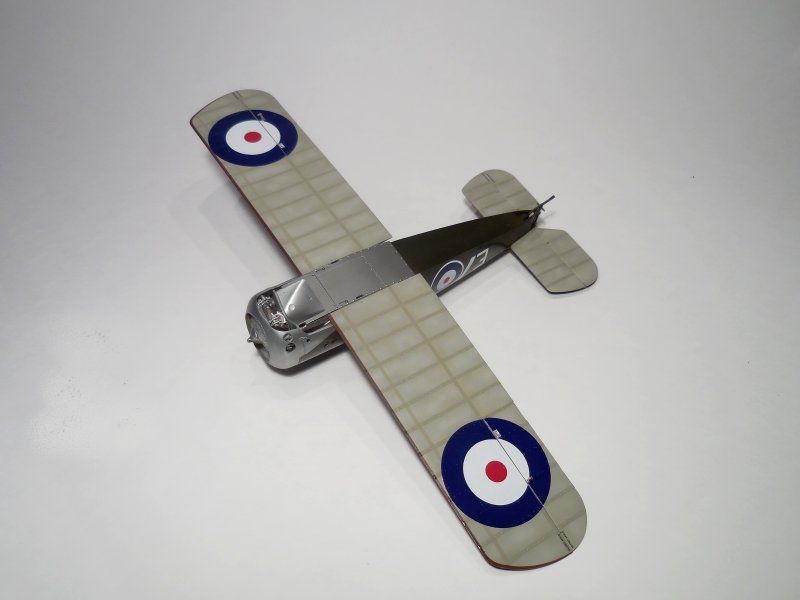
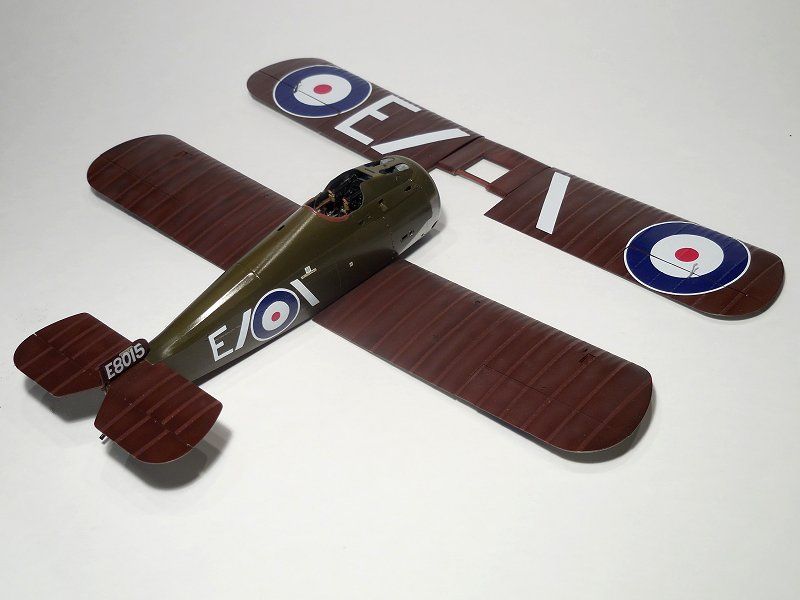
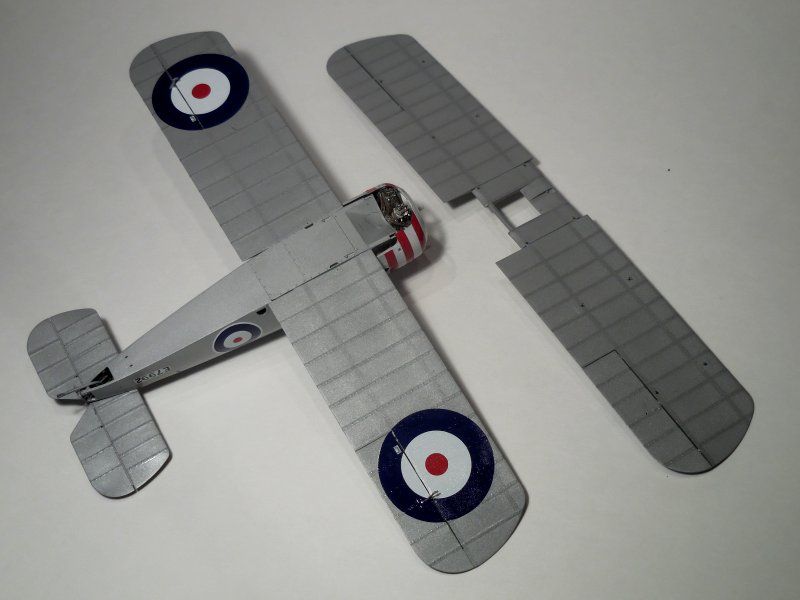
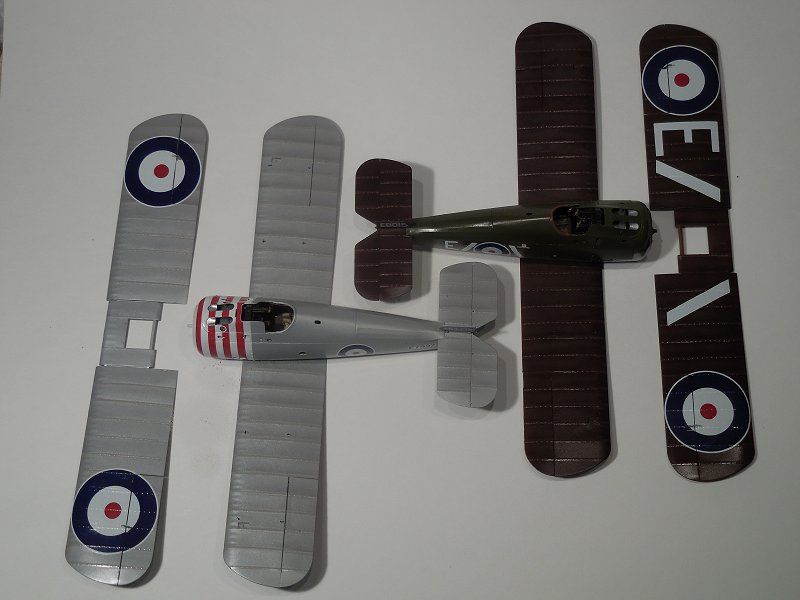
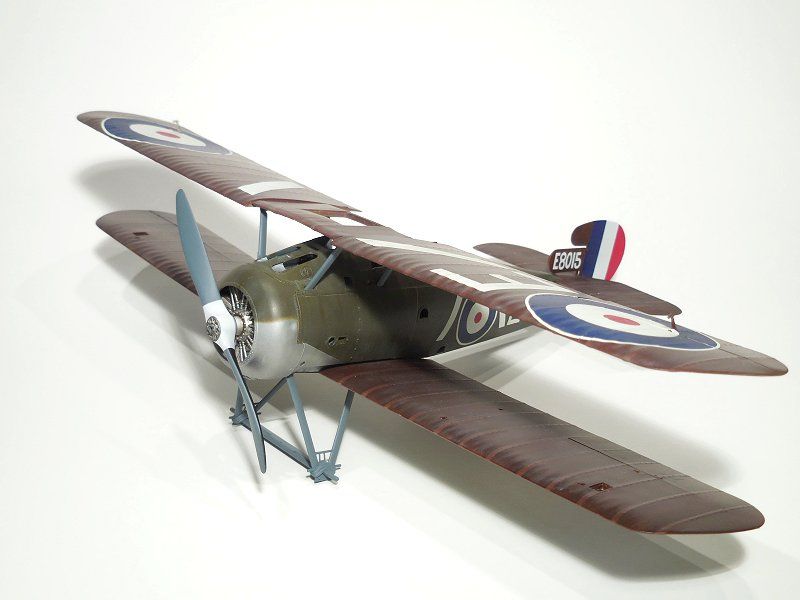
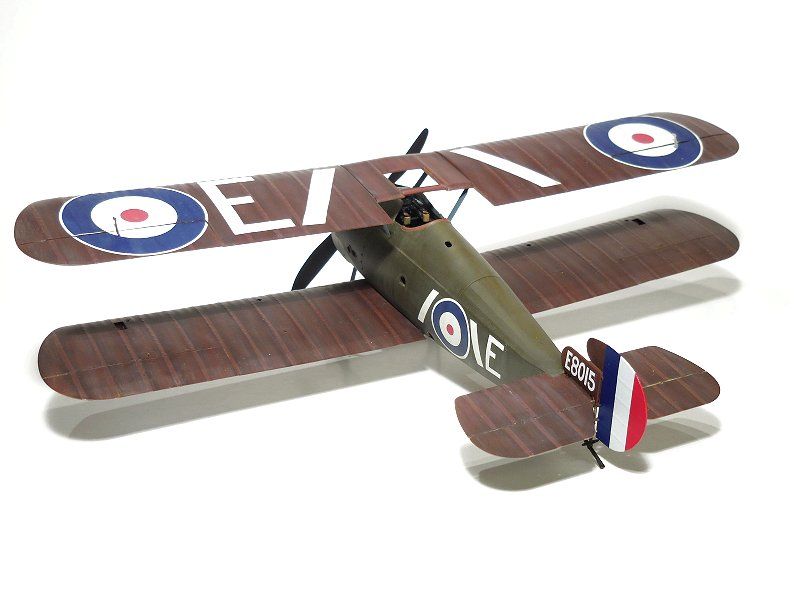
 They both look stunning. I really like the candy striped one.

