|
|
Post by deafpanzer on Jan 13, 2015 1:51:54 GMT -5
Thanks guys She currently weigh's in at 20.60 lb I imagine she will be close to 50lb when complete, i should run a sweep stake? Gag LOL! You probably should... winner get to visit you to see your work! |
|
Foenetik
Full Member

Member since: March 2014
Posts: 573 
|
Post by Foenetik on Jan 19, 2015 11:48:56 GMT -5
as usual mr. gag, amazing work. your filling jobs are top notch and machinist precision. cant wait to see more.
|
|
|
|
Post by Deano on Jan 19, 2015 13:18:56 GMT -5
Starting to see Prometheus now , looks brilliant already and the reckon the detailing will blow us away !
|
|
M1Carbine
Senior Member

Member since: November 2012
Posts: 1,630
Nov 16, 2012 2:49:11 GMT -5
Nov 16, 2012 2:49:11 GMT -5
|
Post by M1Carbine on Jan 19, 2015 13:32:04 GMT -5
Looking awesome!
Bob
|
|
thenylongag
Full Member
Sept2013 MoM Winner
Member since: June 2012
Yes, we have 'NO' bananas
Posts: 304
Jun 7, 2012 11:20:57 GMT -5
Jun 7, 2012 11:20:57 GMT -5
|
Post by thenylongag on Jan 20, 2015 21:54:26 GMT -5
|
|
|
|
Post by deafpanzer on Jan 20, 2015 22:42:59 GMT -5
WOW! SO many white sheets... hope we will not experience shortage any time soon. Looking great!!!
|
|
|
|
Post by TRM on Jan 20, 2015 23:40:52 GMT -5
Looks like you are single-handedly keeping the plastics industry in business! Okay then...something to say here....Ummm??? Awe...that covers it this time!! Love watching you mind work my friend! 50lbs? That would explain the HD stand!! Nice band aid too!!  Keep going!! |
|
John Everett
Full Member
Member since: January 2012
July, 2016 MoM Winner
Posts: 1,278
Jan 17, 2012 0:53:48 GMT -5
Jan 17, 2012 0:53:48 GMT -5
|
Post by John Everett on Jan 21, 2015 0:51:37 GMT -5
Love the sheetwork! And put a proper Band-Aid on that finger. If it gets infected, your "other" will never let you hear the end of it.
|
|
|
|
Post by kaytermarram on Jan 21, 2015 16:50:49 GMT -5
You work in the movie industry? It is like film model making, absoute perfect. I do not now what I should say thats not already been said, this is so great...
Frank
|
|
thenylongag
Full Member
Sept2013 MoM Winner
Member since: June 2012
Yes, we have 'NO' bananas
Posts: 304
Jun 7, 2012 11:20:57 GMT -5
Jun 7, 2012 11:20:57 GMT -5
|
Post by thenylongag on Jan 28, 2015 19:26:39 GMT -5
Evening Experts,
I have a very serious question for the brother/sisterhood of all things nerd/geek/fanboy/artist/creator/modeller/prop builder.....thatever.
Today, I watched the movie, .......well, the part's with the ship in it to be honest, because lets be honest,
Prometheus the movie- 0 - Visual Perfection 1
After watching said movie, i did in fact notice, that, the number of flashing or strobing lights on the engines was zero
Now the other last week i had a 50 minute conversation with Mr VooDoo himself, Randy, Thanks mate for bieng so honest
and well, just so cool to chat with. You gave me some ideas and i thought i had discovered my solution, four light units, one per engine with strobes, constants and flashers in a small curcuit board for under $60.
But then I watch the film.
I said that this build was more water pistol than cannon, but i think my lights could be better than the original. Strobe, flashers, markers and enough left over for the power unit.
But the down side is the cost, 5 x $60 is a lot of lolly.
I think reality/cannon i could get away with one, may be two.
Just interested to know what you think?
Gag
|
|
|
|
Post by TRM on Jan 28, 2015 19:39:26 GMT -5
Certainly...and more realistically, the one or two board application would probably do the trick. I don;t think you need to factor in the accuracy to the movie end of things if you ask me. Like you said "i think my lights could be better than the original"...this would be true! I personally don't see the need to folk out $300+ on getting a huge light show effect when you will probably get the effect to come across nicely by downsizing...less is more sometimes. Just my take my friend!
|
|
|
|
Post by Leon on Jan 28, 2015 20:13:02 GMT -5
Gag that is some awesome progress!  I have to agree with Todd on the lighting.  |
|
|
|
Post by deafpanzer on Jan 29, 2015 12:01:50 GMT -5
Yeah since it is a huge project I will not hesitate to cough up another dollar if it will ramp up the WOW factor big time. Its your build... I don't want you to regret the decision not to adding them later on. Maybe mix strobe and solid lights instead of going for all five? I can help you rob the bank if you need the money... |
|
|
|
Post by kaytermarram on Jan 29, 2015 13:20:21 GMT -5
I am with Todd and the rest of the gang here! Not to mention that your build will nevertheless be better than the film model, I have one main thought: Why make a lightshow when you can argue, the engines are blasting with half the power? There is, for me, definitly no reason why they should fire full power when one can say they are in a "sleep modus"? And the ship will look even better when electricity is toned down a bit (not to mention the money you safe using on other new builds, hehe!)
Frank
|
|
thenylongag
Full Member
Sept2013 MoM Winner
Member since: June 2012
Yes, we have 'NO' bananas
Posts: 304
Jun 7, 2012 11:20:57 GMT -5
Jun 7, 2012 11:20:57 GMT -5
|
Post by thenylongag on Feb 5, 2015 17:32:00 GMT -5
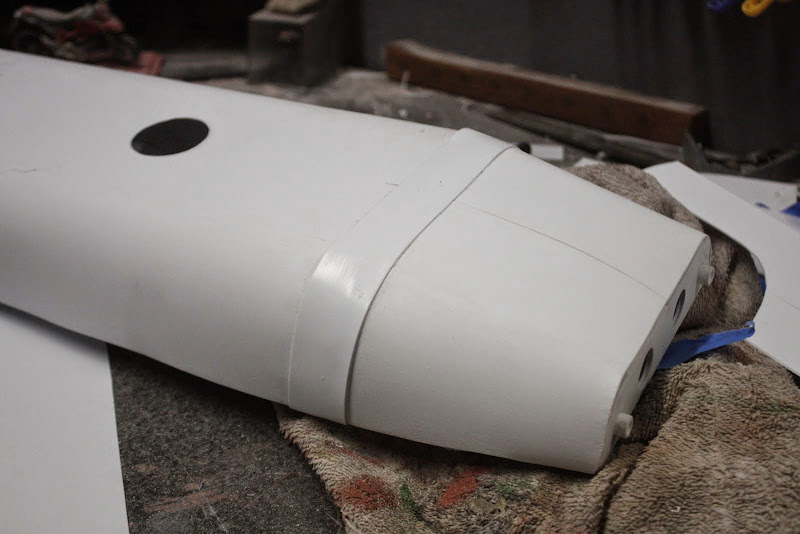
Thanks for the input chaps I have just found out that some of my pictures have been deleted, this is obviously, very annoying, but not life threatening so, i'll continue on with what we got, Did this part twice because it was a bit big when done in plastic and not looking so good when dry fit with everything else so I ripped it to bits and started again with foam. This really is trial and error modelling at its best folks  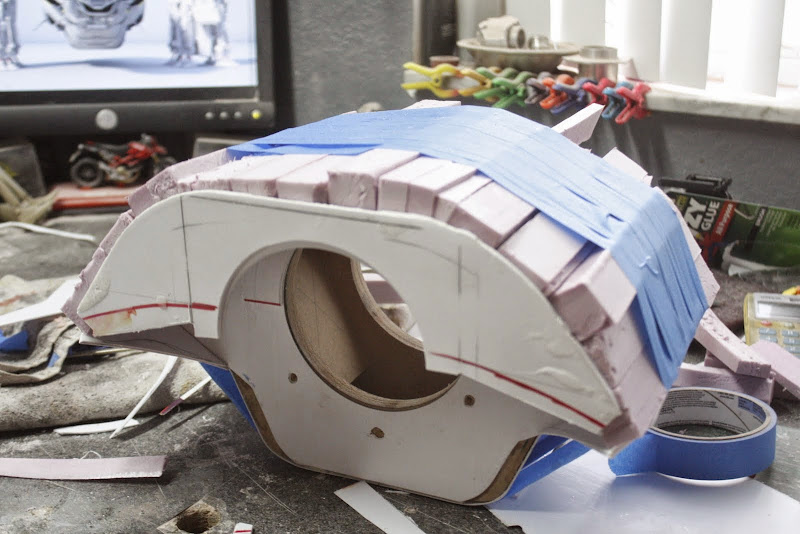 Sanded it into shape 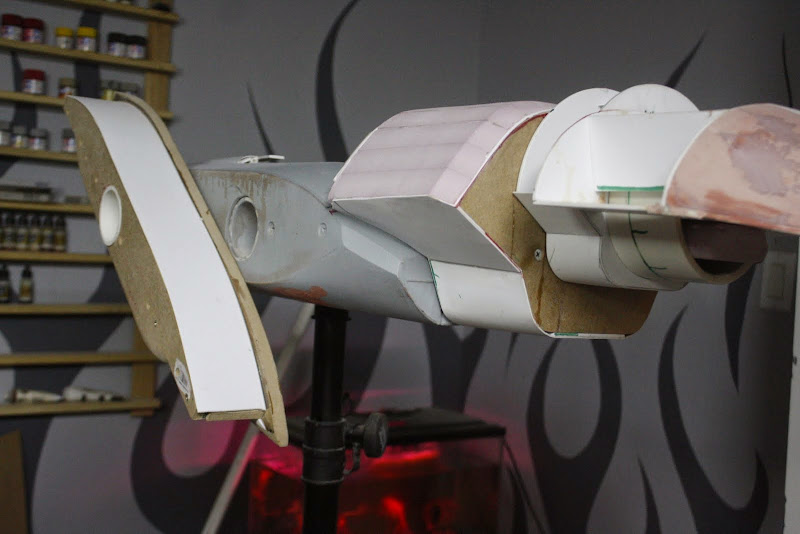 You can see the nose has changed a bit as well, I put a piece of 1mm to flatten out the top then filled and sanded it to shape, it's now ready for its final coat of epoxy and a good finish sand. 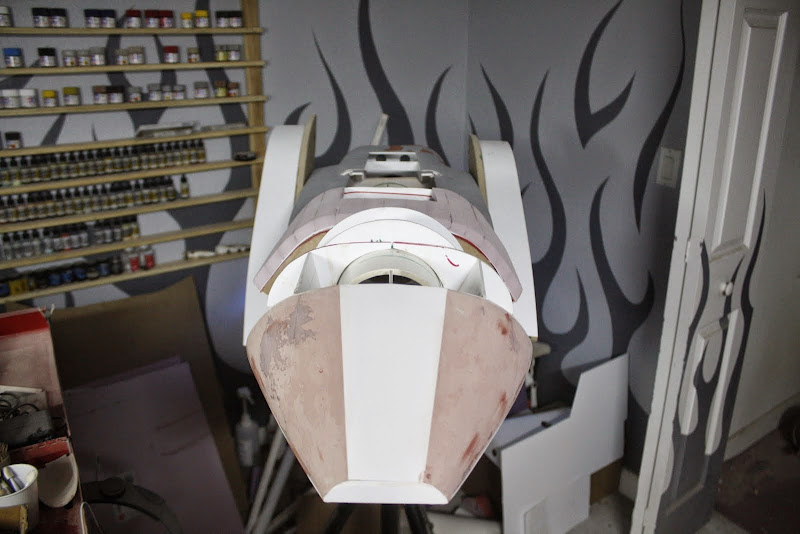 Added another strip of 1mm to give a positive front edge, needs to be filled and sanded next.  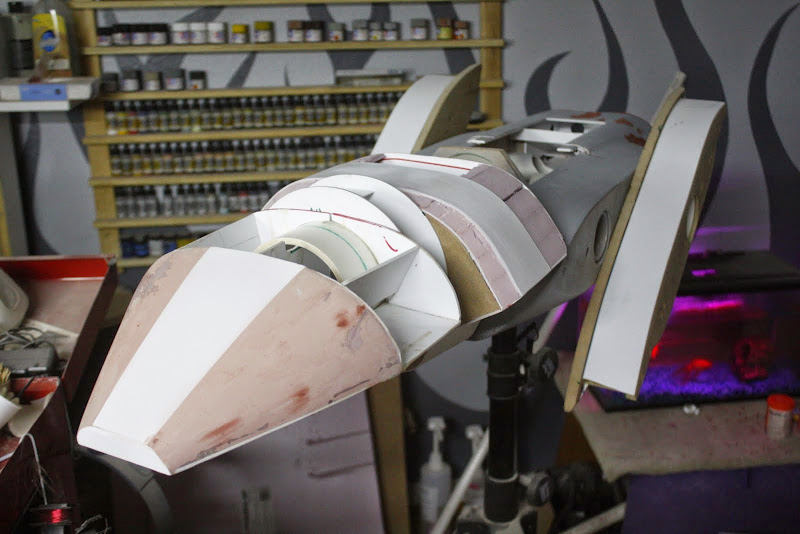 Some fat bloke in a mask to give it some scale, she's a big bugger she be  And finally a small video 360 And thassit for now Stay tuned Take care and stay warm friends Gag (PS got really chilly here in Miami yesterday, into the low 60's it was  |
|
|
|
Post by Leon on Feb 5, 2015 17:44:28 GMT -5
Nice update Gag! My gawd that is huge. |
|
|
|
Post by deafpanzer on Feb 5, 2015 18:06:24 GMT -5
I am DAMNED how HUGE it is! LOL Glad you did it to give us a better idea about its true size... this is so exciting to see how it is starting to come together.
|
|
|
|
Post by dupes on Feb 5, 2015 22:14:45 GMT -5
Same as the other dudes...had no idea it would be this big. I still can't fathom how you wrap your head around scratching something like this. Superb work, gag!
*It looks a lot warmer where you live than where I live. Heh.
|
|
|
|
Post by kaytermarram on Feb 6, 2015 13:58:15 GMT -5
Great scale reference and top build. Sounds simple but what to say more whats not bee said? love it!
Frank
|
|
thenylongag
Full Member
Sept2013 MoM Winner
Member since: June 2012
Yes, we have 'NO' bananas
Posts: 304
Jun 7, 2012 11:20:57 GMT -5
Jun 7, 2012 11:20:57 GMT -5
|
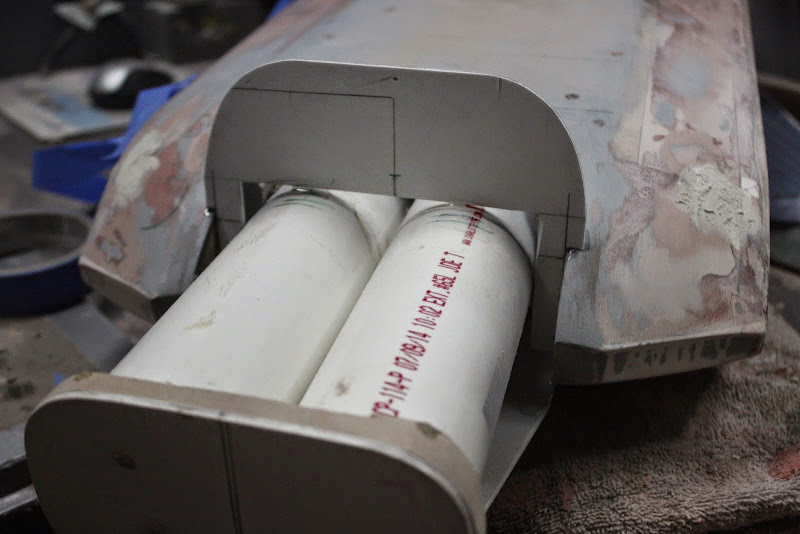
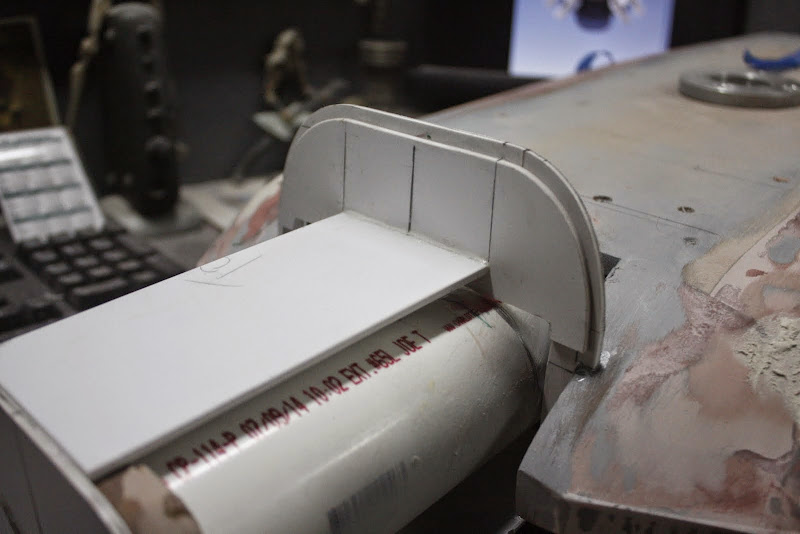
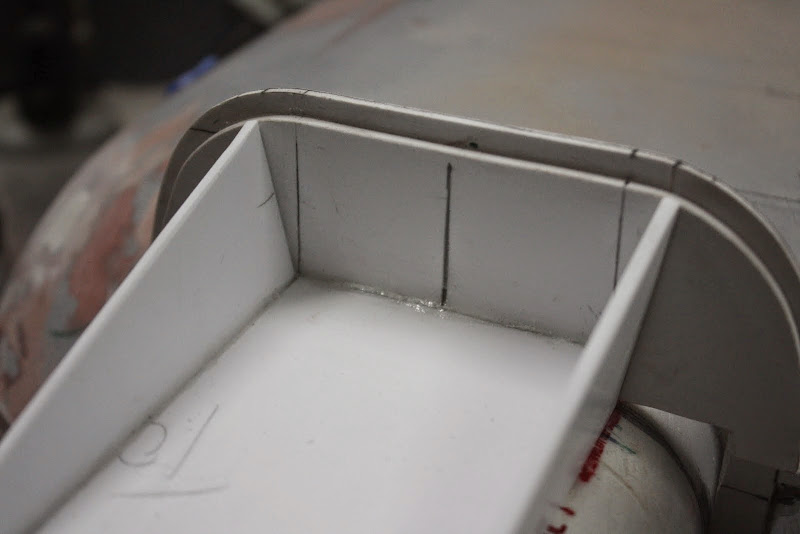
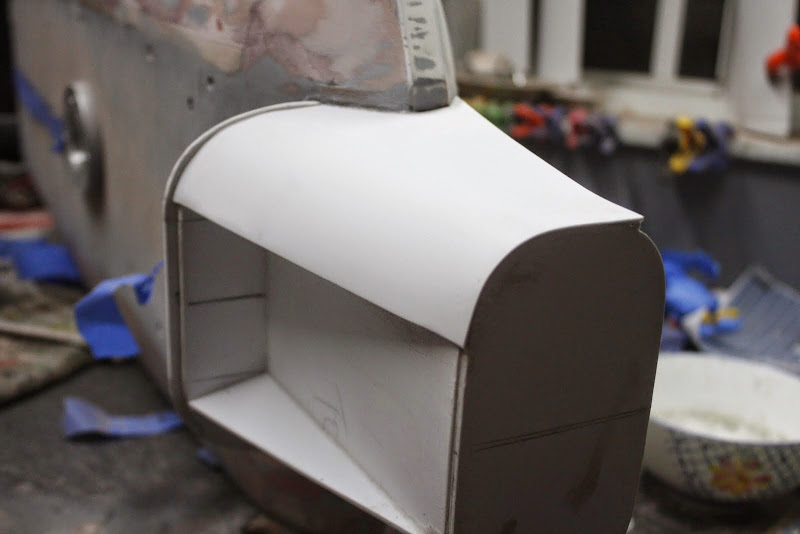
Post by thenylongag on Feb 15, 2015 19:34:29 GMT -5
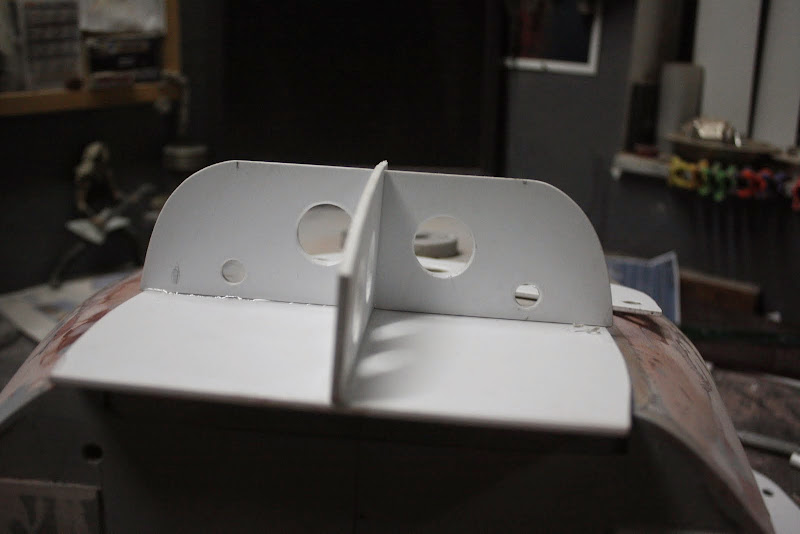
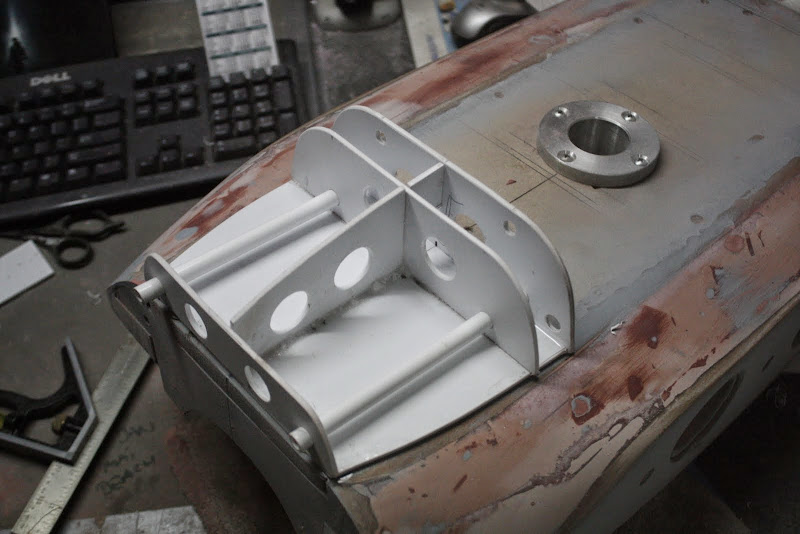
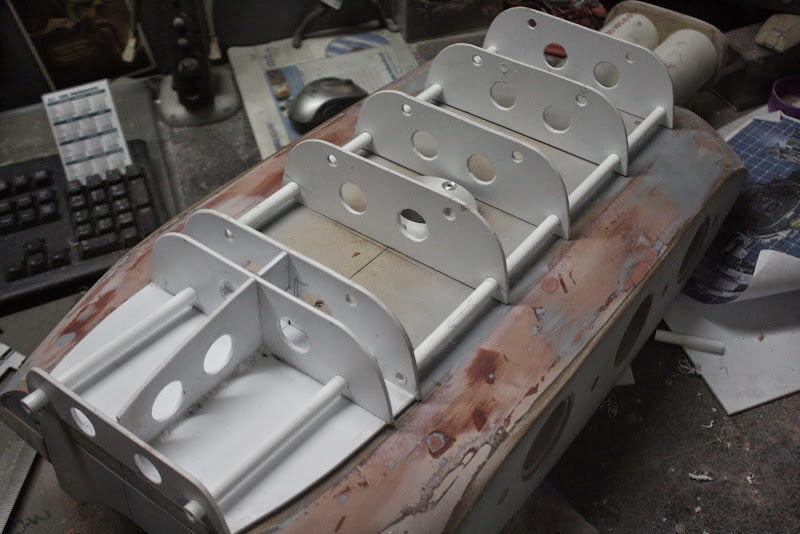
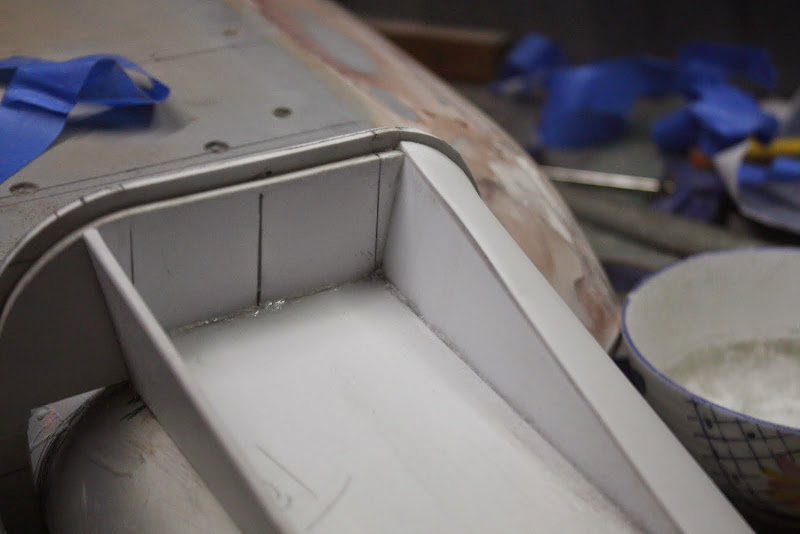
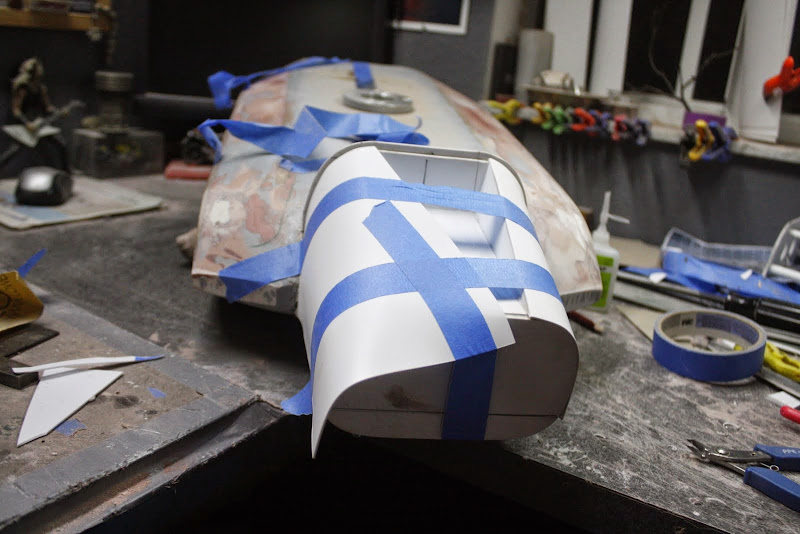
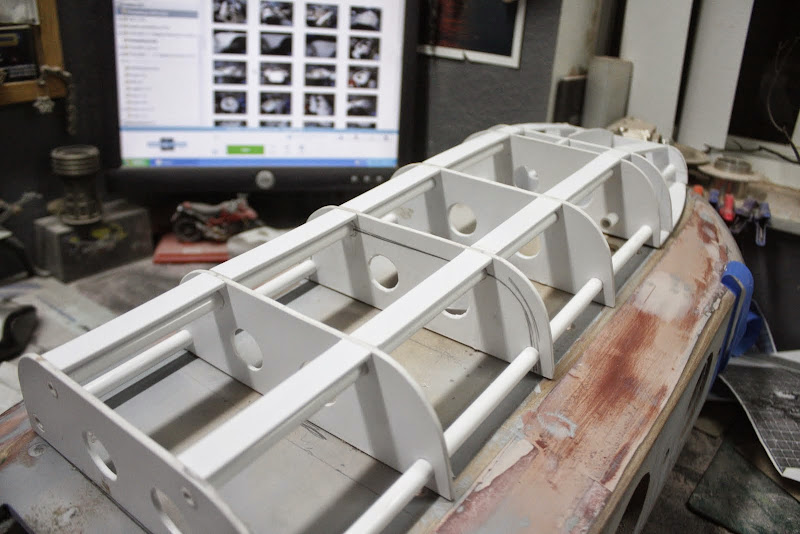
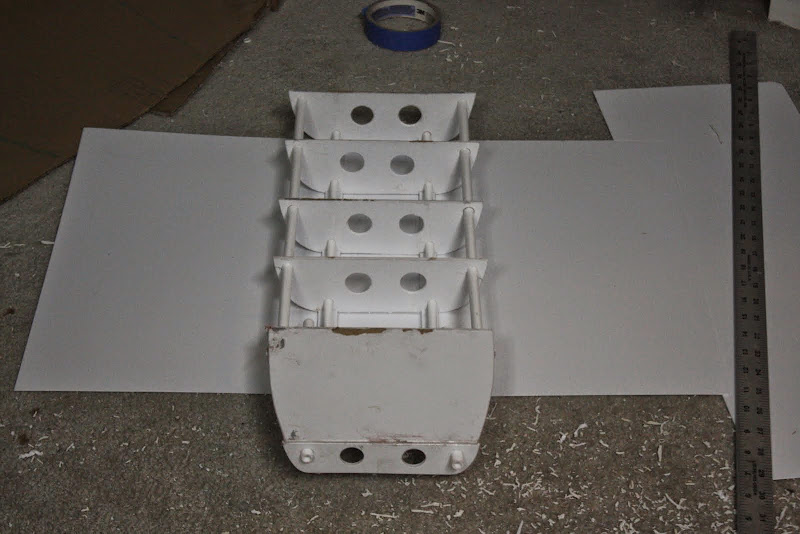
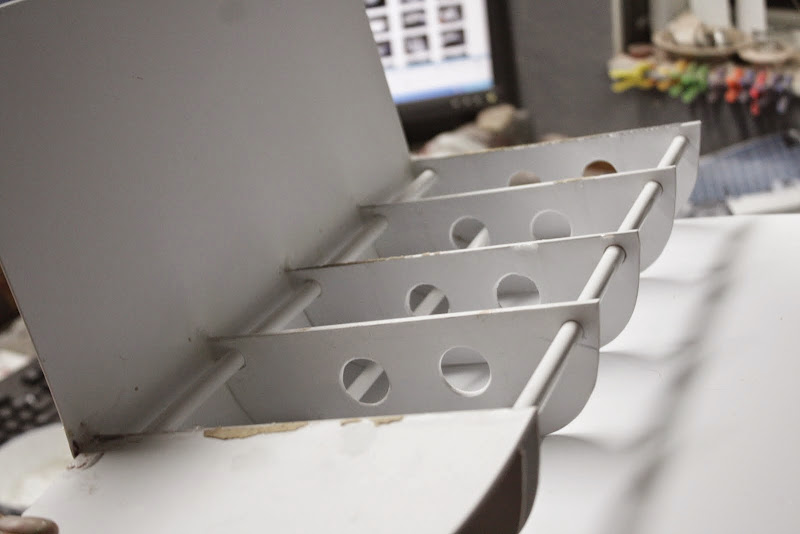
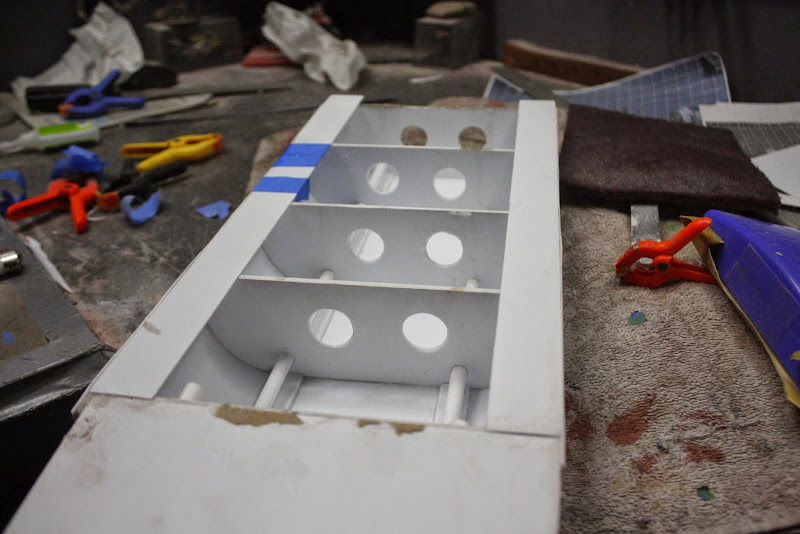
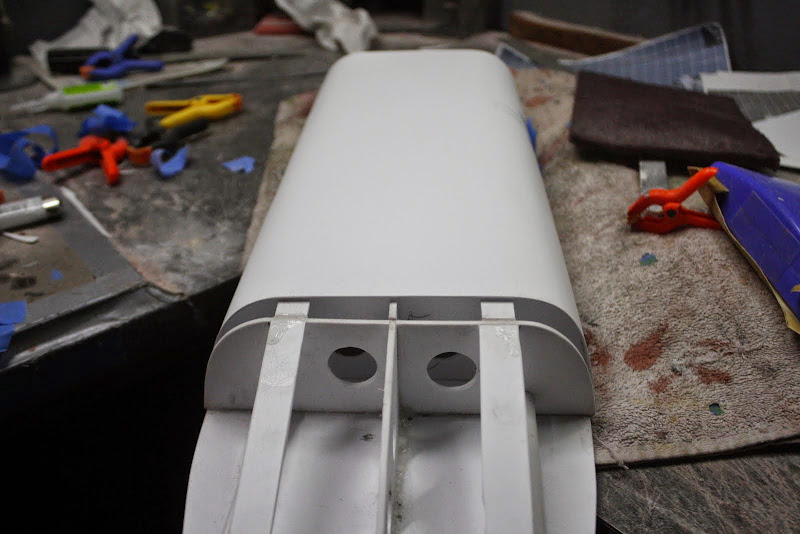
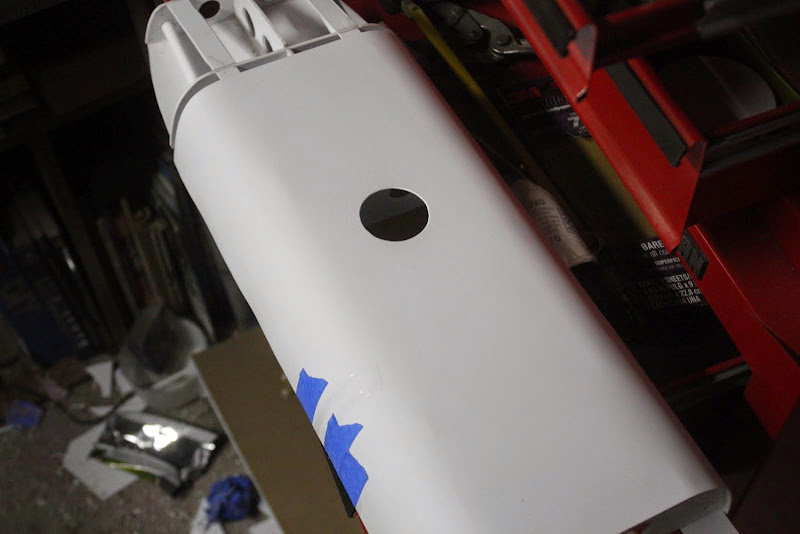
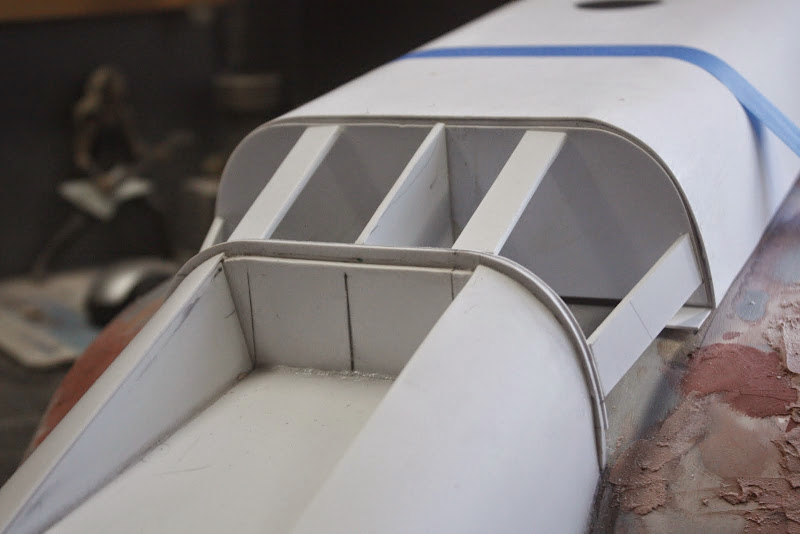
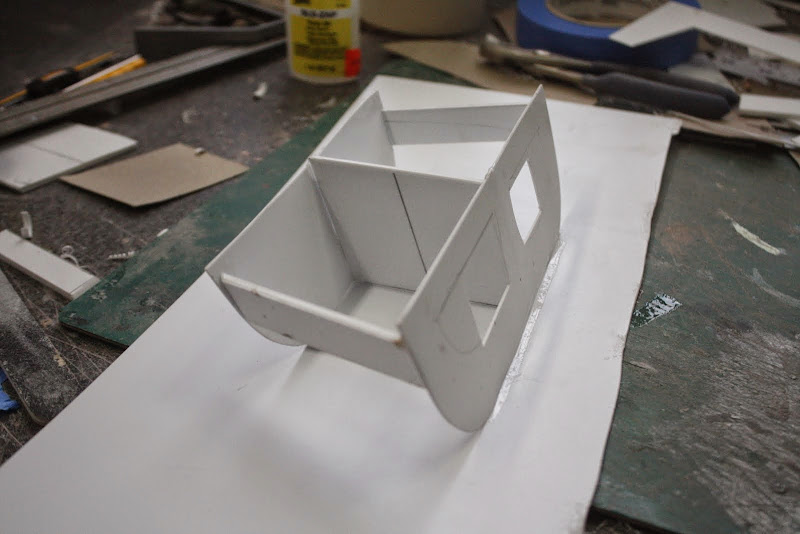
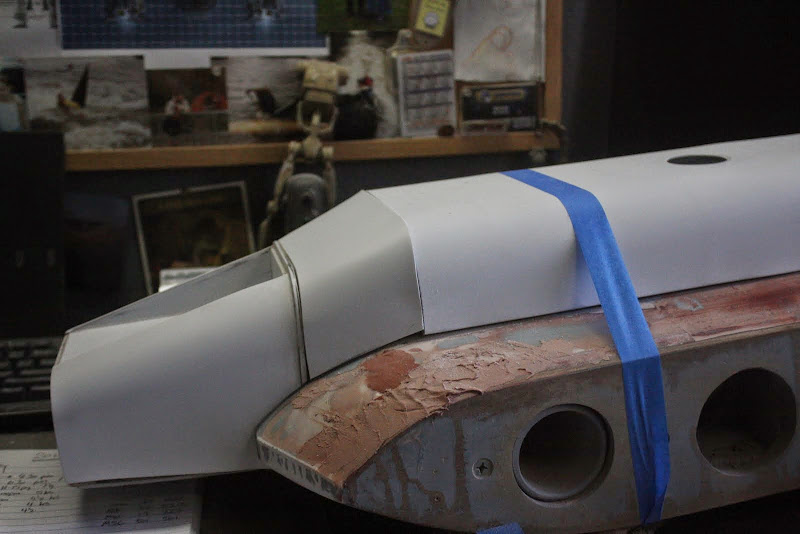
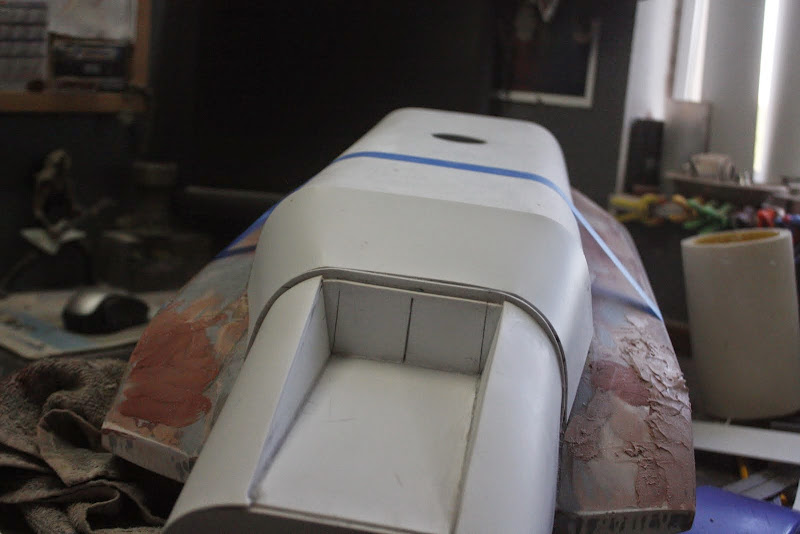
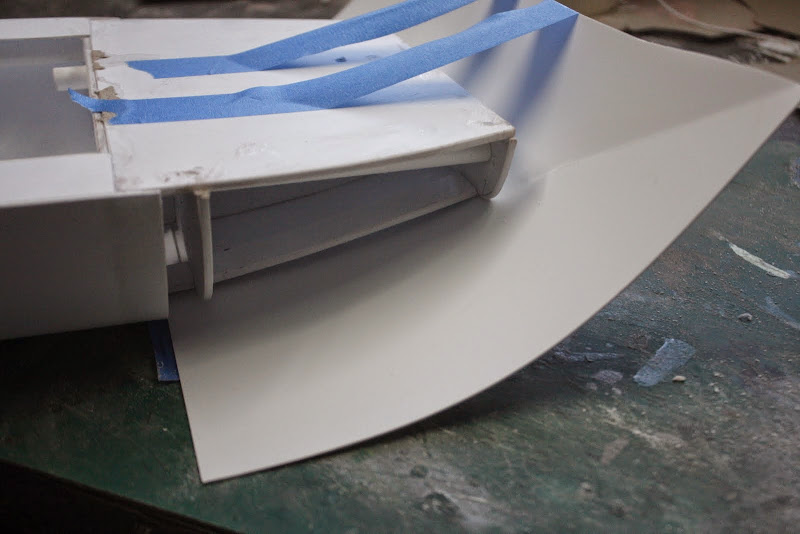
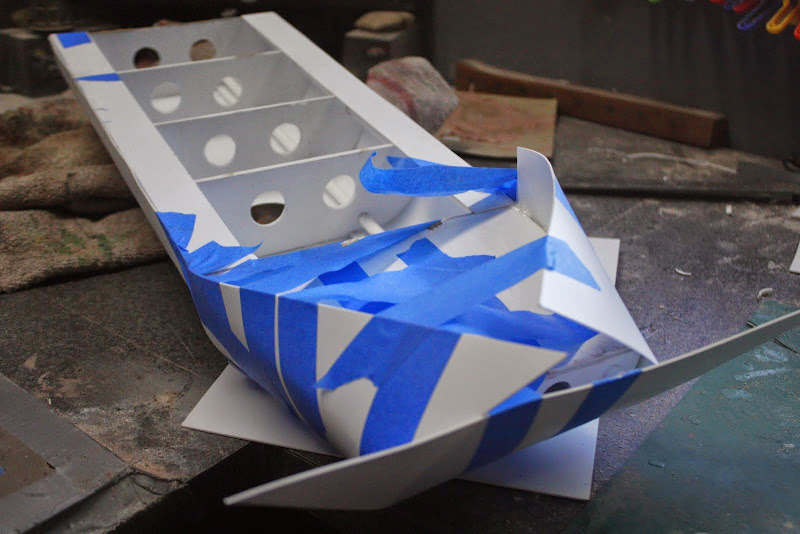
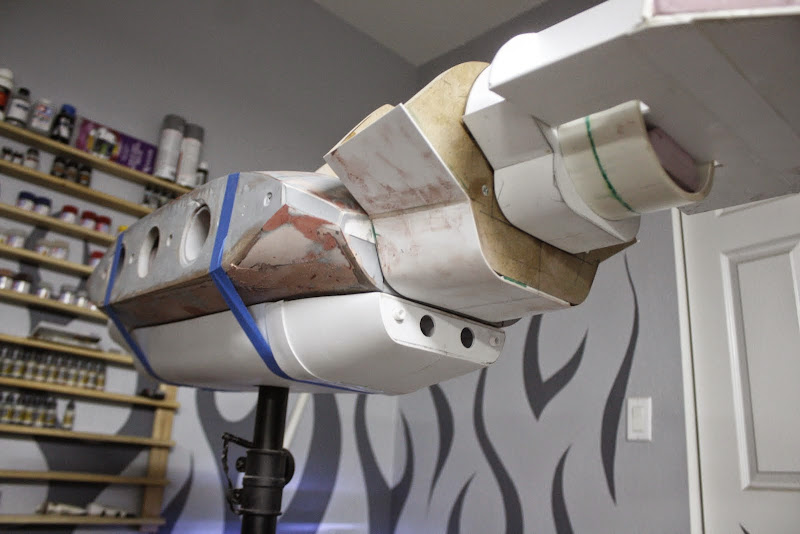
Thank you guys for the positive feedback, nice to have you all along for the ride, Lot's to get to so hold on tight Started to frame in the top section 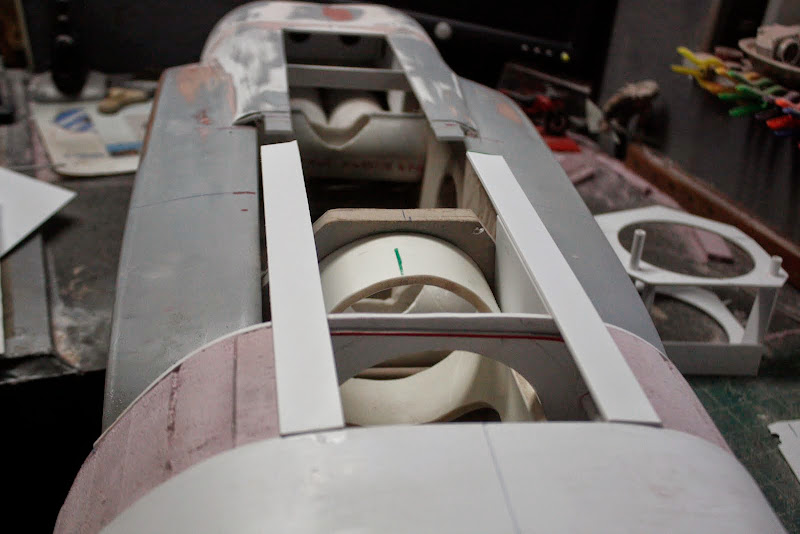 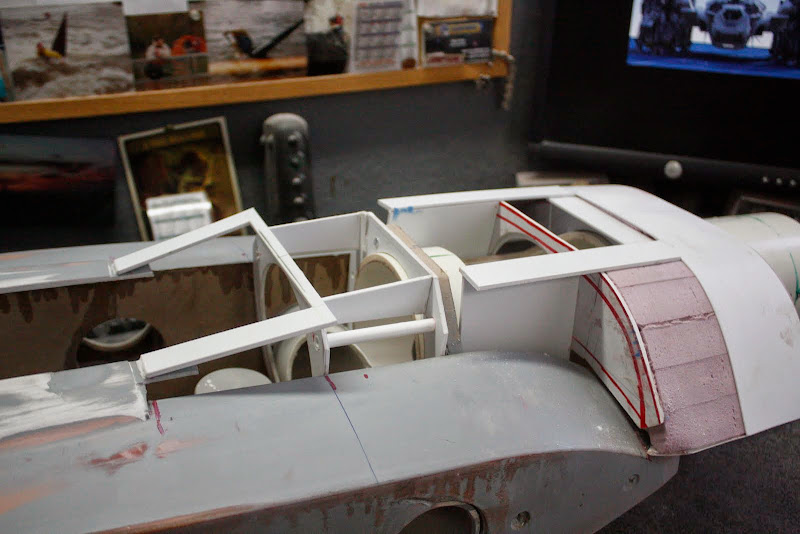 Cut out profile of the top intakes  More frame work  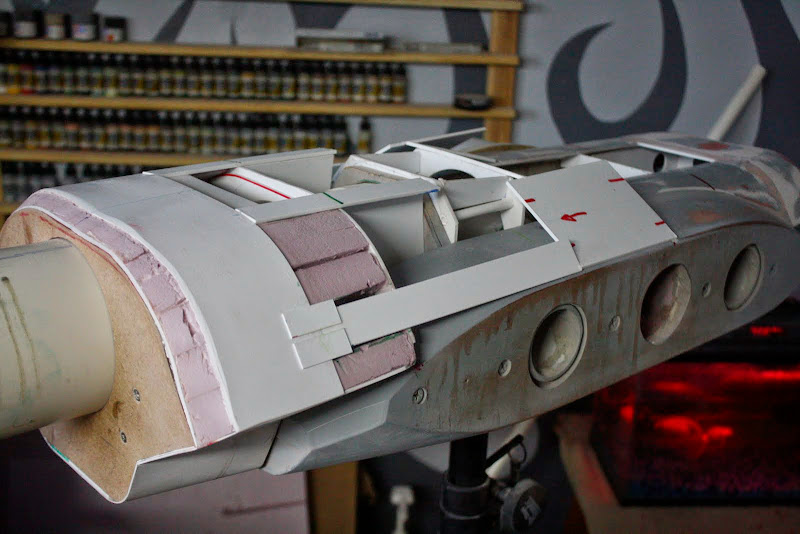 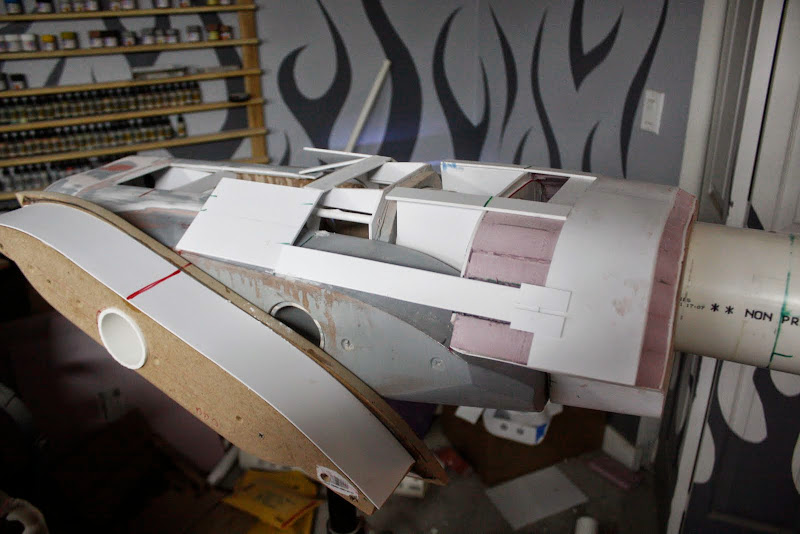 Cut out the back of the escape pod profile 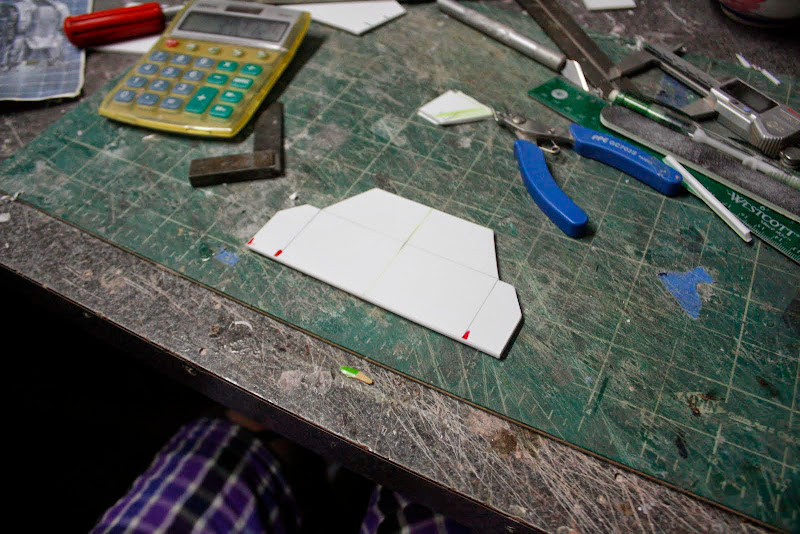 And in position 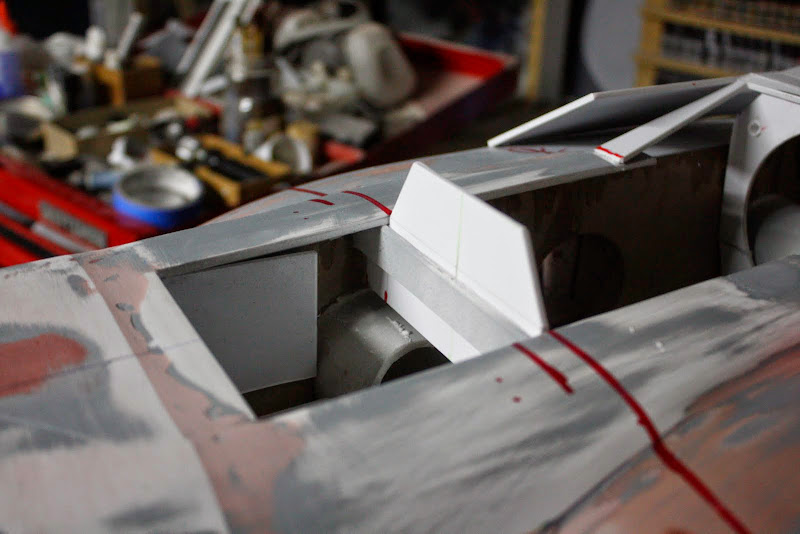 Next was the outer skin of the main body   Glued and taped 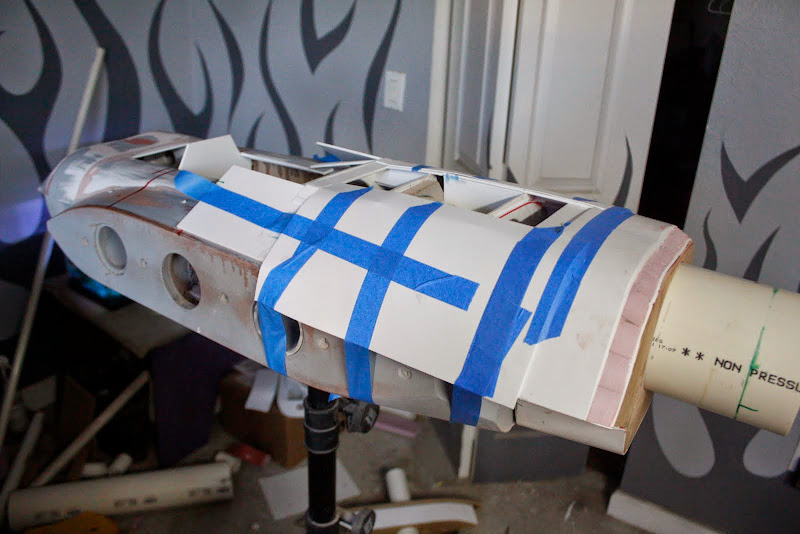 Profile cleaned 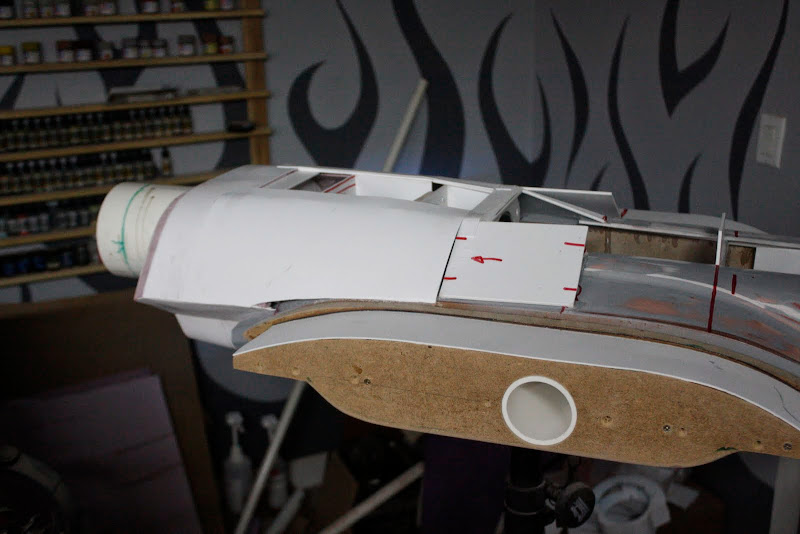 Moved on to the final nose section on the underside 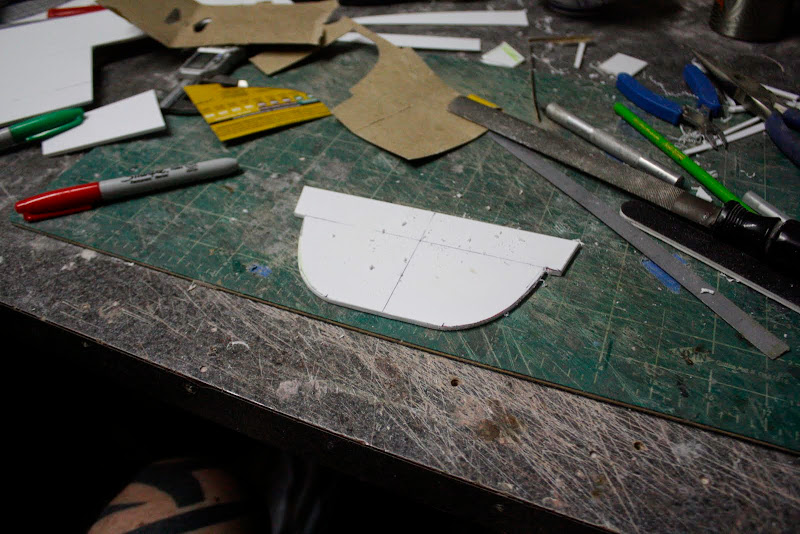 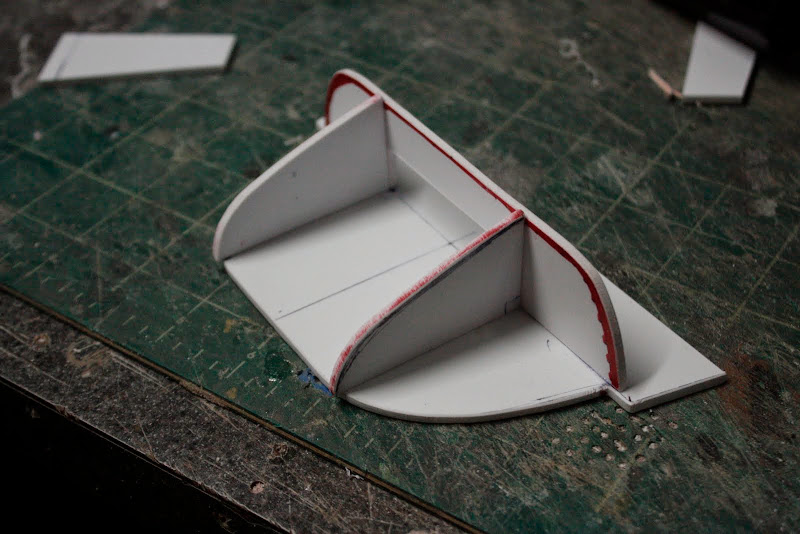 Foam  Shaped 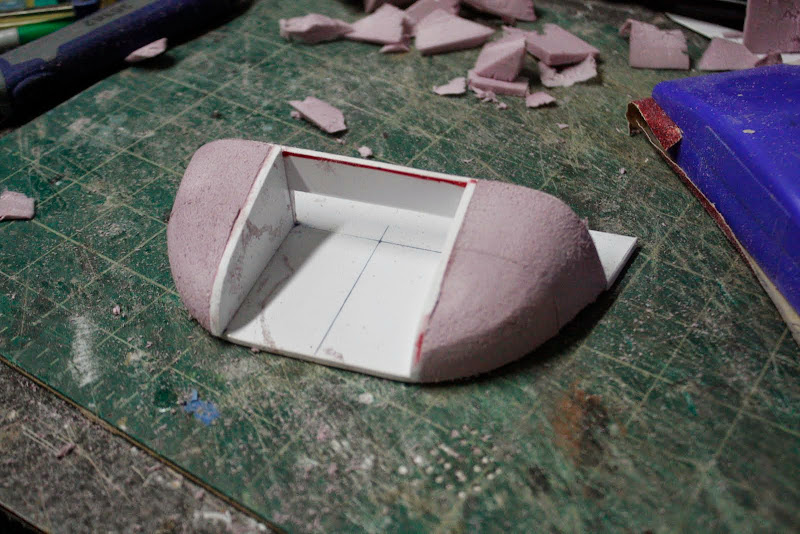 Piece of 1mm styrene sheet  Heated with just friction from my hand and bent and glued to the form then clamped 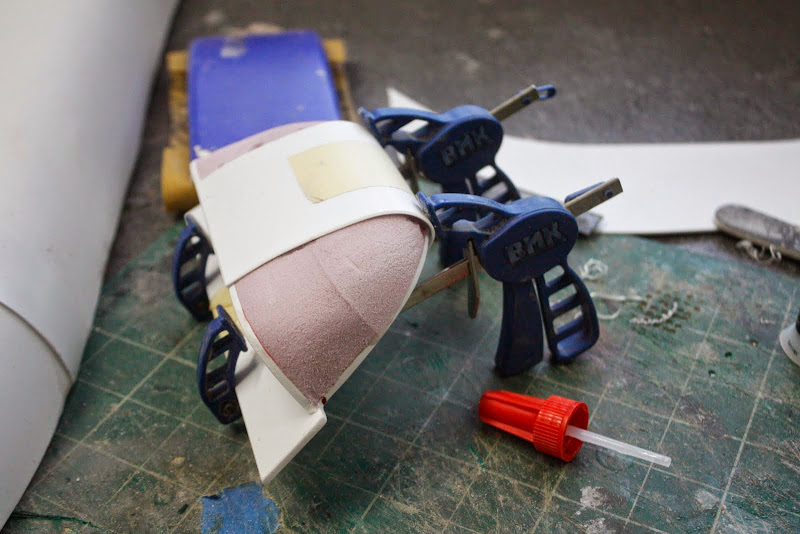 A coat of epoxy resin  And for the main nose 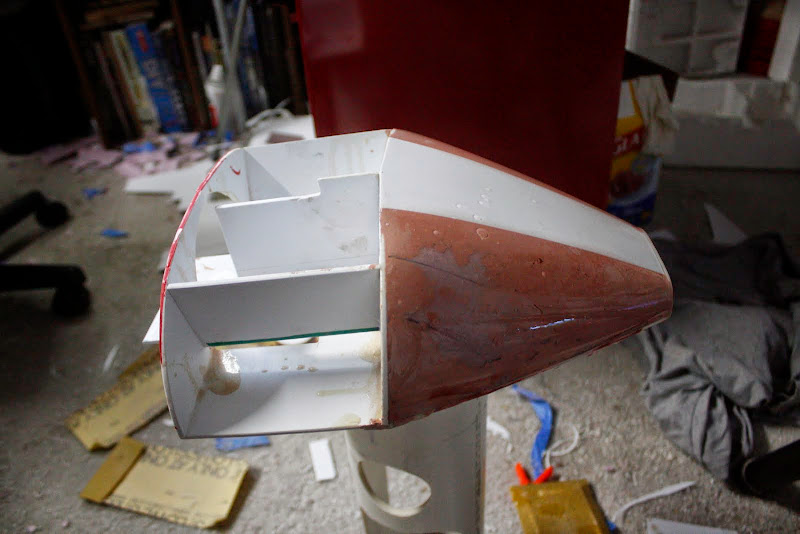 And the angle on the leading edge of the main body  Filled in another small detail surface 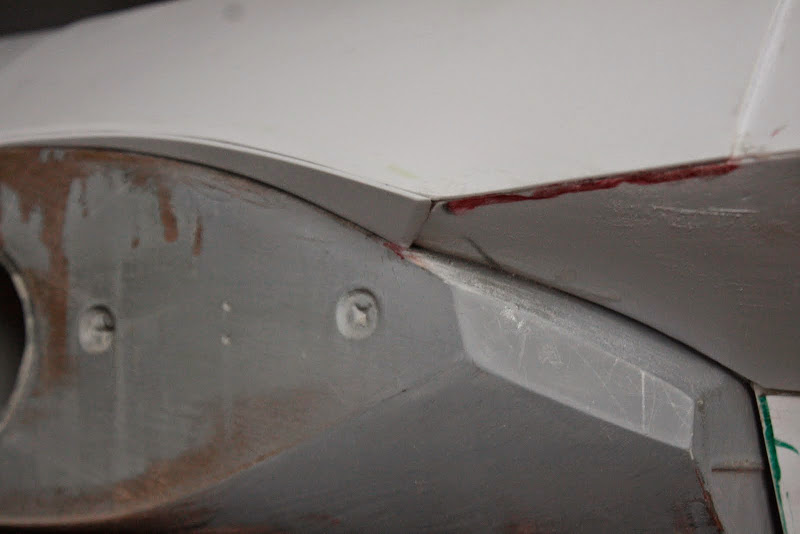 Then moved on to the back section and the escape pod detail 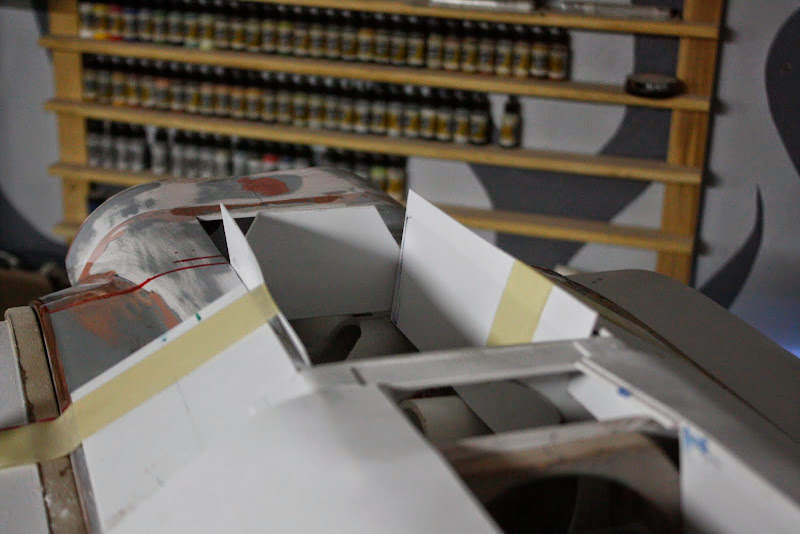 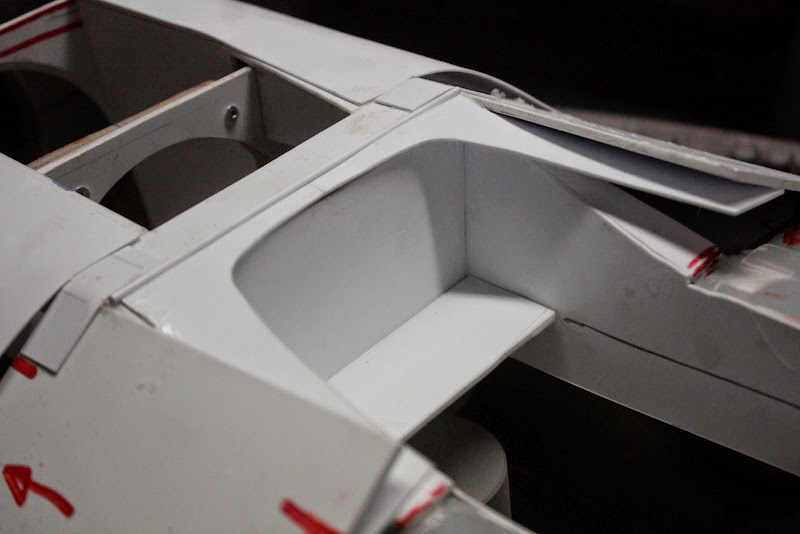 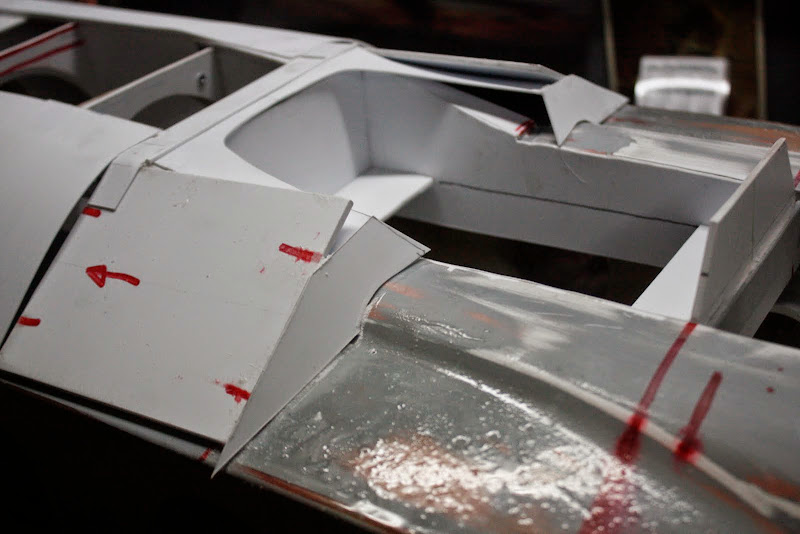  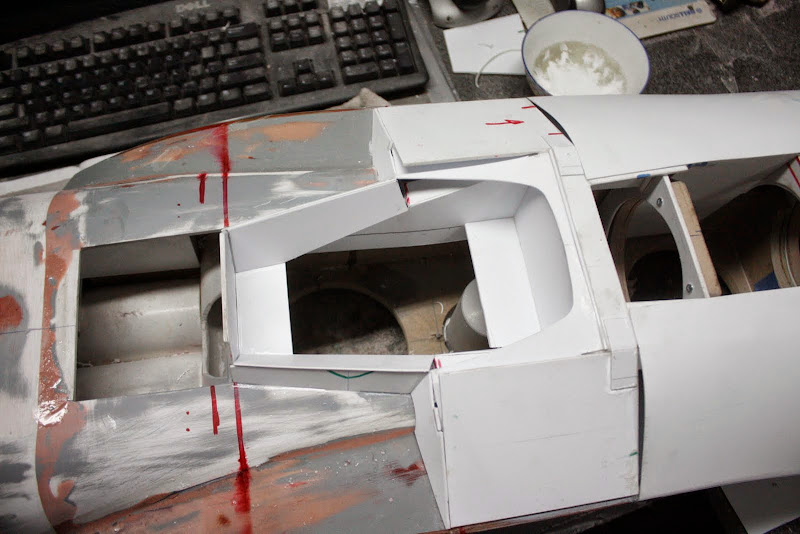 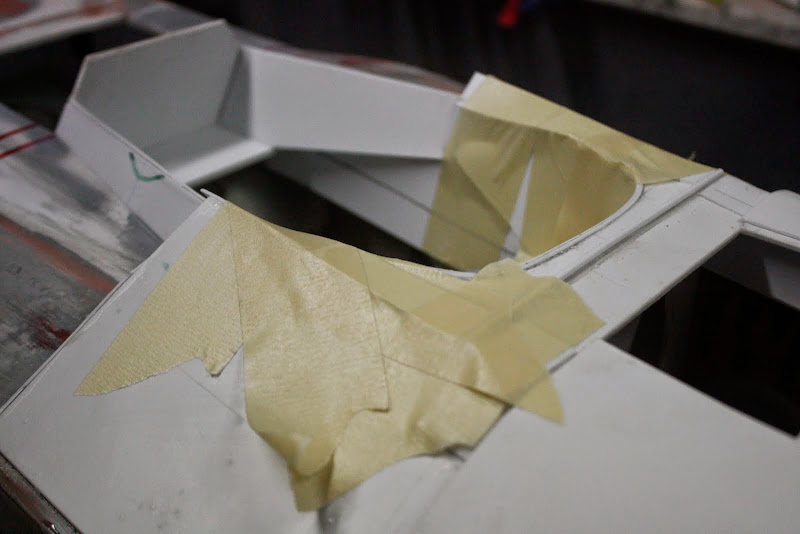 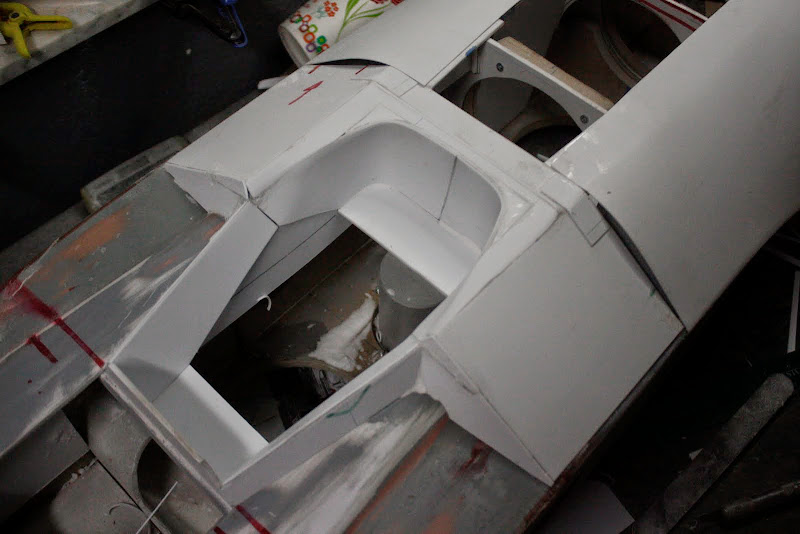 Made the mid point for the escape pod, i'm still not happy with this yet 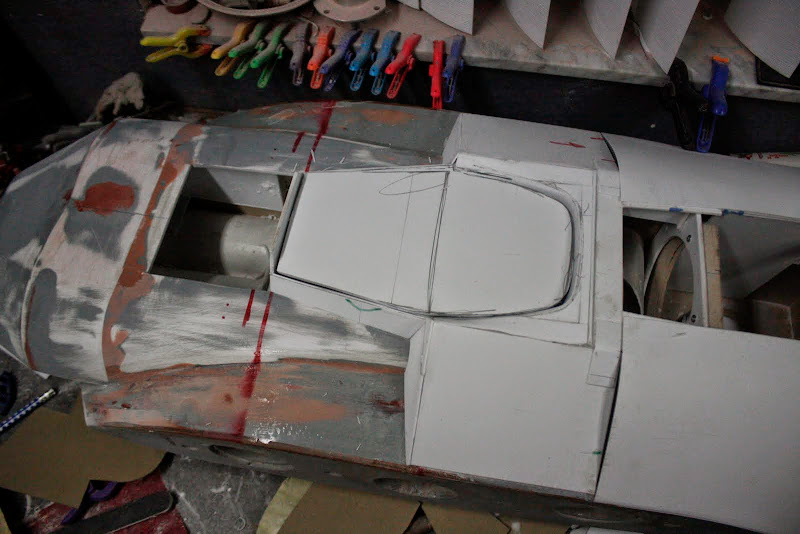 Slapped a bit off bondo on it  Gave the nose a final sand with 400 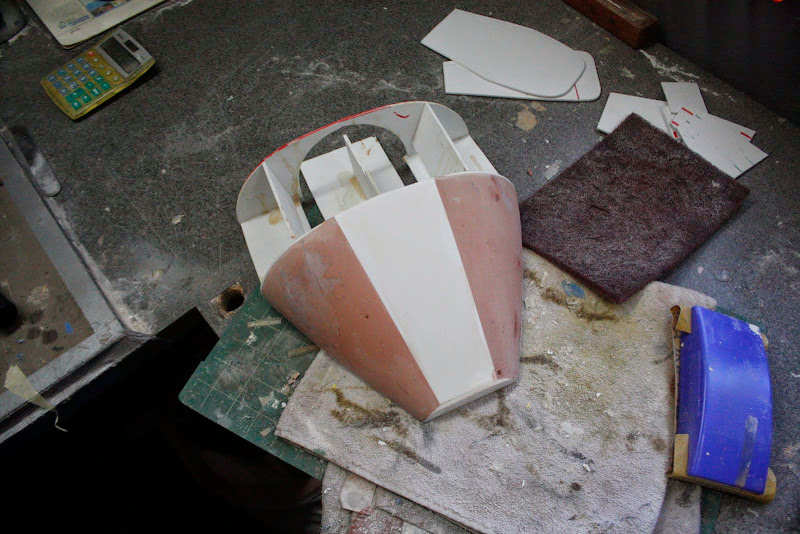 Then..............Mmmmmmmmmmmmmmm Primer 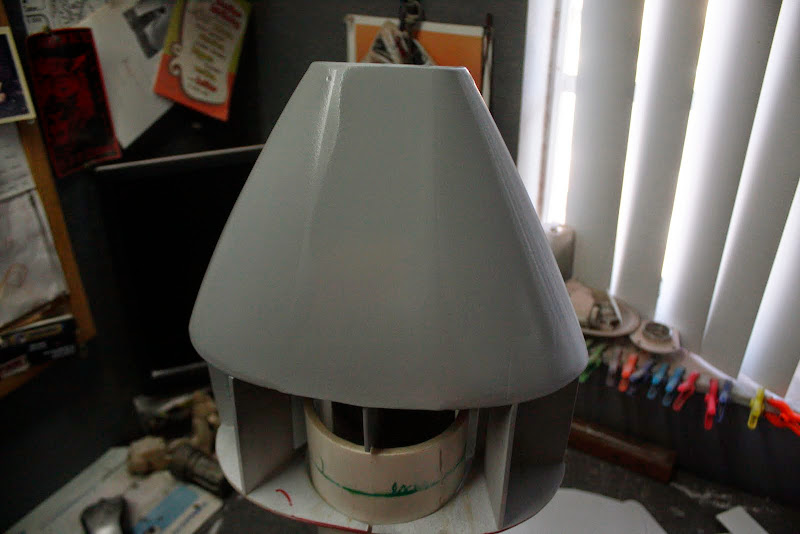 Did the little underside bit as well 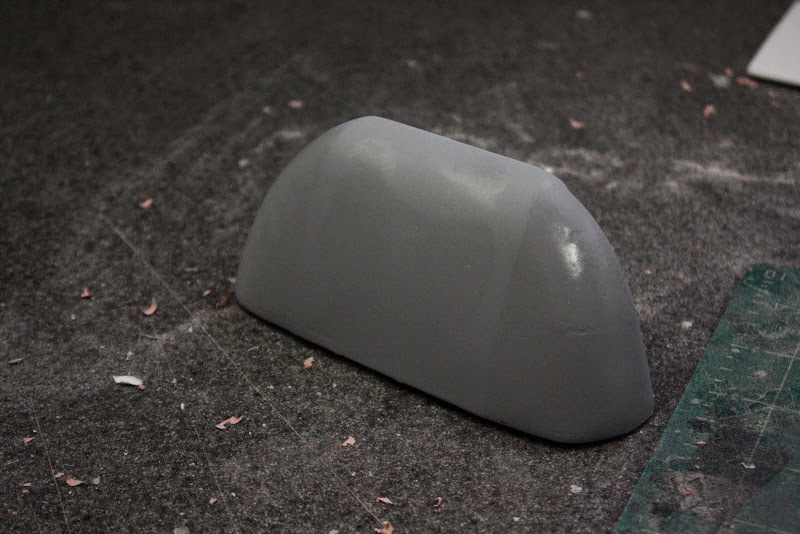 Top section sanded and primered 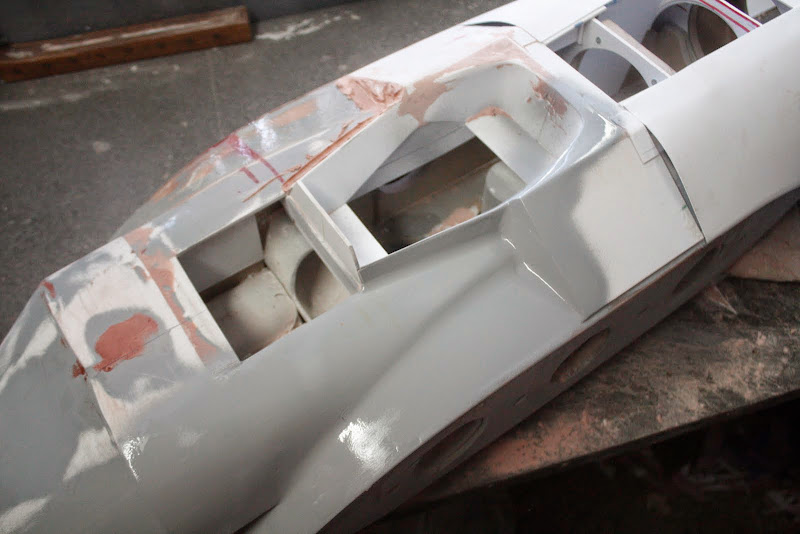 Both sides sanded back ready for another coat But i've run out of primer, so it'll have to wait 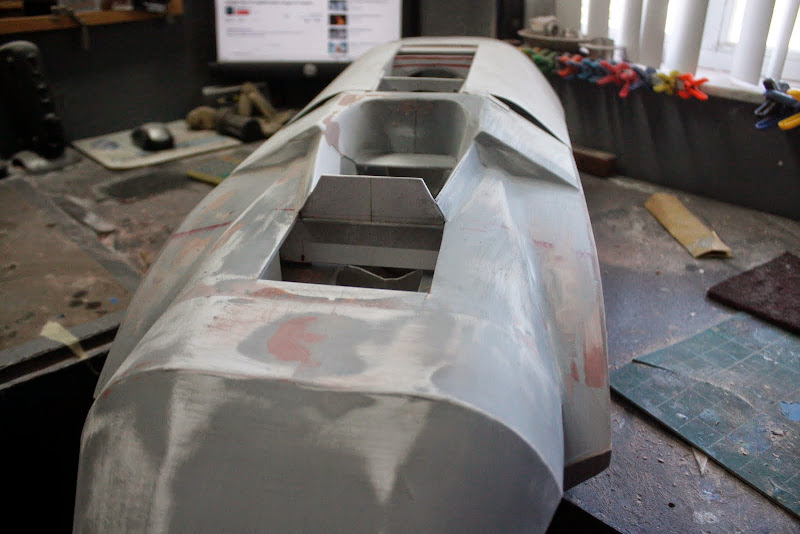 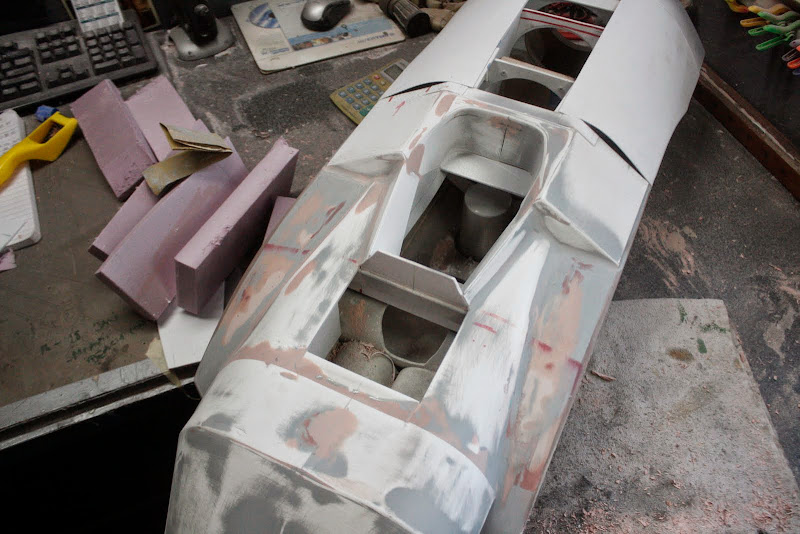 Moved forward to the front section Covered with 1mm styrene sheet 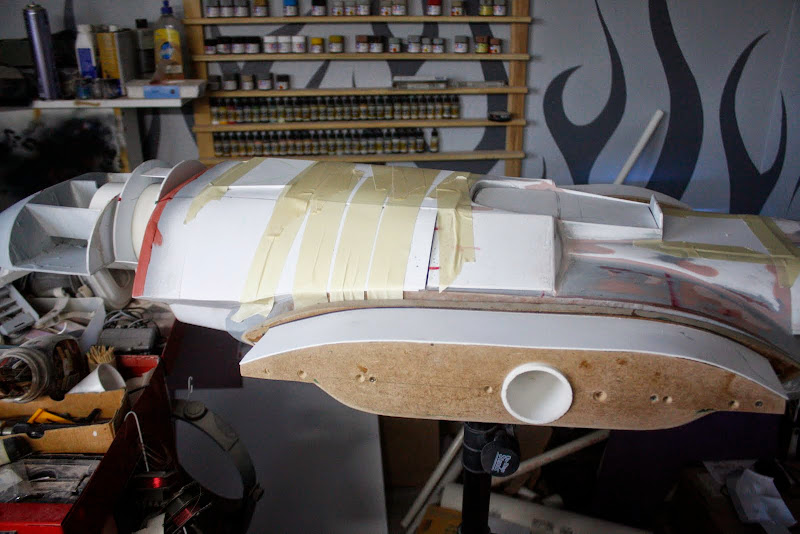 Tape off  And cleaned up 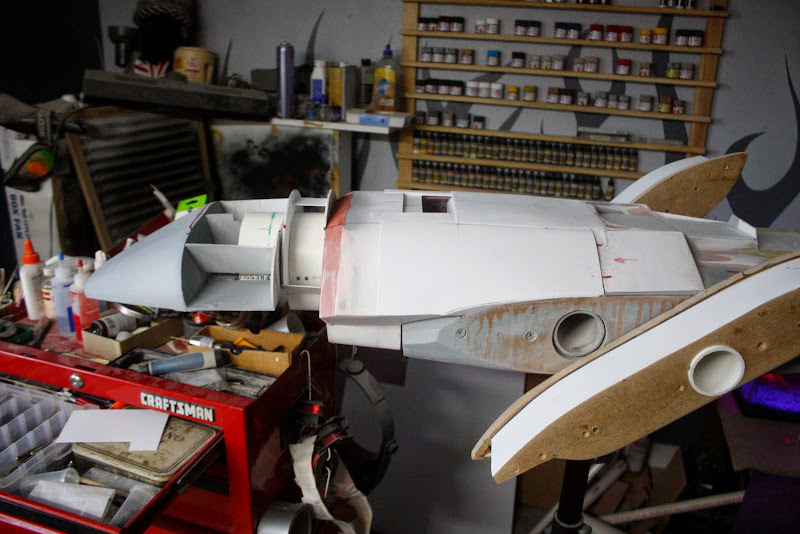 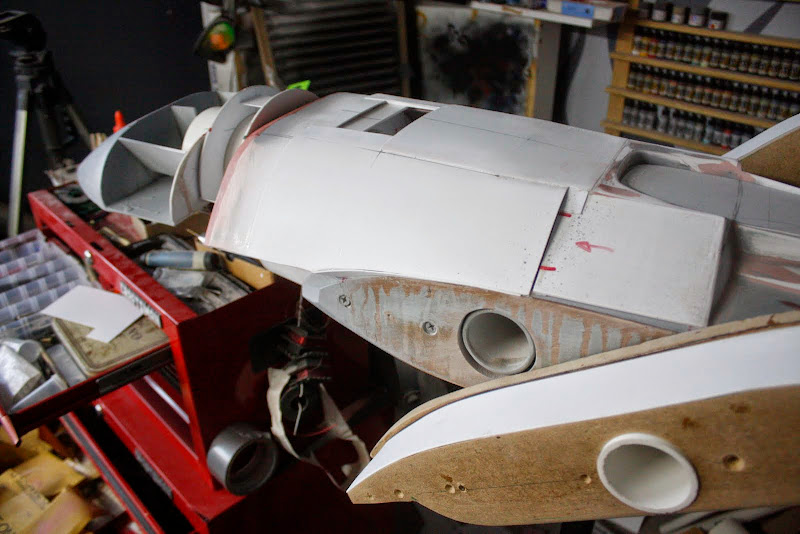 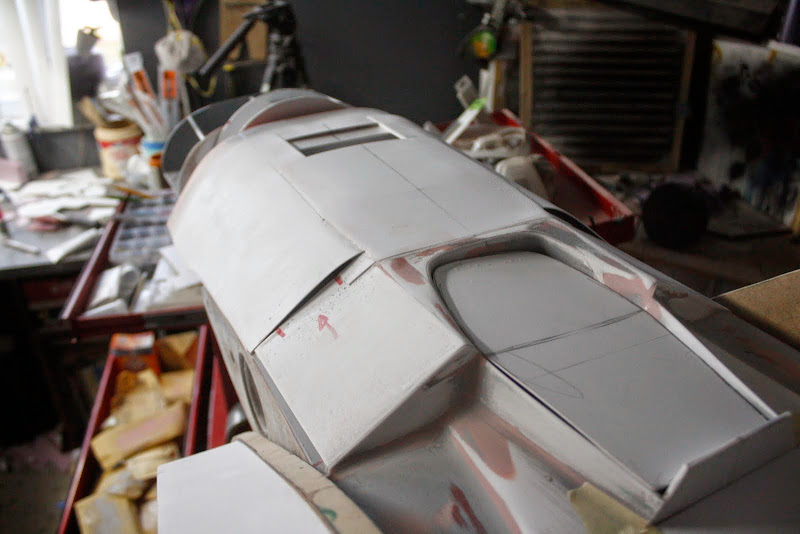 OK you can breath now, thats it Got to get another tin of primer, then.......... Well you'll just have to wait and see Till next time Gag OUT |
|
|
|
Post by Leon on Feb 15, 2015 19:50:07 GMT -5
That's some awesome progress Gag! Really starting to look like the Prometheus now. |
|
reserve
Senior Member
Member since: July 2012
Si vis pacem para bellum
Posts: 2,355
Jul 11, 2012 9:11:45 GMT -5
Jul 11, 2012 9:11:45 GMT -5
|
Post by reserve on Feb 15, 2015 22:35:17 GMT -5
Just as boggling as the last ship you did. I'm doubly impressed as this is a talent I do not possess
Regards,
Mark
|
|
thenylongag
Full Member
Sept2013 MoM Winner
Member since: June 2012
Yes, we have 'NO' bananas
Posts: 304
Jun 7, 2012 11:20:57 GMT -5
Jun 7, 2012 11:20:57 GMT -5
|
Post by thenylongag on Feb 17, 2015 21:24:12 GMT -5
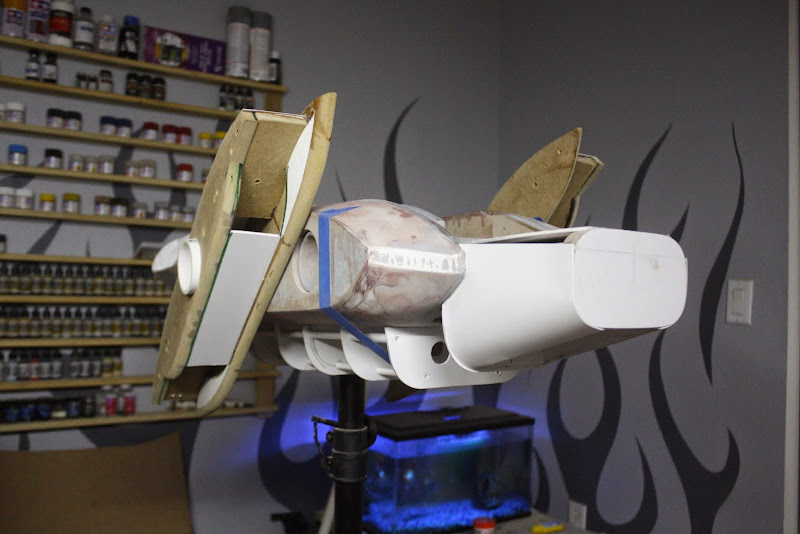
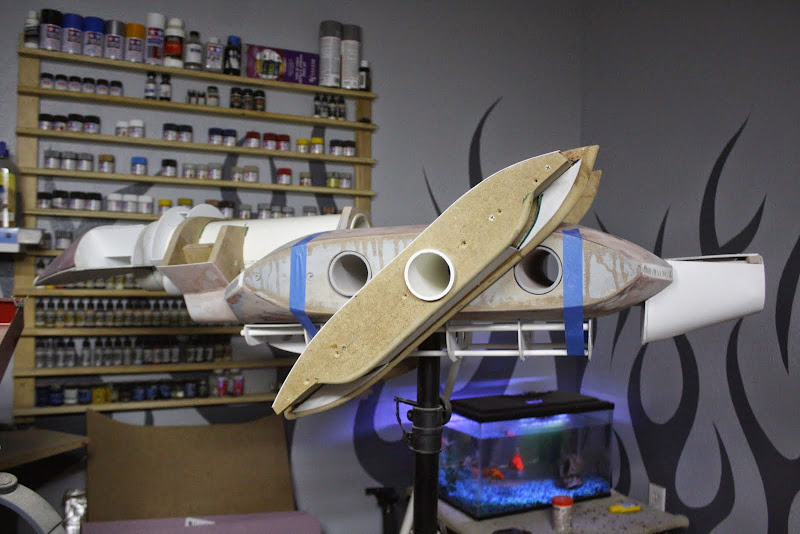
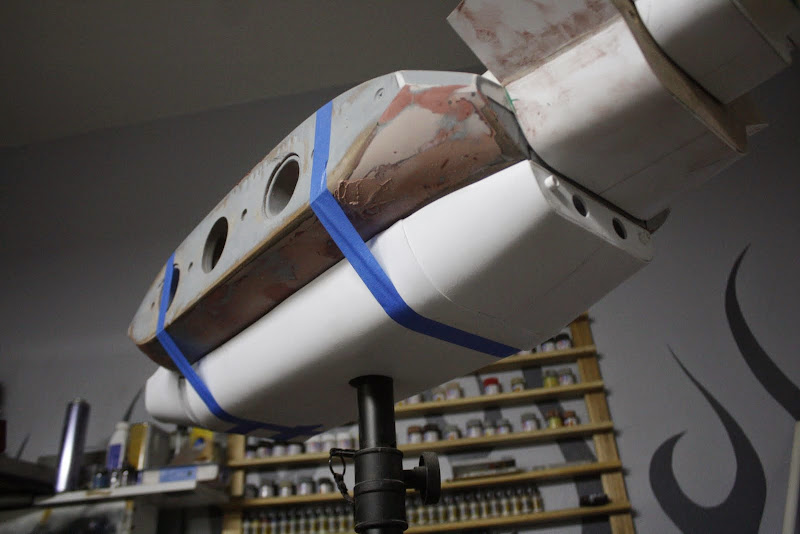
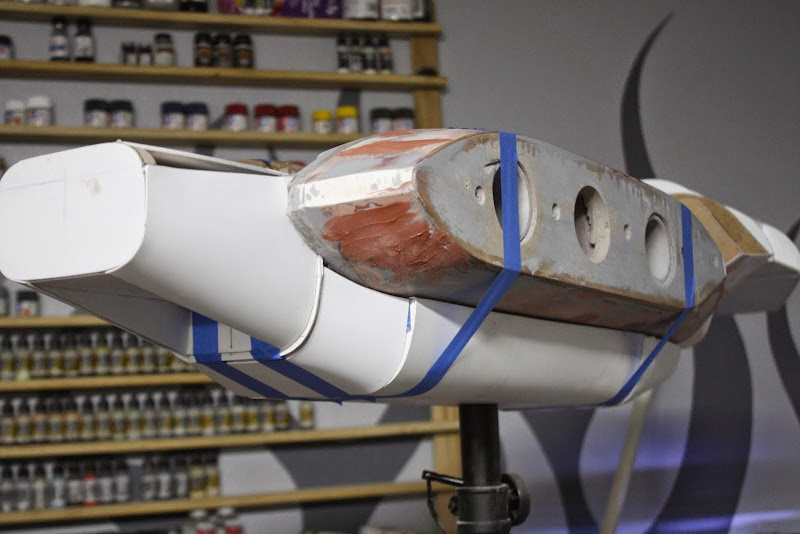
Thanks for the support guys, much appreciated Had a barney with the misses, in the dog house.  So lots of bench time lately ;D On with the show Stuck some foam to the escape pod piece 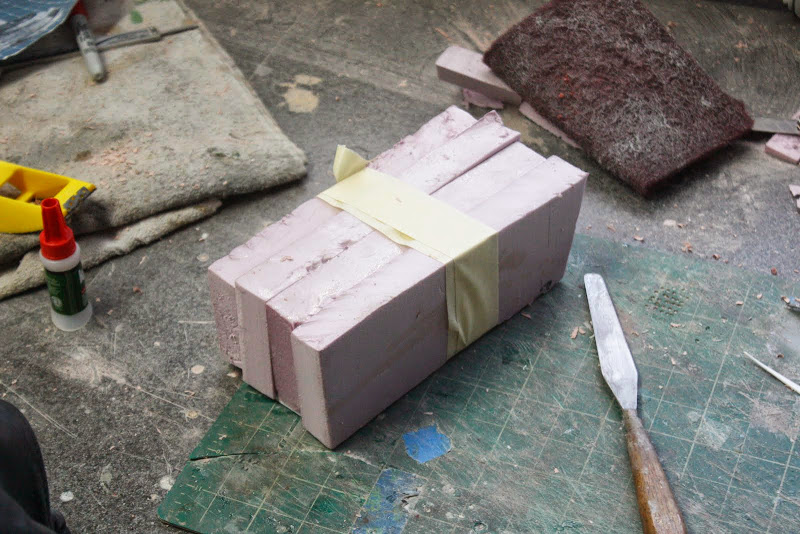 Glued the 'neck' to the 'head'  Skinned the neck and back of the head section 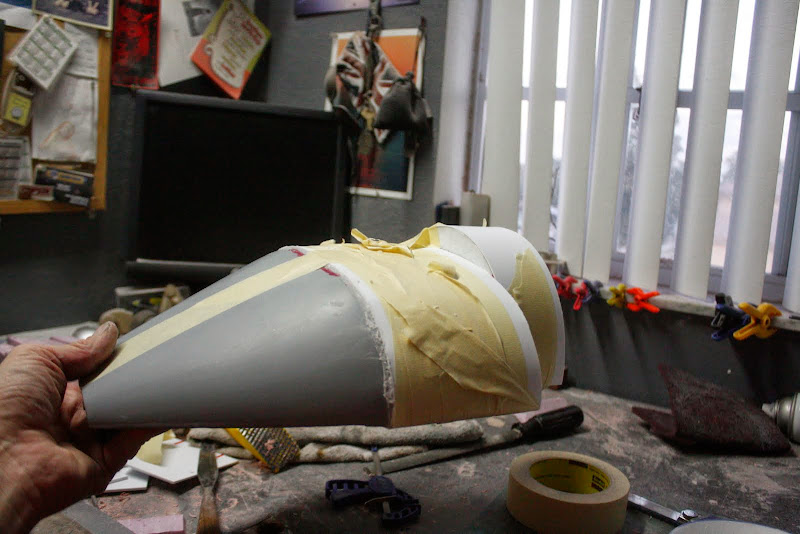 Shaped the bottom section of the escape pod foam 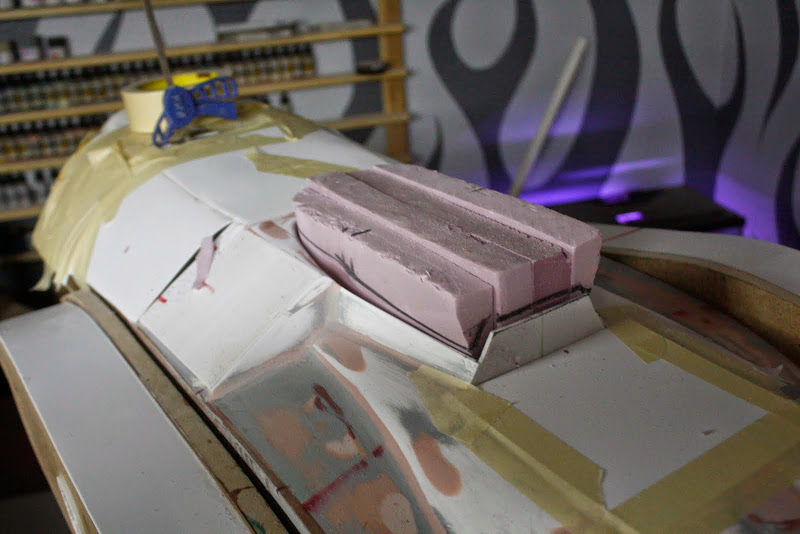 Reduced the thickness 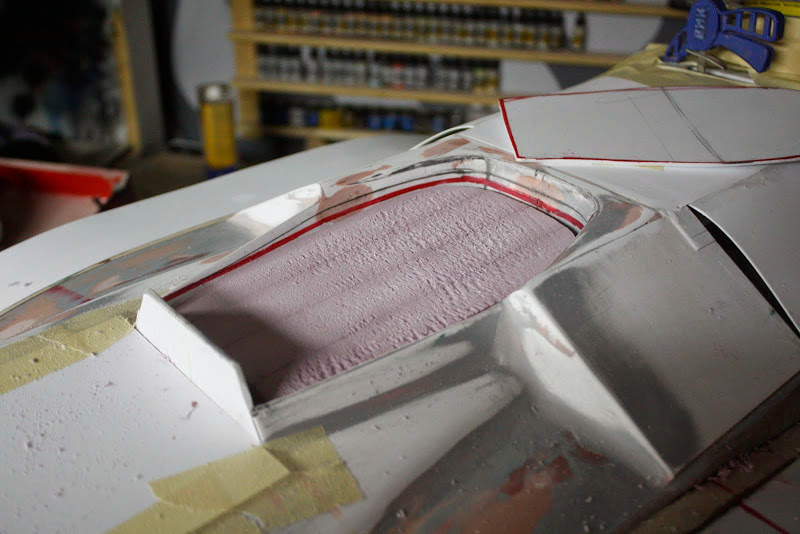 Glued on the central separator 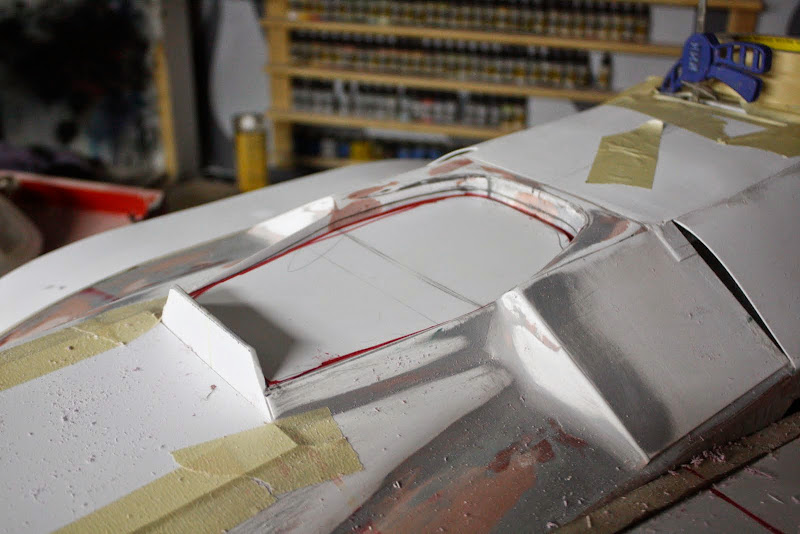 Then glued on an oversized top piece  Shaped the top piece 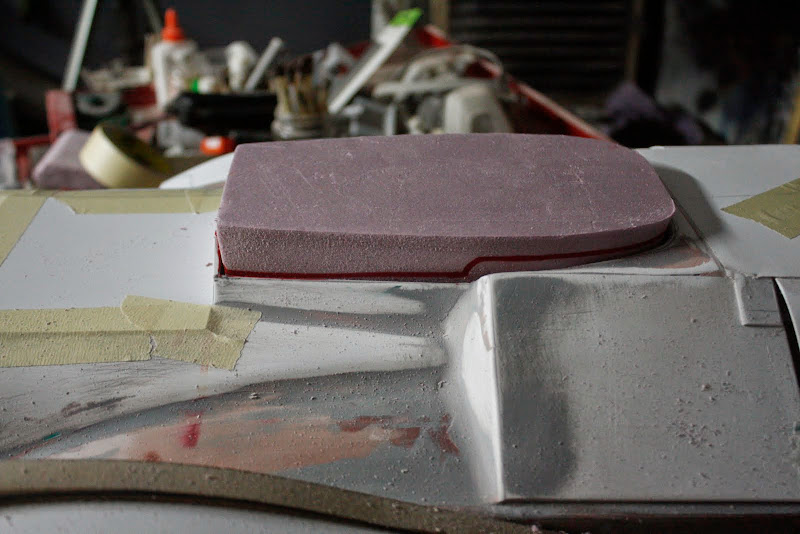 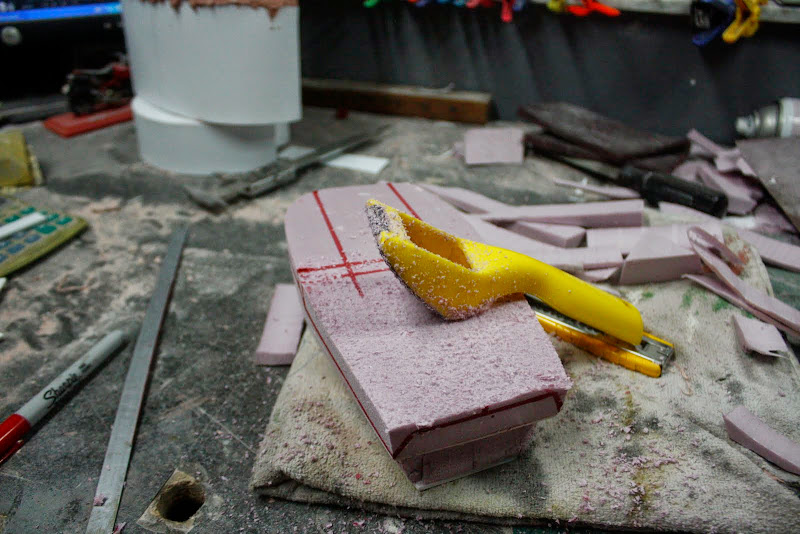 Sanded and in position 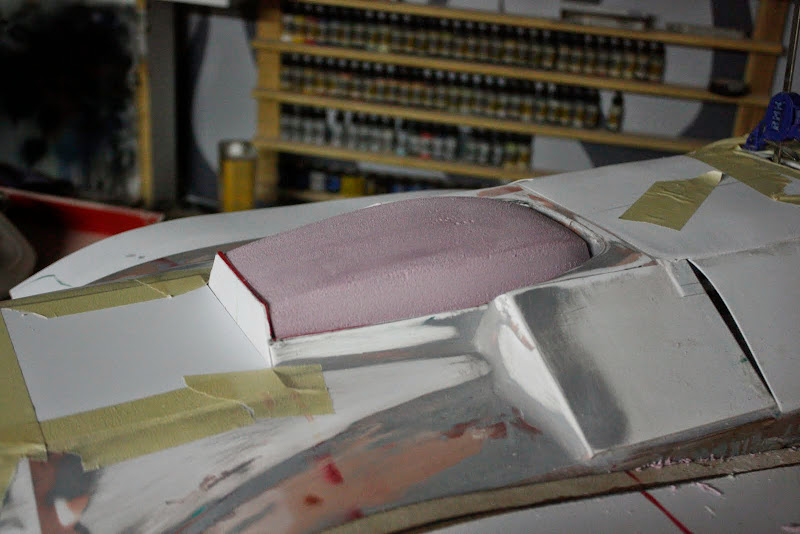 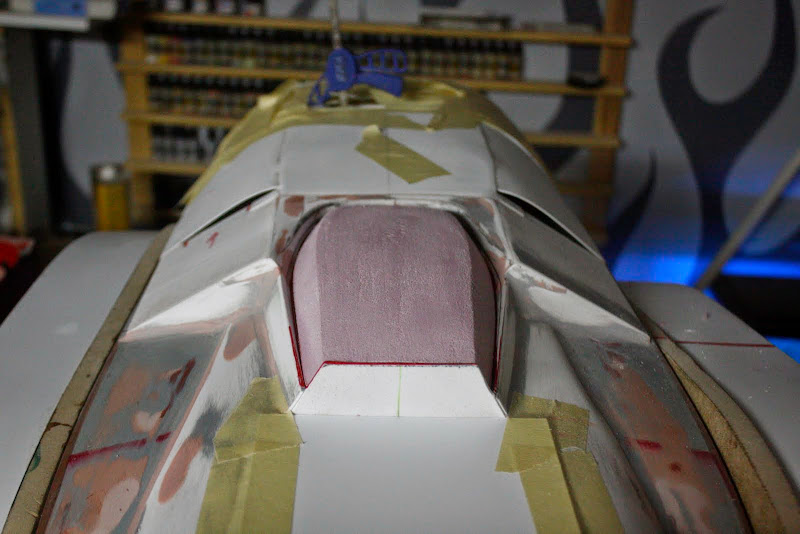 Bondo on the head 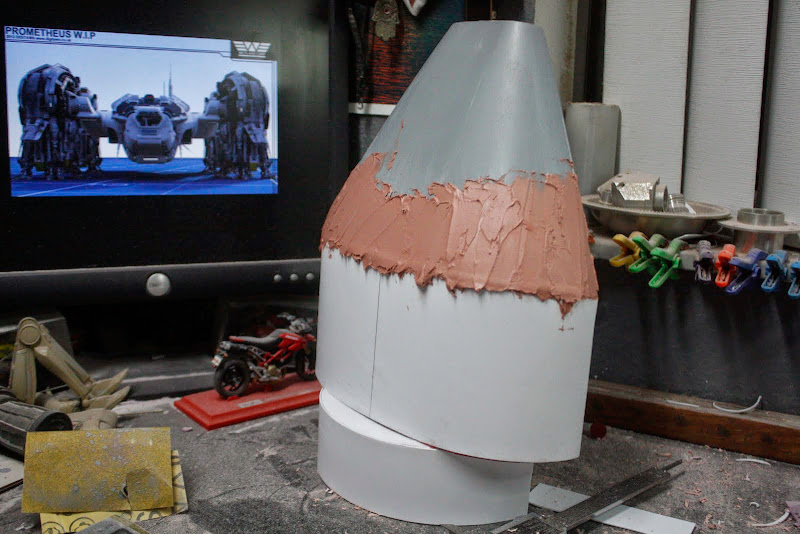 During clean up 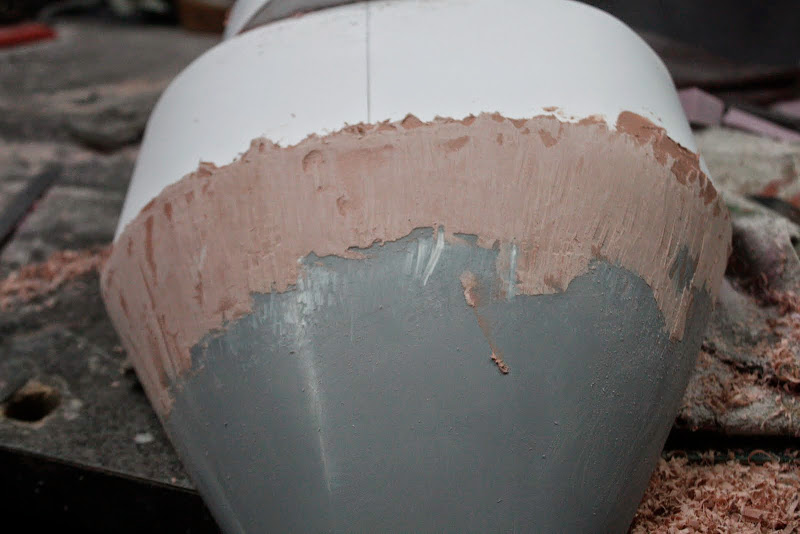 Finished and in position 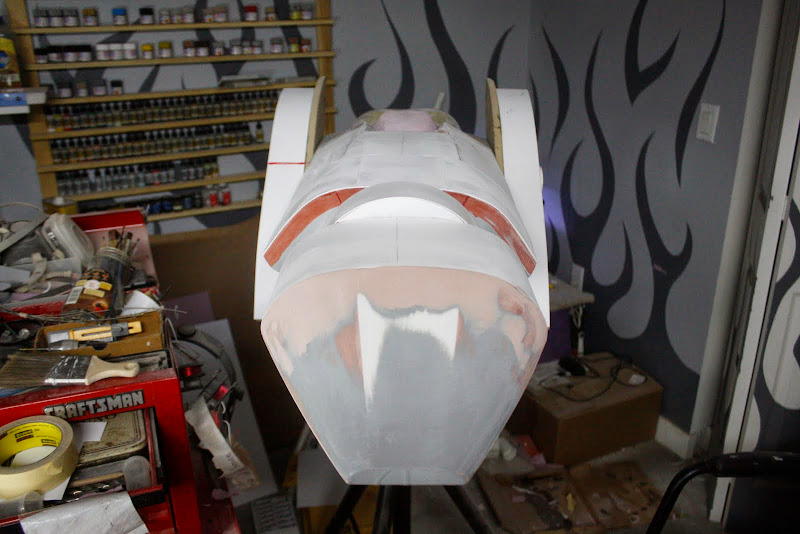 So, i do believe we are very close to primer time, but lets take a look at where we are so far 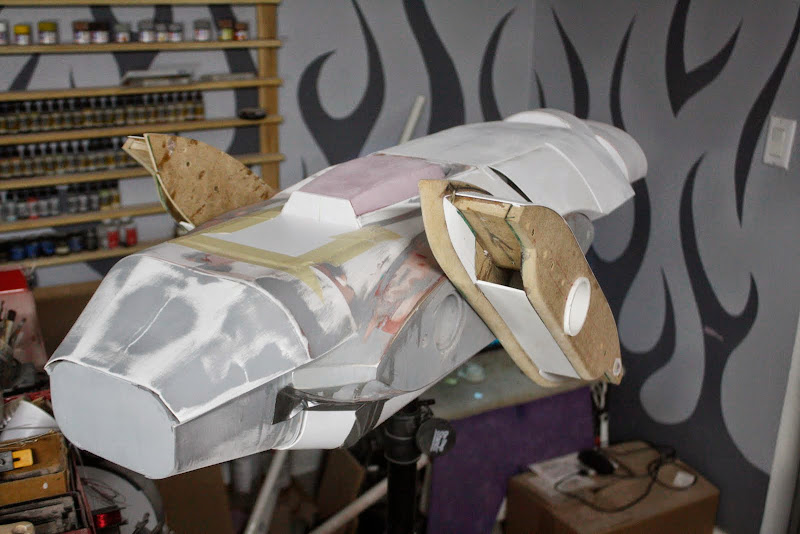  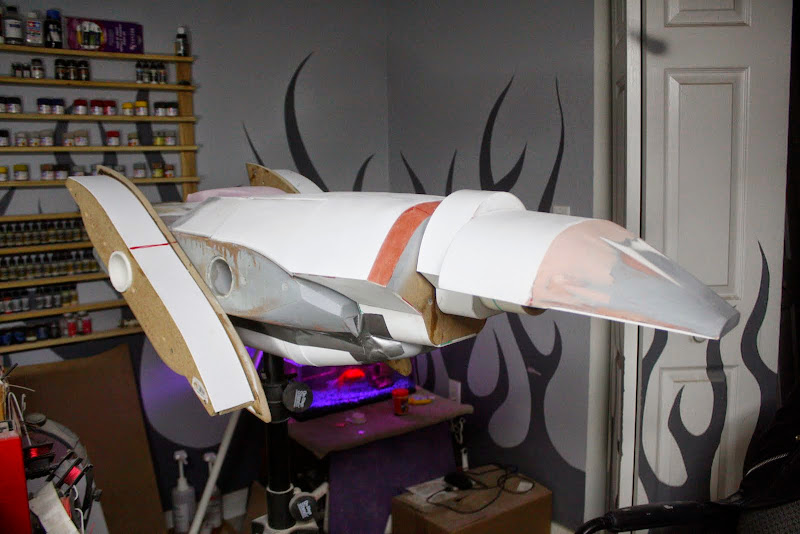 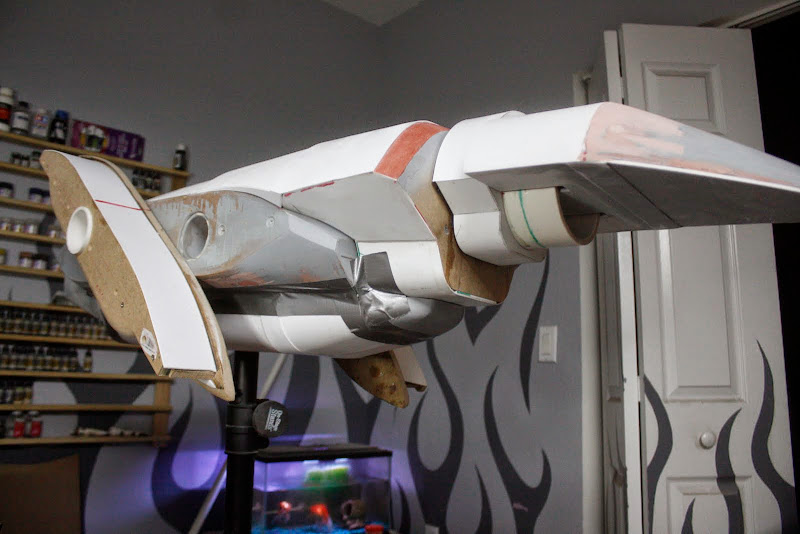  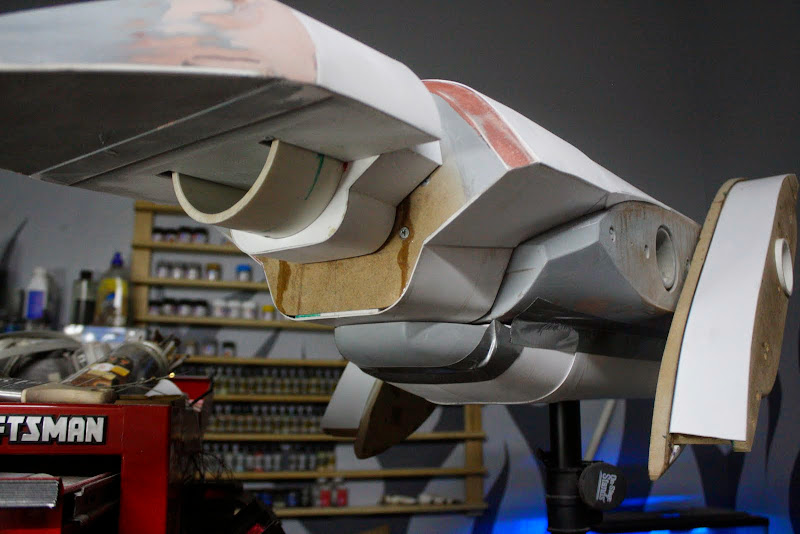 But, that will have to be next time Cheers Gag |
|
|
|
Post by Leon on Feb 17, 2015 21:32:01 GMT -5
Looking forward to seeing this with primer on Gag! Outstanding work so far.
|
|
|
|
Post by deafpanzer on Feb 18, 2015 0:05:16 GMT -5
Man, can't imagine how much dust you have created just for this project. Hope you have one real good shop vacuum... me and my OCD!
Looking great!!!
|
|
thenylongag
Full Member
Sept2013 MoM Winner
Member since: June 2012
Yes, we have 'NO' bananas
Posts: 304
Jun 7, 2012 11:20:57 GMT -5
Jun 7, 2012 11:20:57 GMT -5
|
Post by thenylongag on Mar 1, 2015 14:39:19 GMT -5
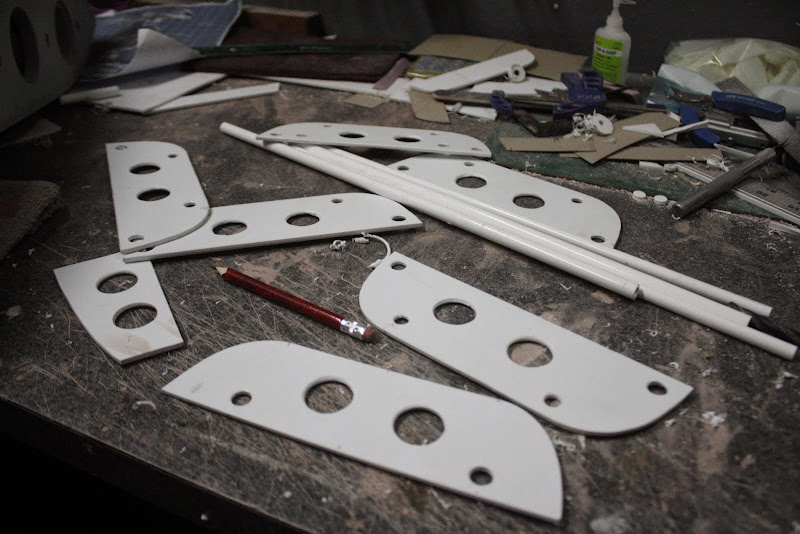
Afternoon Everyone, Thanks for stopping by guys welcome my friends, Not much accomplished the last few days because of a very worrying pain in my right wrist. It feels like bones are grating on bones, very painful, my hand can, at times, be useless. Not good but i have an appointment to see a specialist tomorrow afternoon. Enough negitivity Would you like some cheese with that wine the show MUST go on To the Mancave A wonderful out of focus shot of the head with primer 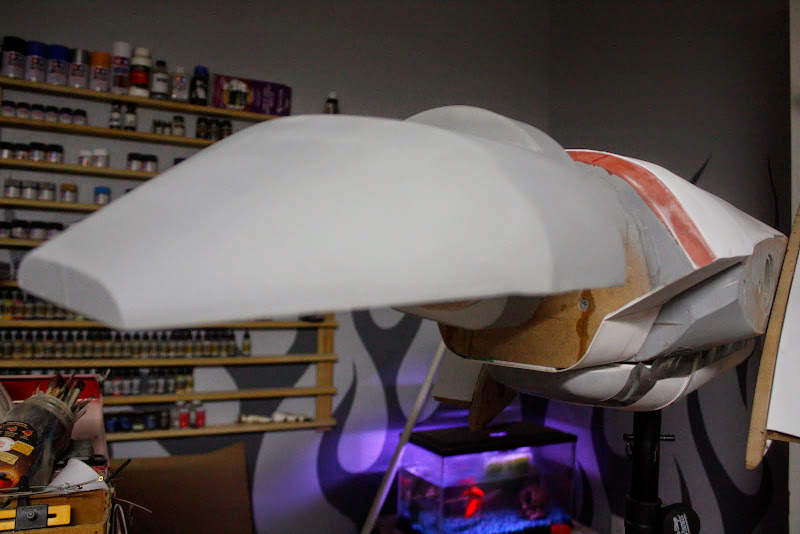 Decided to cut an access hole in the underside assembly Marked out  And cut out with the dremel  Faced the bulkhead with 1mm styrene sheet  Have run out of bondo spot putty so used a bit of squadron i had lying around, mmmm, not so good either 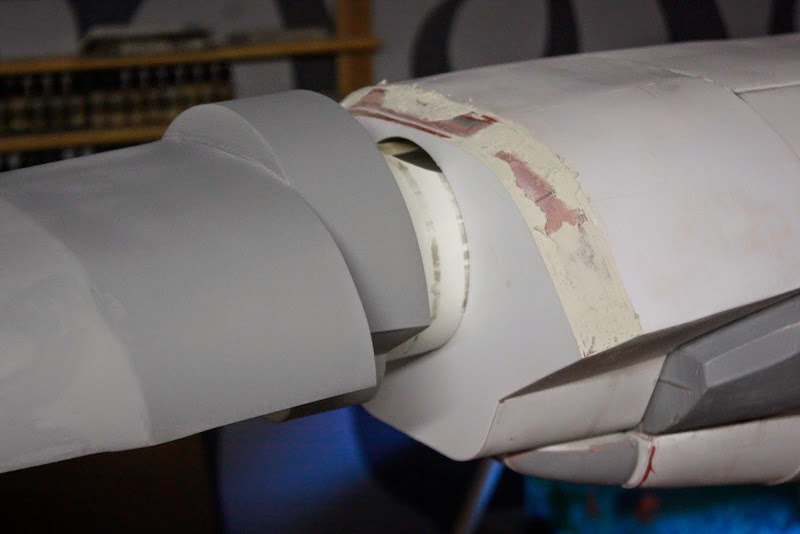 This whole join line has to be filled eventually but that will happen later 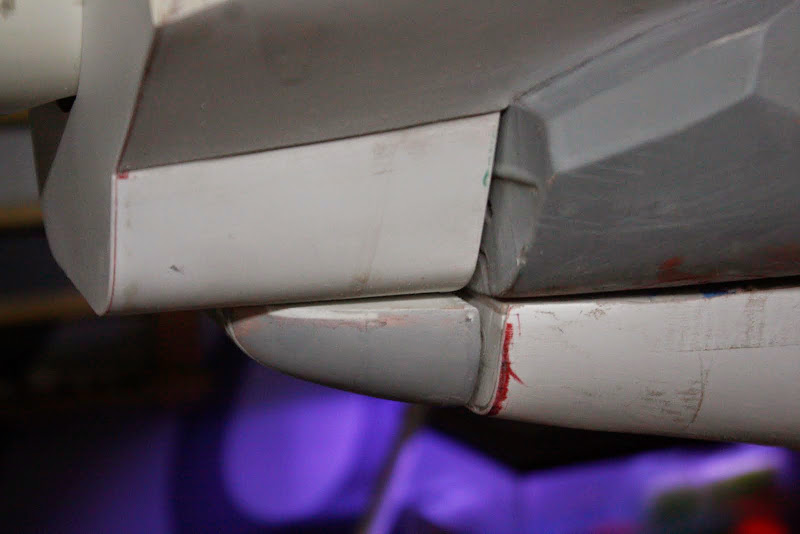 So i decided that it was time to clean the cave ready for final skinning and details, So we went from this....  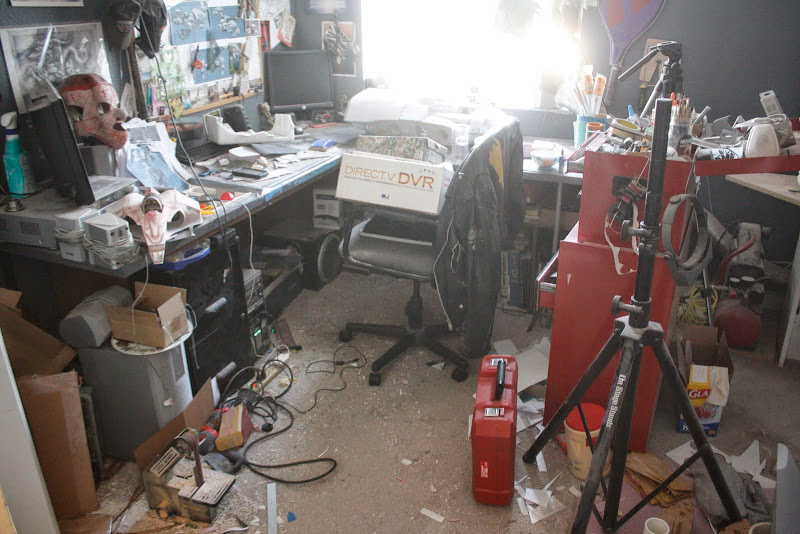   To this..... 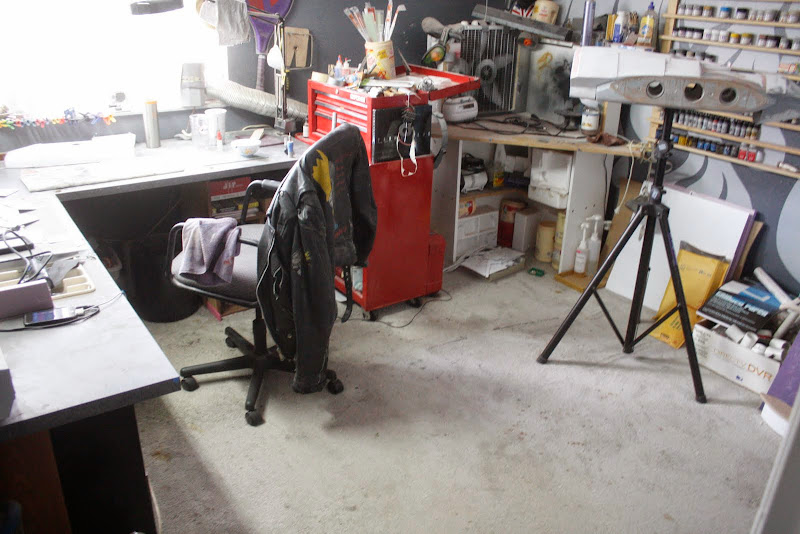 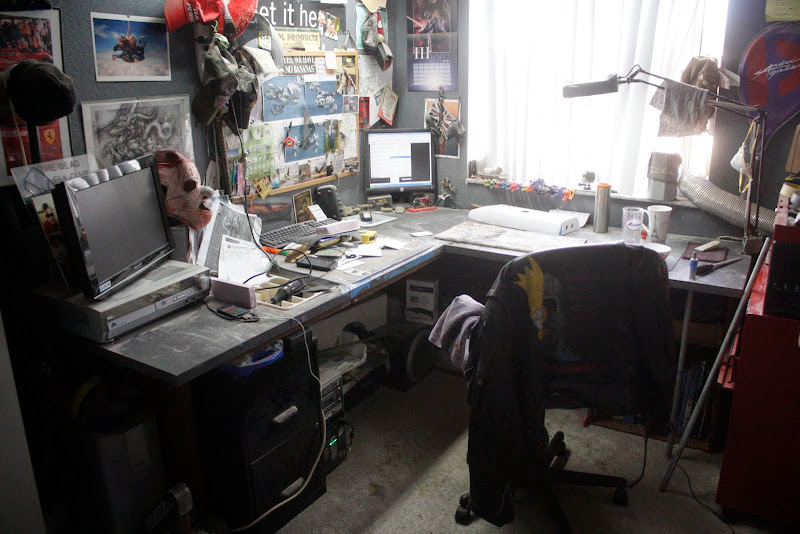 The next stage of the build will be to make the engine plugs, for some parts silicon molds will be made and multiples cast. Now some people would make these on a 3D printer or machine them on a lathe and mill maybe but i don't have those things on hand. I do have access to a machine shop but its called Work, and they don't like you making spaceships when you should be doing their work. I am trying to make these in such a way so maybe i can make a few kits of just the engines to sell at a later date, but i make no promises. But if anyone can offer up any tips to make this process easier for me as this will be my first time casting and molding then that would be great and much appreciated. Suggestions on a good silicon and plastic would be a start. I was going to go with smooth-on, i need a silicon that doesn't need degassing but is strong enough to stand several castings. So the first thing i did was to make a scale drawing of the engine parts, everything scaled from Digitawn's computer renderings 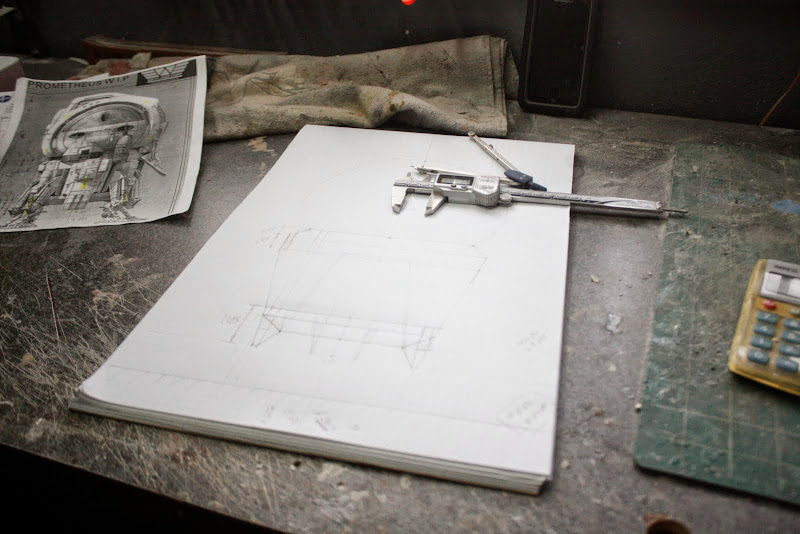 4" diameter tubing from the local DIY store cut on my mitre saw in the garage  Marked 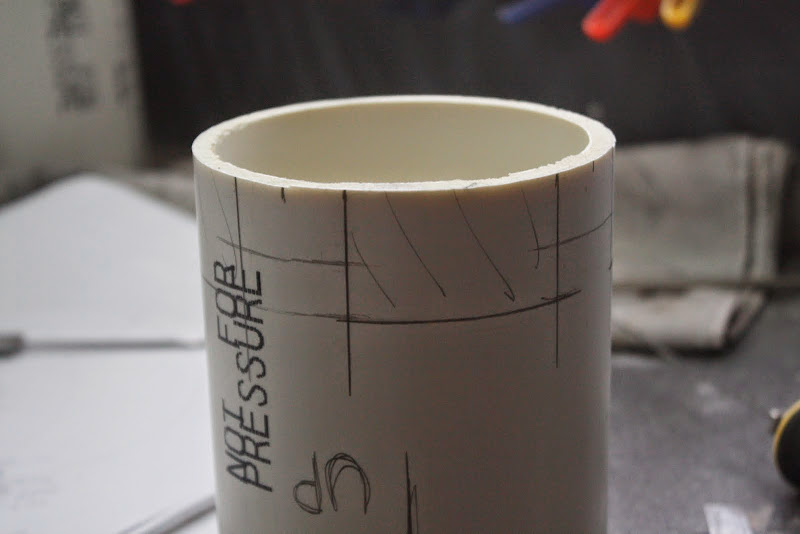 Cut 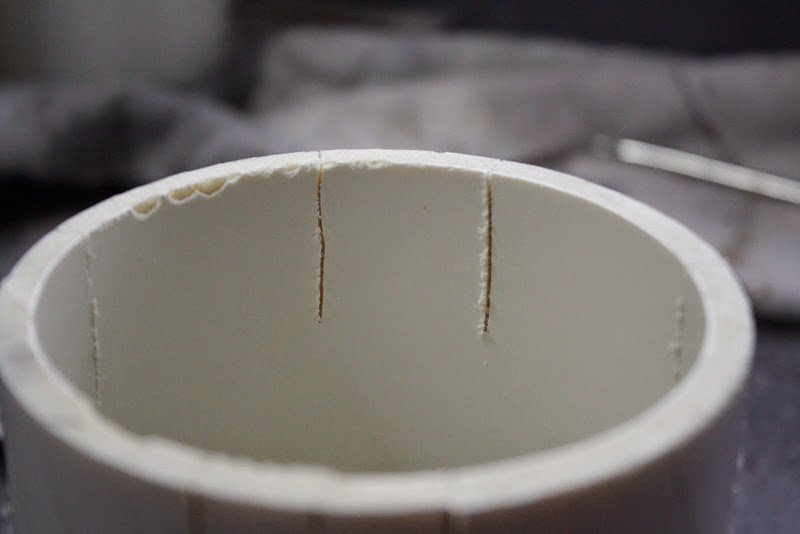 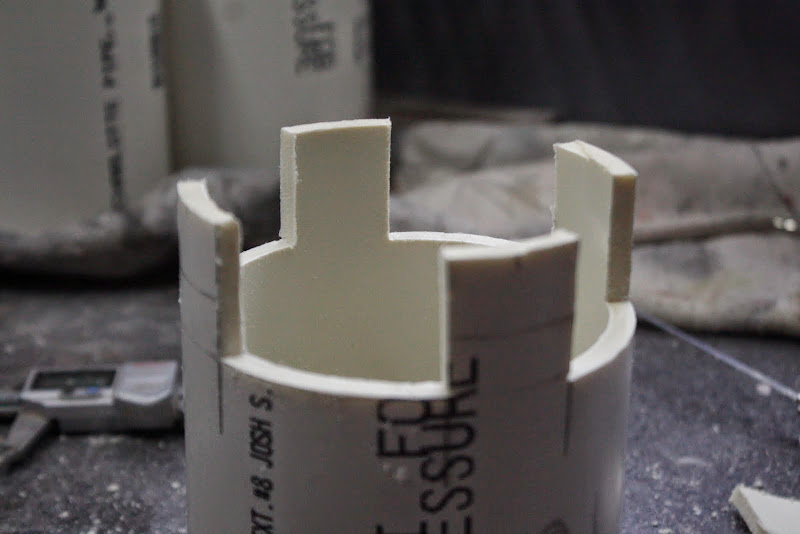 Then started to mark and cut out the different layers for my thruster nozzle from 1/8" and 0.040" styrene 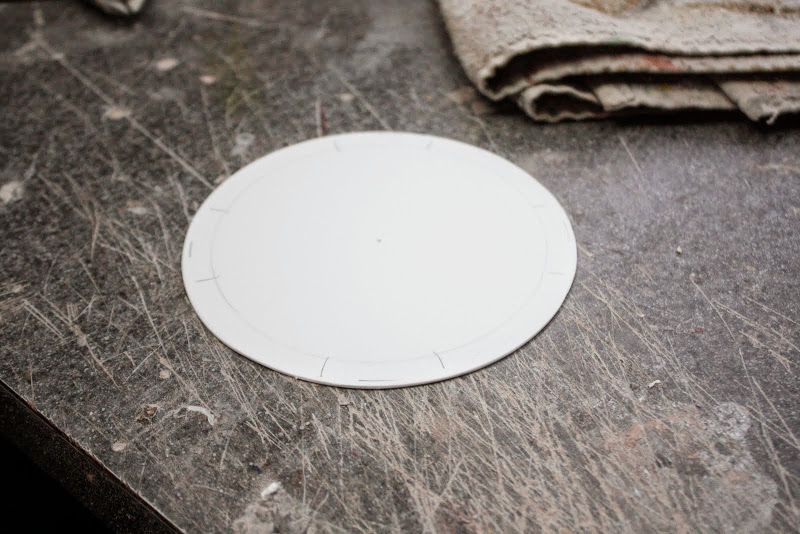 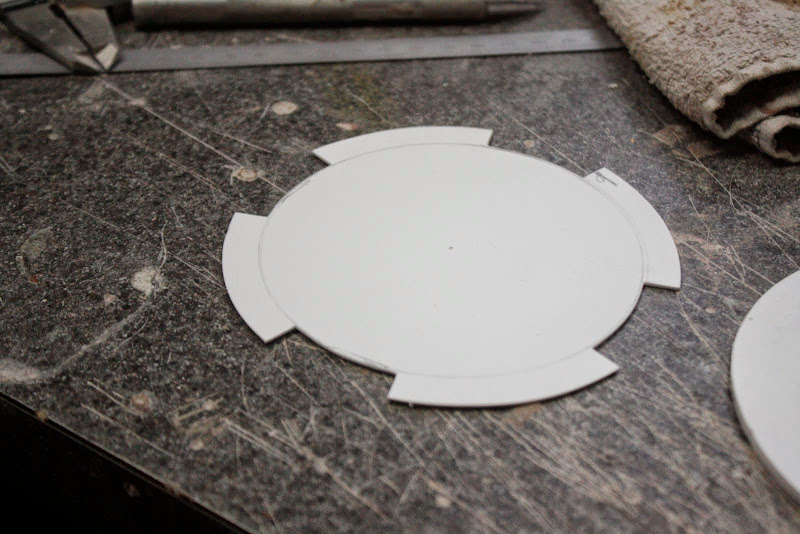 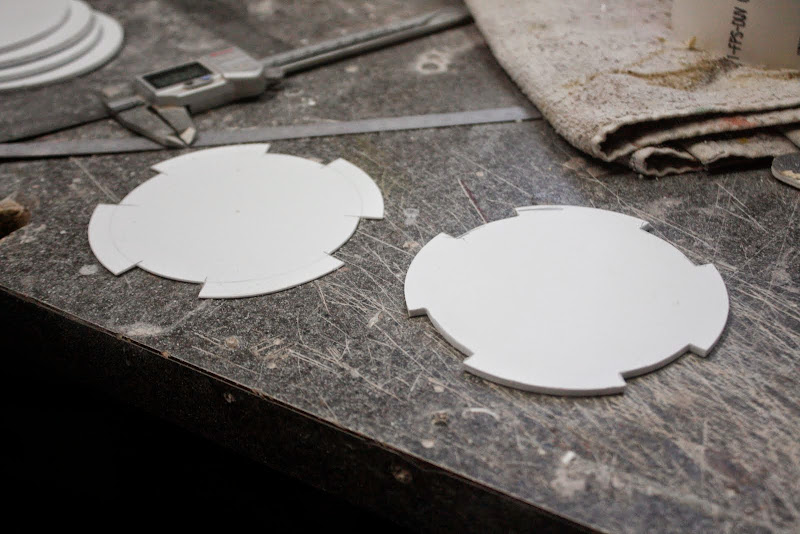 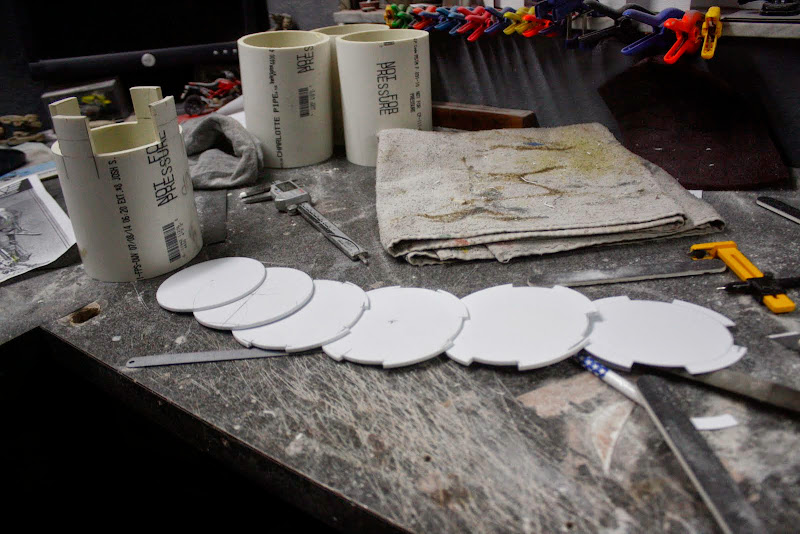 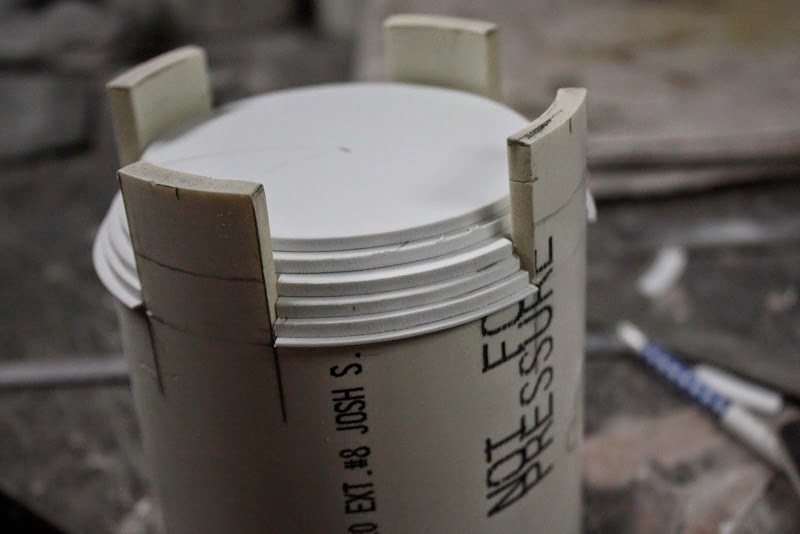 Cut and faced off 6" diameter PVC pipe into 3/4" wide rings 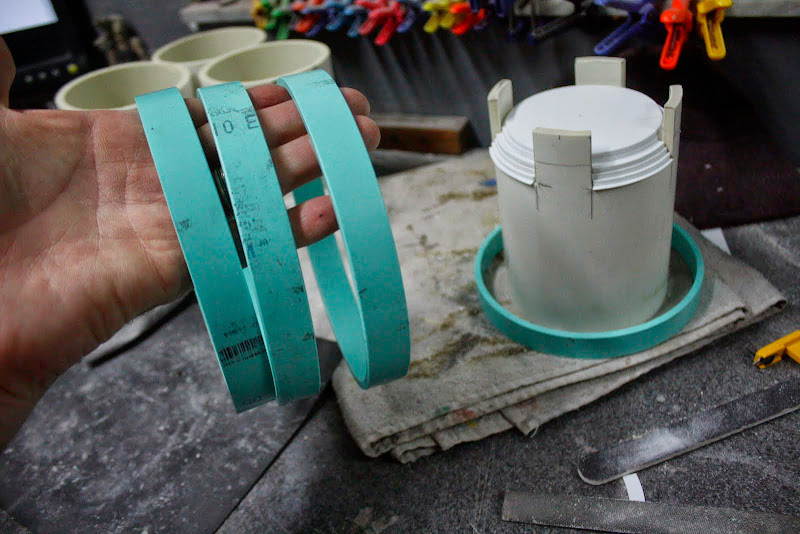 Marked and cut the layers for the top of the engine nozzle from 1/8" styrene sheet 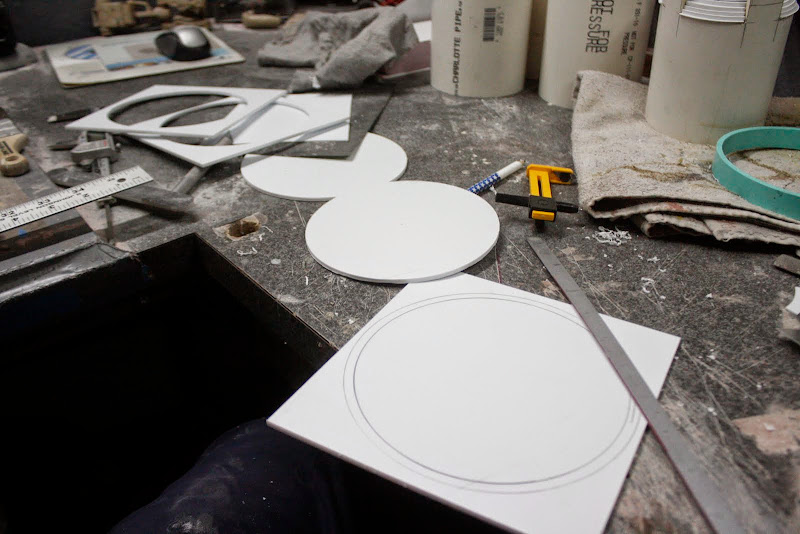   Made a hole through the middle and glued everything together 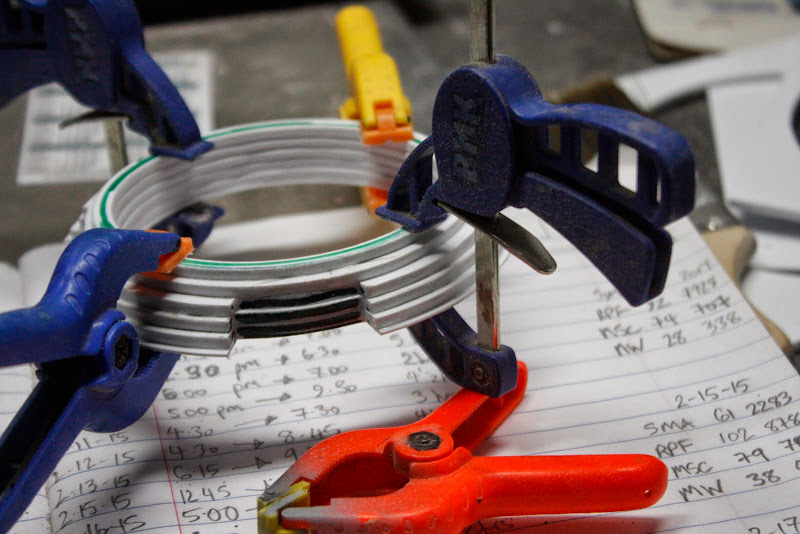 Was going to use one of these cups for the inside but after further analisis i think its too short so will get the taller ones next time i'm at the store 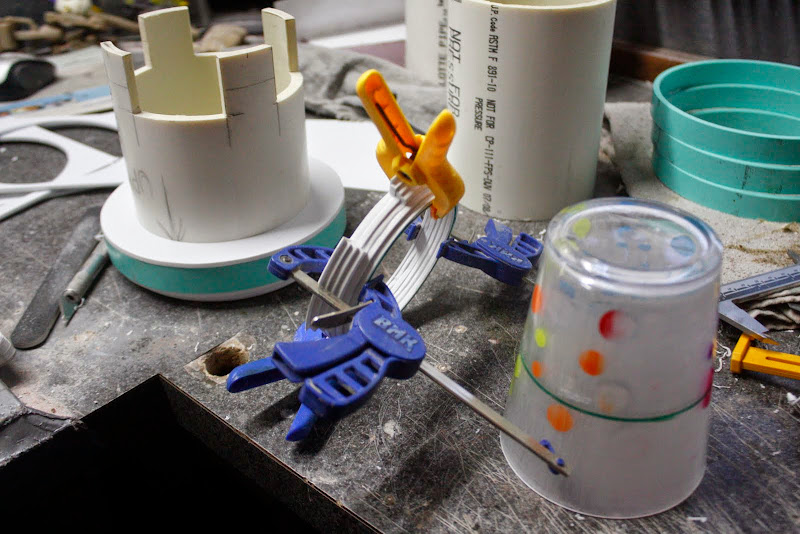 Started to shape the bottom nozzle first using the bastard half round file 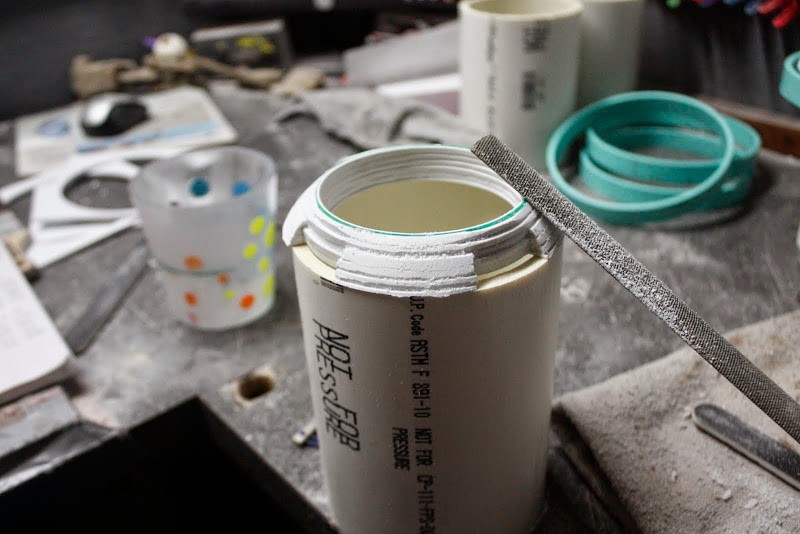 Cleaned with a salon board 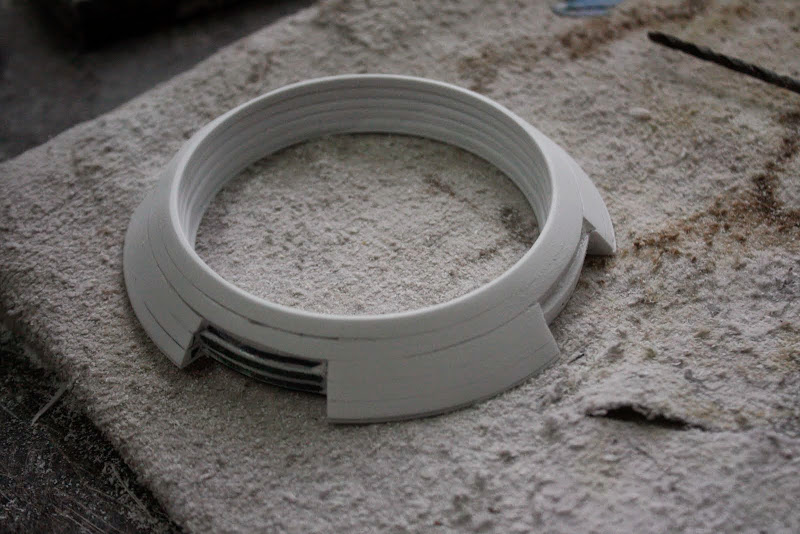 Tapered the end of the tube    And thats it so far Stay tuned for more updates Gagsterman |
|
S e r z h
Full Member
Member since: November 2014
RIP- December 2023
Posts: 650
|
Post by S e r z h on Mar 1, 2015 14:57:29 GMT -5
It's fantastic !!!
Very, very interesting! As if I read a good book or watched a good movie! Good luck!
|
|
|
|
Post by robbo on Mar 1, 2015 15:02:16 GMT -5
Wait till I pick my jaw up off the floor. If I hadn't of seen it with my own eyes I seriously would of though nah, it couldn't happen, but it has
|
|
|
|
Post by Leon on Mar 1, 2015 15:26:21 GMT -5
WOW!!!! Nice start on the engines Gag. Hope it nothing serious with the wrist. |
|
|
|
Post by deafpanzer on Mar 1, 2015 19:08:41 GMT -5
I spot a clean man cave!!! You absolutely have my APPROVAL! As usual stunning updates... my jaw always drop! No kidding...
|
|


 Keep going!!


 I have to agree with Todd on the lighting.