|
|
Post by dupes on Dec 15, 2014 1:26:47 GMT -5
|
|
|
|
Post by TRM on Dec 15, 2014 6:25:29 GMT -5
Nice one Dupes!! You really do pull these out from under a rock!! (was going to say a slightly more less acceptable place....'rock' worked). Looks great! These little one certainly fill the void for ya!!
|
|
|
|
Post by dupes on Dec 15, 2014 7:32:46 GMT -5
Thanks T! This one is actually a good bit larger than some of the 2256/4222 capital ships I've done lately (see pic 1 on the grid)...but 25 resin parts tend to go together a lot quicker than 300 styrene ones if you've got the right tools!  Testing the paint job as a potential on the 38(t). |
|
|
|
Post by tobias5555 on Dec 15, 2014 9:11:51 GMT -5
Really great. I love Star Wars and what you done here.
|
|
|
|
Post by dupes on Dec 15, 2014 10:45:02 GMT -5
Thanks Tobias! Decaling this evening...should have an update tonight.  |
|
|
|
Post by wbill76 on Dec 15, 2014 13:42:45 GMT -5
Ah yes, the Z-95! I remember many hours spent encountering them in PC games from years ago...always the favorite of pirates/smugglers as I recall. Nice work on the little guy there Dupes!
|
|
|
|
Post by dupes on Dec 15, 2014 16:14:29 GMT -5
Good memory, Bill! And exactly why I'm doing this one for a GB (at www.keeperoftheforce.com ) entitled "Scum And Villainy". Going with some Black Sun markings this time around. |
|
|
|
Post by deafpanzer on Dec 16, 2014 0:27:10 GMT -5
Freaking AWESOME! Of course you have my attention! What did you use for the barrels? Metal rod and what was that black thang? They look great!
|
|
|
|
Post by dupes on Dec 16, 2014 9:31:16 GMT -5
Andy - brass rod and brass tube (of slightly larger diameter). The white balance makes that tube look like something other than brass!
|
|
|
|
Post by kaytermarram on Dec 16, 2014 12:09:16 GMT -5
The little rascal seemed to get together real fast! Since I have never seen this kit and to my shame have no idea of a Z-95 I am very curious of the decals you will put on and the final paint job. Indeed!!
Frank
|
|
|
|
Post by dupes on Dec 20, 2014 21:31:49 GMT -5
Frank - it sure did! Not a lot of messing with parts to get things to fit properly...quick to get to the paint booth. Let's see, since last time I got the "dunkelgrau shine" applied via brush, the custom decals applied, then the whole deal flat coated. Started in on the drybrushing, but judging by this pic, I'm going to have to go a bit heavier to get the look I want. 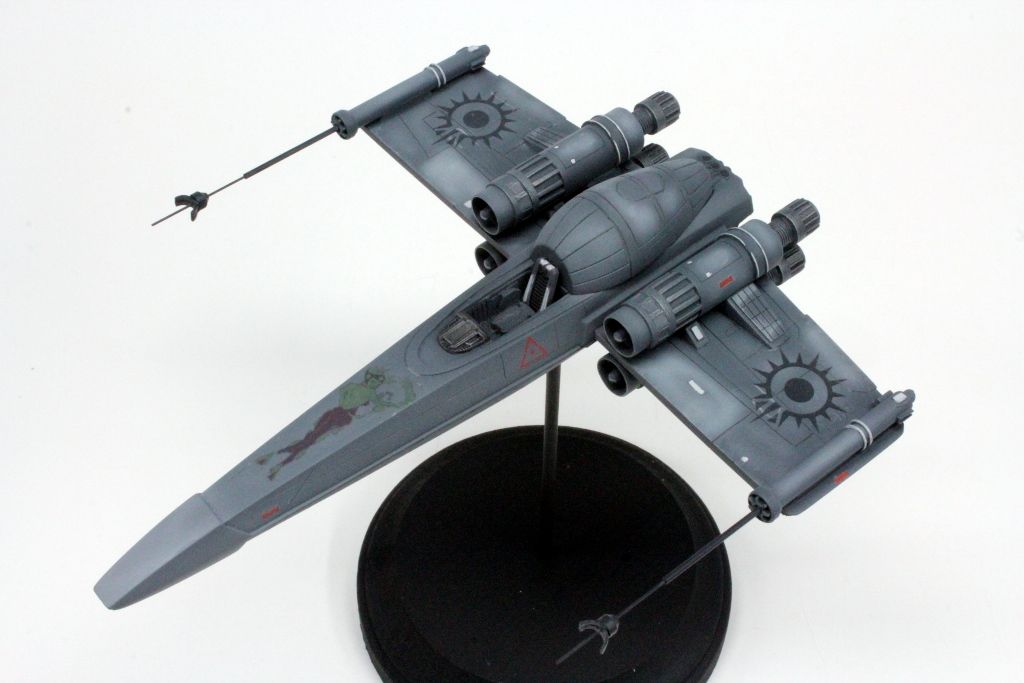 |
|
|
|
Post by wing_nut on Dec 21, 2014 7:54:56 GMT -5
Neat little project. Got nose art too.
|
|
|
|
Post by kaytermarram on Dec 21, 2014 8:00:29 GMT -5
Pros and cons of heavy weathering... I like the flyboy the way he is, but sure, you can add lots more, in different colours and styles. The decals look like those low visibilty thingies seen on airplanes sometimes... Go on and post more pics, hehe!
Frank
|
|
|
|
Post by dupes on Dec 21, 2014 8:17:34 GMT -5
No worries - once she's finished I'll put up a bunch of pics. Won't be long. |
|
|
|
Post by Leon on Dec 21, 2014 8:22:37 GMT -5
Dupes! Don't know how I missed this  ,but it is looking really great.  |
|
|
|
Post by TRM on Dec 21, 2014 8:59:39 GMT -5
Looking great Dupes! Cross the line brotha'!!
|
|
|
|
Post by dupes on Dec 22, 2014 10:25:05 GMT -5
Thanks Leon and Todd! More progress made, but the wife absconded with the camera...will get it back tonight so I can snap some pics. |
|
|
|
Post by Deano on Dec 22, 2014 20:51:57 GMT -5
You are nailing this one Dupes , looking great so far!
|
|
|
|
Post by dupes on Dec 23, 2014 8:06:22 GMT -5
Thanks Deano!
Definite update today (I mean it this time!). Got the camera back and a bunch of work done.
|
|
|
|
Post by wbill76 on Dec 24, 2014 14:13:00 GMT -5
Looking good with the paint and markings on Dupes. Looking forward to the next round on this baby.
|
|
|
|
Post by dupes on Dec 24, 2014 18:16:26 GMT -5
Here it is, Bill! Did I say I was going to put up a pic yesterday? I really meant today. Heh. More drybrushing all around, a blue/black pinwash applied (AK's Pz. Grey-specific bottle), and the vacuform canopy sanded down to fit. Not much left on this guy...maybe a bit o' streaking and/or blast marks, glue the engine nozzles into place, and work out some sort of pilot (I have one on the way, just not sure when it's going to get here). 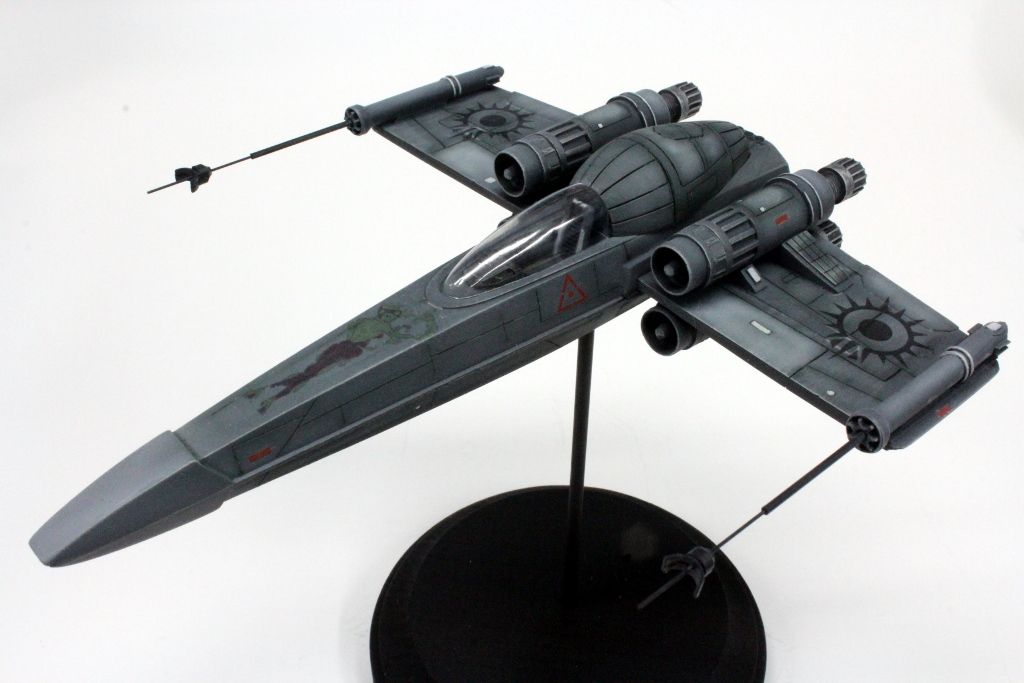 |
|
|
|
Post by deafpanzer on Dec 24, 2014 18:18:02 GMT -5
Looking great... five or six more days to go!
|
|
|
|
Post by dupes on Dec 24, 2014 18:33:49 GMT -5
I know it! Will definitely have it done in time...may just have to "sub" in a pilot to make the deadline (I've got one done for my Cloakshape fighter which is also nearing the finish line).
|
|
|
|
Post by Leon on Dec 24, 2014 20:51:45 GMT -5
Looking really good Dupes! Nice work on the pinwash and drybrushing. |
|
|
|
Post by dupes on Dec 25, 2014 16:28:22 GMT -5
Thanks Leon! I'm liking how this guy is turning out. Not much left to do! |
|
|
|
Post by dupes on Dec 26, 2014 18:48:19 GMT -5
|
|
|
|
Post by deafpanzer on Dec 26, 2014 20:18:14 GMT -5
Man, it looks fantastic!!! What a huge transformation since the last post!!!
|
|
|
|
Post by dupes on Dec 26, 2014 21:59:23 GMT -5
Thanks Andy! Glad that all of the "little details" came through in the pics...I was a little worried. Got another one going up in a few minutes. |
|
|
|
Post by kaytermarram on Dec 28, 2014 15:30:56 GMT -5
Yeah, looks really awesome! Great, all the small surfaces look well shaded and lighted and the whole kit is finely weathered, not too much, not too little. The whole "low visibility" is well done. Wanna hit him with a gun shot? Aim for the pilot, harhar! The overworked laser cannons look great!
Frank
|
|
|
|
Post by dupes on Dec 28, 2014 20:52:24 GMT -5
Thanks Frank! Yeah, that guy will be replaced ASAP...withOUT an orange jumpsuit, I promise!
|
|


 ,but it is looking really great.