|
|
Post by wing_nut on Jan 1, 2015 15:22:36 GMT -5
Lets get READY TO RRRUUMMMMMMBBBBBBLLLLLLEEEEESince Andy was dogging Bill during his build and I expressed an interest in the overall coolness of the sub Bill thought it would be a good idea if we went toe to toe. So I whacked Andy with my gauntlet and, well, here we are. And to give Bill his proper credit, the duel is named for him. "Kapitän Zupfen's Rache" or "Captain Plunk's Revenge". But to keep it light I went with the a more literal "plunk" cuz zupfen seems a cool word to use. Andy, when ever your ready my friend...  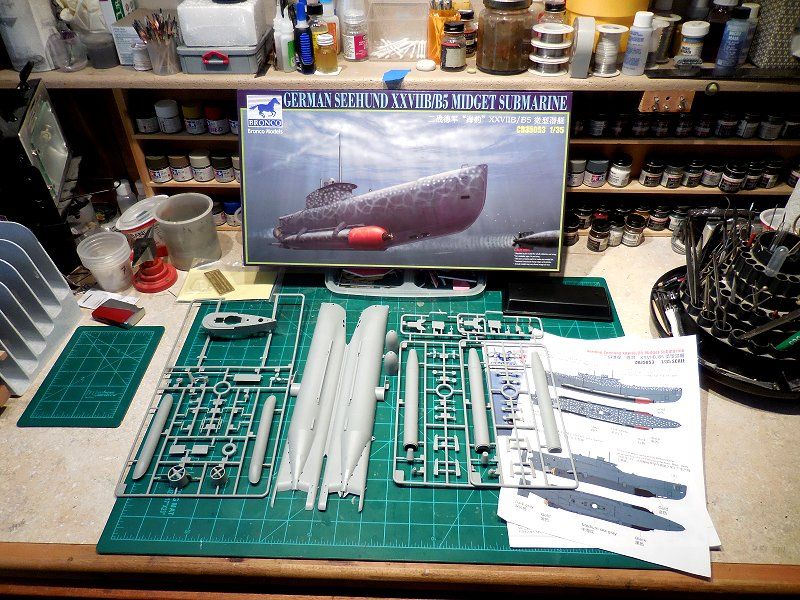 |
|
|
|
Post by Leon on Jan 1, 2015 16:38:13 GMT -5
I am so looking forward to seeing this duel.  |
|
|
|
Post by TRM on Jan 1, 2015 17:46:52 GMT -5
Outstanding way to start off the year!!! Let the fun begin guys!!!  Sorry...couldn't resist playing around a little!!  |
|
DeafStuG
Full Member
  
Member since: May 2013
..
Posts: 1,283 
|
Post by DeafStuG on Jan 1, 2015 19:03:40 GMT -5
Nice start.
|
|
|
|
Post by deafpanzer on Jan 2, 2015 2:45:01 GMT -5
Can't wait... I should be ready on Sunday. I am so close at finishing my Little Bird... stop by if you haven't seen it. LOL
|
|
|
|
Post by wing_nut on Jan 2, 2015 8:44:19 GMT -5
Little Bird? I was wondering here you've been.
|
|
|
|
Post by 406 Silverado on Jan 2, 2015 10:28:47 GMT -5
This should be very cool.
|
|
|
|
Post by deafpanzer on Jan 2, 2015 10:57:17 GMT -5
Little Bird? I was wondering here you've been. I did my best to hide from you... LOL |
|
|
|
Post by wbill76 on Jan 2, 2015 20:59:09 GMT -5
Looking forward to this one for sure! Let the games begin.  |
|
|
|
Post by wouter on Jan 3, 2015 5:11:53 GMT -5
Nice one, will be interested to follow this one. Saw one in the flesh last year in Koblenz, pretty impressive stuff
Cheers
|
|
|
|
Post by wing_nut on Jan 3, 2015 11:02:17 GMT -5
|
|
|
|
Post by Leon on Jan 3, 2015 12:02:49 GMT -5
Nice start on the fish Marc.The prop blades and arming props look great.
|
|
|
|
Post by deafpanzer on Jan 4, 2015 11:14:31 GMT -5
Yep! I am ready... figured Marc wouldn't wait for me. LOL  You know my rule... figure(s) for all builds if possible. Resin figure of U-Boat sea man from Royal Model.  Glad to see there is not too many parts this time.  I am planning a small diorama for this too. LOL |
|
|
|
Post by wing_nut on Jan 4, 2015 11:30:29 GMT -5
A dio? With figures? You? No way!  And technically, you finished your bird on Saturday and I started the fish on Saturday. So we are gastronomically equal. |
|
|
|
Post by deafpanzer on Jan 4, 2015 11:33:03 GMT -5
LOL It will be a simple diorama... the sea man, couple of fuel drums, and maybe wood crates? Anybody know if somebody makes a resin figure of German female civilian in a bikini too?  |
|
|
|
Post by TRM on Jan 4, 2015 11:36:33 GMT -5
I think they sell medication for that!!  Nice work on the fish Marc! Props look really cool!! Andy...well, you are just nuts anyway!!  Seriously, a great thought with the dio! Both of these are shaping up to be awesome!! Keep it going fellas!! |
|
|
|
Post by wing_nut on Jan 4, 2015 15:51:39 GMT -5
Girls in bikinis? Can't help ya. But I got crates if you need a few.
|
|
|
|
Post by deafpanzer on Jan 4, 2015 18:44:34 GMT -5
LOL! Thanks for the offer... have plenty of wood crates. Haven't started yet... honey do list I was slammed today. LOL
|
|
|
|
Post by wing_nut on Jan 4, 2015 18:57:39 GMT -5
No worries. I am giving you some catch up time. Today was the last day of my 1st ever winter vacation and went out in style. A few beers while I prepped dinner then a couple of martinis while it cooked. No sharp tools in my hands tonight LOL And I have a tip for you in the build but I have to wait for the vodka to dissipate so I can remember what is is.  It had something to do with the fish props I think.  PS Holy guacamole did I just give the spell checker a major workout. |
|
DeafStuG
Full Member
  
Member since: May 2013
..
Posts: 1,283 
|
Post by DeafStuG on Jan 4, 2015 19:06:33 GMT -5
Andy, Nice start, Have a good fun build!
|
|
|
|
Post by deafpanzer on Jan 4, 2015 19:22:58 GMT -5
Did somebody say martinis?!?!? I love martinis... one day we will drink over martinis I am positive it will happen.
Likewise my week long vacation ends today. ;( Back to routine tomorrow...
|
|
|
|
Post by wbill76 on Jan 4, 2015 20:13:27 GMT -5
Nice start to the fish there Marc! Looks like the perfect way to wrap up the winter break for sure.  Be careful with those PE 'whiskers' on the war heads...mine had a disturbing tendency to want to let go as time went on during handling/painting but I was fortunate in that they were found each time and safely reattached.  |
|
|
|
Post by wing_nut on Jan 5, 2015 7:38:34 GMT -5
Heed Bill's advise regarding those whiskers. Don't ask how I know.  Get parts B2, B10 and B11 trimmed, fit and glued together as a sub-assembly before attaching the extra blades. I added the blades to B10 and B11 1st. Extremely fiddly once they're on and if you need to do any fit adjustments it will come to no good. Once more, didn't ask how I know  . In my case I made it even my fiddly by thinning the blades and reducing the gluing surfaces by at least half. One of the blades popped off and vanished. Still can't figure out how such a small piece with so little mass can drop from a height of about 12" and go completely missing. Cleared the entire bench and vacuumed the carpet... all the parts finding trick. GONE! Made a new on from one of the parts number tabs. 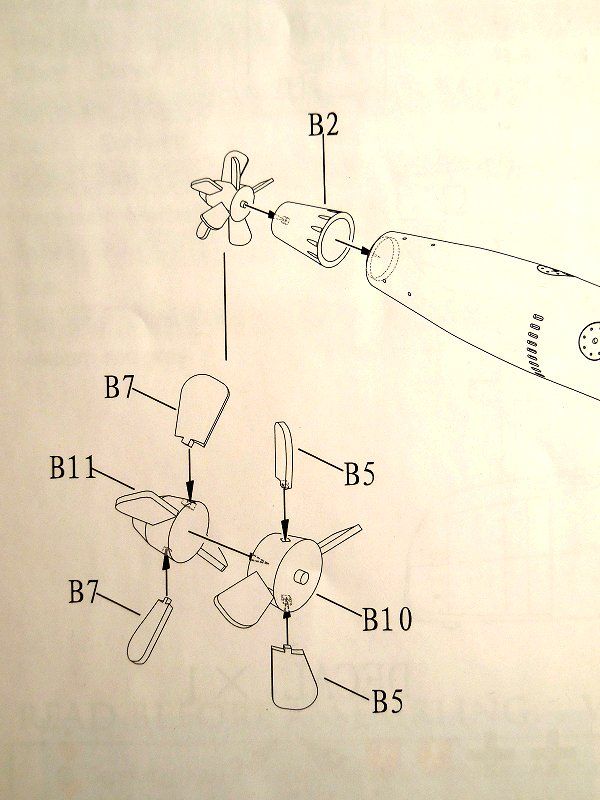 |
|
|
|
Post by Leon on Jan 5, 2015 17:13:36 GMT -5
Heed Bill's advise regarding those whiskers. Don't ask how I know.  Get parts B2, B10 and B11 trimmed, fit and glued together as a sub-assembly before attaching the extra blades. I added the blades to B10 and B11 1st. Extremely fiddly once they're on and if you need to do any fit adjustments it will come to no good. Once more, didn't ask how I know  . In my case I made it even my fiddly by thinning the blades and reducing the gluing surfaces by at least half. One of the blades popped off and vanished. Still can't figure out how such a small piece with so little mass can drop from a height of about 12" and go completely missing. Cleared the entire bench and vacuumed the carpet... all the parts finding trick. GONE! Made a new on from one of the parts number tabs.  Been there done that Marc!  It will turn up when your not looking for it.  |
|
|
|
Post by deafpanzer on Jan 6, 2015 2:08:05 GMT -5
Be careful with those PE 'whiskers' on the war heads...mine had a disturbing tendency to want to let go as time went on during handling/painting but I was fortunate in that they were found each time and safely reattached.  No kidding... one flew off once already tonight but found it. LOL |
|
|
|
Post by deafpanzer on Jan 6, 2015 2:10:57 GMT -5
Marc, oh boy, I am glad I am not alone... those little prop blades were feisty bastards!!! Felt like if I had to pour lots of glue to make them stay attached! LOL
Looking forward to your update!
|
|
|
|
Post by deafpanzer on Jan 6, 2015 2:19:21 GMT -5
Had two great nights of bench times... I have to say I am impressed with this kit except for the propellers. Like Marc did, it was necessary to thin those blades to make them look more realistic. Only the right one has been sanded...  Mini-sub glued... very good fitting!  Torpdoes are pretty done... I found it funny that there were more parts for those two than the mini-sub itself. LOL  I am leaning toward to this scheme... dig the blue & red torpedoes I think.  Marc, have you decided which one you are going for? |
|
|
|
Post by wing_nut on Jan 6, 2015 9:33:28 GMT -5
Ahoy Andy. You are really "sailing" along. You gotta be done, or close to it, with actual building. I start the hull tonight. As far as the scheme I am going spotted one that Bill did. The difference will be in the camo application. Some time ago I saw an He 219 "UHU" done with a reverse applied camo and have wanted to try it eve since. I am going to paint the white, or light gray, first and apply various sized balls of blue tack then paint the dark gray. If Bill can go 5 hours with an AB I can roll a few hundred balls of tack. The torpedoes also gave me the opportunity to try something I've been using to metalize small parts. I've been curious how it would look on a larger scale like an aircraft. It uses MM buffing metalizers. For the smaller parts I actually just dip them in the jar, this time I sprayed, but the trick is in the buffing. To get into the nooks and crannies I put a pointed cotton swap in the Dremel and use it as a buffing wheel. Sanding, priming with Mr. Surfacer and then a sanding with 4000 micro mesh gives a super smooth surface. Buffing steel was applied. The swap it never perfectly round so when you're buffing at a lowish speed the tip sort of bounces on the surface. It buffs sort of unevenly and leaves tonal variations. Sadly they don't show to well in the photos. The more you buff and the heavier the build up on the swab, the better. Next time I will spray/buff some scrap to get there quicker.  The front has fish has not been buffed yet. You can see the variations in the surface a little on the back one between the center and right access hatch.  This also makes the surface much more durable. Maybe not as good as Alclad but way better than the reputation the MM metalizers have gotten. Weathering is done with caulk pastels ground with a mortar & pestle as fine as talc and rubbing it into the surface with a brush. Buff as before. A wash is made with the pastels with water and a drop of liquid soap to make of flow. This is applied around the recessed detail and then buffed after dry. The hatches and band near the rear were masked and sprayed with buffing magnesium for some contrast. This was done back at the beginning with the original painting. 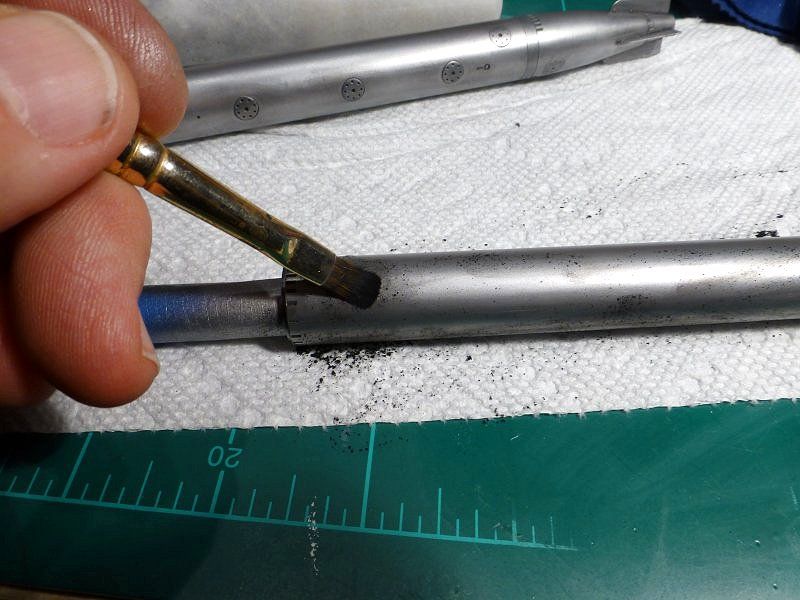 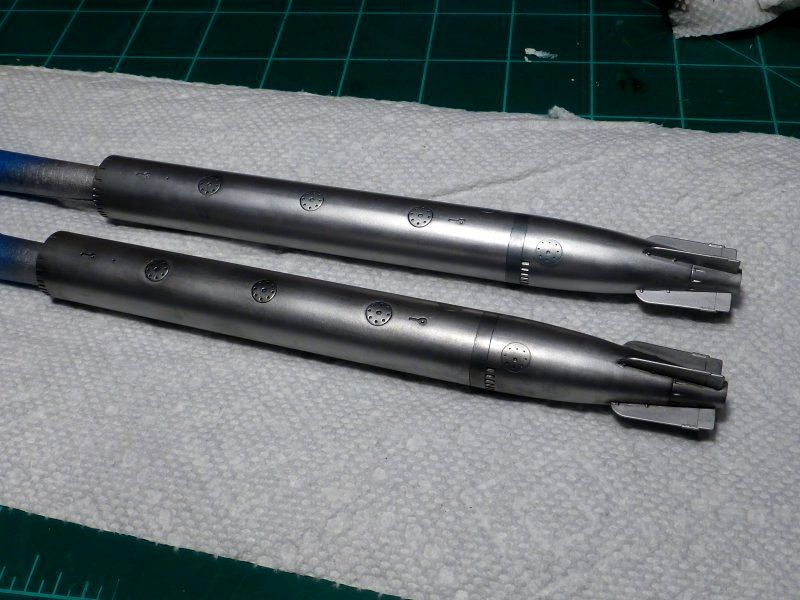 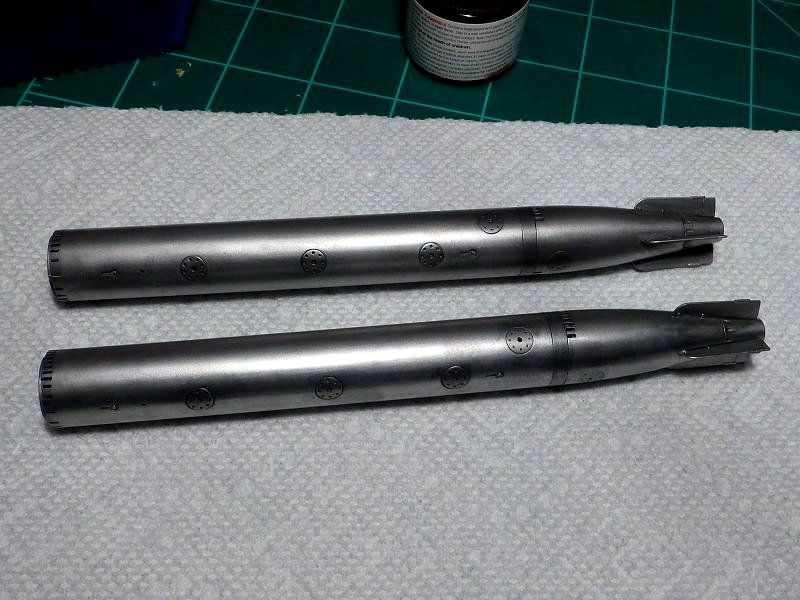 And the finished torpedos. 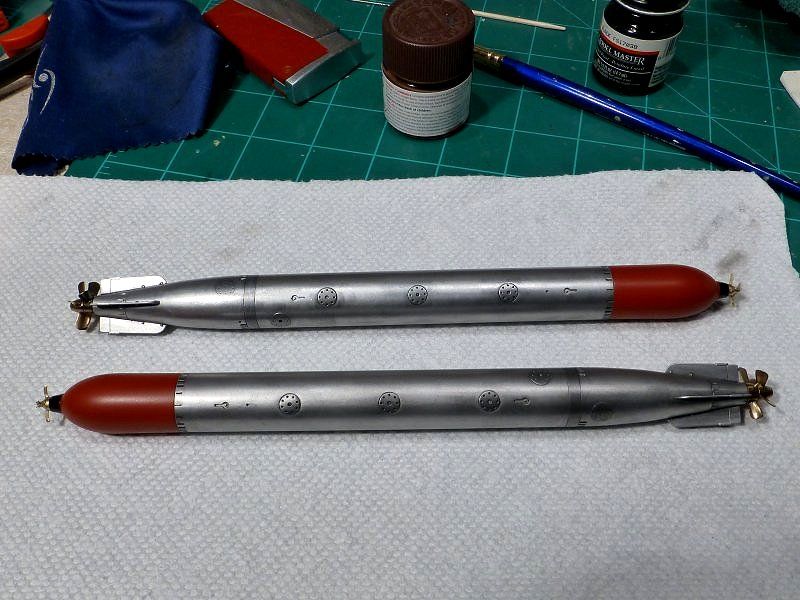 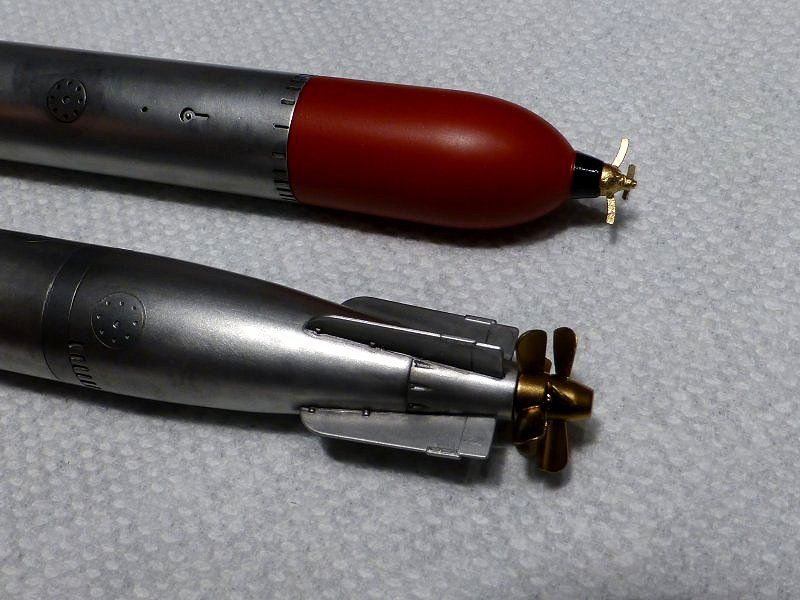 |
|
|
|
Post by wbill76 on Jan 6, 2015 13:54:48 GMT -5
Some nice progress on both fronts! Those fish are looking good after the buffing treatment Marc, nice!
Just noticed something that I perhaps missed earlier, have you opened up the mounting holes in the torpedo bodies for the support arms to attach to for the fish? Bronco molded them as handed openings (left vs. right) on the torpedoes and the mount tabs on the arms aren't round, they're actually kind of rectangular and are a tight fit as a result. If not, it's going to be a pain to do that with them fully assembled.
|
|
|
|
Post by deafpanzer on Jan 6, 2015 14:21:57 GMT -5
Marc, your scheme sounds great... go for it!!! The torpedoes look great! I hope to paint them tonight...
Bill, saw that I missed that part last night. LOL Gonna figure it out tonight I probably will drill the hole from outside. Never a dull moment in modeling...
|
|