johnt
Full Member
   Feb 2012 MoM and 2012 Model of the Year Winner
Member since: November 2011
Posts: 1,174
Nov 15, 2011 5:38:32 GMT -5
Nov 15, 2011 5:38:32 GMT -5
|
Post by johnt on Jun 26, 2015 10:25:42 GMT -5
Looks great so far!
Cheers
JT
|
|
|
|
Post by wbill76 on Jun 26, 2015 14:43:56 GMT -5
Pond looks good from here!  |
|
coro69
Full Member
  
Member since: January 2015
Posts: 351 
|
Post by coro69 on Jun 28, 2015 16:37:31 GMT -5
|
|
|
|
Post by Leon on Jun 28, 2015 17:02:01 GMT -5
WOW!!!! Great job on the pond Coro.   |
|
|
|
Post by deafpanzer on Jun 29, 2015 10:07:12 GMT -5
Love the pond! Bet you will add a fishing pole next...
|
|
|
|
Post by wbill76 on Jun 29, 2015 12:50:55 GMT -5
Pond looks cool!
|
|
coro69
Full Member
  
Member since: January 2015
Posts: 351 
|
Post by coro69 on Jun 29, 2015 14:56:21 GMT -5
deafpanzer do not tempt me t add more and more details... but wait... a fishing pole... hmmm... :-) yes so far the water looks quite good. but i feel the surface is to smooth.. i have to think how i can add some small ripples on it...
|
|
k1w1
Full Member
  
Member since: February 2015
Posts: 873
Feb 18, 2015 8:07:41 GMT -5
Feb 18, 2015 8:07:41 GMT -5
|
Post by k1w1 on Jul 15, 2015 7:02:34 GMT -5
Your water looks really good. I am still looking for a good product to use for water. I am about to experiment with resin. I tried the Woodlands Scenic one but it seems to get drawn up on to the plant life and anything else protruding from the water. On the second to last of your photos the bottom of the reeds look wet and also the ground surrounding the pond. Is this from the product seeping up ?.
Making ripples on the water surface - I am no expert but have seen clear silicone used and also on one of the Woodlands Scenic tutorials - probably on You tube ( should be easy to find on you tube or Woodlands Scenic site ) they show one of their water products being poured on to the surface to make circular ripples - looked good. May be worth while for you to watch it. |
|
coro69
Full Member
  
Member since: January 2015
Posts: 351 
|
Post by coro69 on Jul 17, 2015 17:29:57 GMT -5
k1w1: yes everything looking wet around the pond is from the capillary effect on the "water"... i primed it with one go of the water beforehand to reduce or maybe to eliminate this effect. but i made tthe mistake to pour more fluid than primed area into the pond... damn... ;-) to get ripples or waves onto the magic water you have to do it afterwards with some differnt product. the producer of magic water by himself suggest some woodland scenics product or similar... but so far i am totally happy with working with the product. it doesn't smell, it is easy in handling and it looks really good... but better leave it some time longer drying than suggest... ;-) when dried it keeps a rubberish consistence, so you can only cut it but not sand it... so better try to get nice edges in the first go... ;-) i have to do some homework on the edges to get them as clean and smooth as i want...
|
|
k1w1
Full Member
  
Member since: February 2015
Posts: 873
Feb 18, 2015 8:07:41 GMT -5
Feb 18, 2015 8:07:41 GMT -5
|
Post by k1w1 on Jul 22, 2015 10:32:30 GMT -5
Your Magic Water has the same characteristics as the Woodlands Scenic water. The capillary action with things around the water, The rubbery texture when set. I guess the formulas are very similar. I have brought some 2 part clear resin for a small diorama project my lady has been working on. It will be interesting to see how that works. Unfortunately she has not worked on it recently - hopefully she will get inspired soon so I can see the results of the resin water.
|
|
coro69
Full Member
  
Member since: January 2015
Posts: 351 
|
Post by coro69 on Jul 22, 2015 20:11:17 GMT -5
k1w1: keep me informed how the resin water behaves... resin water would be the next i want to try... i think one advantage of it is, you always can sand / polish the sides of your water area, if you poured it into an open corner... now i have the problem to beautify my partly ripped sides... i have to add the barrier again, pour a tiny amount of magic water into the small gap and hope that it wont leak anywhere... :-)
|
|
BJ---Rest In Peace
Full Member
   Oct '24 Showcased Model Awarded
Member since: July 2014
Posts: 378
Jul 24, 2014 12:31:35 GMT -5
Jul 24, 2014 12:31:35 GMT -5
|
Post by BJ---Rest In Peace on Jul 22, 2015 20:18:47 GMT -5
Try 5 Minute epoxy for the ripples. Do a test first as I am not sure how it will react with your water. I use epoxy for my water. what you can do with epoxy is you can speed dry it with a Heatgun causing it to ripple on it own. The heatgun will cause the top to cure faster so when it fully cures creates an uneven surface... Exactly what you don't want on counter-tops.  Another one of those Need to finish one day projects. Can't really see the ripples yet as I need to add another layer once I add some slime and Gunk to the shore. One other Nice thing about Epoxy verses the Urethane's is you can tint the epoxy with standard Oil Paint (Humbrol/Windsor Newton) and/or Powdered Pigments. 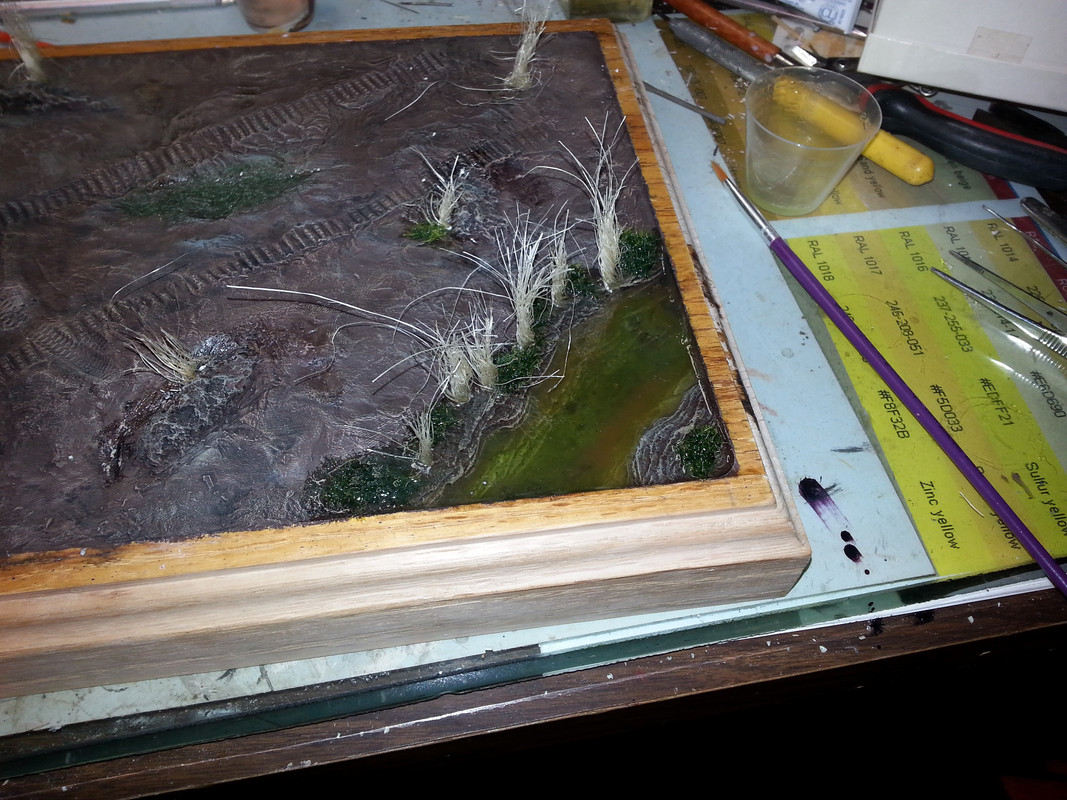 |
|
coro69
Full Member
  
Member since: January 2015
Posts: 351 
|
Post by coro69 on Jul 22, 2015 20:19:06 GMT -5
|
|
coro69
Full Member
  
Member since: January 2015
Posts: 351 
|
Post by coro69 on Jul 22, 2015 20:33:32 GMT -5
BJ---Rest In Peace: next thing on my list i have ti try... ;-) 5 min epoxy... ;-) the manufacturer of my water product suggest to add ripples afterwards with other brands products. some woodland or vallejo water effects...
|
|
BJ---Rest In Peace
Full Member
   Oct '24 Showcased Model Awarded
Member since: July 2014
Posts: 378
Jul 24, 2014 12:31:35 GMT -5
Jul 24, 2014 12:31:35 GMT -5
|
Post by BJ---Rest In Peace on Jul 22, 2015 20:37:57 GMT -5
Ahh Ok.. I never had any issues with using epoxy on top of Urethane or Polyesters but as soon as I say Go for it there will be no issue we'll find out that there is some weird reaction with a some new non-toxic chemical additive and you get blown up.  |
|
BJ---Rest In Peace
Full Member
   Oct '24 Showcased Model Awarded
Member since: July 2014
Posts: 378
Jul 24, 2014 12:31:35 GMT -5
Jul 24, 2014 12:31:35 GMT -5
|
Post by BJ---Rest In Peace on Jul 22, 2015 20:41:33 GMT -5
Here is what I use. I order the Medium in 5 Gallon Kits. But I also use it for back filling Sign work.  So for just straight up Model work you could get by with the fast. www.uscomposites.com/epoxy.html |
|
coro69
Full Member
  
Member since: January 2015
Posts: 351 
|
Post by coro69 on Jul 22, 2015 20:42:52 GMT -5
i just think the mf just doesn't know all possibilities... i have to set up some testing water area to find out what would be the best way for me... :-)
|
|
coro69
Full Member
  
Member since: January 2015
Posts: 351 
|
Post by coro69 on Aug 10, 2015 16:20:26 GMT -5
YEEEEHAW... tonight i did the last touch ups and fixxing the water issue... now let it dry for 24 hours and then i call it done... pictures will follow wednesday evening...
if someone told me before that it would take nearly one year to finish, i think i wouldn't have started it...
|
|
|
|
Post by wbill76 on Aug 10, 2015 16:41:31 GMT -5
It's been well worth the time and effort you've put into it! Looking forward to those final pics.  |
|
kiwibelg
Full Member
  
Member since: December 2014
Posts: 613 
|
Post by kiwibelg on Aug 11, 2015 12:16:57 GMT -5
It's not finished yet Olly? Lol only joking mate!!
Looking good , everything has really come together and the hard work has really paid off!
Good to see you are still busy with your dio, hope you are doing well.
Cheers,
Shay
|
|
coro69
Full Member
  
Member since: January 2015
Posts: 351 
|
Post by coro69 on Aug 12, 2015 5:14:58 GMT -5
it is done... it took nearly one year to finish it. starting with the building of the models of the halftrack, the flak and the suchscheinwerfer... if you are new to the hobby, do not set your standards too high and do not plan your project to big... being the project that large nearly cost me my motivation to finish it in the end... but now finished it and accomplished all the small parts i wanted to install and practice, i am happy... before i started it, i did a lot of reading, in books and in the internet... and all these great tutorials or books inspired me... so parts i wanted to practice were, building a tree, try out and get experience with some water product, build groundwork and vegetation, scratchbuilding different objects from different materials, like the wall made out from styrofoam. the gates in the wall, made from styrene and the frame and roof of the gate made from air drying clay for the tiles, the wooden frame. one bid discussion in some german forum were the color of my red fence... now seeing the whole i am happy i left it red. it adds some nice contrast to the whole scene. painting figures for the first time, i think i stripped the paint almost three or four times... but at the end they came out quite nice, i think... so... now it is a little bit image heavy... 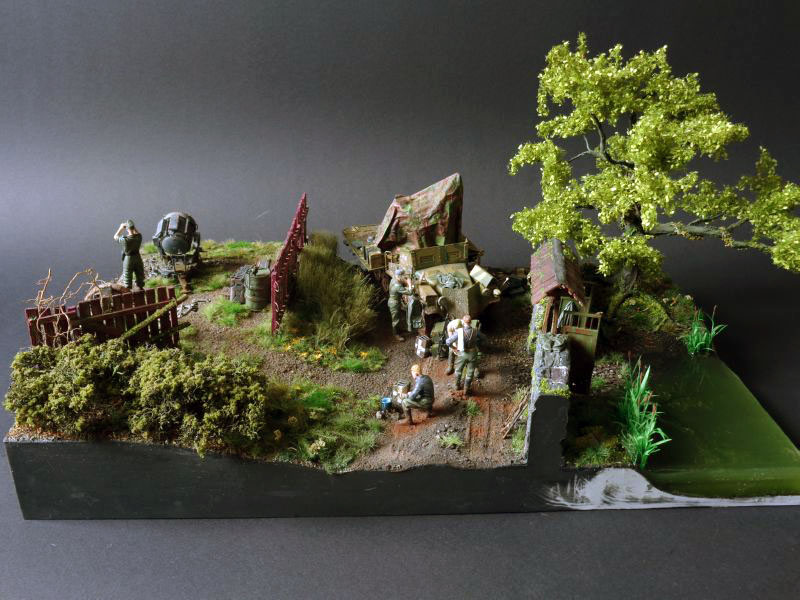 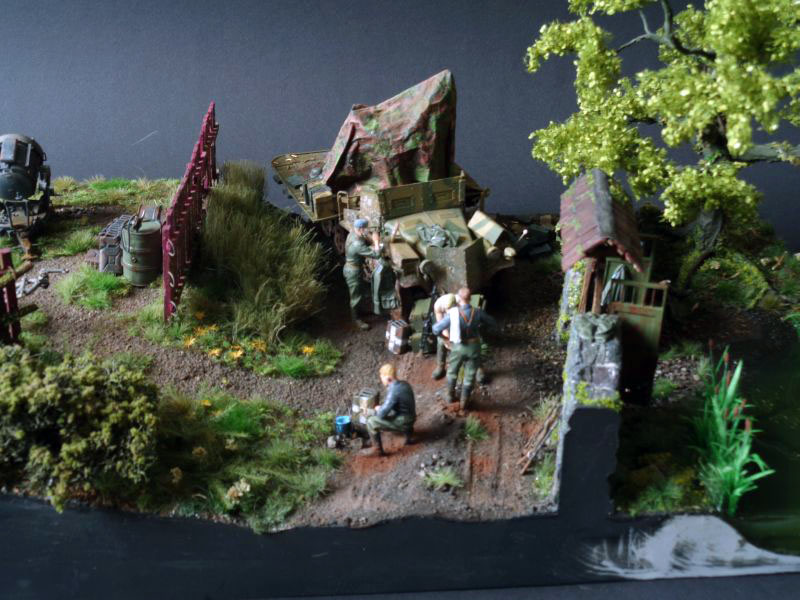 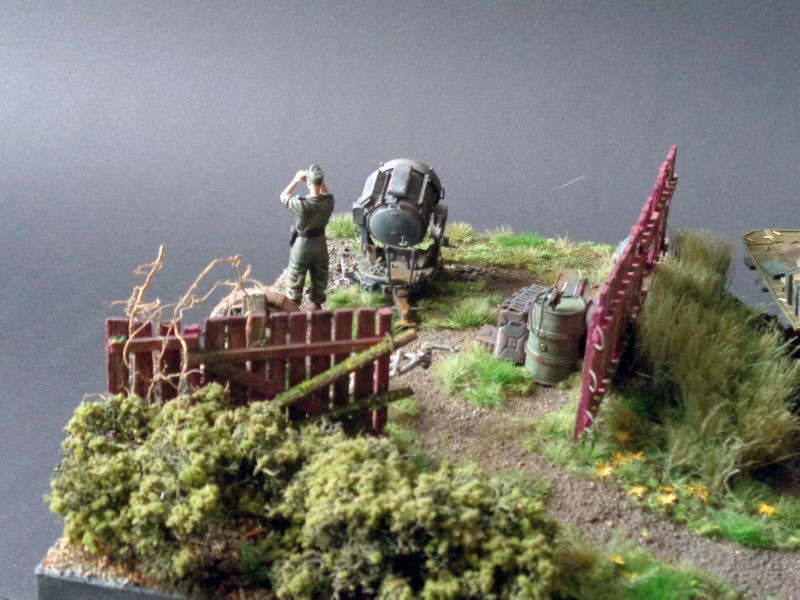 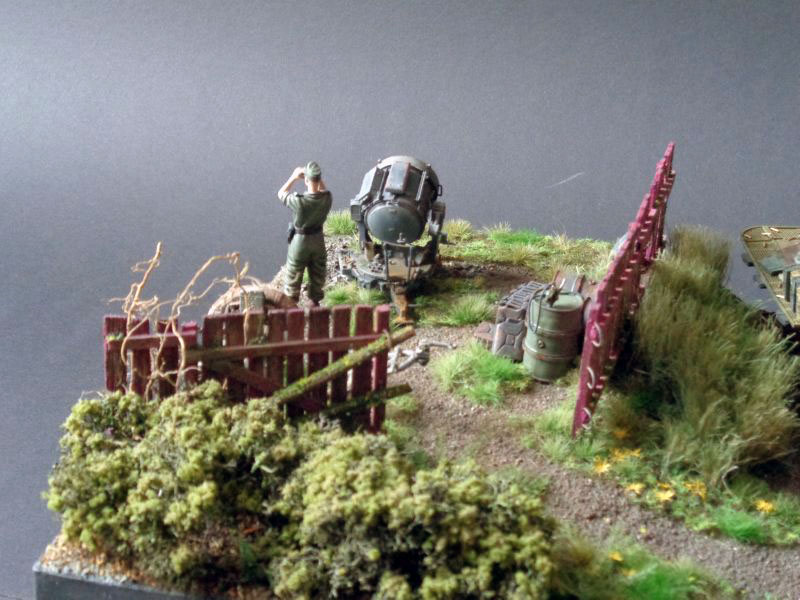 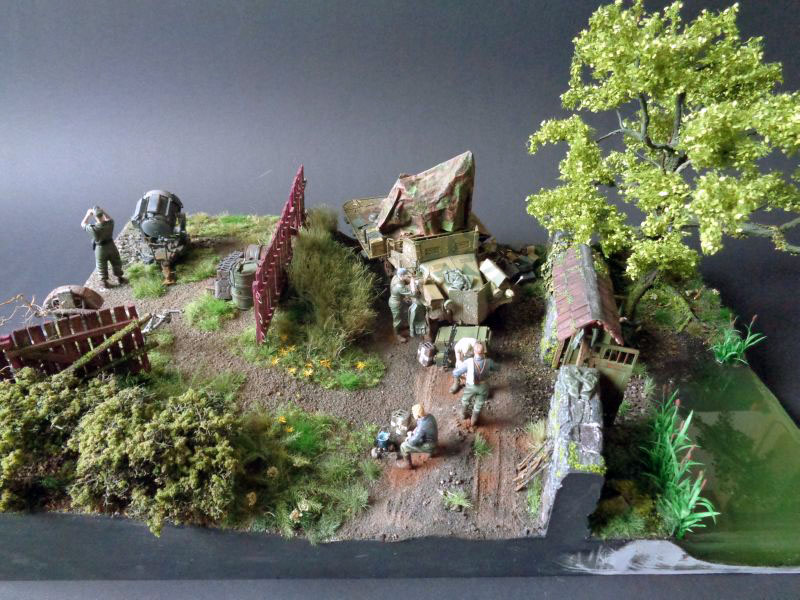 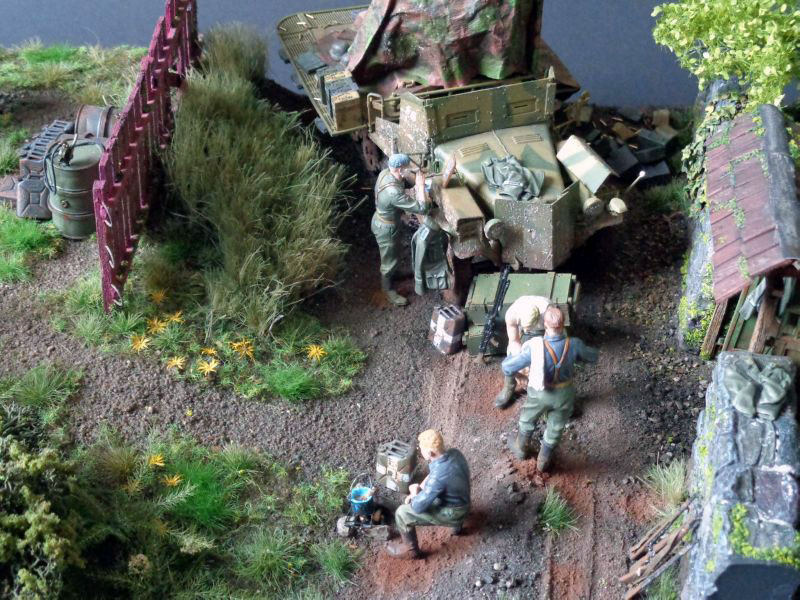 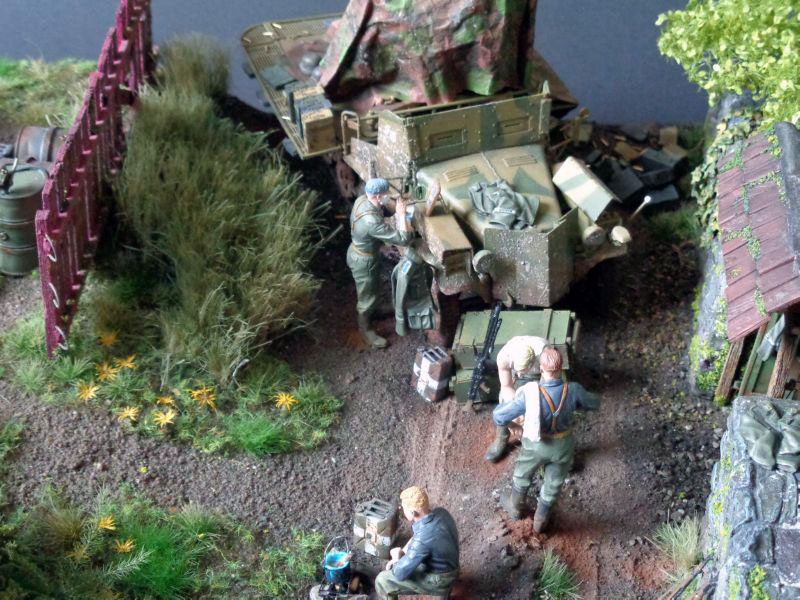  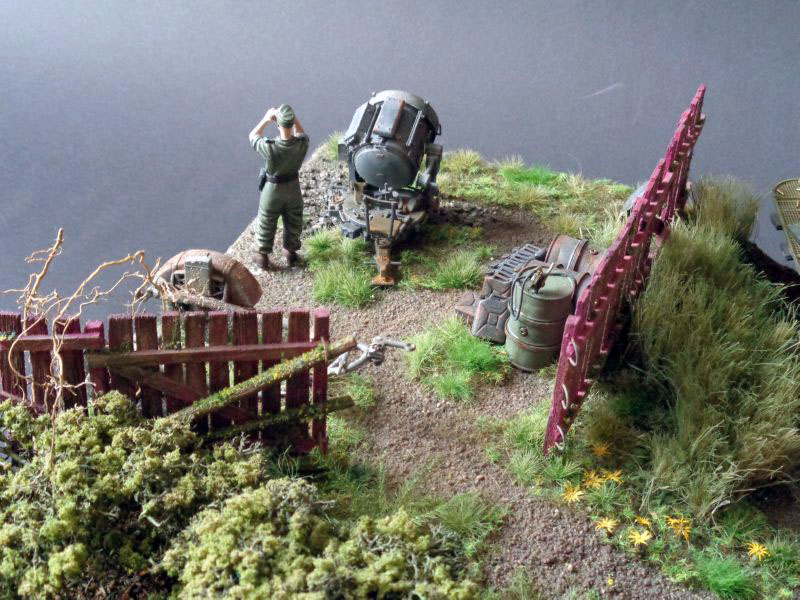 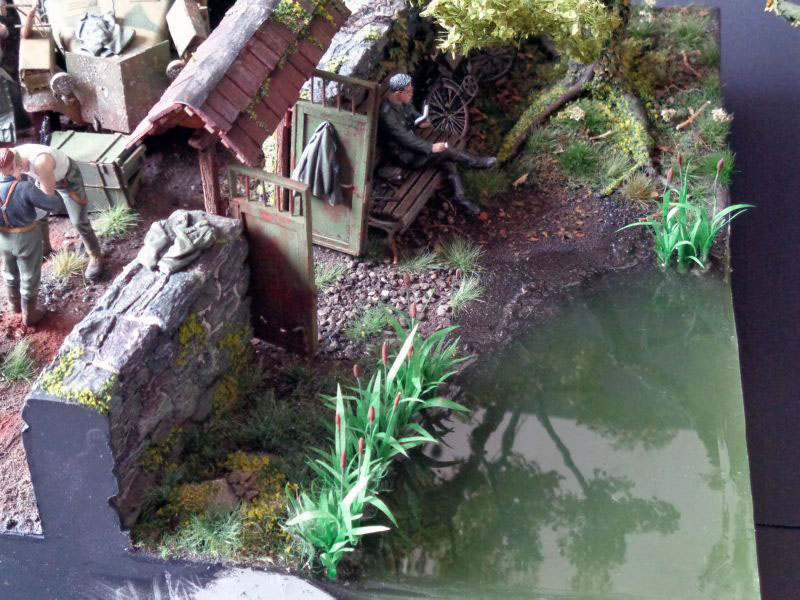  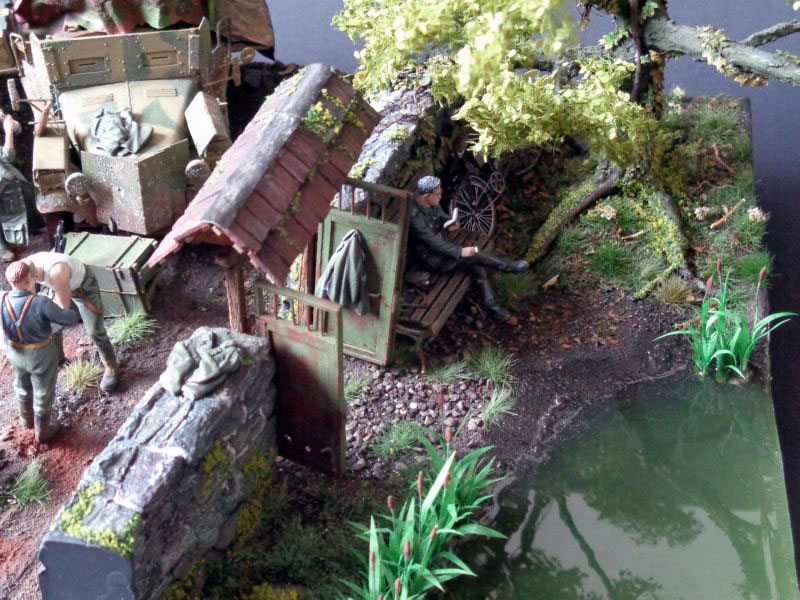 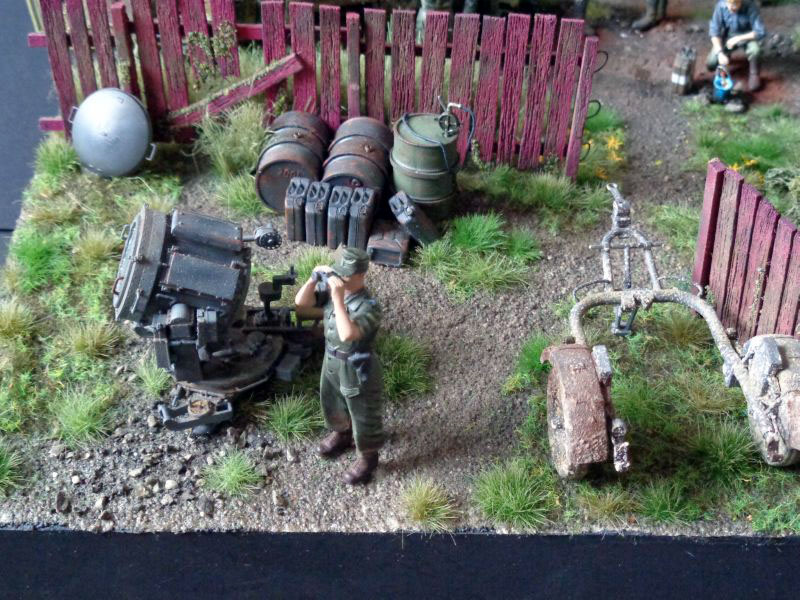   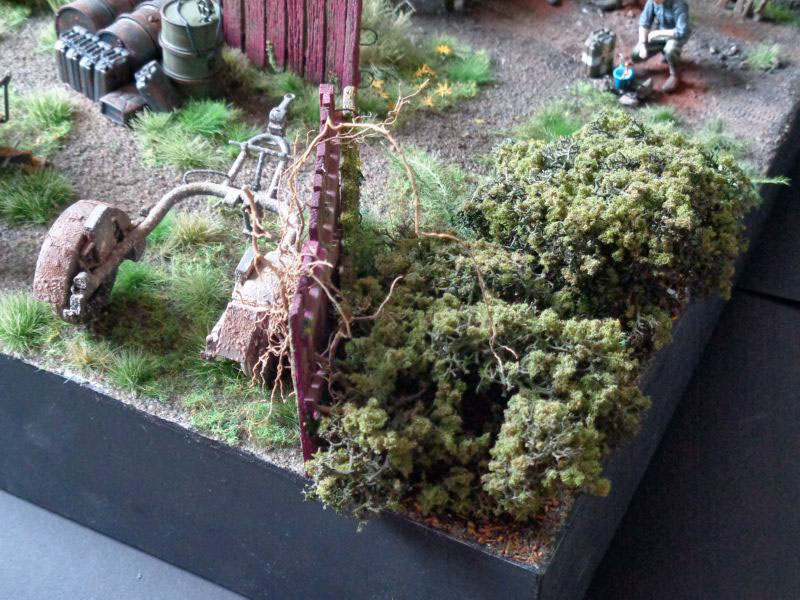  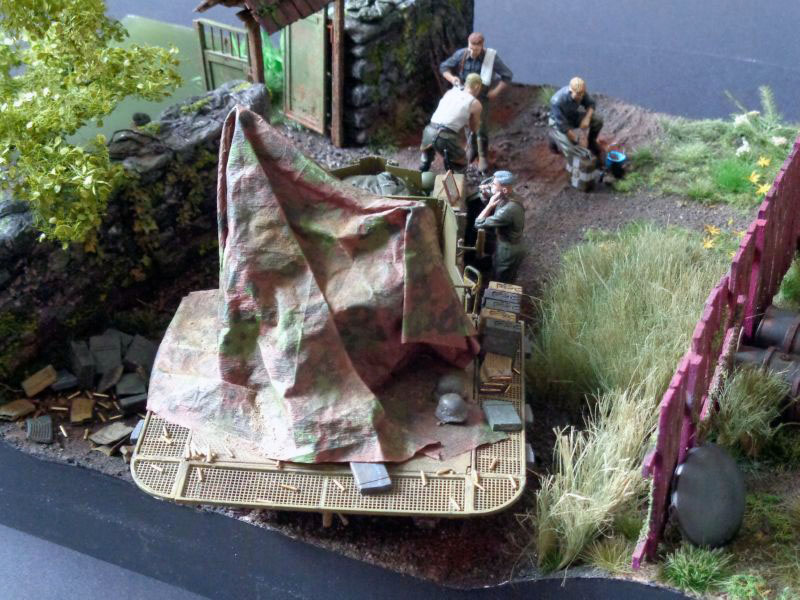 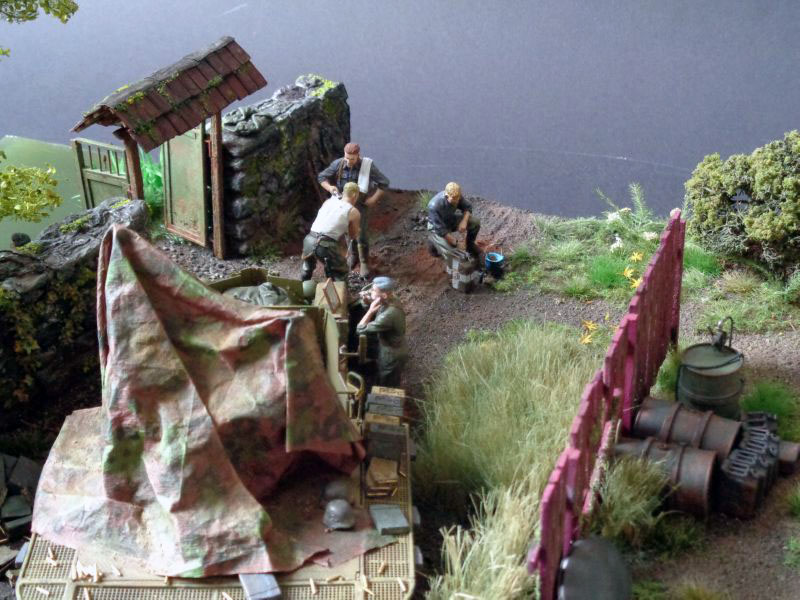 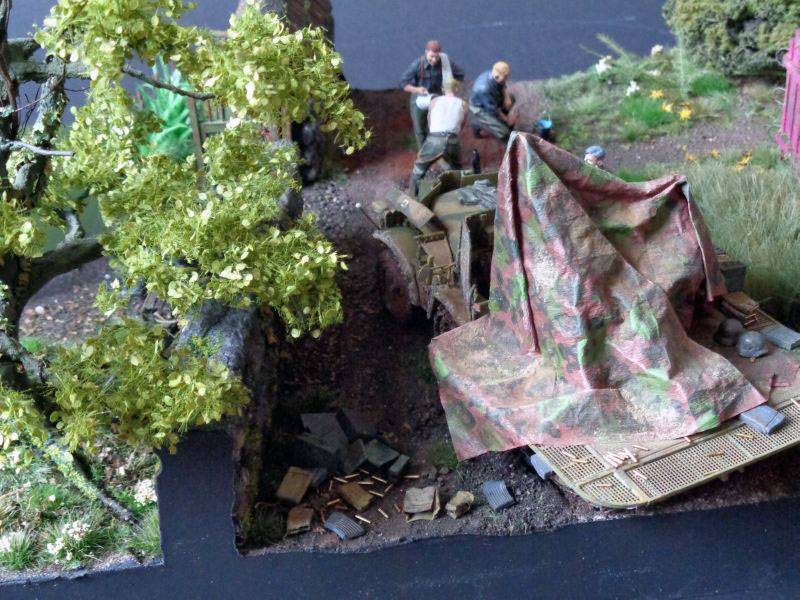   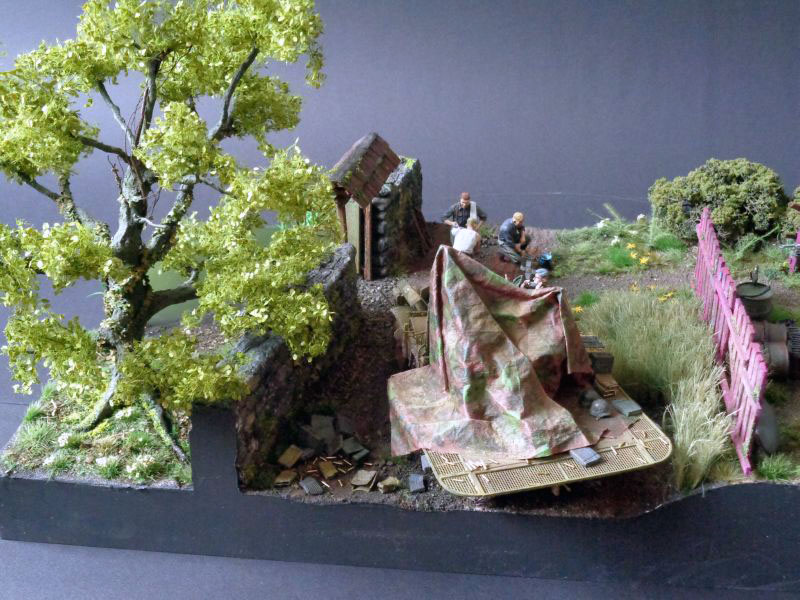  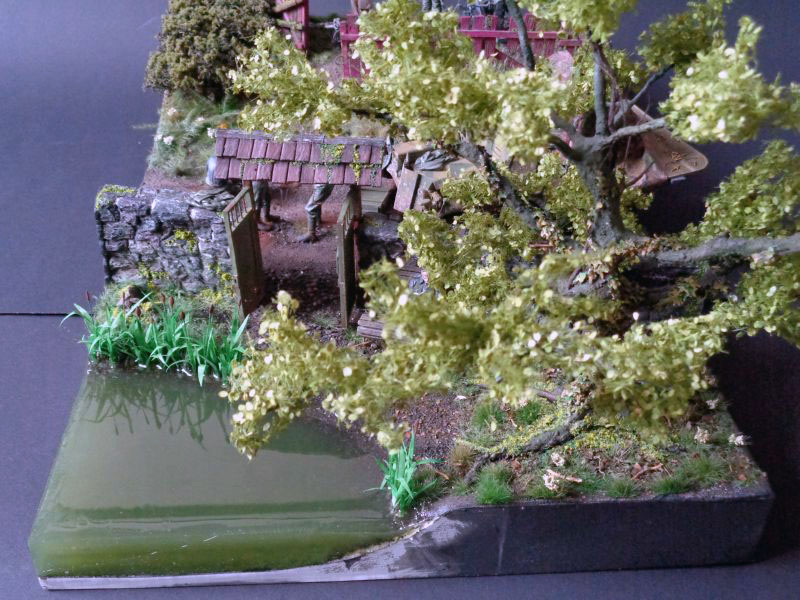 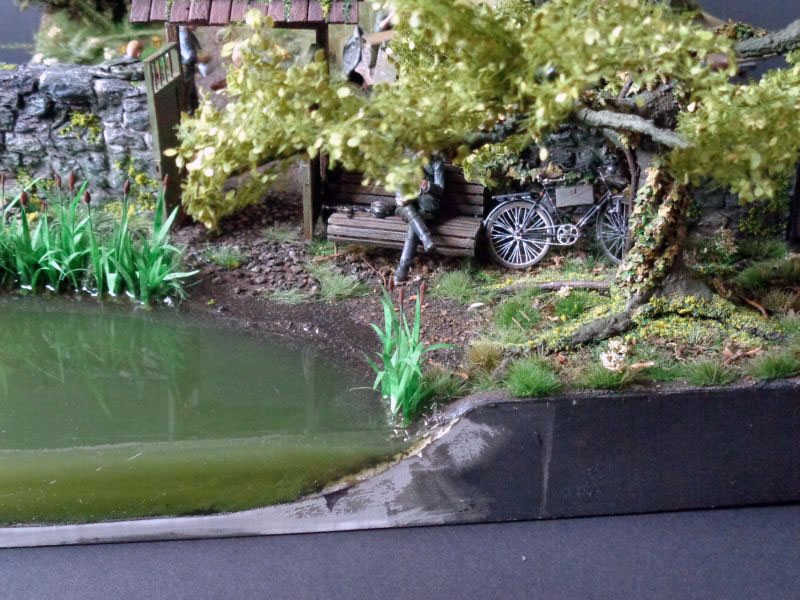 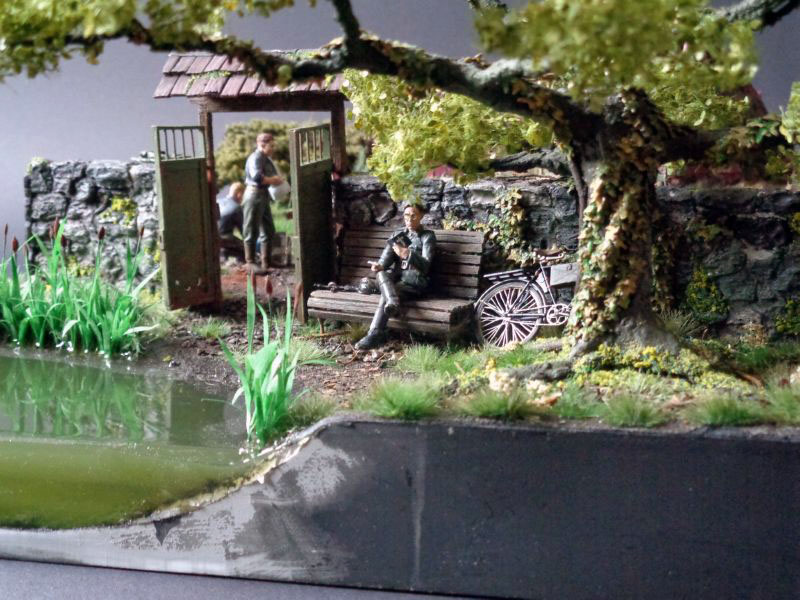 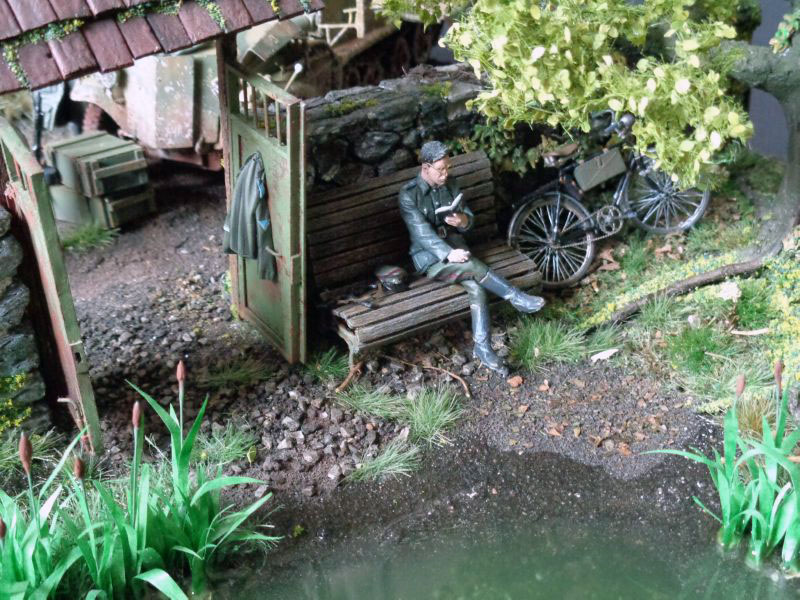 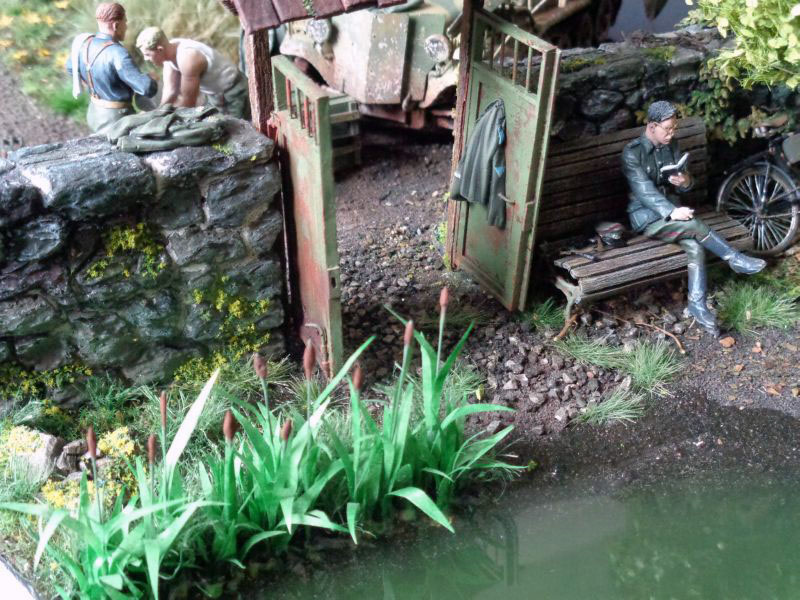 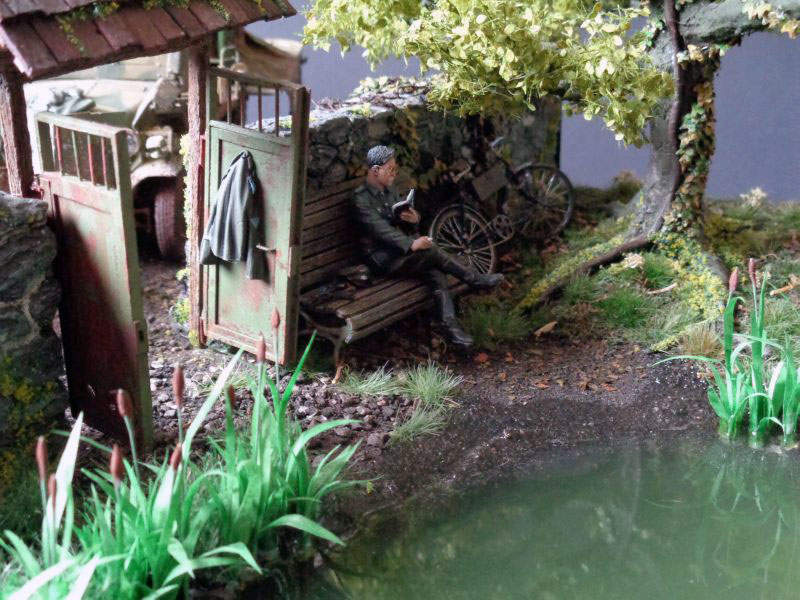 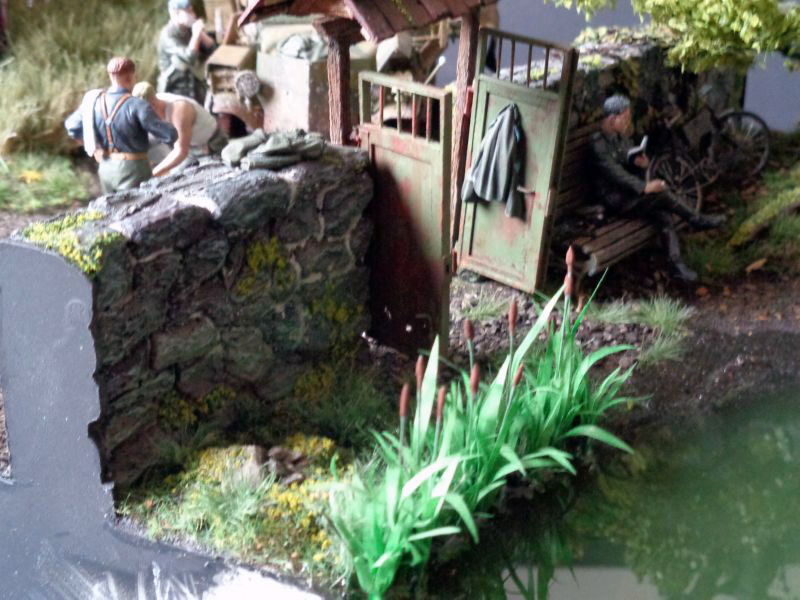 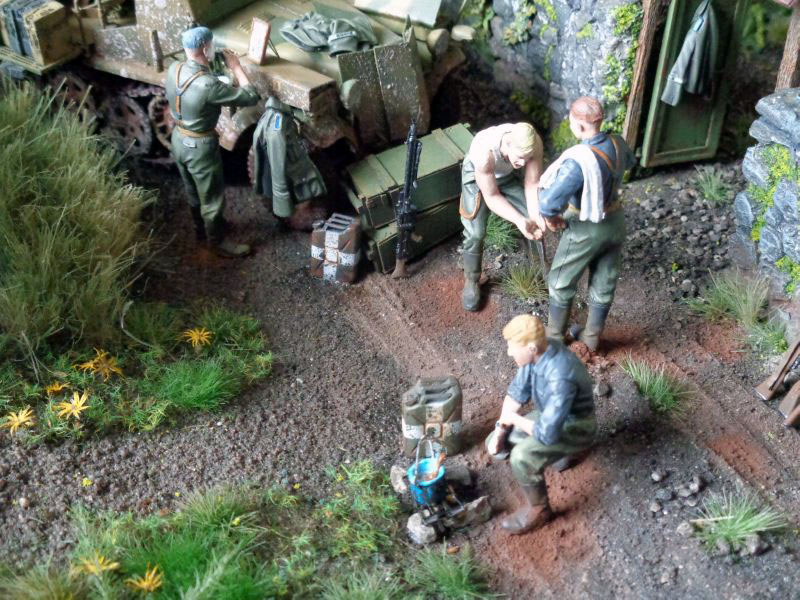 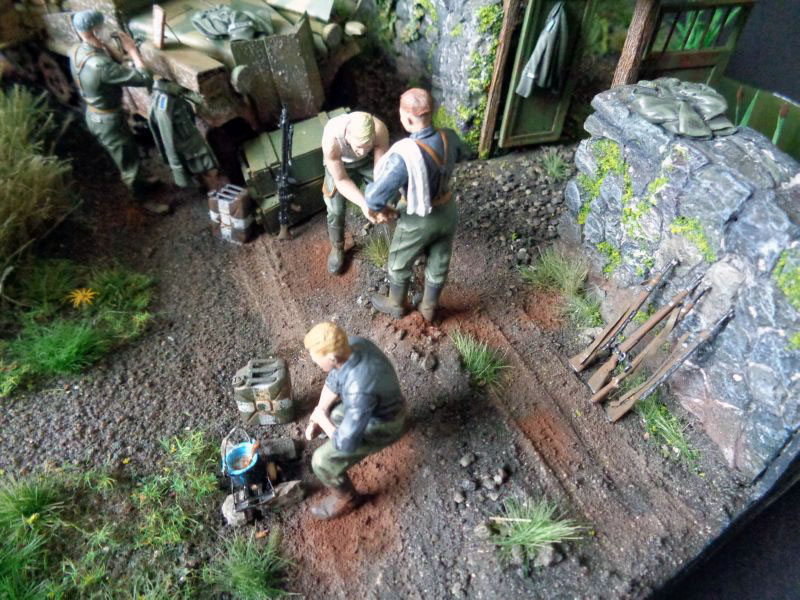 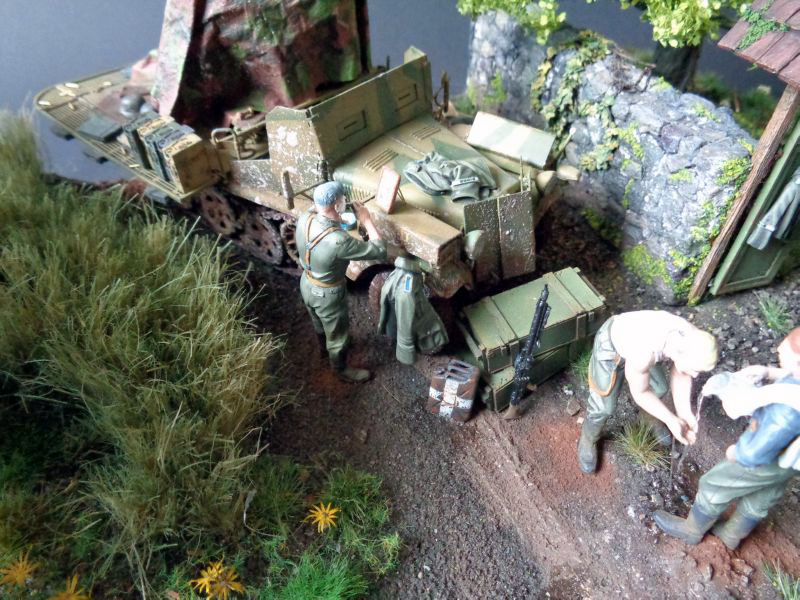  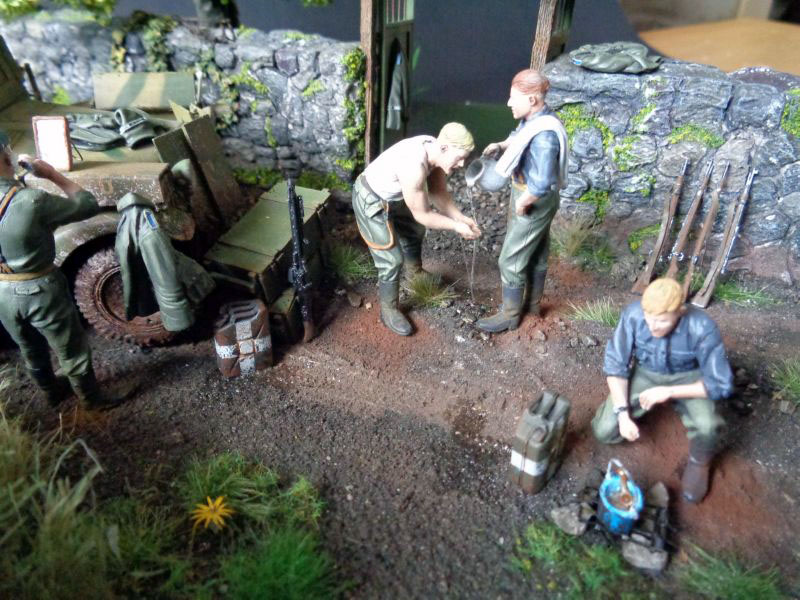 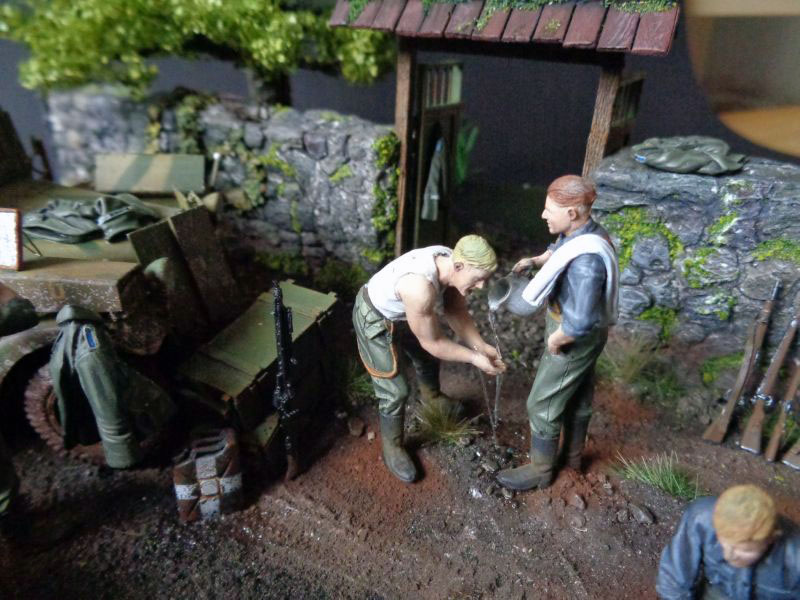  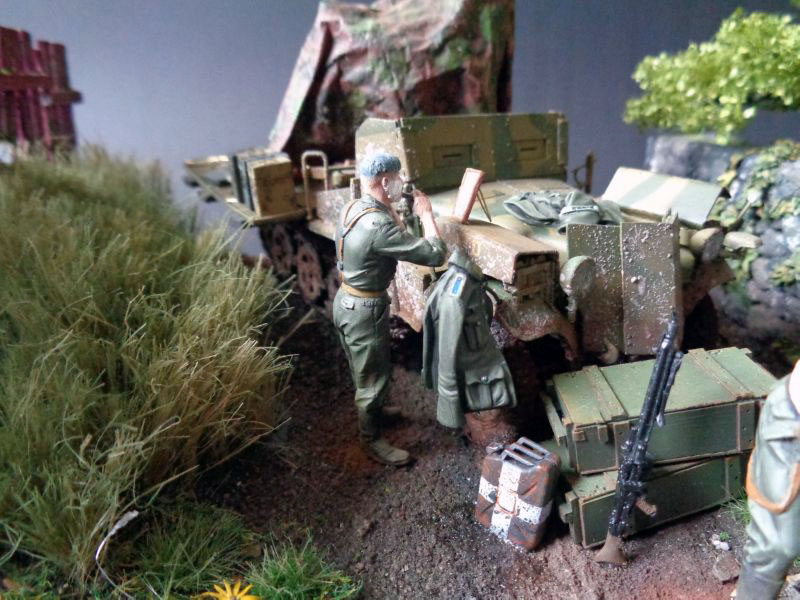 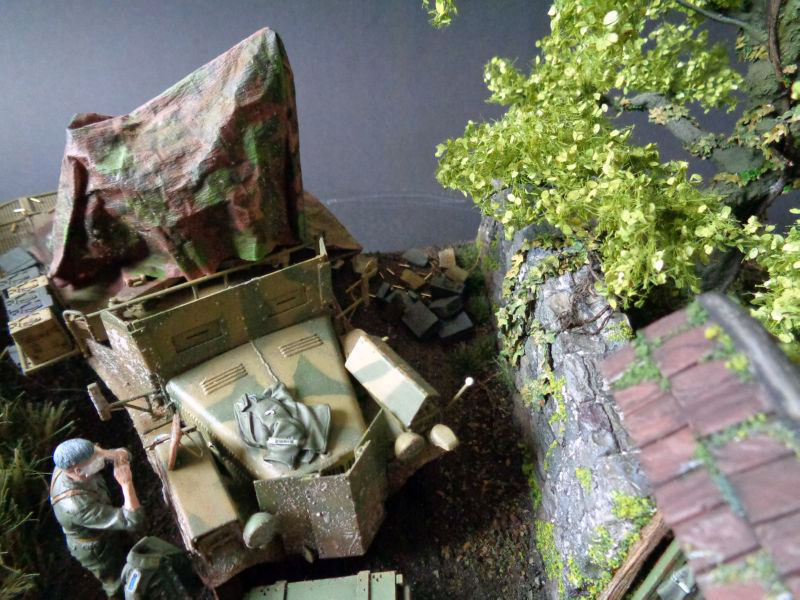 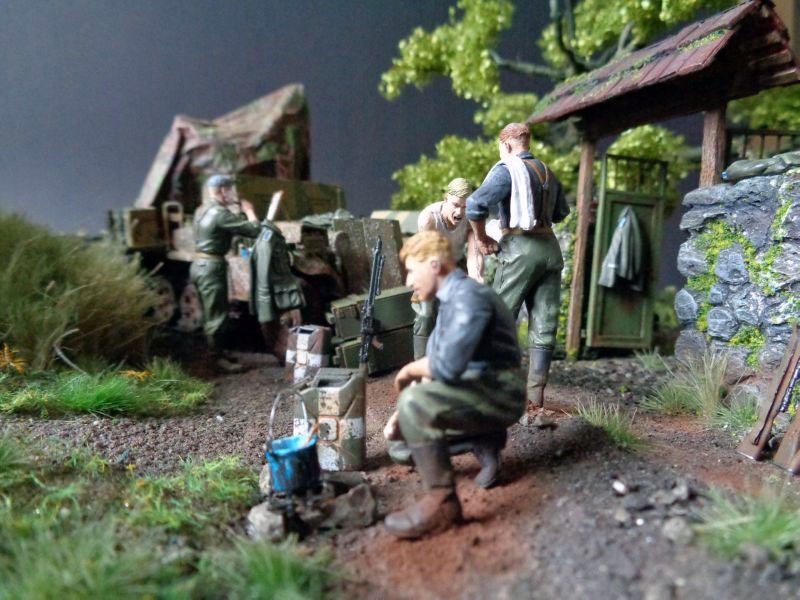 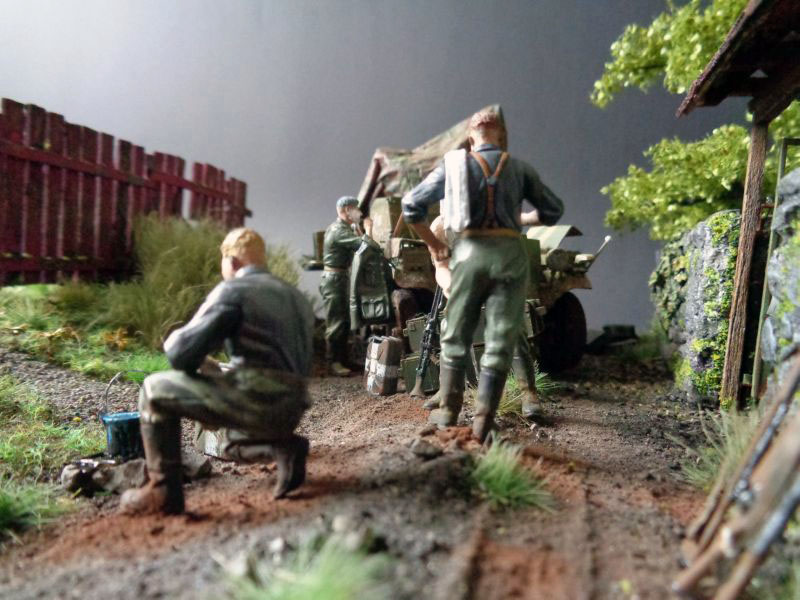 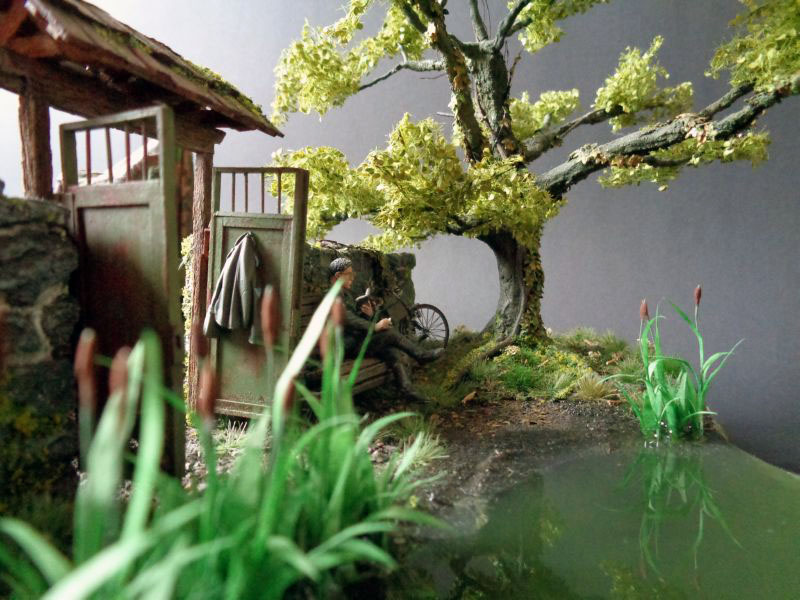 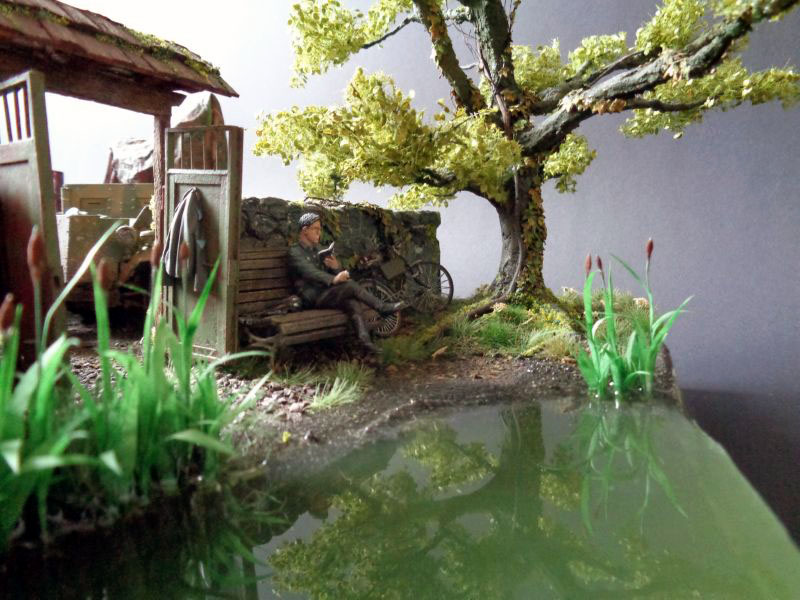  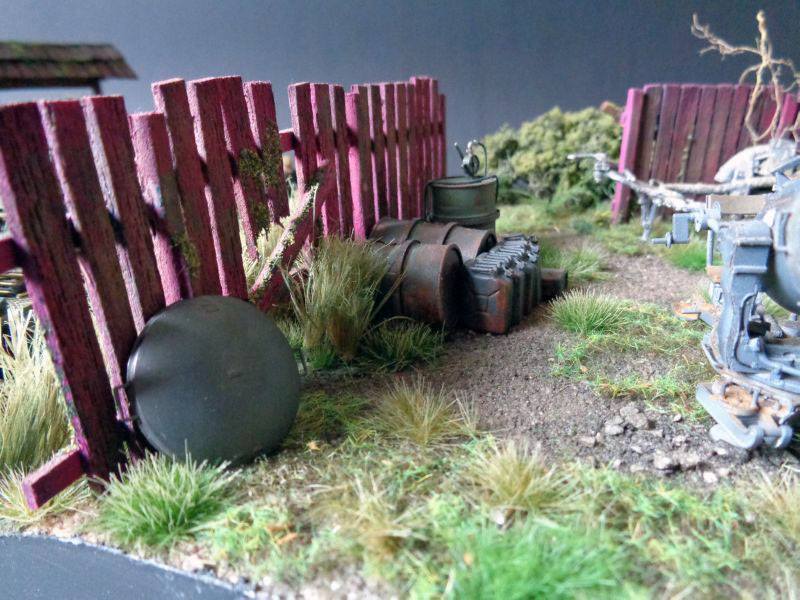 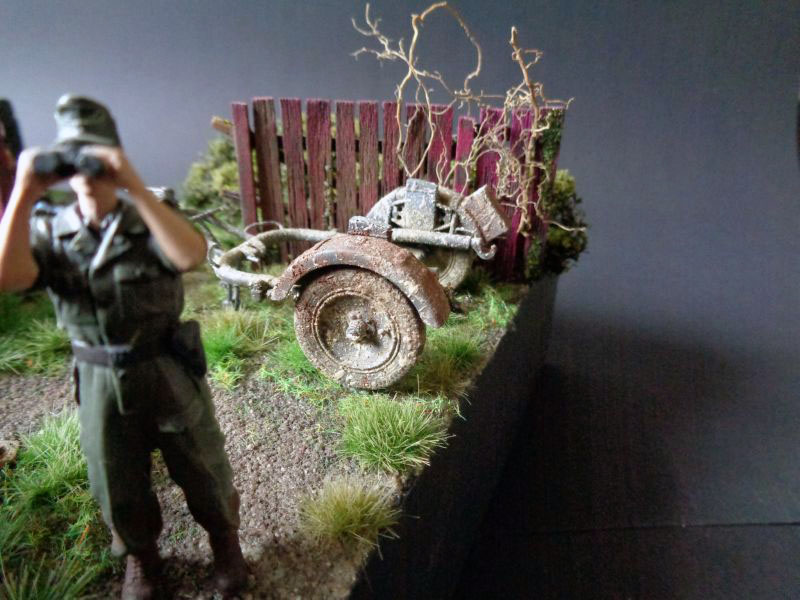 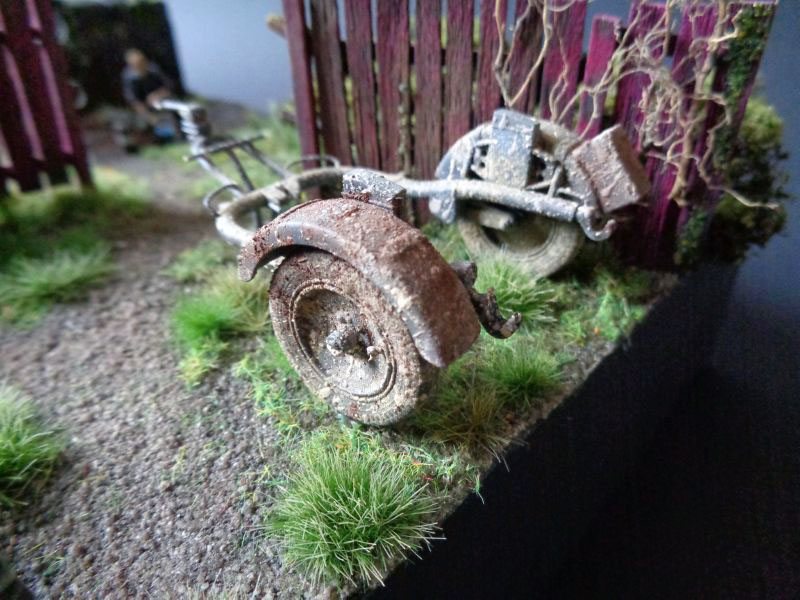 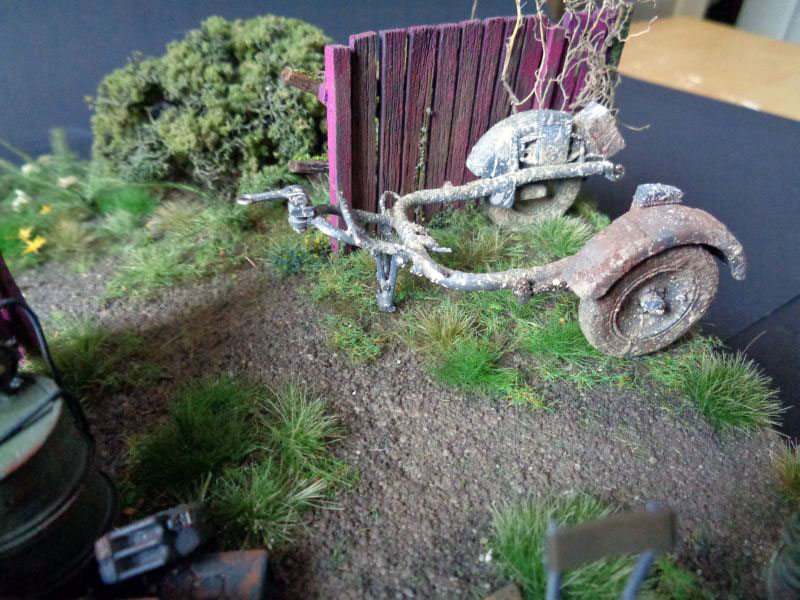 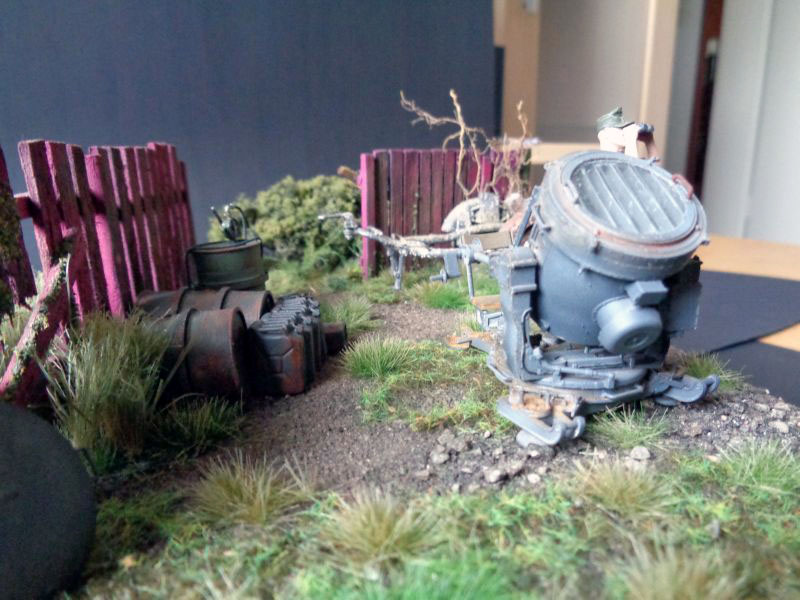 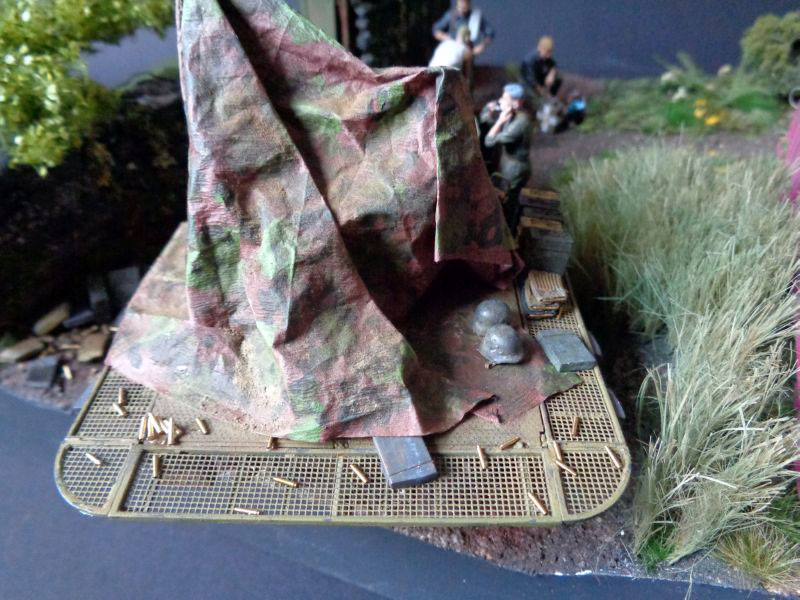 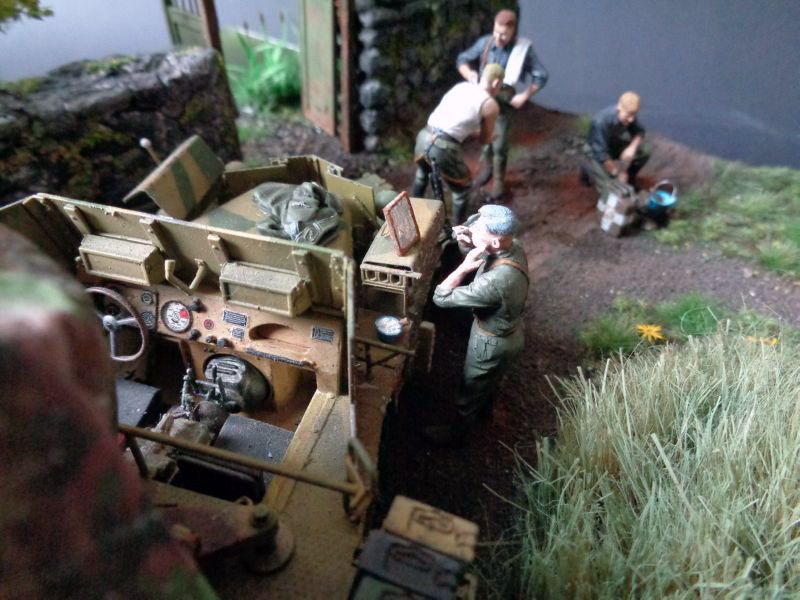 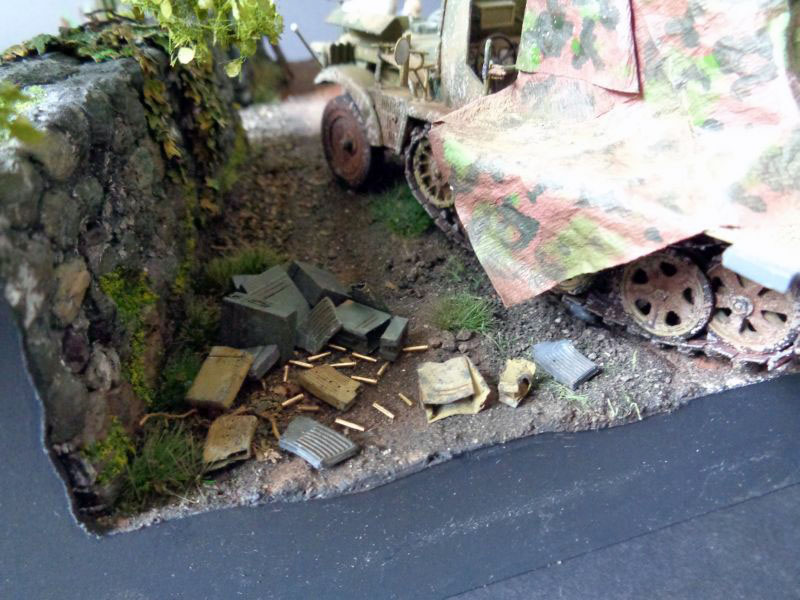 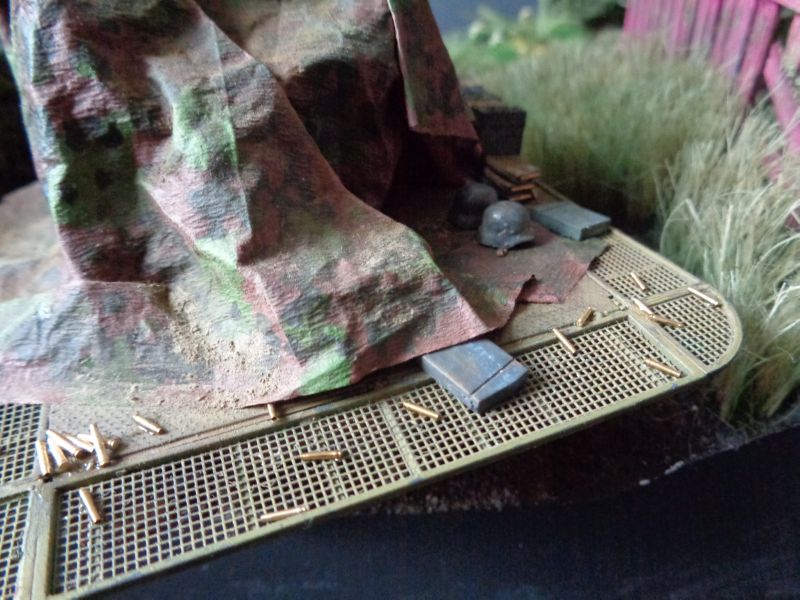 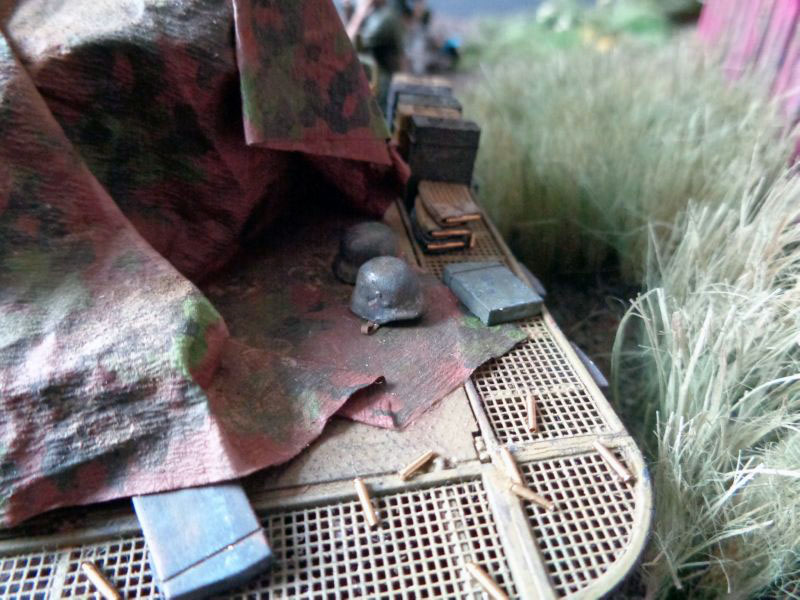 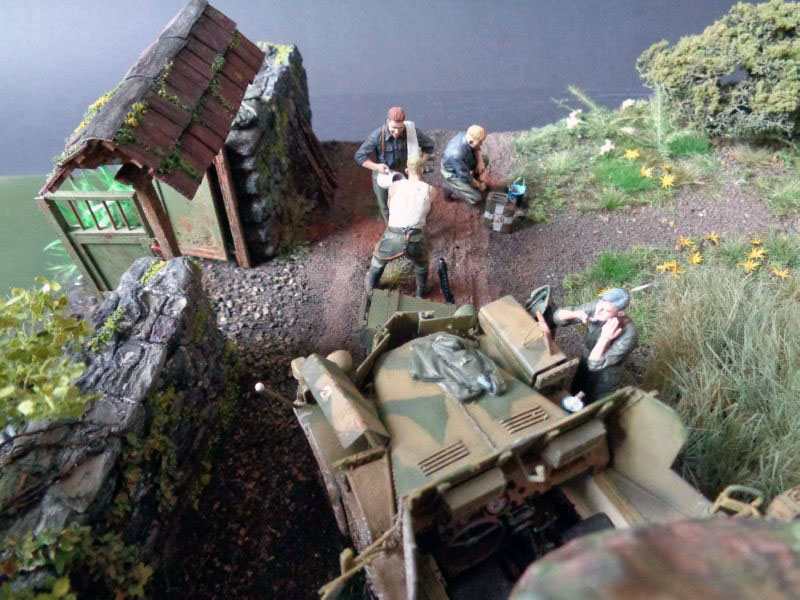  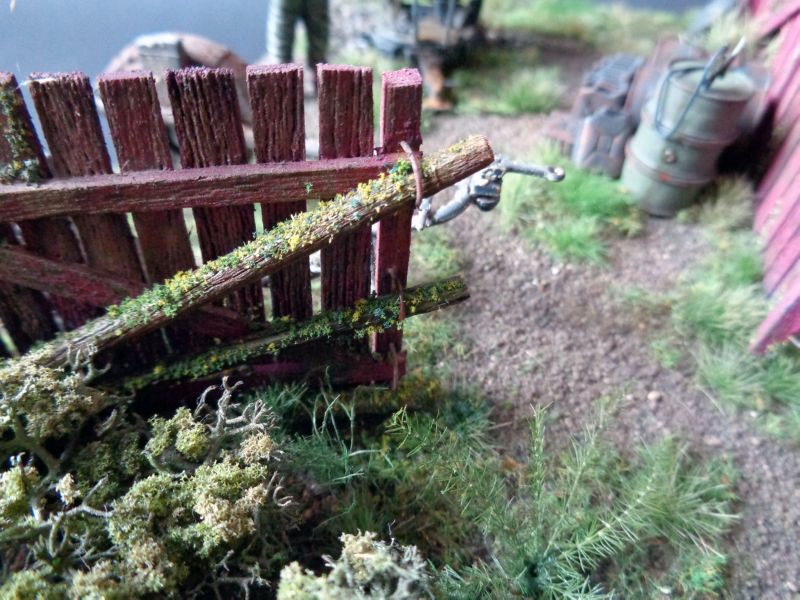 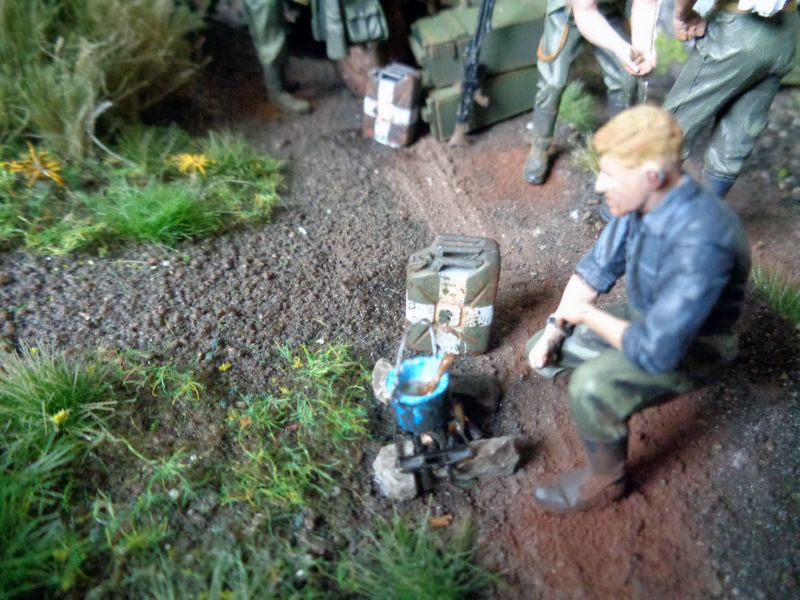 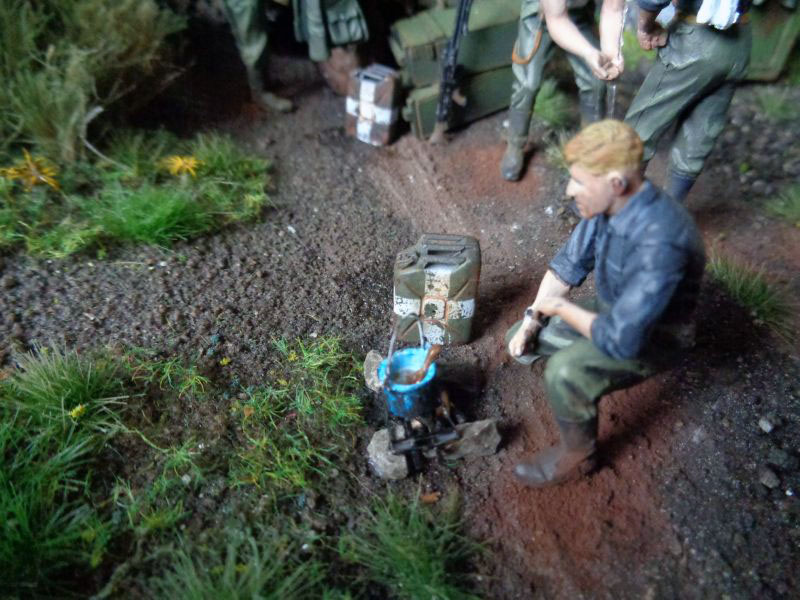 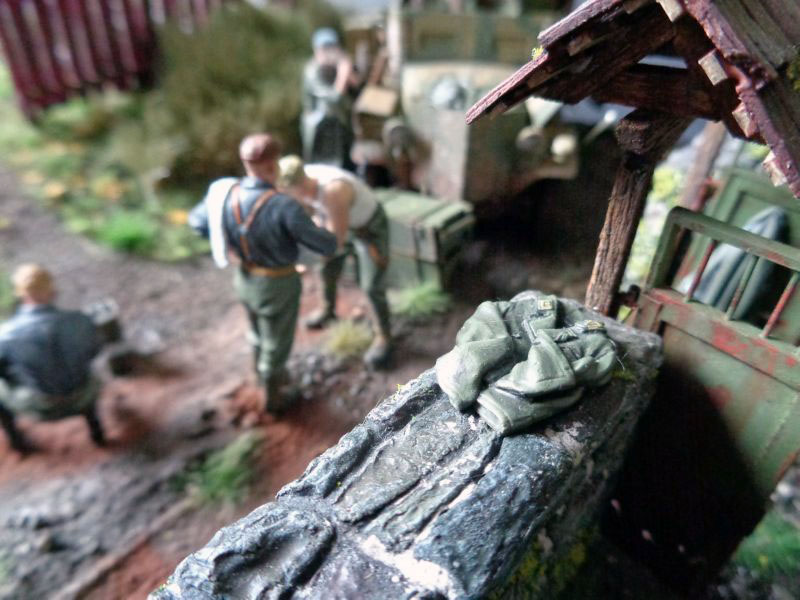 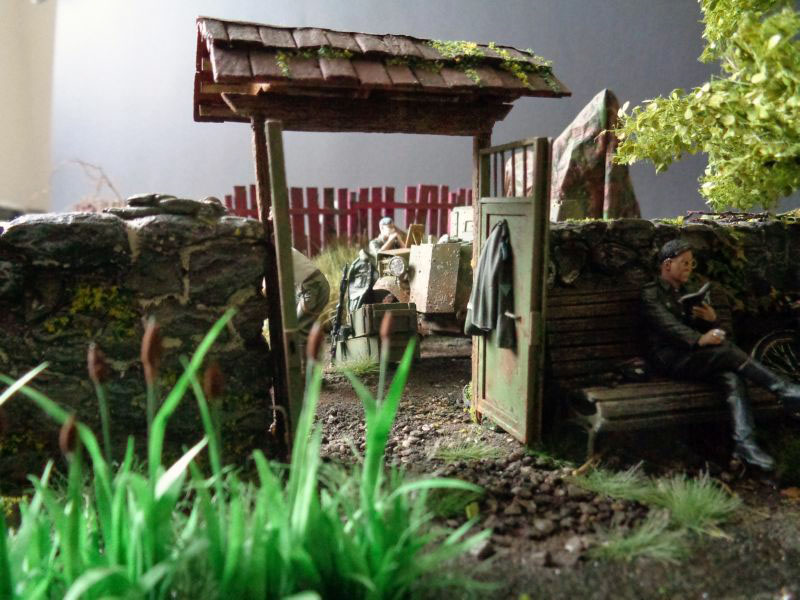 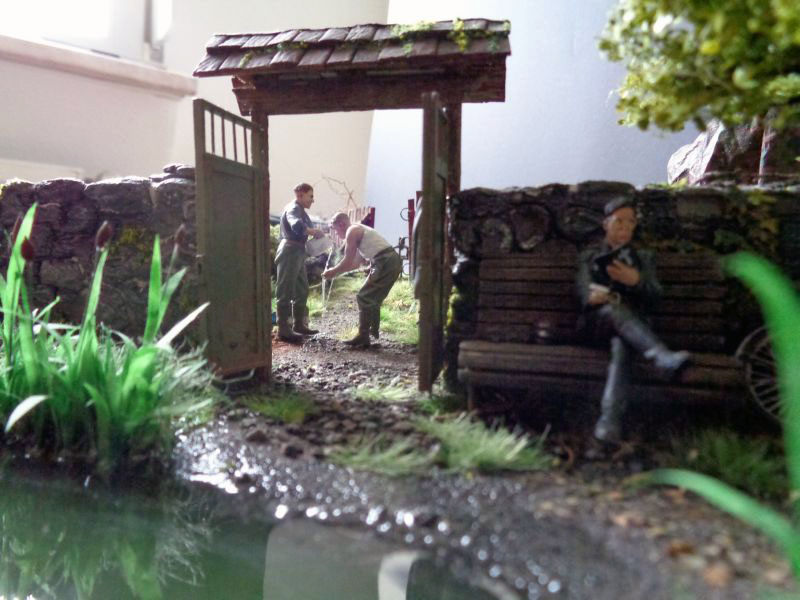 |
|
kiwibelg
Full Member
  
Member since: December 2014
Posts: 613 
|
Post by kiwibelg on Aug 12, 2015 12:25:00 GMT -5
You should be extremely proud of your first diorama Olly! It must be satisfying to have it finally completed.
I logged in last week and saw your pond area, fantastic effort! The water area is such a great feature in the dio.
Everyone is on a learning curve and I think the way you have approached this diorama has really benefited your skill level and it will only get better on future projects.
Well done mate! So....what's cooking next in the kitchen??
Cheers,
Shay
|
|
coro69
Full Member
  
Member since: January 2015
Posts: 351 
|
Post by coro69 on Aug 12, 2015 12:30:26 GMT -5
holla shay... you are right, the work on that dio pushed my skill level extraordinary up and seeing it today in front of the black backdrop i was really proud... i managed to include all the aspects i wanted to train on... and i already have improvements or different ways to do things in my mind... :-)
the oven is still hot, next project is already cooking... i keep you all informed at this spot... :-) but it will be definitely some smaller than this beast...
and thanks for your always positive comments...
|
|
k1w1
Full Member
  
Member since: February 2015
Posts: 873
Feb 18, 2015 8:07:41 GMT -5
Feb 18, 2015 8:07:41 GMT -5
|
Post by k1w1 on Aug 12, 2015 12:30:50 GMT -5
Great work. It is not until you scroll through all the photos that you become aware of just how many small little details you have included here. Your tree, the wall and gate, the water - all have turned out very well. My first diorama also took a year to complete and like you , several times when progress was very slow I nearly walked away from it. To start with a smaller project is good advice. |
|
coro69
Full Member
  
Member since: January 2015
Posts: 351 
|
Post by coro69 on Aug 12, 2015 12:38:11 GMT -5
the hardest time gave me the small details at the end... with everything else, you see big steps forward... but with the details to the end... there were no visible steps forward gained... that is the point, where you have to motivate yourself... but i had some hard times... :-) i think some of you realized the output of the post diminished at last..
so the next project will be some smaller, just to take a deep breath for the next big thing... at the end the scratchbuilding for the big dio was the most fun part. and i have some nice town setting in my mind...
|
|
sabre
Full Member
  
Member since: September 2013
Posts: 414 
|
Post by sabre on Aug 12, 2015 13:52:51 GMT -5
Nice work coro69 it's been a pleasure to watch this one progress.
|
|
|
|
Post by wbill76 on Aug 12, 2015 19:39:01 GMT -5
Glad to see you stuck with it and got this one all pulled together. Very nice work and lots of details to draw the eye. My favorite part has to be the guy with the bicycle and book by the pond. A quiet moment that says it all...  |
|
coro69
Full Member
  
Member since: January 2015
Posts: 351 
|
Post by coro69 on Aug 13, 2015 10:54:39 GMT -5
the guy at the pond is also my favorite part...
adding the details was the hardest part of all... you do not see a lot of progress but thy take their time to finish
|
|
|
|
Post by deafpanzer on Aug 17, 2015 11:49:45 GMT -5
BEAUTIFUL finish! It was blast following your build since you started posting here. WOW! Sure it is something you should be proud of. And I hope to see more of your work here too.
|
|
coro69
Full Member
  
Member since: January 2015
Posts: 351 
|
Post by coro69 on Aug 17, 2015 13:33:30 GMT -5
deafpanzer you sure will see some more work from me... :-) thanks for your compliments...
|
|