|
|
Post by tigrazor on Feb 14, 2015 2:42:56 GMT -5
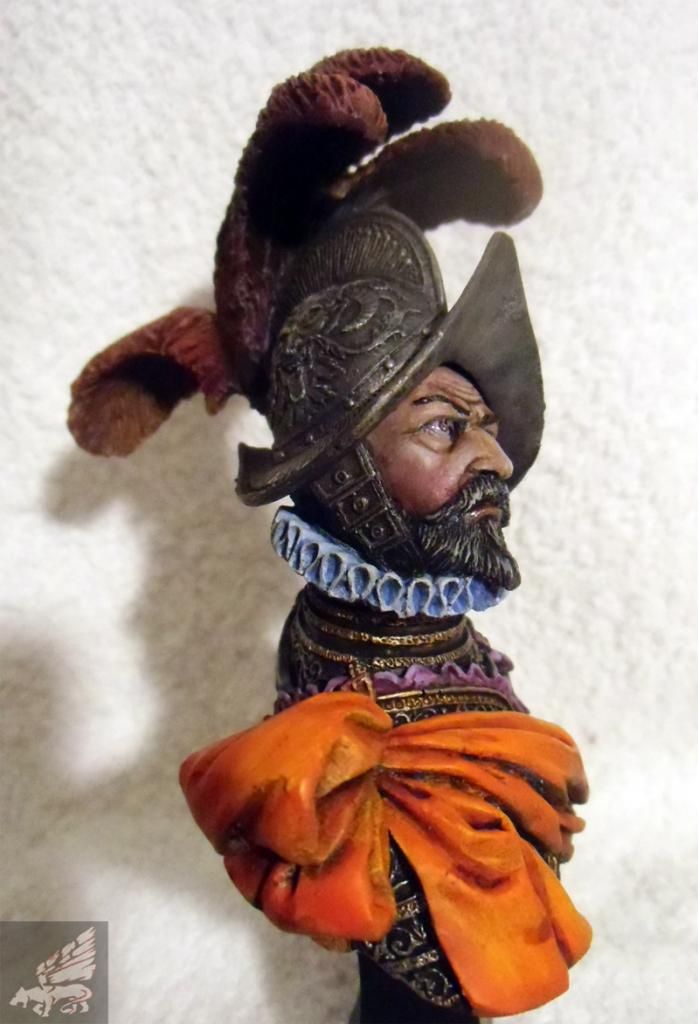
Hi all. Got me a new bust last weekend for a special price - Pegasos "Spanish Admiral, 16th Century". Its full of beautiful details and seems perfect for the GB. Thats the state so far: Target: 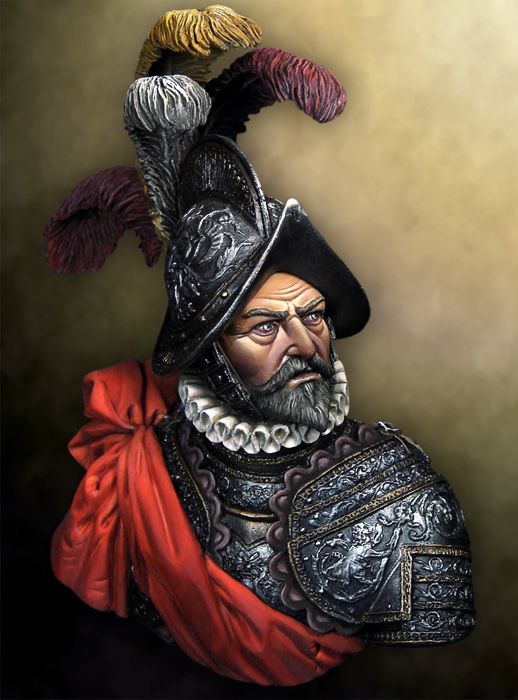 It was primed with black first, then with white to get some depth all over - simple trick, but it really helps for the painting. 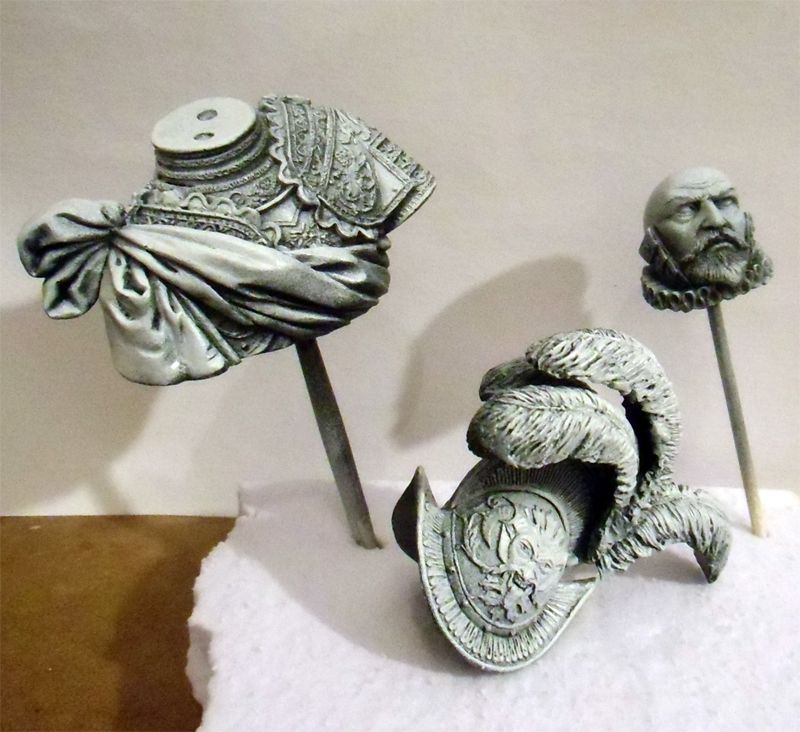 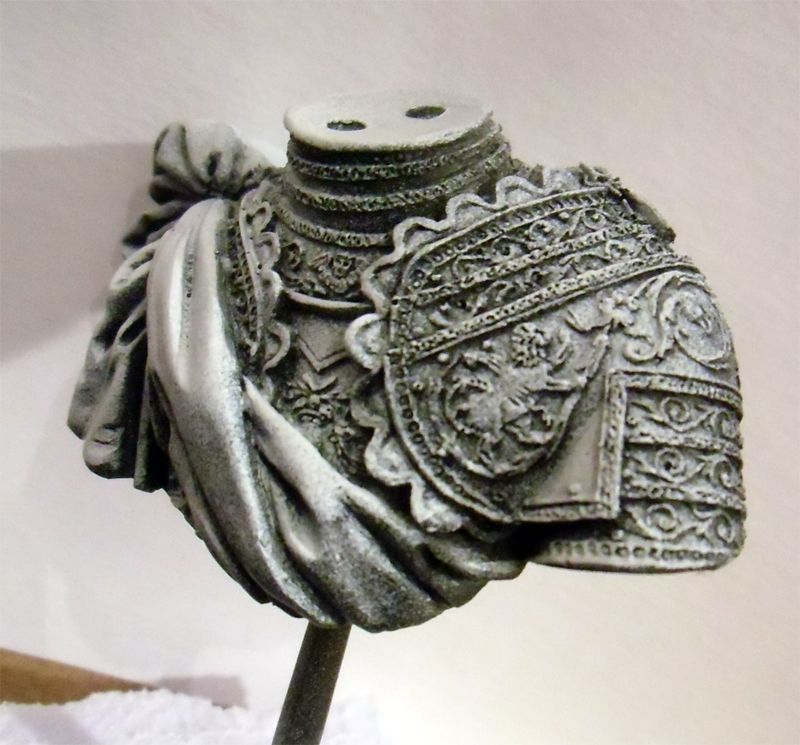 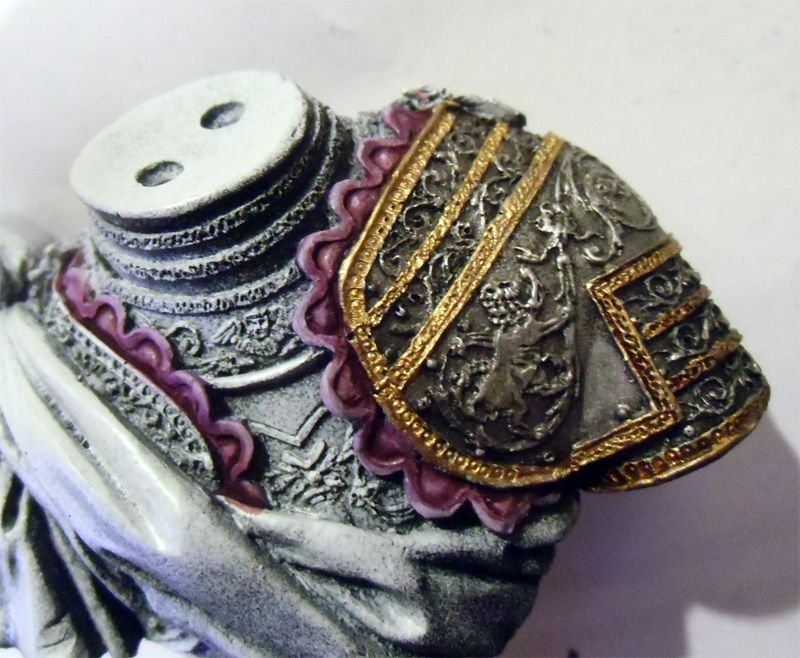 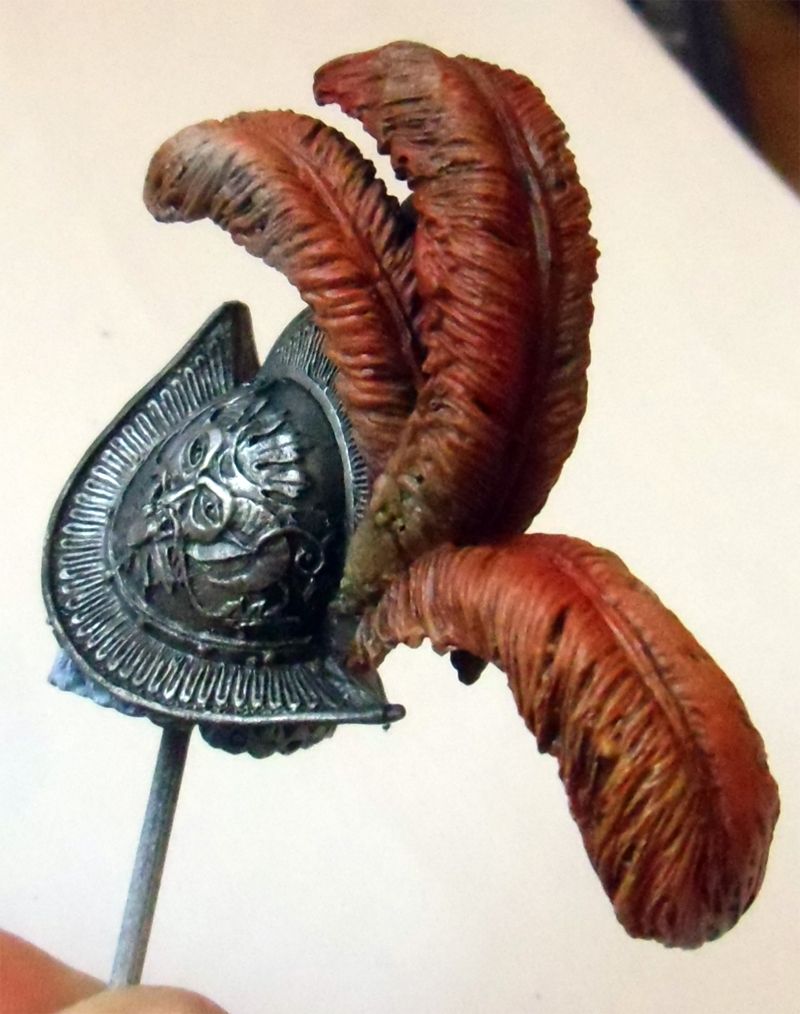 |
|
kiwibelg
Full Member

Member since: December 2014
Posts: 613 
|
Post by kiwibelg on Feb 14, 2015 2:49:40 GMT -5
Awesome start to this bust, and what a beautifully sculpted one! Looks very crisp!!
I will be trying the black and white primer out on my upcoming busts, I used that trick on "rubbled" dioramas and it really brought more depth out of the scene.
Fantastic choice and I will be following your thread for this one!!
Have a good "busty" Valentines mate!! Hehehe
Shay
|
|
|
|
Post by tigrazor on Feb 14, 2015 2:54:15 GMT -5
|
|
kiwibelg
Full Member
Member since: December 2014
Posts: 613
|
Post by kiwibelg on Feb 14, 2015 3:09:08 GMT -5
Hahaha....a lot of bromance in your house tonight!!
Awesome trailer!
|
|
|
|
Post by tobias5555 on Feb 14, 2015 3:27:27 GMT -5
Cool bust.
|
|
nicusi
Full Member
Member since: September 2013
Posts: 776
|
Post by nicusi on Feb 14, 2015 4:16:49 GMT -5
Great start, Lucas! The Pegaso bust deserves all the attention, I'm sure you'll gonna show us a handsome Spanish admiral. Please, give us more details, I'm particularly interested in how you'll give more depth to the metal, a lot of details there and on red plume. To throw out into relief the details of the armour, I'm used to work with inks. I hope to learn new things. Already, I've noticed your priming method, I'll surelly try on a future project. But I'm working only with acryllics
Warm regards!
Nicolae
|
|
|
|
Post by Leon on Feb 14, 2015 4:31:57 GMT -5
Nice start on the bust Lucas.
|
|
|
|
Post by tigrazor on Feb 14, 2015 7:07:37 GMT -5
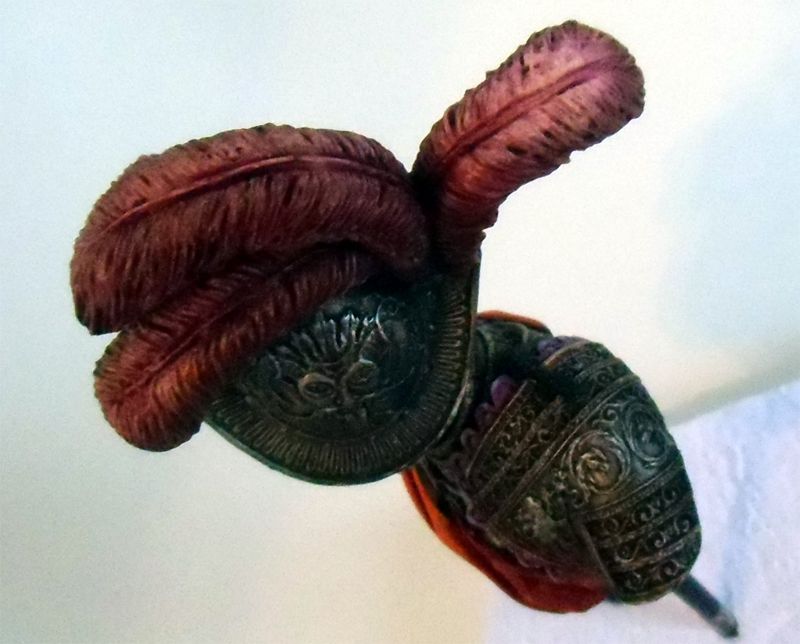
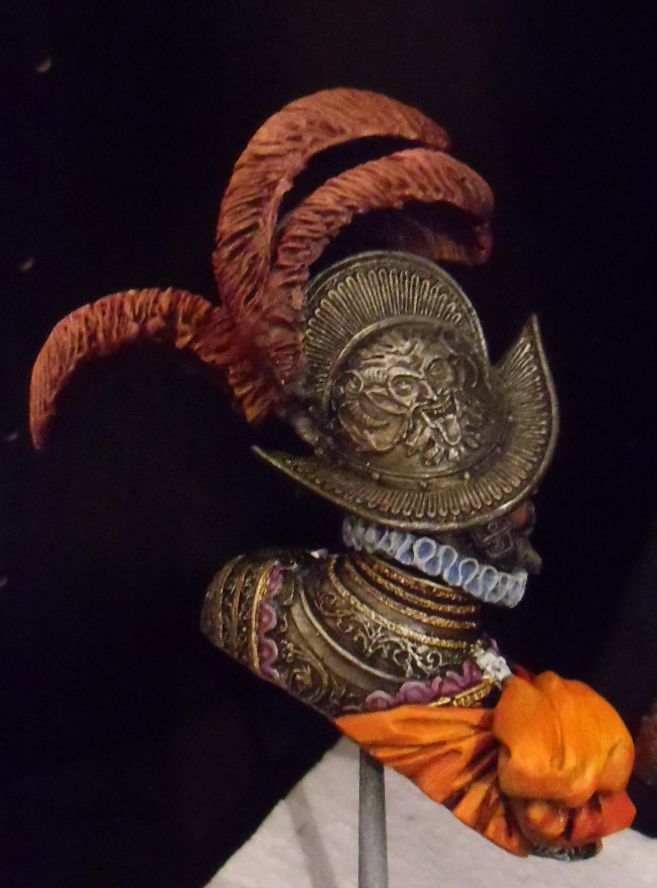
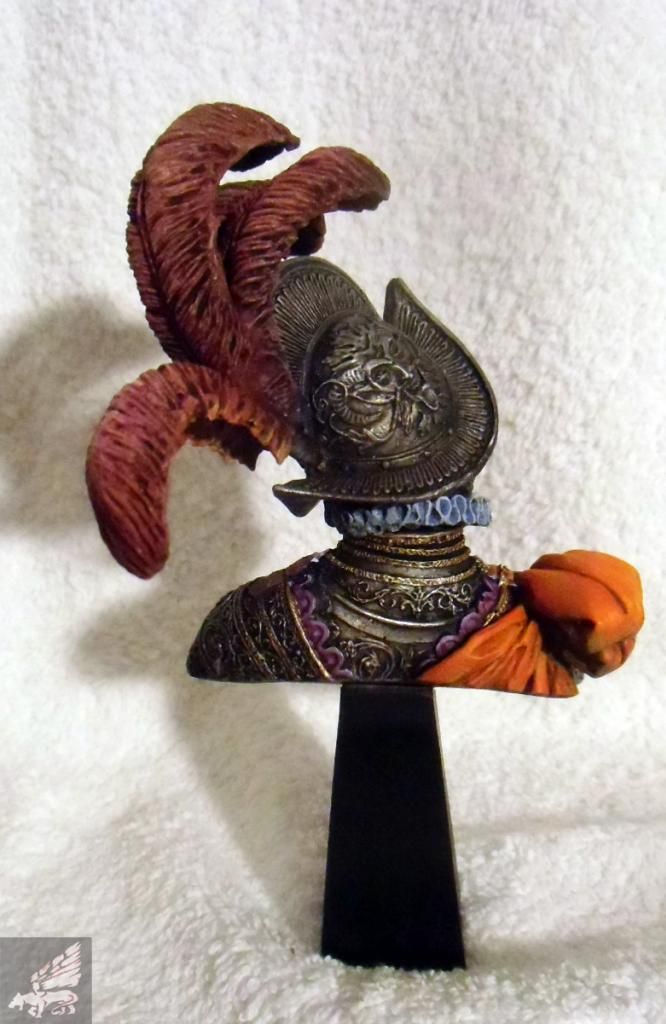
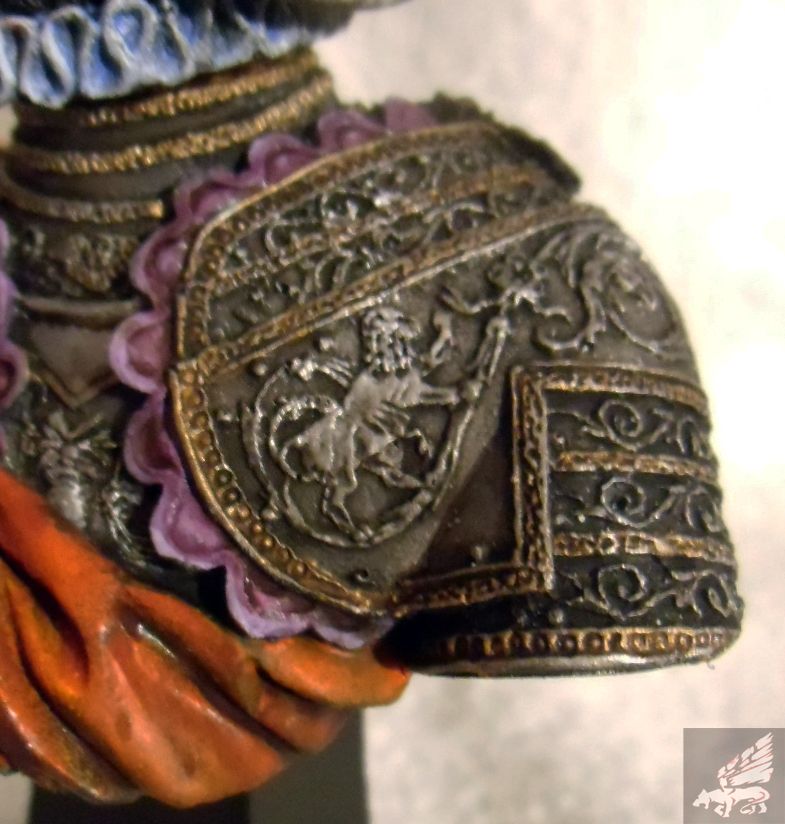
Thanks for the feedback.  The metal parts got a treatment with Humbrol Metal Cote colors. We have a model train shop here, which has artificial grass which I like, Noch and Busch stuff and a complete range of Humbrol colors, including those. I guess the shop owner always wonders why I buy tons of them - its simple: in my opinion they are the best colors to achieve realistic metal finishes. It started with Gun Metal, then "27003" followed. Dont know if that color has an official name, lets call it "brighter gun metal". Then a washing followed, for this reason I used GW "Agrax Eartshade", a very dark brown and an "universal weapon" so to say. Finally, some drybrushing with Polished Aluminium followed. No clear caot, though - it would ruin all effects. The feathers werent so simple, I needed three attempts and Im still not too happy with them. I guess Ill let them be like that now, until we have our modellers brunch at the end of February. A friend will be there and hes far more better than me, so maybe we can do a small workshop with the bust.  |
|
nicusi
Full Member
Member since: September 2013
Posts: 776
|
Post by nicusi on Feb 14, 2015 8:41:38 GMT -5
Hi Lucas,
Thank your very much for your kind comments, I have also a good friend who works with Humbrol metalics and was very pleased with them. For the feathers, because I have the same problems (http://modelerssocialclub.proboards.com/thread/9093/thermopylae-death-barbarians-lokros-hoplite?page=1&scrollTo=254734) and I was very curious to know others colleagues'solutions, I can tell you that I prefer to work in this manner: I start from a darken colour (let's say a dark red in your case. Then I come with a lot of layers and try to lighten. After some layers I begin to build a scale colour, id est lighter layers from the middle to the exterior part of the feathers. The extreme lights with some white put in the light red of the last third part/exterior of the feathers). I make a wash with black and red, more darken and try to put in the ditches. Then I remake the lights with a very fine brush. It takes patience but the result is very good and the feathers will have depth. And, of course, we must take care to the zenithal light in order to have adequate and natural contrast.
Hope to be some coherent, sorry for my poor English!
Nicolae
|
|
|
|
Post by TRM on Feb 14, 2015 12:02:08 GMT -5
Great bust to work on Lucas!! And you are making some excellent progress already!! Well done on the metal work!! Keep it going!!
|
|
|
|
Post by armorguy on Feb 14, 2015 12:06:58 GMT -5
You picked a stunner Lucas, this is a brilliant bust, I can't get enough of the "metal" parts, you already did a great job, all the details pop out thanks to the white/black spray method.
You must have had a blast today, I love the progress you've already made !
Have fun and best regards ! AG.
|
|
Biskup
Reviews member  June 2012 MoM Winner
Member since: January 2012
Posts: 667
Jan 30, 2012 6:28:11 GMT -5
Jan 30, 2012 6:28:11 GMT -5
|
Post by Biskup on Feb 14, 2015 15:37:02 GMT -5
That's is one cool bust with a lot of details. Thou the box-art never got me interested to much in this bust but I've seen few nicely painted and I will be looking forward to your version.
|
|
|
|
Post by deafpanzer on Feb 14, 2015 19:03:25 GMT -5
DAMN! Try not to have too much fun painting those details... it will be a stunner at the end for sure!
|
|
|
|
Post by tigrazor on Feb 15, 2015 14:48:09 GMT -5
|
|
|
|
Post by deafpanzer on Feb 15, 2015 16:22:14 GMT -5
Excellent work on the skin... keep it coming buddy!
|
|
|
|
Post by tigrazor on Feb 15, 2015 17:05:27 GMT -5
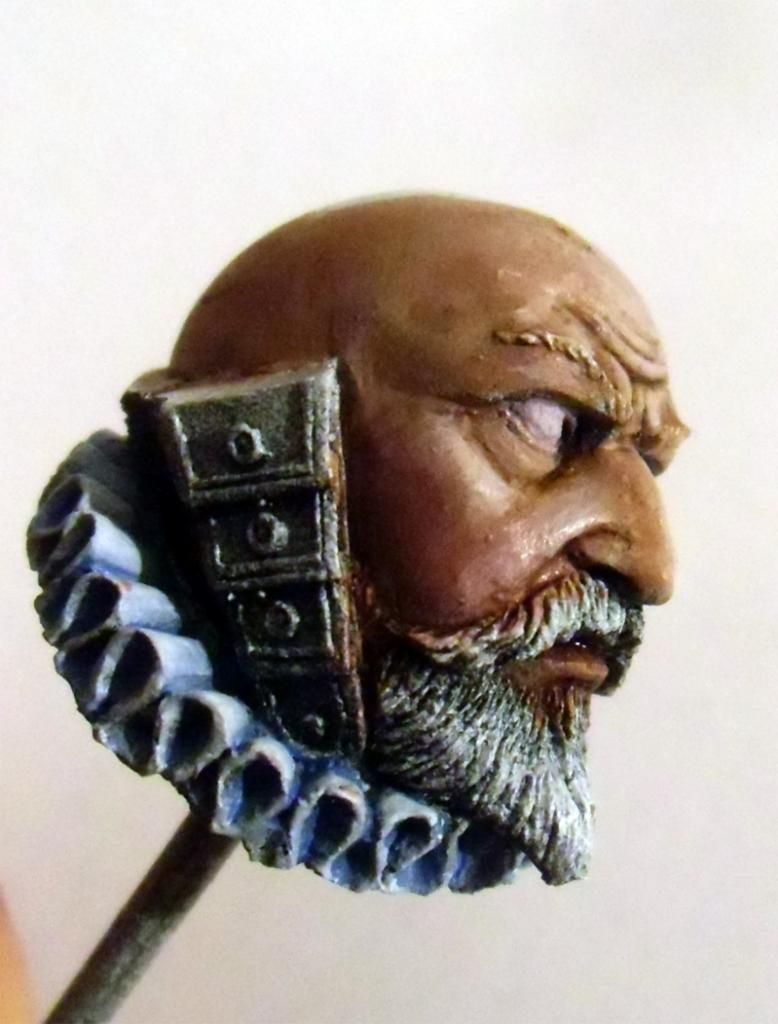
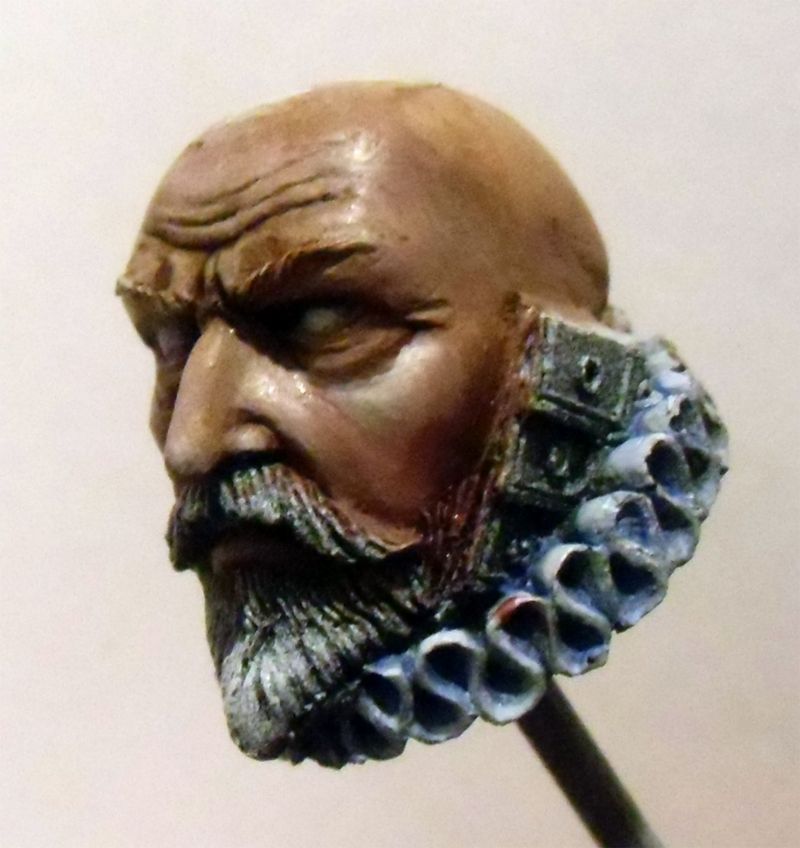
Your wish is my command.  Loads of washes were used, but no oil. Not yet. Sorry for the slightly fuzzy pictures. 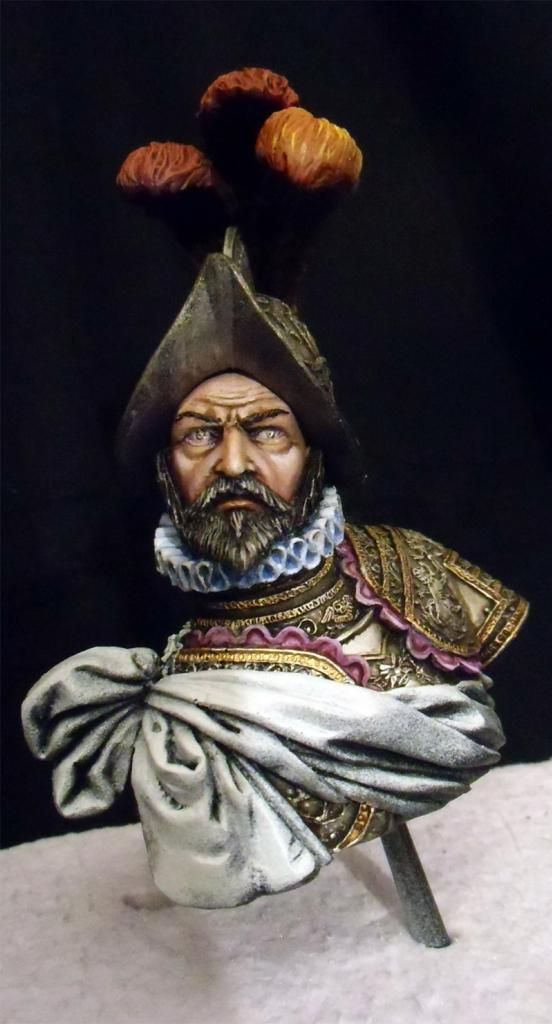 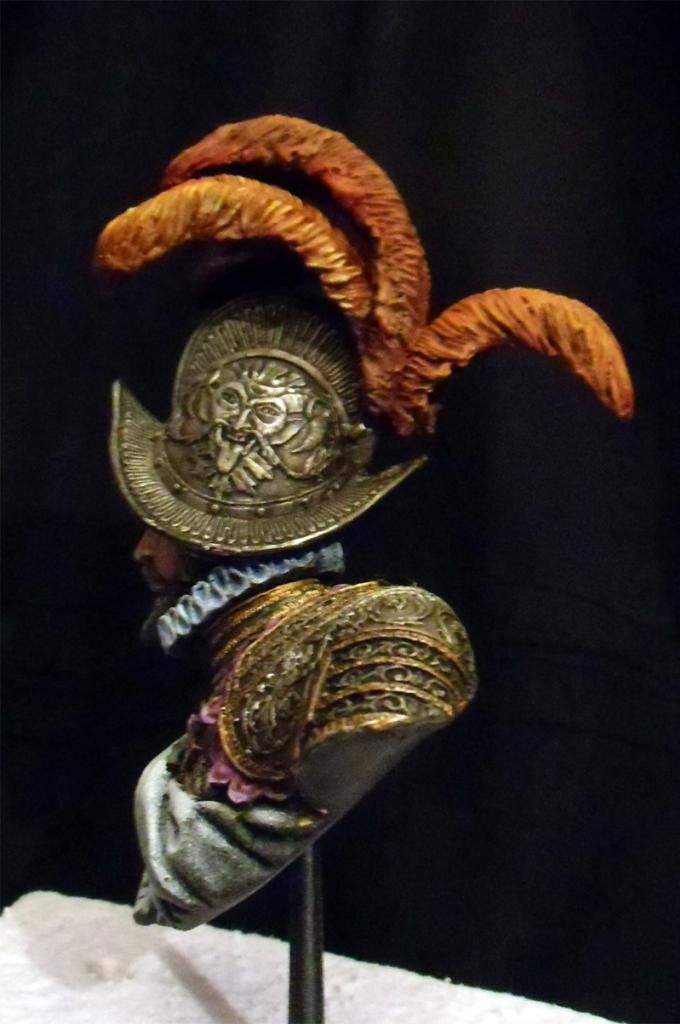 |
|
kiwibelg
Full Member
Member since: December 2014
Posts: 613
|
Post by kiwibelg on Feb 15, 2015 17:18:31 GMT -5
Woooaaaahhhhh!!
Mate, this is freaking excellent! Don't anyone ask for another update...he goes into painting over drive otherwise!!
Really envious of your talent here on this build ( and the others of course)
Shay
|
|
kiwibelg
Full Member
Member since: December 2014
Posts: 613
|
Post by kiwibelg on Feb 15, 2015 17:20:34 GMT -5
That is a photo of the box art right??
Just checking LOL
|
|
rondriaan
Full Member
Member since: March 2012
Posts: 606
Member is Online
Mar 27, 2012 2:07:40 GMT -5
Mar 27, 2012 2:07:40 GMT -5
|
Post by rondriaan on Feb 15, 2015 17:27:18 GMT -5
Nice bust and a flying start
|
|
|
|
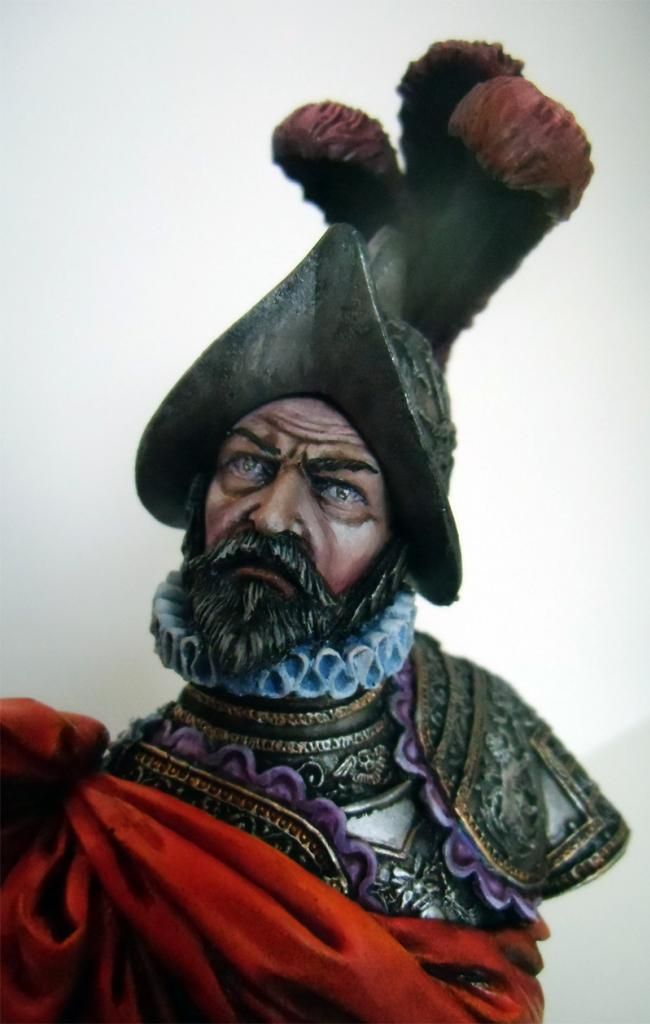
Post by tigrazor on Feb 15, 2015 17:55:18 GMT -5
Sorry, this isnt a picture of the box art. Funny thing is, I dont even know what the box art looks like - the initial picture comes from the net. And thats why I got this bust cheaper (no box). No need to be envious. Im still learning a lot from others, including some members involved in the GB here. But what I have learnt in the past projects: Less is more. It may sound a bit silly, but its really true. I recognized it when I painted the scarf of the Admiral some minutes ago - you can play with the colors and will get far better results when youre patient. Sounds silly again, yes? The lighter areas on the top need 1-2 layers of red, but the darker ones need 3-4, or even 5. Thanks to the b/w preshading this part of painting is really easy then. Thin colors were used (Vallejo Light Red + Carrobourgh Crimson for the darker shades). Believe it or not - I was really shocked how the face turned out, because I was afraid to ruin it first (I have deepest respect for modellers/painters with decades of experience). But again: less is more. The cheeks got two thin layers of dark red as well, and thats it. Enough contrast, but no exaggerated finish. |
|
|
|
Post by TRM on Feb 15, 2015 19:27:18 GMT -5
Outstanding Lucas!! Making some excellent progress!! Keep going my friend!!
|
|
|
|
Post by tigrazor on Feb 16, 2015 2:01:23 GMT -5
|
|
nicusi
Full Member
Member since: September 2013
Posts: 776
|
Post by nicusi on Feb 16, 2015 9:21:09 GMT -5
Lucas, you made real progresses there. I like very much your results, warm congrats.
It seems to me you have only a little to put an end.
My God, the start was two days ago and you...!
Cheers,
Nicolae
|
|
|
|
Post by TRM on Feb 16, 2015 11:22:21 GMT -5
Great work on the feathers Lucas!! Loving the subtle tone shifts in your metal work!! |
|
|
|
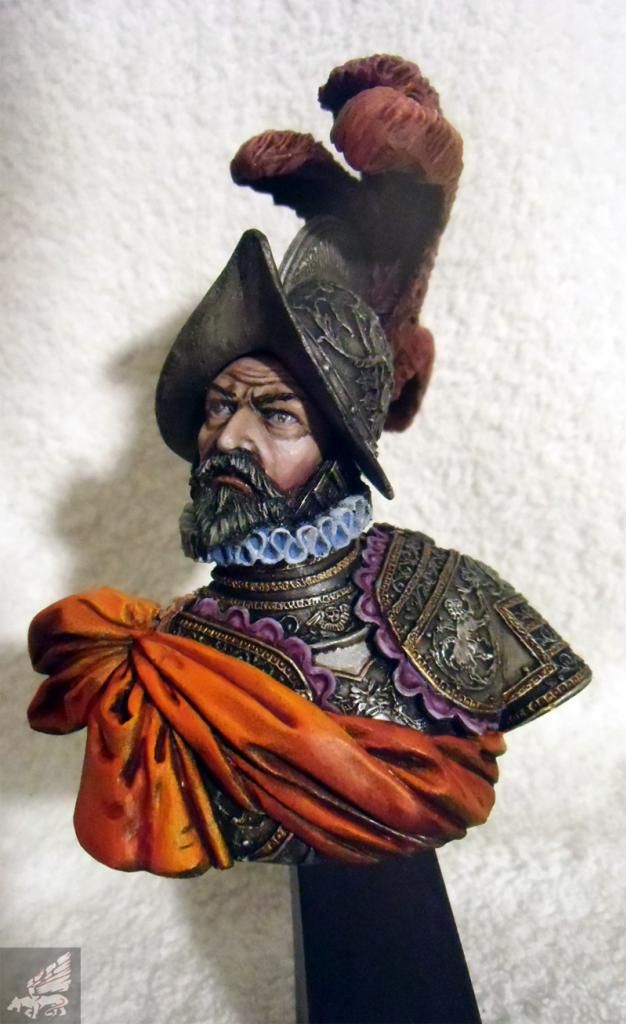
Post by tigrazor on Feb 16, 2015 16:30:46 GMT -5
|
|
|
|
Post by Leon on Feb 16, 2015 16:43:57 GMT -5
WOW!!!! Awesome finish Lucas,your painting skills are top notch. |
|
vlpbruce
Full Member
Member since: March 2013
Posts: 1,463
|
Post by vlpbruce on Feb 16, 2015 17:00:34 GMT -5
Outstanding paint Lucas!!!
|
|
|
|
Post by deafpanzer on Feb 16, 2015 19:10:23 GMT -5
HOLY SMOKES!!! I blinked and it is done. STUNNING!!! I really love the details on the armor...
Sure I will add it to MoM now!
|
|
|
|
Post by armorguy on Feb 17, 2015 6:46:18 GMT -5
Metals : 11/10
folds : 11/10
feathers : 11/10
OR...
Stunning so far !!!
|
|
nicusi
Full Member
Member since: September 2013
Posts: 776
|
Post by nicusi on Feb 17, 2015 7:01:13 GMT -5
So, one first Gold Medal goes... to the Gran Armada.
Warm congrats, Lucas!
Nicolae
|
|


 Loads of washes were used, but no oil. Not yet. Sorry for the slightly fuzzy pictures.