John Everett
Full Member

Member since: January 2012
July, 2016 MoM Winner
Posts: 1,278
Jan 17, 2012 0:53:48 GMT -5
Jan 17, 2012 0:53:48 GMT -5
|
Post by John Everett on May 8, 2015 23:14:37 GMT -5
|
|
|
|
Post by tobias5555 on May 9, 2015 0:59:00 GMT -5
Very cool work.
|
|
|
|
Post by Leon on May 9, 2015 3:12:01 GMT -5
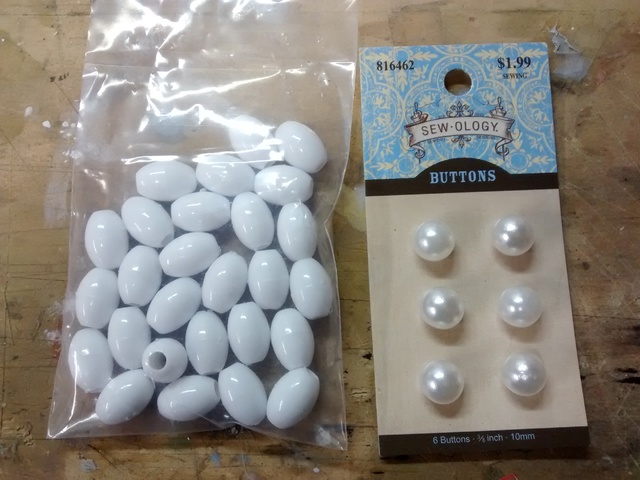
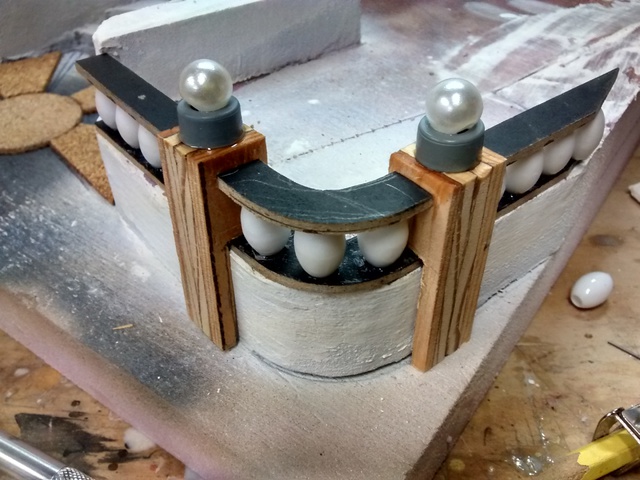
Cool idea on the beads and stuff John! Railing looks great.   |
|
|
|
Post by kaytermarram on May 9, 2015 7:33:32 GMT -5
John, you are a master of environment! This looks so great and as always, inspiring. Bringing in always new ideas and technics, top work here!
Frank
|
|
|
|
Post by TRM on May 9, 2015 8:59:50 GMT -5
Really incredible stuff here John!! Great sourcing of materials!! Looking forward to seeing things all pasted p!! |
|
|
|
Post by wbill76 on May 9, 2015 12:50:20 GMT -5
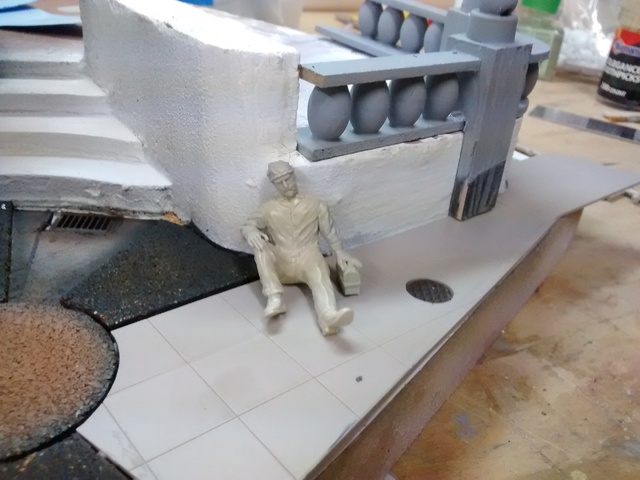
Nice use of found materials. Craft stores can be a real fun place to just kind of roam around in...never know what you might find that can be very handy for just this sort of thing. That figure looks like he's worn out from helping out!  |
|
John Everett
Full Member
Member since: January 2012
July, 2016 MoM Winner
Posts: 1,278
Jan 17, 2012 0:53:48 GMT -5
Jan 17, 2012 0:53:48 GMT -5
|
Post by John Everett on May 14, 2015 17:50:23 GMT -5
Thanks for posting in, gents! Sidewalk and grout seams: PRE-SHADE Just because I don't build airplane models, doesn't mean I haven't been watching those who do.  Greys and Tans  Tile Grout  Railing is glued down and blended with more of the acrylic/baking soda mix.  Lightly watered to help soften the transitions.  OVERALL VIEW Still needs to be treated with oil based washes. 
Landscaping and greenery next! |
|
|
|
Post by Leon on May 14, 2015 19:33:39 GMT -5
John this is progressing nicely! Sidewalk and grout seams look great. |
|
Wes
Full Member
Member since: November 2011
Posts: 686
Nov 16, 2011 9:34:50 GMT -5
Nov 16, 2011 9:34:50 GMT -5
|
Post by Wes on May 15, 2015 0:52:10 GMT -5
Smashing this one out of the park John. Im loving it.
|
|
|
|
Post by tiking on May 15, 2015 2:52:17 GMT -5
Outstanding work.
|
|
|
|
Post by kaytermarram on May 15, 2015 4:45:58 GMT -5
Top work1 This scene reminds me on something similar from RESIDENT EVIL: NEMESIS, the game. Feels like home so to say! You always doing wonders here!!
Frank
|
|
|
|
Post by deafpanzer on May 15, 2015 11:59:06 GMT -5
That's pretty cool!!! Sorry I am late but I am here now. Keep it coming buddy
|
|
|
|
Post by wbill76 on May 19, 2015 11:56:34 GMT -5
Impressive progress on this one John! Love the direction you're taking this one in in terms of the wear and varied look.
|
|
John Everett
Full Member
Member since: January 2012
July, 2016 MoM Winner
Posts: 1,278
Jan 17, 2012 0:53:48 GMT -5
Jan 17, 2012 0:53:48 GMT -5
|
Post by John Everett on May 19, 2015 23:01:56 GMT -5
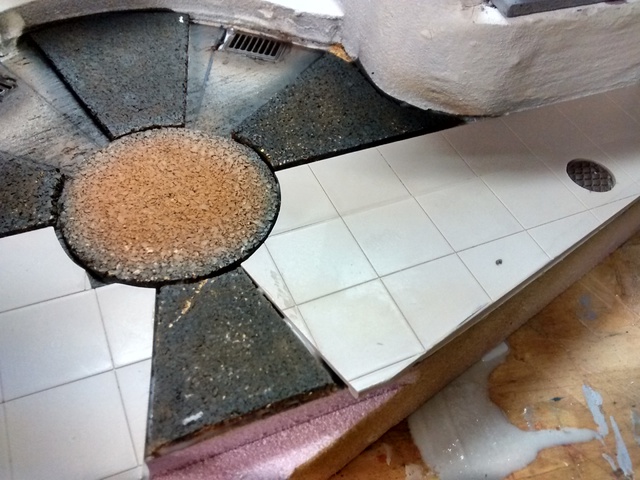
Thanks for taking the time to post-in, gents! I've made some decisions about the final layout of the scene elements and have decided to use more of the HO scale sidewalk tiles to form the paved path through the park. I'm also going to attempt a pink granite coloration. If it fails, I'll airbrush it grey to match the sidewalk on the lower level. Filed out a trench and placed the sidewalk unit. 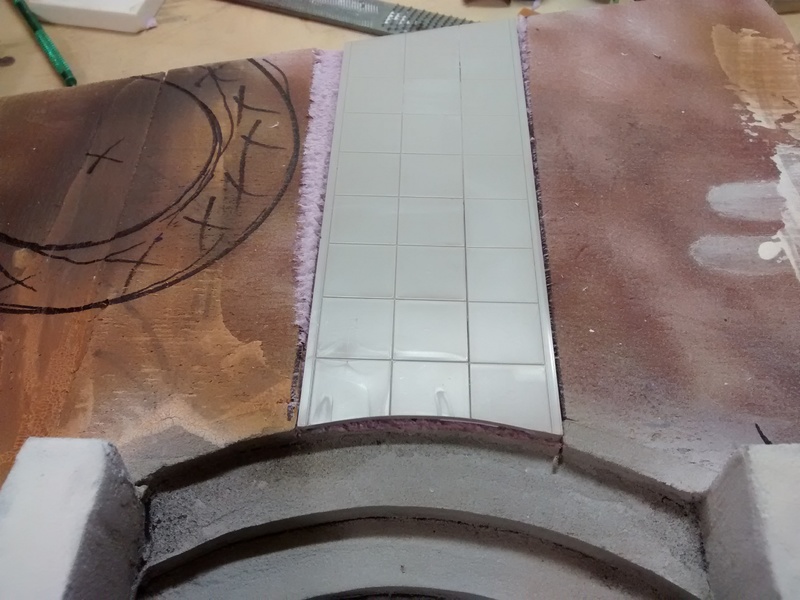 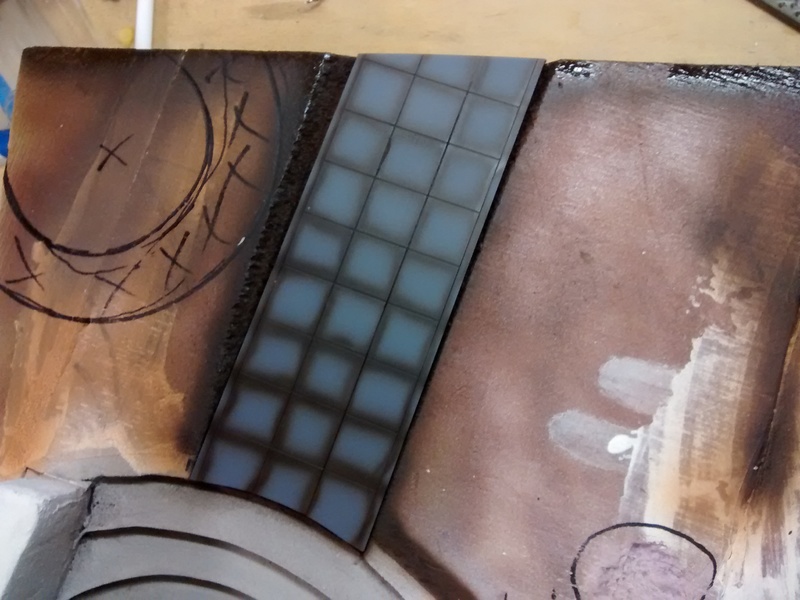 Base colors for pink granite. 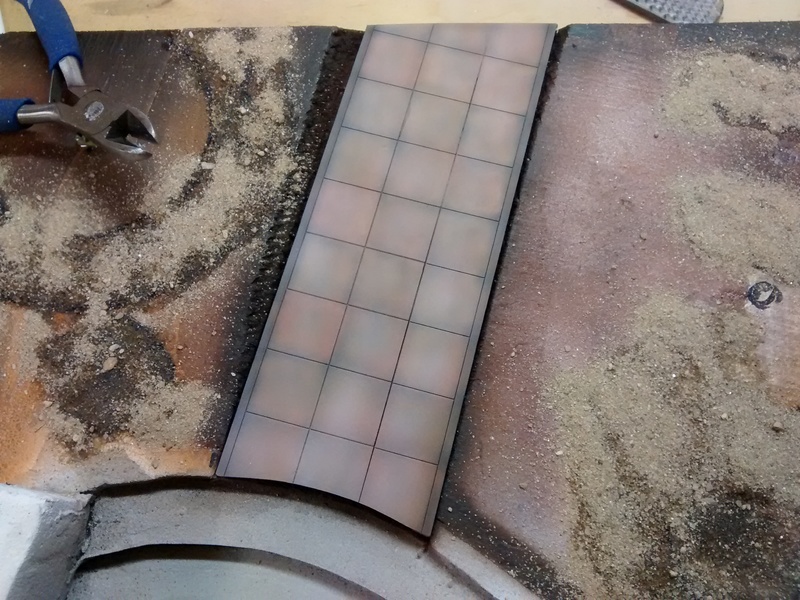 Granite "texturing". In general, acceptable. 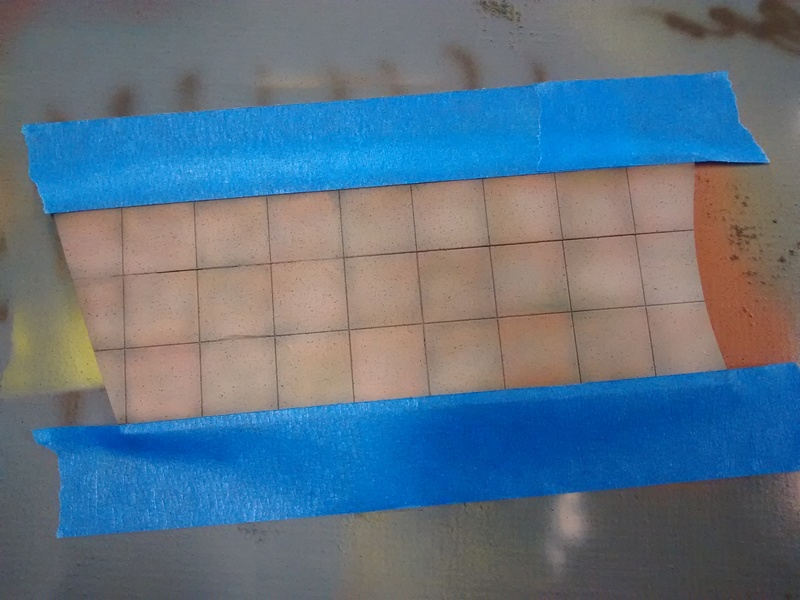 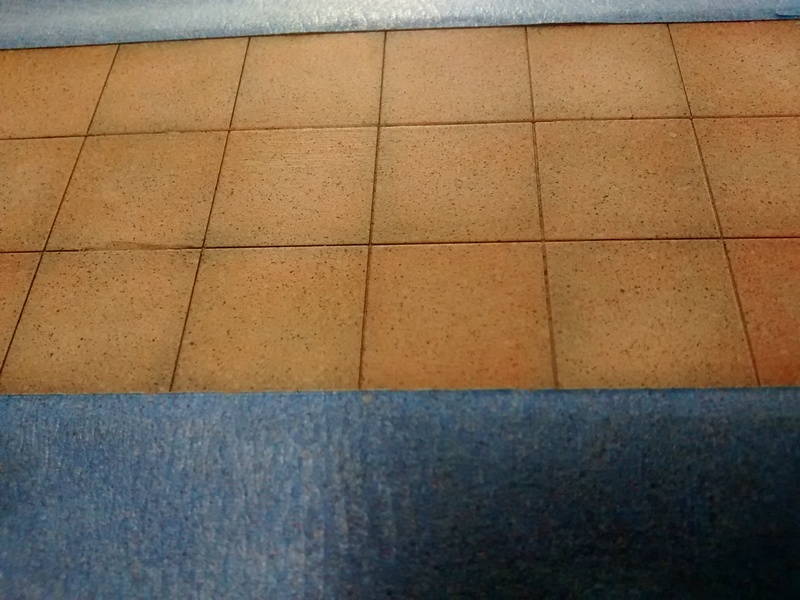 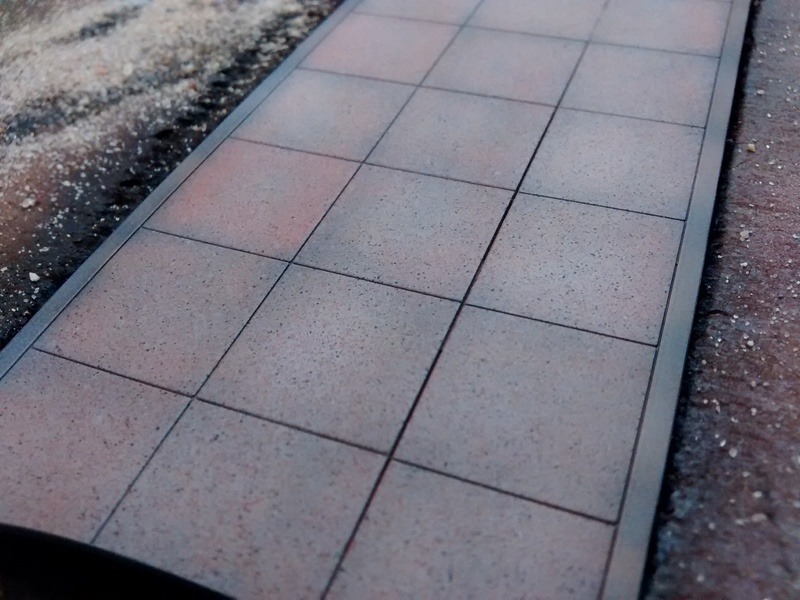 The styrene sidewalk was sprayed with thin acrylic from about 2 feet away so that each micro-droplet of paint had time to separate from its neighbors and partially dry out during its flight from the airbrush. This allows a multitude of individual tiny specks to gradually build up in density. The black is most prominent. But there are spots of various red and very light pink also on the surface. |
|
|
|
Post by Leon on May 20, 2015 4:24:33 GMT -5
John the granite texturing looks fantastic! |
|
|
|
Post by tiking on May 20, 2015 6:35:56 GMT -5
Fantastic rendition.
|
|
elco
Full Member
July & Oct 2014 MoM Winner
Member since: May 2013
MOY 2014 Winner
Posts: 660 
|
Post by elco on May 20, 2015 6:49:21 GMT -5
Cool stuff!!
|
|
|
|
Post by kaytermarram on May 20, 2015 11:59:07 GMT -5
John, when I see how you handle the "stony" elements of the base I cannot wait for the plants (hopefully you will do something about). They must be killer when added! Absolut brilliant work here!
Frank
|
|
John Everett
Full Member
Member since: January 2012
July, 2016 MoM Winner
Posts: 1,278
Jan 17, 2012 0:53:48 GMT -5
Jan 17, 2012 0:53:48 GMT -5
|
Post by John Everett on May 20, 2015 23:51:33 GMT -5
I cannot wait for the plants. Frank Wait no more! More use of my favorite ground cover, latex DAP! Water soluble and sticky as heck. The areas of sand were done last night with 30 minute epoxy. (Epoxy, the 2 part liquid type used for bonding wood, can be thinned with rubbing alcohol while it's still in liquid form. This is handy for the guys in the RC airplane world who want to seal wooden structures against fuel or oil intrusion. It will take several hours to harden. But it provides a tough and durable sealant) In this case, I used thinned epoxy because it's foam friendly and holds down very aggressively. White glue works well, but can pull free of the pink foam if placed under too much stress. 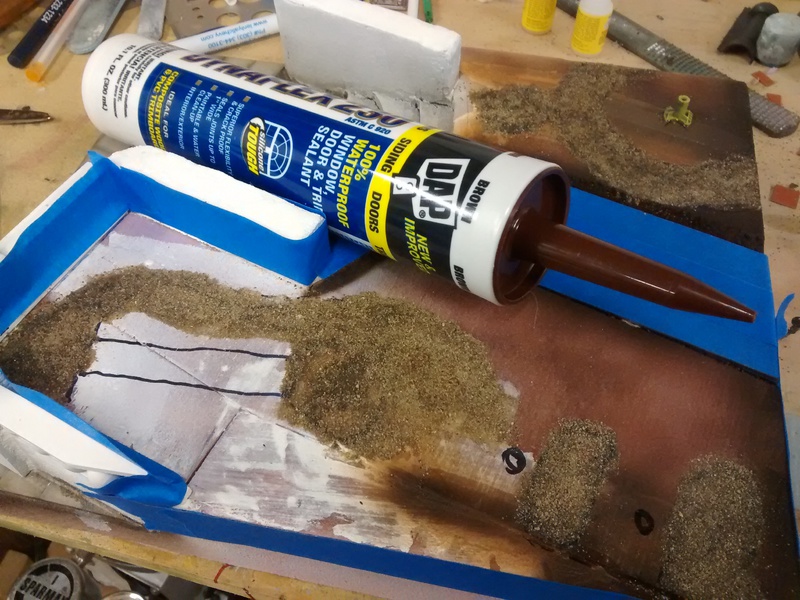 A damp brush will soften the caulk and make it easier to place. It will also destroy your brush, so use a disposable type.  Yellow grass is always found beneath the green. 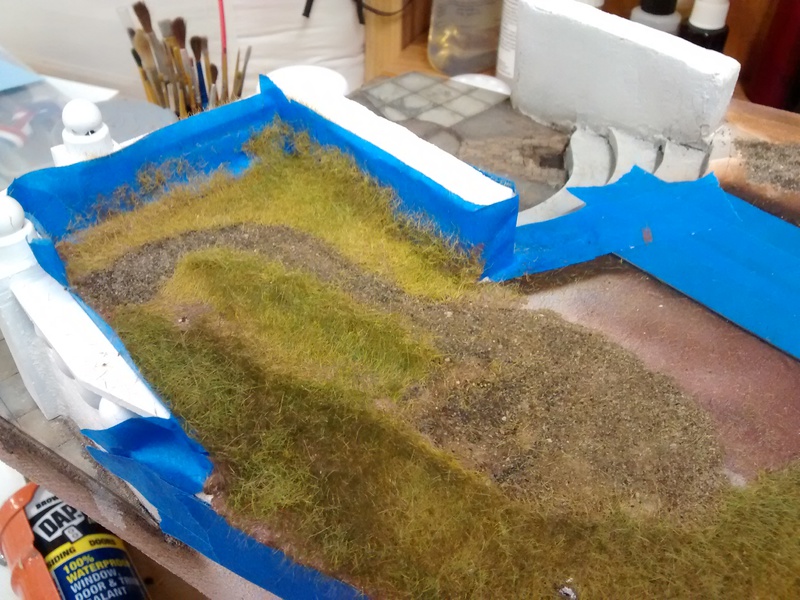
I have a static grass tool made from a converted, electric fly swatter. ( www.youtube.com/watch?v=EAEmcqc-yIc ) It works well; but it can be difficult to place fibers in some of the tight corners I have here. 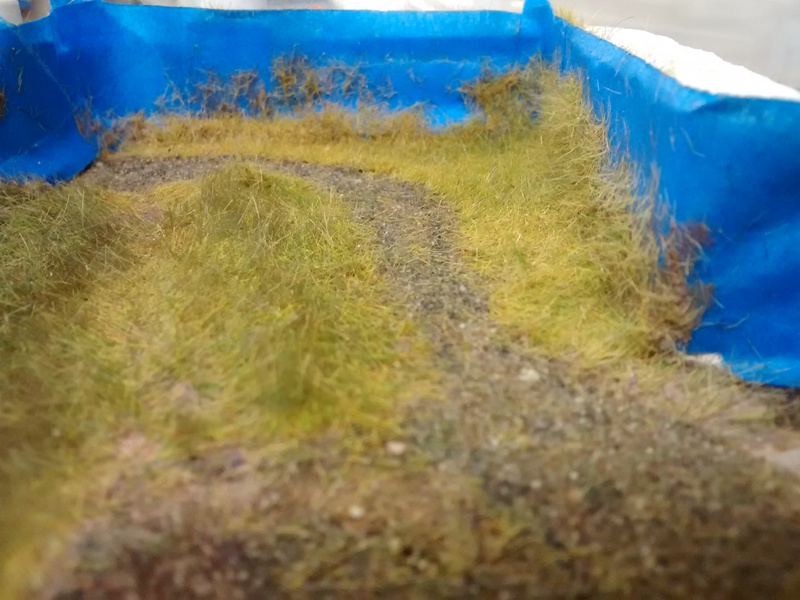
Green over the yellow and more areas covered with Dap. (masking tape removed from sidewalk prior to grass application) 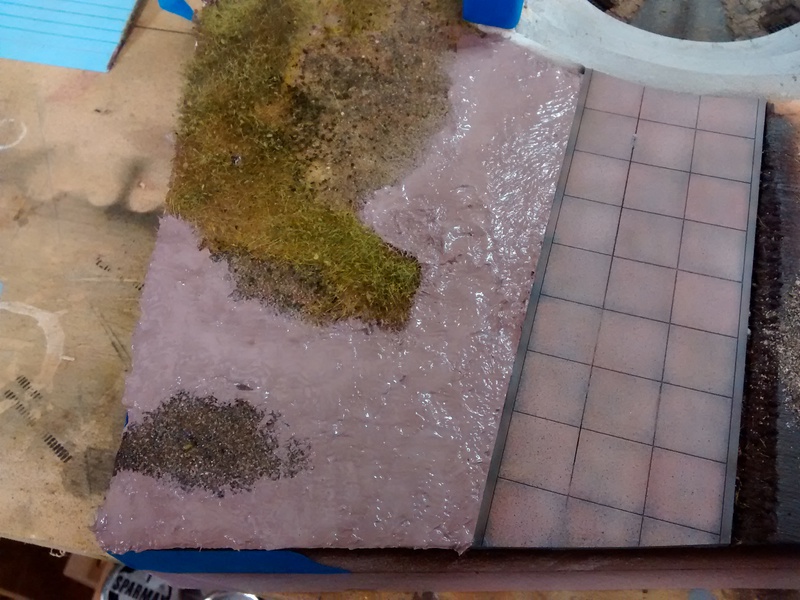
Crushed up leaves and various plant material collected from around the neighborhood add a nice touch of random mess.  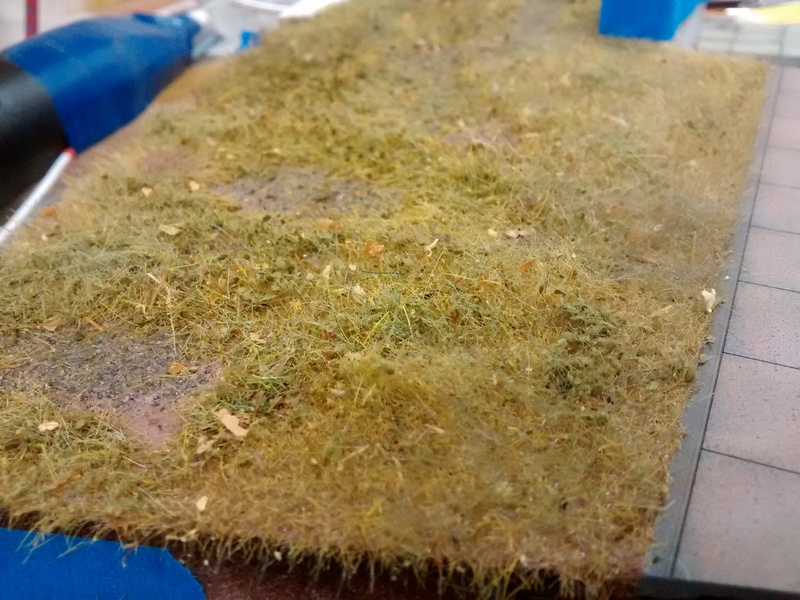 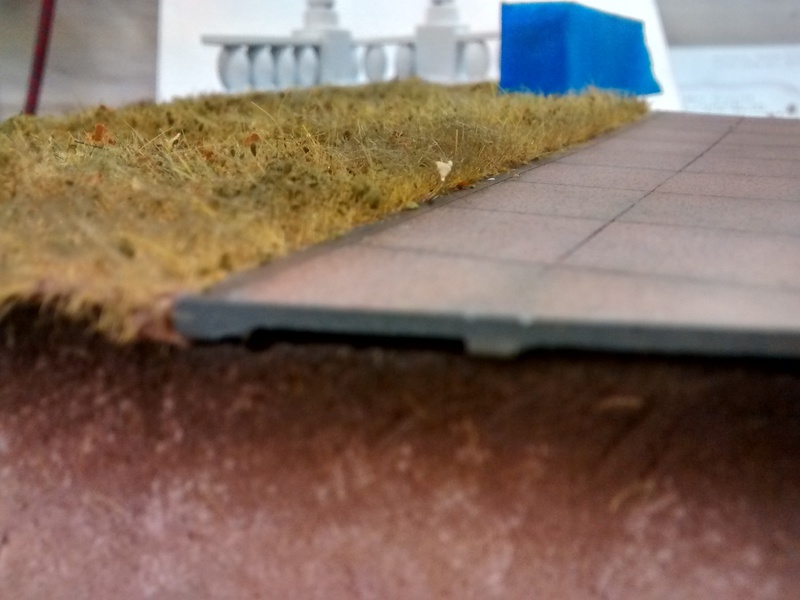 |
|
|
|
Post by Leon on May 21, 2015 3:34:04 GMT -5
Ground cover looks fantastic John! |
|
coro69
Full Member
Member since: January 2015
Posts: 351
|
Post by coro69 on May 21, 2015 10:58:31 GMT -5
exceptional inspiring work here... i have to follow and get ideas for my next piece of work... outstanding! i love it!
|
|
|
|
Post by kaytermarram on May 21, 2015 12:07:24 GMT -5
This is some kind of meadow I love. Really! Not only the different colours, all the small stuff lying around, the unflocked areas in between, the different size of the grass, wow, John, this is really great!
Frank
|
|
|
|
Post by wbill76 on May 21, 2015 12:22:28 GMT -5
The pink granite is impressive in its own right John! The added grass and ground work looks right at home as well. Got my popcorn ready for the next round on this one. |
|
John Everett
Full Member
Member since: January 2012
July, 2016 MoM Winner
Posts: 1,278
Jan 17, 2012 0:53:48 GMT -5
Jan 17, 2012 0:53:48 GMT -5
|
Post by John Everett on May 22, 2015 0:41:41 GMT -5
"Second verse, same as the first!" 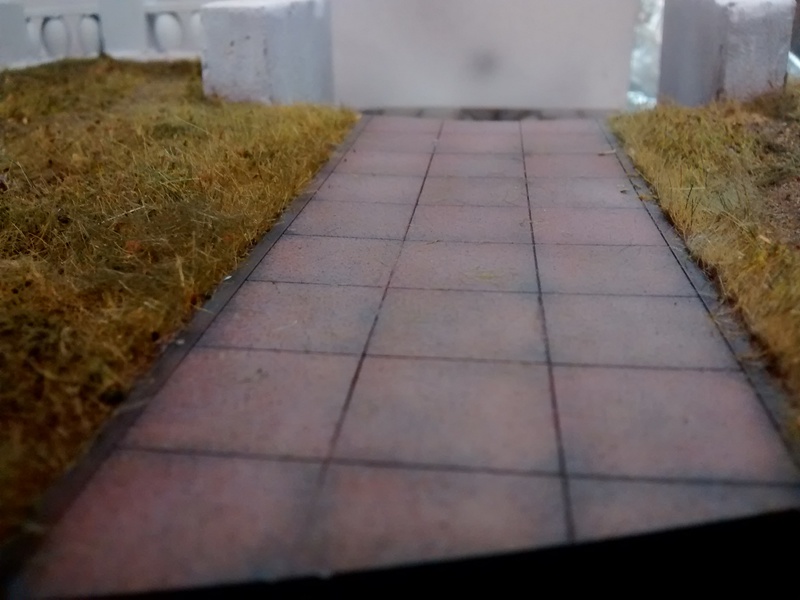
Loose drops of white glue on aluminum foil are covered with static grass. The foil is non-stick and highly conductive, which helps with the static grass applicator. 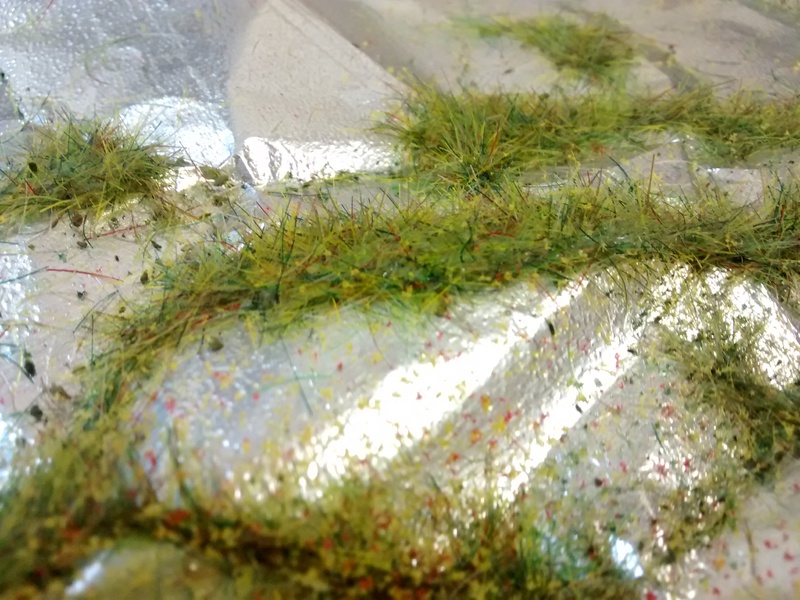 Splash of color here and there. 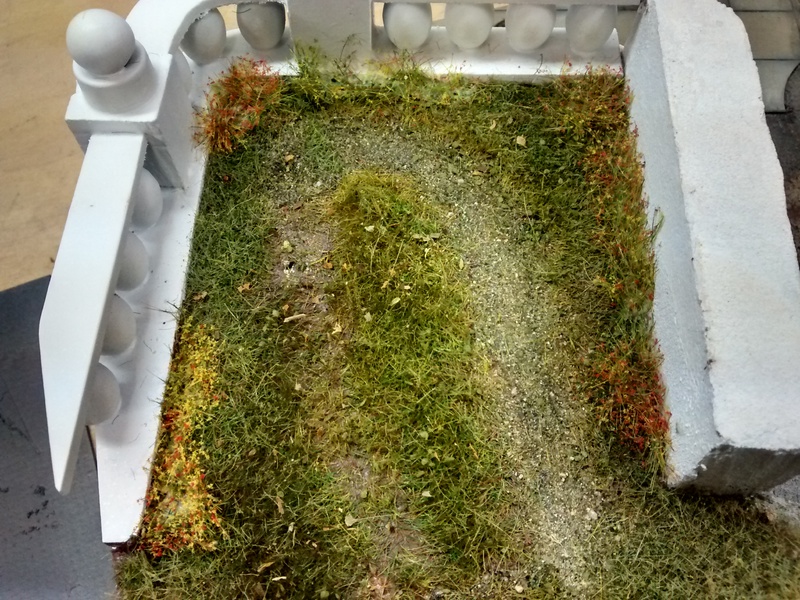
Sidewalk too clean............ 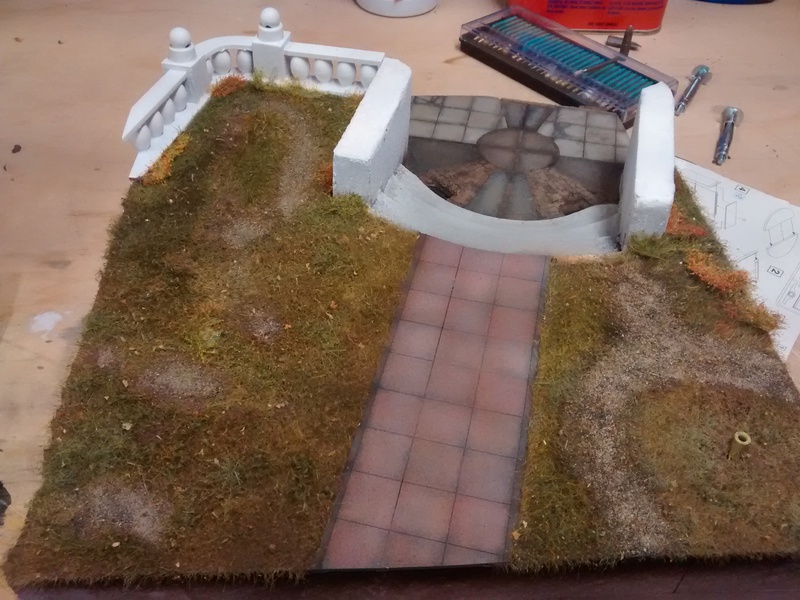
That's better! 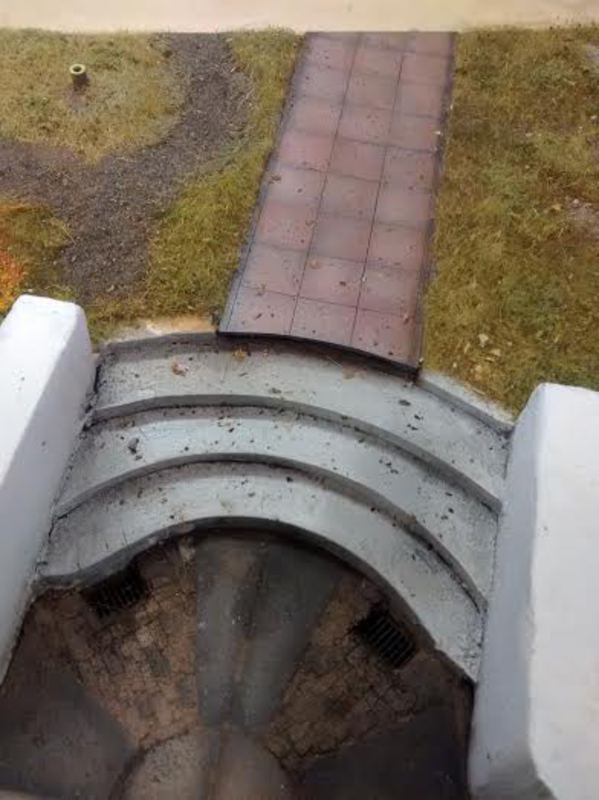
Thanks for watching. This one will go dark for a while as I spend time on the secret diorama "story" components. The whole thing should be ready for display in about 1 month....fingers crossed.  |
|
|
|
Post by wbill76 on May 22, 2015 12:10:41 GMT -5
1 month! Oh the suspense! Looking forward to seeing what emerges to go with this John. |
|
|
|
Post by kaytermarram on May 23, 2015 8:28:18 GMT -5
Love it, very interesting technics and great build. Looks too cool and I could imagine some Zombies moving in and being awaited from some surviors behind the stone gate. OK, this is surely something you won´t build, but always when I see great scenarios I have ideas like this. The grass is really awesome!!
Frank
|
|
|
|
Post by deafpanzer on May 25, 2015 21:08:10 GMT -5
WHOA!!! Fantastic work on the ground... so realistic!
|
|
|
|
Post by tiking on Jun 1, 2015 7:00:44 GMT -5
Great looking dio. Got to give this static grass a try.
|
|
John Everett
Full Member
Member since: January 2012
July, 2016 MoM Winner
Posts: 1,278
Jan 17, 2012 0:53:48 GMT -5
Jan 17, 2012 0:53:48 GMT -5
|
Post by John Everett on Jun 7, 2015 0:34:19 GMT -5
|
|
|
|
Post by kaytermarram on Jun 7, 2015 8:47:55 GMT -5
The head on the last figure should be one of the most beloved ones! It is bald, right? I have used it when I have redone a Dragon US Marine, it is one of the best heads from Roger Saunders! Cool that you add a haircut. You bet, I keep my eyes on the figures, maybe even more than on the landscape because I love your way doing them. Ahem, and what is with the great Welder figures? Have you done a bit more on them? Anyway, figures rules!
Frank
|
|