|
|
Post by deafpanzer on Oct 20, 2015 14:46:56 GMT -5
I can see the pictures now. This is odd!!! Maybe the Mexican cartel panicked when they saw my name because I have special connections with the FBI.
|
|
|
|
Post by wbill76 on Oct 20, 2015 14:47:59 GMT -5
I can see the pictures now. This is odd!!! Maybe the Mexican cartel panicked when they saw my name and I have special connections with the FBI. Watch out for those Little Birds!  |
|
DeafStuG
Full Member
  
Member since: May 2013
..
Posts: 1,283 
|
Post by DeafStuG on Oct 20, 2015 19:30:12 GMT -5
Fantastic work! I enjoyed read on it.
|
|
|
|
Post by wbill76 on Oct 20, 2015 21:32:50 GMT -5
Fantastic work! I enjoyed read on it. Thanks Jeremy!  |
|
|
|
Post by wbill76 on Oct 22, 2015 19:31:09 GMT -5
I've been working on getting the 6 quad-40mm guns that populate the tubs around the superstructure. These are 8-part assemblies that are called out in Step 4 and they go together reasonably well but, just like with the 3-inch guns, a 'merry-go-round' approach helps ensure that the parts have a chance to set up a bit to avoid any mishaps. The PE frame/railing that goes around the back has to be bent to shape just so for it to sit properly and also makes the final assembly a little more delicate to handle. The connection points on the elevation mounts aren't perfectly round so if you want the guns to sit level, some modifications would have to be made. I like having mine partly elevated such that they look like they are in action so it wasn't a big deal. You do have to work a little bit to get the barrel pairs elevated together at the right height as they won't naturally sit that way otherwise. 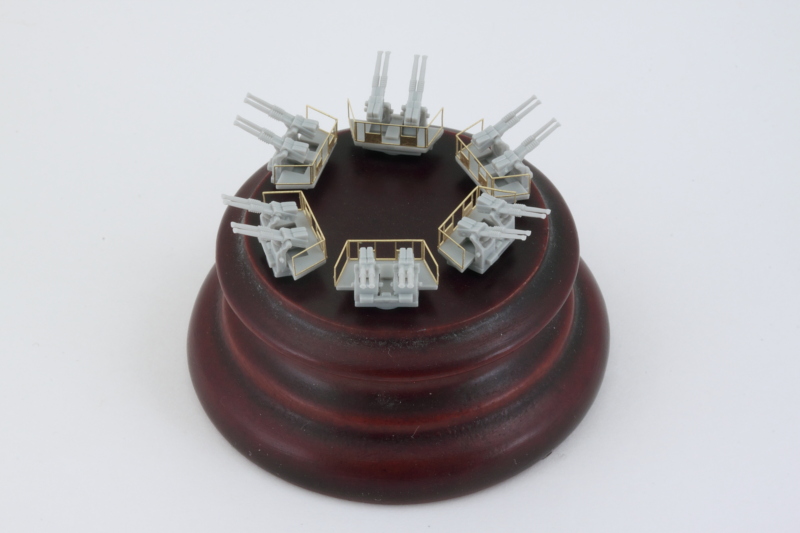 I put the guns into their tubs to ensure that they all sat at pretty much the same elevation height and 'looked right' together in place. I let them sit overnight before handling them any further for painting purposes. 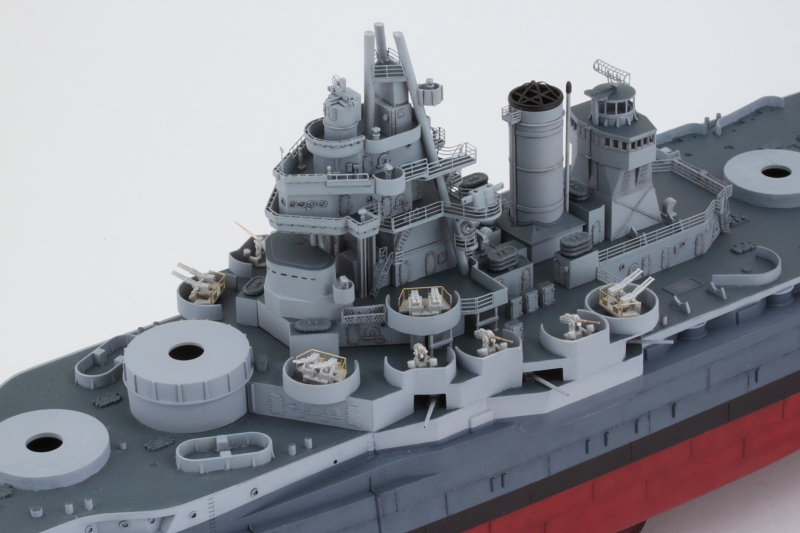 After looking at reference photos, if the guns were stowed they had canvas slip-covers over them that were Deck Blue as were the crew platforms and railings. That meant getting out the airbrush and going to work with it first before hand painting and detailing the rest. The guns themselves and the elevation mounts were Haze Gray and the recoil springs were picked out with MM Metalizer Gunmetal with the help of the Optivisor. 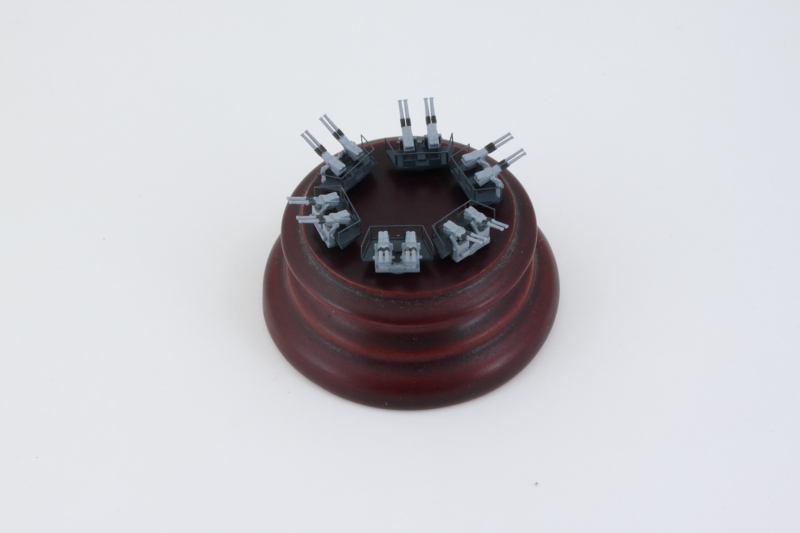 I still need to do some paint work on the 3-inch guns to get them ready for installation as well. There are 4 20mm guns that go into the tubs forward of the 02 deck that I might as well get out of the way too while I'm at it. |
|
|
|
Post by Leon on Oct 23, 2015 4:25:54 GMT -5
Nice work and painting on the 40mm guns Bill! They look great sitting in their tubs.  |
|
|
|
Post by dierk on Oct 23, 2015 8:09:01 GMT -5
Getting more impressive by the update!
|
|
|
|
Post by wbill76 on Oct 23, 2015 9:40:26 GMT -5
Thanks Leon, she's starting to get her teeth! Dierk, thanks as well. Still a long way to go but getting there!  |
|
|
|
Post by JimD on Oct 23, 2015 9:41:30 GMT -5
The guns are great. And I imagine some tedious work both building and painting them. It's paying off well though.
|
|
|
|
Post by wbill76 on Oct 23, 2015 9:46:14 GMT -5
The guns are great. And I imagine some tedious work both building and painting them. It's paying off well though. Total time for building and painting on those 40 mm Guns was about 5 hours give or take. They have some really nice details on them so have to do them justice!  |
|
|
|
Post by deafpanzer on Oct 23, 2015 15:08:17 GMT -5
Dopey (Dupes) better watch out if he dares to fly his bomber any closer to your ship now... looking great!
|
|
|
|
Post by wbill76 on Oct 23, 2015 19:41:03 GMT -5
Thanks Andy! You're right about the AA muscle on this ship. Still a lot more guns to go!  |
|
|
|
Post by wbill76 on Oct 23, 2015 19:41:41 GMT -5
Building on yesterday's work with the 40mm guns, I painted up the 3-inch guns and got them ready for installation. All 12 sets of guns were installed into their respective tubs and then the final set of PE railings and access ladders added for the 02 deck. The railings aren't called out until Step 28 vs. the guns going in under Step 22. In hindsight it would've been a lot easier to install the railings, particularly those with bends, between the tubs if they had gone in first vs. the guns but either way is still possible. Having the guns in place just means that there's a lot less room to maneuver around with the tweezers when it comes to placing the railings into some of those really tight spaces. 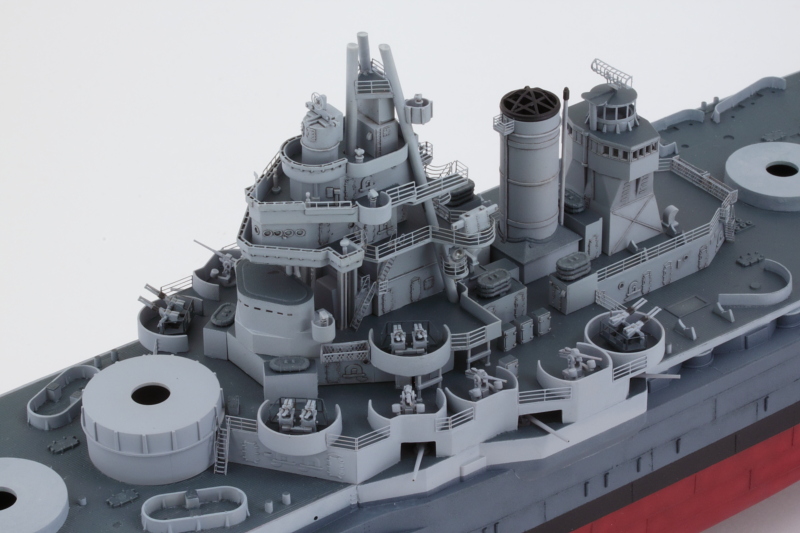 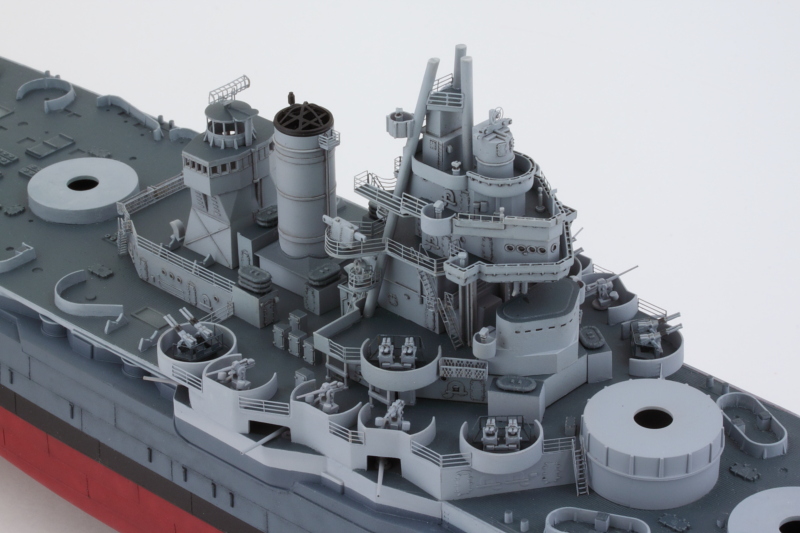 Next up will be dealing with the bow area details including the anchor chains. |
|
4bogreen
Full Member
  
Member since: January 2014
On the bench; Yak-1B, T-30, T-34 model 1940
Posts: 568 
|
Post by 4bogreen on Oct 24, 2015 9:05:10 GMT -5
Awesome!! I love this Bill! You are doing a great job!
|
|
|
|
Post by Leon on Oct 24, 2015 9:30:24 GMT -5
Great work on the added guns and railings Bill!  |
|
|
|
Post by wbill76 on Oct 24, 2015 10:55:56 GMT -5
Thanks Remco and Leon! Appreciate the comments.  |
|
|
|
Post by dierk on Oct 24, 2015 12:04:29 GMT -5
Sorry, I've run out of different ways of how to say 'you're doing a great job'...so here goes: you're doing a great job!  |
|
|
|
Post by wbill76 on Oct 24, 2015 13:18:50 GMT -5
Sorry, I've run out of different ways of how to say 'you're doing a great job'...so here goes: you're doing a great job!  No worries Dierk!  This build still has a good long way to go before it's done so a little repetition is to be expected I guess.  |
|
DeafStuG
Full Member
  
Member since: May 2013
..
Posts: 1,283 
|
Post by DeafStuG on Oct 24, 2015 15:20:52 GMT -5
Sweet AA details.
|
|
S e r z h--Rest In Peace
Full Member
  
Member since: November 2014
RIP- December 2023
Posts: 650 
|
Post by S e r z h--Rest In Peace on Oct 24, 2015 16:16:11 GMT -5
It looks nice shade of difference colors! process was similar to the construction of a multistory office.
Good luck!
|
|
|
|
Post by wbill76 on Oct 24, 2015 20:29:38 GMT -5
Thanks Jeremy! It looks nice shade of difference colors! process was similar to the construction of a multistory office. Good luck! That's not a bad comparison Serzh! Lots of layers to this baby that's for sure.  |
|
|
|
Post by wbill76 on Oct 26, 2015 20:11:58 GMT -5
I've been slowly working my way through the bow details that are called out in multiple steps in order to get things squared away in this area of the ship before moving aft where the lion's share of stuff remaining awaits. First up was returning to Step 19 and all of the little details there that I hadn't yet installed. The 12 tie-off cleats are something to watch out for as the instructions would have you fit them flush to the edge of the hull. The potential issue/problem with that is the railings that need to install there in the final Step 37 don't have any cut-outs in them for the cleats, so you're faced with one of two choices. You can fit the cleats flush and cut out the railings (which are provided as one single long piece for the complex curves in this space) which may or may not cause structural issues in the process or leave a small edge so the railings can install around them. I opted for the latter as that will also allow me to make cuts if practical later when the time comes. The kit provides some nice copper chain for the anchor chains but the instruction diagrams are a little funky to say the least in showing how they should actually sit. I painted the chain as a single long length with Flat Black and then clipped one link at the end in half so I could use that to anchor it around the capstan and into the well with CA. The chain was run forward into the hawse holes in the deck instead of just ending abruptly as the diagram shows and a little more CA used there to secure it taught in place. Rinse and repeat for the 2nd chain. The length provided is plenty long enough and I still ended up with a couple of inches worth to spare. The PE grates were added over the top of the chains, but you can still see the chain if you look down through them. Last but not least I added the 4 20mm guns into the tubs from Step 22 and the 4 floater net baskets on the B turret from Step 28. The baskets need to set just so to allow the back of the A turret to clear them so I did a quick test fit with one set of the turret parts just to make sure that wouldn't be an issue later on. 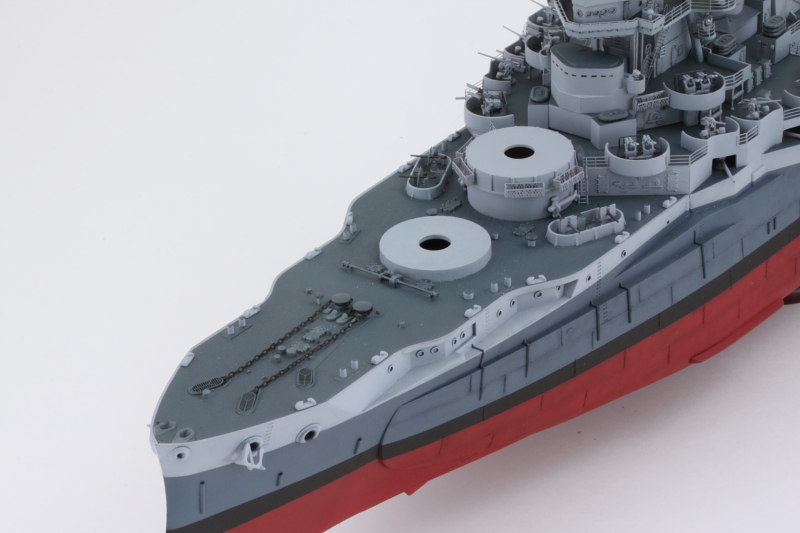 Next up will be starting work on the 2nd half of the hull and all of its remaining goodies! |
|
totalize
Full Member
  
Member since: February 2013
Don't take yourself too seriously. It's just plastic.
Posts: 260 
|
Post by totalize on Oct 26, 2015 20:35:31 GMT -5
Super nice build you have going here Bill.
This makes me want to build a 1/350 scale ship even more.
Looking forward to seeing more.
Dave.
|
|
|
|
Post by Leon on Oct 27, 2015 5:01:00 GMT -5
Nice work on the chains,baskets and 20mm guns Bill!  |
|
|
|
Post by wing_nut on Oct 27, 2015 6:25:34 GMT -5
As amazing as the build is, I am even more impressed that you can see he keys clear enough to type up a description after seeing all the minuscule PE.
|
|
|
|
Post by wbill76 on Oct 27, 2015 11:24:13 GMT -5
Dave, thanks for stopping by and for the comments. 1/350 ships are something that I've found to be enjoyable, but they are definitely a much more time-consuming endeavor no doubt about it.  Leon Leon, thanks as always!  Marc Marc, believe it or not, I have to give myself regular breaks to avoid using the Optivisor for too long or my neck starts to tense up from their added weight, subconsciously hunching over, and there's also the eye strain issue of course! I'm sure you're no stranger to that type of thing yourself, right? 
|
|
|
|
Post by armorguy on Oct 27, 2015 11:34:03 GMT -5
Each time there's progress I take a look and it keeps looking better and better ! What a detailed gem !
|
|
|
|
Post by wbill76 on Oct 27, 2015 11:56:44 GMT -5
Each time there's progress I take a look and it keeps looking better and better ! What a detailed gem ! Thanks AG!  Trumpeter certainly went the extra mile in providing detail for this one IMHO. Of course most of that detail is tiny!  |
|
|
|
Post by wing_nut on Oct 27, 2015 14:43:08 GMT -5
I'm sure you're no stranger to that type of thing yourself, right?  HAHA Nope. In fact... did you see the new F-15 coming out in 144th over on HS today? I am all over that like stink on poop. EDIT... A major disappointment. It's 1/48 not 144th. From excited to not giving a rat's hairy hind quarters in such a short time. 
|
|
|
|
Post by wbill76 on Oct 27, 2015 16:06:03 GMT -5
I'm sure you're no stranger to that type of thing yourself, right?  HAHA Nope. In fact... did you see the new F-15 coming out in 144th over on HS today? I am all over that like stink on poop. EDIT... A major disappointment. It's 1/48 not 144th. From excited to not giving a rat's hairy hind quarters in such a short time.  Well that party didn't last long!  |
|