Rick
Full Member
  
Member since: March 2013
what to build, what to build . . . Ok THAT one!
Posts: 854 
|
Post by Rick on Oct 18, 2015 22:27:50 GMT -5
Greetings. Taken a while to get some mojo working again after the long Typhoon build. Going to tackle another large bird. This time, I'm going to jump across the channel and take on ProModellers Heinkel 111 in 1/32 scale. This kit is the same as Revell's release, just with different markings. In a moment of weakness, I picked this one up last spring from a vendor table at one of the model shows. Of course, Airfix immediately released their 1/72 version would have made it much easier to safely display than this beast. This one is going to take up a bit of space. Wingspan is almost 29 inches, a couple more than Airfix's big Mossie. Can't say for sure how long this one will take as I've started a new job and also got several other kits under construction too. The box itself is huge and it is full. 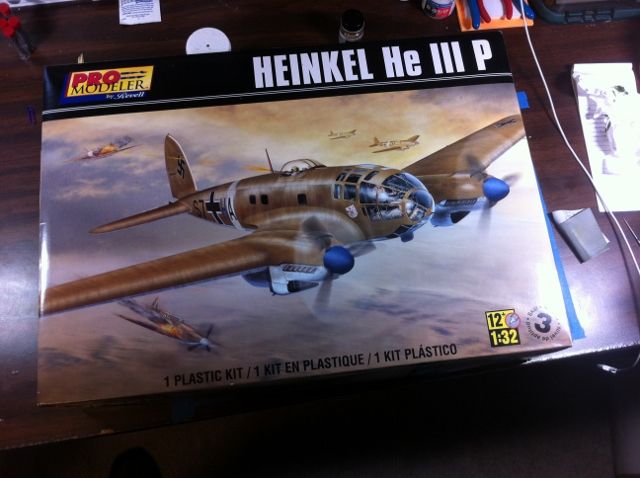 [/URL] Of course, there are several extra goodies that are to be incorporated into the kit. Replacement exhaust, PE pilot harness and instrument panel, resin machine guns should improve the plastic blobs in the kit, and then paint masks for the incredibly massive amount of glass present on these flugzeugs: 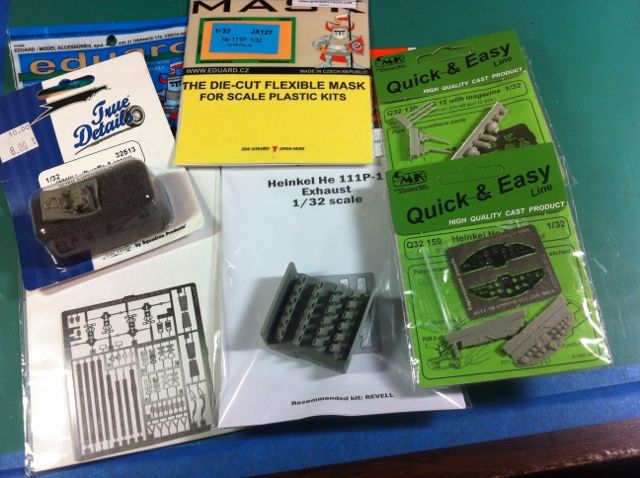 [/URL] A couple mock ups of the main parts: 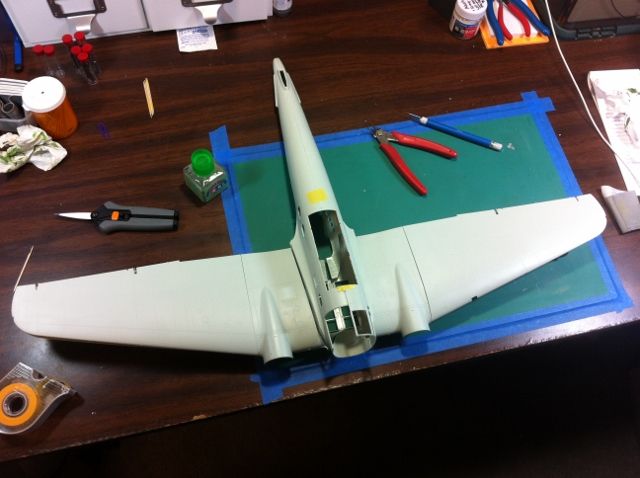 [/URL] 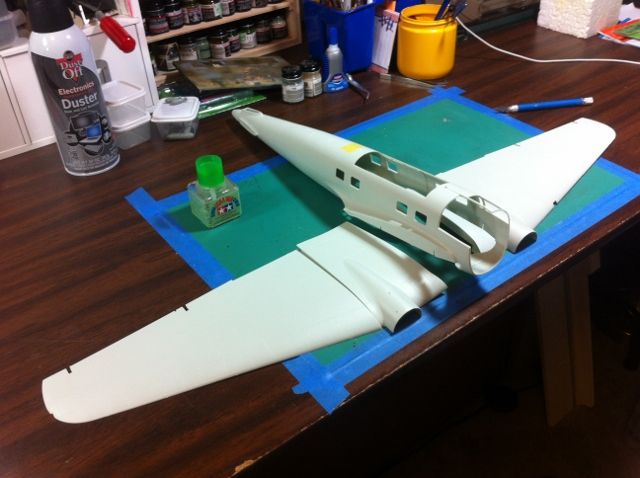 [/URL] To give a bit of scale, a 1/72 ME109G landed on the port wing: 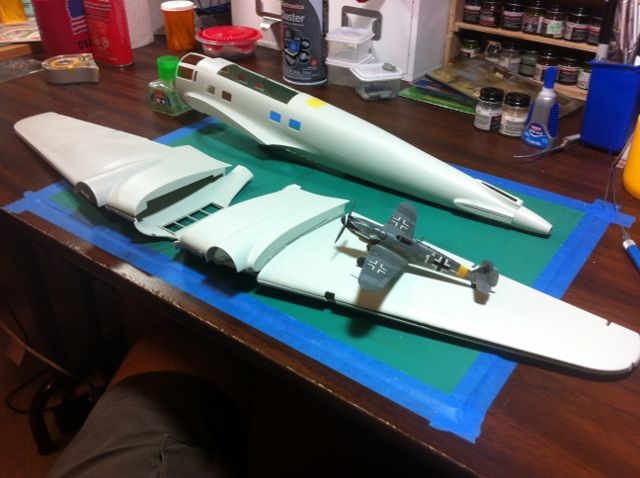 [/URL] Two of the challenges straight out of the box is the instruction sheet and the sprue number. Revell, in their infinite lack of user foresight neglected to call out the letter identifiers of the sprues therefore only use a part number in the instructions. To further complicate the process, parts are molded onto sprues in no particular sub assembly order or any numeric order. Basically, one needs to explore all of the sprues to gather the needed parts to build the various subs. The cockpit alone had parts strung out across about 6 or 8 different sprues. Oh, and did I mention that a couple of parts are mis-numbered on the instruction sheet? 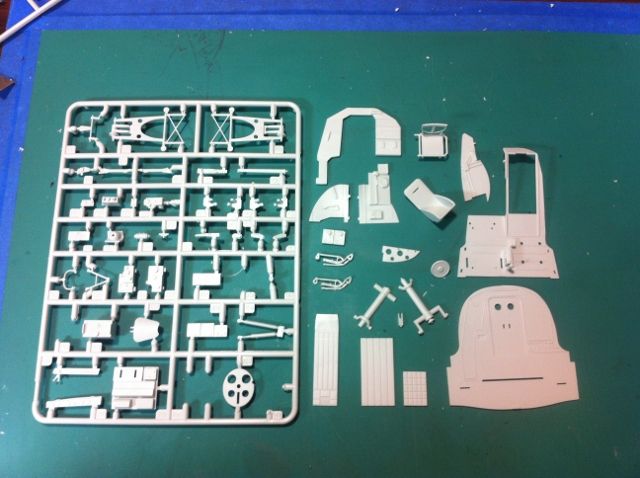 [/URL] That being said, after tracking down all the parts for well over an hour, the overall parts detail is actually pretty decent. There is some extra flash to trim, but at least, Revell did a good job of aligning their molds (unlike the Airfix Typhoon) so seams are very minimal. Here is the flight deck and part of the fuselage interior mostly together and almost ready to paint. I'm planning to take the interior assembly as far as possible before firing up the airbrush. 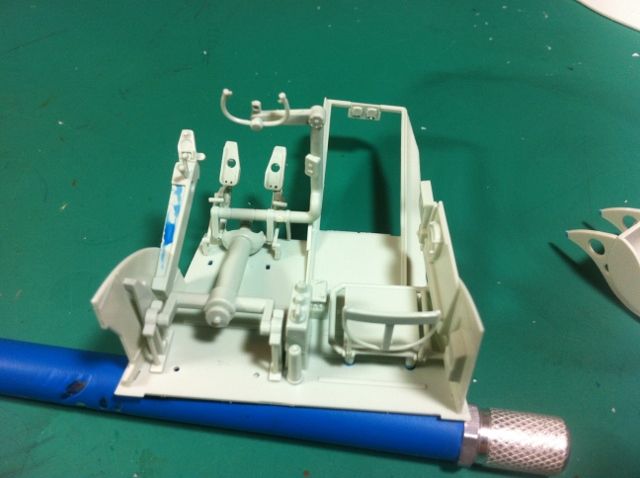 [/URL] 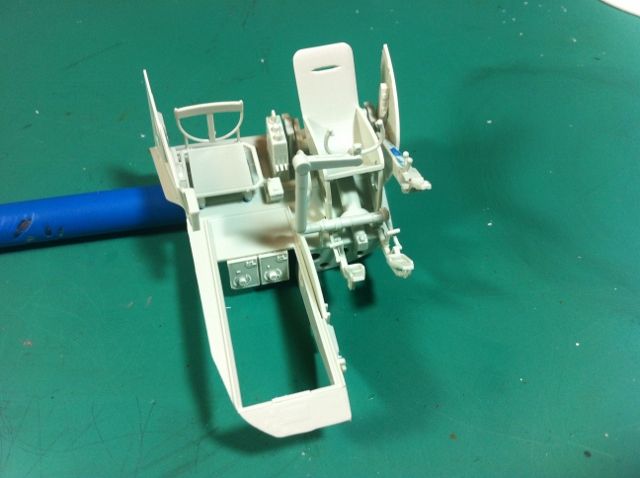 [/URL] 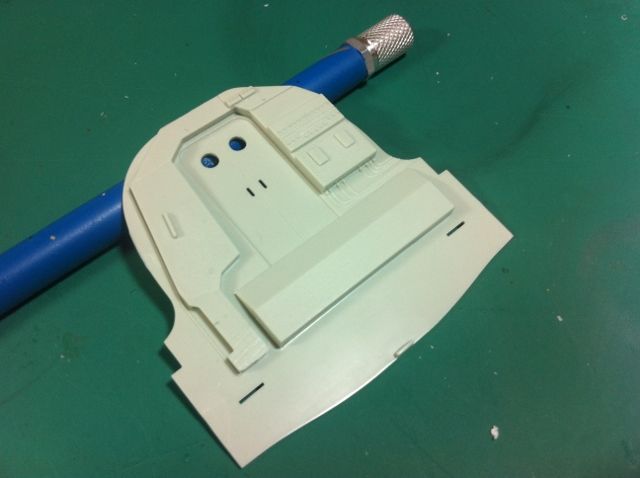 [/URL] 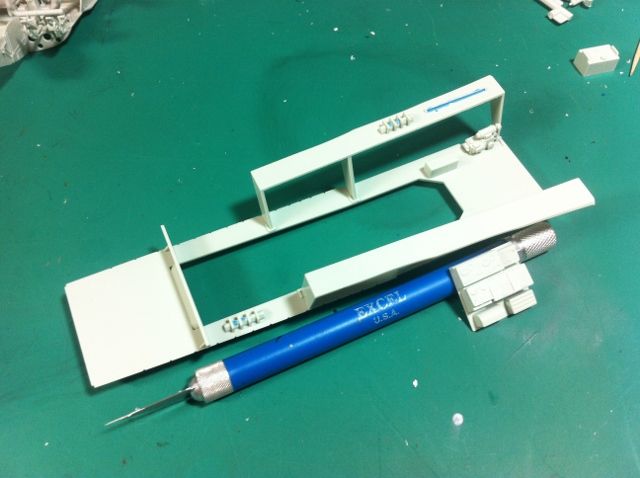 [/URL] 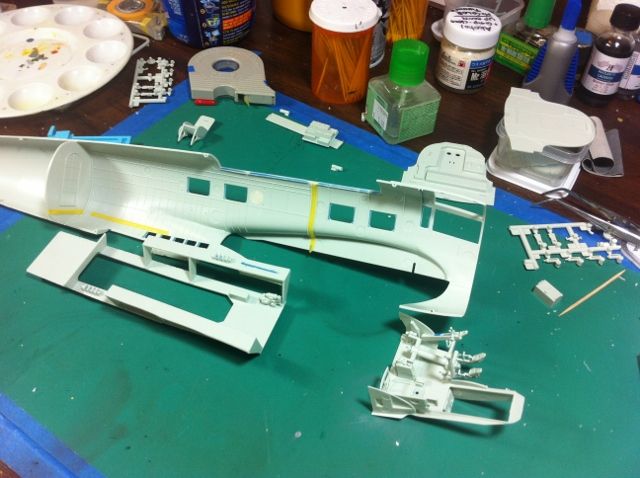 [/URL] The 111 had that weird bombay that hung the load by it's nose and then dropped them tail first. The kit provides a full load. This pic represents the starboard half of the bomb load. The port side will have an identical sub assembly: 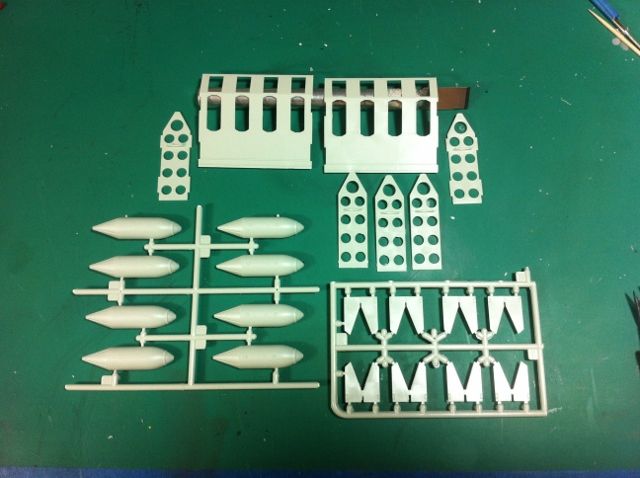 [/URL] That's it for tonight. I'll post again once the interior is built up and some paint flies. Thanks for looking in. As always all input is welcome, especially if someone has built this kit before and has some insights and tips to watch out for. |
|
|
|
Post by Leon on Oct 19, 2015 4:52:47 GMT -5
Nice start on the office Rick!  |
|
|
|
Post by JimD on Oct 19, 2015 12:13:26 GMT -5
Ohh...I can't wait...I've got this very kit. I can't wait to make a real attempt at it. I made a half hearted start, but I'm glad I held off. I need more AM!I'm following with great interest.
|
|
|
|
Post by dupes on Oct 19, 2015 13:32:30 GMT -5
Egads! I have this kit, and until I saw one built up (not well) yesterday at the show, I had no idea how big it truly is. For what Revell charges for this thing, it is WELL worth it...at least in it's weight in styrene.
Can't wait to see how yours comes out!
|
|
|
|
Post by wbill76 on Oct 19, 2015 14:37:15 GMT -5
Nothing like tackling a big project! Pulling up a chair for this one Rick.
|
|
|
|
Post by JimD on Oct 19, 2015 15:24:09 GMT -5
Egads! I have this kit, and until I saw one built up (not well) yesterday at the show, I had no idea how big it truly is. For what Revell charges for this thing, it is WELL worth it...at least in it's weight in styrene. Can't wait to see how yours comes out! Yeah. The value is really great, and the Ju 88 very much falls in the same range. Lol at "not well." Had a similar experience with the first 1/32 B-17 I saw in person. |
|
|
|
Post by wing_nut on Oct 19, 2015 15:41:04 GMT -5
Before you get too far along... get another and make a 111Z. The 3 1/2' wingspan would be an awesome sight hanging over your desk.
|
|
Rick
Full Member
  
Member since: March 2013
what to build, what to build . . . Ok THAT one!
Posts: 854 
|
Post by Rick on Oct 19, 2015 20:52:02 GMT -5
Thanks guys, yes it's BIg! And what I found with the big Mossie and Typhoon is the bigger the model, the harder it is to bring out the details and make them look as real as possible. Dupes, Jimmy you alluded to that in both your references. Glad you're along for the ride Bill. I like your train of thought Wing. A 111Z would be so frickin' awesome! If I were to do something that outrageous, you know it would only make sense to to scratch up an ME321 Gigant being towed behind it.
Just so happens, I've got an old 1/72 321 in the stash with a wingspan of 30 inches. I'm not smart enough to scale that out to 1/32 but I figure that sucker would have about a 65 inch wingspan. If I had the skills to do that, I'd be all over that in a heartbeat.
|
|
|
|
Post by wbill76 on Oct 20, 2015 14:36:45 GMT -5
A 111Z + Gigant in 1/32...you would need your own room to house that combination!  |
|
|
|
Post by deafpanzer on Oct 20, 2015 14:38:07 GMT -5
Great start! I always liked the 111's nose...
|
|
Rick
Full Member
  
Member since: March 2013
what to build, what to build . . . Ok THAT one!
Posts: 854 
|
Post by Rick on Oct 20, 2015 20:00:31 GMT -5
The 111's nose likes you too DP!  |
|
|
|
Post by JimD on Oct 21, 2015 0:09:56 GMT -5
The 111's nose likes you too DP!  Be careful now. You'll get him excited and he'll be wanting to propose. |
|
|
|
Post by TRM on Oct 21, 2015 5:52:22 GMT -5
Just catching up to this one....Nice pile of goodies there Rick! And you're off to a great start!
|
|
sturmbird
Full Member
  
Member since: June 2012
Posts: 1,406
Jun 21, 2012 13:51:45 GMT -5
Jun 21, 2012 13:51:45 GMT -5
|
Post by sturmbird on Oct 21, 2015 14:43:35 GMT -5
Egads! I have this kit, and until I saw one built up (not well) yesterday at the show, I had no idea how big it truly is. For what Revell charges for this thing, it is WELL worth it...at least in it's weight in styrene. Can't wait to see how yours comes out! , I almost bought the same kit (they had both), and passed due to size alone. Where would I put it? gary |
|
sturmbird
Full Member
  
Member since: June 2012
Posts: 1,406
Jun 21, 2012 13:51:45 GMT -5
Jun 21, 2012 13:51:45 GMT -5
|
Post by sturmbird on Oct 21, 2015 14:47:07 GMT -5
A 111Z + Gigant in 1/32...you would need your own room to house that combination!  time to drop the hammer! There's a Gigant in 1/32 scale scheduled for release. gary |
|
Rick
Full Member
  
Member since: March 2013
what to build, what to build . . . Ok THAT one!
Posts: 854 
|
Post by Rick on Oct 21, 2015 18:42:03 GMT -5
Bill, don't be teasing us like that. Who and when would they be releasing a beast like that? That would make a 111z a lot more enticing. If that were to happen no doubt a conversion release to add the joining wing and 5th engine would be logical. The outer wings attach outside the engine nacelles so it would be an easy conversion.
I'd be glad to box up my 111 after finishing the fuselage and engines then build a second 111 while waiting for the gigant Gigant to be released. Warning you Bill, don't be teasing us.
|
|
Rick
Full Member
  
Member since: March 2013
what to build, what to build . . . Ok THAT one!
Posts: 854 
|
Post by Rick on Oct 21, 2015 18:42:50 GMT -5
Bill, don't be teasing us like that. Who and when would they be releasing a beast like that? That would make a 111z a lot more enticing. If that were to happen no doubt a conversion release to add the joining wing and 5th engine would be logical. The outer wings attach outside the engine nacelles so it would be an easy conversion.
I'd be glad to box up my 111 after finishing the fuselage and engines then build a second 111 while waiting for the gigant Gigant to be released. Warning you Bill, don't be teasing us.
|
|
|
|
Post by wbill76 on Oct 22, 2015 11:36:58 GMT -5
Bill, don't be teasing us like that. Who and when would they be releasing a beast like that? That would make a 111z a lot more enticing. If that were to happen no doubt a conversion release to add the joining wing and 5th engine would be logical. The outer wings attach outside the engine nacelles so it would be an easy conversion. I'd be glad to box up my 111 after finishing the fuselage and engines then build a second 111 while waiting for the gigant Gigant to be released. Warning you Bill, don't be teasing us. Gary's the one with the insider info on a possible Gigant not me!  Please direct all torches and pitchforks in his direction.  |
|
|
|
Post by panzerjager2 on Nov 7, 2015 19:41:46 GMT -5
I thought my project was big....dang 1/32nd HE-111 THAT'S gonna be BIG
|
|
|
|
Post by mustang1989 on Nov 12, 2015 8:23:30 GMT -5
I've always been drawn to this aircraft. I guess it's the layout with all the possibilities for detail and the beautiful lines of this bird. Will be watchin' this one with great interest. Are you going to open up any engine cowlings?  |
|
Rick
Full Member
  
Member since: March 2013
what to build, what to build . . . Ok THAT one!
Posts: 854 
|
Post by Rick on Nov 15, 2015 20:04:35 GMT -5
Hey 'Stang, would love to open up both nacelles. Revell for some unfathomable reason, neglected to include any engines in the kit. A shame, this would really have made this kit a classic in my opinion. considered going after AM engines. The nacelles would need a complete interior scratch and couldn't find much in the way of references so decided not to go that route.
Will try to get an update posted shortly.
|
|
Rick
Full Member
  
Member since: March 2013
what to build, what to build . . . Ok THAT one!
Posts: 854 
|
Post by Rick on Jan 1, 2016 2:09:53 GMT -5
That's it for now, I'll add the cockpit shortly.
|
|
Rick
Full Member
  
Member since: March 2013
what to build, what to build . . . Ok THAT one!
Posts: 854 
|
Post by Rick on Jan 1, 2016 2:12:18 GMT -5
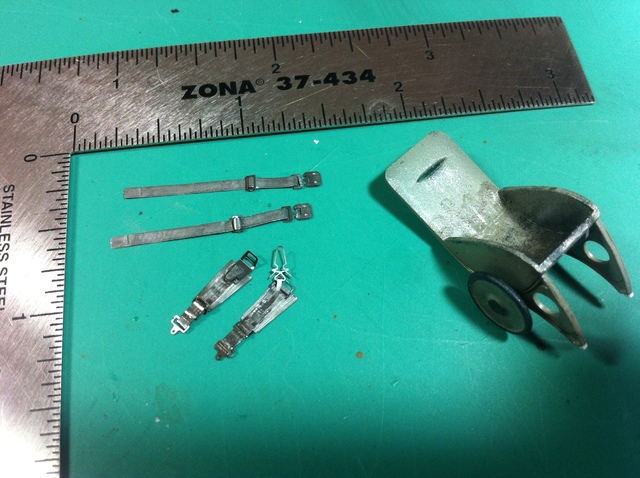
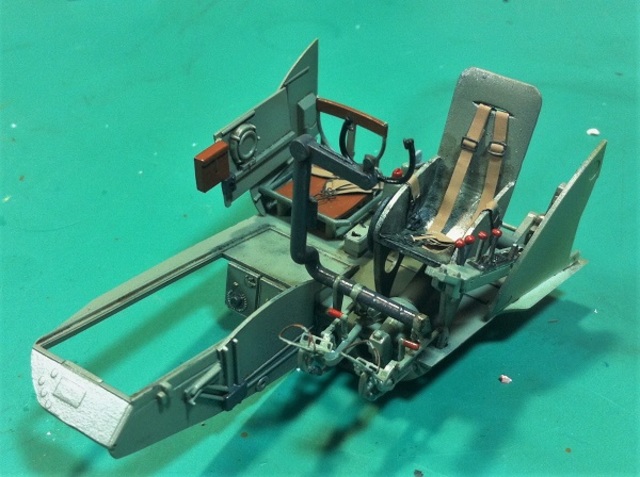
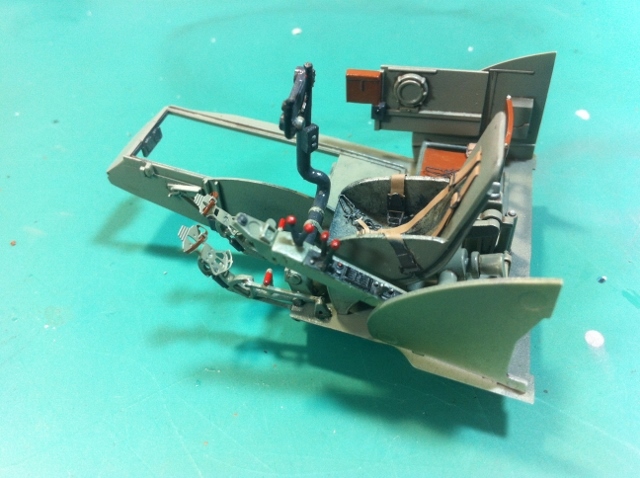
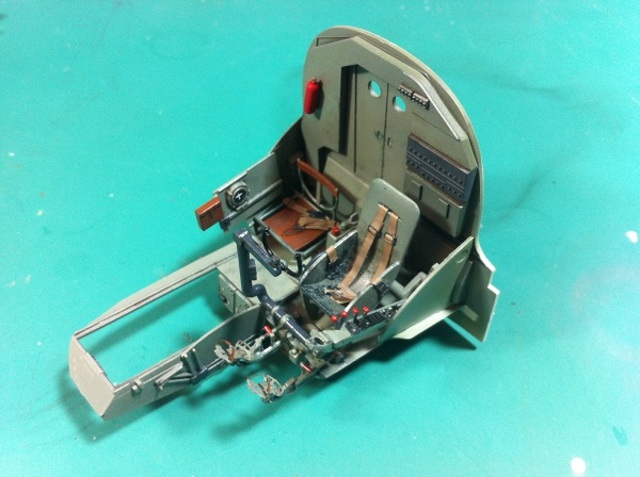
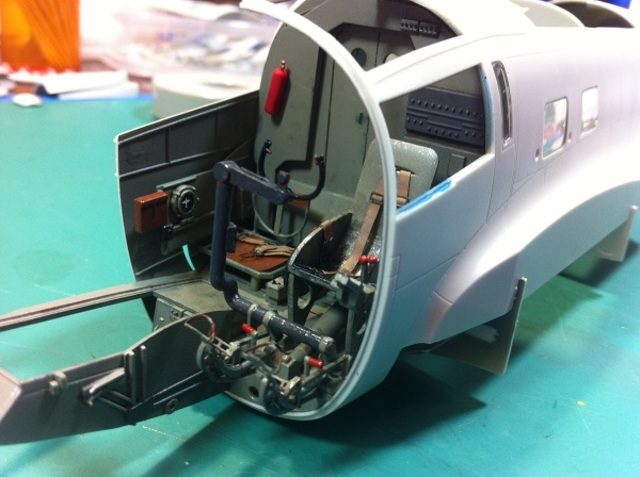
Been meaning to get this update posted for a while now. December seemed to blow right on past and it just turned into 2016. Have been able to get most of the parts cleaned up and worked through assembling the interior. First pics are the landing gear bays. No problems with assembling the bays. The landing gear is a bit on the spindly side but by hte time all the parts were assembled, it turned out quite sturdy. 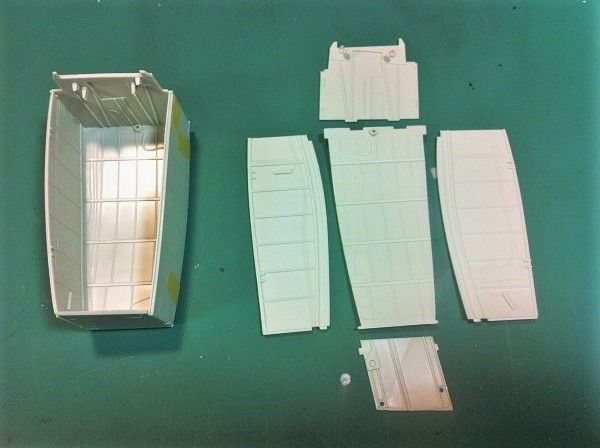 [/URL] 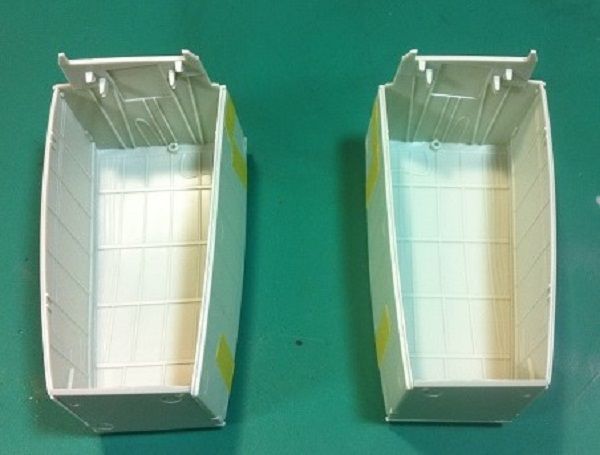 [/URL] 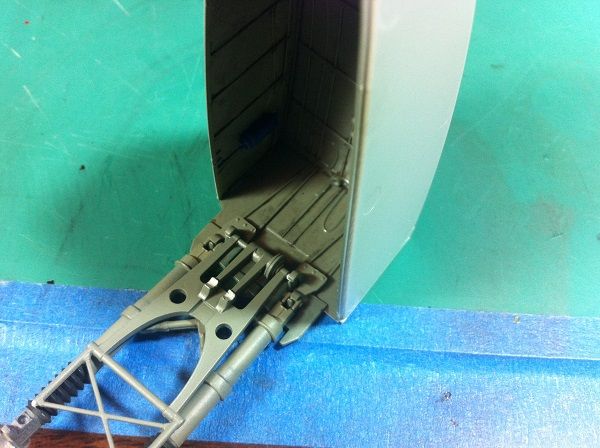 [/URL] The landing gear were painted and assembled prior to attaching to the lower center fuselage. 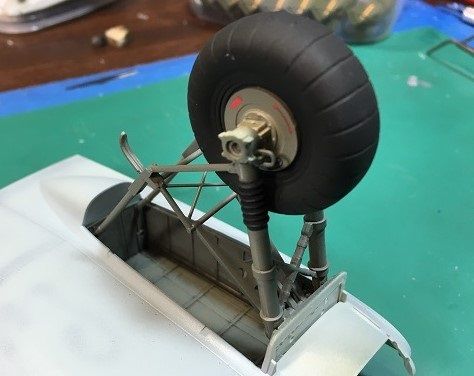 [/URL] 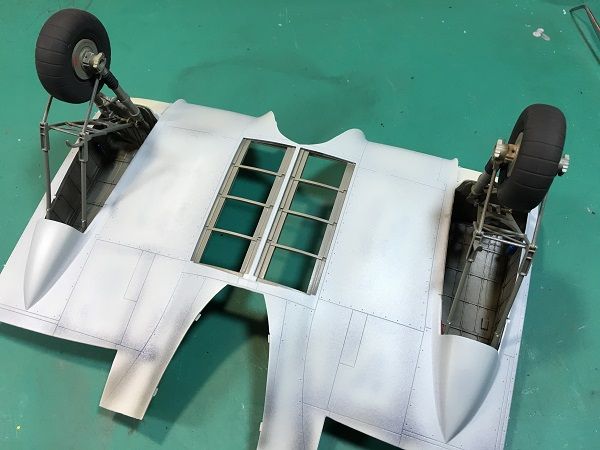 [/URL] 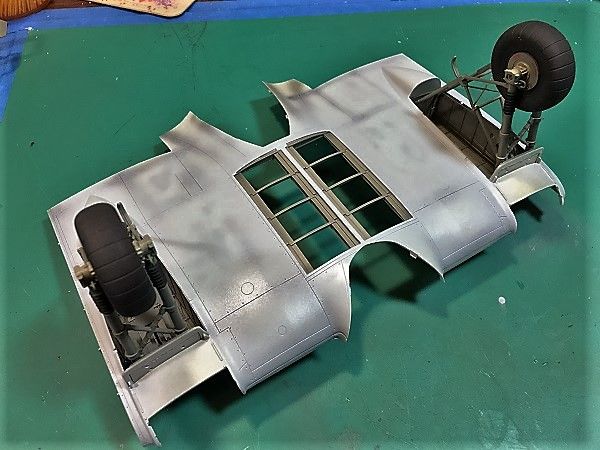 [/URL] Next up is the ordnance load and bomb racks. The kit included eight 250lb bombs. The bombs are loaded into the Heinkel vertically and dropped out tail first when released. A very odd arrangement Videos of the bombs dropping out are cool.  [/URL] 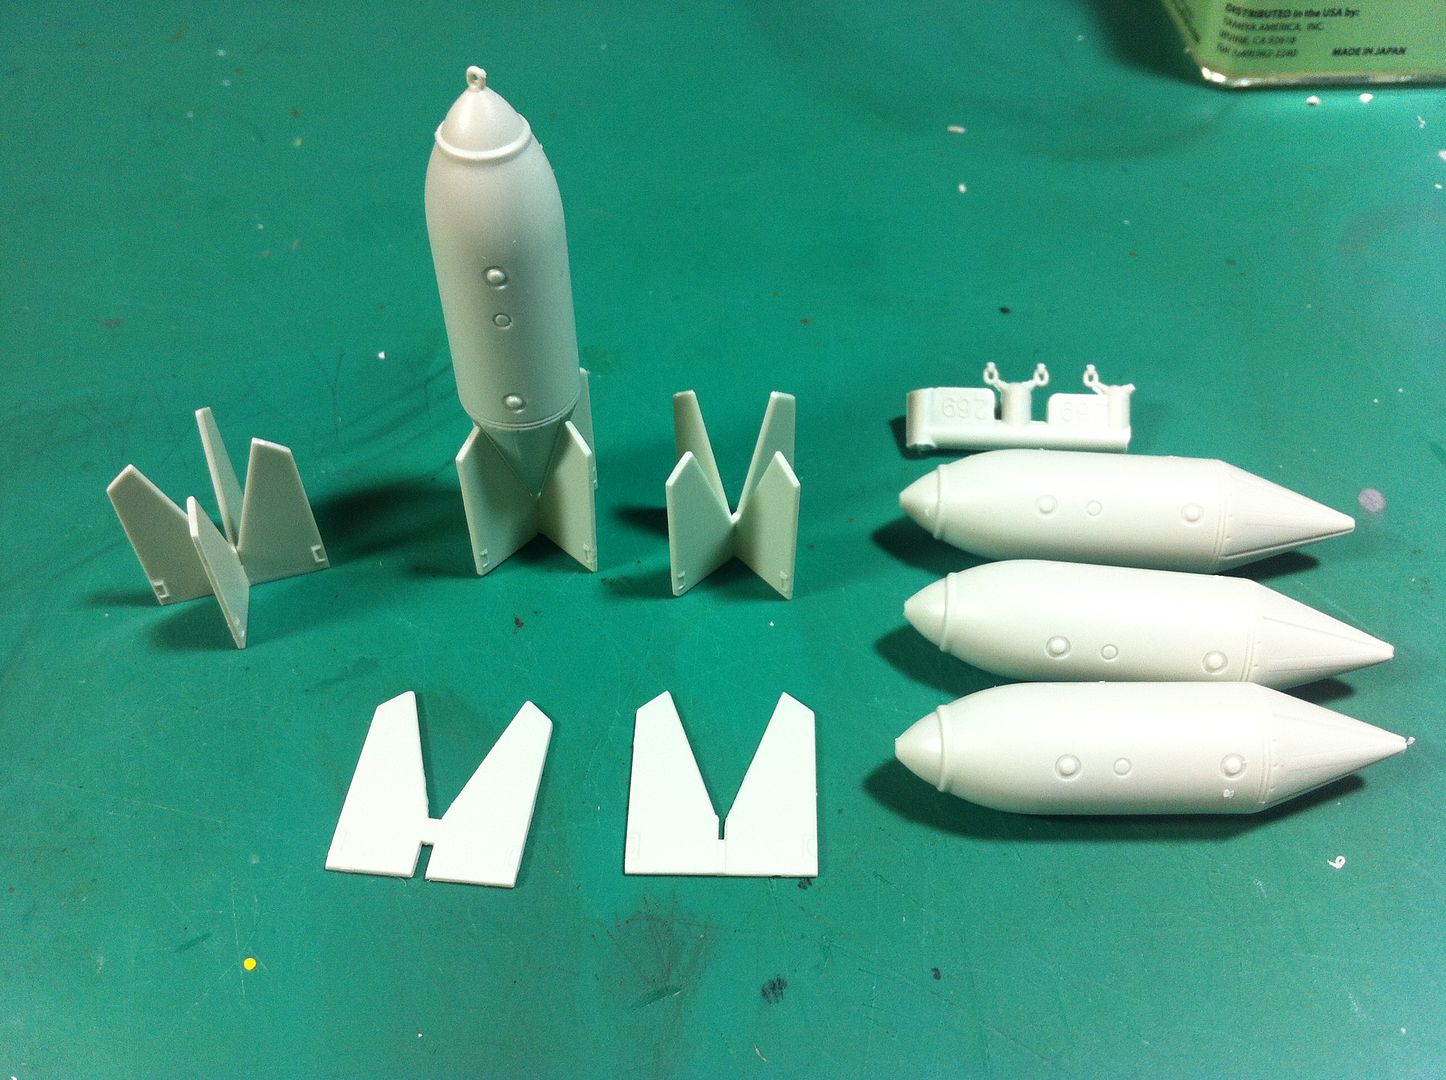 [/URL] 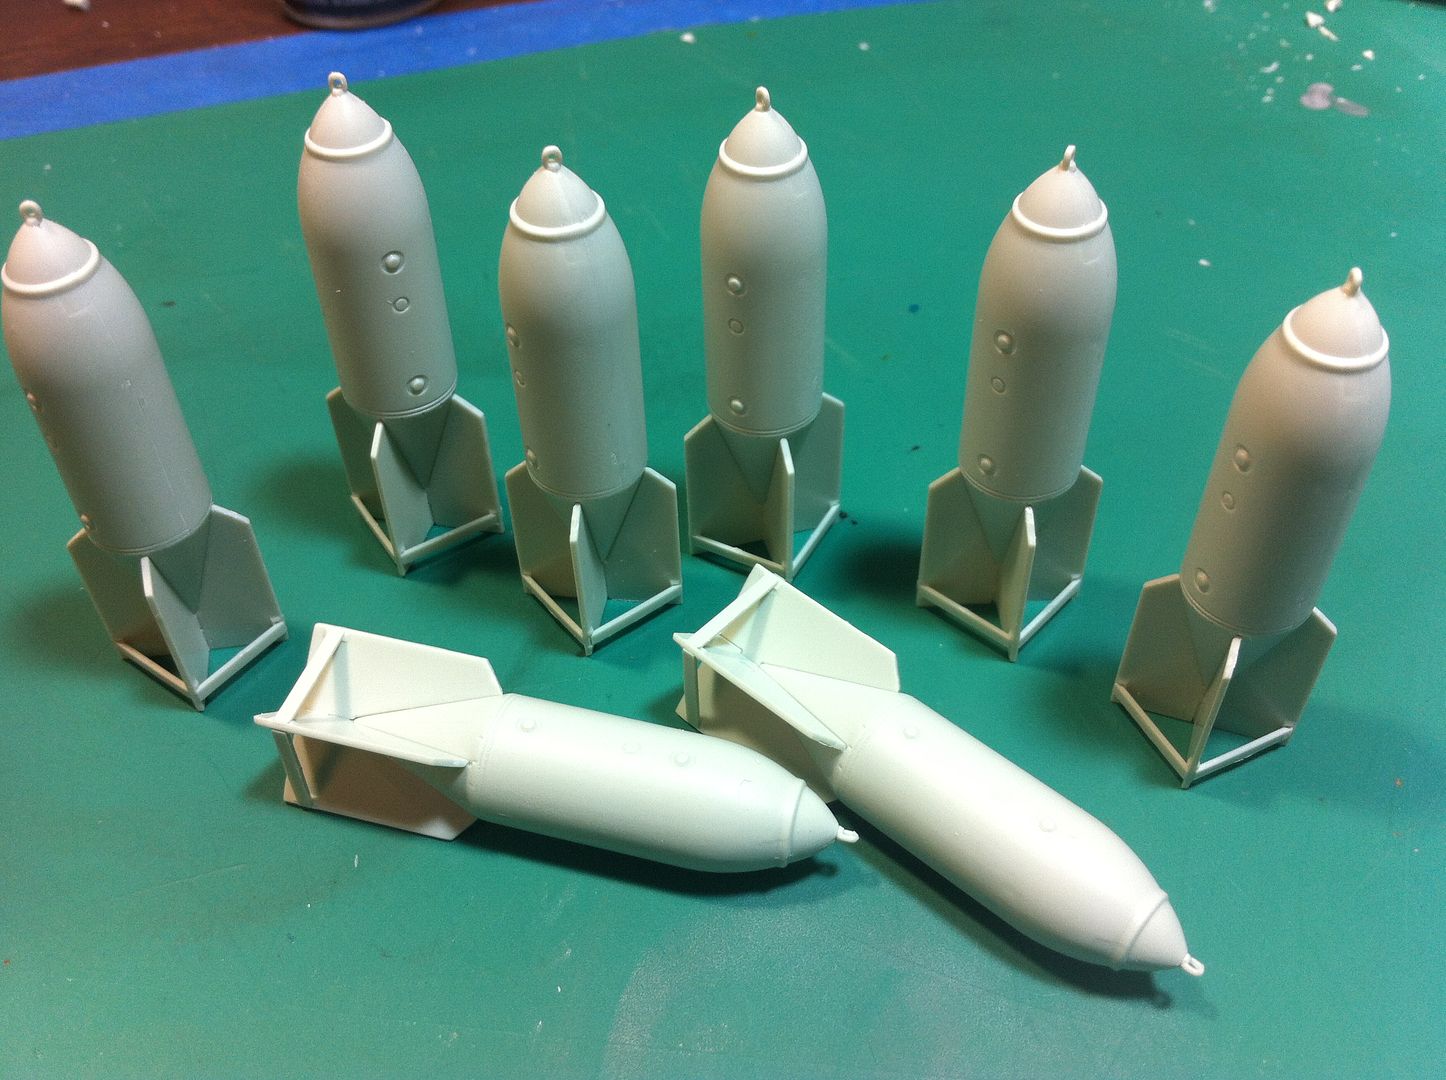 [/URL] And painted up with decals applied. My thought is to depict the bomber on a base with the loading sequence in progress. 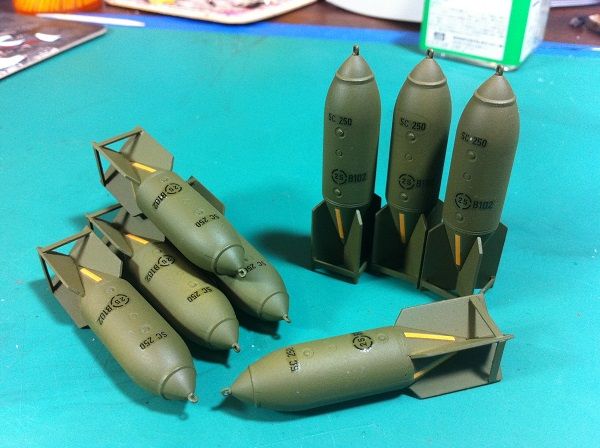 [/URL] I found that the bombs do not fit cleanly inside the bomb racks. I actually had to break open the completed bomb racks to get completed bombs into the racks. I loaded several and hope to get a kit of a loader and place the remaining bombs on the ground or back of a truck. We'll see ... There is a PE set that includes the bomb racks. A couple of blogs I found indicated the PE racks were about 5mm's to short. Since very little of the bomb racks will be visible, I don't see the value in using PE and trying to correct for the incorrect rack size. Here's a couple pics of the bomb racks installed on the fuselage center section and with the upper inboard wing sections in place with pre-shading. 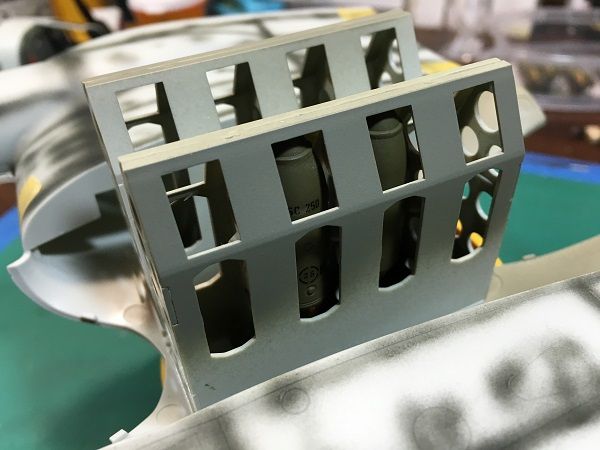 [/URL] 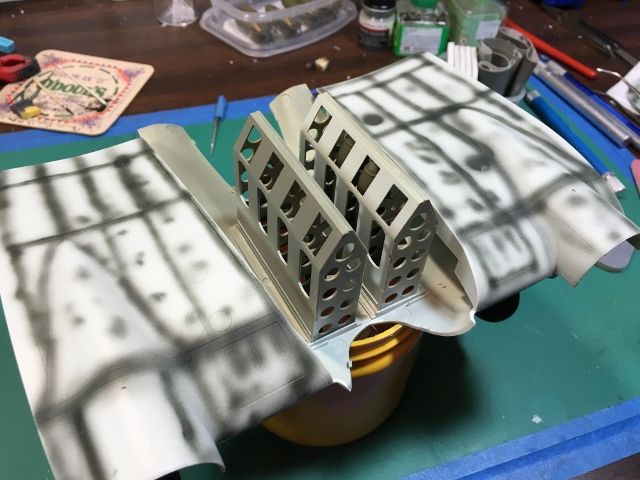 [/URL] 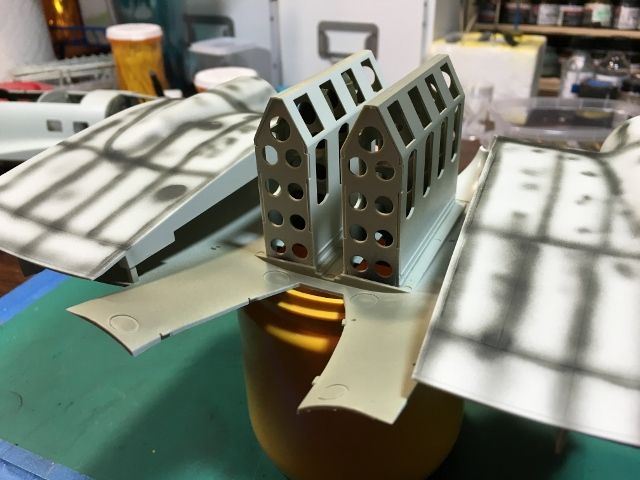 [/URL] The two engine nacelles came next. These were a pain in the butt. Each consisted of top, bottom, two sides, front, and an air scoop. they had to fit around the front piece. Before assembly, I painted the replacement resin exhausts and the side panels the underside light blue. Figured this would be the easiest way to paint them without getting paint on the exhausts. Using tape to get proper alignment around the front piece. 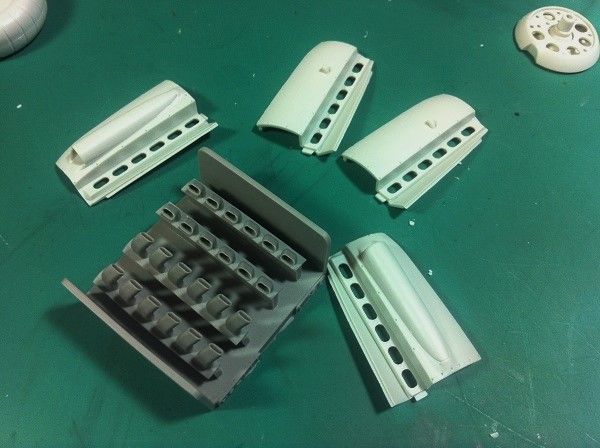 [/URL] 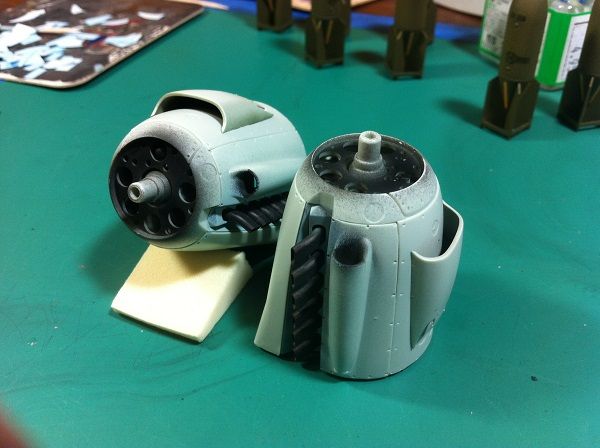 [/URL] Instructions indicated a guide molded into the top wing section to align the lower radiater screen which in turn would ensure the nacelles were in the correct position. In reality, this did not exist. I had to use tape to hold the entire nacelle assembly together to get them correctly aligned with the wing sections and front wall of the landing gear bay. 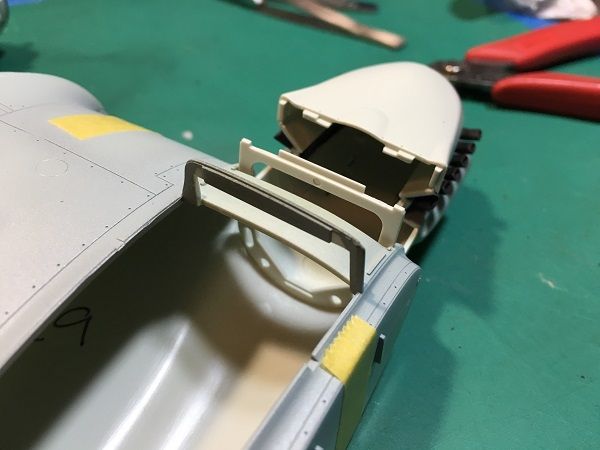 [/URL] 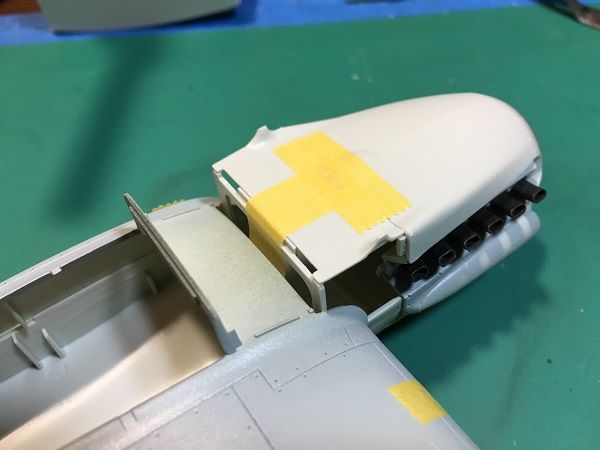 [/URL] Glad that mess is over with! Next, the interior assembly begins with the aft flight deck followed by the forward flight deck.  [/URL]  [/URL] Painting the sub assemblies is much easier before inserting them into the interior. The main reason for this is the windows. There are tons of them. I painted the interior of the fuselage then added windows. Now I only have to mask them from the outside. the interior sub assemblies followed once they were painted. 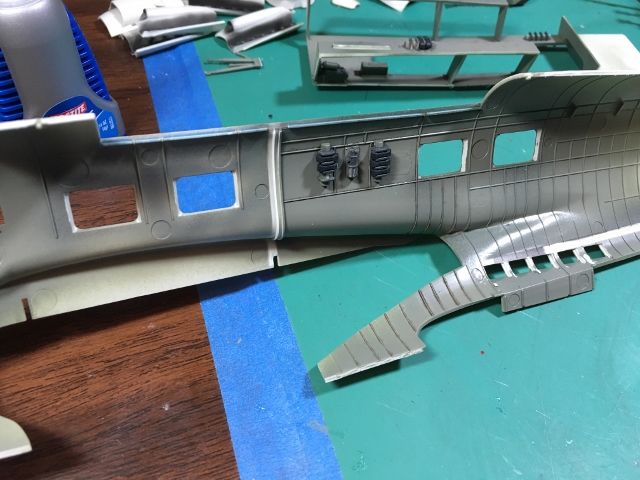 [/URL] 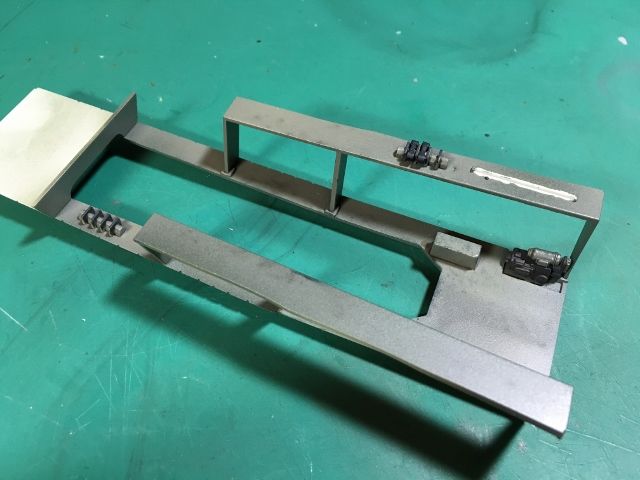 [/URL] 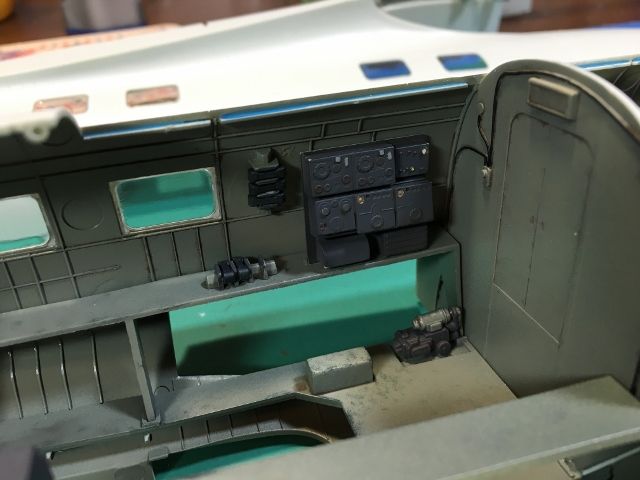 [/URL] That's it for now, I'll add the cockpit shortly. |
|
|
|
Post by Leon on Jan 1, 2016 3:12:35 GMT -5
WOW.....Making really nice progress Rick!  |
|
|
|
Post by wbill76 on Jan 1, 2016 13:12:06 GMT -5
A nice chunk of progress Rick. Good call on the bomb rack. Sometimes PE adds more to the problem than it solves.  |
|
Rick
Full Member
  
Member since: March 2013
what to build, what to build . . . Ok THAT one!
Posts: 854 
|
Post by Rick on Jan 1, 2016 16:47:58 GMT -5
|
|
|
|
Post by Leon on Jan 1, 2016 18:11:45 GMT -5
Flight deck looks great Rick!  |
|
|
|
Post by Deano on Jan 1, 2016 18:38:32 GMT -5
Wow , beasting in there Rick ... its a big bird eh !!!!
|
|
adt70hk
Forum Moderator      November '24 Showcased Model Awarded
Member since: November 2015
Currently attempting to build something decent!!! ;)
Posts: 2,836 
MSC Staff
|
Post by adt70hk on Jan 2, 2016 6:35:58 GMT -5
Hi rick
I'm sorry for being a bit late to the party but very glad I found it. It's looking really good, especially the cockpit!!
Looking forward to future updates!
Andrew
|
|
|
|
Post by wing_nut on Jan 23, 2016 20:37:27 GMT -5
SCHA-WING Rick.
|
|
 [/URL]
 [/URL]
 [/URL]
 [/URL]
 [/URL]
 [/URL]
 [/URL]
 [/URL]
 [/URL]
 [/URL]
 [/URL]
 [/URL]
 [/URL]
 [/URL]
 [/URL]
 [/URL]
 [/URL]
 [/URL]
 [/URL]
 [/URL]
 [/URL]
 [/URL]
 [/URL]
 [/URL]



 [/URL]
 [/URL]
 [/URL]
 [/URL]
 [/URL]
 [/URL]
 [/URL]
 [/URL]
 [/URL]
 [/URL]
 [/URL]
 [/URL]
 [/URL]
 [/URL]
 [/URL]
 [/URL]
 [/URL]
 [/URL]
 [/URL]