Deleted
Member since: January 1970
Posts: 0
Nov 23, 2024 9:02:52 GMT -5
Nov 23, 2024 9:02:52 GMT -5
|
Post by Deleted on Nov 17, 2015 7:25:44 GMT -5
WOw, great job. Are you going to cover it?
Eddy
|
|
|
|
Post by dierk on Nov 17, 2015 7:54:33 GMT -5
Stunning engeneering! But let me ask you: when did you stop taking the medication? As you are madder then a box of frogs, and I mean that in a good way.
|
|
BJ---Rest In Peace
Full Member
   Oct '24 Showcased Model Awarded
Member since: July 2014
Posts: 378
Jul 24, 2014 12:31:35 GMT -5
Jul 24, 2014 12:31:35 GMT -5
|
Post by BJ---Rest In Peace on Nov 17, 2015 11:51:01 GMT -5
Thanks Guys, Eddy, No. I am building the tank completely disassembled in "Restoration mode" Dierk, You don't want to see me off my Meds.  Adderal is my best friend. |
|
|
|
Post by deafpanzer on Nov 17, 2015 14:13:33 GMT -5
WOW!!! I admire your craftsmanship... keep it coming!
|
|
|
|
Post by panzerjager2 on Nov 18, 2015 23:57:53 GMT -5
BillieJean I thought 1/25th scale was big....... HOLLY SHEEP DIP that thing is HUGE
|
|
BJ---Rest In Peace
Full Member
   Oct '24 Showcased Model Awarded
Member since: July 2014
Posts: 378
Jul 24, 2014 12:31:35 GMT -5
Jul 24, 2014 12:31:35 GMT -5
|
Post by BJ---Rest In Peace on Nov 19, 2015 3:37:37 GMT -5
LOOL.. Yea.. It's actually throwing me off. I am use to machining 1/35th scale stuff so all my tooling is micro size. I was machining the brake cover tonight and just from habit I selected a .01 end mill for my roughing.. Ran my simulation and it said it would take 53 hours to machine. Hence I selected a little bigger endmill .25 done in 3 minutes  |
|
adt70hk
Forum Moderator     
Member since: November 2015
Currently attempting to build something decent!!! ;)
Posts: 2,831 
MSC Staff
|
Post by adt70hk on Nov 21, 2015 19:11:35 GMT -5
Hi Billie Jean As a newbie to the site I've been having a look around and have come across this. To say I'm stunned, amazed, flabbergasted, speachless and generally in complete awe at what you're attempting is something of an understatement - but then us Brits do generally have problems expressing our feelings and emotions!!!  I see your going to have it in a restoration/workshop mode, are you going to do a 'worskshop' dio to go with it, although at 1/16 I can only imagine such a dio would be huge! Keep up the good work I'll be keeping my eye on how this turns out!! Regards Andrew |
|
BJ---Rest In Peace
Full Member
   Oct '24 Showcased Model Awarded
Member since: July 2014
Posts: 378
Jul 24, 2014 12:31:35 GMT -5
Jul 24, 2014 12:31:35 GMT -5
|
Post by BJ---Rest In Peace on Nov 21, 2015 21:45:27 GMT -5
Thank You.. I try.. As for a Diorama, Yes it will be.. I have roughly drawn it out and it is going to be 36-40" long by 18-24" deep. Once I have the sub assemblies done then I can do final placements.
I will use this Dio as a Marketing tool for the kits I am producing for it.
|
|
pt109
Full Member
  
Member since: April 2013
Stop staring at me! heheheh
Posts: 491 
|
Post by pt109 on Dec 12, 2015 1:09:22 GMT -5
All I can say is Wowza.......beautiful milling/machining and nice details.
Makes us mere modellers look like rookies!
Paul
|
|
BJ---Rest In Peace
Full Member
   Oct '24 Showcased Model Awarded
Member since: July 2014
Posts: 378
Jul 24, 2014 12:31:35 GMT -5
Jul 24, 2014 12:31:35 GMT -5
|
Post by BJ---Rest In Peace on Dec 12, 2015 10:35:14 GMT -5
Thank YOU PT. Here is what the Final part Layout is going to look like. The parts on the left, there will be 4 each of those trees and 2x everything else. looking right at 200 parts in the kit plus a lot of rod. Everything has been sent of for final printing so may see this ready by Mid January early February along with the Aux. Generator.   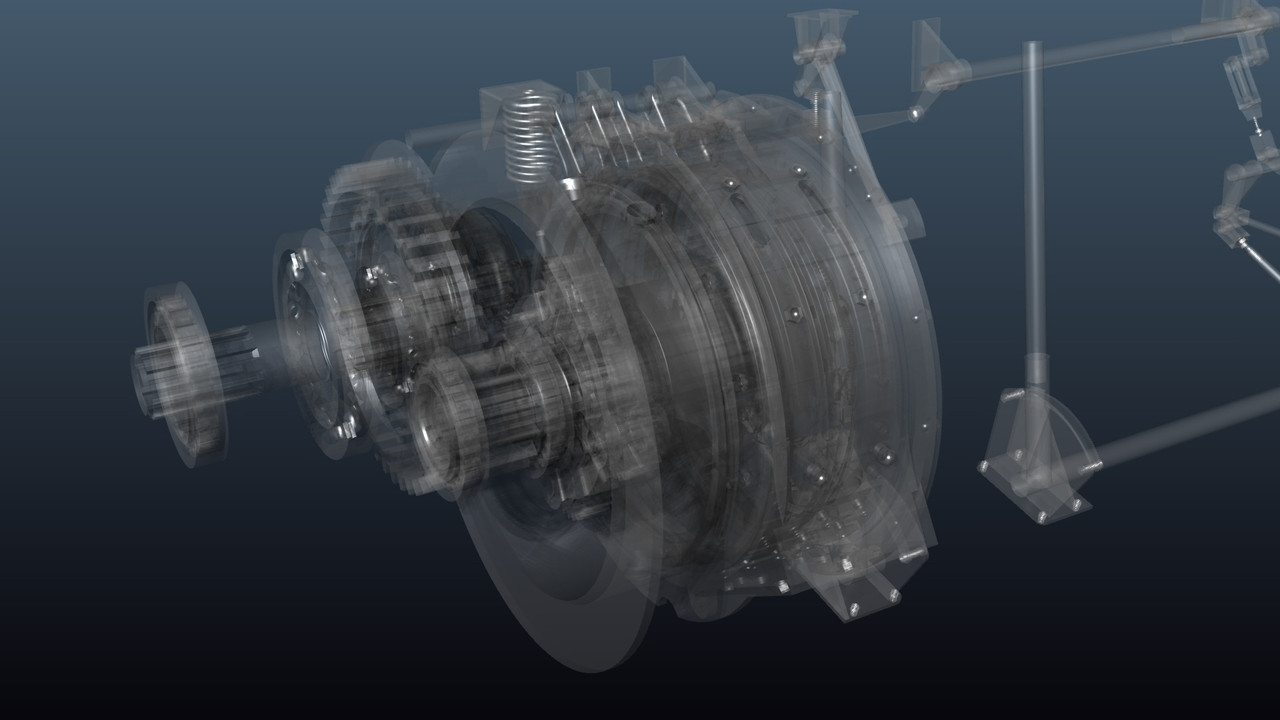 |
|
|
|
Post by Leon on Dec 12, 2015 11:02:50 GMT -5
Those are some very impressive looking parts Billie Jean!  Looking forward to seeing all this come together.  |
|
|
|
Post by dierk on Dec 12, 2015 11:13:47 GMT -5
You are truly bonkers BJ - but in a good way that I whole-heartedly approve of.
|
|
vindicareassassin
Full Member
  
Member since: May 2015
Posts: 569 
|
Post by vindicareassassin on Dec 12, 2015 11:54:02 GMT -5
This is way too awesome!!
|
|
adt70hk
Forum Moderator     
Member since: November 2015
Currently attempting to build something decent!!! ;)
Posts: 2,831 
MSC Staff
|
Post by adt70hk on Dec 12, 2015 12:10:22 GMT -5
Billiejean
I've got to say that the level of detail is out of this world!!
Andrew
|
|
afvfan
Senior Member
   
Member since: December 2012
Bob
Posts: 1,772
Dec 10, 2012 17:32:38 GMT -5
Dec 10, 2012 17:32:38 GMT -5
|
Post by afvfan on Dec 12, 2015 19:41:19 GMT -5
Insanely great work you're showing here BJ. Color me impressed!
|
|
BJ---Rest In Peace
Full Member
   Oct '24 Showcased Model Awarded
Member since: July 2014
Posts: 378
Jul 24, 2014 12:31:35 GMT -5
Jul 24, 2014 12:31:35 GMT -5
|
Post by BJ---Rest In Peace on Jan 4, 2016 1:35:45 GMT -5
|
|
adt70hk
Forum Moderator     
Member since: November 2015
Currently attempting to build something decent!!! ;)
Posts: 2,831 
MSC Staff
|
Post by adt70hk on Jan 4, 2016 3:27:20 GMT -5
Hi billiejean
I've seen some amazing scratchwork since coming back to the hobby but this HAS to be the most intricate I've seen. It really is amazing. Very well done!
Andrew
|
|
|
|
Post by dierk on Jan 4, 2016 3:33:08 GMT -5
Simply brilliant! Multiple thumbs up!!!
|
|
|
|
Post by wbill76 on Jan 4, 2016 16:02:22 GMT -5
Always nice when you can get the gears to line up they way they should BJ, very impressive!
|
|
|
|
Post by TRM on Jan 4, 2016 16:14:35 GMT -5
No pain, no gain! Wow, that looks amazing BJ!! Definitely one to show off the assembly! Once the 1/16th is complete, are you still planning the 1/35th version?  |
|
|
|
Post by Leon on Jan 4, 2016 17:32:18 GMT -5
WOW....That looks really impressive Billie Jean!  Glad everything lined up nicely for you.  |
|
BJ---Rest In Peace
Full Member
   Oct '24 Showcased Model Awarded
Member since: July 2014
Posts: 378
Jul 24, 2014 12:31:35 GMT -5
Jul 24, 2014 12:31:35 GMT -5
|
Post by BJ---Rest In Peace on Jan 4, 2016 17:36:01 GMT -5
Thanks everyone, This was a blast seeing all go together TRM, Yes I am, Actually going to get back on that once I get the Final Drive molds finished. I was going to start on the Motor assembly but I'm not sure how big of a seller that will be so I want to finish the 35th scale lower fighting compartment assembly first then go back to the motor and Bay and then offer that in both scales, My plan on PZ IV stuff from now is to hopefully release both scales around the same time. I just need to "Dumb Down" the 35th scale stuff as we would never be able to assemble the 35th scale kit as the parts are so frikin small. Kinda need to make kits that you can build.  Just trying to decide if I want to do it all in resin or a combo kit with PE. I could actually make just about the whole thing in PE but it would drive you crazy.  Builders Input would be greatly appreciated. I also think I am just going to go back to machining my Masters as the 3d Printing is so hit and miss on these parts. Some come out gorgeous then others not so much. So I end spending more time trying to clean up the part then what I would have done if I would have just machined it to start with. Plus a 3-4 week lead time just to find out they screwed it up. And now with my laser I can add a lot more detail without having to write complicated code for the mill. I have developed a way that I can actually make Pseudo PE from Card Stock but I don't think Modellers are ready to make the switch even though it is actually easier to work with then Brass and ends up being just as strong if done correctly. I may do up some sample parts and see if anyone here wants to have a try at it and give me feedback. |
|
|
|
Post by TRM on Jan 4, 2016 19:52:07 GMT -5
LOL...no one in my camp is afraid of a little PE~!  With that said, a healthy mix of both goes a long way to making the building interesting and more detailed without blowing one's mind on just one medium. The make-shift plastic PE sounds interesting! Flat sprues!  Either way, that detail so far is off the chain! I would think just the outside gear assemble would make for a nice seller...especially for someone who is looking for the repair theme or better yet...a wreck!!  Quick and dirty with plenty of eye candy! |
|
BJ---Rest In Peace
Full Member
   Oct '24 Showcased Model Awarded
Member since: July 2014
Posts: 378
Jul 24, 2014 12:31:35 GMT -5
Jul 24, 2014 12:31:35 GMT -5
|
Post by BJ---Rest In Peace on Jan 4, 2016 22:27:03 GMT -5
Whoops sent this a PM to TRM What I actually meant with card stock was Business card stock (Paper) I sometimes forget the rest of the world is not in the Graphic business.  I use the crap out of it for surface details and I found out once you bend it to shape just add a drop of super thin ca mixed with a few drops of acetone it will soak it up and lock the part to shape then you can do what ever you want with it. (Within reason just like PE and no soldering) Have to use the cheap CA in a tube from the $ Store. The Insta cure brand foams up as it has additives. That trick also works for assembling Resin Track links. Assemble and just paint the tracks with the reduced CA. The acetone slows down the cure so you can shape the track and once dry it locks the tracks into shape. But I do love working with Brass also.. Thinking of a Full blow PE kit only for the bridge layer and a Brass Stobokrane. |
|
|
|
Post by panzerjager2 on Jan 4, 2016 22:33:58 GMT -5
WOW
|
|
adt70hk
Forum Moderator     
Member since: November 2015
Currently attempting to build something decent!!! ;)
Posts: 2,831 
MSC Staff
|
Post by adt70hk on Jan 7, 2016 8:25:18 GMT -5
Thanks everyone, This was a blast seeing all go together I have developed a way that I can actually make Pseudo PE from Card Stock but I don't think Modellers are ready to make the switch even though it is actually easier to work with then Brass and ends up being just as strong if done correctly. I may do up some sample parts and see if anyone here wants to have a try at it and give me feedback. I use the crap out of it for surface details and I found out once you bend it to shape just add a drop of super thin ca mixed with a few drops of acetone it will soak it up and lock the part to shape then you can do what ever you want with it. Hi Billiejean I'm more than happy to be a guinea pig for your trials!!   So if you could see you way to rustling up a couple of Zimmerit sets like this, to fit two 1/72 Armourfast Ausf G's, I'd be very grateful - I need some for my Cuckoo Panther build. Let me know the cost including shipping to the UK!!  Now back to reality..... I have to say, personally I think it really is an excellent idea. As you say easier to work with than brass and there are no potentially sharp edges for small fingers to get cut on (i.e. my young son) and I would also imagine the paper/card is cheaper to source than metal. I've also not used a soldering iron in 30 years or so and whilst superglue (sorry, CA) is not with out it's problems, I'd be happy to use it in the way described. By the way I've now had a chance to look at the assemblies on a PC screen, rather than my phone and they really do look amazing. Very well done!! Yours Andrew |
|
BJ---Rest In Peace
Full Member
   Oct '24 Showcased Model Awarded
Member since: July 2014
Posts: 378
Jul 24, 2014 12:31:35 GMT -5
Jul 24, 2014 12:31:35 GMT -5
|
Post by BJ---Rest In Peace on Jan 7, 2016 12:40:46 GMT -5
I'll have to dabble with some Zimmerit. I think it might look TOO computer generated which in my opinion would be worse then a poor putty job. What I meant for surface details was small fittings,Spacers, Fillets and washers. For a Decent Zimmerit we would want to emboss paper or foil then apply the sheet. (That is a future project I am slowly working on. Making an embossing tool to make stamped tread/diamond plate from aluminum or lead foil) Spackle Paste makes for a nice Zimmerit then you can just flick and chip it very easily. Just need to put some paint/primer down first to give the Spackle something to bite too. Making a Zimmerit tool would be very easy in 1/72. Just use an old fine tooth razor saw or I could Laser cut you one out of 1.5mm (1/16th inch)acrylic for a couple of $$. I personally use the DAP Synthetic Spackle. I like it as it is much smoother then Plaster based spackle and has a little flex once dry.(Very close to gesso)paint sticks to it like there is no tomorrow and if you mess up easy to wash off before it dries. And the pretty pink color makes it easy to see what you're doing  (Goes on Pink and turns white when dry)I use it all the time to seal the edges of Plywood signs. 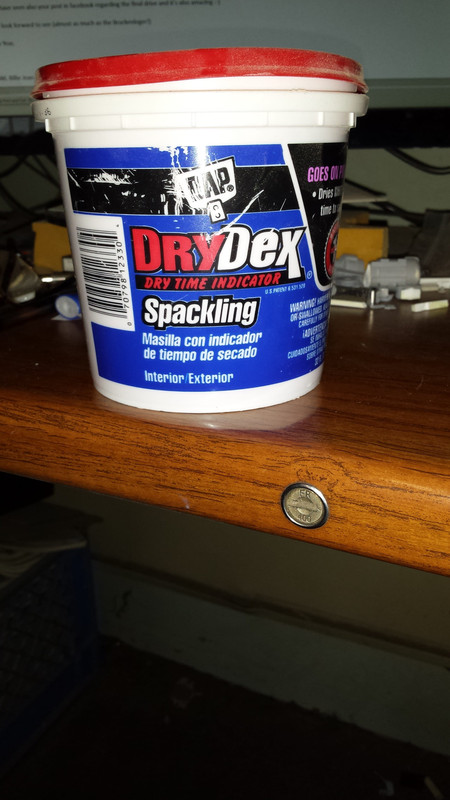 The washers with the black edges are paper right around 2 mm diameter and in the second photo are some of the interior parts for the 1/35th PZ IV interior. This allows me to make quick test "PE" so I can check my fold lines and sizes and this is what led me to the Superglue idea/trick, Then by using my " Complicated Patented Multipurpose Burnishing Apparatus" aka a cut end of a Wallyworld Paint Brush. You can emboss the stiffening ribs for a realistic engine bay access panel.  Just not sure the purists are ready for Paper PE.  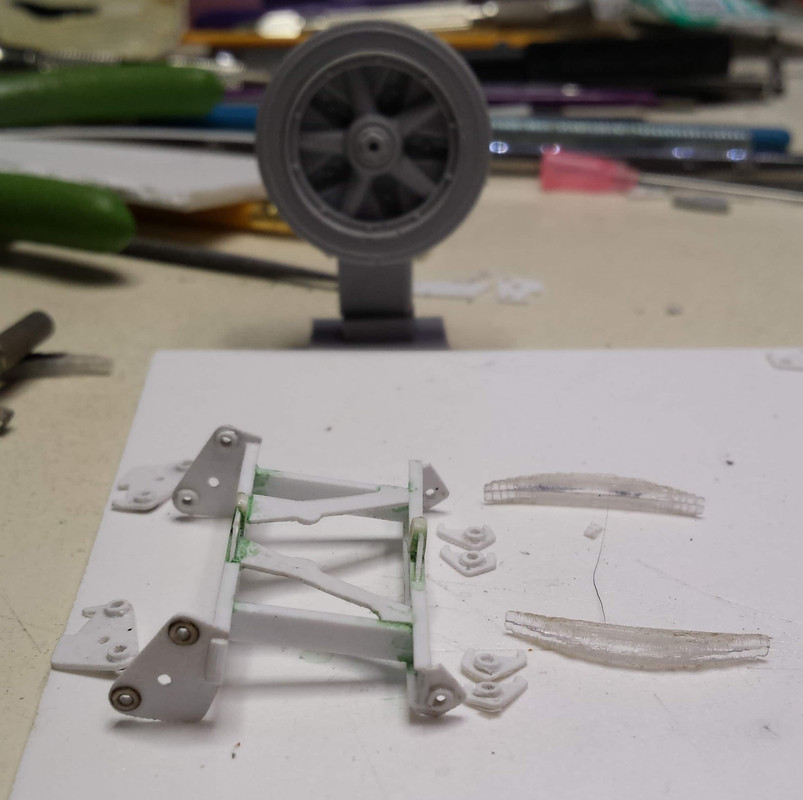 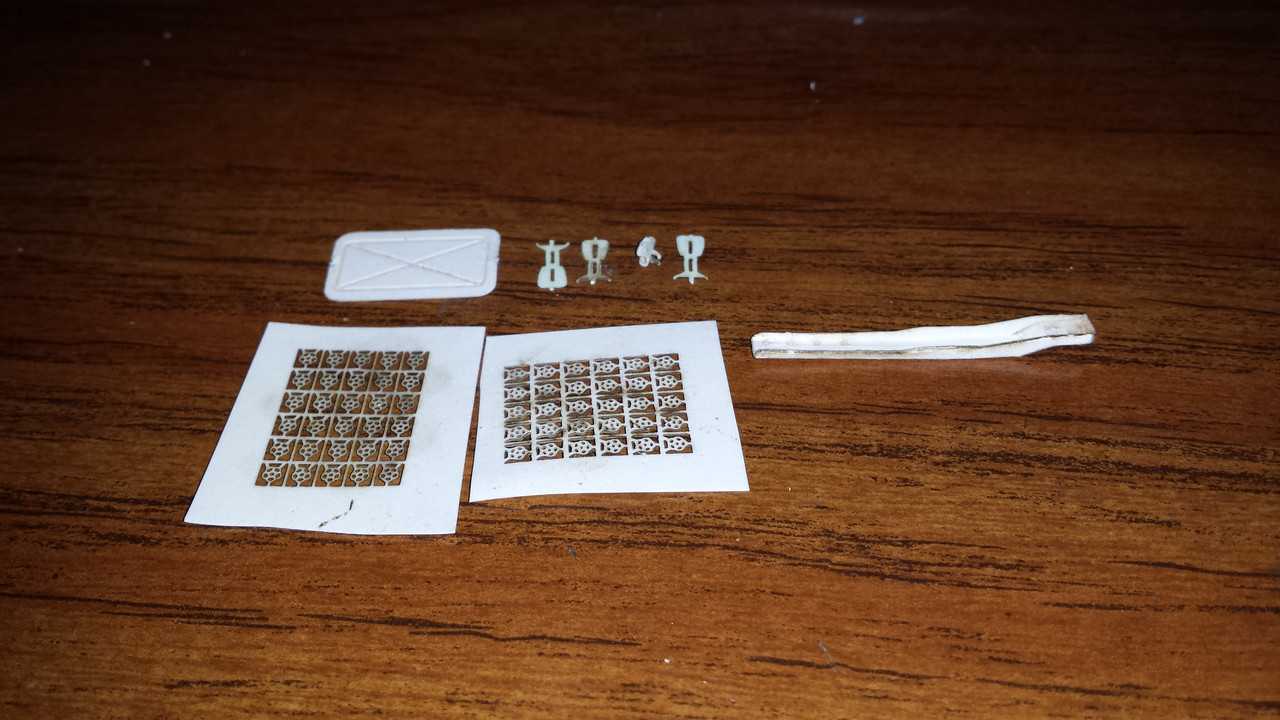 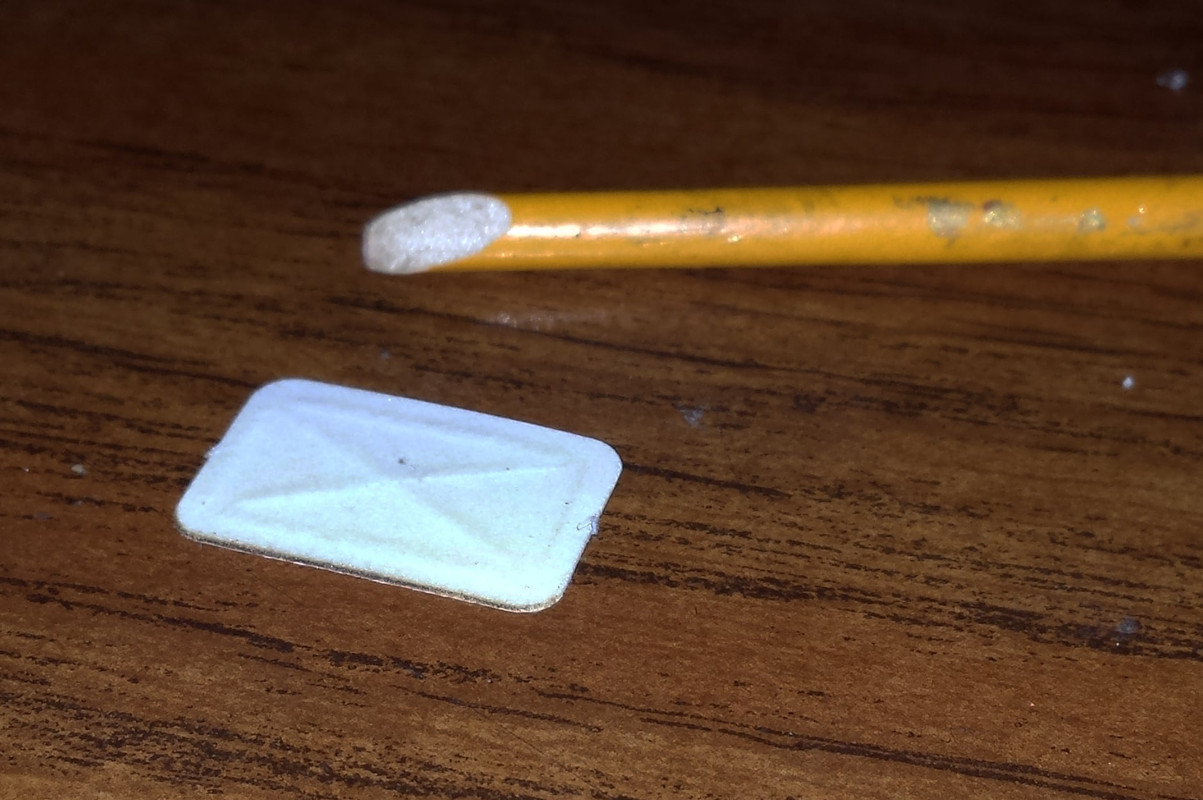 |
|
adt70hk
Forum Moderator     
Member since: November 2015
Currently attempting to build something decent!!! ;)
Posts: 2,831 
MSC Staff
|
Post by adt70hk on Jan 8, 2016 18:22:03 GMT -5
BillieJean Thank you very much for your comprehensive reply - and taking the time away from your build to explain one way of doing DIY Zimmerit - it really wasn't what I was intending!! I must admit though I had to look up 'spackle paste' as I wasn't familiar with the term. Our branded UK equivalent is called Polyfilla, although according to Wikipedia (not that it can always be trusted  ) it's cellulose based, not that I know if that makes a difference. Vindicareassassin actually had a quick test with polyfilla on my Cuckoo WIP and it looked ok. So that now that I know it does work. I might well give it a try. And I wish you all the best on convincing the purists of the merits of paper PE!! For what it's worth I think it look great and it's brilliant idea - I hope it takes off!! Thank you once again. Andrew PS I'll have a think about commissioning a zimmerit tool from you!!  |
|
|
|
Post by deafpanzer on Jan 11, 2016 22:44:42 GMT -5
Spackle for Zimmerit?!?!? I would never thought about this. I am anxious to see more of this!
|
|
adt70hk
Forum Moderator     
Member since: November 2015
Currently attempting to build something decent!!! ;)
Posts: 2,831 
MSC Staff
|
Post by adt70hk on Jan 12, 2016 7:56:24 GMT -5
Spackle for Zimmerit?!?!? I would never thought about this. I am anxious to see more of this! If you're patient you might just get your wish - and sooner than you think - so just keep you're eye out.....but enough said so far.....  |
|