pt109
Full Member
  
Member since: April 2013
Stop staring at me! heheheh
Posts: 491 
|
Post by pt109 on Dec 10, 2015 22:13:30 GMT -5
Hi Guys! Been away for too long, but I figured I'd post a few photos of my recent work, minus the paint. I did this one for the You tube Stug Life GB....... ![]() 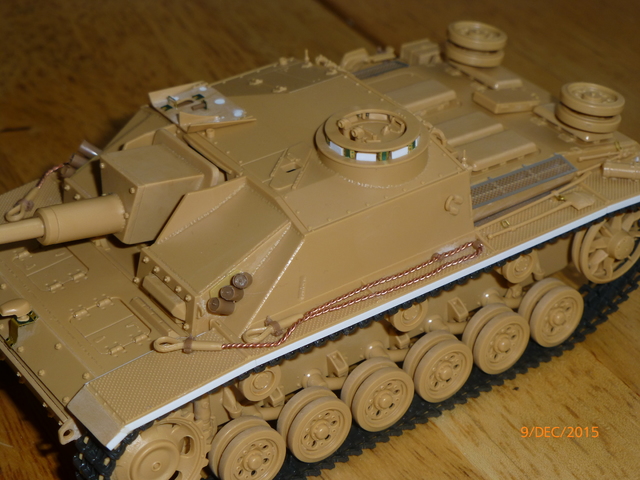
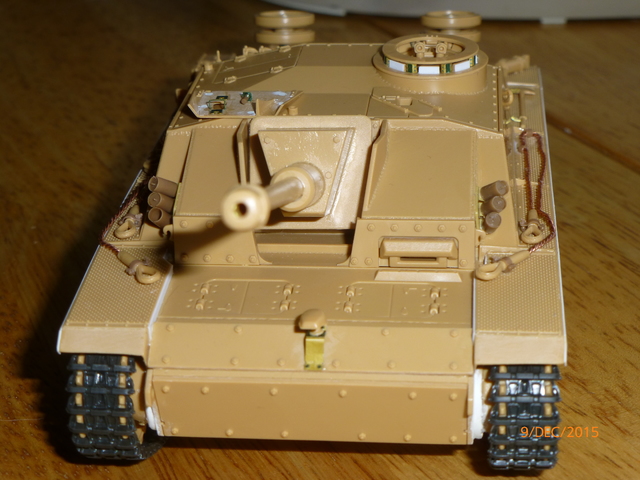
![]() 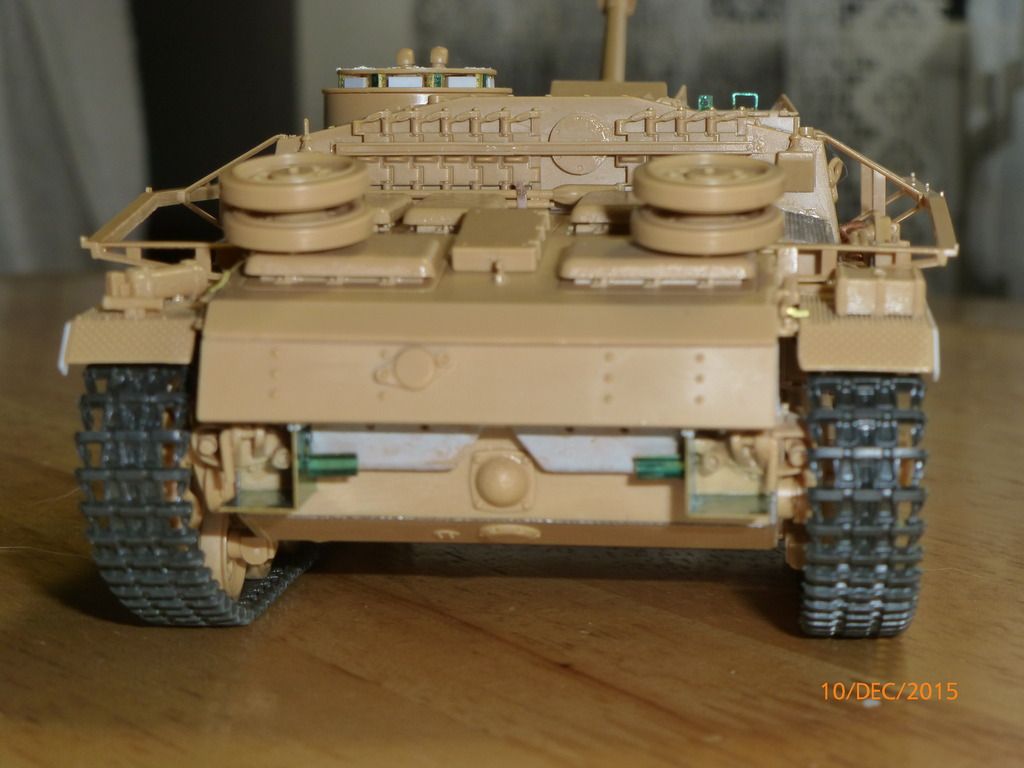 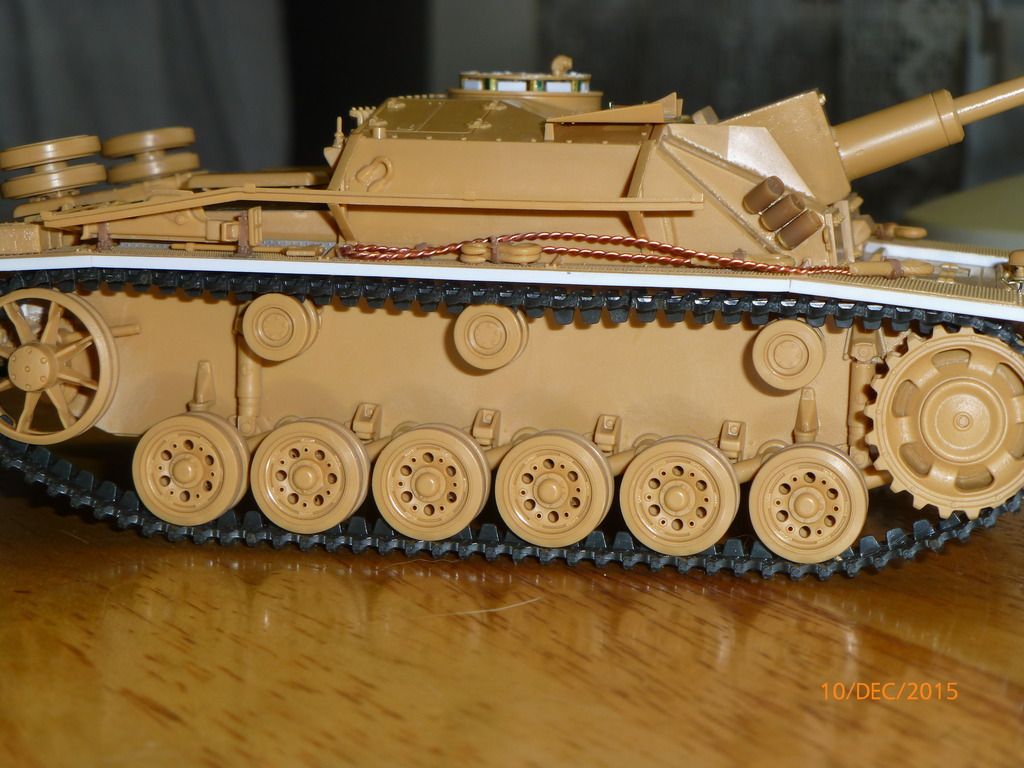 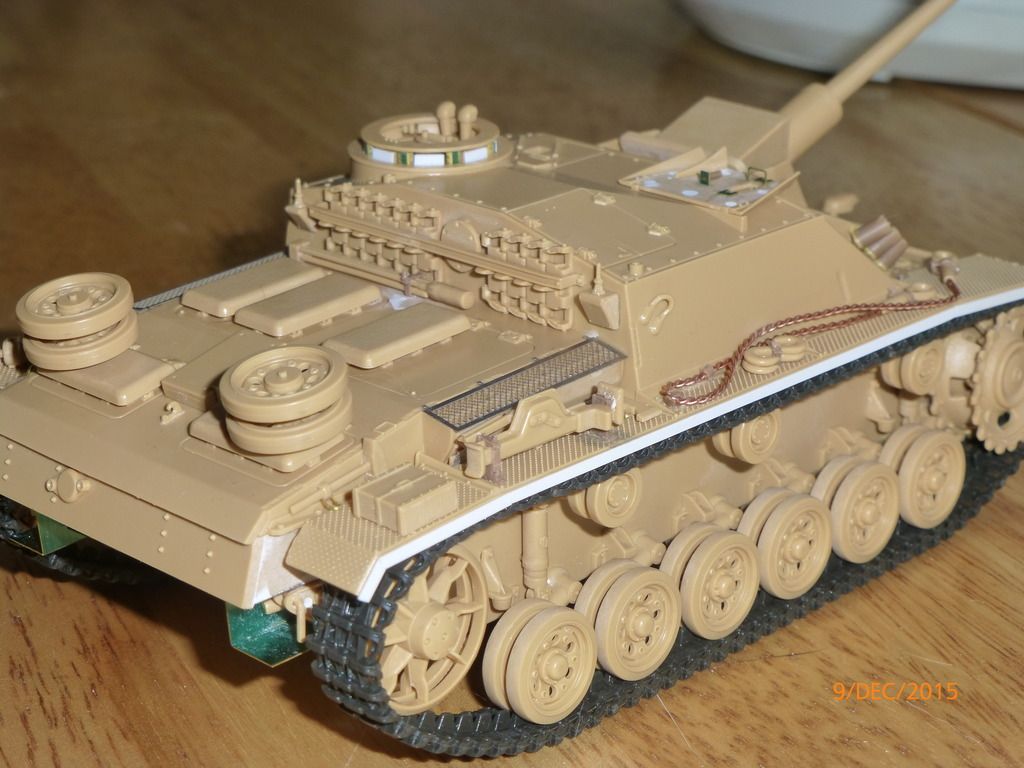 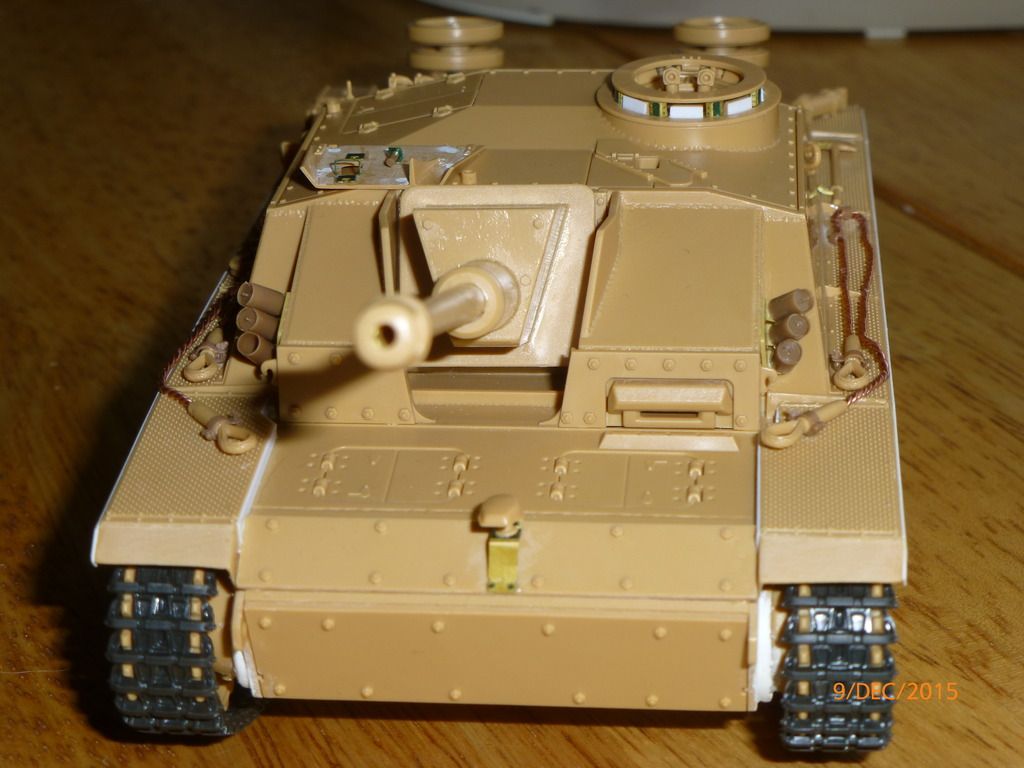 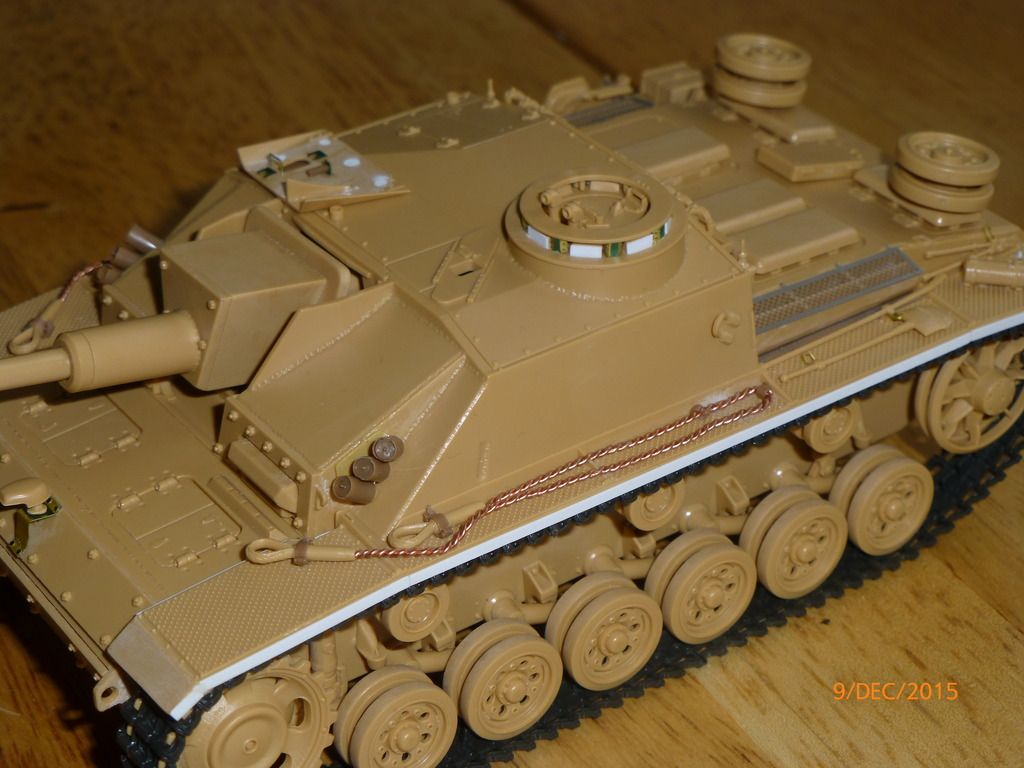 I still have a couple of things to do, like adding the scherzen plates and gun sight, but everything else is finished, just needs paint. I wish I had twisted the tow cables tighter as I'm not too happy with how they came out but it's too late now to fix them. Smoke ejectors and various tiny brackets are from the Modelkasten Stug III G detail parts. The deflector plate that covers the mufflers will be added after it's painted also I used the kit gun barrel...... Thanks for watching..... Paul PS In the end I re-sprayed the basecoat after drying for an hour on the darker areas, matched really well so should be fine. BTW, the wheels came out real good...... |
|
|
|
Post by Leon on Dec 11, 2015 8:46:26 GMT -5
StuG is looking really good Paul!
|
|
adt70hk
Forum Moderator     
Member since: November 2015
Currently attempting to build something decent!!! ;)
Posts: 2,831 
MSC Staff
|
Post by adt70hk on Dec 11, 2015 9:02:31 GMT -5
I had to look at this just because because of the title....and I'm glad I did.
A very nice job!!
Andrew
|
|
pt109
Full Member
  
Member since: April 2013
Stop staring at me! heheheh
Posts: 491 
|
Post by pt109 on Dec 11, 2015 10:06:56 GMT -5
Thanks guys....hopefully I will add the paint this week-end.
Paul
|
|
|
|
Post by Deano on Dec 11, 2015 10:10:34 GMT -5
Great job and nice detailing .... look forward to colour !  |
|
|
|
Post by deafpanzer on Dec 11, 2015 12:58:40 GMT -5
I love them StuGs!!! It is great having you back... I see few familiar faces returning just in time for the winter!
|
|
|
|
Post by wbill76 on Dec 11, 2015 19:29:59 GMT -5
Can't argue with a nice looking StuG Paul, glad to see you back.  |
|
pt109
Full Member
  
Member since: April 2013
Stop staring at me! heheheh
Posts: 491 
|
Post by pt109 on Dec 12, 2015 0:18:01 GMT -5
Thanks all for the nice comments, hopefully I can finish the paint this week end.
Thanks for watching.....Paul
|
|
|
|
Post by panzerjager2 on Dec 12, 2015 22:32:17 GMT -5
NICE STUGGGGGGGGGGGGGGGGGGGGGGGGGGGGG
|
|
pt109
Full Member
  
Member since: April 2013
Stop staring at me! heheheh
Posts: 491 
|
Post by pt109 on Dec 20, 2015 0:55:56 GMT -5
Hi Guys......small update. A few more photos. 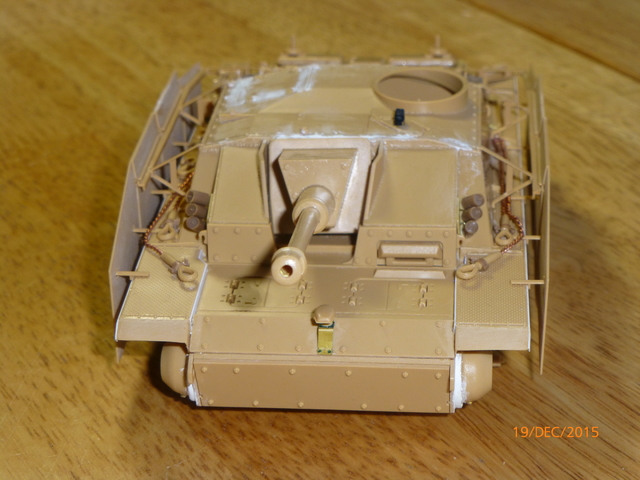
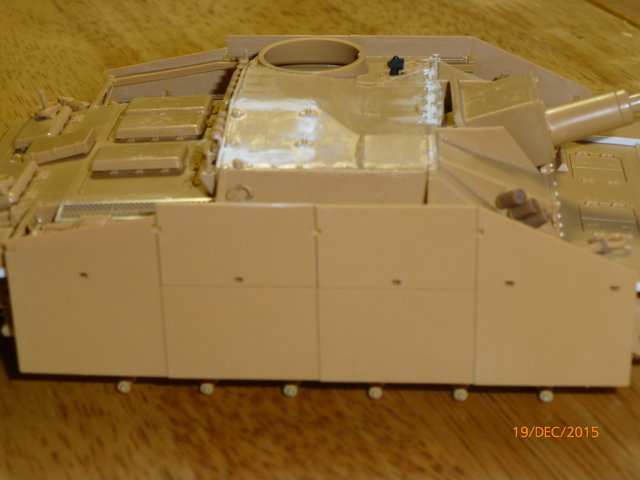 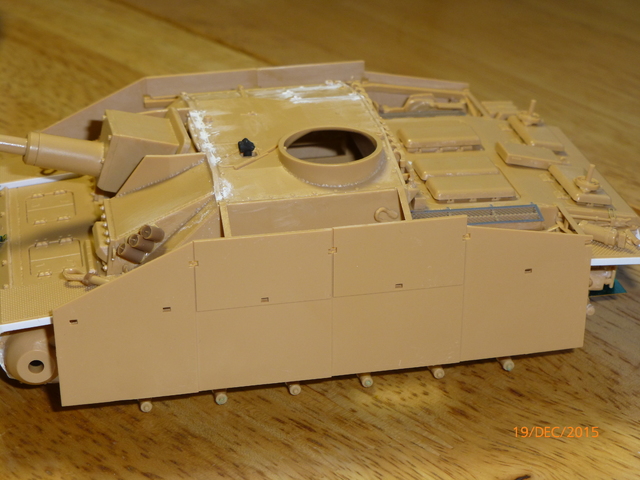 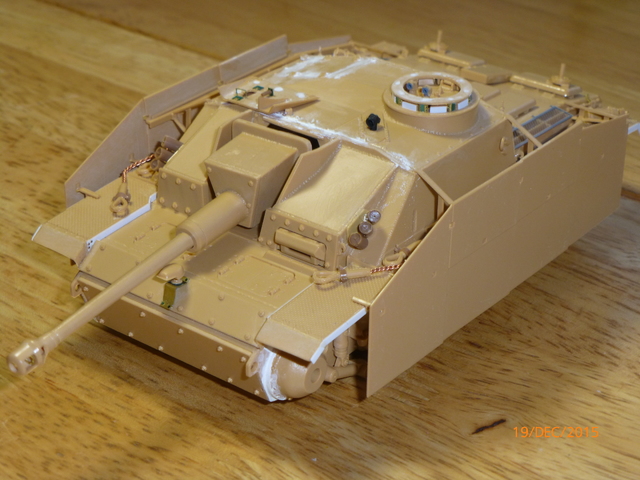 Schuerzen plates installed, I had to remove the wheels and tracks so I can paint behind the plates etc. I will leave the MG shield off until after painting....all assembly is done. Hopefully on to paint tomorrow. Thanks for watching, Paul |
|
desertrat
Full Member
  
Member since: October 2013
Posts: 934 
|
Post by desertrat on Dec 20, 2015 4:33:02 GMT -5
looking great, bring on the paint........................
|
|
|
|
Post by armorguy on Dec 20, 2015 5:09:57 GMT -5
Nice one Paul !
|
|
|
|
Post by Leon on Dec 20, 2015 5:23:52 GMT -5
Looking good Paul!
|
|
|
|
Post by tonylee-Rest In Peace on Dec 20, 2015 13:21:30 GMT -5
I sure hope the armor shield for the machine gunner is not placed and just there for the photo because it's backward and in the wrong location.
Tony lee
|
|
pt109
Full Member
  
Member since: April 2013
Stop staring at me! heheheh
Posts: 491 
|
Post by pt109 on Dec 21, 2015 22:38:06 GMT -5
Are you sure Tony? The part is not glued yet......according to the Tamiya instructions, it's correctly installed and the Tamiya box art shows it this way also? A photo of the instructions to show....on the real loaders hatch there's a bracket, not included in kit which attaches to the gun shield in the up position.....but since the hatches are closed, it's in the stowed position laying down. 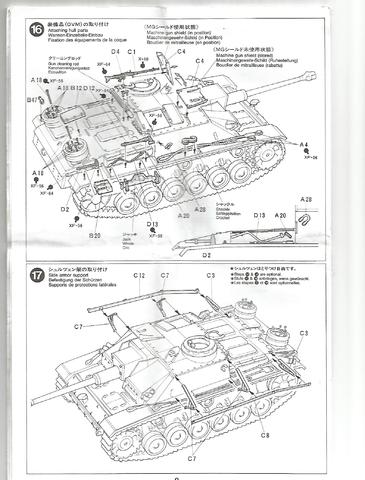 Hope this helps.....Paul PS I would have posted better photos, but I'm sending this via my lap top which has no AFV photos....my desktop got bombarded by a nasty virus a few days ago..... |
|
afvfan
Senior Member
   
Member since: December 2012
Bob
Posts: 1,772
Dec 10, 2012 17:32:38 GMT -5
Dec 10, 2012 17:32:38 GMT -5
|
Post by afvfan on Dec 22, 2015 1:48:41 GMT -5
The shield looks good to me where it's at, Paul, as does the rest of the build.
You say the skirts are installed. I sure hope you don't mean glued on. That could lead to some problems when the paint starts flying. Also, I see you took the trouble to putty up the gaps. Don't overlook the seams inside the muzzlebrake. They're a little hard to get to but with the large openings in the brake, they're very visible.
|
|
pt109
Full Member
  
Member since: April 2013
Stop staring at me! heheheh
Posts: 491 
|
Post by pt109 on Dec 22, 2015 9:17:52 GMT -5
Thanks for your input AFV.....I don't notice the seams on the muzzle too much but I'll hit them with super glue, there's also a circular insert in the muzzle taken from a Dragon PAK 40 spare just to add a missing detail.
One thing I did notice is a crack in one of the smoke dischargers, so I'll have to fix that.
I don't think I'll have too much trouble painting/weathering under the side plates, that is why I glued them since it would have been more difficult to install them after the basecoat.
Thanks again, Paul
|
|
SMJmodeler
Junior Member
 
Member since: October 2015
Posts: 90
Oct 28, 2015 13:55:05 GMT -5
Oct 28, 2015 13:55:05 GMT -5
|
Post by SMJmodeler on Dec 22, 2015 9:45:20 GMT -5
pt109: This kit is on my "to build" shortlist so I'm pulling up a seat to follow-along  . I see some nice scratch-work...if you wouldn't mind could you please explain what you are replacing/ upgarding, etc... for the following: #1. The scratchwork under/ around the turret ring #2. Vertical styrene on both sides of glacis #3. L-shaped PE with a bracket of some sort on the bottom-back of the hull Couple other questions: #4. Is that just seam filler next to the drive sprockets? #5. Are those AM smoke launchers? For future reference, a real brief explanation with each picture is very helpful, it takes a bit longer but it is much appreciated.  BTW: Your pictures are REALLY nice, the close-ups are fantastic and well-lit! She's looking really good so far, your construction is tight and thorough, two thumb up!
|
|
pt109
Full Member
  
Member since: April 2013
Stop staring at me! heheheh
Posts: 491 
|
Post by pt109 on Dec 22, 2015 21:29:40 GMT -5
smjmodeler,
First off thanks for the very nice comments much appreciated!
I'll answer your questions in order:
#1. The scratchwork under/ around the turret ring
I just added plastic pieces to the periscopes (evergreen scale models 010 " 0.25mm) sheet styrene, I didn't think the kit detail was adequate.
The green pieces were from an old photo etch set by Airwaves for the old Tamiya Stug III kit....they bend around the plastic posts between the periscopes.
#2. Vertical styrene on both sides of glacis
I think you mean the horizontal styrene? Again just strips of .010 X .060 (0,25 X 1.5 strips).
Obviously this detail is missing on the Tamiya kit but is present on the real vehicle. I added some bolt heads to the strips which were missing also.
#3. L-shaped PE with a bracket of some sort on the bottom-back of the hull
From the Airwaves set which replaces the missing flange detail, maybe I can post a photo of the Airwaves instructions showing this detail (Note: This is included in the newer Dragon kits.)
#4. Is that just seam filler next to the drive sprockets?
Yes, Tamiya putty thinned with Tamiya extra thin cement....the drive housings didn't sit flush so they needed a little filler.
#5. Are those AM smoke launchers?
Yes, from the Modelkasten Detail Parts set number A7....the smoke launcher brackets
were from Tristar though. All parts from that set were added to the model.
There are some additional details I added which don't show up in the photos. If you want to know about those, just post again.
Again, thanks for your comments and thanks for watching...Paul
|
|
pt109
Full Member
  
Member since: April 2013
Stop staring at me! heheheh
Posts: 491 
|
Post by pt109 on Dec 22, 2015 23:50:40 GMT -5
Here's a photo showing the kit box art and the PE sets I used.... 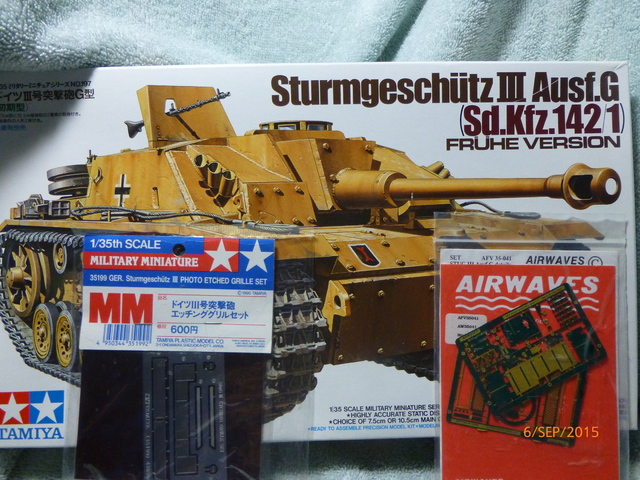 |
|
SMJmodeler
Junior Member
 
Member since: October 2015
Posts: 90
Oct 28, 2015 13:55:05 GMT -5
Oct 28, 2015 13:55:05 GMT -5
|
Post by SMJmodeler on Dec 23, 2015 11:06:50 GMT -5
pt109: Thanks for the additional explanations. On the scratch-work for the glacis it kinda' threw me when you said horizontal...but indeed is done run horizontal...I was refering to the styrene standing on-edge vertically. When you mentioned the added bolts it made sense, we're on the same page now! That's a NICE addition!, I think I even see it  on the box-art. I think I follow the rest of your additional work, but thanks for offing the additional pic's. I really plan to blow-the-wad on AM goodies, specifically PE, when I get to this one! Fenders, schurzen, etc...This must be a popular subject because there's a lot available. Some stuff's for the Dragon kit but I hope to be able to adapt it to my Tamiya version. Again, this is looking sweet...I'll be looking forward to seeing some paint!
|
|
pt109
Full Member
  
Member since: April 2013
Stop staring at me! heheheh
Posts: 491 
|
Post by pt109 on Jan 2, 2016 19:06:22 GMT -5
Hello MSC forums....! Hope everyone had great holidays......and a year later and I got some paint layed down, inagine that. A few photos to keep the interest... 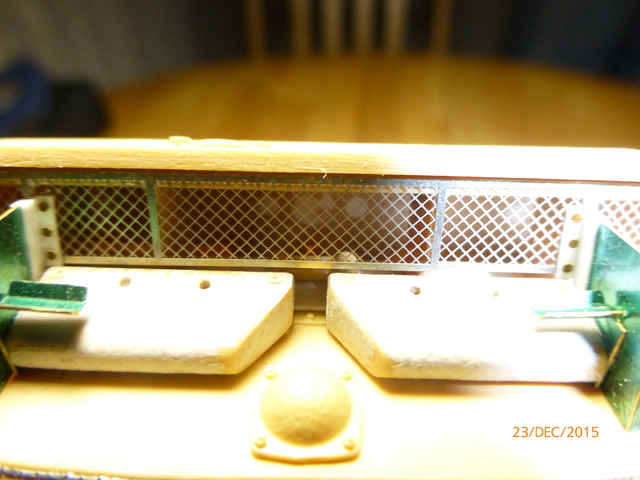 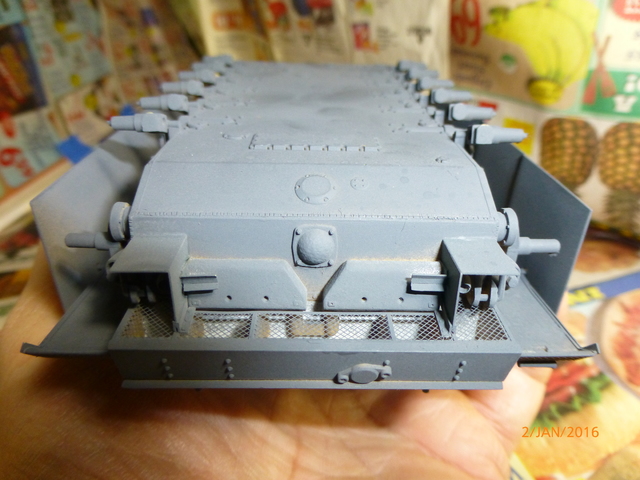 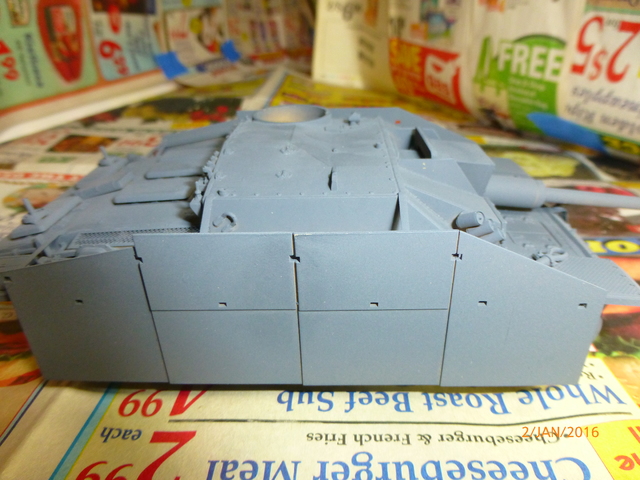 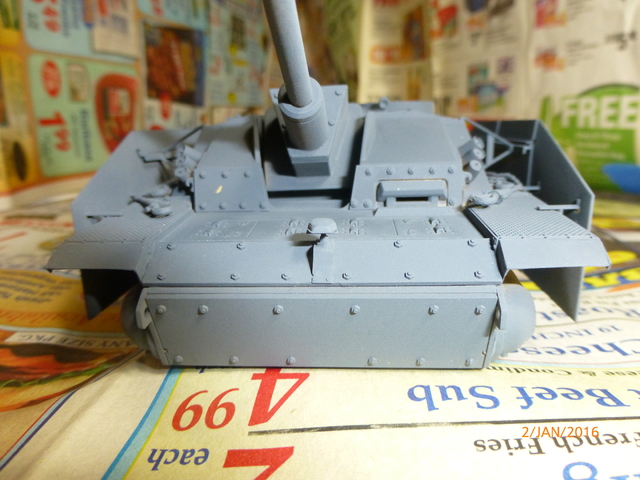 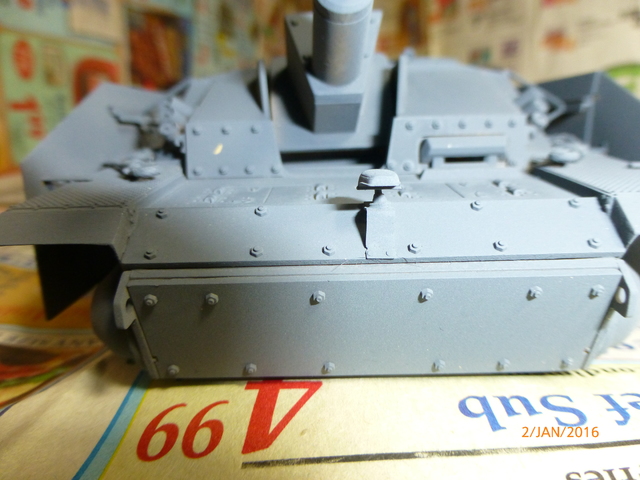 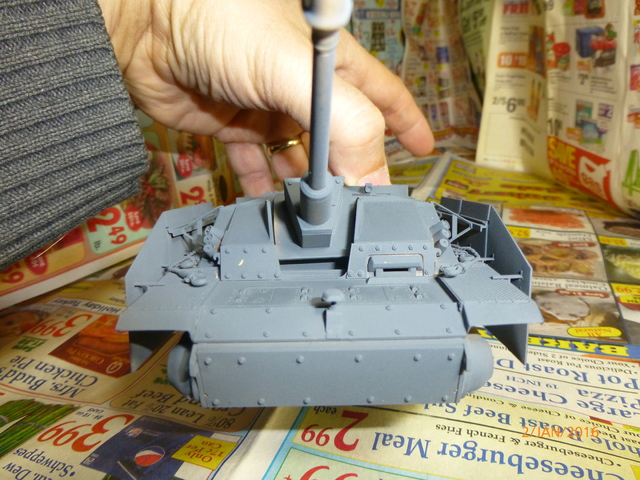 I know their not much to look at but at least I'm moving forward! Primer coat is a bit thin so I'll shoot another layer as I've missed quite a lot.... Wheels done same as tank...... Thanks for any and all interest. Paul PS Primer coat is Tamiya German Gray, not really primer but will serve that role pretty well. Actual color is quite a bit darker in real life. |
|
|
|
Post by Leon on Jan 2, 2016 20:26:01 GMT -5
Always nice to see primer go on Paul!  |
|
desertrat
Full Member
  
Member since: October 2013
Posts: 934 
|
Post by desertrat on Jan 3, 2016 16:55:37 GMT -5
looking good, what's your colour scheme?
|
|
pt109
Full Member
  
Member since: April 2013
Stop staring at me! heheheh
Posts: 491 
|
Post by pt109 on Jan 3, 2016 21:44:39 GMT -5
Here's a copy of the camo scheme....the one on the bottom, dunkel gelb and rot braun. 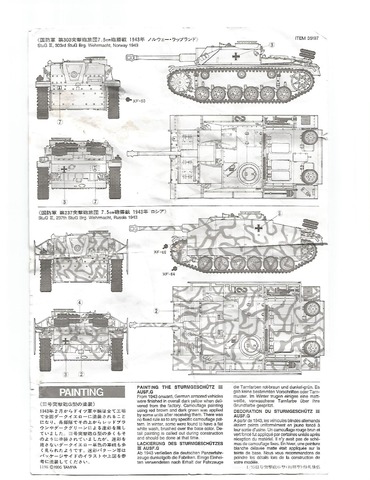 Paul |
|
|
|
Post by TRM on Jan 3, 2016 21:51:05 GMT -5
Lovely work Paul!! Nice to see you've broken out the primer too!  Always a good sign! Looking forward to some color soon!! Enjoy! |
|
SMJmodeler
Junior Member
 
Member since: October 2015
Posts: 90
Oct 28, 2015 13:55:05 GMT -5
Oct 28, 2015 13:55:05 GMT -5
|
Post by SMJmodeler on Jan 4, 2016 10:39:37 GMT -5
pt109: Primer is always a significant milestone...nice work!
|
|
desertrat
Full Member
  
Member since: October 2013
Posts: 934 
|
Post by desertrat on Jan 4, 2016 14:50:30 GMT -5
looking forward to seeing the camo going on,
|
|
|
|
Post by wbill76 on Jan 4, 2016 16:05:08 GMT -5
Nice choice of pattern scheme for this one, will be an eye-catcher when done.
|
|
pt109
Full Member
  
Member since: April 2013
Stop staring at me! heheheh
Posts: 491 
|
Post by pt109 on Jan 5, 2016 22:36:48 GMT -5
Hi Guys, I started the basecoat saturday but I noticed some weird stuff happening.....here's a few photos to show what I mean: 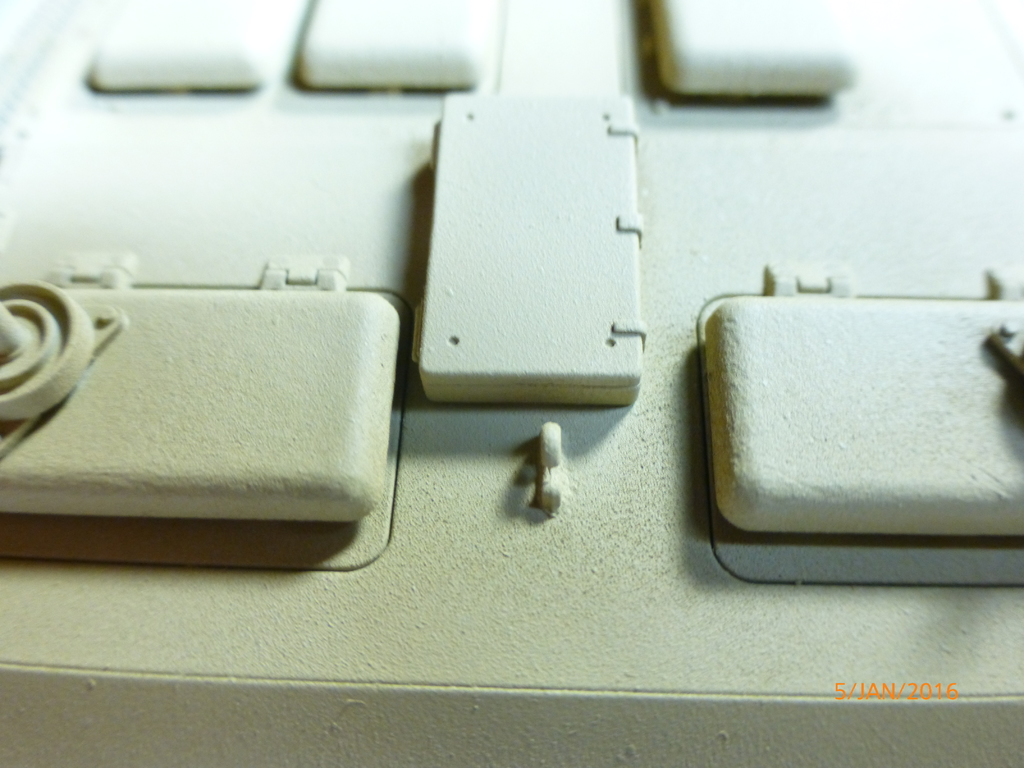 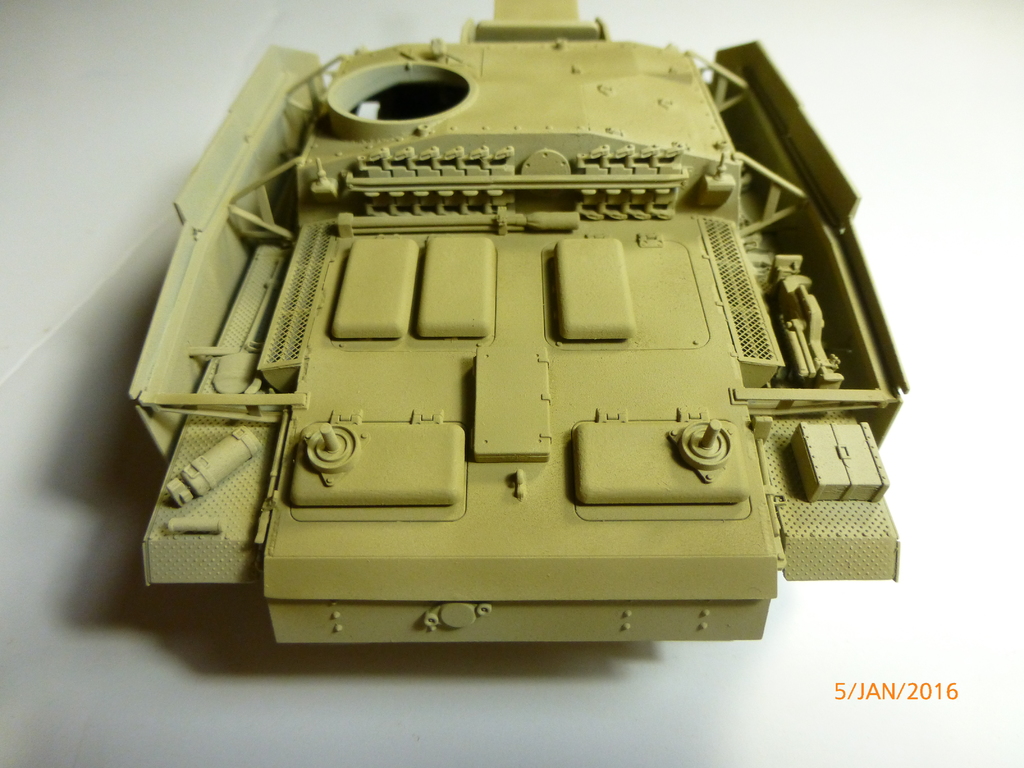 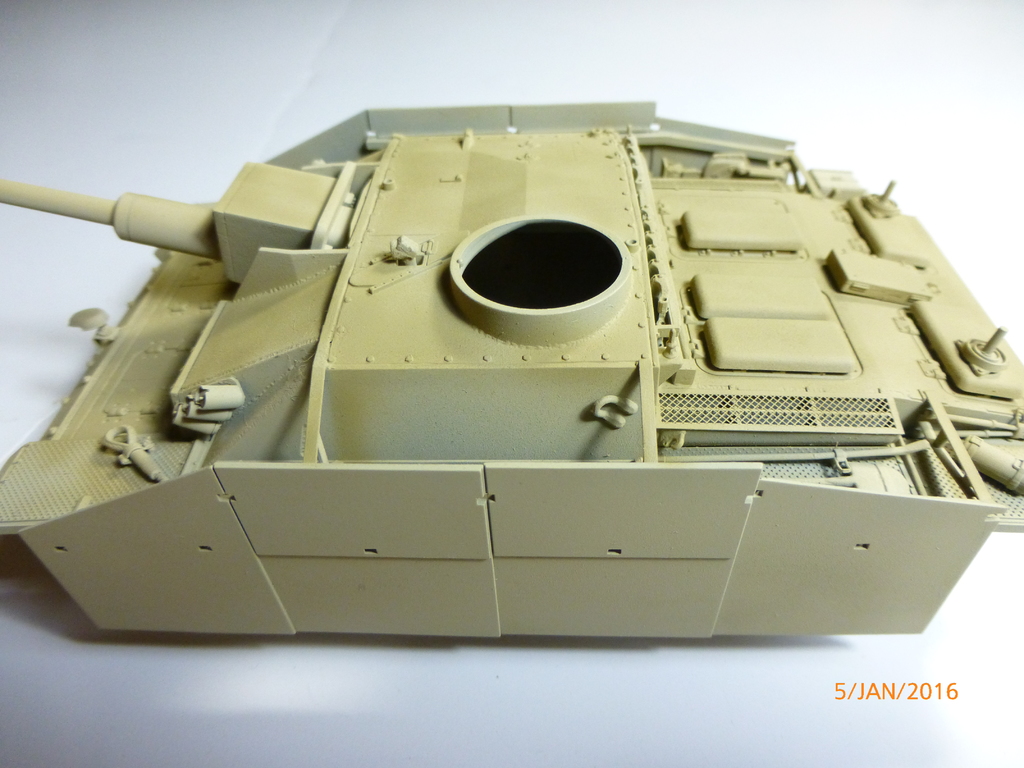 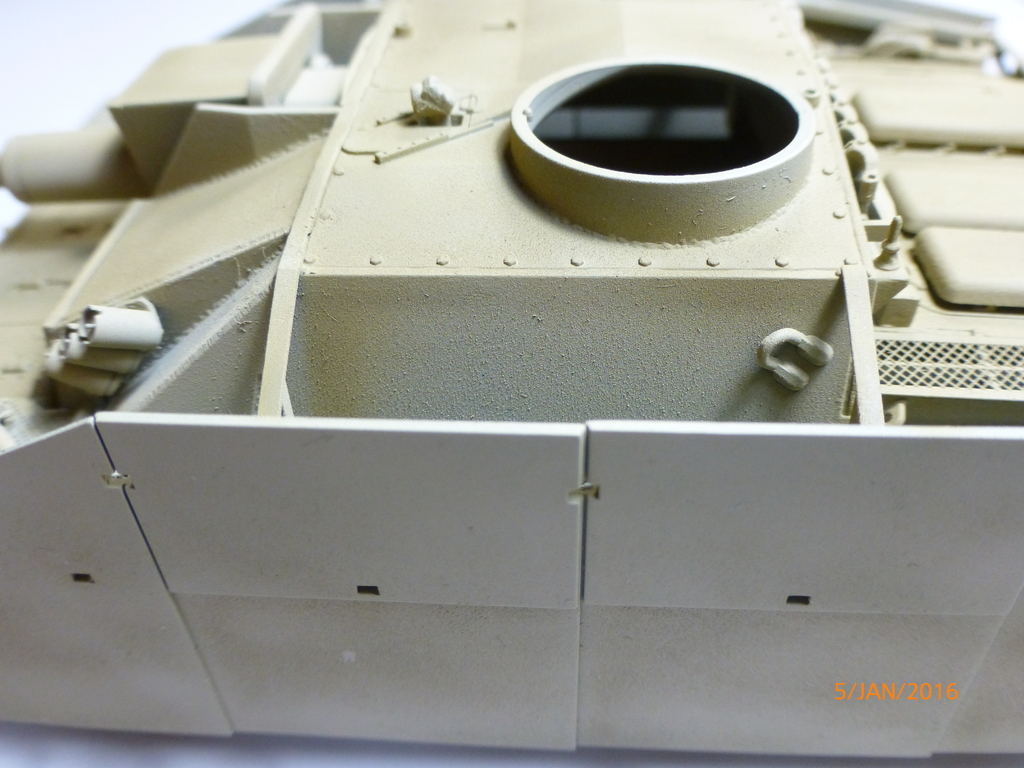 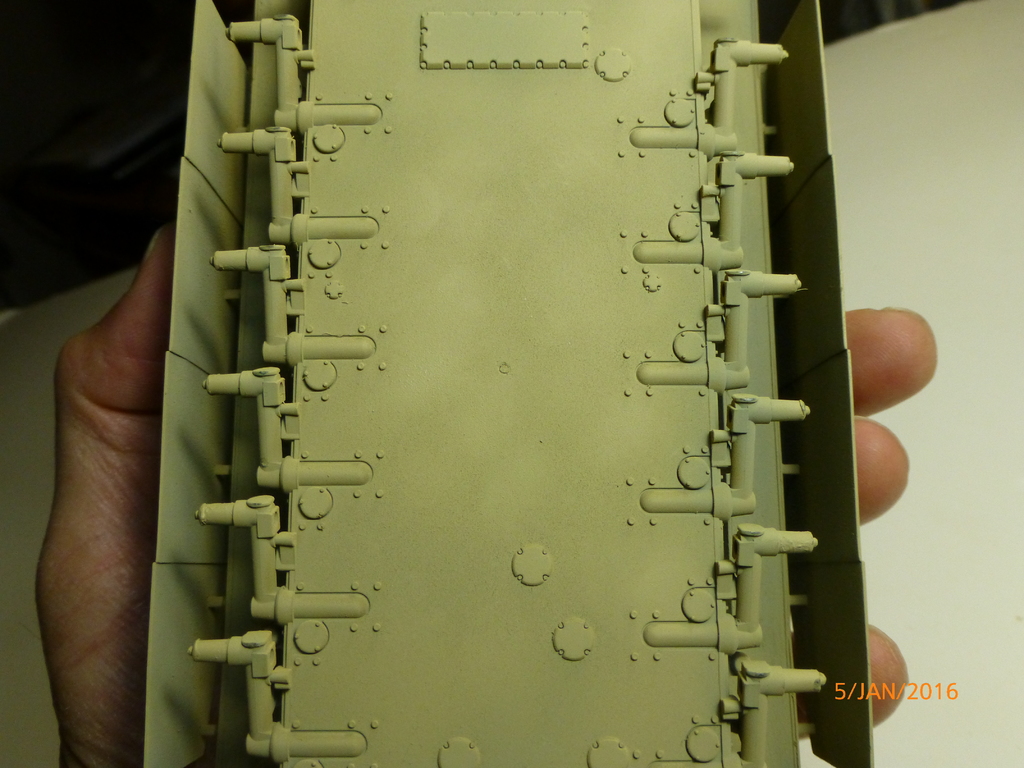 Not sure you can see it in these photos but the paint in certain areas looks like it's cracking/peeling? I lowered the air pressure from 20 psi to 15 but still notice it. I used Tamiya paint thinned with alcohol at room temp. Maybe I should've used Tamiya thinner but I've never seen this before when painting. Anyone have a clue? Paint too thin? Primer coat went on ok as far as I remember, no issues with that. I tried re-spraying the basecoat by adding more yellow which darkened the coat so I tried some modulation but that looks worse, so I decided I'd re-paint it with a third coat at original color or as close as I can get to it (I don't measure anything just go with looks ok to me). In the end I'm not too worried about the basecoat as weathering will fix anything....! HeHe Paul |
|