|
|
Post by panzerjager2 on Jan 23, 2016 0:15:04 GMT -5
Nice work...... Cool beans leaving the Pfifel air cleaners on
|
|
charleygnarlyp290
Full Member
  
Member since: October 2014
Posts: 136 
|
Post by charleygnarlyp290 on Jan 23, 2016 12:25:29 GMT -5
Thanks. I almost opted leave them off, but after I assembled the parts they cleaned up pretty good and decided to install them. I like the fact that it adds a bit more "busy-ness" to the engine deck.
|
|
|
|
Post by wbill76 on Jan 23, 2016 20:10:00 GMT -5
Looking good with the paint on Charley, coming along nicely.
|
|
|
|
Post by Leon on Jan 23, 2016 20:29:14 GMT -5
Nice work on the painting Charley! Great idea for the wheel mask.   |
|
|
|
Post by dierk on Jan 24, 2016 5:44:41 GMT -5
Coming along nicely!
|
|
Deleted
Member since: January 1970
Posts: 0
Nov 23, 2024 13:49:44 GMT -5
Nov 23, 2024 13:49:44 GMT -5
|
Post by Deleted on Jan 24, 2016 7:01:55 GMT -5
Hello,
Good job on this oldy,but look at the MG in the turret, it sticks out to far, normally it is just the tip of the barrel
Eddy
|
|
|
|
Post by wing_nut on Jan 25, 2016 8:55:04 GMT -5
Ah nuts! Got up to take a leak and missing half the show... and lost my seat!
|
|
charleygnarlyp290
Full Member
  
Member since: October 2014
Posts: 136 
|
Post by charleygnarlyp290 on Jan 25, 2016 22:04:20 GMT -5
Hello, Good job on this oldy,but look at the MG in the turret, it sticks out to far, normally it is just the tip of the barrel Eddy Cripes! No doubt. How in tarnation did I miss that!? That I will fix somehow or another. Thanks Eddy. And everybody else thanks for the compliments... and Eddy, thanks for the compliment and pointing out that MG. I would have spaced that to the end. |
|
charleygnarlyp290
Full Member
  
Member since: October 2014
Posts: 136 
|
Post by charleygnarlyp290 on Jan 31, 2016 11:56:15 GMT -5
The camouflage is up next. Here is a progress pic of the hull and turret. 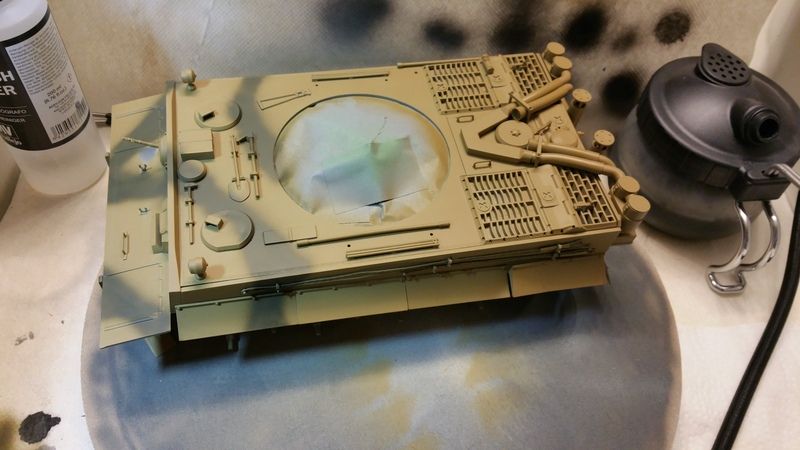 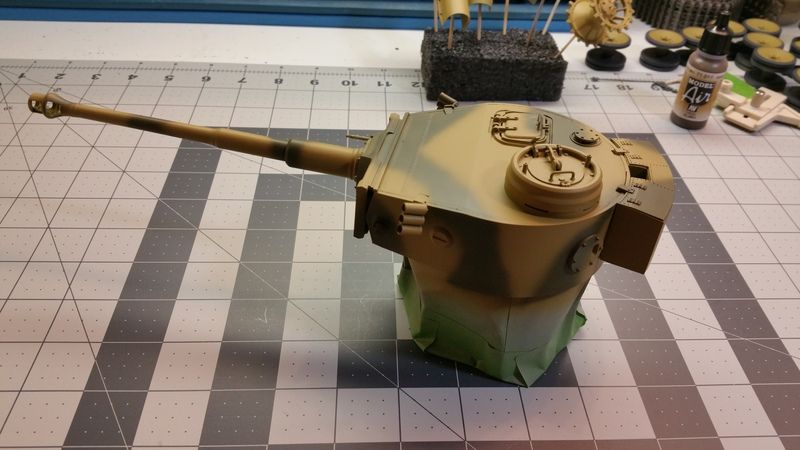 For painting the camo on the wheels I used the same template method as before, but used the outer part of the tape instead of the circle. I cut them out and then cut them apart and apply them. 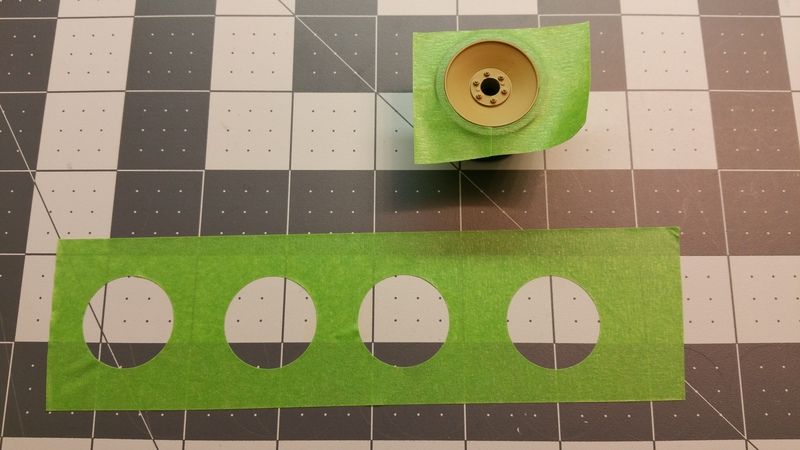 When removing the template from my cutting mat, a small bit of stretching can occur to the tape. To counter this I simply snip one side and wrap the template around the rim, overlapping the cut end a wee bit. 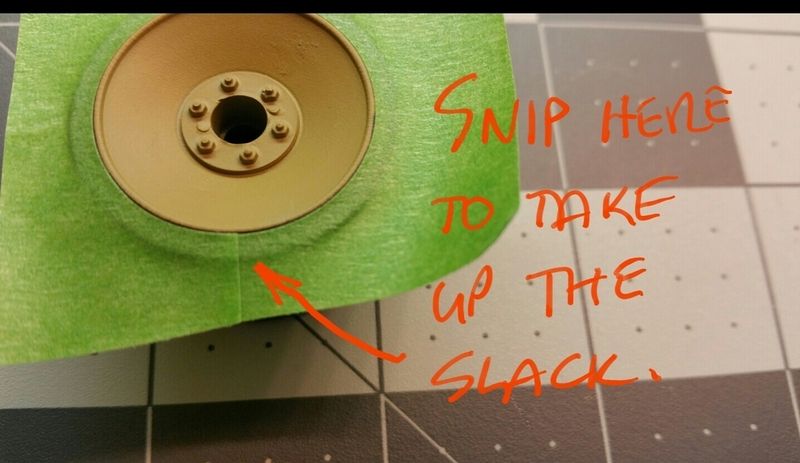 After that it was airbrush time. In the next episode I will be discussing the track assembly and painting. |
|
|
|
Post by Leon on Jan 31, 2016 12:18:41 GMT -5
Camo looks good Charley!  |
|
c3p0.
Full Member
  
Member since: January 2016
The harder you sweat in here the less you gonna bleed on the special project this is a must have.
Posts: 157 
|
Post by c3p0. on Jan 31, 2016 17:53:44 GMT -5
Thanks for the wheel covering information. I found that very useful and helpful.
|
|
|
|
Post by wbill76 on Jan 31, 2016 19:30:37 GMT -5
Making good progress Charley! Nice trick with the wheels.
|
|
modsrule1976
Junior Member
 
Member since: December 2015
Posts: 98 
|
Post by modsrule1976 on Feb 4, 2016 3:24:52 GMT -5
Looking real good! I received the same kit as a Christmas present. Have to say that 1/25 is new to me but I really enjoyed the build. Typical Tamiya good quality components that go together real easily. Here are a couple of shots of my build, there are still a couple of small things to finish off. *Go easy on me I'm by no means anything other than an amateur modeller!!   |
|
|
|
Post by dierk on Feb 4, 2016 5:54:51 GMT -5
Nice work on the wheels Charley  ! Looking forward to you "making tracks"  Not bad Mod'74 - one thing though: is there a way to shorten the tracks to make them look less baggy? Maybe you could start your own thread with some more pictures so we can have a proper look? |
|
|
|
Post by Tojo72 on Feb 4, 2016 8:13:42 GMT -5
Really nice work on the camo and weathering,as said,the tracks look a little loose.
|
|
modsrule1976
Junior Member
 
Member since: December 2015
Posts: 98 
|
Post by modsrule1976 on Feb 4, 2016 8:21:52 GMT -5
Yes, there is a tensioner included in the kit. I just want to add a little more detail to the tracks and then tighten things up and remove the sag.
Cheers :-)
|
|
charleygnarlyp290
Full Member
  
Member since: October 2014
Posts: 136 
|
Post by charleygnarlyp290 on Feb 11, 2016 21:11:11 GMT -5
Sorry about it being almost two weeks since the last update, but work is picking up with the nice weather, I went to Disneyland with me wife for a couple of days, and the stuff I am doing on the model takes a bit longer since paint is involved and it has to cure. So, anyways... I got the Tiger painted and a clear coat applied. I have seen many opinions on clear coats versus no clear coat, regular hobby brand clears (i.e., Model Master, Vallejo, Tamiya, etc.) versus Future. Personally, I prefer a clear coat, and I use Future. Future is cheap, and goes on very thin. I also find it easy to clean the airbrush afterwards. In my opinion, a clear coat makes decal application easier, and gives me a good base for the weathering process, starting with a wash. I have found that an acrylic wash directly onto acrylic paint doesn't work that great for me. So, a base of clear goes down first. After the clear coat, it was time for decals. I was quite worried about the kit decals since they are 25+ years old, but figured I would give them a shot. Amazingly enough, they worked fine. I soaked them a little longer than normal, but after that, they slid right off and stuck with no silvering, or tearing. One thing I didn't like was the strange matte finish they had. I don't know if that was due to the age of the decals, or if that is the way they were printed. 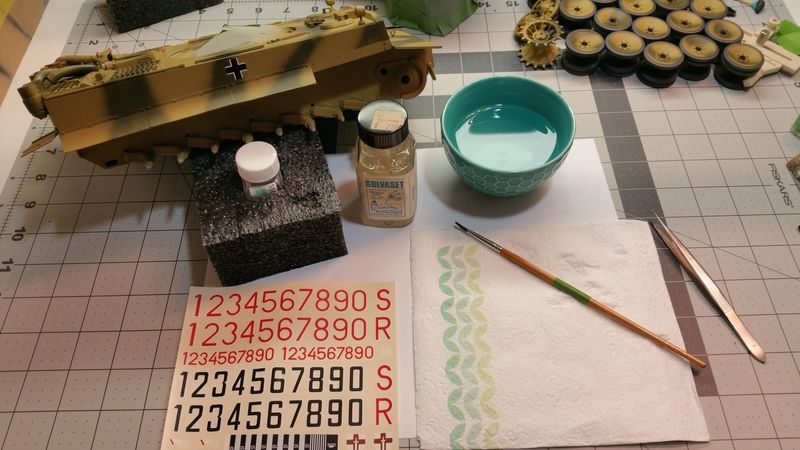 Next, I worked on the tracks a bit. I gave them a dark reddish wash, then black. 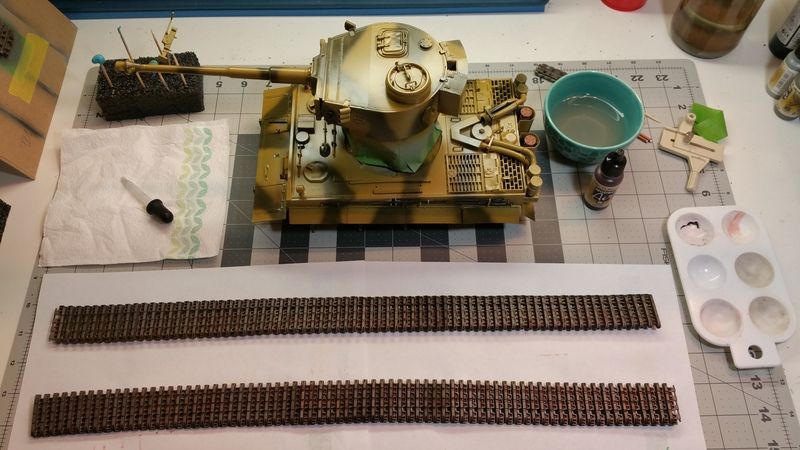 Since I forgot to spray clear on the wheels for weathering, I did that next. 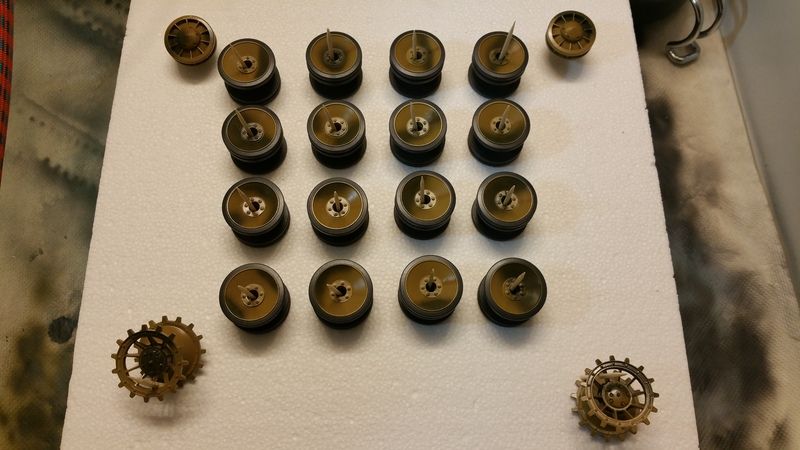 Then I applied a black wash using Vallejo Model Color black, heavily diluted with water. 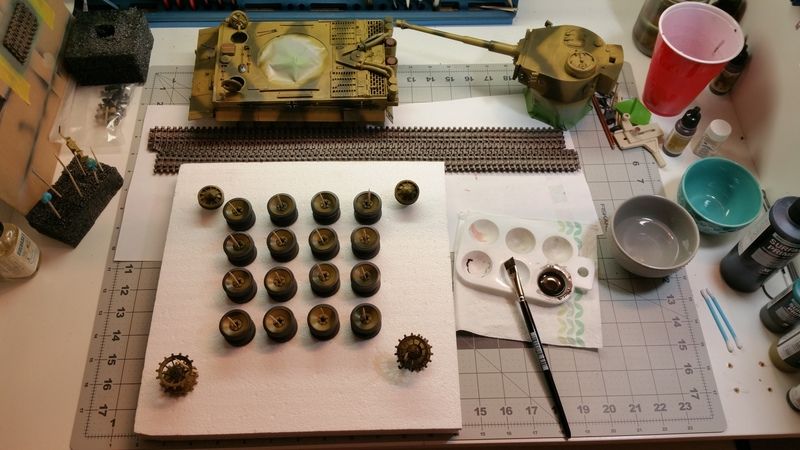 Next up will be chipping, then some weathering. |
|
|
|
Post by Leon on Feb 12, 2016 5:43:06 GMT -5
Coming along nicely Charley! Tracks and wheels look good.  |
|
|
|
Post by deafpanzer on Feb 14, 2016 11:50:29 GMT -5
Camo looks great on her!
|
|
charleygnarlyp290
Full Member
  
Member since: October 2014
Posts: 136 
|
Post by charleygnarlyp290 on Feb 16, 2016 10:58:26 GMT -5
|
|
|
|
Post by wbill76 on Feb 16, 2016 11:49:46 GMT -5
Looks like you made the most out of it. Nice work Charley.
|
|
|
|
Post by Leon on Feb 16, 2016 12:12:16 GMT -5
Great finish Charley!
|
|
|
|
Post by panzerjager2 on Feb 16, 2016 13:16:36 GMT -5
Very nice work...you did this "old warhorse" proud
|
|
adt70hk
Forum Moderator     
Member since: November 2015
Currently attempting to build something decent!!! ;)
Posts: 2,833 
MSC Staff
|
Post by adt70hk on Feb 16, 2016 18:04:11 GMT -5
Charley
That's a very nice job you've done there!
I love in the interior, the paint job, the chipping and your home made cable look amazing.
Very well done!
Andrew
|
|
charleygnarlyp290
Full Member
  
Member since: October 2014
Posts: 136 
|
Post by charleygnarlyp290 on Feb 17, 2016 20:43:03 GMT -5
Looking real good! I received the same kit as a Christmas present. Have to say that 1/25 is new to me but I really enjoyed the build. Typical Tamiya good quality components that go together real easily. Here are a couple of shots of my build, there are still a couple of small things to finish off. *Go easy on me I'm by no means anything other than an amateur modeller!!   Holy cow! How did I miss this? That is a great looking Tiger. And that is kinda weird we did the same color scheme. And I would love to see more pics of it. Did you do the interior? Any pics of the inside? |
|
charleygnarlyp290
Full Member
  
Member since: October 2014
Posts: 136 
|
Post by charleygnarlyp290 on Feb 17, 2016 20:44:35 GMT -5
Thanks for all of the compliments, everyone. I really enjoyed this project... probably more than any others for quite some time.
|
|
modsrule1976
Junior Member
 
Member since: December 2015
Posts: 98 
|
Post by modsrule1976 on Feb 18, 2016 4:46:48 GMT -5
Looking real good! I received the same kit as a Christmas present. Have to say that 1/25 is new to me but I really enjoyed the build. Typical Tamiya good quality components that go together real easily. Here are a couple of shots of my build, there are still a couple of small things to finish off. *Go easy on me I'm by no means anything other than an amateur modeller!!   Holy cow! How did I miss this? That is a great looking Tiger. And that is kinda weird we did the same color scheme. And I would love to see more pics of it. Did you do the interior? Any pics of the inside? Thanks for the great comments....means a lot. Here are some shots I took of the interior. I sealed both the turret and hull roof so not easy to get full shots.     Cheers |
|
charleygnarlyp290
Full Member
  
Member since: October 2014
Posts: 136 
|
Post by charleygnarlyp290 on Feb 18, 2016 9:02:41 GMT -5
Nice. I see you went with the red oxide on parts of the inside. I was torn between using grey or red oxide. During my research, I discovered that both were used and there was even some crossover, but in the end I just used what I had on hand.
Interior looks great by the way. I also glued the top of the hull and turret. I figured since the interior was sparse with detail it would still look good through the hatches.
|
|