ossie262
Full Member
   July '24 Showcased Build Awarded
Member since: January 2015
Posts: 319
Jan 3, 2015 15:31:27 GMT -5
Jan 3, 2015 15:31:27 GMT -5
|
Post by ossie262 on Dec 29, 2015 11:54:32 GMT -5
Hi Everyone well i thought i start this thread . i am building a Swedish Strv 102R Centurion in 1/25 just for starters it may change to a Strv 104. i have the Tamiya 1/25 Centurion Kit , flui metal tracks ,Mouse Enterprise 105mm barrel ,Rb 1/25 .30 browning barrels. thats just for starters . now i have built this in 1/35 so this will give you some idea of the amount of detail to change at the moment i have taken a 1inch file to the turret to completely reshape it . the interior of the turret may only be just basic unsure yet till i start the build fully 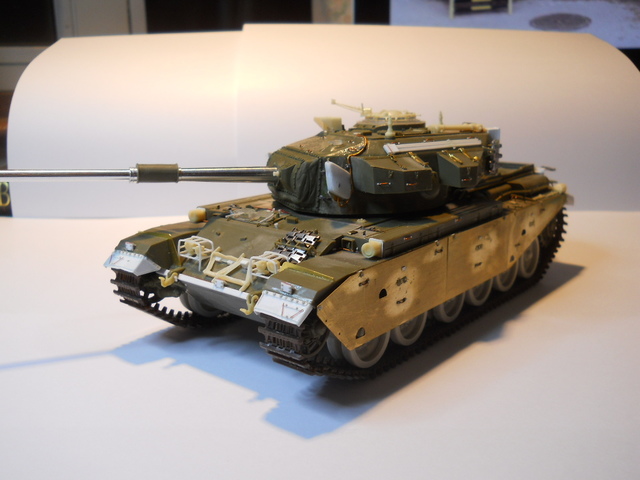 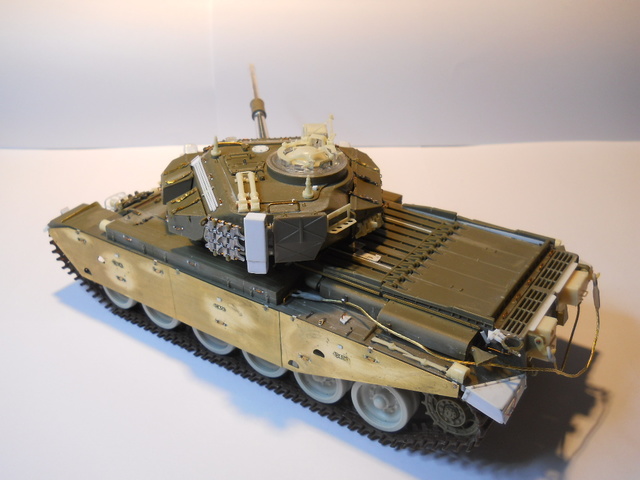 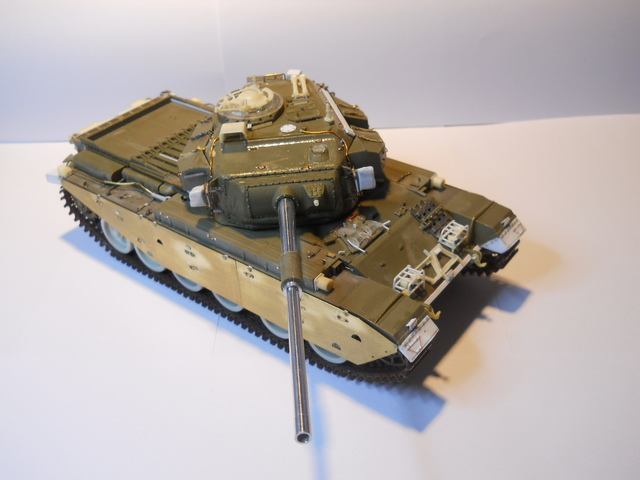 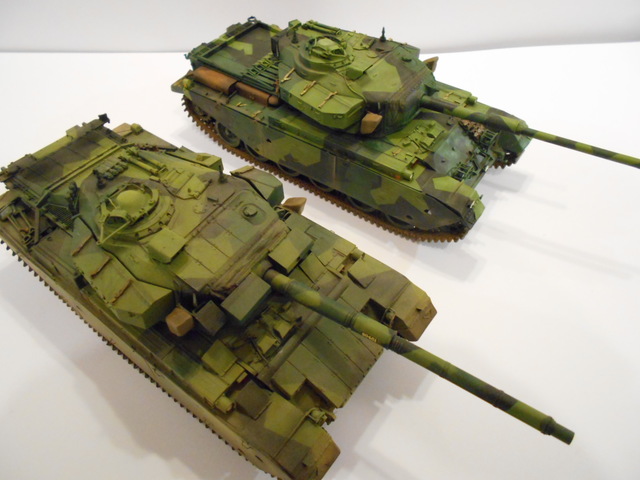 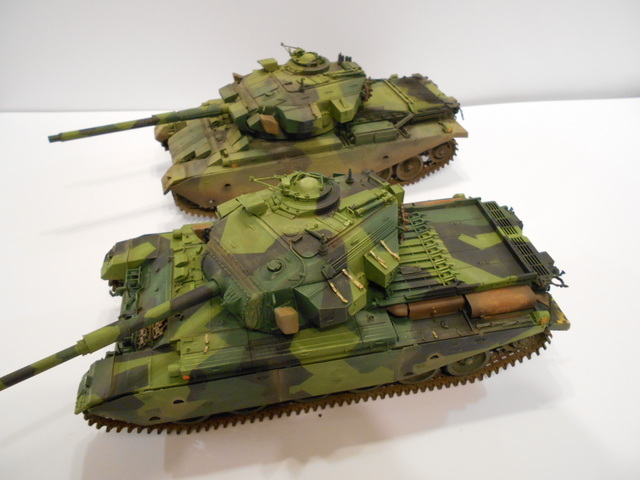 so now the hard work comes , will post some pictures as i go along with the turret and you can see the changes ossie |
|
|
|
Post by TRM on Dec 29, 2015 12:11:01 GMT -5
Fine looking Centurion there Ossie! Nice work on the detailing and that camo!! ;)Looking forward to seeing the weathering come about!  |
|
|
|
Post by Leon on Dec 29, 2015 12:11:42 GMT -5
Welcome aboard Ossie!Looking forward to seeing how this progresses
|
|
ossie262
Full Member
   July '24 Showcased Build Awarded
Member since: January 2015
Posts: 319
Jan 3, 2015 15:31:27 GMT -5
Jan 3, 2015 15:31:27 GMT -5
|
Post by ossie262 on Dec 29, 2015 12:15:32 GMT -5
So these pictures are of the 1/35scale versions i built two years ago and now going to build them in 1/25.
will update when i start to add plastic card to the turret
thank you
ossie
|
|
|
|
Post by TRM on Dec 29, 2015 12:38:36 GMT -5
Can't wait to see your progress on the 1/25th scale version then!  Might even put a spark for me to continue my plight with an IDF version on the shelf!  |
|
ossie262
Full Member
   July '24 Showcased Build Awarded
Member since: January 2015
Posts: 319
Jan 3, 2015 15:31:27 GMT -5
Jan 3, 2015 15:31:27 GMT -5
|
Post by ossie262 on Dec 29, 2015 13:32:05 GMT -5
Hi
i also have planned in 1/25 are:-
Centurion AVRE 165mm unsure gulf or non gulf version
Centurion ARK
centurion Nagmachon
AEC Mk 2 or even a Mk 3 armoured car
ossie
|
|
ossie262
Full Member
   July '24 Showcased Build Awarded
Member since: January 2015
Posts: 319
Jan 3, 2015 15:31:27 GMT -5
Jan 3, 2015 15:31:27 GMT -5
|
Post by ossie262 on Dec 29, 2015 14:49:03 GMT -5
Gents As promised some pictures after i started surgery on the basic Tamiya turret. you can see i have lowered the top and also removed all details. This will allow me to rebuild and reshape with new plastic card inserts . You can see the 1/35 turret next to it and you can see the turret top angles are wrong , the front and also the sides are to thin. I will be making a late model turret which has a thicker sides and base. So here is the first pictures of the build. Ossie 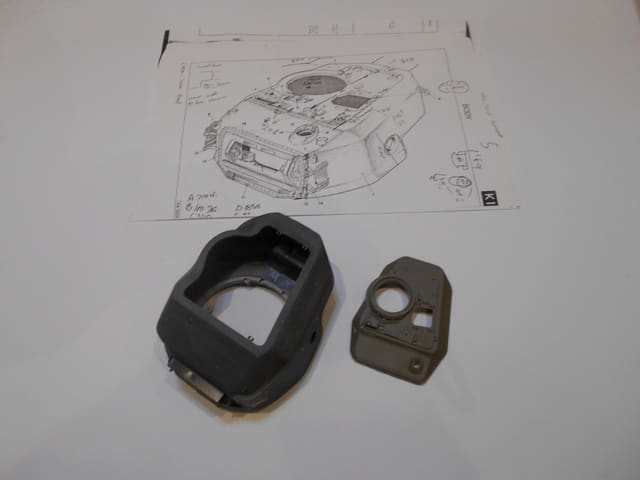 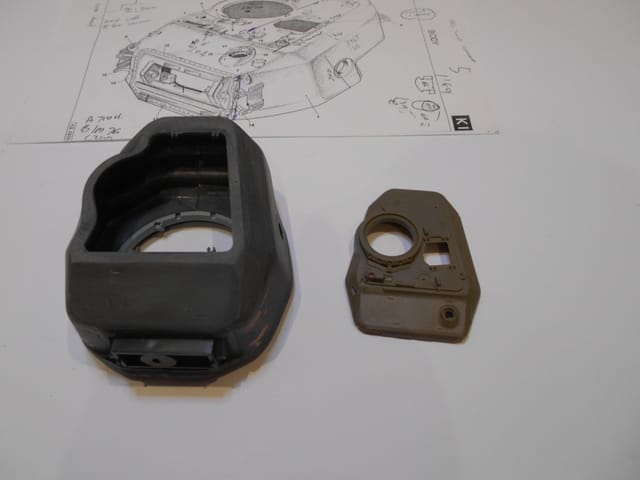 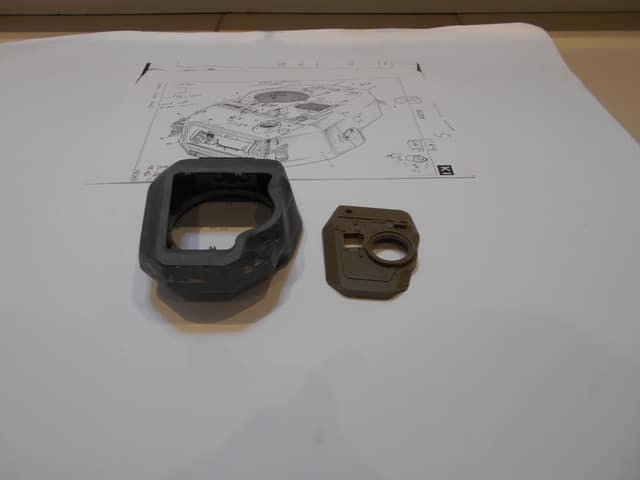 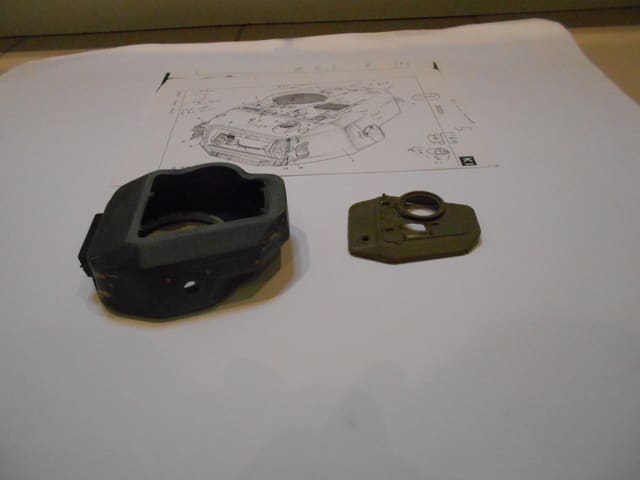 |
|
|
|
Post by panzerjager2 on Dec 29, 2015 16:39:15 GMT -5
Really nice conversion..............................
Keep the updates coming
|
|
|
|
Post by wbill76 on Dec 29, 2015 17:14:09 GMT -5
Sounds like a fun project, pulling up a chair!
|
|
Ray Dunakin
Full Member
  
Member since: February 2013
Posts: 409 
|
Post by Ray Dunakin on Dec 29, 2015 22:47:00 GMT -5
Very nice. The completed smaller scale models look great, can't wait to see how good it looks in a larger size.
|
|
|
|
Post by rbaer on Dec 30, 2015 11:28:51 GMT -5
Very interesting!
|
|
|
|
Post by dupes on Dec 30, 2015 11:40:12 GMT -5
Cool project! Very ambitious. Looks really good so far!
|
|
ossie262
Full Member
   July '24 Showcased Build Awarded
Member since: January 2015
Posts: 319
Jan 3, 2015 15:31:27 GMT -5
Jan 3, 2015 15:31:27 GMT -5
|
Post by ossie262 on Dec 30, 2015 14:08:53 GMT -5
Hi Gents Ok todays update is a very small one . What I have done is looked at the back bottom edge shape of the rear bustle of the turret. Tamiya Mk 3 turret is angled and i want a Rounded shape as seen on the AFV CLUB 1/35 turret and my line on the paper. So what have i done !! Well i have cut some plastic card Thick 4 mmm and glued it on with plastic weld. Then I have filled all the joints with Super Glue and then baking powder put on whilst it is wet . NOW i can assure you this is a good filler but is HARD as Rock . It's a technic i learnt and i used when i was making masters. So next picture will be George 1inch rough cut file and Percy 1inch RASP file have done there work and shape it . hope you like the update and thank you all for the support ossie 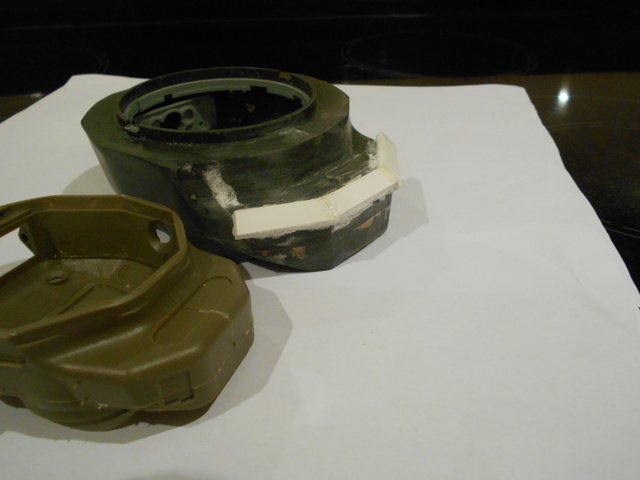 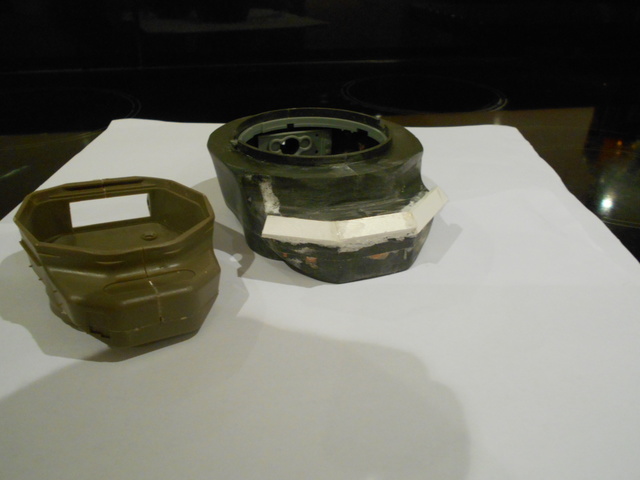 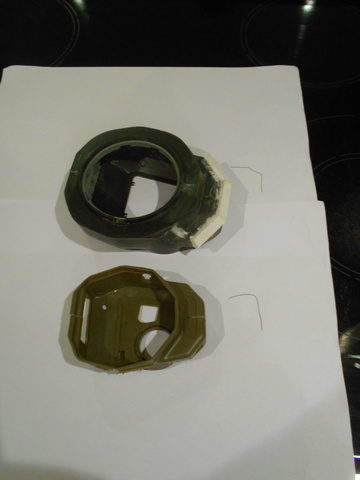 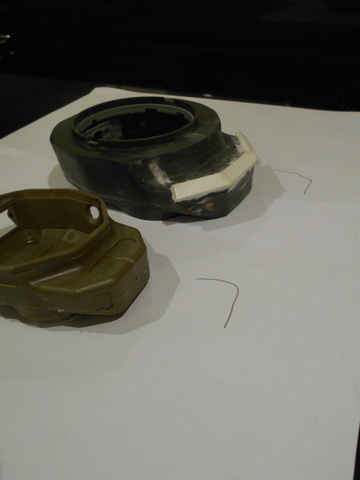 |
|
ossie262
Full Member
   July '24 Showcased Build Awarded
Member since: January 2015
Posts: 319
Jan 3, 2015 15:31:27 GMT -5
Jan 3, 2015 15:31:27 GMT -5
|
Post by ossie262 on Jan 2, 2016 11:30:54 GMT -5
Hi Everyone Well, I have rubbed down what i put on the under side of the base of the turret now starting to add all new plates so i can reshape the whole turret to a late version. Still there is a lot to do but you can see the start of the work . ossie 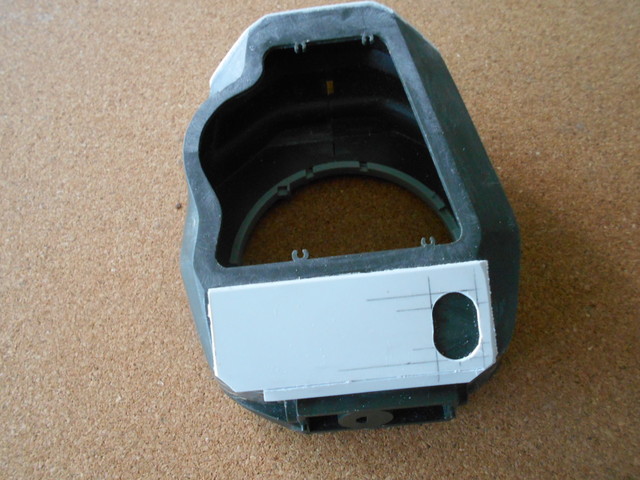 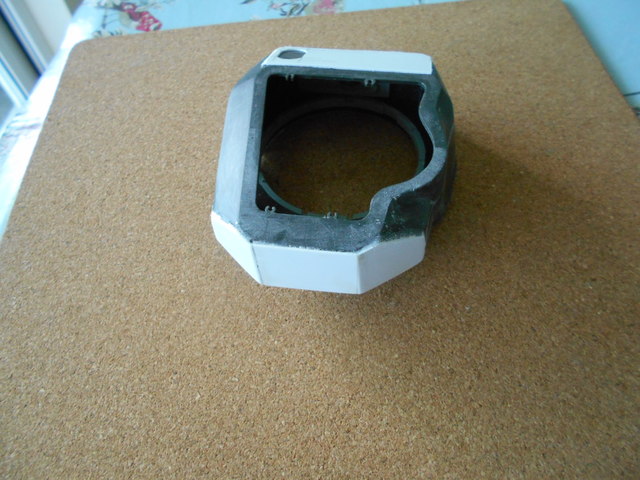 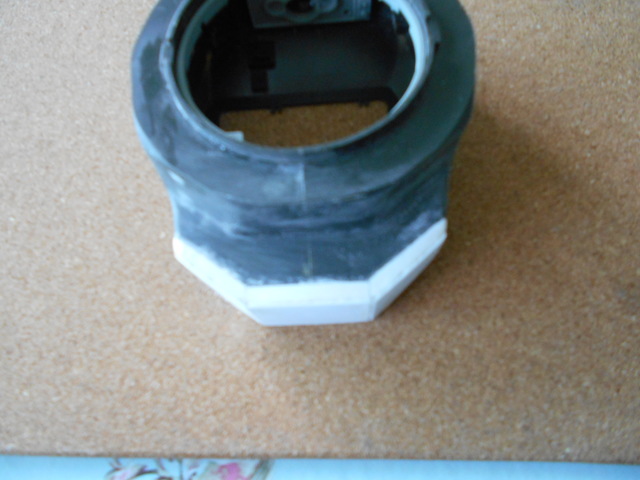 |
|
|
|
Post by Leon on Jan 2, 2016 14:51:04 GMT -5
Turret is looking good Ossie!
|
|
Ray Dunakin
Full Member
  
Member since: February 2013
Posts: 409 
|
Post by Ray Dunakin on Jan 2, 2016 16:31:44 GMT -5
Nice work!
|
|
ossie262
Full Member
   July '24 Showcased Build Awarded
Member since: January 2015
Posts: 319
Jan 3, 2015 15:31:27 GMT -5
Jan 3, 2015 15:31:27 GMT -5
|
Post by ossie262 on Jan 3, 2016 7:11:59 GMT -5
Hi Everyone. Thanks for the comments so far. So what have i done well i have added some plates to the turret so i can reshape to the late version . I have used super glue then added baking powder to the super glue while it is wet , sets like concrete . Then i have used Milliput mixed then same amount of plasticine for some other parts why? This becomes easy to carve but is still as hard, also is smoother finish on it . so here is the mess next lot of updates will be when i have totally rubbed it down to the new shape . hope you enjoying this Ossie 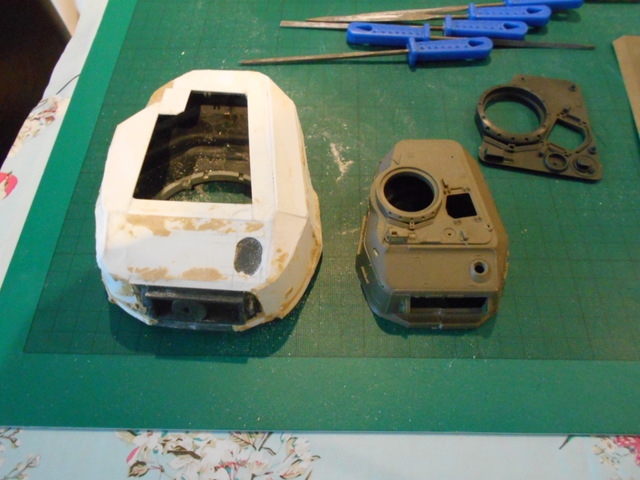 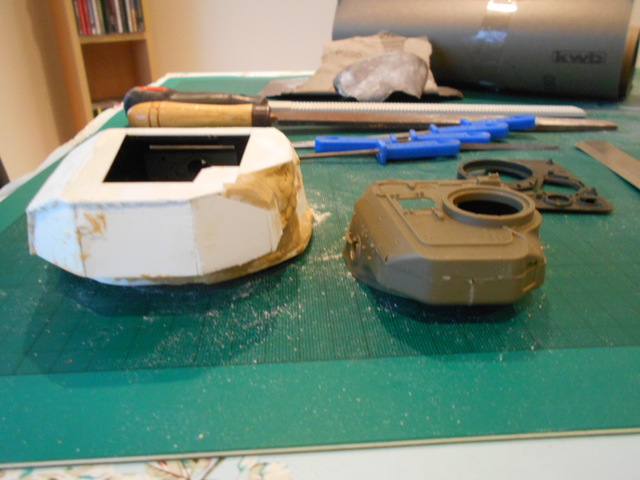 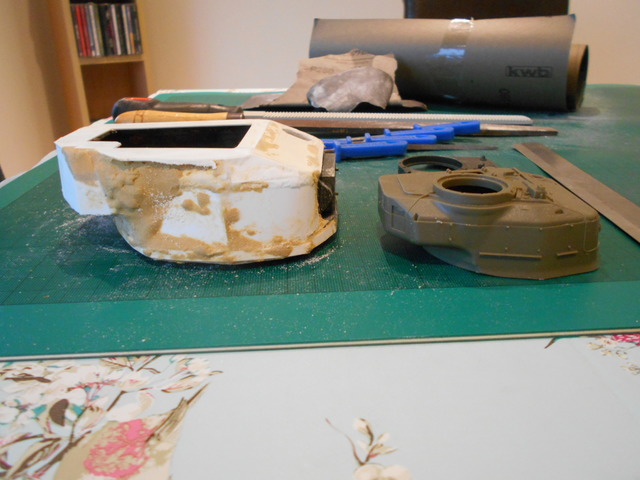 |
|
|
|
Post by wbill76 on Jan 4, 2016 15:54:38 GMT -5
May be messy in progress but should give you a good foundation for the reshaping/carving you need to do.  |
|
ossie262
Full Member
   July '24 Showcased Build Awarded
Member since: January 2015
Posts: 319
Jan 3, 2015 15:31:27 GMT -5
Jan 3, 2015 15:31:27 GMT -5
|
Post by ossie262 on Jan 5, 2016 15:23:49 GMT -5
Hi Thanks for the encouragement so here is a few pictures just slightly blurred sorry but the basic shape is almost done now . hope you like what i am have done so far ossie 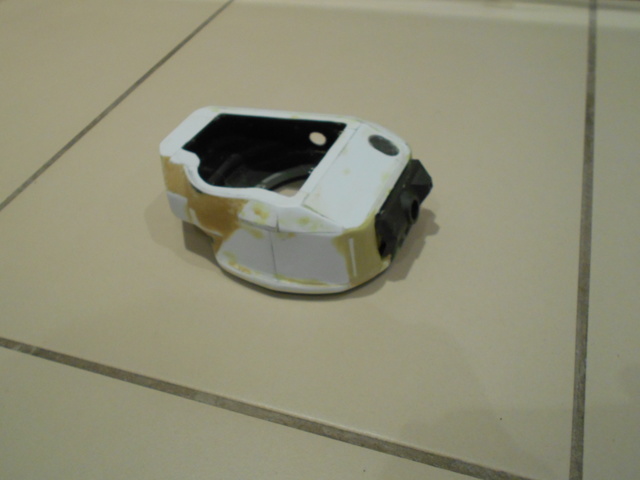 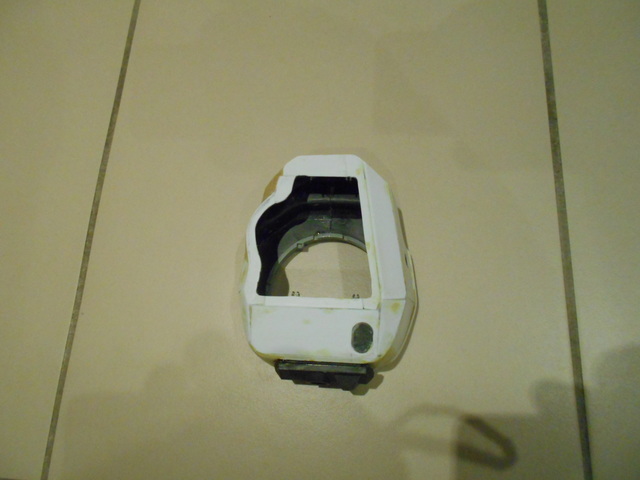 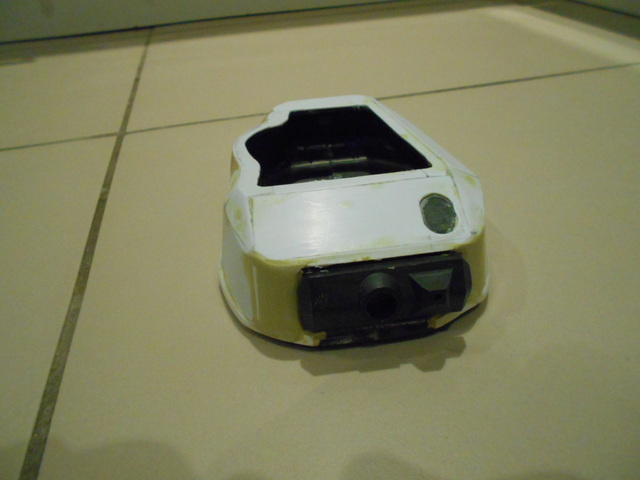 |
|
|
|
Post by Leon on Jan 5, 2016 16:49:11 GMT -5
Shaping up nicely Ossie! Your doing a great job.  |
|
Ray Dunakin
Full Member
  
Member since: February 2013
Posts: 409 
|
Post by Ray Dunakin on Jan 6, 2016 0:16:29 GMT -5
Nice work. I'm surprised that the Milliput and plasticine can be combined.
|
|
adt70hk
Forum Moderator      November '24 Showcased Model Awarded
Member since: November 2015
Currently attempting to build something decent!!! ;)
Posts: 2,834 
MSC Staff
|
Post by adt70hk on Jan 6, 2016 4:27:19 GMT -5
Nice work. I'm surprised that the Milliput and plasticine can be combined. Ossie This was news to me as well! I'm assuming it also works out a bit cheaper than working in pure milliput? Thanks. Andrew |
|
ossie262
Full Member
   July '24 Showcased Build Awarded
Member since: January 2015
Posts: 319
Jan 3, 2015 15:31:27 GMT -5
Jan 3, 2015 15:31:27 GMT -5
|
Post by ossie262 on Jan 7, 2016 15:56:45 GMT -5
Hi
when using my milliput trick what it does allows you to do carve it easier, but will clog files quicker
and is slightly soft. as i say trick i learnt when pattern making.
try it out you can see i have used it on my turret sides etc .
ossie
|
|
ossie262
Full Member
   July '24 Showcased Build Awarded
Member since: January 2015
Posts: 319
Jan 3, 2015 15:31:27 GMT -5
Jan 3, 2015 15:31:27 GMT -5
|
Post by ossie262 on Mar 28, 2016 13:58:41 GMT -5
Hi Everyone. well i am back working my 1/25 scale Centurion. i am still adjusting the shape but its almost there. which is good then i got to add the side hatch raised portion and the loaders periscope mount ,then i be ready to start making the top plate and details. Now i have also been using my Surfacer 500 and its found all the marks , once i am happy and added all the detail i may spray prime the turret sides and front top and stipple mr Surfacer to give that rough look and loads of paint look on a turret. starting to feel good about this project . time is on my side so i just want it right. so hope what you see so far . ossie 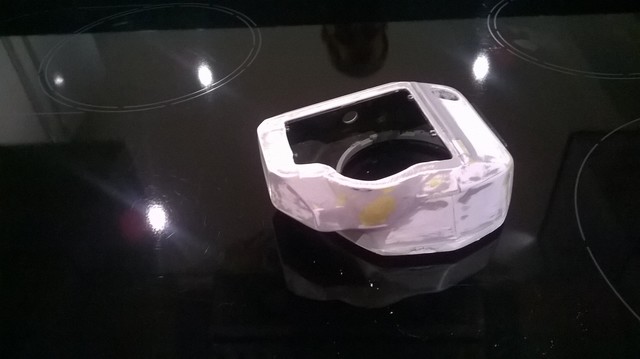 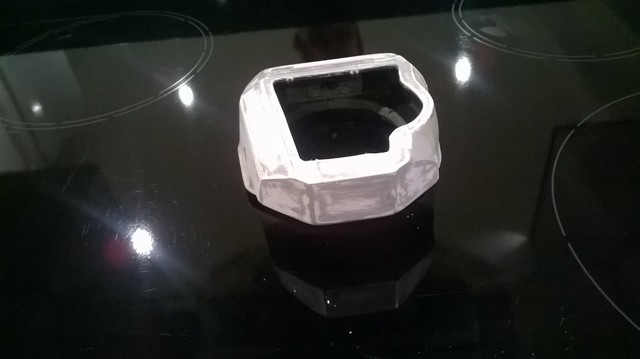 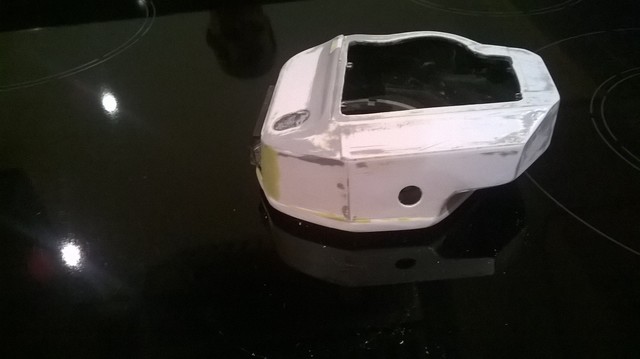 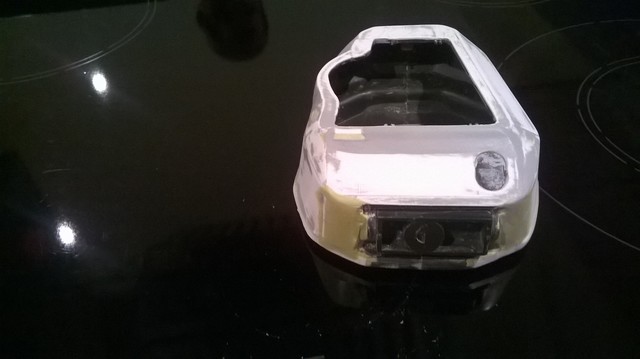 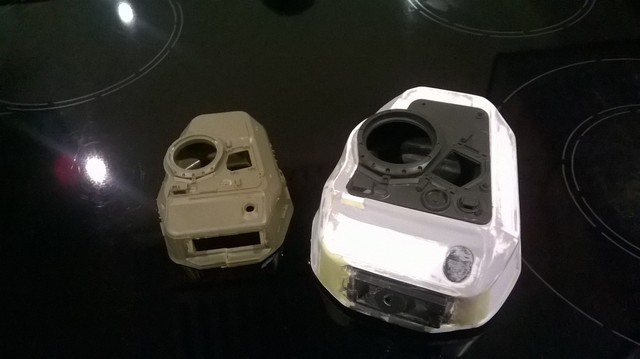 |
|
|
|
Post by Leon on Mar 28, 2016 16:48:39 GMT -5
Nice progress on the turret Ossie! Shaping up really nice.  |
|
|
|
Post by deafpanzer on Mar 29, 2016 11:56:33 GMT -5
Looking real good!!!
|
|
|
|
Post by dierk on Mar 29, 2016 12:13:29 GMT -5
I somehow managed to miss the beginning of this one - but I'll be watching from now on. Really impressive work Ossi!
|
|
ossie262
Full Member
   July '24 Showcased Build Awarded
Member since: January 2015
Posts: 319
Jan 3, 2015 15:31:27 GMT -5
Jan 3, 2015 15:31:27 GMT -5
|
Post by ossie262 on Mar 29, 2016 15:31:58 GMT -5
Hi everyone,
thank you all for the encouragement to carry on with the model , there is a possibility i might change the build to a centurion AVRE 165 but i see.
But what ever i decide i must do it soon because the turret shape at the base will decide the type of build reason other then Swedish tanks the other centurion turrets have cut outs in the base so that the turret can turn, but the Swedish turrets have the edges ground back
thanks for checking in
Ossie
|
|
Deleted
Member since: January 1970
Posts: 0
Nov 25, 2024 19:40:39 GMT -5
Nov 25, 2024 19:40:39 GMT -5
|
Post by Deleted on Mar 30, 2016 8:43:51 GMT -5
|
|
ossie262
Full Member
   July '24 Showcased Build Awarded
Member since: January 2015
Posts: 319
Jan 3, 2015 15:31:27 GMT -5
Jan 3, 2015 15:31:27 GMT -5
|
Post by ossie262 on Mar 30, 2016 11:20:06 GMT -5
cheers bruce
|
|