charleygnarlyp290
Full Member
  
Member since: October 2014
Posts: 136 
|
Post by charleygnarlyp290 on Feb 21, 2016 11:58:41 GMT -5
My next project is a nostalgia build: The Monogram 1/32 scale Panzer IV. 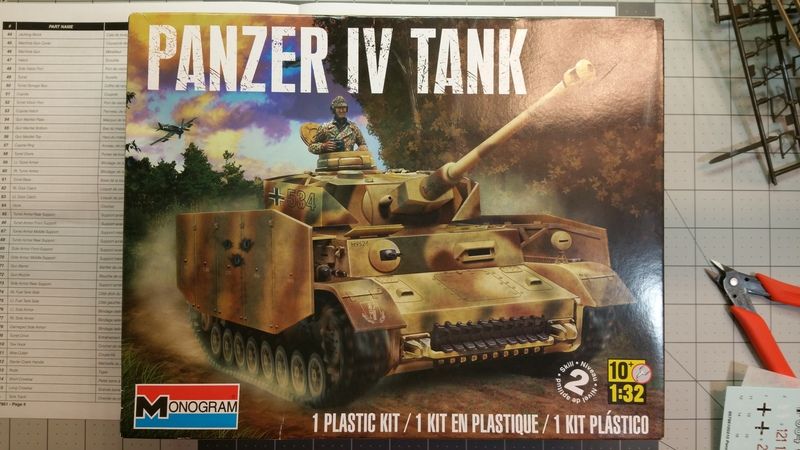 Way back when, in those wonderful years known as the '70s, Monogram had their Armor Series kits. There were US, British and German vehicles available. For some crazy reason, these kits were molded in 1/32 scale instead of the more common 1/35. In the mid-'70s, a friend of mine introduced me to the Monogram armor kits. Up to that point, my model building included cars, ships, and aircraft, with a few motorcycles sprinkled in. But, once I discovered armor, I rarely built anything else. Hence, the "nostalgia build." The Panzer IV was first molded in 1970. The one I am about to build is a re-box of that kit. Compared to modern kits, this kit is quite simple, with a low parts count, and somewhat soft detail. With that in mind, it should be a rather quick build. 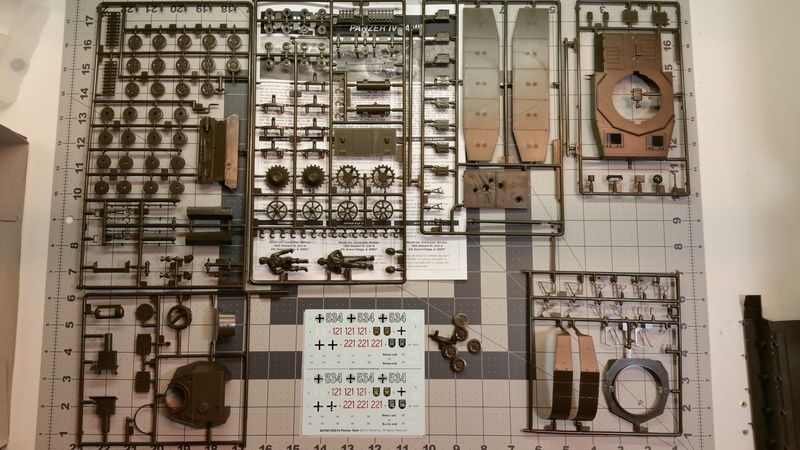 This model has some pretty nifty options available. First, there is an option to model kit supplied battle damage to the side skirts. 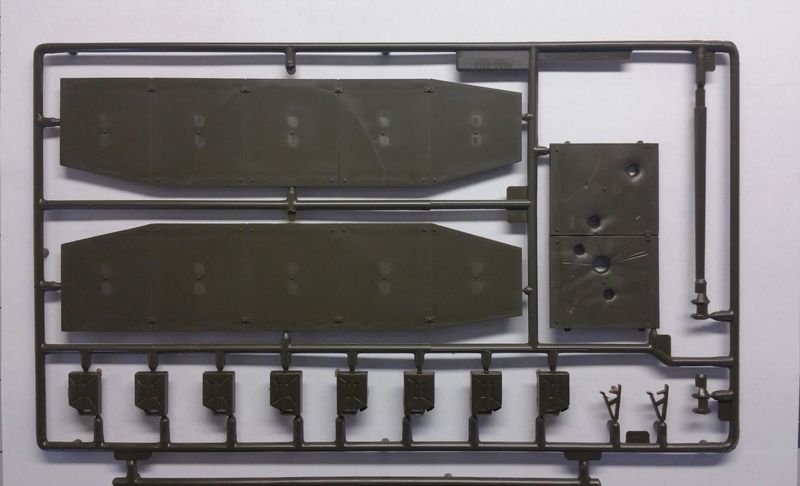 Next, the kit supplied decals are offered two ways. There is a clean, factory applied look set, and a scuffed up battle damaged set. 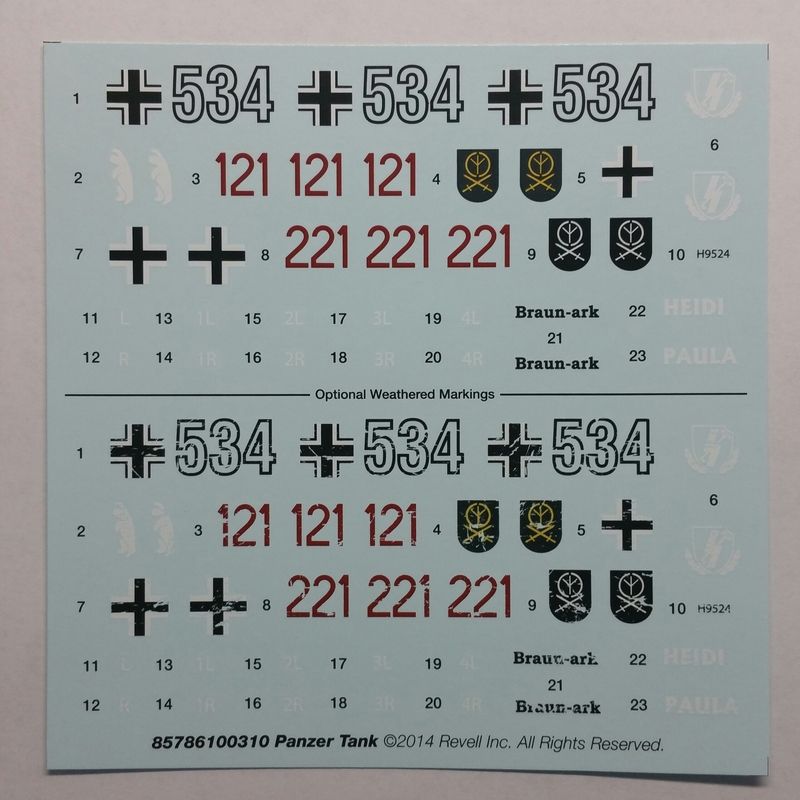 There are also two figures supplied, and considering they were molded in 1970, they are actually quite good. 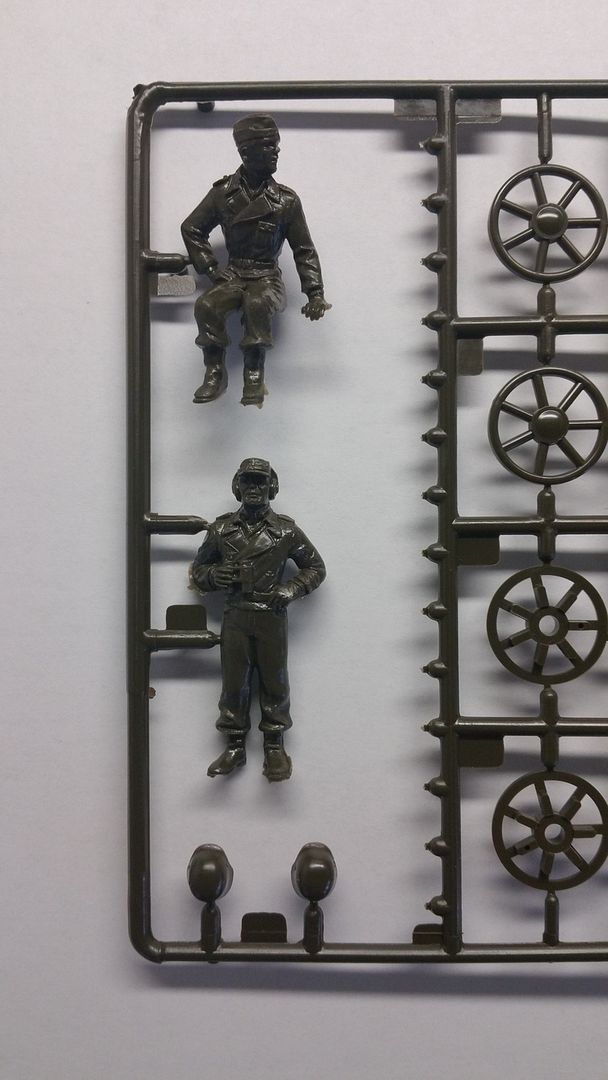 My plan with this kit is to model it with the damaged side skirts. I am also going to apply zimmerit to this vehicle. It will be only the second time I have applied zimmerit to a model, that being 25+ years ago. |
|
|
|
Post by dierk on Feb 21, 2016 12:48:22 GMT -5
I'll be watching with interest! Nice optional extras included - quite surprising really. Wish they'd been as thorough with their 'Screamin Mimi' kit, which is just plain nasty by comparison and will probably fester at the back of my stash forever.
|
|
desertrat
Full Member
  
Member since: October 2013
Posts: 934 
|
Post by desertrat on Feb 21, 2016 13:51:09 GMT -5
watching this with great memories, always think of the great late shep paine when see Monogram kits, really like the decals,great idea to do battle worn set.
|
|
charleygnarlyp290
Full Member
  
Member since: October 2014
Posts: 136 
|
Post by charleygnarlyp290 on Feb 21, 2016 14:59:03 GMT -5
I'll be watching with interest! Nice optional extras included - quite surprising really. Wish they'd been as thorough with their 'Screamin Mimi' kit, which is just plain nasty by comparison and will probably fester at the back of my stash forever. Funny you mention the Screamin Mimi. That was the second kit I built when I got back into the hobby a few years ago. True, it has its issues, but I enjoyed it. As a matter of fact I still have the diorama tips insert that came with the original issues of the kit that I built in '78 or so. |
|
charleygnarlyp290
Full Member
  
Member since: October 2014
Posts: 136 
|
Post by charleygnarlyp290 on Feb 21, 2016 15:00:31 GMT -5
watching this with great memories, always think of the great late shep paine when see Monogram kits, really like the decals,great idea to do battle worn set. Shep Paine's work is what got me hooked on armor modelling. he could do wonders with a kit, and knowing now what he had to work with makes it even more amazing. |
|
desertrat
Full Member
  
Member since: October 2013
Posts: 934 
|
Post by desertrat on Feb 21, 2016 15:04:19 GMT -5
Shep Paine's work is what got me hooked on armor modelling. he could do wonders with a kit, and knowing now what he had to work with makes it even more amazing. yeah, imagine what his builds would be like today !!!!! |
|
afvfan
Senior Member
   
Member since: December 2012
Bob
Posts: 1,772
Dec 10, 2012 17:32:38 GMT -5
Dec 10, 2012 17:32:38 GMT -5
|
Post by afvfan on Feb 21, 2016 17:59:31 GMT -5
Monogram had their Armor Series kits. There were US, British and German vehicles available. For some crazy reason, these kits were molded in 1/32 scale instead of the more common 1/35. No, the crazy thing is that most of the Allied stuff they did back then was in 1/35, making an Axis/Allied diorama almost impossible. |
|
|
|
Post by panzerjager2 on Feb 21, 2016 18:49:32 GMT -5
I too am gonna be watching this one. This is a "throw back" to a simpler times in modeling. Let's remember what Shep Paine did with this Ole warhorse...
BEST OF LUCK on this build
|
|
|
|
Post by Leon on Feb 21, 2016 19:29:38 GMT -5
Have to say Monogram is one kit that i never built! I'll be following along ith interest.  |
|
|
|
Post by panzerjager2 on Feb 21, 2016 21:25:17 GMT -5
The cool thing that I totally just remembered is, you get to use the Airfix 1/32nd multi-pose figures and accessories.....
|
|
afvfan
Senior Member
   
Member since: December 2012
Bob
Posts: 1,772
Dec 10, 2012 17:32:38 GMT -5
Dec 10, 2012 17:32:38 GMT -5
|
Post by afvfan on Feb 22, 2016 5:43:50 GMT -5
Have to say Monogram is one kit that i never built! I'll be following along ith interest.  You need to try it someday when you need a low stress build, Leon. With a little extra work it can be a really nice model. |
|
|
|
Post by Leon on Feb 22, 2016 5:52:26 GMT -5
Thank you Bob! I'll put that on my to do list.   |
|
charleygnarlyp290
Full Member
  
Member since: October 2014
Posts: 136 
|
Post by charleygnarlyp290 on Feb 26, 2016 10:36:21 GMT -5
Time for the first update. First up is the suspension and drive sprockets. Pretty straight forward. Fit was fine and the only tedius part was the clean up. 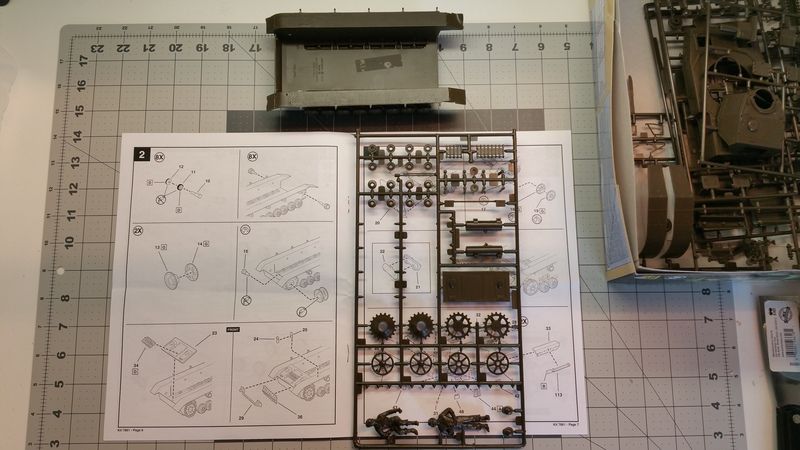 Next was the front spare track bracket. In looking at photos of the real deal, there seems to be two types of pins that are located in the ends of the brackets. There is one that looks to be a round bar with a flat bar welded on the end. The round part goes through the holes in the bracket end tabs, with the flat part hanging. There is a chain attached to the flat bar which is also attached to the vehicle itself (to keep it from getting lost, I assume). Then there is a simple pin made with a piece of round bar bent into the shape of an "L". This is the one I will do. I assume the pins were used to aid in towing and some photos also show the pin used to secure the ends of tow cable when not in use. The kit part comes with no holes for the pins, so I drilled them out with a pin vise. 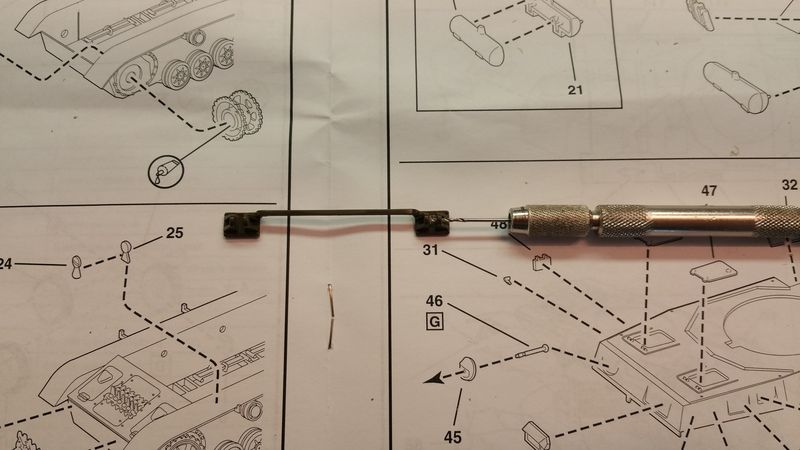 Since I am going to model zimmerit on this kit, I marked an outline in pencil on the front plate of the hull where the track bracket mounts. I will leave this area clear as I apply the zimmerit. 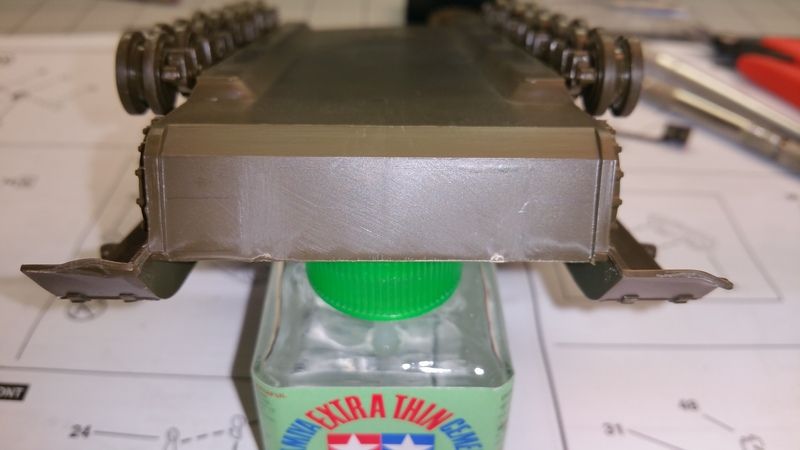 Next up will be the back plate of the hull and the hull upper. |
|
Deleted
Member since: January 1970
Posts: 0
Nov 23, 2024 11:53:51 GMT -5
Nov 23, 2024 11:53:51 GMT -5
|
Post by Deleted on Feb 26, 2016 10:43:01 GMT -5
|
|
|
|
Post by dierk on Feb 26, 2016 11:35:43 GMT -5
Good start! Always nice to get the wheels out of the way.
|
|
|
|
Post by panzerjager2 on Feb 26, 2016 13:01:03 GMT -5
Ditto, Mark IV road wheels the bane of every German armor modeler LOL
|
|
afvfan
Senior Member
   
Member since: December 2012
Bob
Posts: 1,772
Dec 10, 2012 17:32:38 GMT -5
Dec 10, 2012 17:32:38 GMT -5
|
Post by afvfan on Feb 26, 2016 14:30:53 GMT -5
Ditto, Mark IV road wheels the bane of every German armor modeler LOL I don't know, they're pretty much a walk in the park when compared to the early Tiger I.  |
|
charleygnarlyp290
Full Member
  
Member since: October 2014
Posts: 136 
|
Post by charleygnarlyp290 on Mar 2, 2016 0:38:07 GMT -5
A little more progress. The first thing I did was attach the upper hull parts. 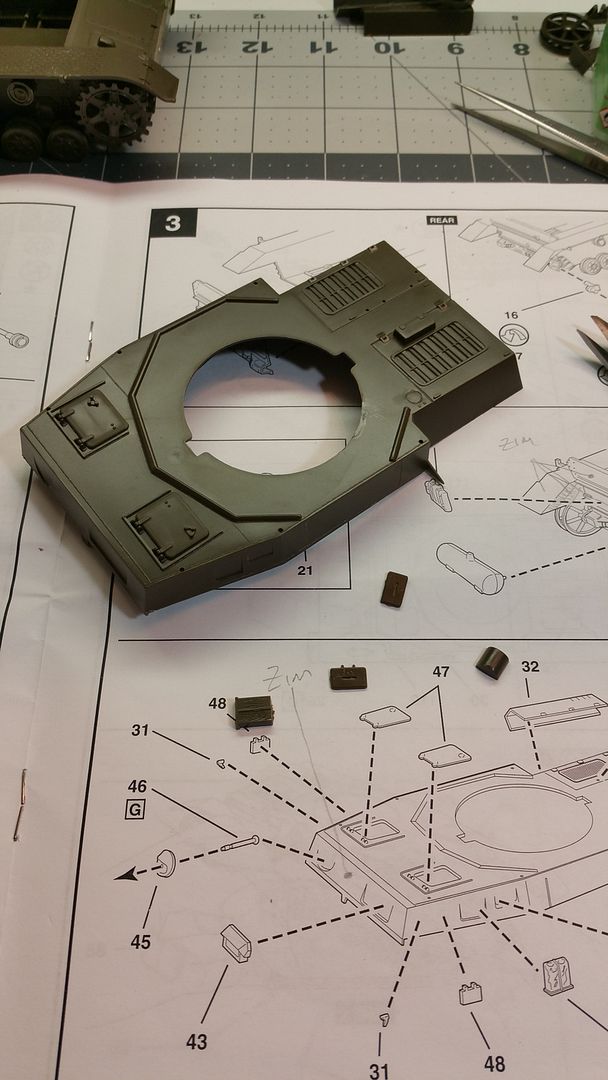 Before I could go much further, I needed to apply some of the zimmerit. Let me say up front, that this is only the second time I have applied zimmerit to a model. The first time was in '88 or '89, and the method I used was far different than the method I wanted to attempt this time. The method I used before involved drawing the zimm pattern on the vehicle, applying a liberal amount of liquid cement, letting the cement soften the plastic, then scribing the zimm into the softened plastic. It worked really well, but was very time consuming and tedious. This time, after seeing a Youtube video, I decided to give putty a try. I tried Squadron Green stuff years ago and hated it. The putty skinned over in very short order making it impossible to work with. So, upon the recommendation of the person in the video, I decided to use a water based wood filler. It is nice in that it can be thinned a bit using water, and is easy to clean up. Also, if the zimm doesn't look right, it can be washed off with water leaving perfectly clean plastic. This would be impossible with solvent based putties. Here is my materials list: 1. Bowl of water for cleanup and/or thinning 2. Wood filler 3. A wide, flat applicator (more on that in a minute). 3 A tool for making the zimmerit pattern. 4. Napkins for clean up. The wood filler is available at any hardware, or home improvement store and is cheap. The applicator is dependent upon what size the surface is where the zimmerit will be applied. In my case, I used a flat blade for the larger Xacto knife for the vertical hull surfaces. The larger putty knife will be used for doing the zimmerit on the side skirts. The tool I used for the zimmerit pattern is a gauge used for measuring thread sizes on nuts and bolts. It comes with a number of sizes, so you can pick the size you need. It could be used for a few different scales of models. It is set up like a feeler gauge in that you only expose the blade you want, while tucking the rest back into the handle. I could have ordered an actual zimmerit tool (like the Tamiya version, for instance) but had this tool in my tool box, so decided to use it. 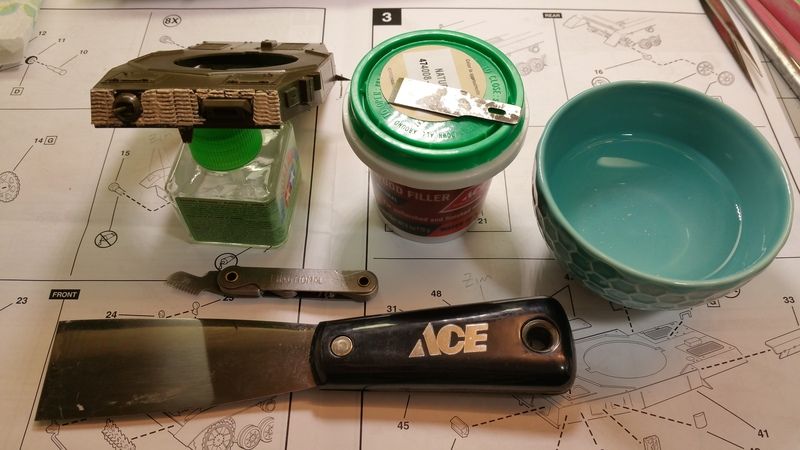 In the above photo you can see the tools and materials, as well as the first application on the upper hull front. I was pretty pleased with the result... especially since this was my first attempt. Then I moved to the back of the vehicle. 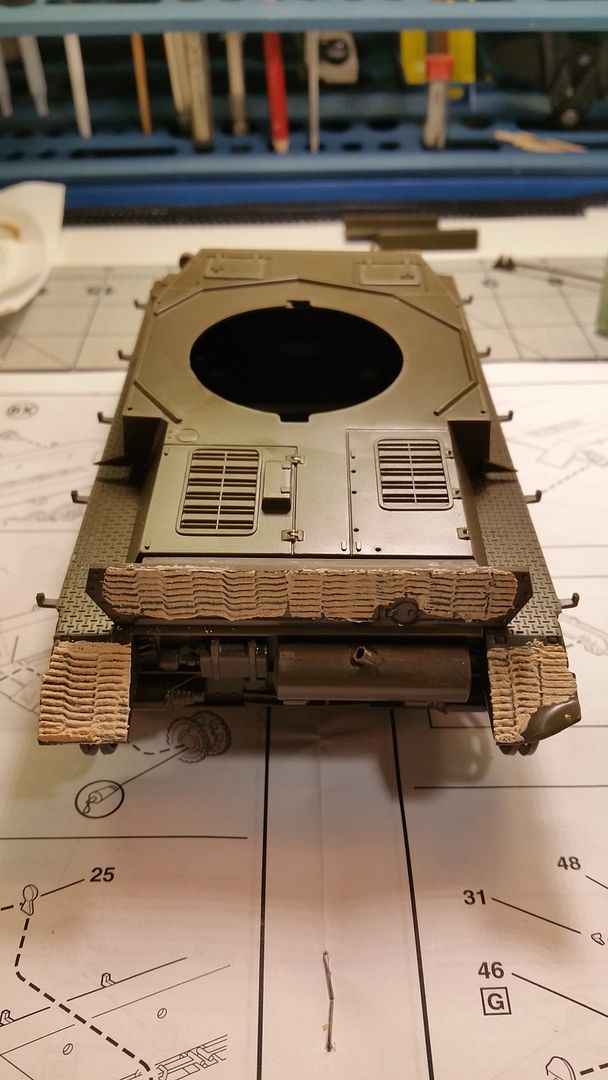 Next, I took the front track rack and stuck it to the sticky side of some masking tape and cut around the mounting points to make masks for the front of the hull. This way, when I applied the zimmerit to the hull front, I could peel the tape off to leave bare plastic for cementing the rack in place. 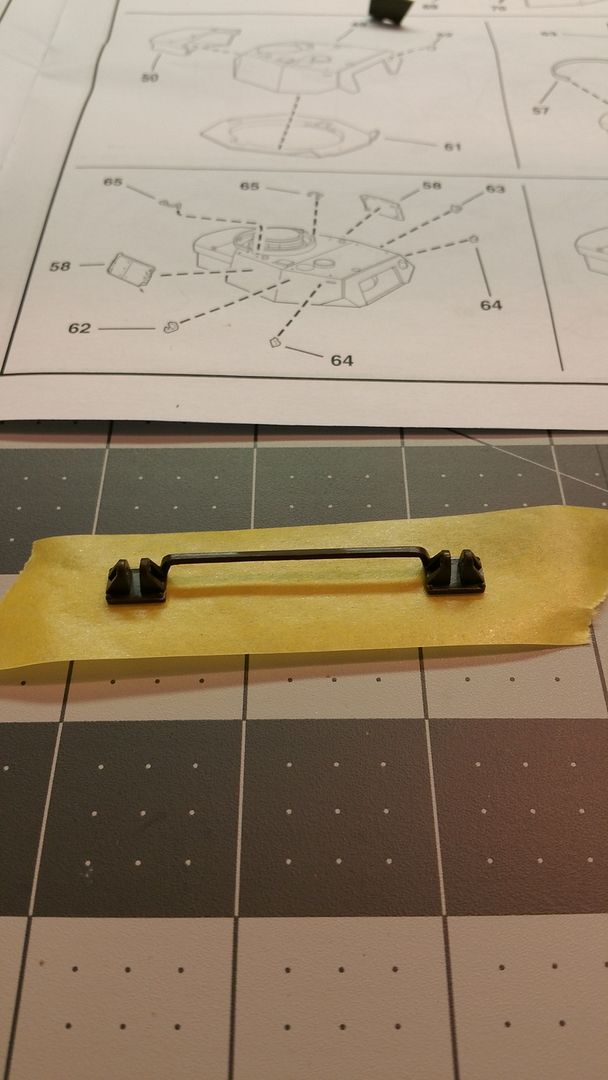 Here is the front of the vehicle with the zimmerit applied and the tape removed. (Note that the upper hull is just resting on the lower.) 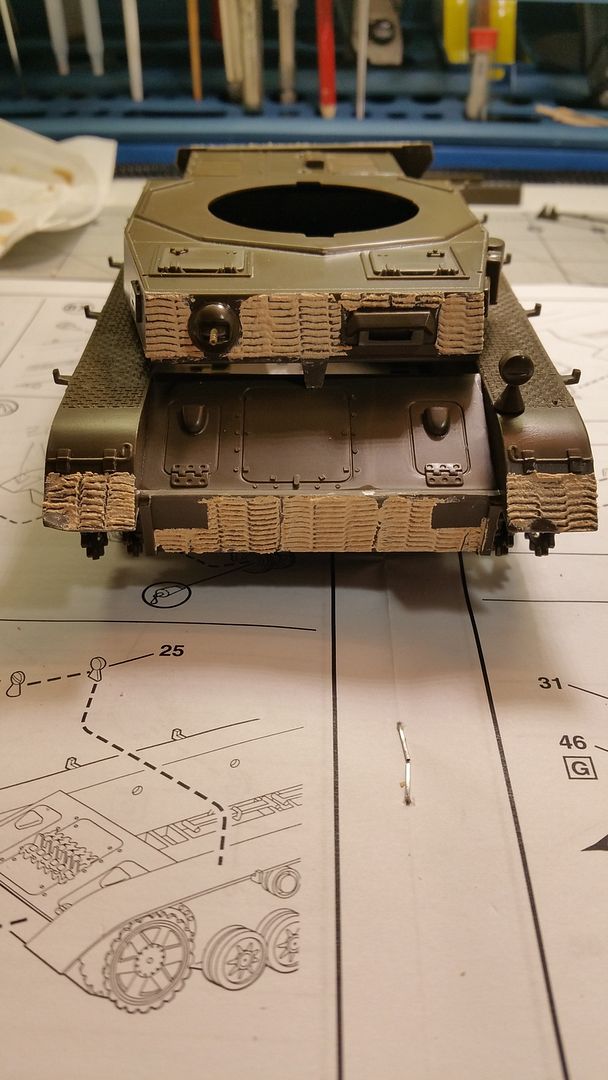 |
|
|
|
Post by panzerjager2 on Mar 2, 2016 1:12:58 GMT -5
Darn nice job on the Zimmerit
|
|
|
|
Post by dierk on Mar 2, 2016 3:36:30 GMT -5
Zimm looks great! Thanks for the SBS.
|
|
|
|
Post by Leon on Mar 2, 2016 5:43:58 GMT -5
Nice start on the zimm Charley! Looking good.
|
|
adt70hk
Forum Moderator     
Member since: November 2015
Currently attempting to build something decent!!! ;)
Posts: 2,833 
MSC Staff
|
Post by adt70hk on Mar 2, 2016 8:00:59 GMT -5
Before I could go much further, I needed to apply some of the zimmerit. Let me say up front, that this is only the second time I have applied zimmerit to a model. The first time was in '88 or '89, and the method I used was far different than the method I wanted to attempt this time. The method I used before involved drawing the zimm pattern on the vehicle, applying a liberal amount of liquid cement, letting the cement soften the plastic, then scribing the zimm into the softened plastic. It worked really well, but was very time consuming and tedious. This time, after seeing a Youtube video, I decided to give putty a try. I tried Squadron Green stuff years ago and hated it. The putty skinned over in very short order making it impossible to work with. So, upon the recommendation of the person in the video, I decided to use a water based wood filler. It is nice in that it can be thinned a bit using water, and is easy to clean up. Also, if the zimm doesn't look right, it can be washed off with water leaving perfectly clean plastic. This would be impossible with solvent based putties. Here is my materials list: 1. Bowl of water for cleanup and/or thinning 2. Wood filler 3. A wide, flat applicator (more on that in a minute). 3 A tool for making the zimmerit pattern. 4. Napkins for clean up. The wood filler is available at any hardware, or home improvement store and is cheap. The applicator is dependent upon what size the surface is where the zimmerit will be applied. In my case, I used a flat blade for the larger Xacto knife for the vertical hull surfaces. The larger putty knife will be used for doing the zimmerit on the side skirts. The tool I used for the zimmerit pattern is a gauge used for measuring thread sizes on nuts and bolts. It comes with a number of sizes, so you can pick the size you need. It could be used for a few different scales of models. It is set up like a feeler gauge in that you only expose the blade you want, while tucking the rest back into the handle. I could have ordered an actual zimmerit tool (like the Tamiya version, for instance) but had this tool in my tool box, so decided to use it. In the above photo you can see the tools and materials, as well as the first application on the upper hull front. I was pretty pleased with the result... especially since this was my first attempt. Then I moved to the back of the vehicle. Next, I took the front track rack and stuck it to the sticky side of some masking tape and cut around the mounting points to make masks for the front of the hull. This way, when I applied the zimmerit to the hull front, I could peel the tape off to leave bare plastic for cementing the rack in place. Charley Thank you very much for posting such a helpful mini-tutorial! I'm thinking of doing my own Zimmerit for my Cuckoo build and have been given a couple of suggestions to try including spackle paste (polyfilla here in the UK). I have one question though, did the hull need any prep to help the filler key and adhere properly e.g. a bit of a sand to roughen the surface? I also assume the filler takes a while to dry and so is reasonably workable for quite some time. The masking idea is also a genius idea - I had been wrestling with how to approach this on my build Thanks again for sharing your discovery. Andrew |
|
charleygnarlyp290
Full Member
  
Member since: October 2014
Posts: 136 
|
Post by charleygnarlyp290 on Mar 2, 2016 8:44:36 GMT -5
Thanks for the compliments, guys.
Andrew, I did no prep whatsoever. Just applied it to the bare, untouched plastic. It probably wouldn't hurt to rough it a bit, but once it is on and it cures for awhile, it is pretty solid. I had to scrape some away on a piece where I didn't want it and it was pretty tough... it didn't just pop off.
As far as the mask goes, it really helps. I will be using it to mask off some other areas as well as spots that I want to simulate battle damage. I apply the putty and let it sit for a few minutes so it solidifies just a bit, then use my hobby knife to peel up the edge, then tweezers (if needed) to peel it of. I get a nice edge that way.
Cure time is actually pretty quick, due to it being water based, I think. It definitely needs to be done in sections. I will be doing the side skirts this evening or tomorrow and those are bigger areas, so I will give an update on how that goes pretty quick.
|
|
desertrat
Full Member
  
Member since: October 2013
Posts: 934 
|
Post by desertrat on Mar 2, 2016 9:26:25 GMT -5
wow, that there zimm looks spot on, thanks for sharing!! it's amazing how well it works straight onto the plastic, nice one.
|
|
jsteinman
Full Member
  
Member since: March 2013
Posts: 735
Mar 24, 2013 9:29:10 GMT -5
Mar 24, 2013 9:29:10 GMT -5
|
Post by jsteinman on Mar 2, 2016 9:28:13 GMT -5
I loved this kit as a kid, this and the StuG IV.  |
|
Deleted
Member since: January 1970
Posts: 0
Nov 23, 2024 11:53:51 GMT -5
Nov 23, 2024 11:53:51 GMT -5
|
Post by Deleted on Mar 2, 2016 11:17:26 GMT -5
Very nice work!
|
|
charleygnarlyp290
Full Member
  
Member since: October 2014
Posts: 136 
|
Post by charleygnarlyp290 on Mar 2, 2016 12:17:23 GMT -5
I loved this kit as a kid, this and the StuG IV.  Thanks guys!. And jsteinman, I also built the Monogram kits as a kid in the '70s. As a matter of fact, I still have some of the Shepard Paine diorama tip sheets and the instructions for the very StuG IV you speak of! Why I have kept them for almost forty years I'll never know. |
|
|
|
Post by wbill76 on Mar 2, 2016 19:25:29 GMT -5
Looks like the wood putty route did the trick nicely. Looking good!
|
|
charleygnarlyp290
Full Member
  
Member since: October 2014
Posts: 136 
|
Post by charleygnarlyp290 on Mar 7, 2016 10:50:44 GMT -5
Step 4 is complete. The upper hull details have been added, and the appropriate zimmerit applied. As far as the zimmerit goes, I am at the point where I need to make some final decisions. In doing my research on the unit I am portraying, I have found that there is no consistent approach to where the vehicle had zimmerit. Here are some of the combos that I found: 1. Zimm on the vehicle front hull, sides, turret front, turret skirts and side skirts. 2. Zimm on the vehicle front hull, turret front, turret skirts, side skirts, but not on the hull sides. 3. Zimm on the vehicle front hull, turret front, turret skirts, but not the side skirts. 4. Zimm on the vehicle front hull, turret front, but not on the turret skirts, or the side skirts. and on, and on, and on... Basically, any combination of the above. As Charlie Brown would say... "ARGH!" So, I settled on the following: Zimm on the hull front vertical surfaces; the turret front; and the rear hull plate. These seem to be pretty consistent through the H series in this unit. In addition, I will be applying zimmerit to the turret skirts as well. So, at the end of step 4 and the very beginning of step 5, here is what I have. The hull is complete with zimm and the brackets for the side skirts attached. 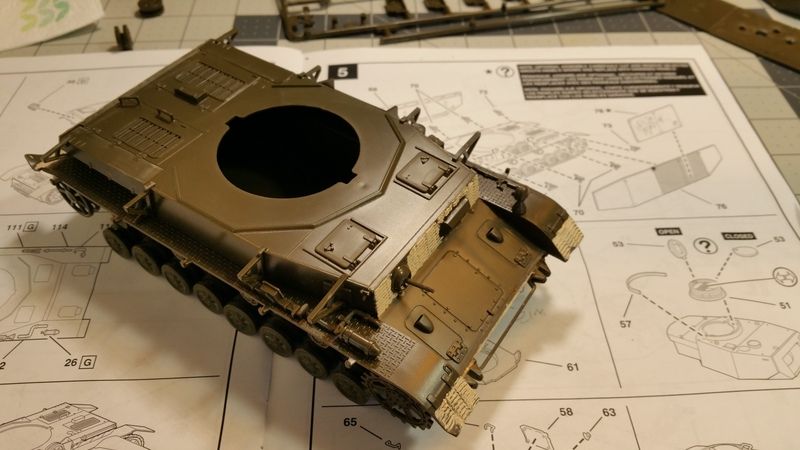 As you can see, step five starts out with the aforementioned side skirt brackets and side skirts. 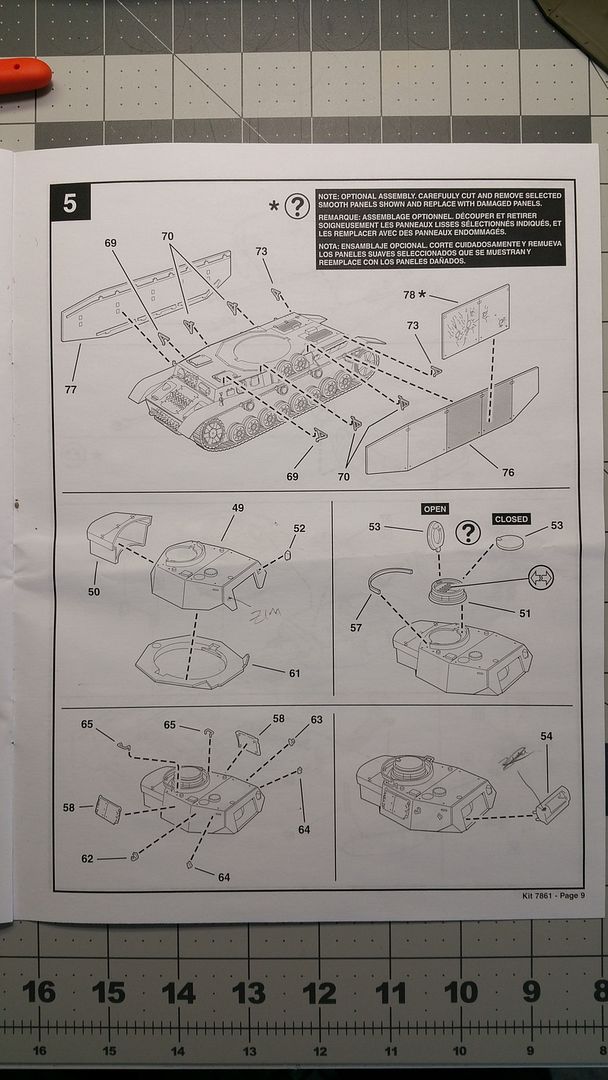 An available option is to cut out segments of the side skirts and replace them with the kit supplied battle-damaged parts. I opted for this, since it will add a little interest to the kit. I took the skirt I wanted to modify, and using the backside of a sturdier blade than I normally use, I scribed the joints a few times, then snapped them apart. 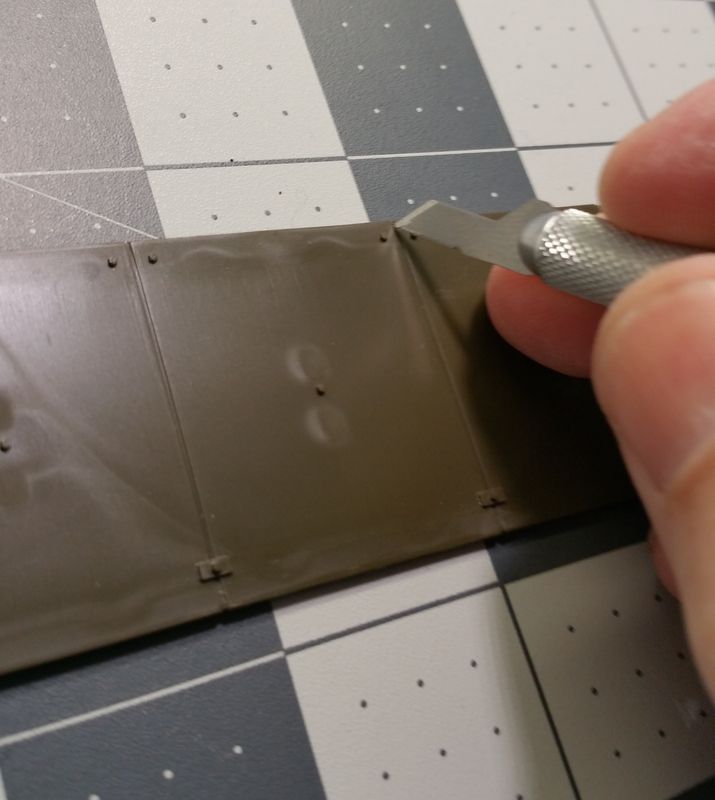 Then, after a bit of sanding to smooth the mating surfaces, I cemented the damaged portion into place. The skirts will be set aside until it is time to paint since I will be not mount them until the vehicle has been painted and weathered. 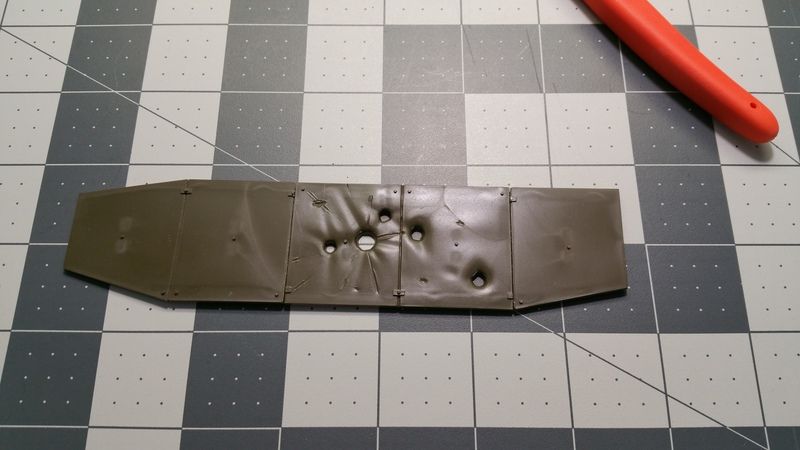 The final steps of step 5 are to assemble the turret. This was pretty straight forward. The only part I had to really pay attention too as far as fit, were the side hatches. The backside of the hatches had raised ejector pin marks that had to be sanded flush in order to get the hatches to sit flat on the turret sides. 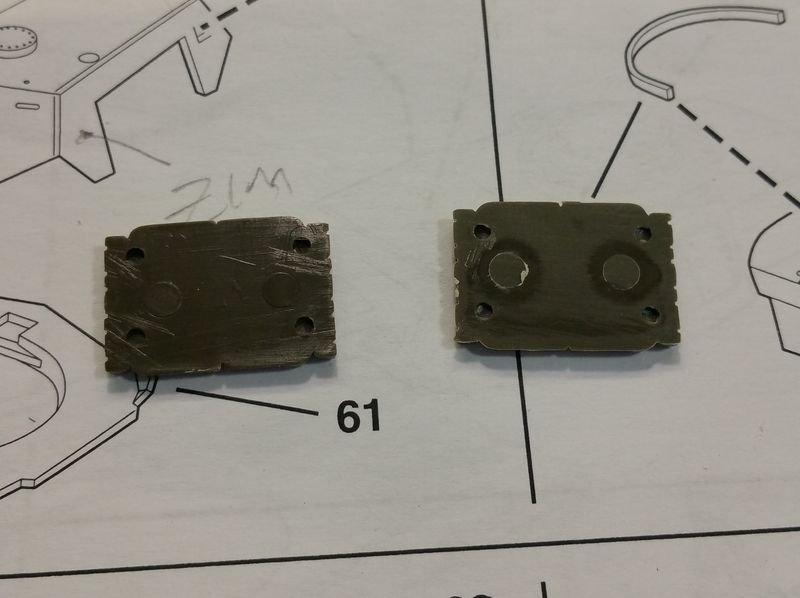 And here is the completed turret. 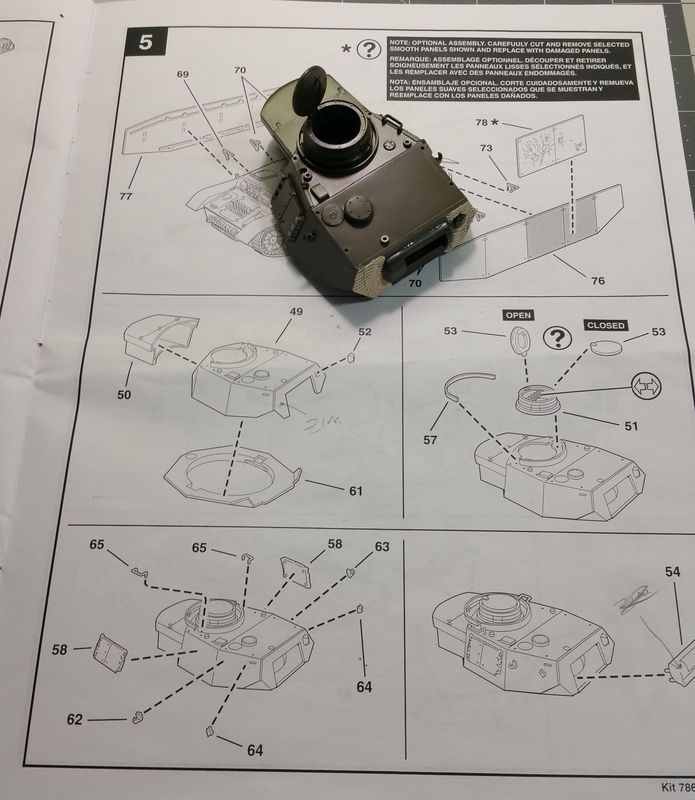 |
|
jsteinman
Full Member
  
Member since: March 2013
Posts: 735
Mar 24, 2013 9:29:10 GMT -5
Mar 24, 2013 9:29:10 GMT -5
|
Post by jsteinman on Mar 7, 2016 11:36:36 GMT -5
Looking good. I remember those battle damaged parts. I always wondered what the heck made such large holes, but didn't hurt the side of the tank...
|
|