mrversatile
Full Member
   July '23 Showcased Build Awarded
Member since: January 2013
Posts: 682
Jan 20, 2013 10:52:24 GMT -5
Jan 20, 2013 10:52:24 GMT -5
|
Post by mrversatile on Apr 6, 2016 16:14:52 GMT -5
I bet you thought this had something to do with Johnny Walker, but alas, I disappoint. This is build about two iconic vehicles from my childhood that I wish I had and wouldn't mind having today. These would be the 1977 Pontiac Trans Am SE in 1/25 scale(Bandit version...can there be any other?), and the legendary 1987 Buick Grand National in 1/24 scale. Both are by Revell. Ordinarily I am not a big fan of black painted cars but these have to be black, so I figured I would paint both at the same time. A little about the kits: The Trans Am is a recent release by Revell which was originally a pre-painted metal kit. According to reviews, it is the best TA example but lacks the "Trans Am" decals and is marketed as a firebird for licensing reasons I presume. I have already prepared the body and have found, like the last Revell car build I did, (2010 SS Camaro), the castings are covered in flash. The front fascia, which has to be added after painting, seems to be a bit narrower than the fenders, so some more work was needed there to make the joint more flush. The hood was warped and needed to be heated and bent so it too sits flush, and the side scoops, separate pieces, didn't fit well and had prominent gaps which needed to be filled around each. So I worked all this out as well as sanding the whole body twice, removing seam lines, and preparing it for primer. The Grand National, an older 90's or earlier release, was actually a better casting with nicely molded engine compartment details. Just some minor body filler was used to fix some flaws and the usual mold lines removed before it too was sanded and prepared for primer. PAINT: I will be using a black base coat from automotivetouchup.com. This is a single stage urethane touch-up paint that I have used before, and when cut with MEK, spray beautifully. The clear coat will be my usual UPOL synthetic lacquer clear. Boy, I need this scale right now after my 1/350 microsurgery build. 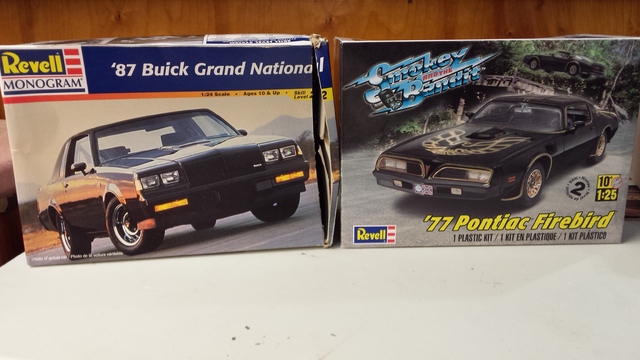 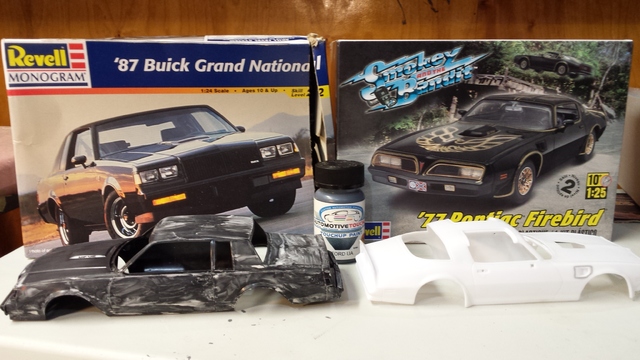 Both have been wet sanded and need to be washed and primed. Ok, let's get on with it. |
|
|
|
Post by Leon on Apr 6, 2016 19:34:46 GMT -5
Pulling up a chair and putting my seat belt on for this double header!  |
|
|
|
Post by eastrock on Apr 7, 2016 1:30:25 GMT -5
Gil, let's keep walking!!! you can actually have a shot while working lol!!!
looking forward to it
Cheers!!
|
|
noname
Full Member
   March 2012 / April 2013 MoM Winner
Member since: January 2012
I like building models
Posts: 726
Jan 29, 2012 9:24:03 GMT -5
Jan 29, 2012 9:24:03 GMT -5
|
Post by noname on Apr 7, 2016 5:37:28 GMT -5
I remember being a teenager in the 80s. The Grand National was the car to have. Even the Camaros and Mustangs were relatively gutless compared to the 60s and todays cars. It was a slow time literally for muscle cars. But the Grand Nationals turbo V6 had lots of potential.
Personally, I think black is beautiful. I don't think a car exists that doesn't look good in black.
|
|
Deleted
Member since: January 1970
Posts: 0
Nov 29, 2024 5:45:18 GMT -5
Nov 29, 2024 5:45:18 GMT -5
|
Post by Deleted on Apr 7, 2016 9:29:23 GMT -5
Two of my favorites! 
|
|
|
|
Post by mustang1989 on Apr 7, 2016 9:54:08 GMT -5
Well given the last spectacular effort on the ship, this outta be one helluva ride. Bring it. I'll be watching.
|
|
mrversatile
Full Member
   July '23 Showcased Build Awarded
Member since: January 2013
Posts: 682
Jan 20, 2013 10:52:24 GMT -5
Jan 20, 2013 10:52:24 GMT -5
|
Post by mrversatile on Apr 8, 2016 18:20:51 GMT -5
Primed with my primer of choice, Tamiya fine gray primer, the body painted parts are ready for the black base coat. This primer is silky smooth and I rarely have to sand it before painting. I will also be using a new double action trigger airbrush by Master. This comes with a fan nozzle, which I bought specifically for spraying car bodies. I will be testing this out this weekend and hopefully the clear coat will be applied as well. 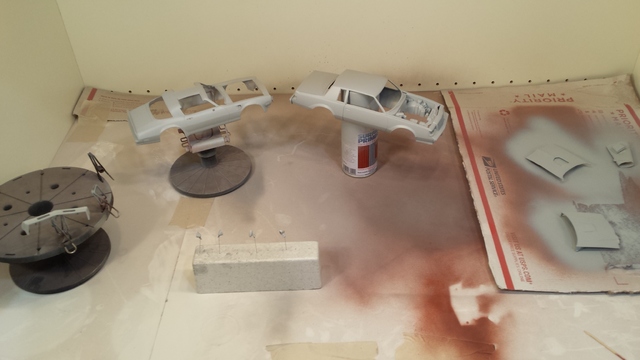 |
|
|
|
Post by Leon on Apr 8, 2016 19:19:45 GMT -5
Primer looks good Gil!  |
|
|
|
Post by deafpanzer on Apr 10, 2016 22:13:22 GMT -5
My second car was a 1984 Monte Carlo... it was similar body so it is going to be fun to watch this!! Looking good so far...
|
|
|
|
Post by eastrock on Apr 12, 2016 1:28:20 GMT -5
Great start with the double header, Gil
|
|
fhvn4d
Full Member
  
Member since: October 2012
Posts: 439
Oct 1, 2012 6:30:09 GMT -5
Oct 1, 2012 6:30:09 GMT -5
|
Post by fhvn4d on Apr 12, 2016 6:58:15 GMT -5
generally speaking, I am not a car guy.... but im gonna make an exception on this one!!! Thank you Gil for sharing!
|
|
mrversatile
Full Member
   July '23 Showcased Build Awarded
Member since: January 2013
Posts: 682
Jan 20, 2013 10:52:24 GMT -5
Jan 20, 2013 10:52:24 GMT -5
|
Post by mrversatile on Apr 26, 2016 16:04:09 GMT -5
A quick update since I have been working on these. I painted both with my new airbrush and the fan nozzle worked perfectly. However, the clear coat from the can didn't go on as nicely as I wanted. This can is a little old and I think the propellant is low. It just didn't atomize that well and I ended up with a number of small runs (5 on the TA and one on the GN. It also "orange peeled" more than I like necessitating the use of a polishing kit. When I had to sand more for the runs I ended up "burning through" some color in spots so I spot painted those areas and finished with airbrushed decanted clear coat. I then polished with Tamiya polish and got it to this. I only finished the Trans Am body right now and painted many of the other components which you can see below. When building cars I often put a bit more effort into the undercarriage because I believe this sets car models apart. I decided to concentrate on the Trans Am first so the parts will stay separate. Front of the Trans Am showing the installed headlight assembly. I used a gold sharpie to paint the bezel. 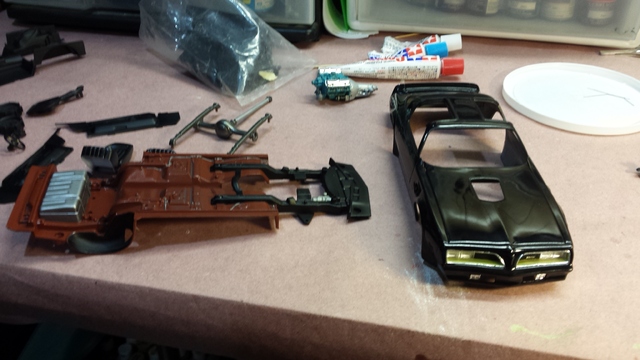 Many of the remaining parts. I painted the interior with different sheens of black 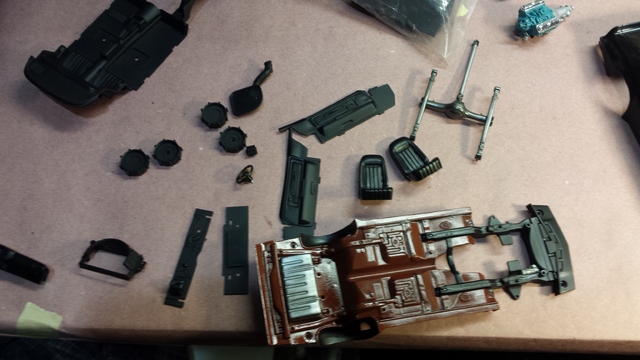 Better pics on future updates to follow. I |
|
|
|
Post by Leon on Apr 26, 2016 18:38:58 GMT -5
Nice progress on the TA Gil! Interior parts look good.  |
|
|
|
Post by eastrock on Apr 28, 2016 1:39:17 GMT -5
Good Progress, Gil!!! good thing that the parts don't mix  |
|
mrversatile
Full Member
   July '23 Showcased Build Awarded
Member since: January 2013
Posts: 682
Jan 20, 2013 10:52:24 GMT -5
Jan 20, 2013 10:52:24 GMT -5
|
Post by mrversatile on May 11, 2016 15:24:59 GMT -5
|
|
|
|
Post by Leon on May 11, 2016 17:14:44 GMT -5
That is looking fantastic Gil!  |
|
|
|
Post by deafpanzer on May 16, 2016 11:48:11 GMT -5
I always wanted that Firebird when I was a teenager. LOL But yours is really looking good!
|
|
|
|
Post by wbill76 on May 17, 2016 13:52:36 GMT -5
Looking sharp Gil, brings back a lot of memories.  |
|
mrversatile
Full Member
   July '23 Showcased Build Awarded
Member since: January 2013
Posts: 682
Jan 20, 2013 10:52:24 GMT -5
Jan 20, 2013 10:52:24 GMT -5
|
Post by mrversatile on May 18, 2016 8:42:29 GMT -5
|
|
|
|
Post by Leon on May 18, 2016 9:11:36 GMT -5
WOW...That is looking fantastic Gil!
|
|
mrversatile
Full Member
   July '23 Showcased Build Awarded
Member since: January 2013
Posts: 682
Jan 20, 2013 10:52:24 GMT -5
Jan 20, 2013 10:52:24 GMT -5
|
Post by mrversatile on May 23, 2016 21:22:31 GMT -5
|
|
|
|
Post by eastrock on May 23, 2016 23:35:14 GMT -5
Nicely done, Gil!!! looking forward with the finsih  |
|
|
|
Post by Leon on May 24, 2016 4:47:06 GMT -5
Excellent finish on the T/A Gil! Looking really sharp.  |
|
|
|
Post by deafpanzer on May 24, 2016 14:58:01 GMT -5
She is truly a beauty!!! I'd love to drive that car one day...
|
|
|
|
Post by mustang1989 on Jun 1, 2016 15:50:07 GMT -5
|
|
mrversatile
Full Member
   July '23 Showcased Build Awarded
Member since: January 2013
Posts: 682
Jan 20, 2013 10:52:24 GMT -5
Jan 20, 2013 10:52:24 GMT -5
|
Post by mrversatile on Jun 2, 2016 13:48:47 GMT -5
Yeah, I agree. This car was one of the best of their era and the auction prices are starting to show that. These late 70's early eighties cars didn't have much HP but some really looked cool.
|
|
mrversatile
Full Member
   July '23 Showcased Build Awarded
Member since: January 2013
Posts: 682
Jan 20, 2013 10:52:24 GMT -5
Jan 20, 2013 10:52:24 GMT -5
|
Post by mrversatile on Jul 29, 2016 15:46:31 GMT -5
If you are wondering, I have not stopped building, but I have been sidetracked working on my 70 Mustang Mach I which has developed a "hot starting" problem, but I think I finally got it licked. Now back to modeling: I have nearly completed the Grand National and, after initially thinking this would be the easier of the two builds considering the decals involved on the T/A, I have changed my mind. This build has been more complicated in that the molded detail is super nice for an older kit. The complicated engine is beautifully rendered and the interior trim, also extensive, is better than most newer kits. Because of this, I decided to take some extra time detailing and accentuating these. Here are some quick pics of the progress. The interior comprises of at least 4 different colors and textures and was mostly hand painted 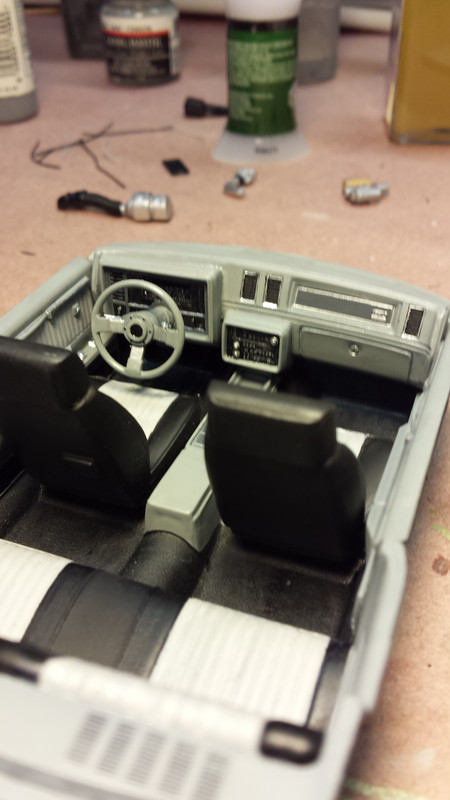 NOtice the molded details including the ignition 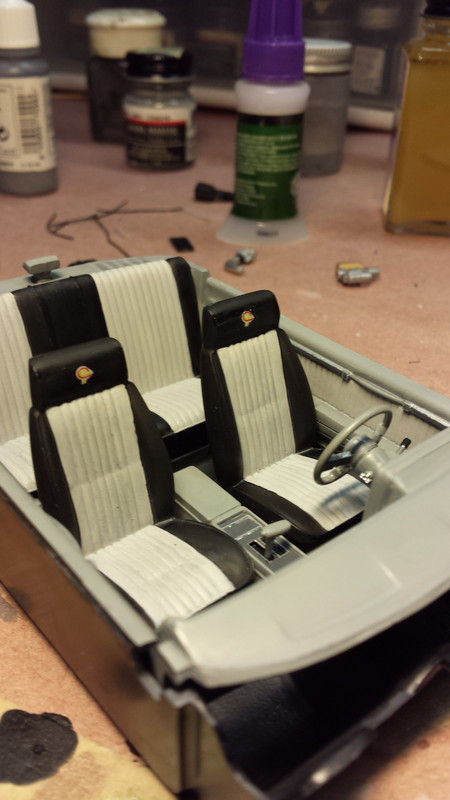 The engine with added ignition wires. There are a few more parts to add after the body is joined. I plan to add more plumbing as well 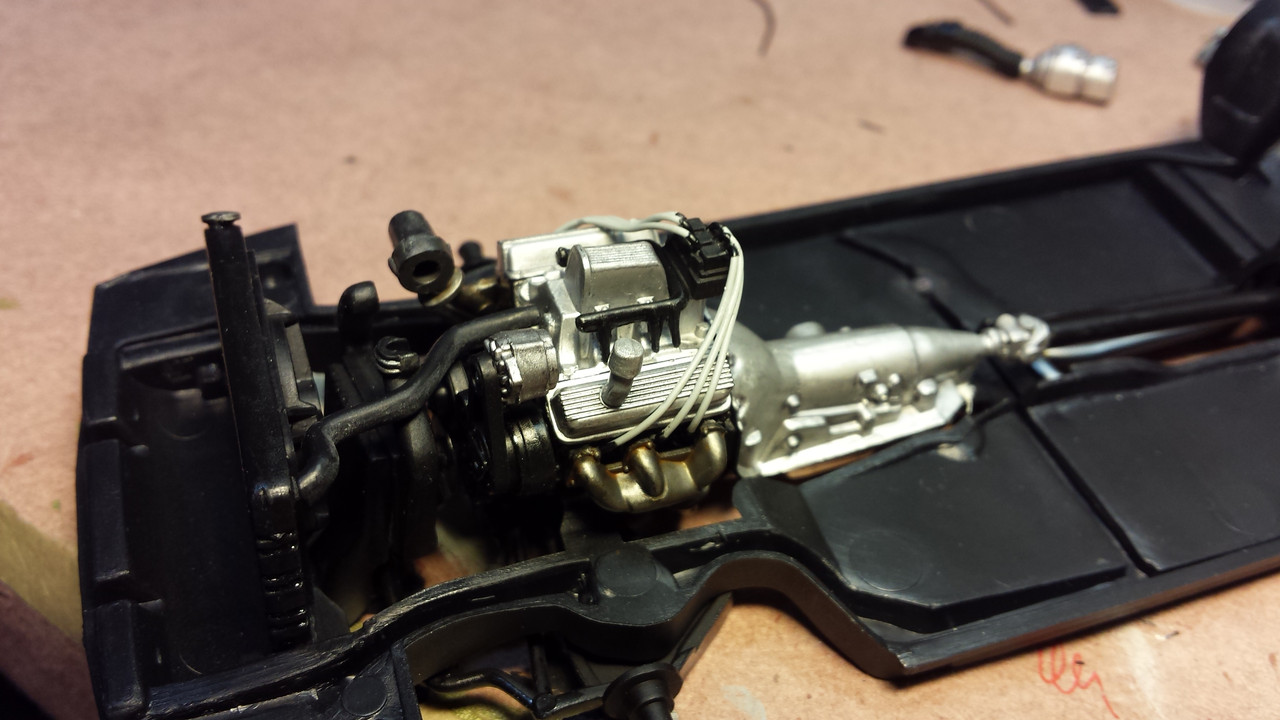 The undercarriage looks the part when painted and slightly weathered.  Here is the front of the body with the hood off. The tape is used to hold the glass when gluing. I tinted the top part 80's like. 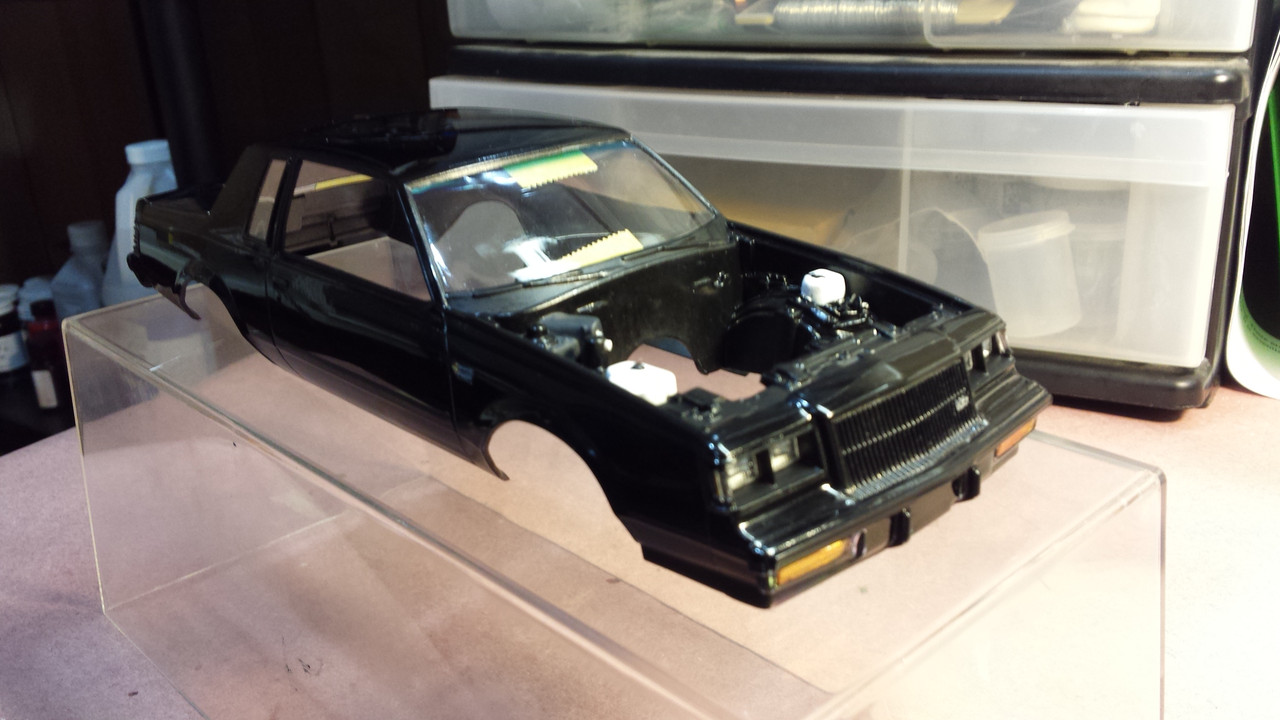 And here is the rear 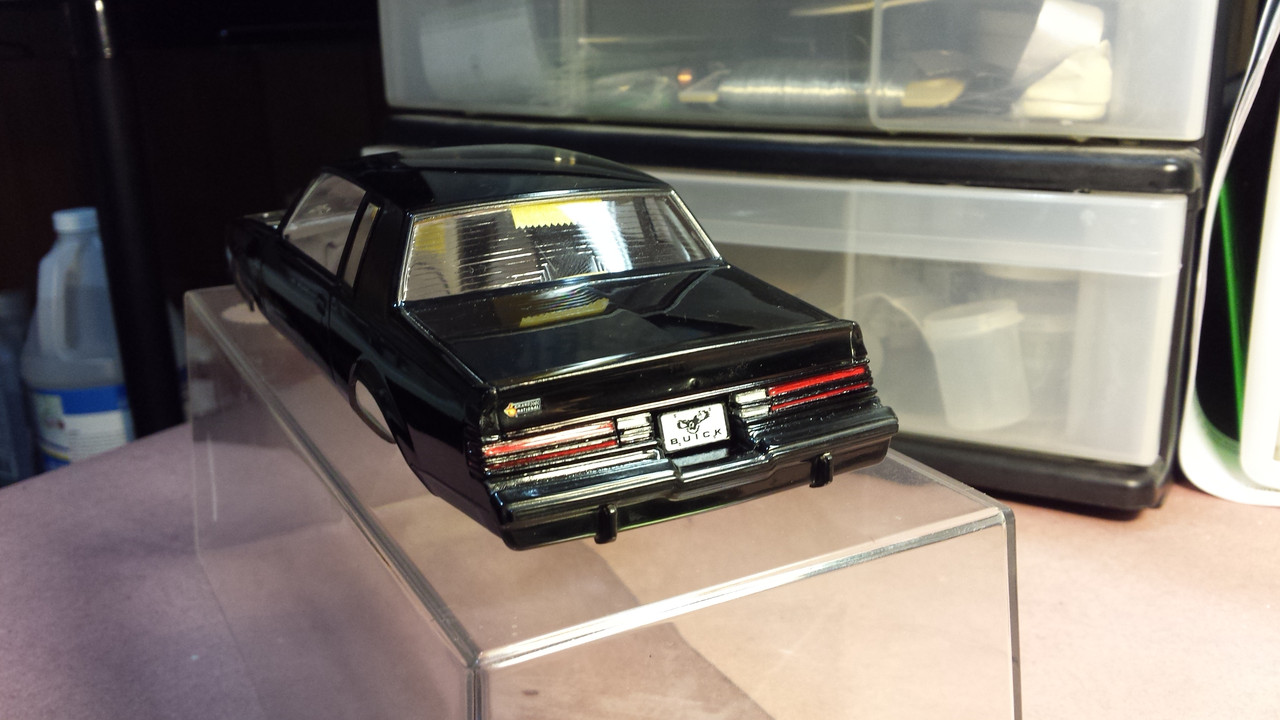 wheels and tires are accurately rendered and needed to be painted in the recessed areas to be accurate. 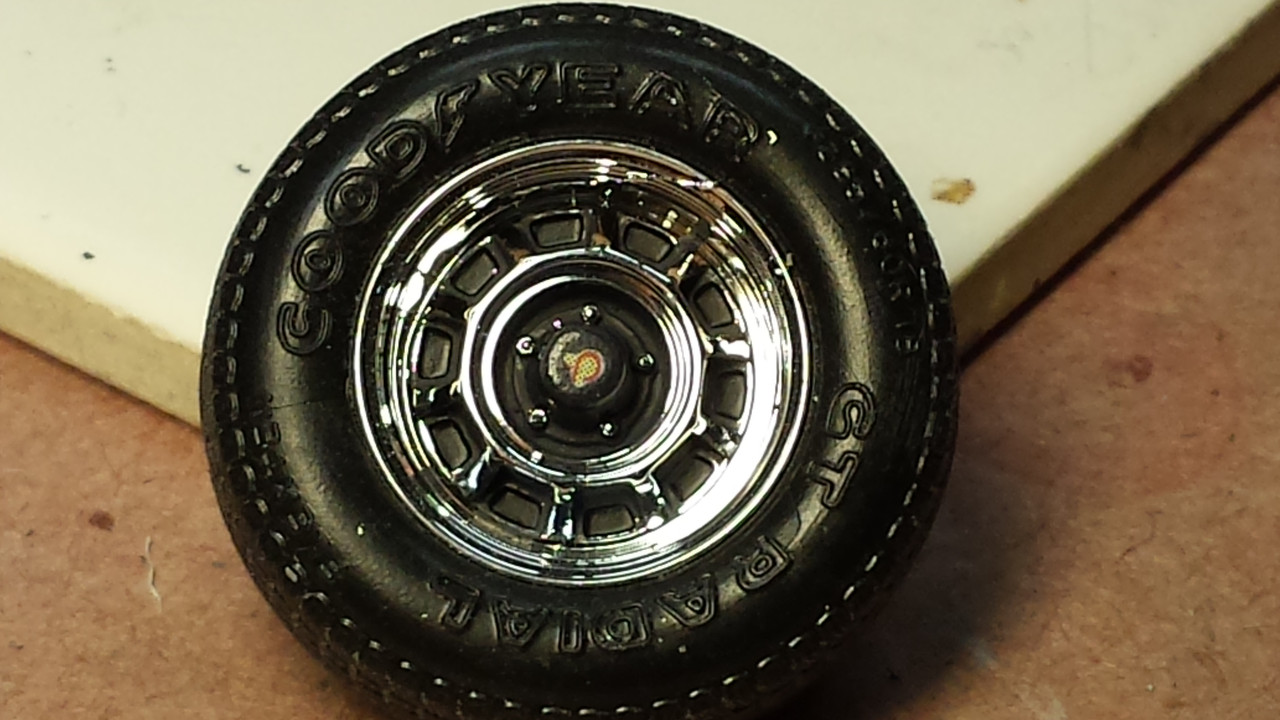 |
|
|
|
Post by Leon on Jul 29, 2016 19:30:12 GMT -5
Nice progress on the Grand National Gil! Detailing looks great.  |
|
|
|
Post by mustang1989 on Jul 30, 2016 7:44:18 GMT -5
Great progress thus far Gil. I built one of these things about 12 years ago but it didn't come out all that well looking back. You're making me want to do a street machine version of this thing. lol
|
|
mrversatile
Full Member
   July '23 Showcased Build Awarded
Member since: January 2013
Posts: 682
Jan 20, 2013 10:52:24 GMT -5
Jan 20, 2013 10:52:24 GMT -5
|
Post by mrversatile on Jul 30, 2016 12:13:02 GMT -5
Thanks, the only downfall of this kit is the amount of cleanup required. Every part had seam lines which had to be removed. Very tedious. I also don't like the way the glass installs. No locator points. Much tougher than the T/A.
|
|