S e r z h--Rest In Peace
Full Member
  
Member since: November 2014
RIP- December 2023
Posts: 650 
|
Post by S e r z h--Rest In Peace on Jun 20, 2016 5:40:19 GMT -5
+ 1 !  look and enjoy - a painstaking and accurate work! |
|
|
|
Post by wbill76 on Jun 20, 2016 11:45:26 GMT -5
Thanks Dierk and Serzh! Today should see the funnels added along with their bracing wires/rigging, that's going to be fun.  |
|
|
|
Post by wbill76 on Jun 20, 2016 20:36:20 GMT -5
After fiddling around with the stacks and checking the layouts for the boats and the various details for the walkways, I decided the best course of action was to add all the PE details first to maximize the room I had to maneuver with the tweezers. My focus was in particular on the walkway areas, so I added the railings, access ladders, and the searchlight platforms to both sides. The bridge deck and crossover walkway will, of course, get more railing detail attention in the near future, but one thing at a time first! 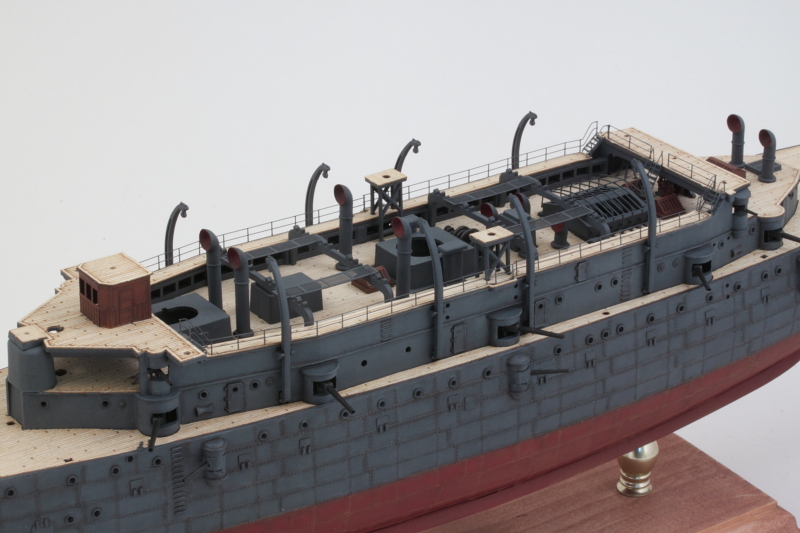 Both the funnels were installed with the help of some regular Testors black bottle glue since they had a slight tendency to wobble a bit inside their housings on the deck. I also added the railings and installed the searchlights onto their platforms. Will let that set up overnight and then will go about adding the bracing wires for the funnels since they have to anchor on the inboard sides of the walkways and also not interfere with the boats in their racks. 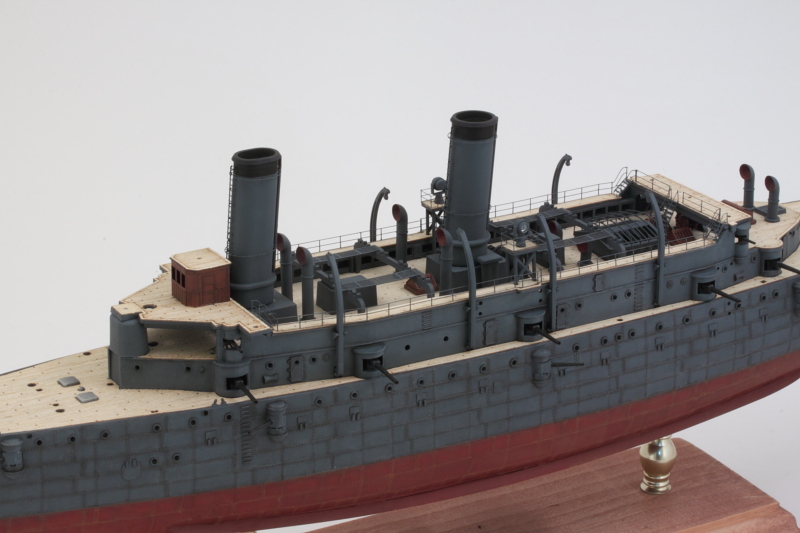 More fun to come! |
|
|
|
Post by dierk on Jun 21, 2016 2:36:50 GMT -5
Looks like you're having stacks of fun  |
|
|
|
Post by Leon on Jun 21, 2016 4:49:04 GMT -5
Nice work on the PE details and funnels Bill!  |
|
|
|
Post by wbill76 on Jun 21, 2016 10:04:31 GMT -5
Thanks LeonLooks like you're having stacks of fun  Better than a barrel of monkeys!  |
|
|
|
Post by kaytermarram on Jun 21, 2016 13:38:37 GMT -5
Any idea how you will present this Beauty?? Sculpting a sea for it or adding some figues (but this could be nearly impossible... scale!) But anyway, it looks absolute fabulous!
Frank
|
|
|
|
Post by wbill76 on Jun 21, 2016 14:59:10 GMT -5
Any idea how you will present this Beauty?? Sculpting a sea for it or adding some figues (but this could be nearly impossible... scale!) But anyway, it looks absolute fabulous! Frank Thanks Frank! It's already mounted on its display stand, so now 'at sea' work planned for it. I'm not sure if anyone produces 1/200 scale figures (that would be the closest to this one at 1/232 scale)...if they do, they are likely in PE with all the issues that presents.  |
|
|
|
Post by wbill76 on Jun 21, 2016 16:46:23 GMT -5
More progress in the mid-ships detail areas to report. After confirming that the rigging needed for the masts wasn't going to cause a conflict with the funnel stays, I went ahead and added those to the smoke funnels. I used EZ Line (fine) and CA for this, drilling small holes in the wood deck areas with a #78 finger drill to provide a little extra contact surface for the line to grab onto. Place a dot of CA, dip or brush the line end with CA accelerator, and voila! Or close enough, sometimes I still had to hold it for a few seconds before the glue fully grabbed. I also added the railings to the top of the pilothouse and the back sides to the bridge deck so they would connect up with the railing work done yesterday. I'm leaving off the rest of the railings in this area until after I've run the signal line rigging from the mast to give me the most flexibility and room to maneuver. 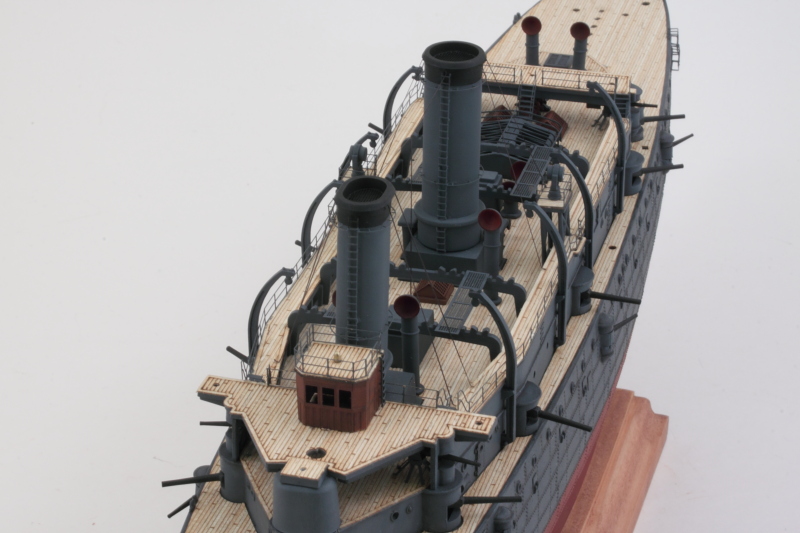 The line between the stacks that also connects down to the water tank was a bit of a challenge as the spaces involved at the funnel tops is pretty tight. I did a test fit with the boats that go into this area as well to make sure that wouldn't be a problem and it was just barely possible to run the central vertical bracing line. Good thing I did that now instead of later! 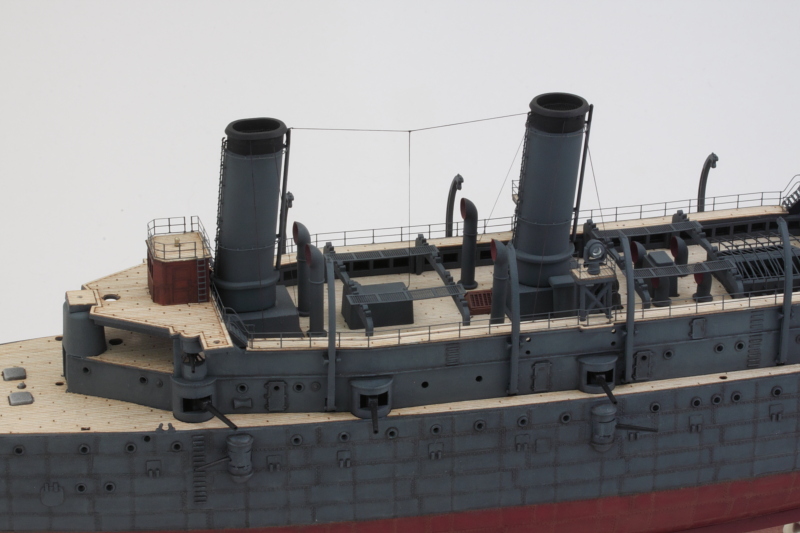 Some familiar lines are starting to appear on Olympia as a whole, the masts are what are really going to complete her look I think once they are in place. 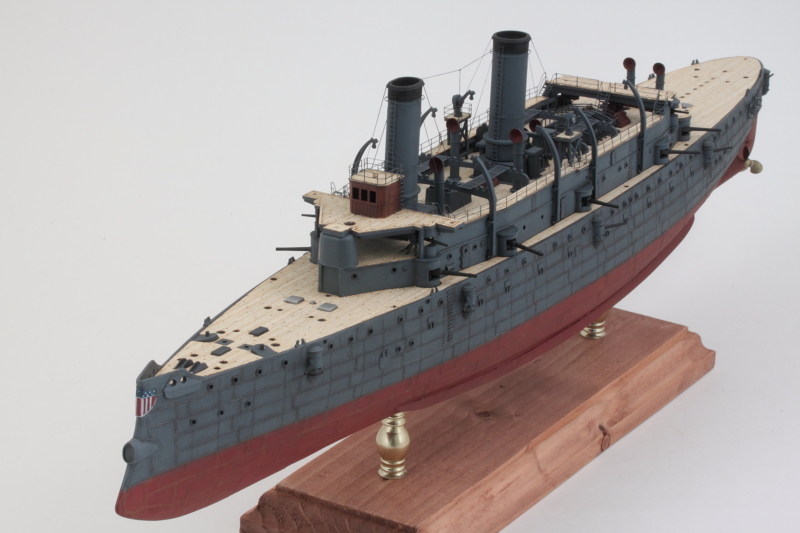 |
|
|
|
Post by Leon on Jun 21, 2016 17:17:20 GMT -5
Nice start on the rigging Bill! Coming along nicely.  |
|
|
|
Post by wbill76 on Jun 21, 2016 18:54:34 GMT -5
Nice start on the rigging Bill! Coming along nicely.  Thanks Leon! First round done, more to come!  |
|
thug626
Senior Member
   
Member since: January 2013
Posts: 2,035
Jan 15, 2013 13:05:28 GMT -5
Jan 15, 2013 13:05:28 GMT -5
|
Post by thug626 on Jun 22, 2016 0:59:51 GMT -5
I may not be the first out of the blocks Bill....but I do get there eventually. A very slick ship build!
|
|
|
|
Post by dierk on Jun 22, 2016 2:44:50 GMT -5
Yay, friggin' in the riggin'! Looking sharp Bill!
|
|
|
|
Post by wbill76 on Jun 22, 2016 9:44:09 GMT -5
Thanks Dave, you've arrived at just the right moment, still room in the house!  Dierk Dierk , we'll see how I feel about the frigging after the schooner rig is done with the masts.  |
|
martslay
Full Member
  
Member since: February 2016
Posts: 1,113 
|
Post by martslay on Jun 22, 2016 9:51:03 GMT -5
It is magnificent, Bill!
|
|
|
|
Post by wbill76 on Jun 22, 2016 11:00:14 GMT -5
Thanks Martin!
|
|
|
|
Post by wbill76 on Jun 22, 2016 18:07:52 GMT -5
Today's efforts focused on getting the masts built and installed. The masts themselves had some flash and mold seams that had to be dealt with first before I could add the searchlight platforms and 1-pounder/crows nest elements. Those platforms rely on supports or tabs to hold them in place on the masts but those also need to be removed and replaced with PE angled supports. I decided to glue the platforms in place first and then trim down the support tabs after the glue had set and then install the PE supports in their place. This approach worked out pretty well but the fit of the platforms wasn't uniformly perfect, so I used some styrene rod to fill in gaps on the floor bottoms in places so that it could do double-duty by also providing additional support to the platform in the process. 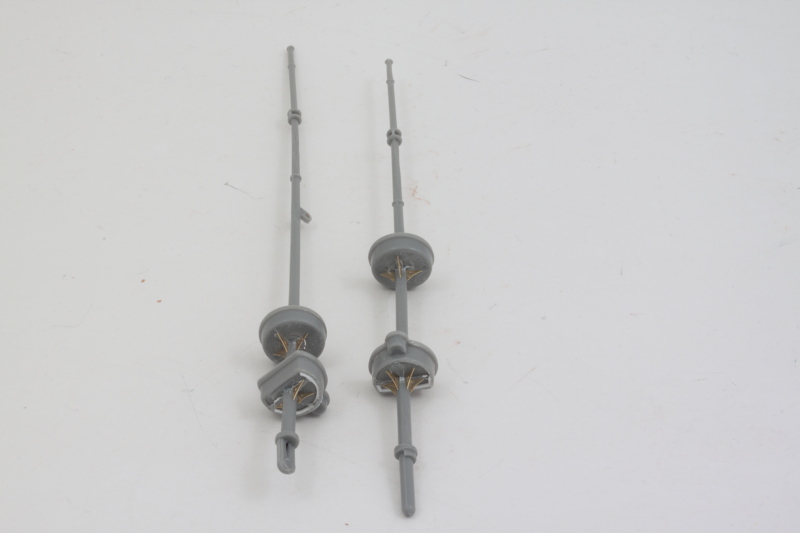 The yardarms and schooner rig sail masts were installed next and the masts sent off to the paint booth. Primer coat of Flat Black followed by Gunship Gray did the trick nicely. I drilled out the faces of the searchlights and detailed the 1-pounder guns by hand before adding them in place on their respective platforms. 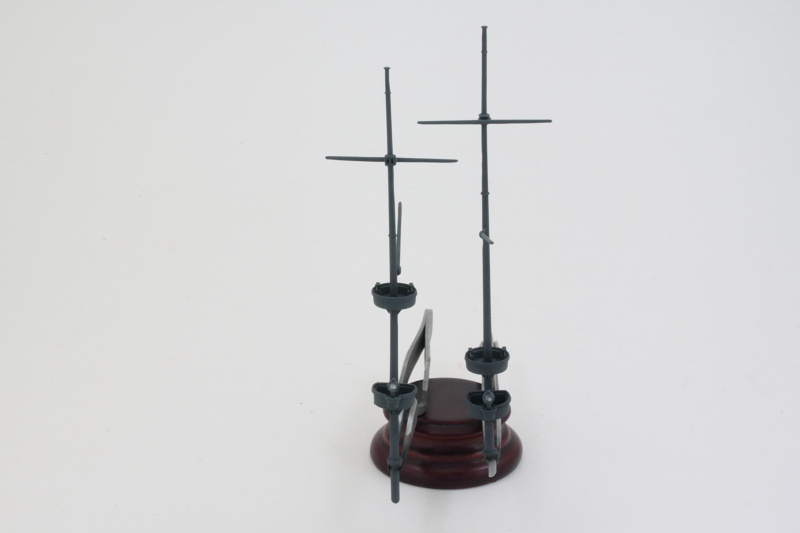 Masts were installed fore and aft and this, of course, makes the model significantly taller as a result. 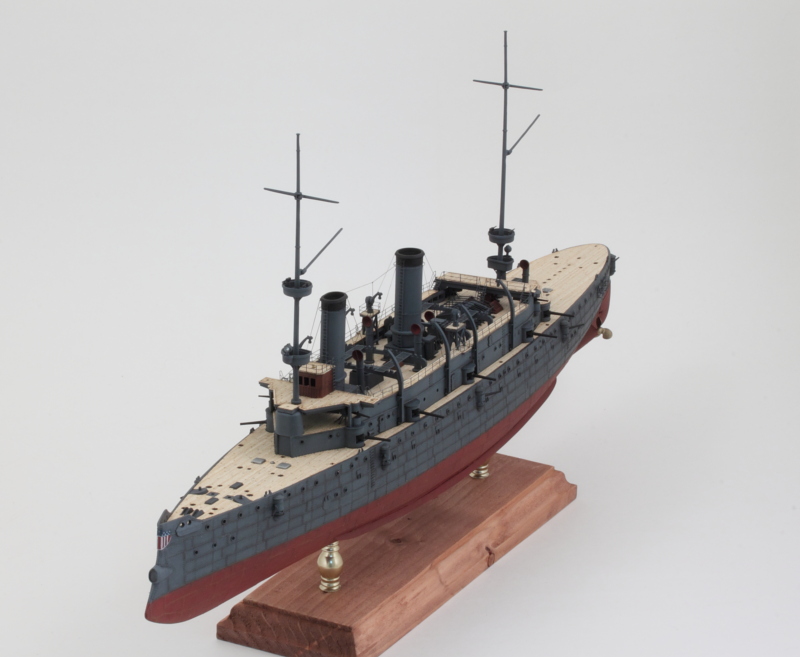 This clears the way for Round 2 of the rigging saga to begin! |
|
|
|
Post by armorguy on Jun 22, 2016 18:19:36 GMT -5
You keep going Bill, and it looks sooooo fine to me !
|
|
|
|
Post by wbill76 on Jun 22, 2016 18:31:55 GMT -5
Thanks AG, full steam ahead!  |
|
|
|
Post by Leon on Jun 22, 2016 18:50:48 GMT -5
Nice progress on the mast Bill! Really looking ship shape.  |
|
|
|
Post by wbill76 on Jun 22, 2016 19:42:11 GMT -5
Nice progress on the mast Bill! Really looking ship shape.  As long as I don't draw deck swabbing duty, I'll be fine Leon!  |
|
|
|
Post by deafpanzer on Jun 22, 2016 23:28:30 GMT -5
Despite my absence I am grateful for FB so I could keep track of your updates during trips.
She will be one of builds I will always remember just like your 100th build...
|
|
|
|
Post by wbill76 on Jun 23, 2016 9:55:31 GMT -5
Thanks Andy! Glad you've been able to keep up with all your other adventures.  |
|
martslay
Full Member
  
Member since: February 2016
Posts: 1,113 
|
Post by martslay on Jun 23, 2016 15:36:30 GMT -5
|
|
|
|
Post by wbill76 on Jun 23, 2016 19:32:06 GMT -5
With the masts installed yesterday, the way was cleared for me to add the rigging required. I started with the foremast and added all of its lines with the exception of the bracing lines that connect to the bow since I didn't want them to be in the way when I work on the rest of the details still to come. EZ Line, CA, and accelerator plus enduring the full day working without the fan running (airflow makes it really hard to handle the superfine EZ line thread!) made for a successful effort. I'm really glad I held off adding the bridge deck railings as that would've made for some really tight spaces if I hadn't. 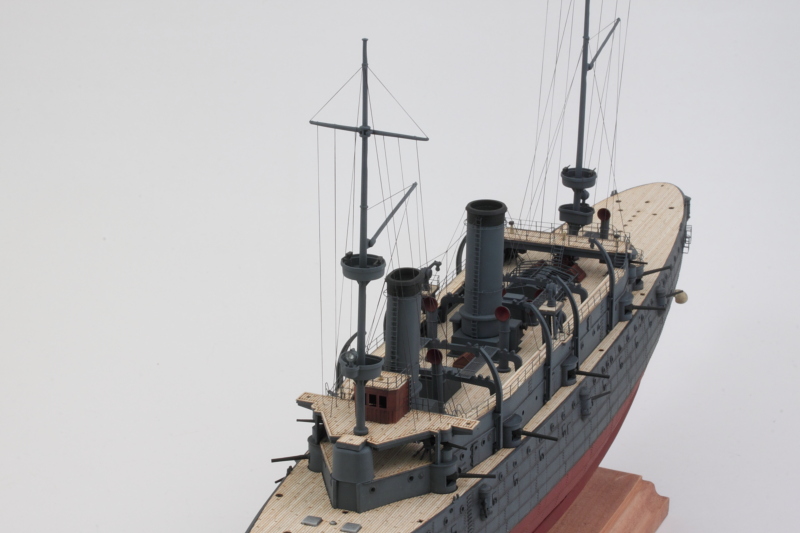 The mainmast also got its dose of rigging as well. I almost painted myself into a corner by adding all of the signal flag lines before I added the aft railing for the walkway section. Fortunately, I had just enough room to fit it in around the lines without disturbing them but it was a close call. Learning my lesson, I shaped the boat deck level railings first and checked their fit and placement before I added the bracing stays and lines for the sail boom. Once I was sure I had the necessary room and clearance, I added those lines, installed the railings, and added the access ladders down to the main deck level. 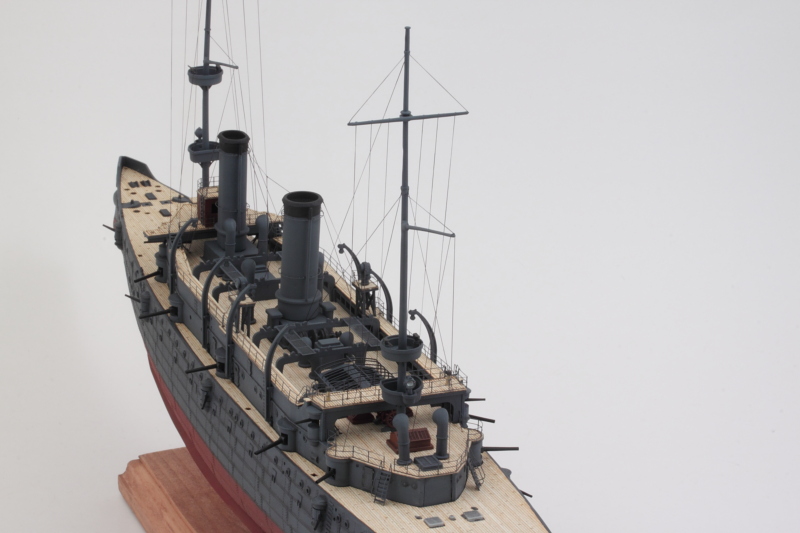 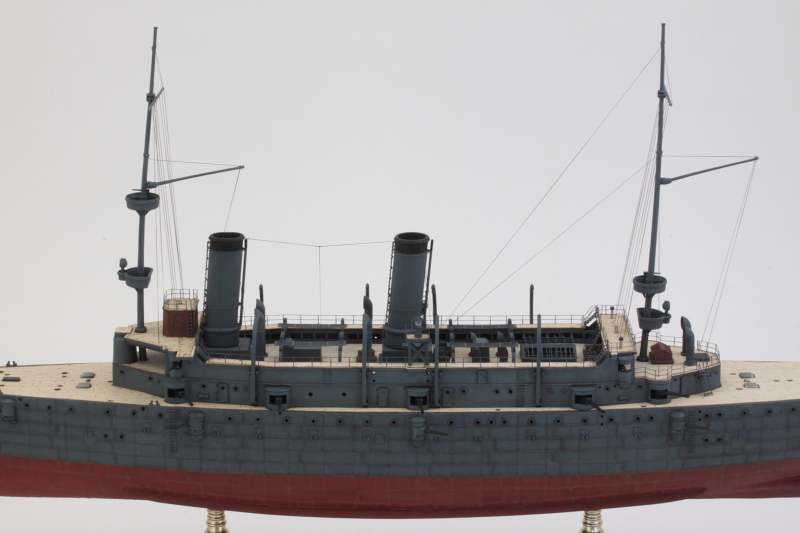 It's worth noting that the instructions include a rigging diagram and it's helpful up to a point...but there were a couple of cases where the rigging they were calling out just wasn't physically possible, so I used a little creative license in a couple of spots to get things as close as I could given the spaces available. Next up will be tackling the ship's boats so I can populate the racks now that I don't need access to those areas any longer. |
|
|
|
Post by wbill76 on Jun 25, 2016 20:22:10 GMT -5
With all the time I spent today working on the bridge, I might as well have been in a dentist's office!  I completed all the remaining bridge details and installed the remaining railings and ratlines for the foremast. It was necessary to be a little strategic in the choice of order of shaping, painting, and installing the different railings sections to ensure everything would play nice. This was particularly true for the ratlines as they required a curve to clear the bridge deck railing and mate up with the mast under the crow's nest platform. It all worked out in the end! The instructions failed to call out the railing section on top of the small elevated platform at the front of the bridge deck but I figured it out after triple-checking that the one section of railing unaccounted for on the fret wasn't used anywhere else and was the right size. 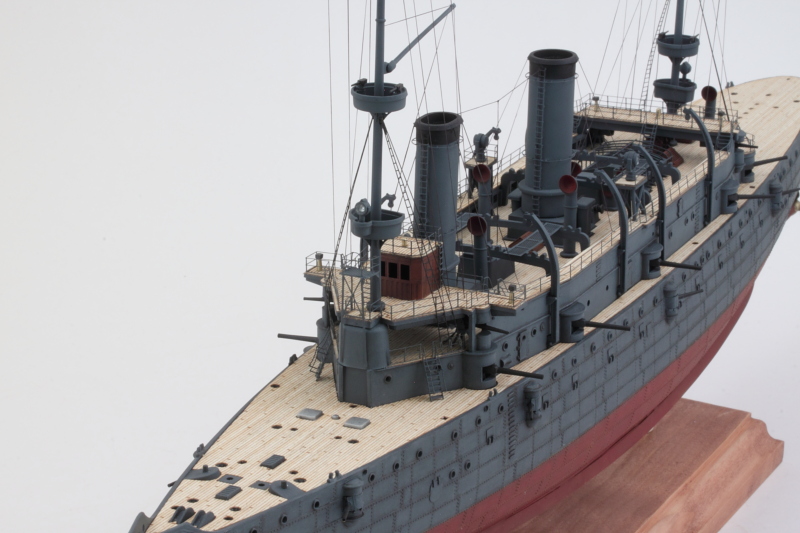 Ratlines were also installed on the mainmast. These were a little trickier in that the spaces available are tighter but no bending required, so that was a plus. 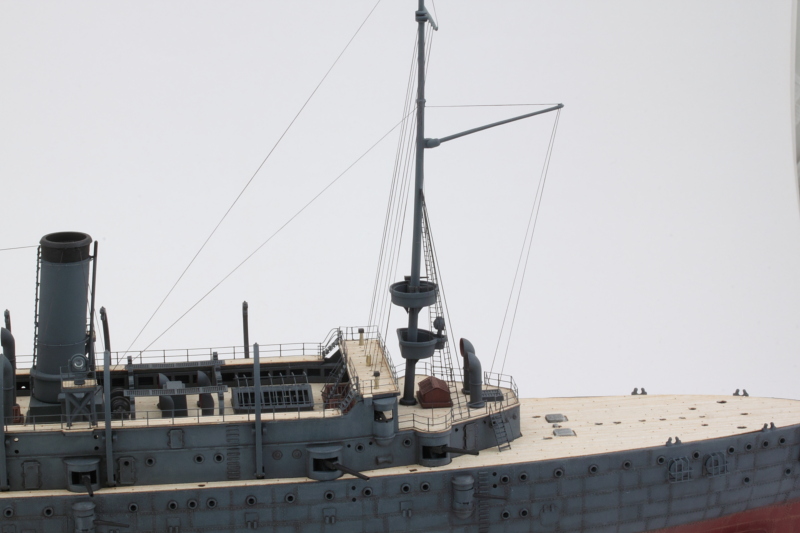 Rounding things out, I assembled the ship's complement of 12 boats. These had varying degrees of flash with the frame for the steam launch getting the worst of it. They cleaned up nicely though and will get painted first before I add the oars and the boiler for the steam launch. 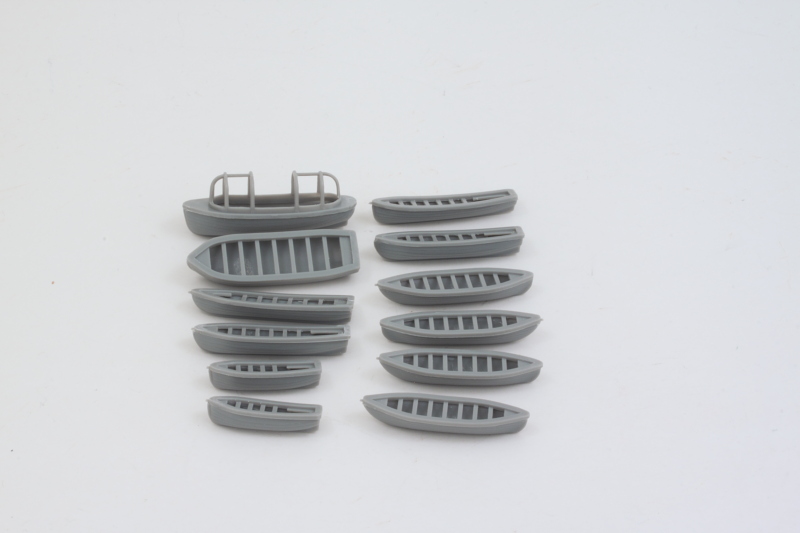 Making good progress! Getting closer to the finish line. |
|
flmlm
Full Member
  
Member since: March 2016
Crack open that kit and smell the build ????
Posts: 170 
|
Post by flmlm on Jun 25, 2016 20:37:04 GMT -5
What a beautiful piece of work!
Regards
Mike
|
|
|
|
Post by wbill76 on Jun 25, 2016 20:54:20 GMT -5
Thanks Mike! Getting closer to the finish line with this baby.
|
|
|
|
Post by Leon on Jun 25, 2016 21:02:23 GMT -5
Excellent days work Bill! Well worth the time and effort involved.  Finally broke the 17K mark. |
|
|
|
Post by wbill76 on Jun 25, 2016 21:51:42 GMT -5
Excellent days work Bill! Well worth the time and effort involved.  Finally broke the 17K mark. Thanks Leon! Looks like you had an equally good day at the bench. Congrats on crossing the milestone!  |
|