cploverby.
Full Member
  
Member since: August 2012
Posts: 129
Aug 14, 2012 14:15:54 GMT -5
Aug 14, 2012 14:15:54 GMT -5
|
Post by cploverby. on Apr 11, 2016 22:24:43 GMT -5
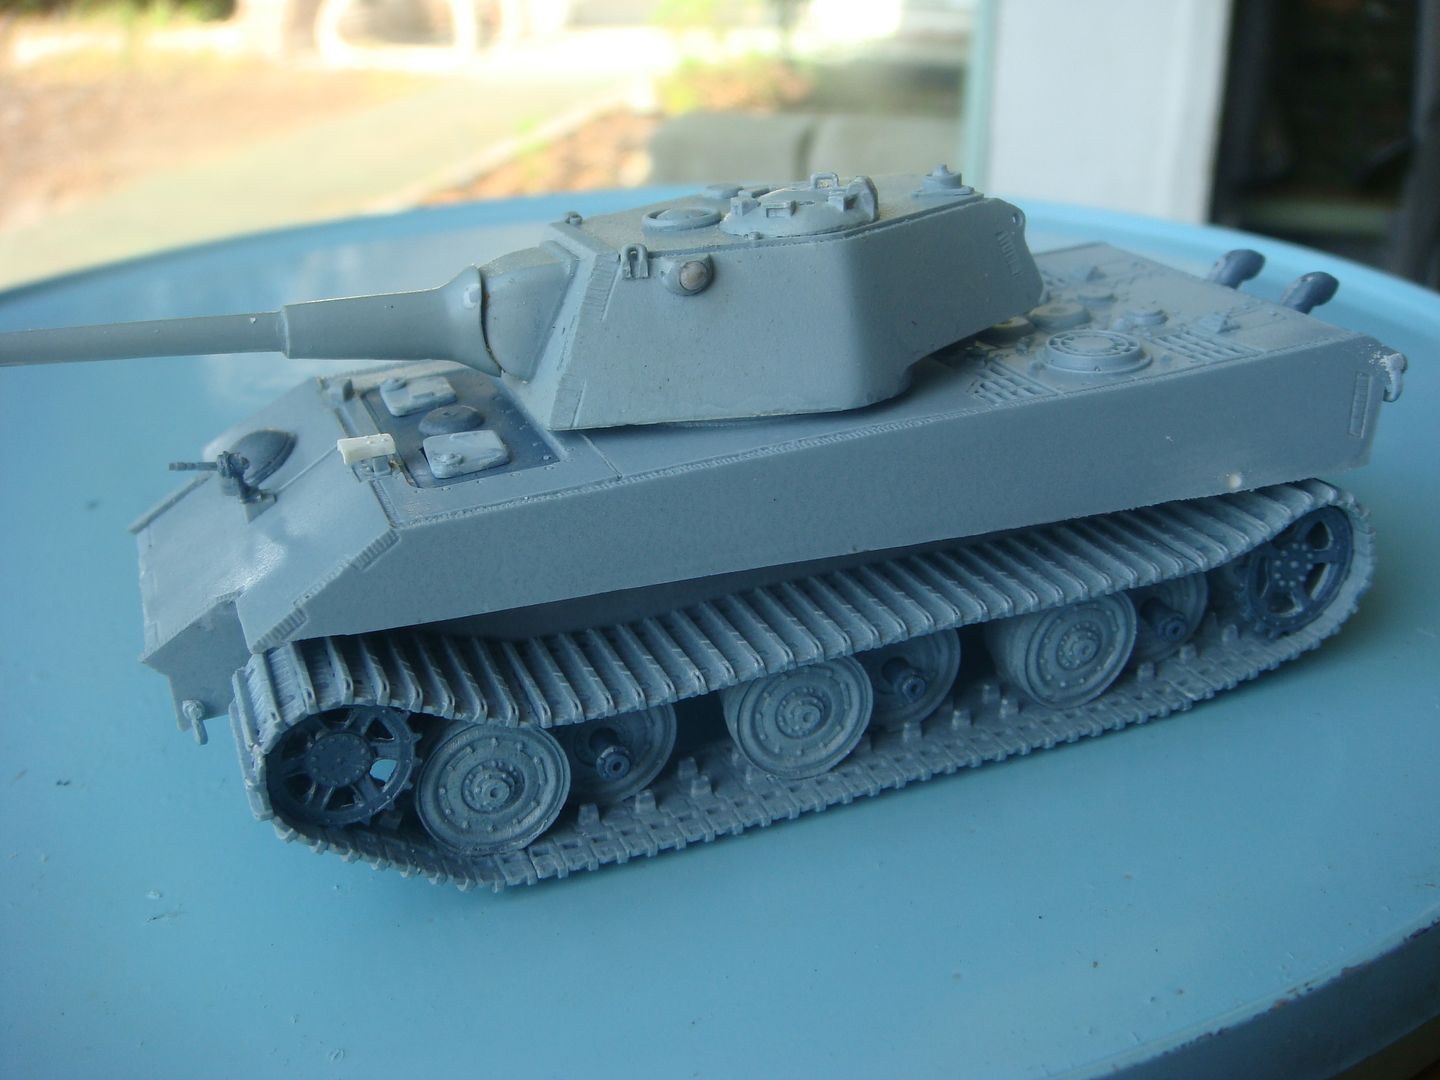
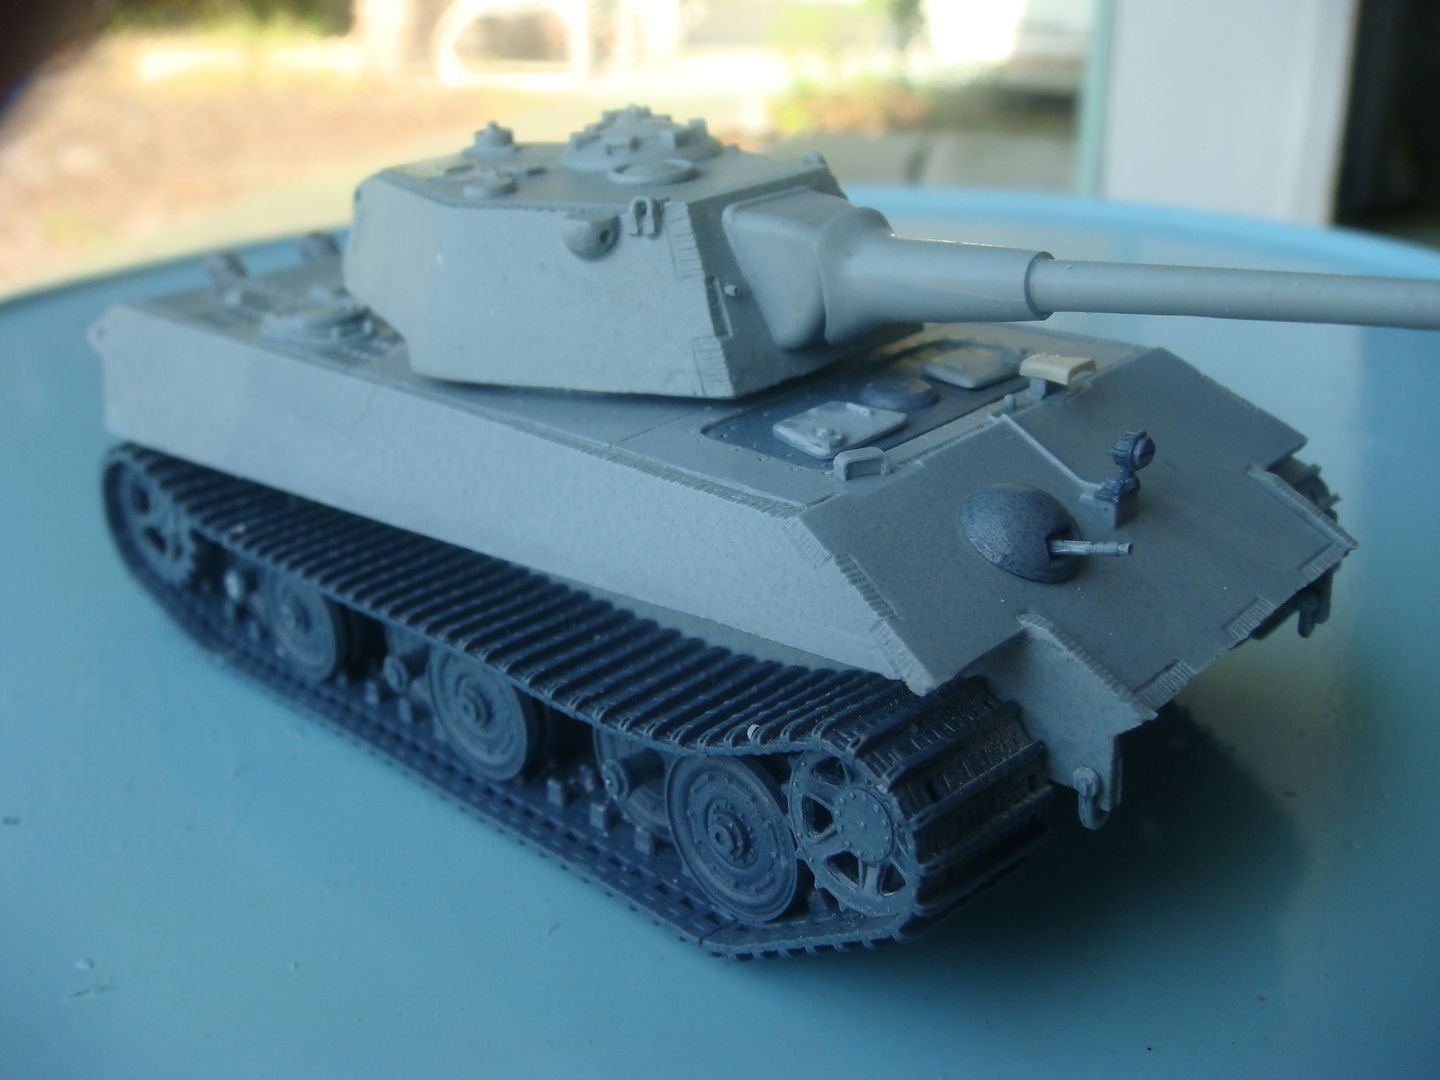
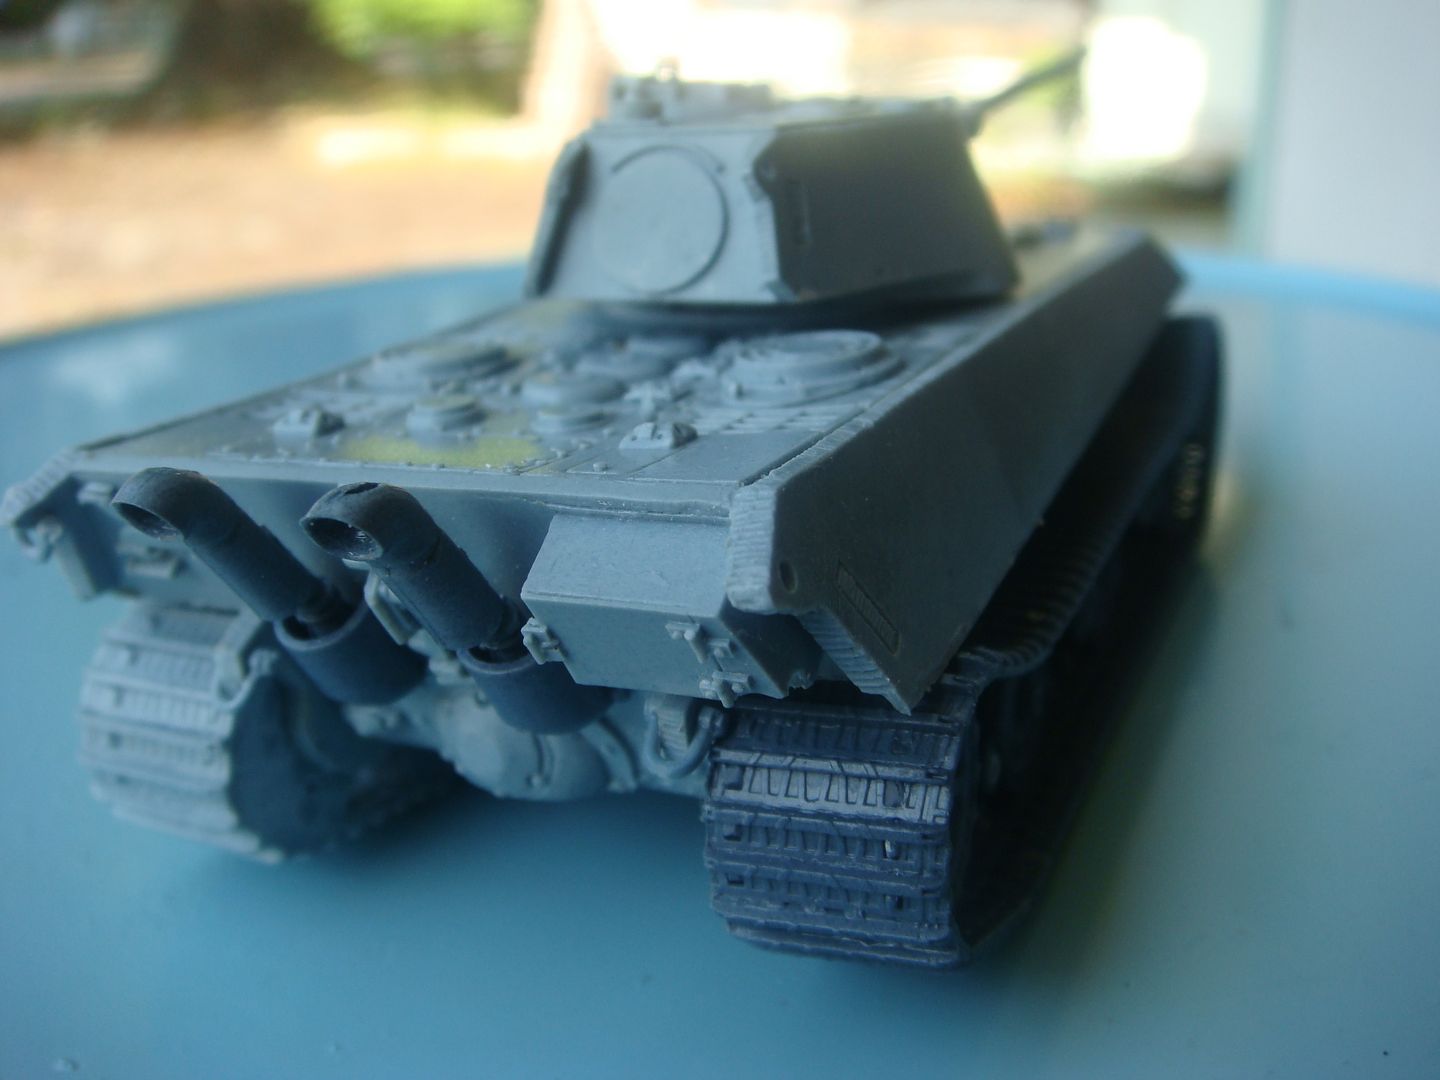
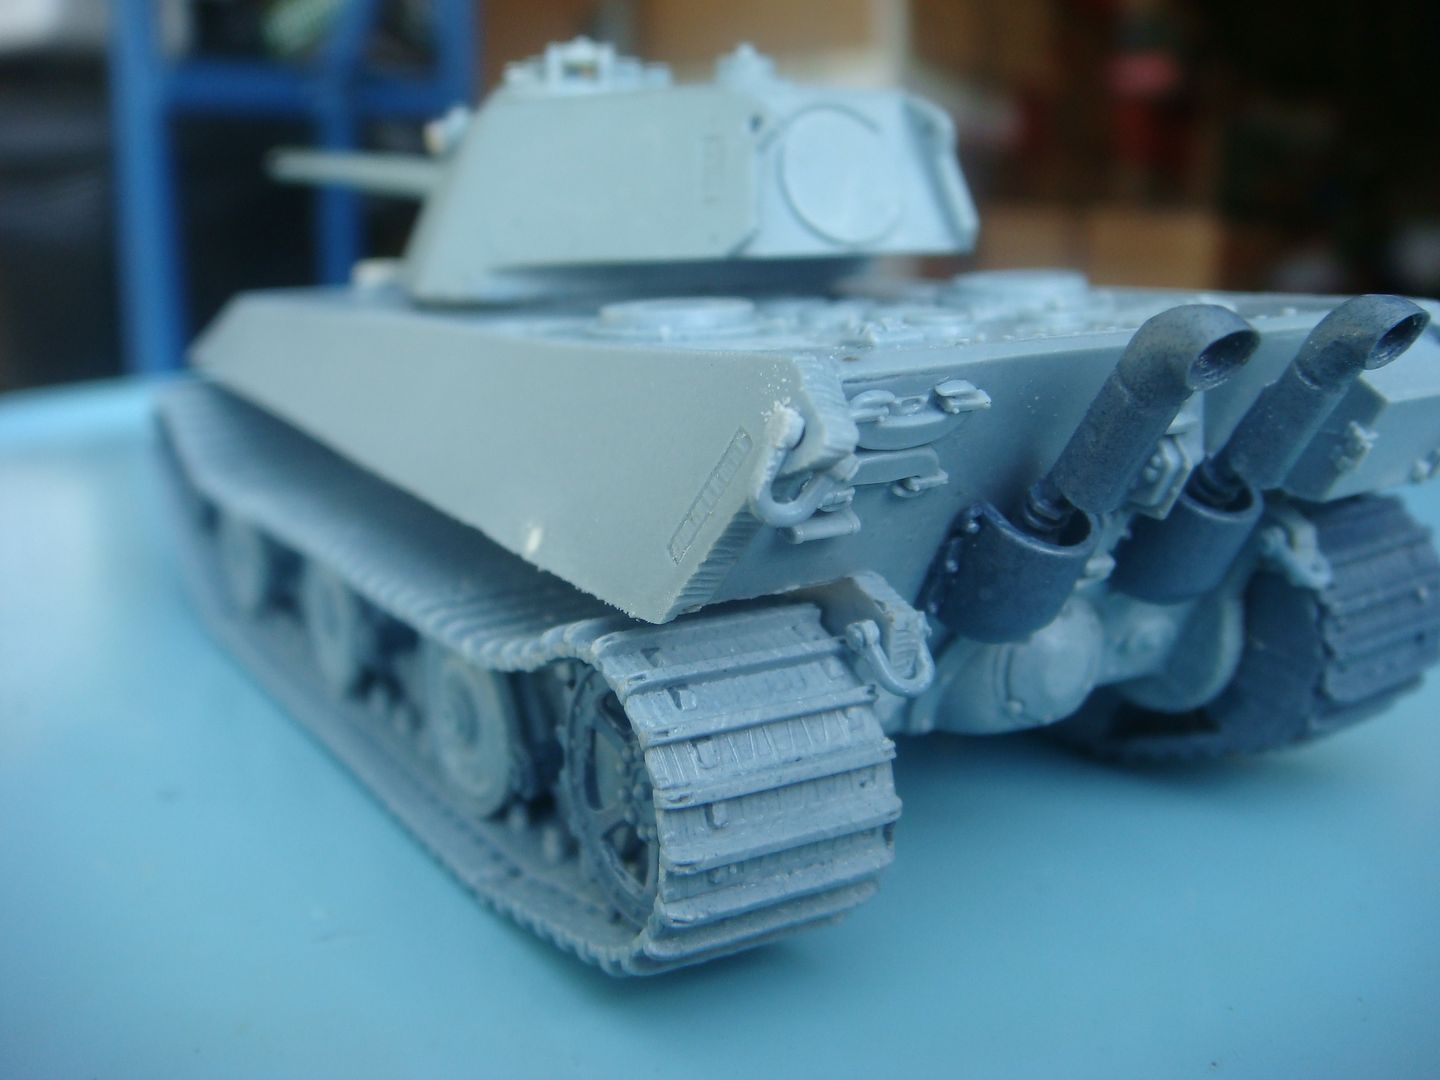
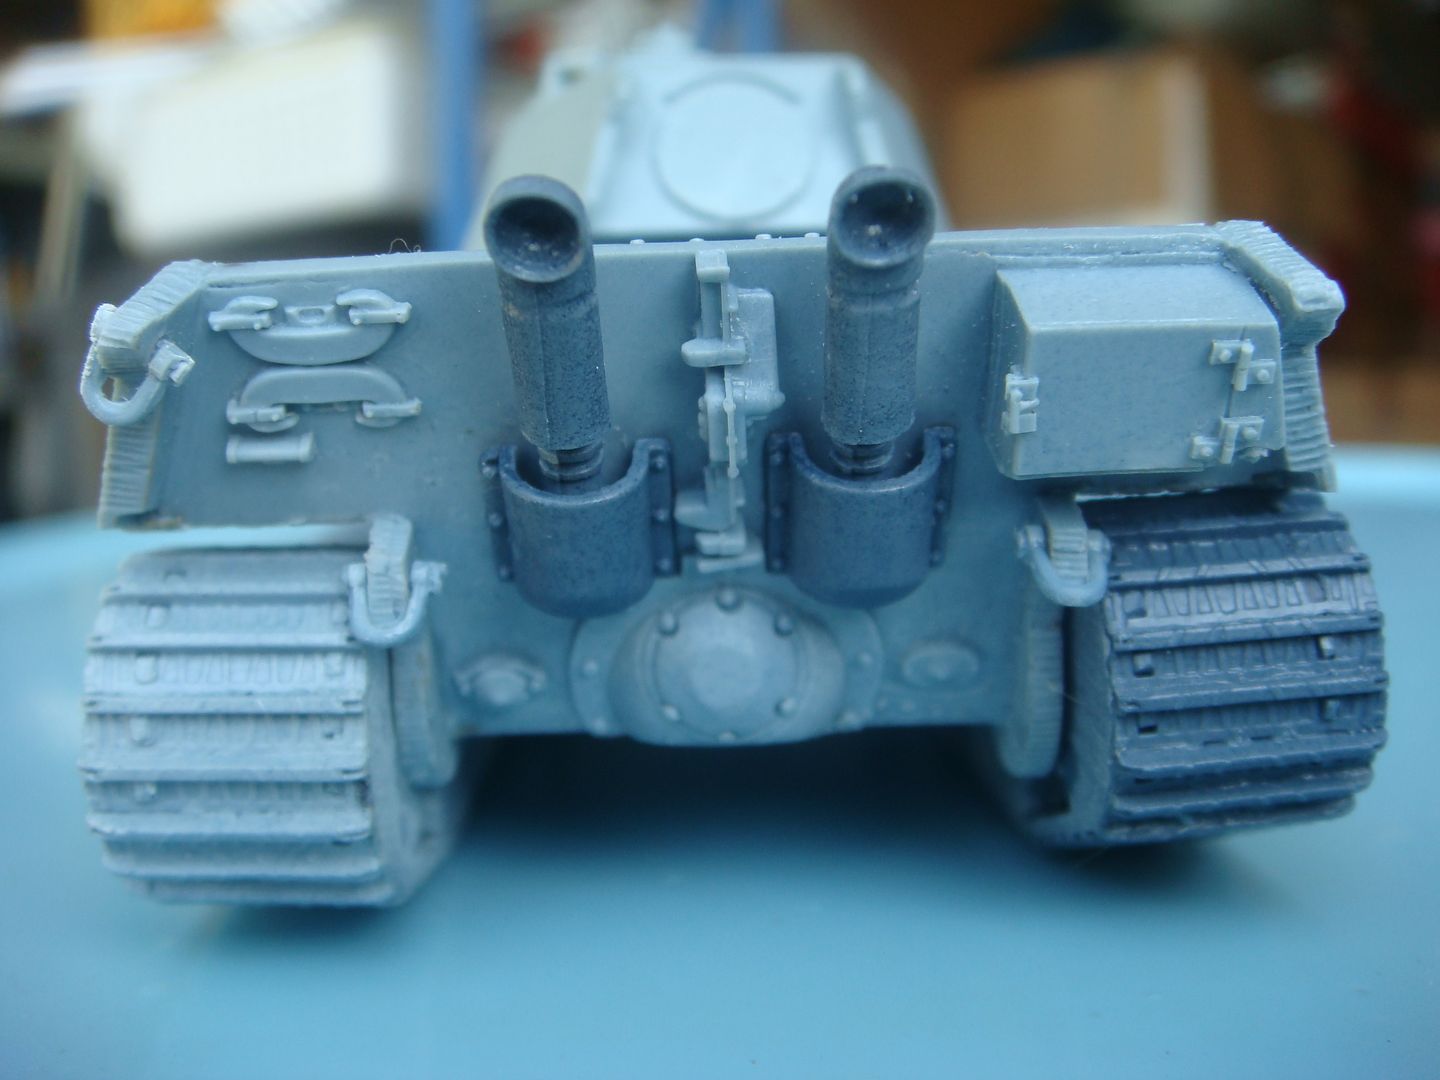
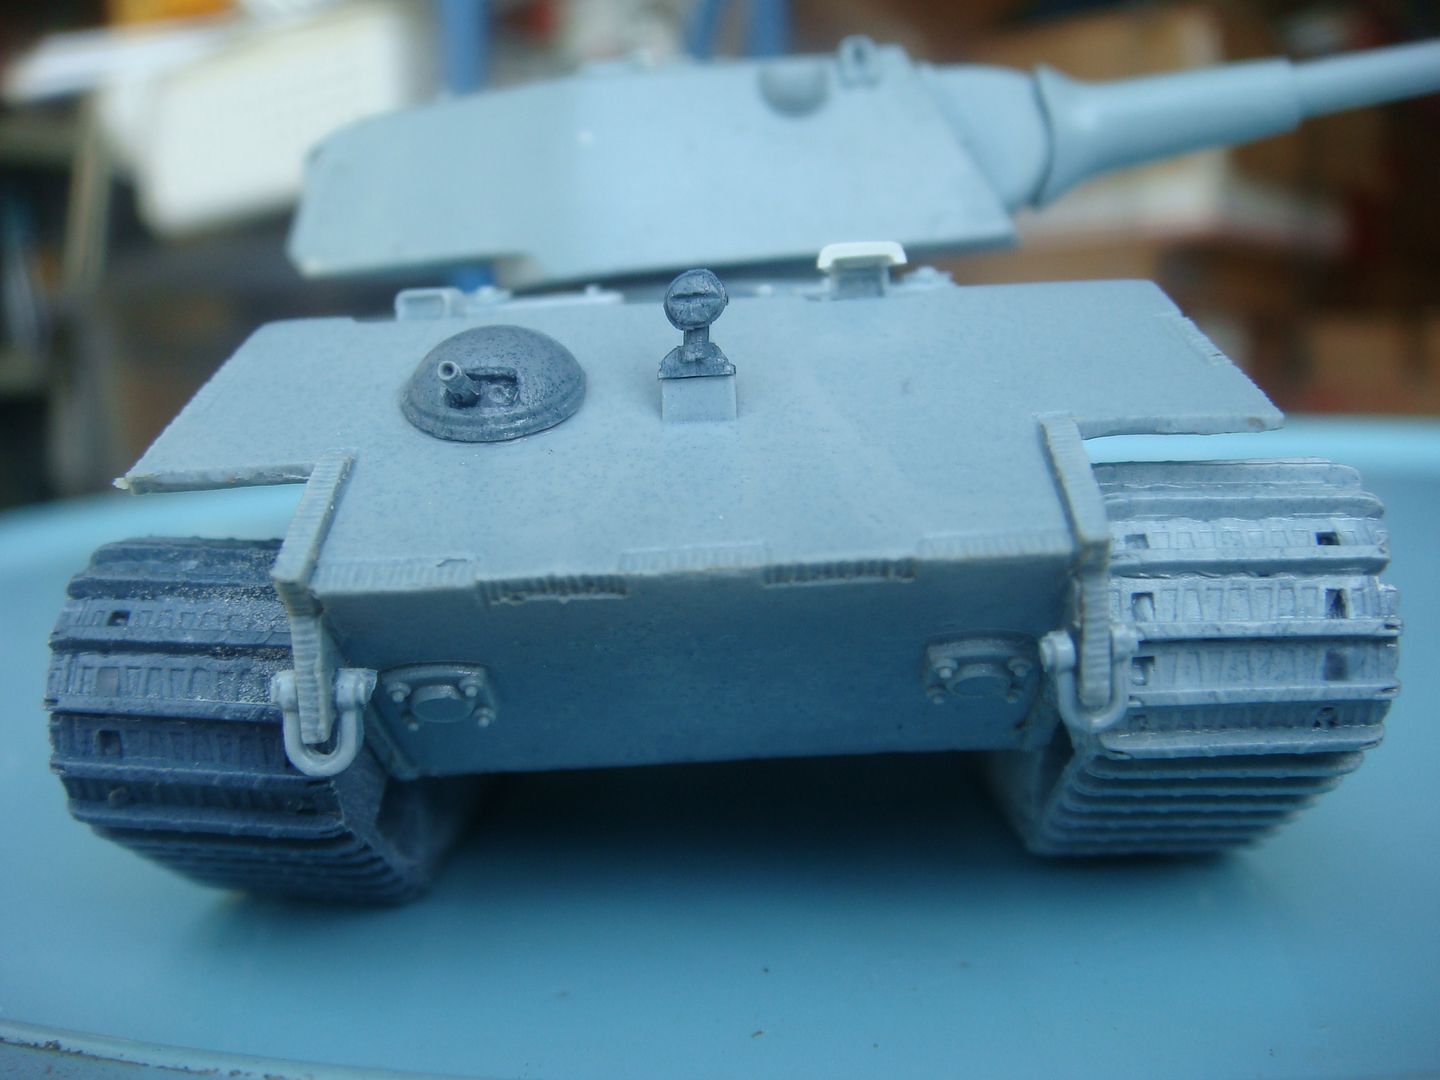
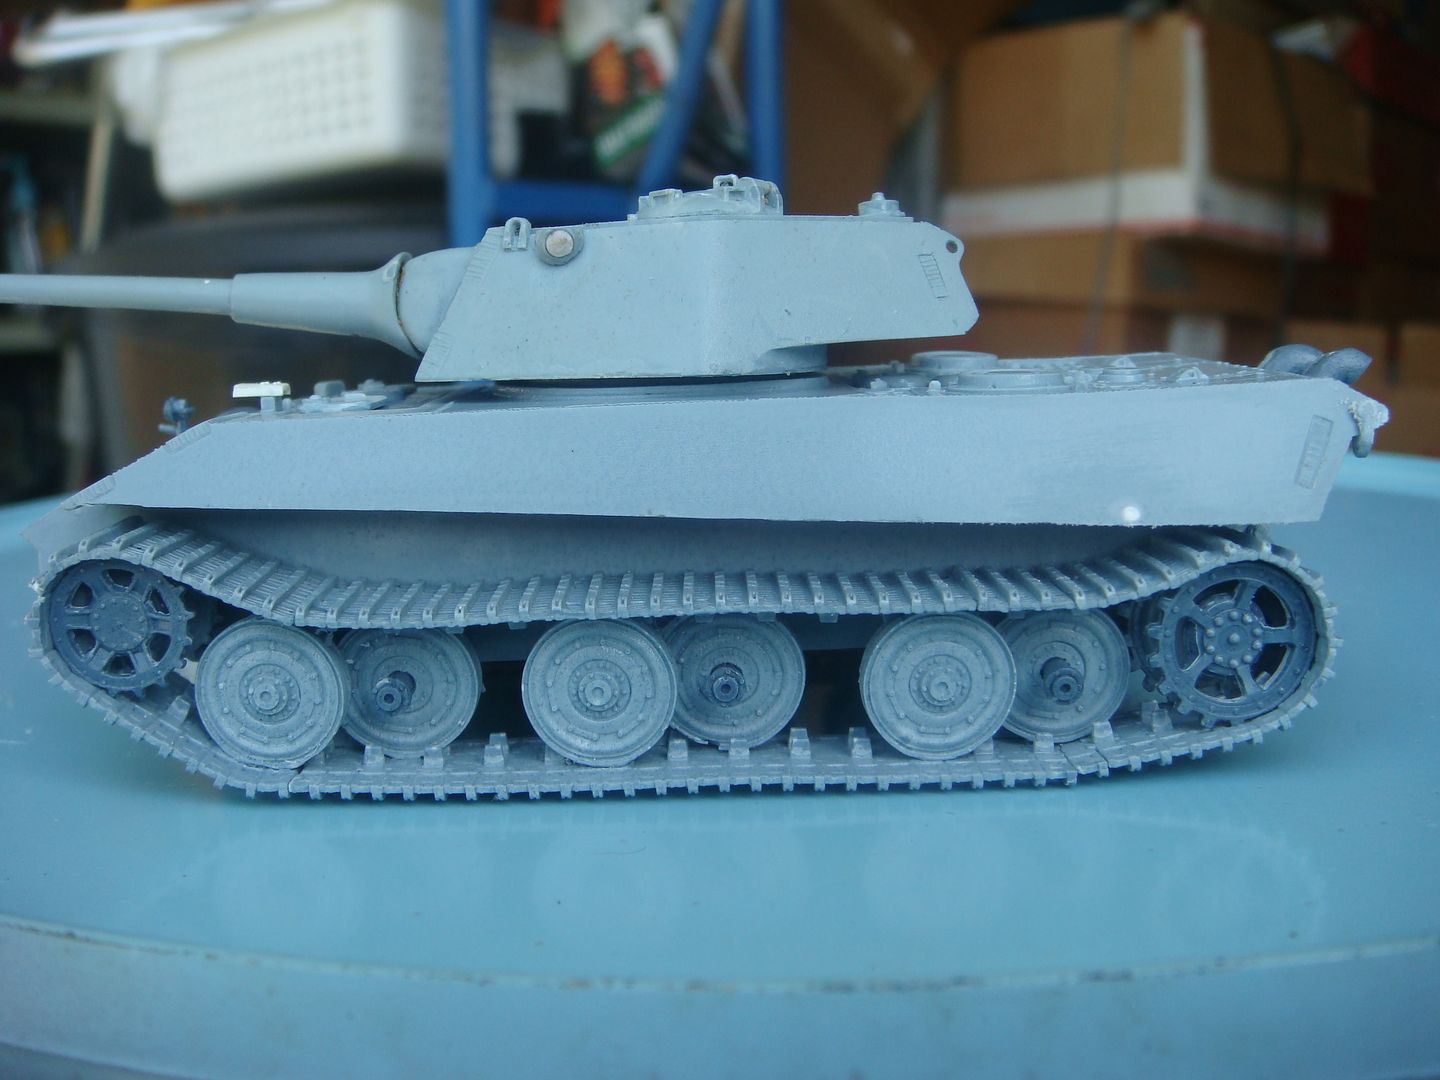
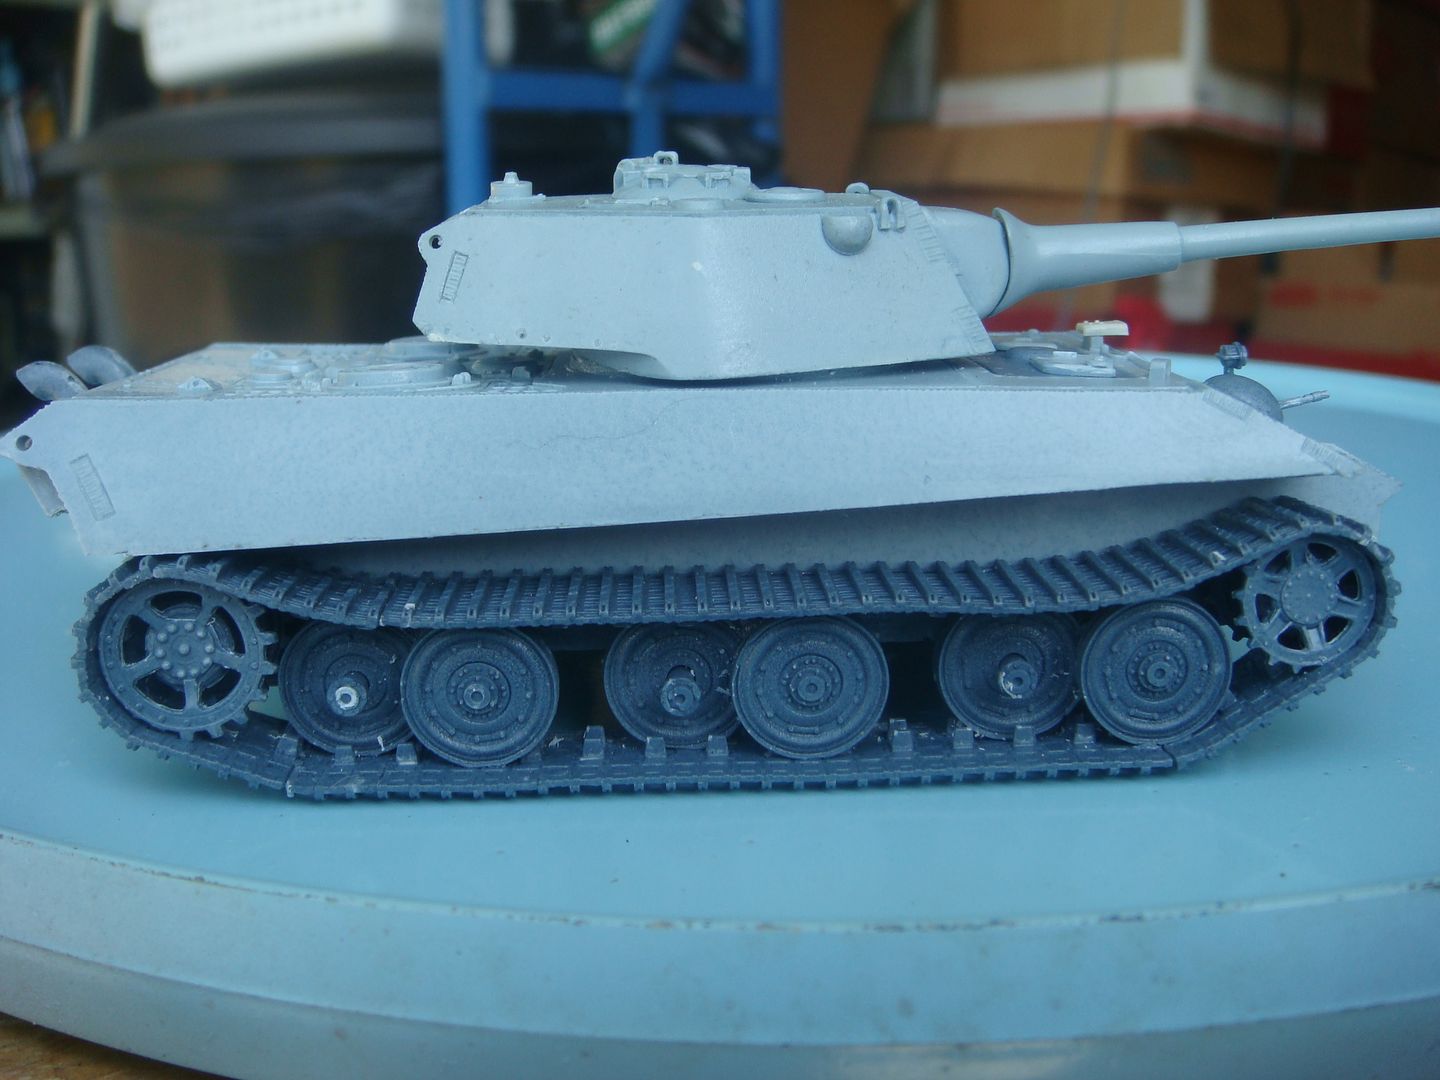
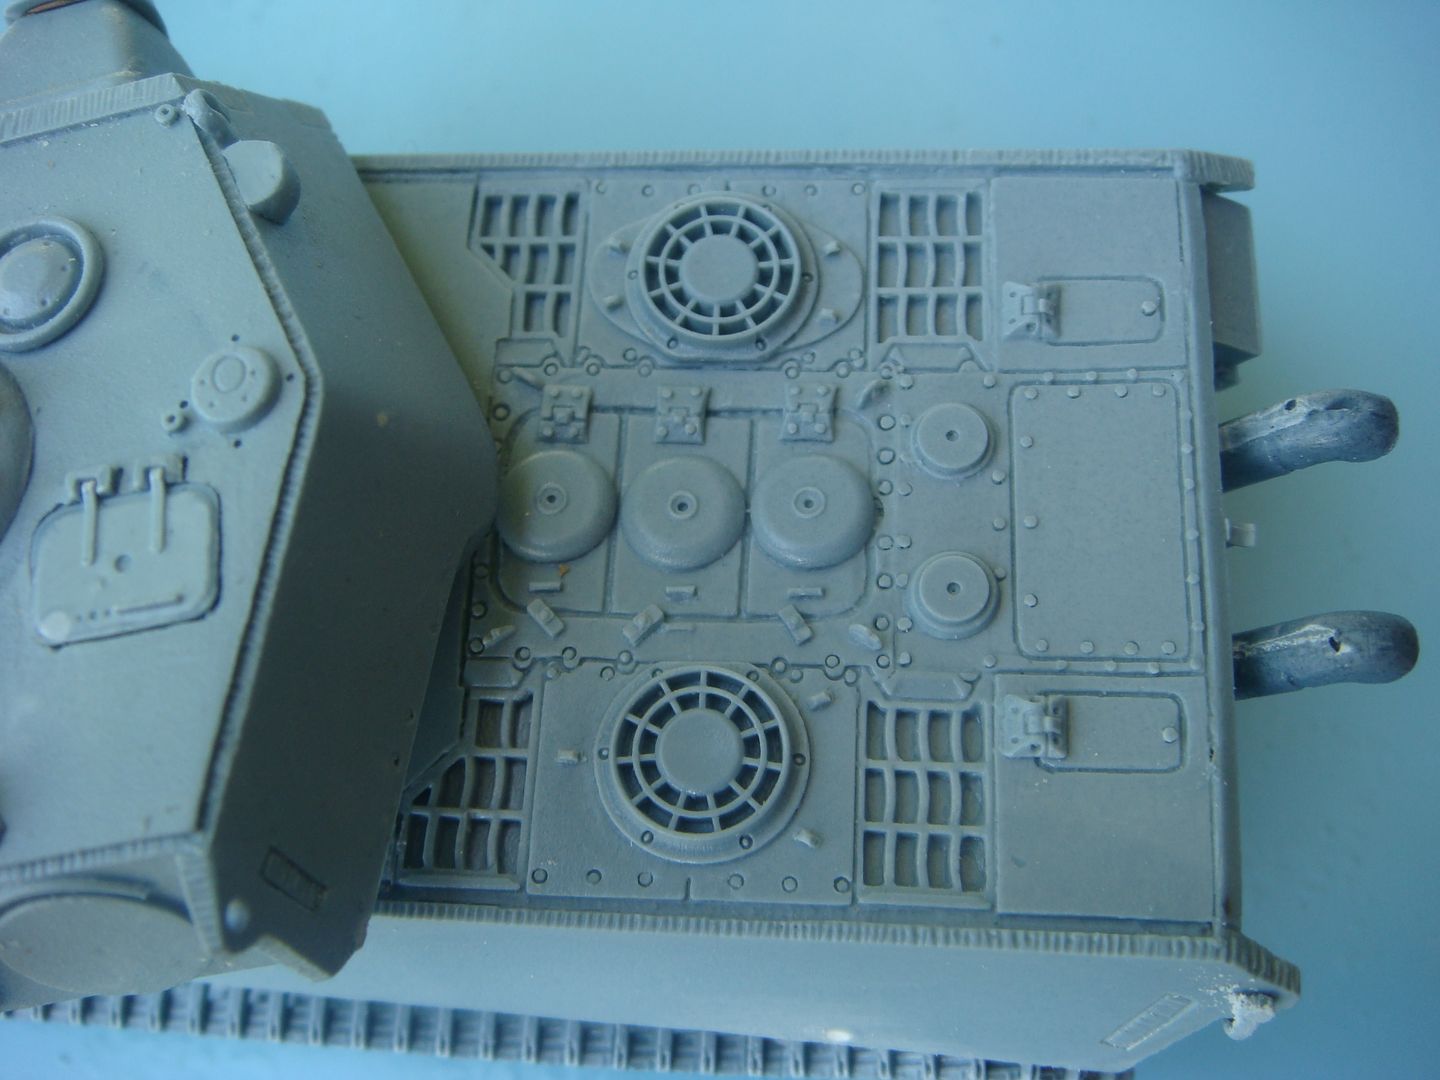
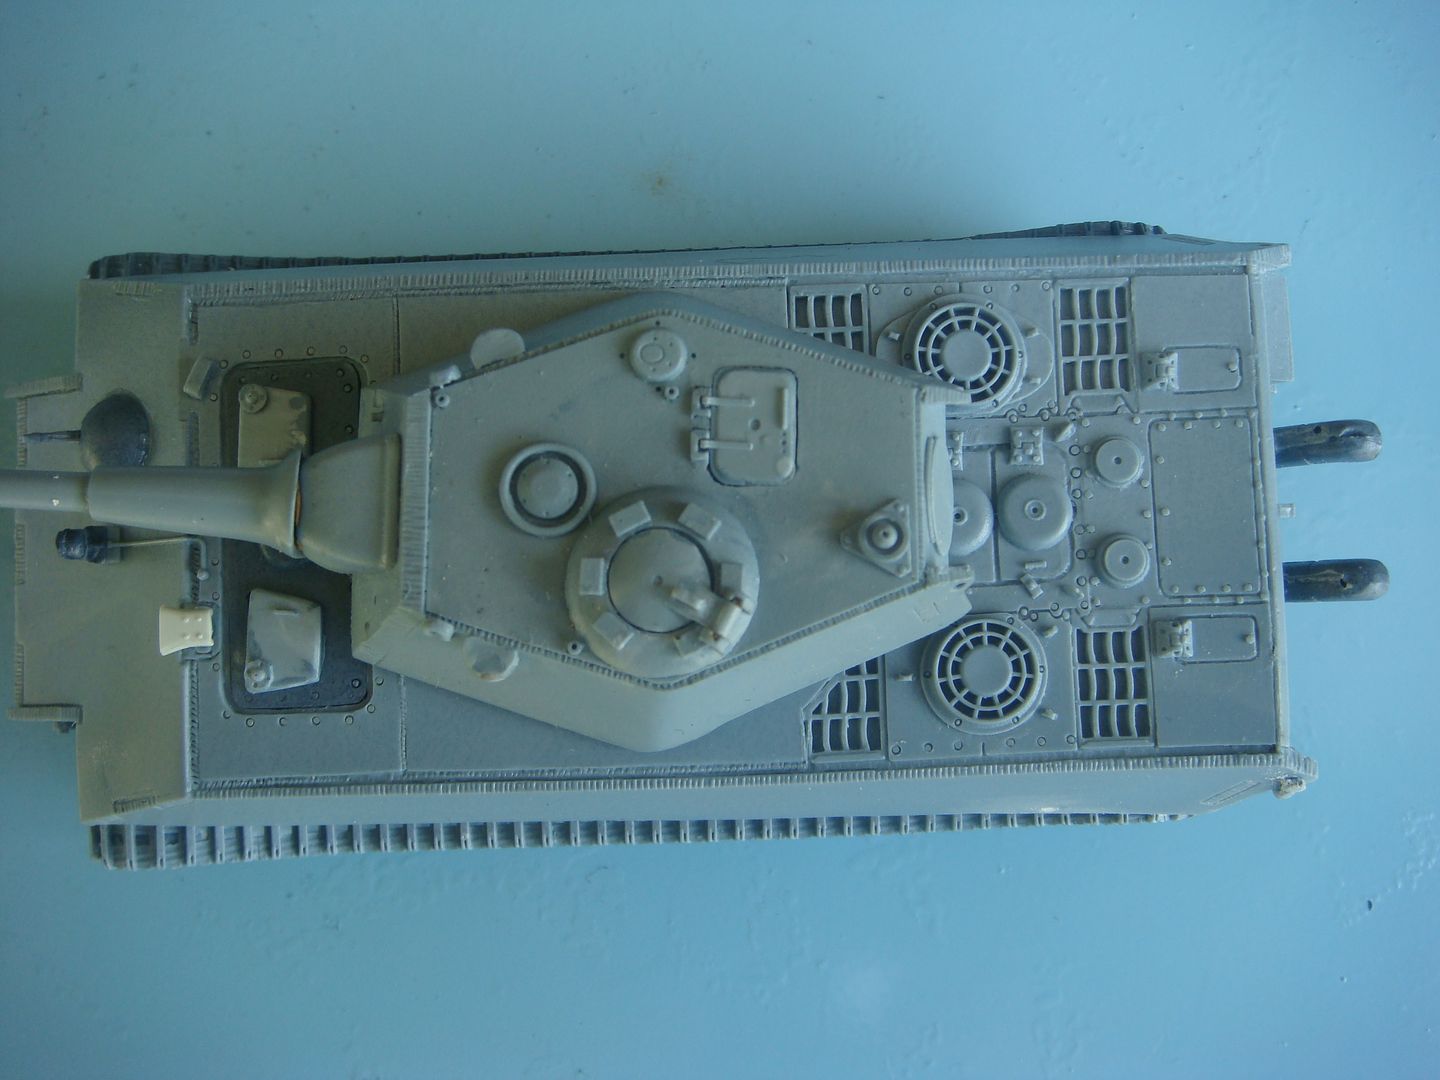
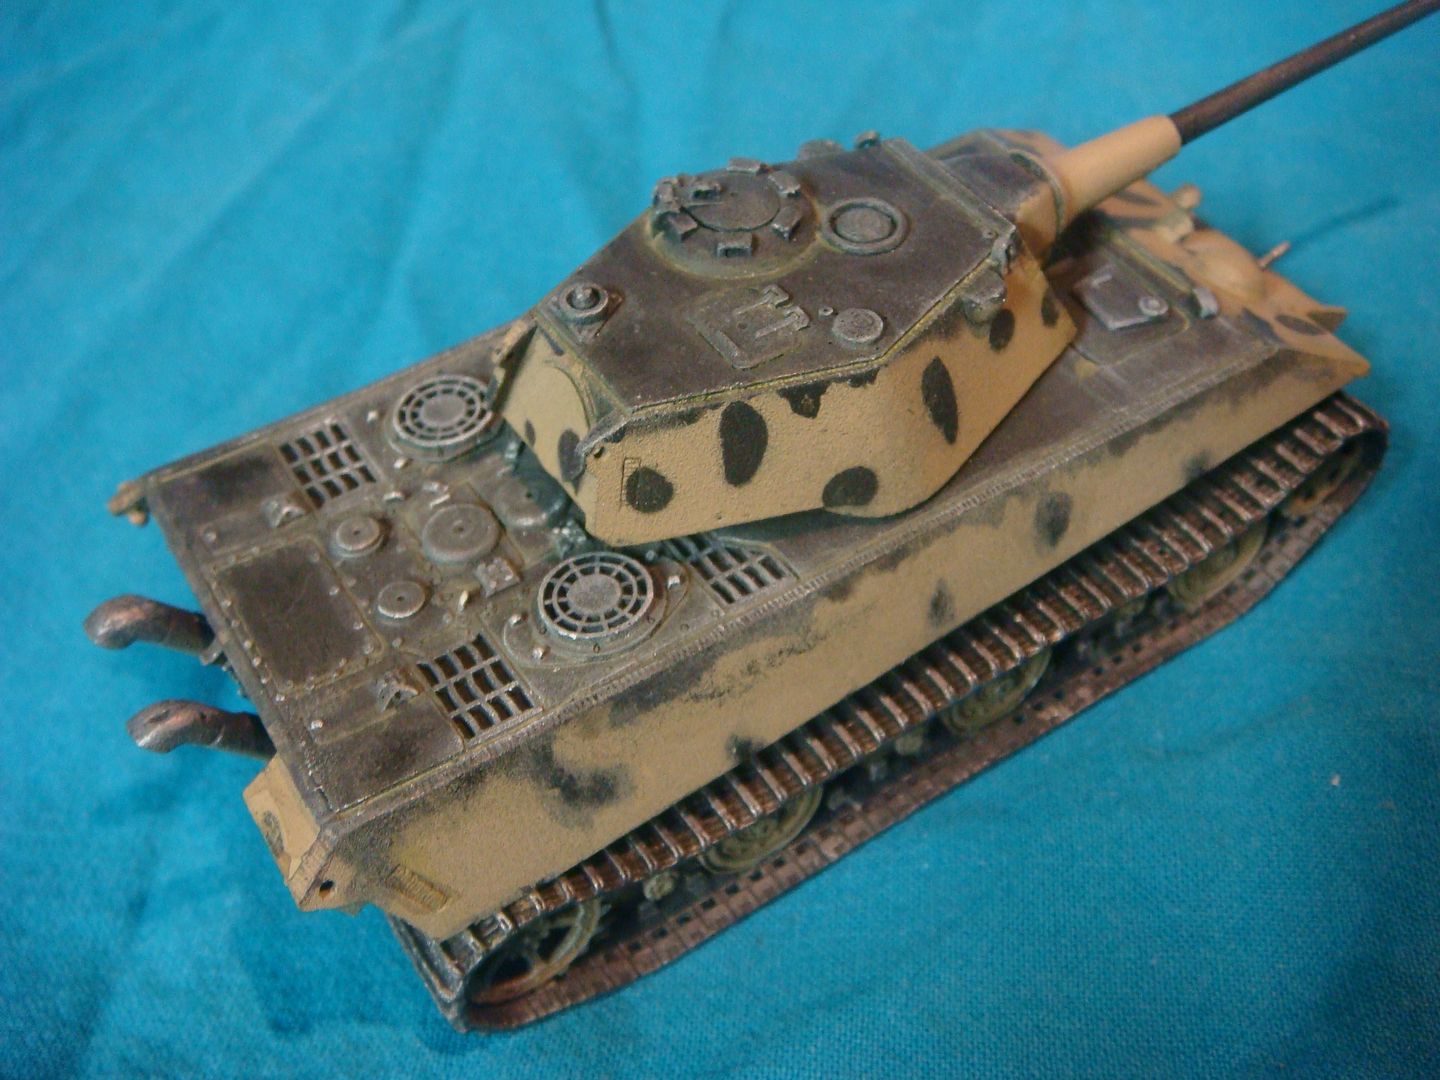
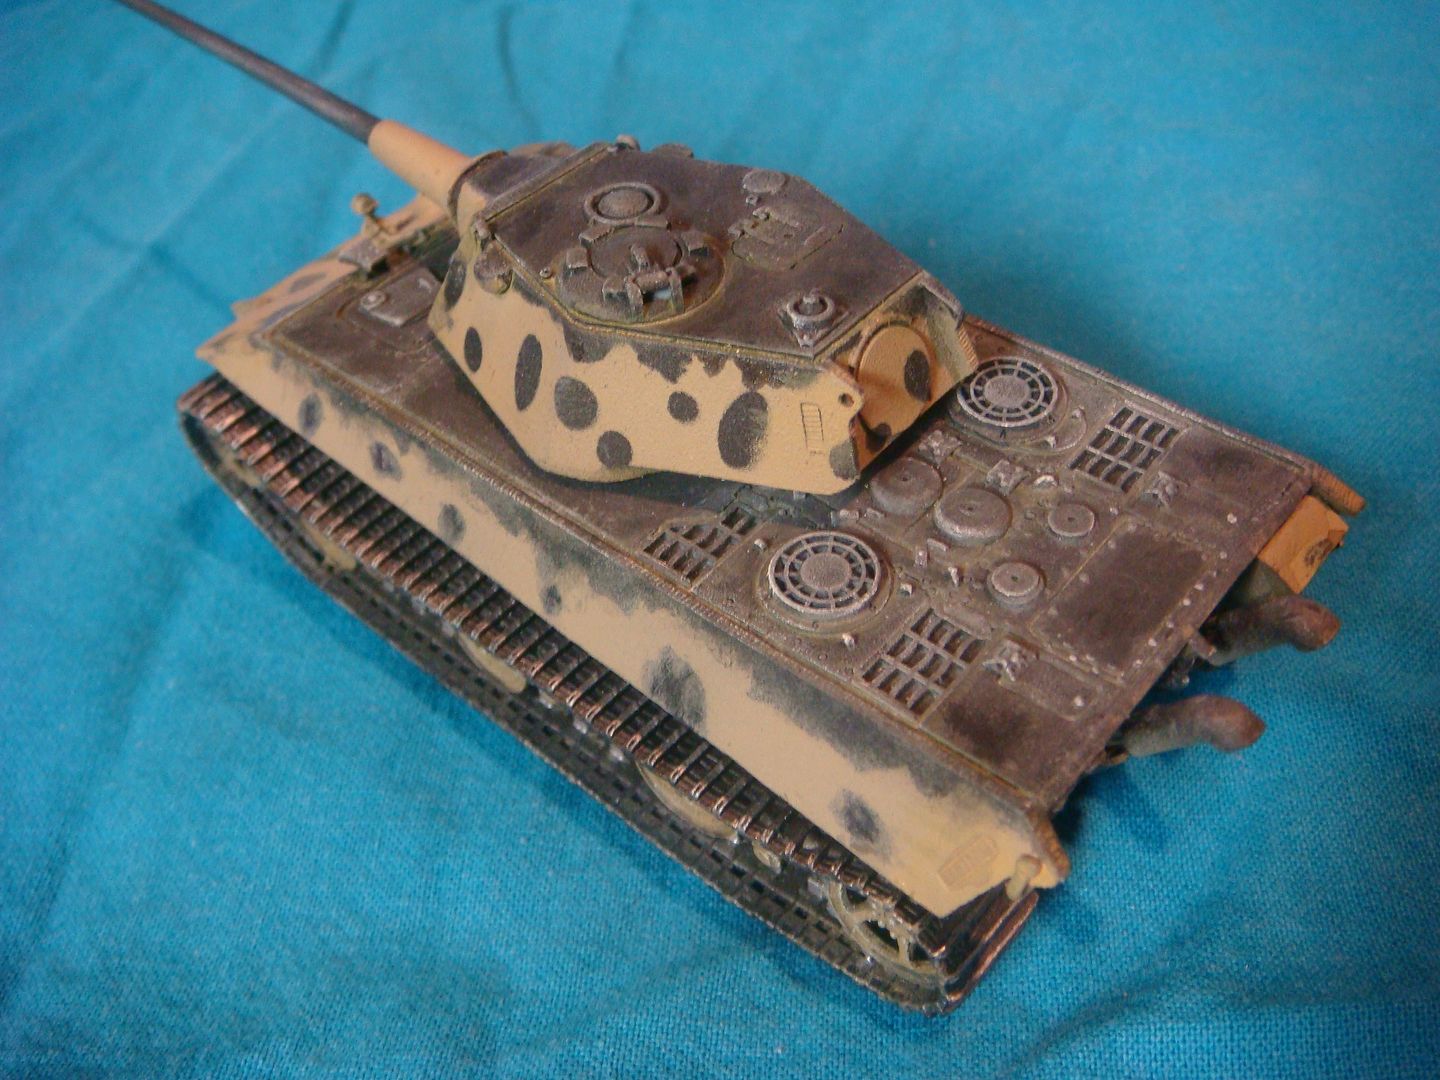
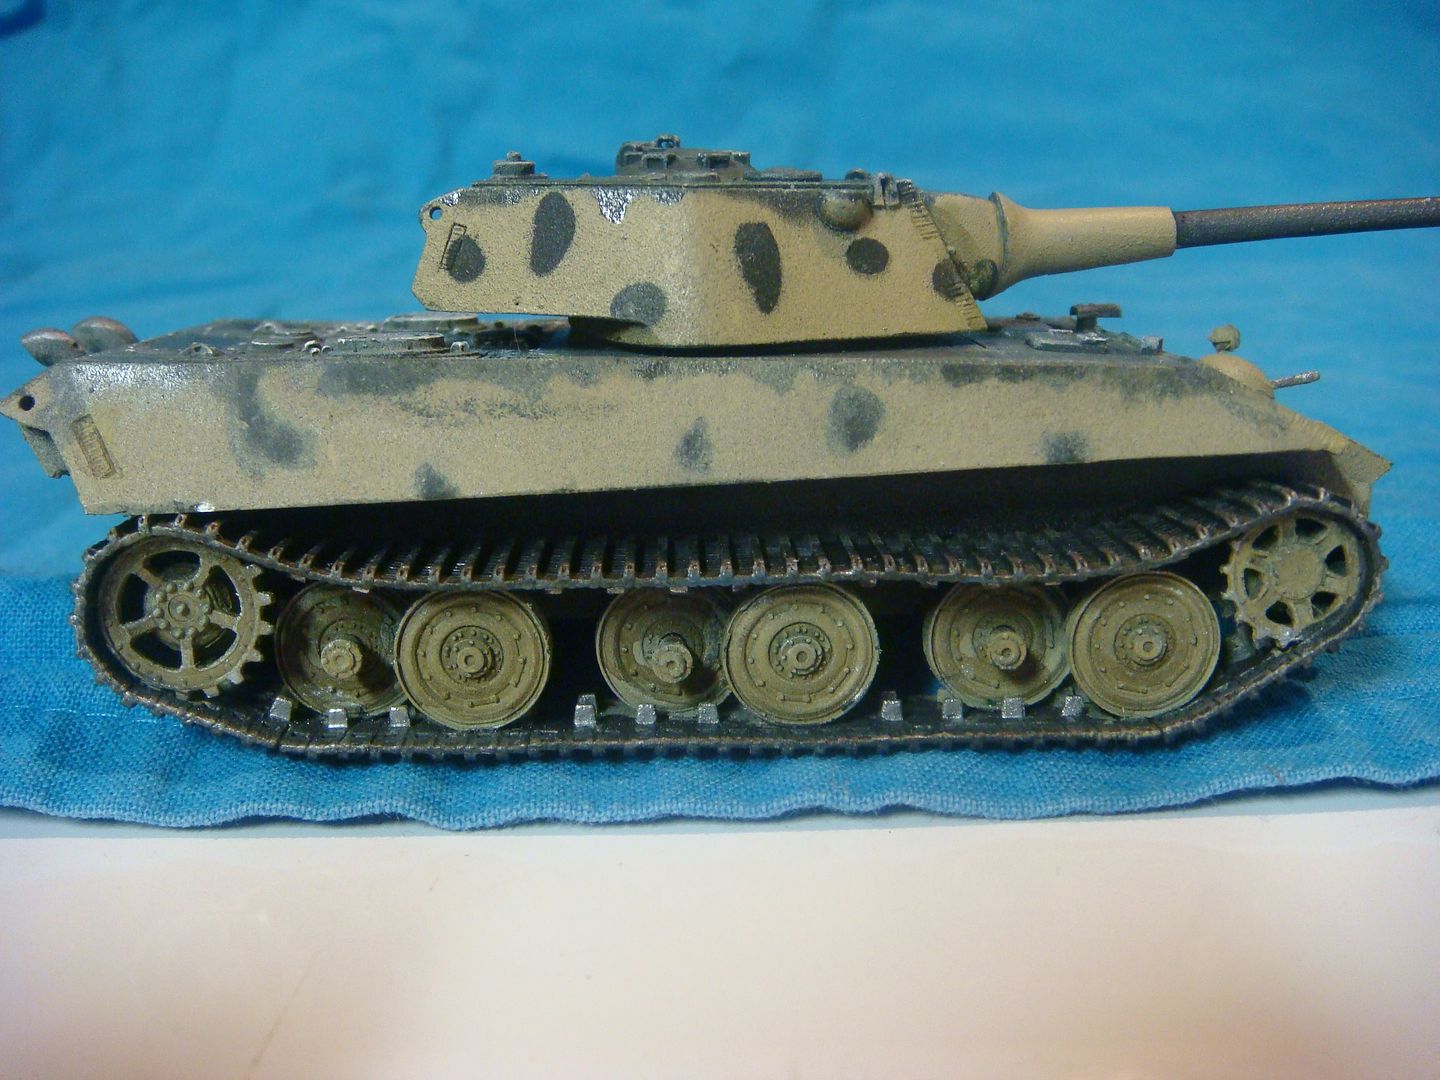
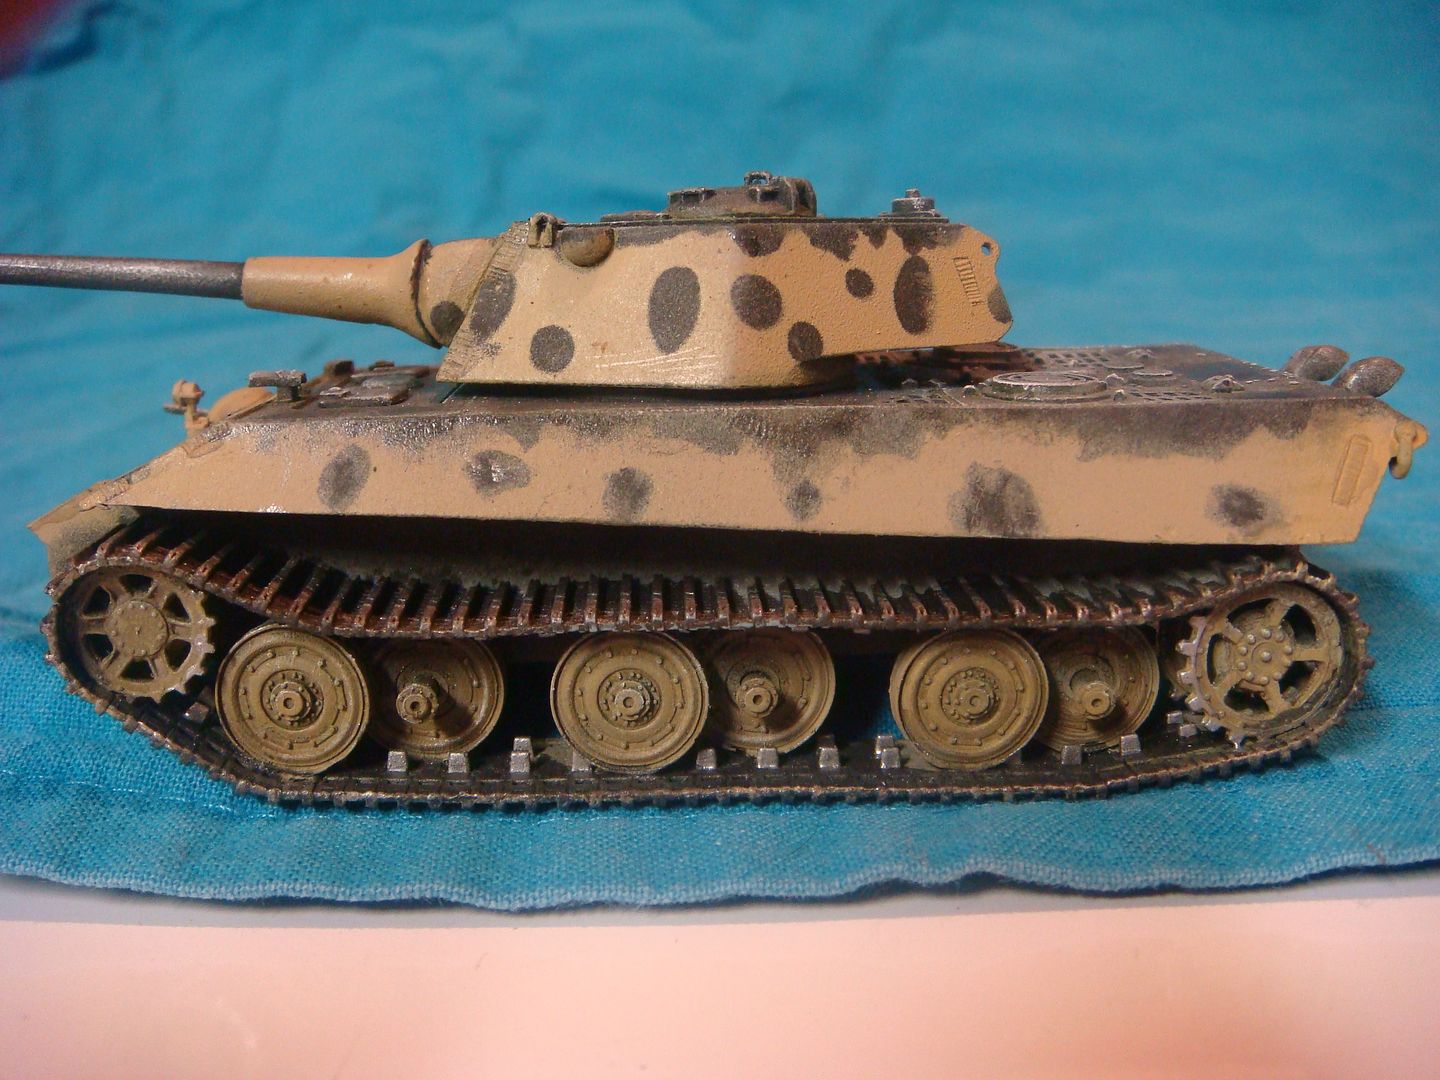
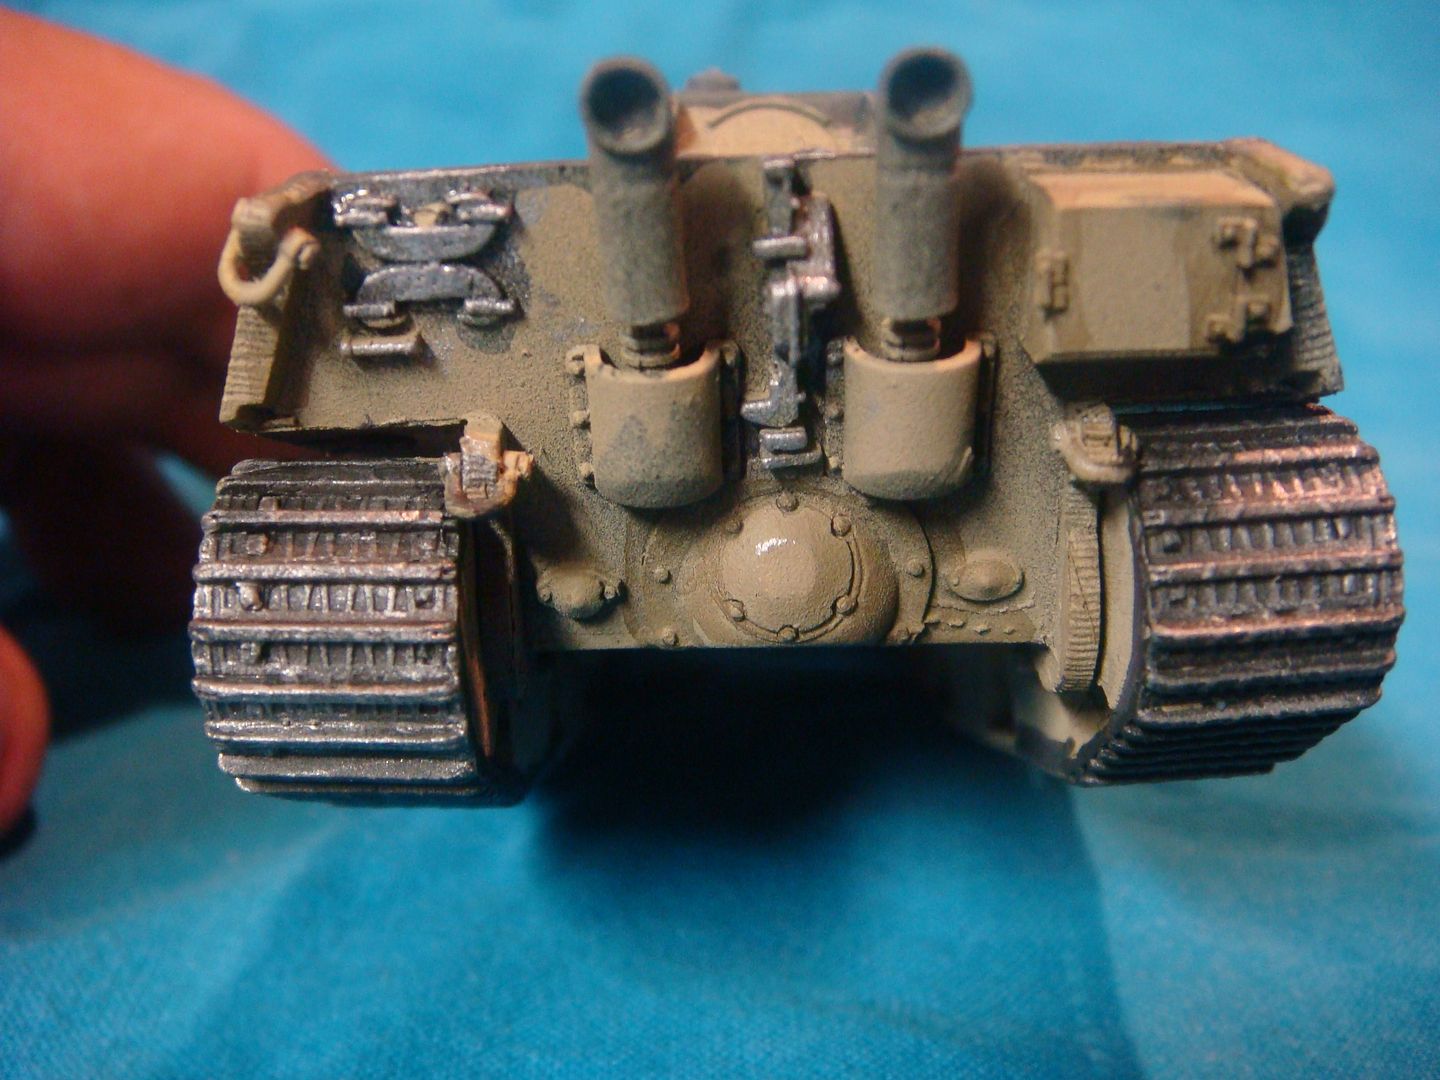
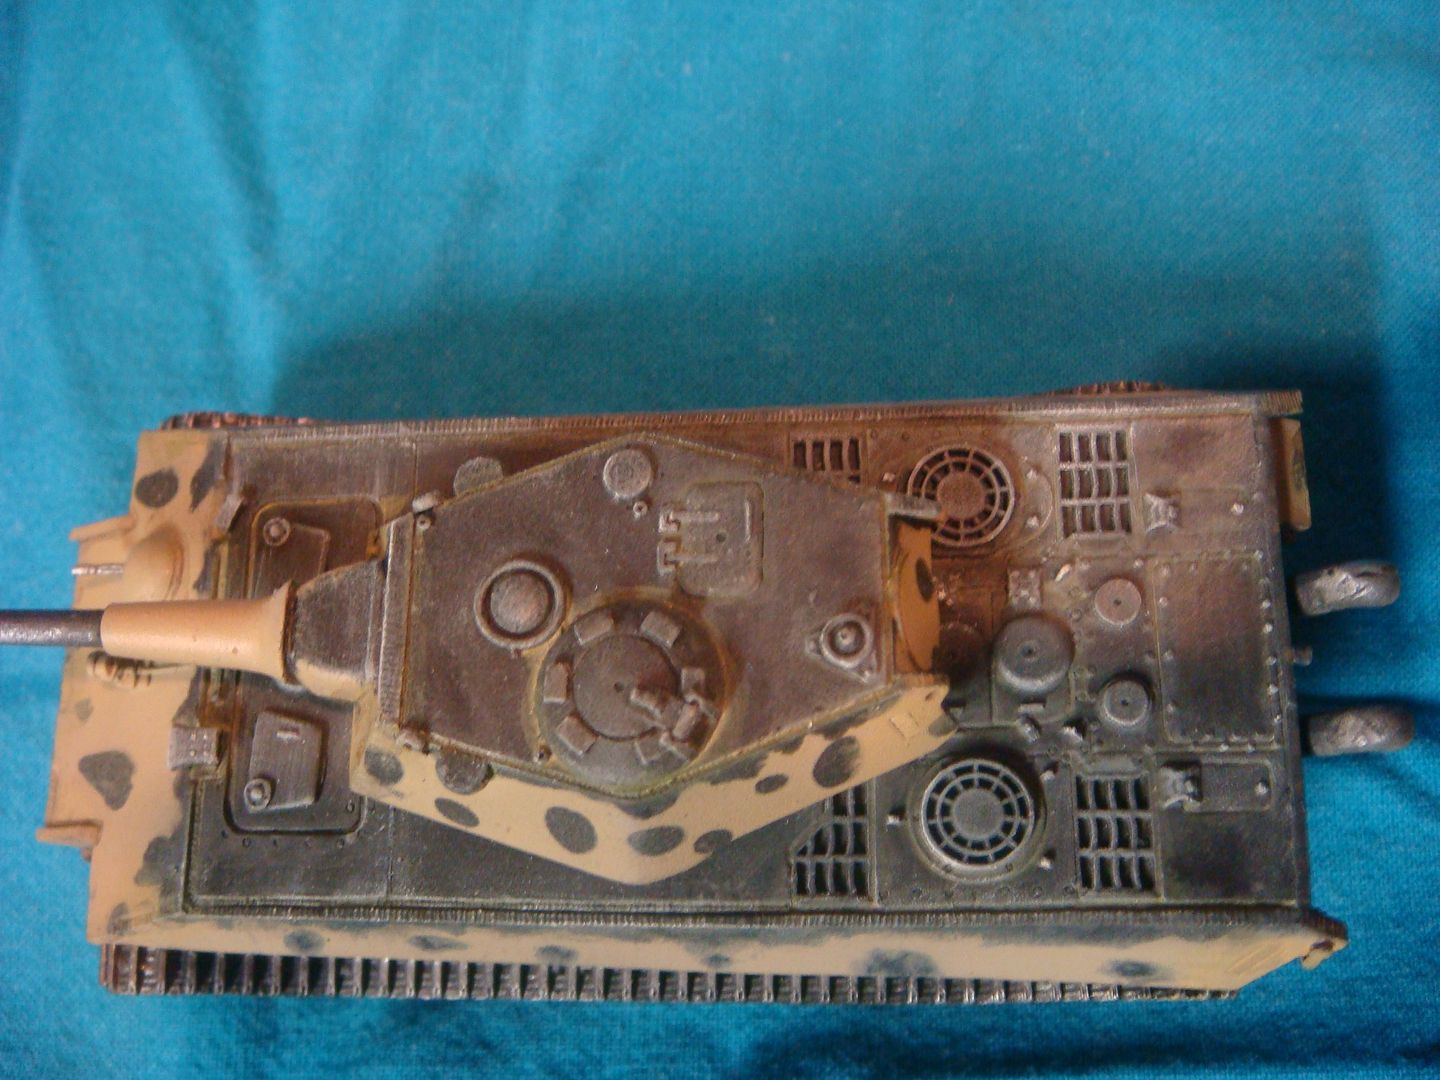
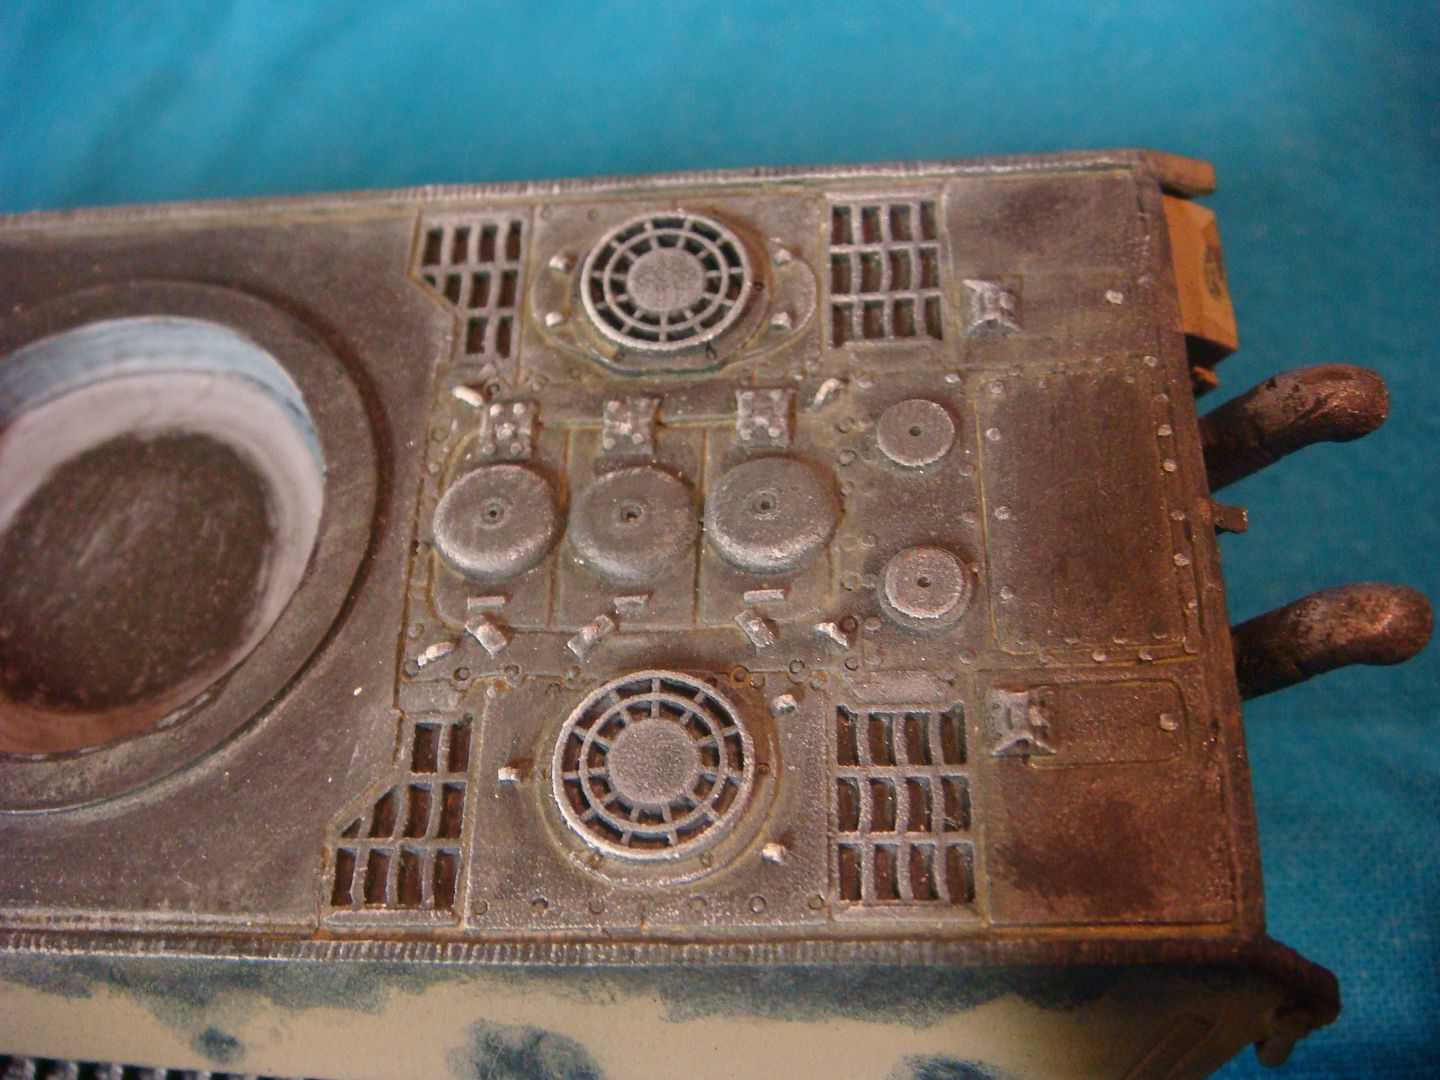
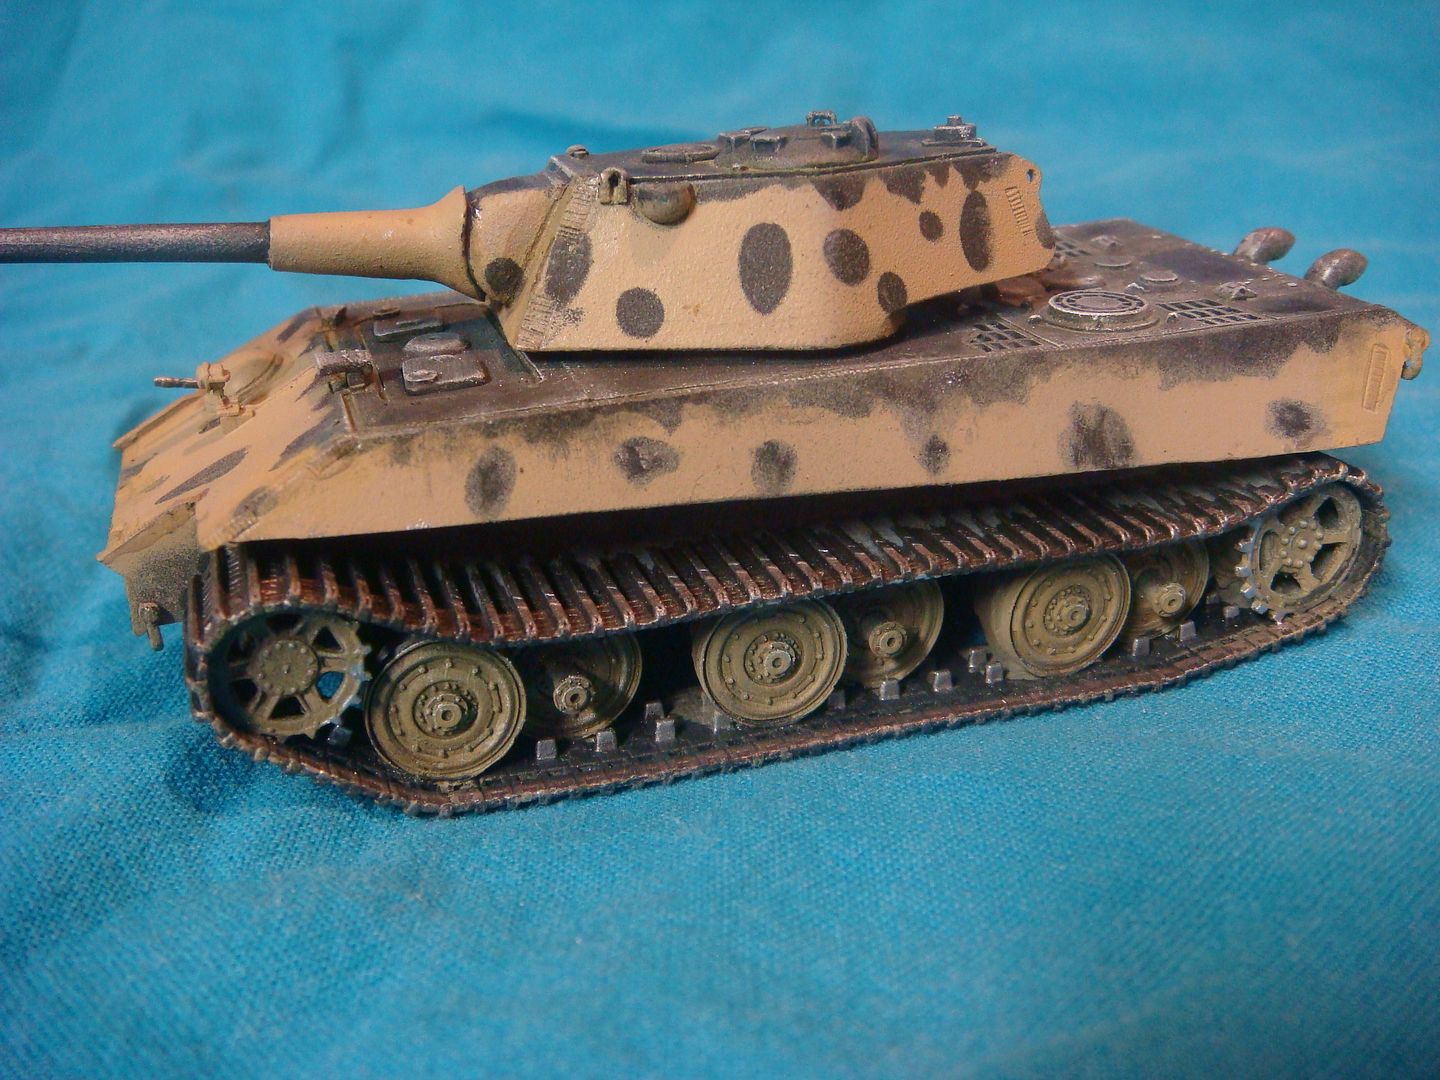
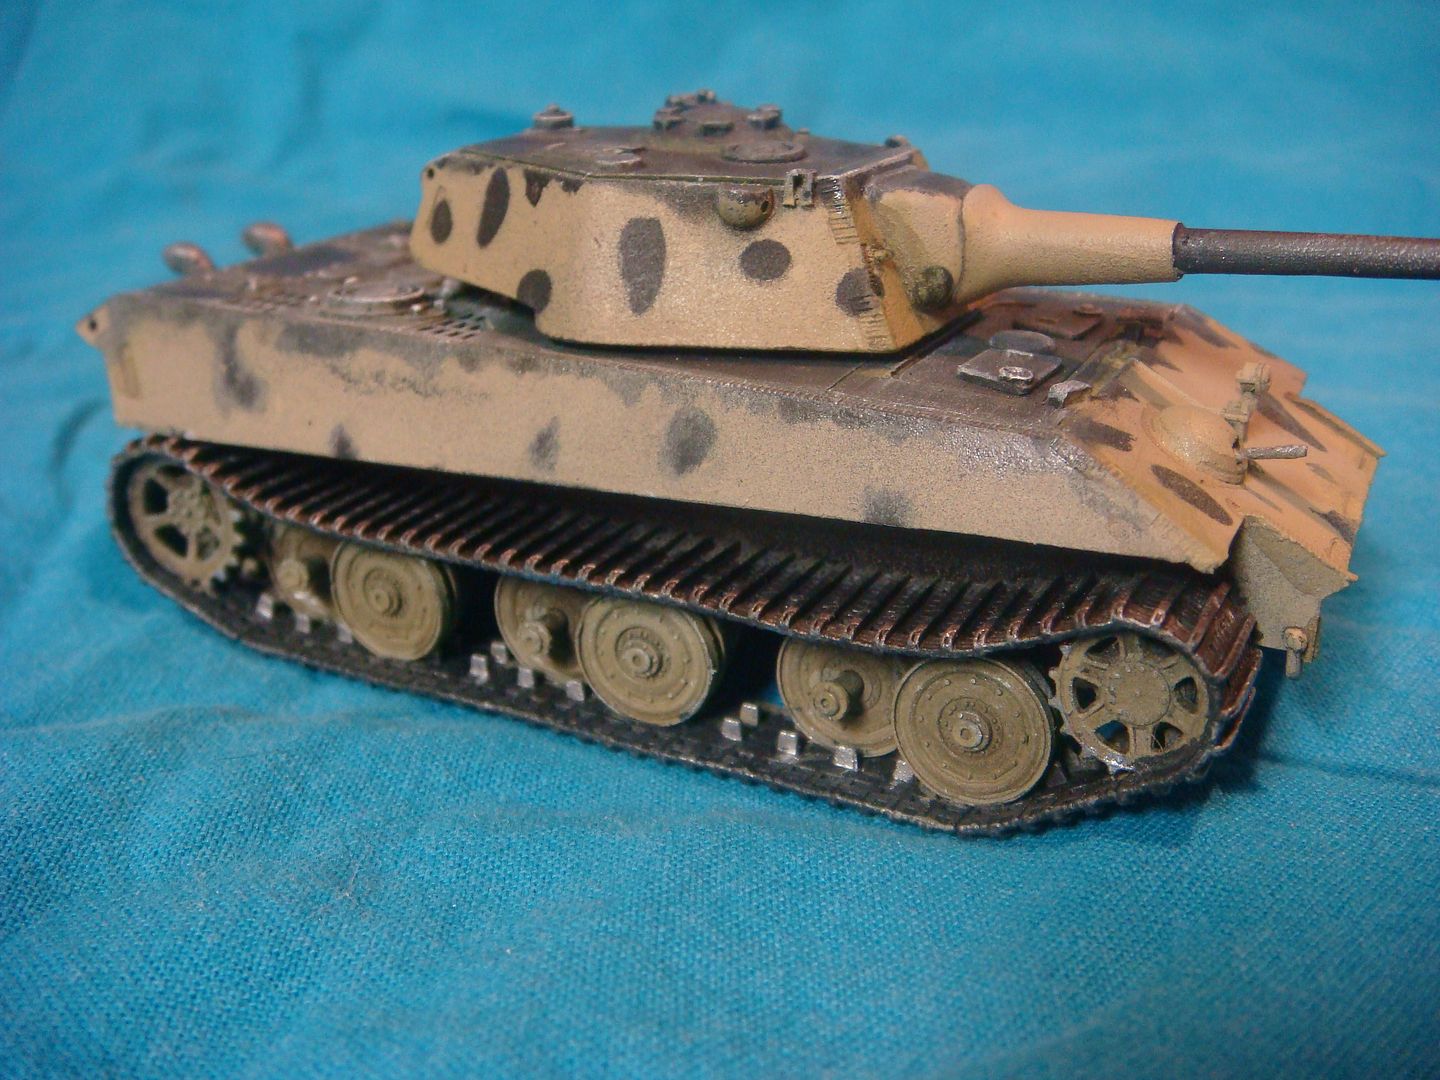
E-50 ausf B I am taking a short break on the E-79 to avoid "burn out". So in the meantime I am working on my E-50 ausf B. I needed a Upper Hull to start with..... So Molded an Upper hull from MC and when I had a cast of that , I detailed it out by hanging the engine deck for mine, removing the fenders, and opening the hatches. 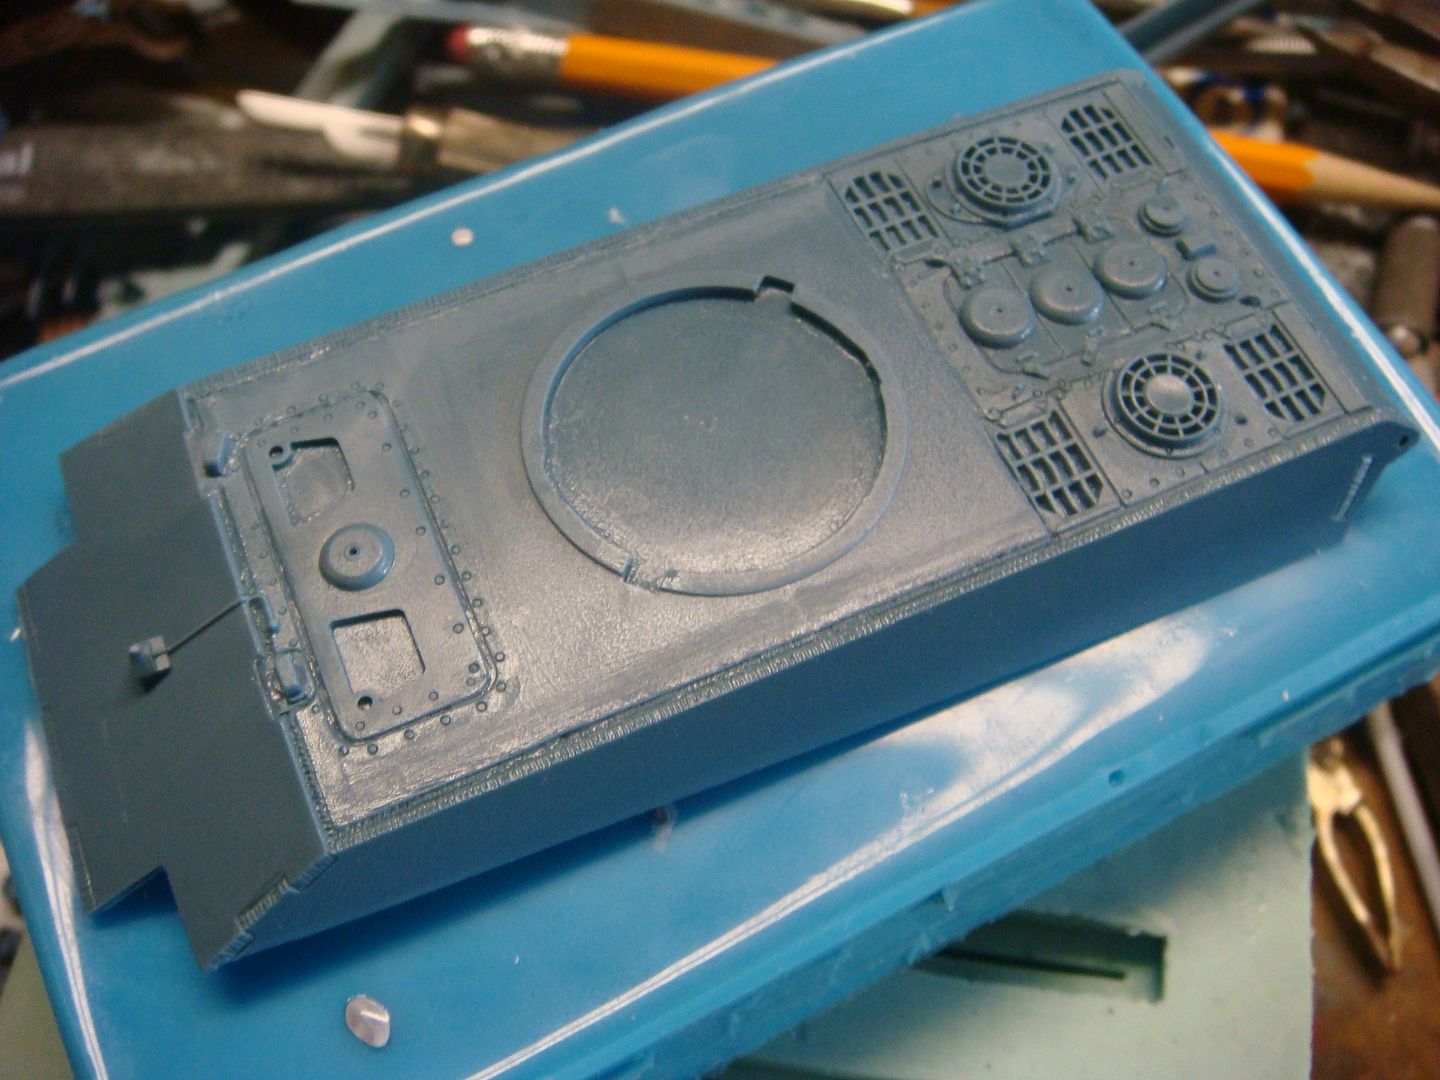 I then wanted to replicate this engine deck 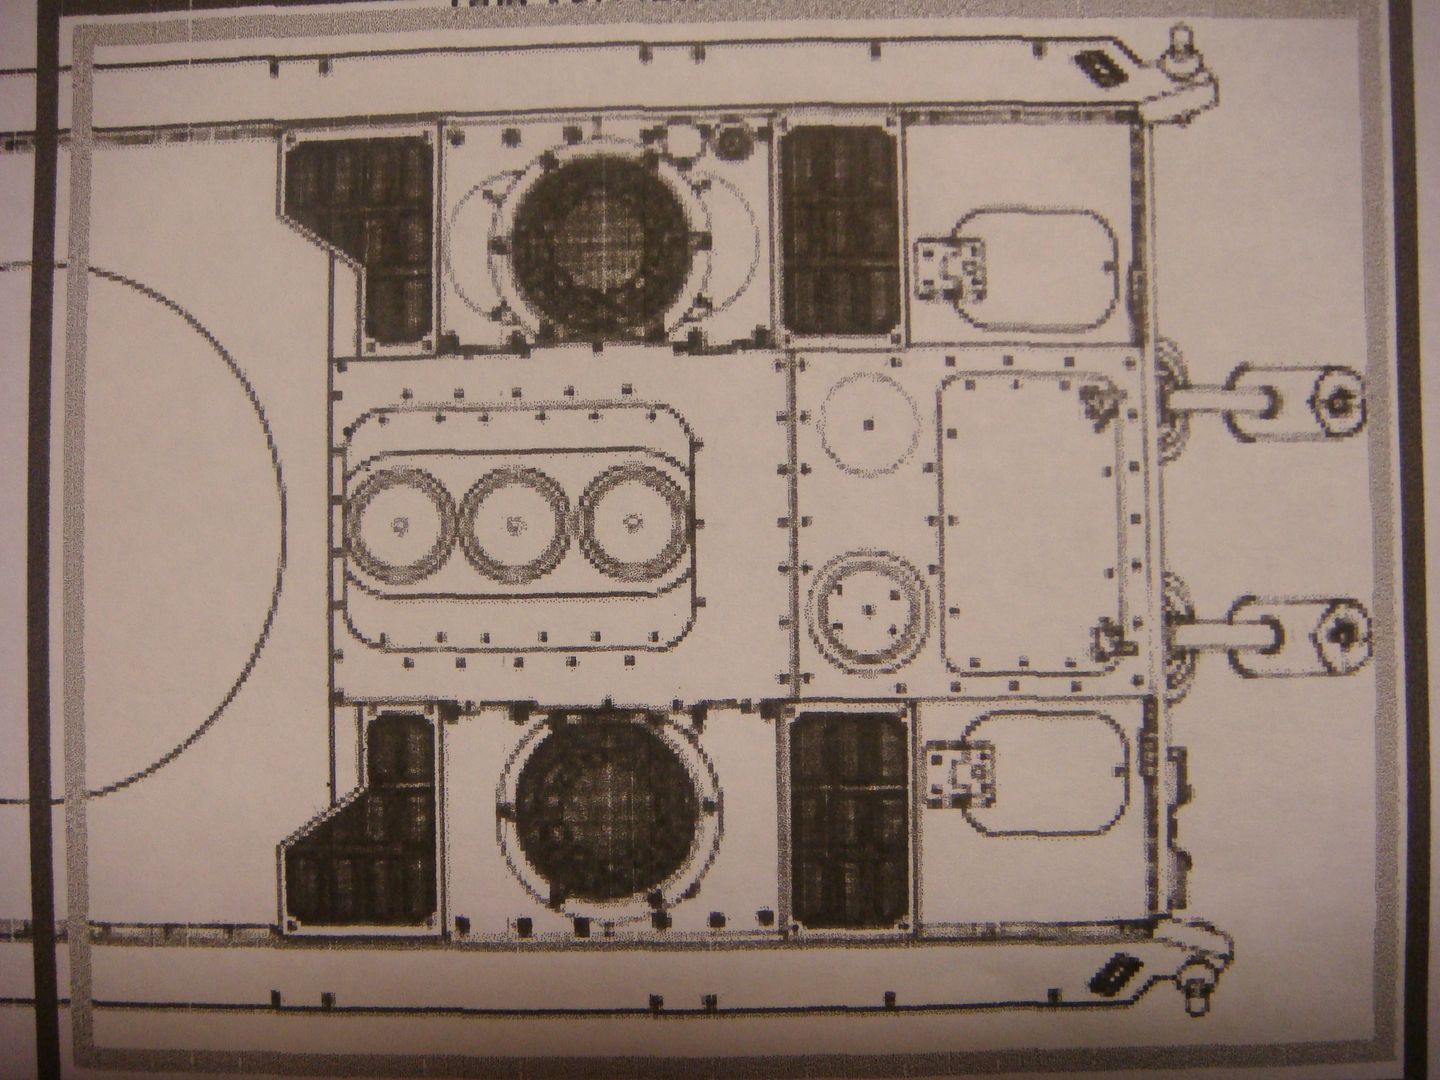 so I started by cutting out the engine deck, then the roof where the turret ring is. I moved the turret ring forward, and started modifying the engine deck. I made the cuts to the front vents, added strip styrene, and added sheet styrene to the back. once this was all detailed, I glued it all together. 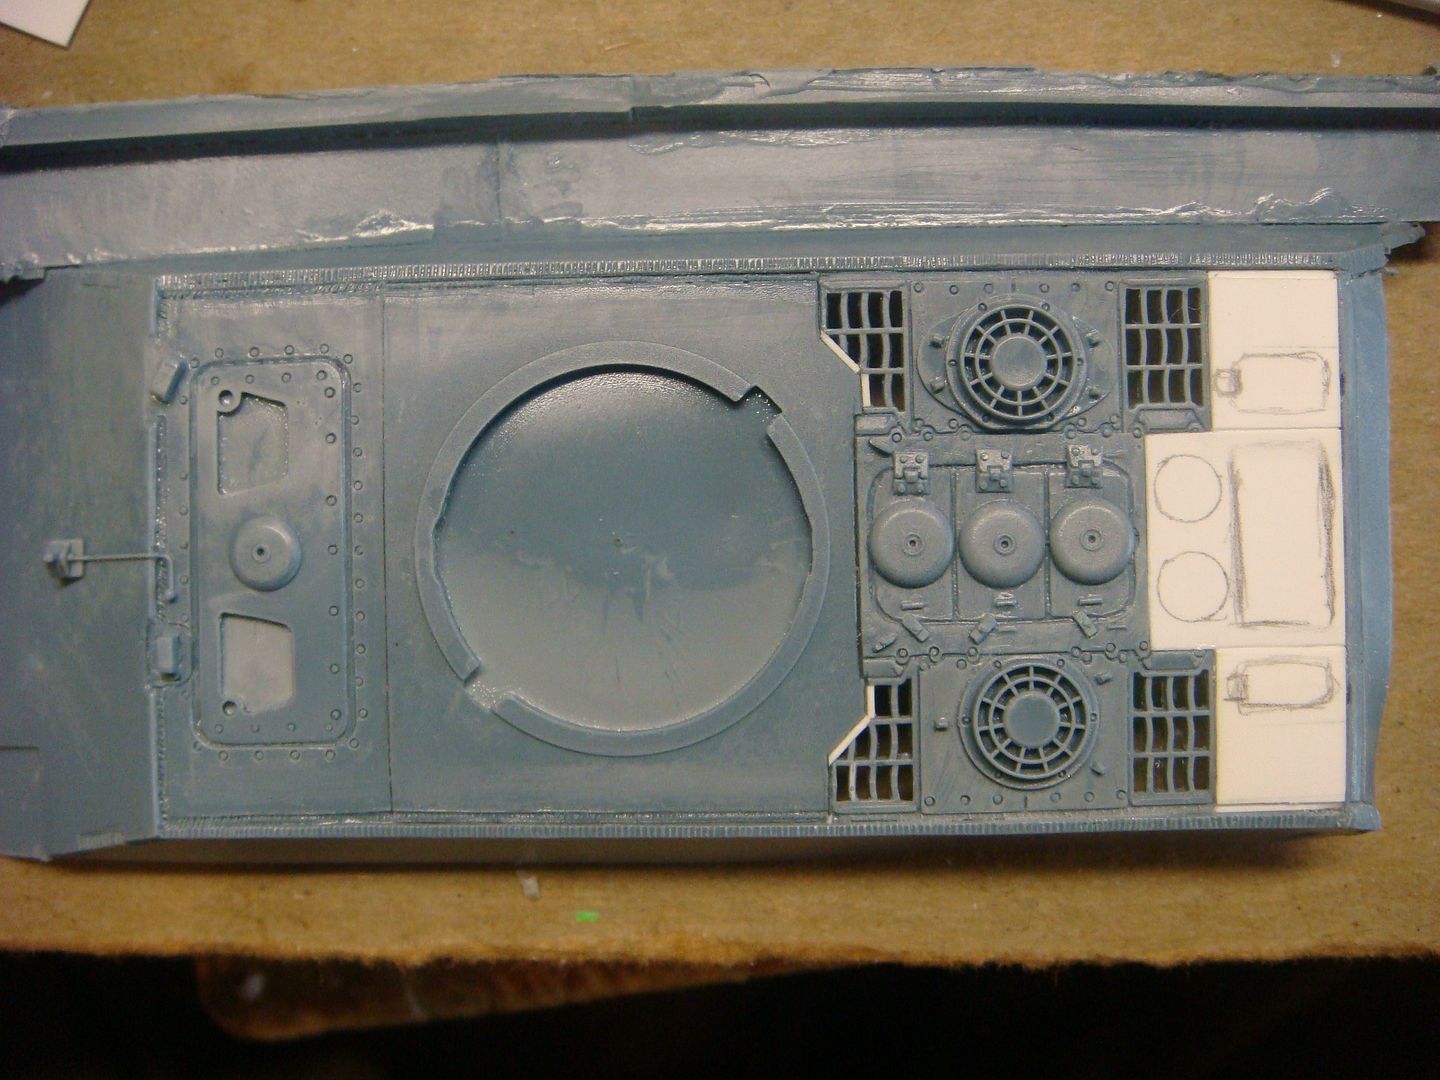 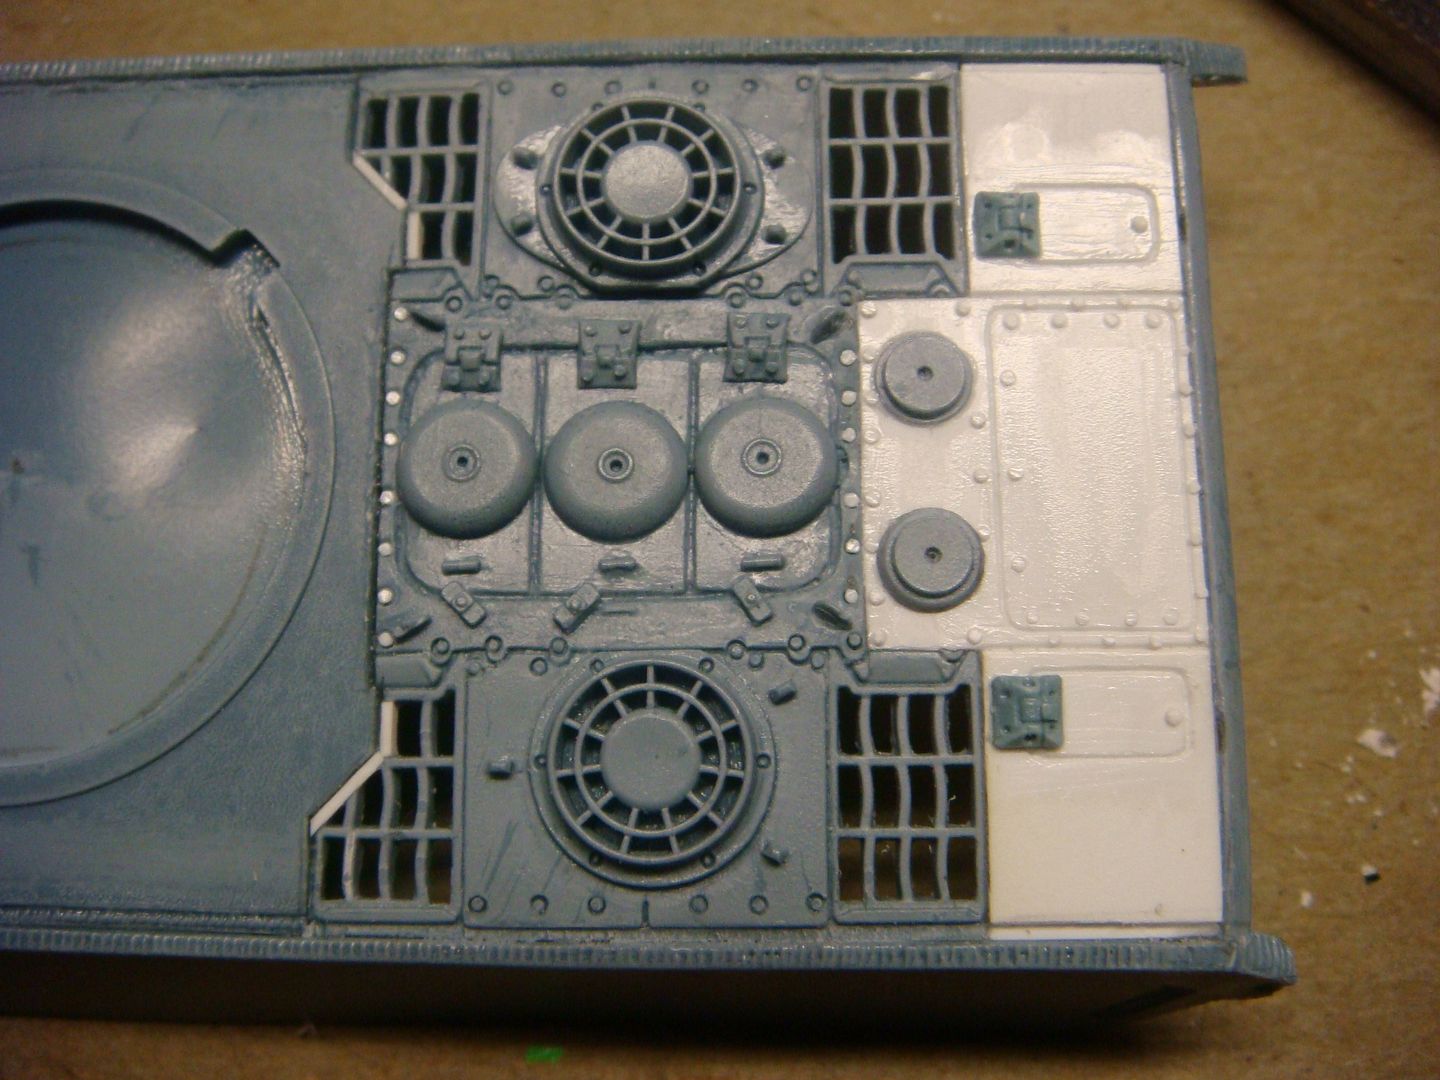 I then turned my attention to making the turret I took a cast of my Teufels Amboss turret sand away the details and the sides to get the general shape. Once this started to take shape I laid it on the upper hull to see how it looked. 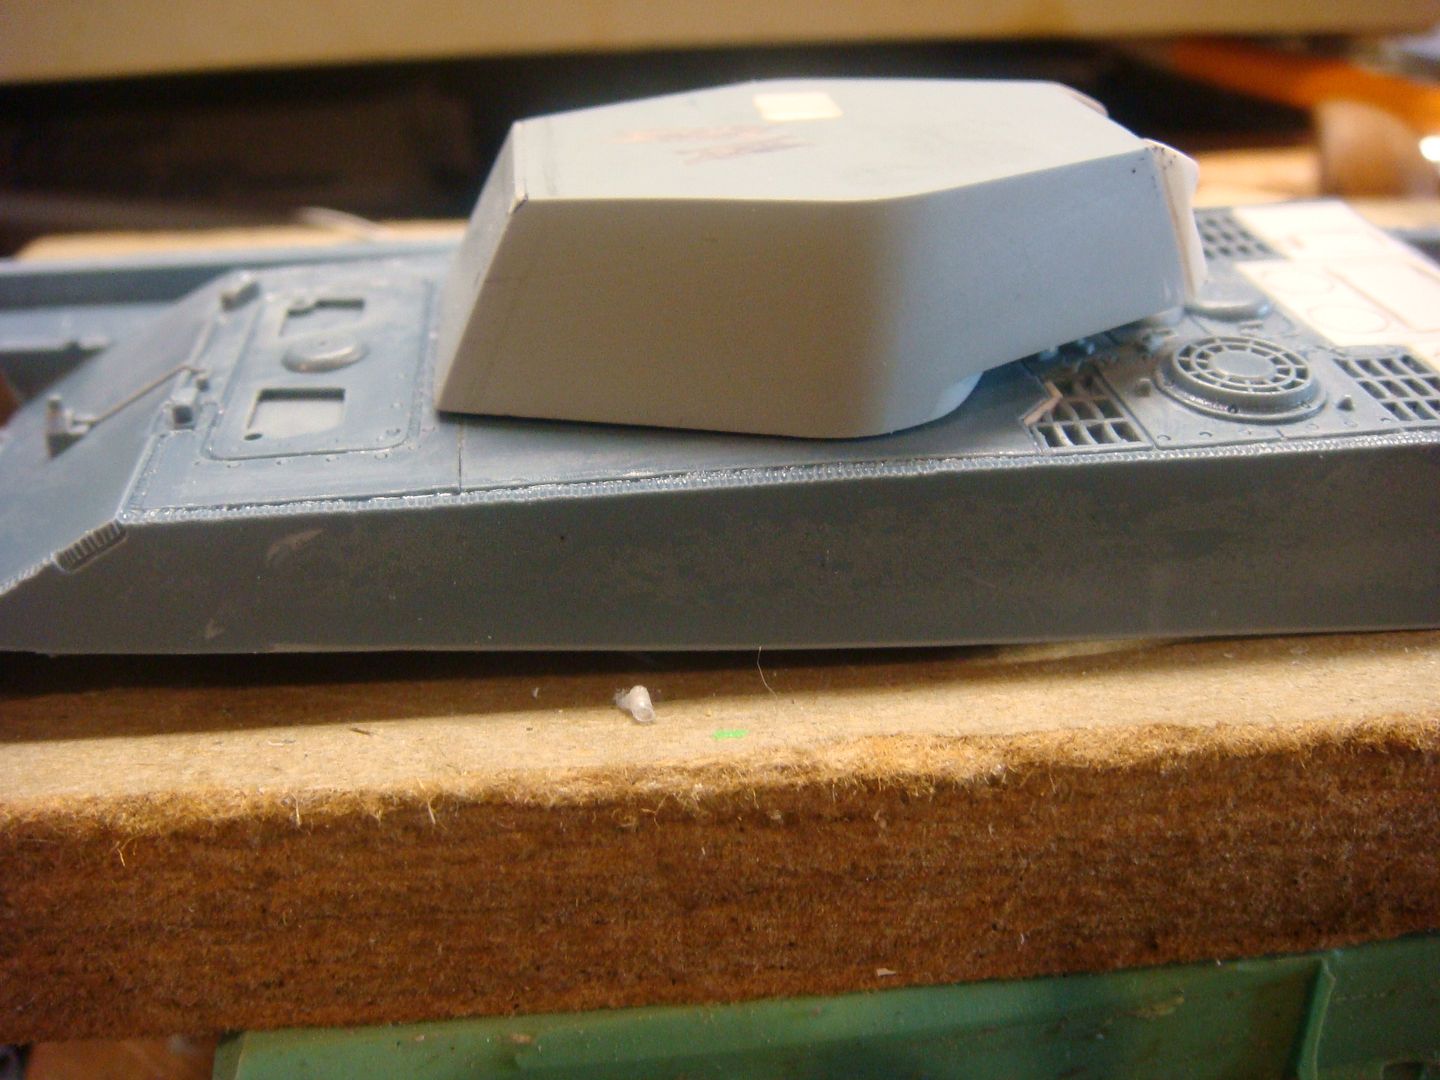 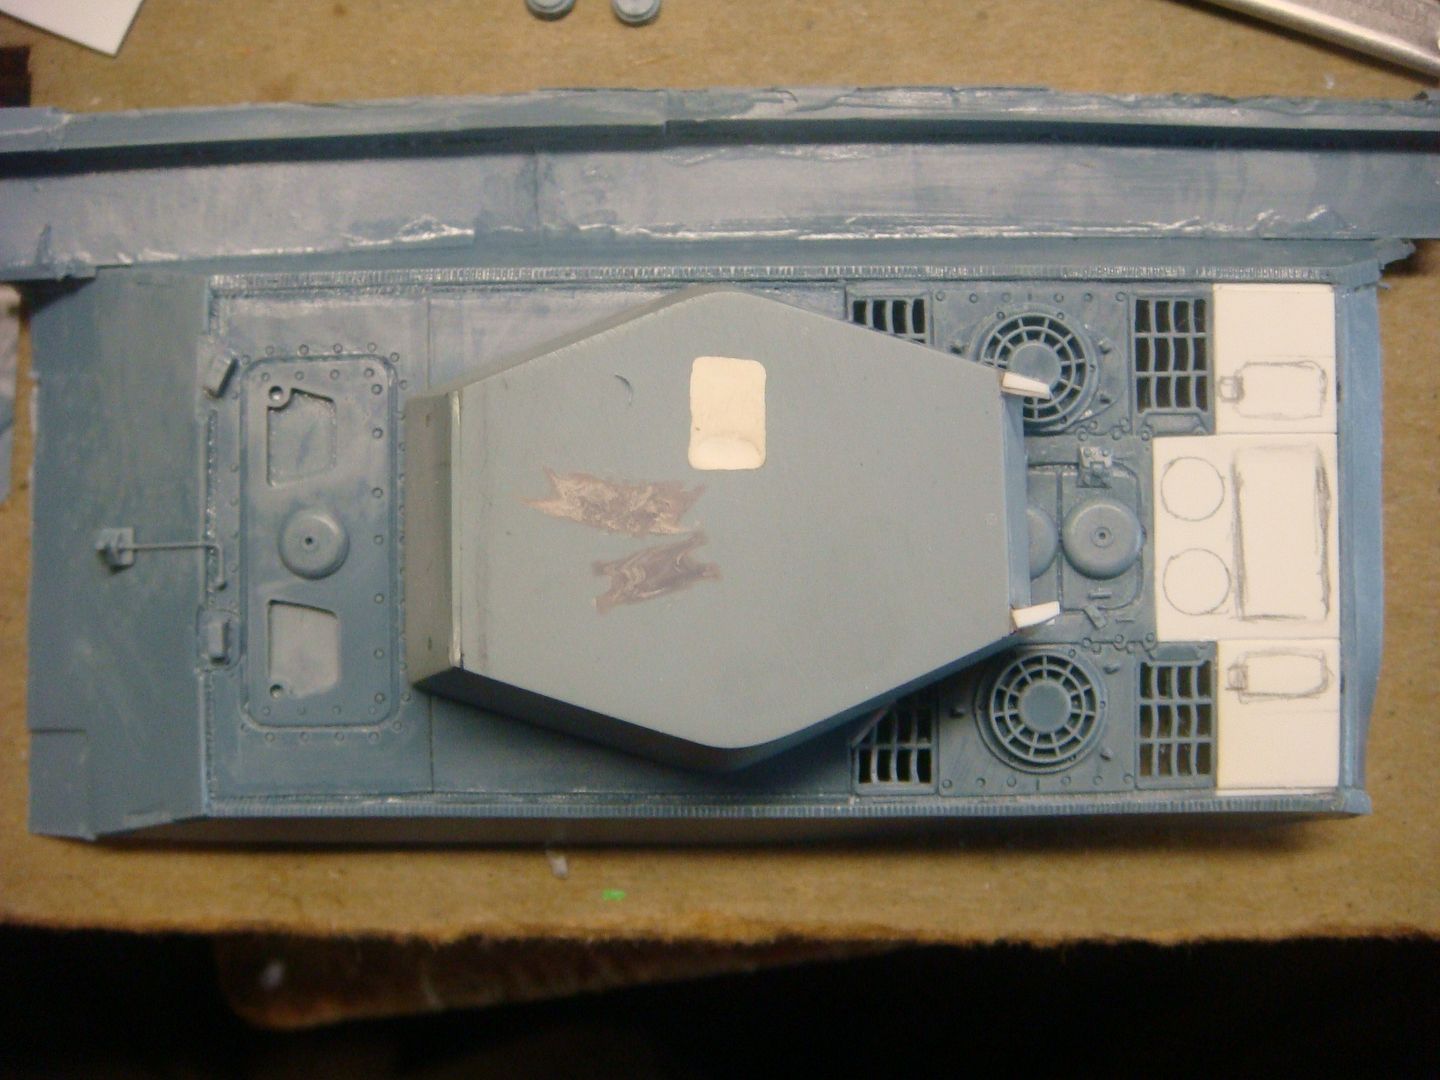 I then began adding the details 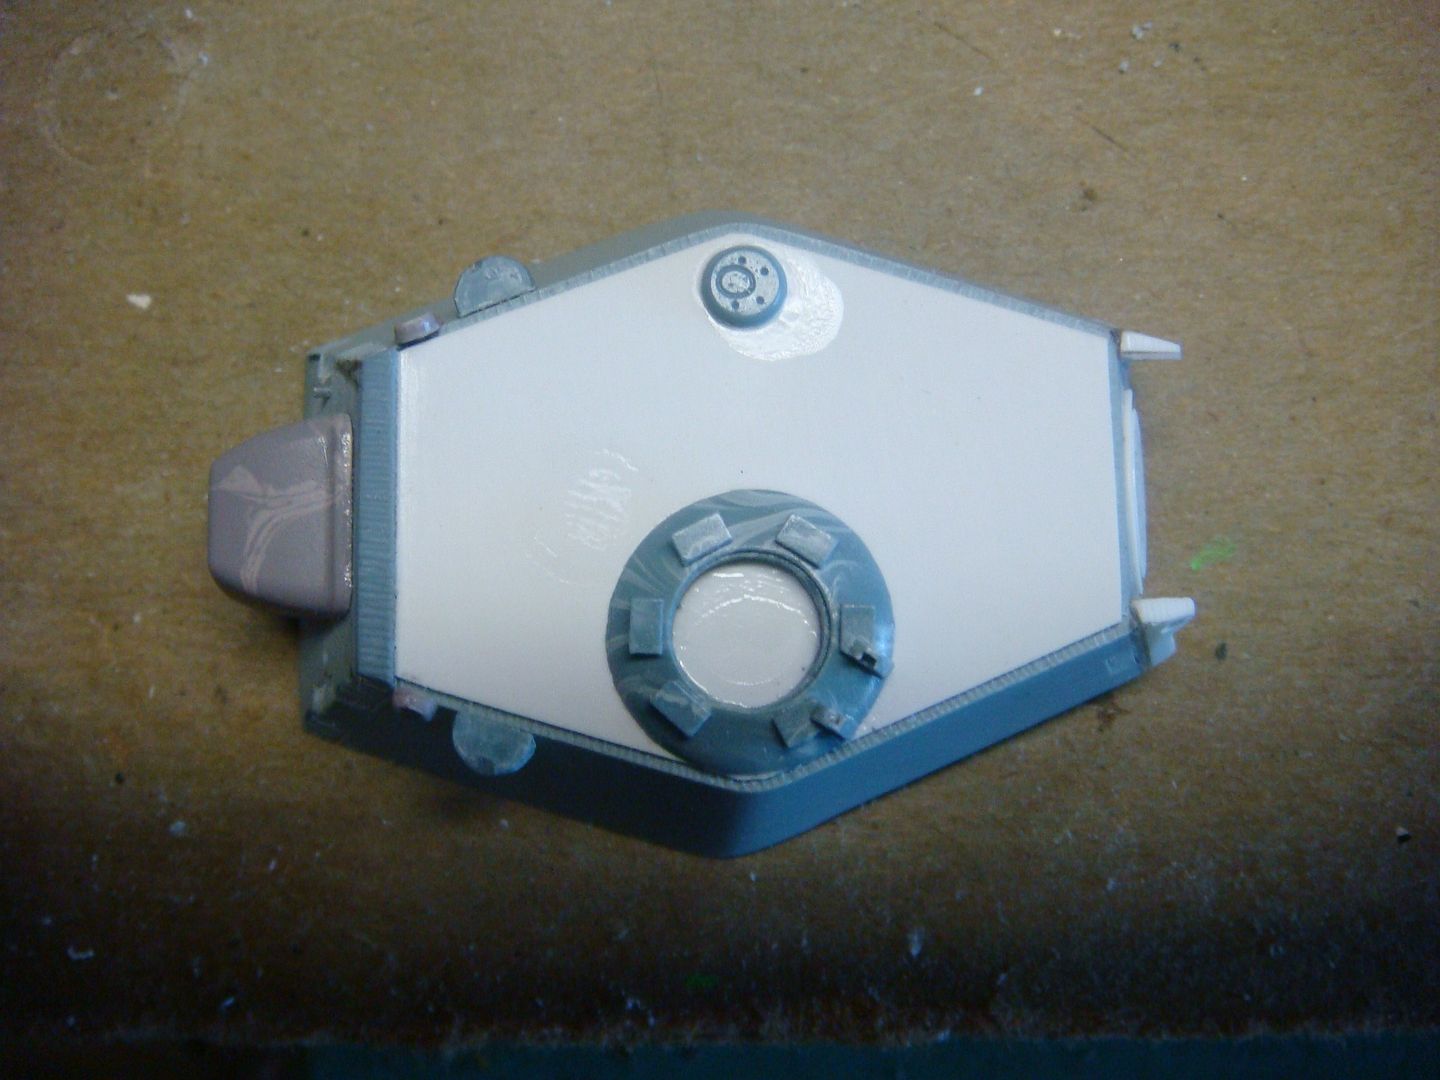 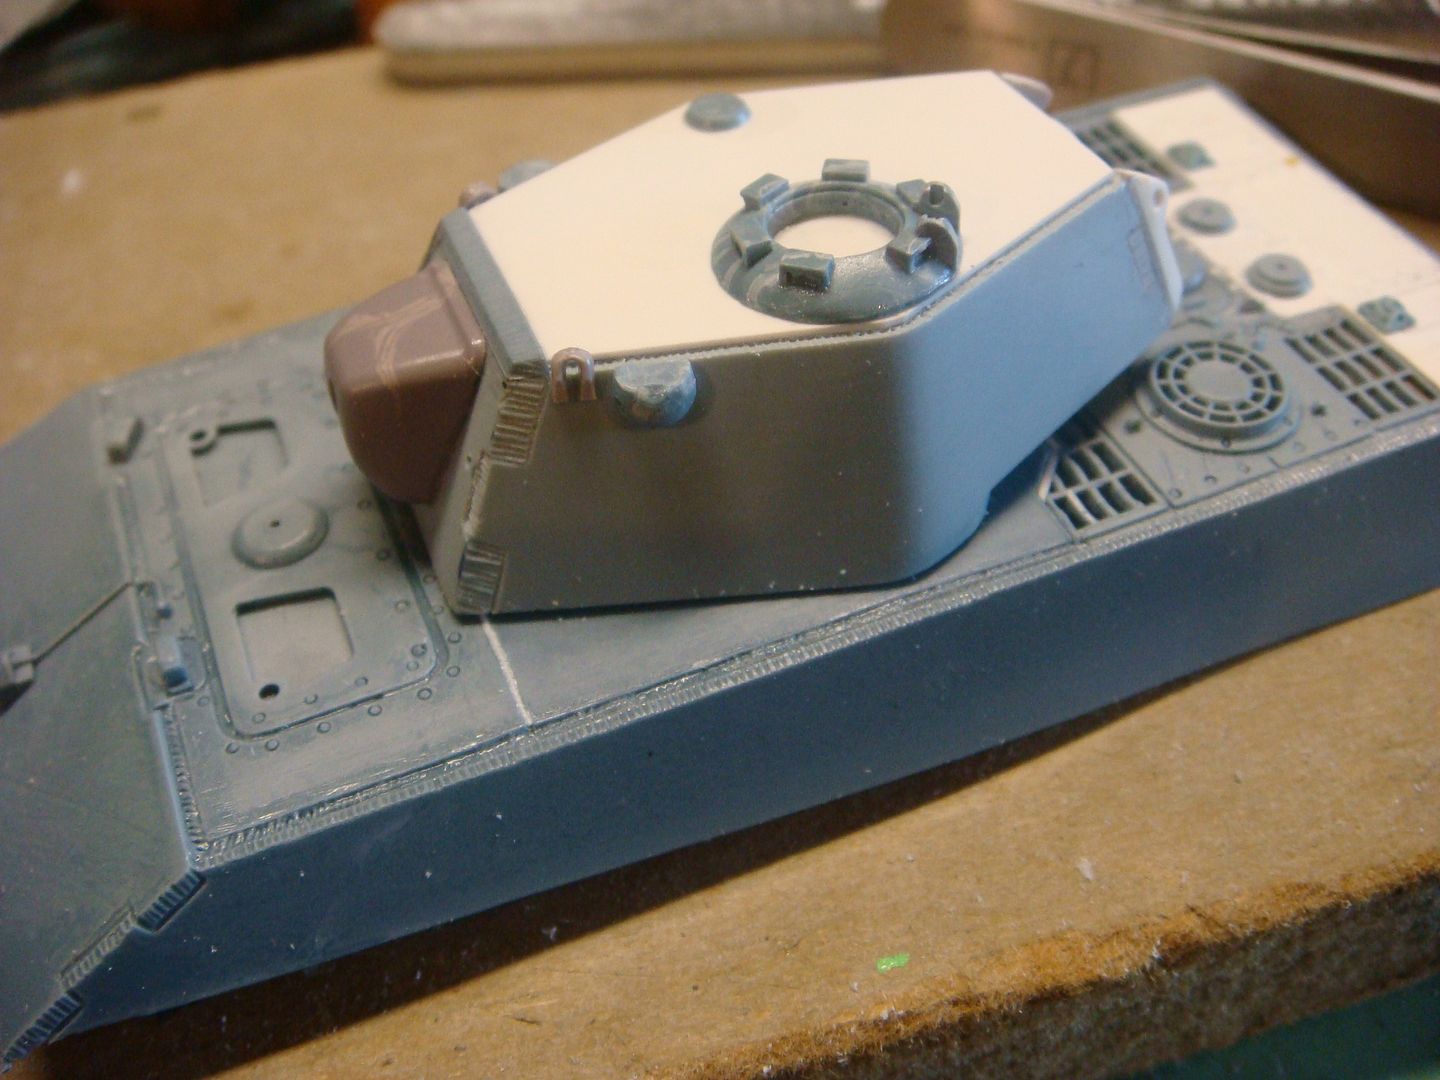 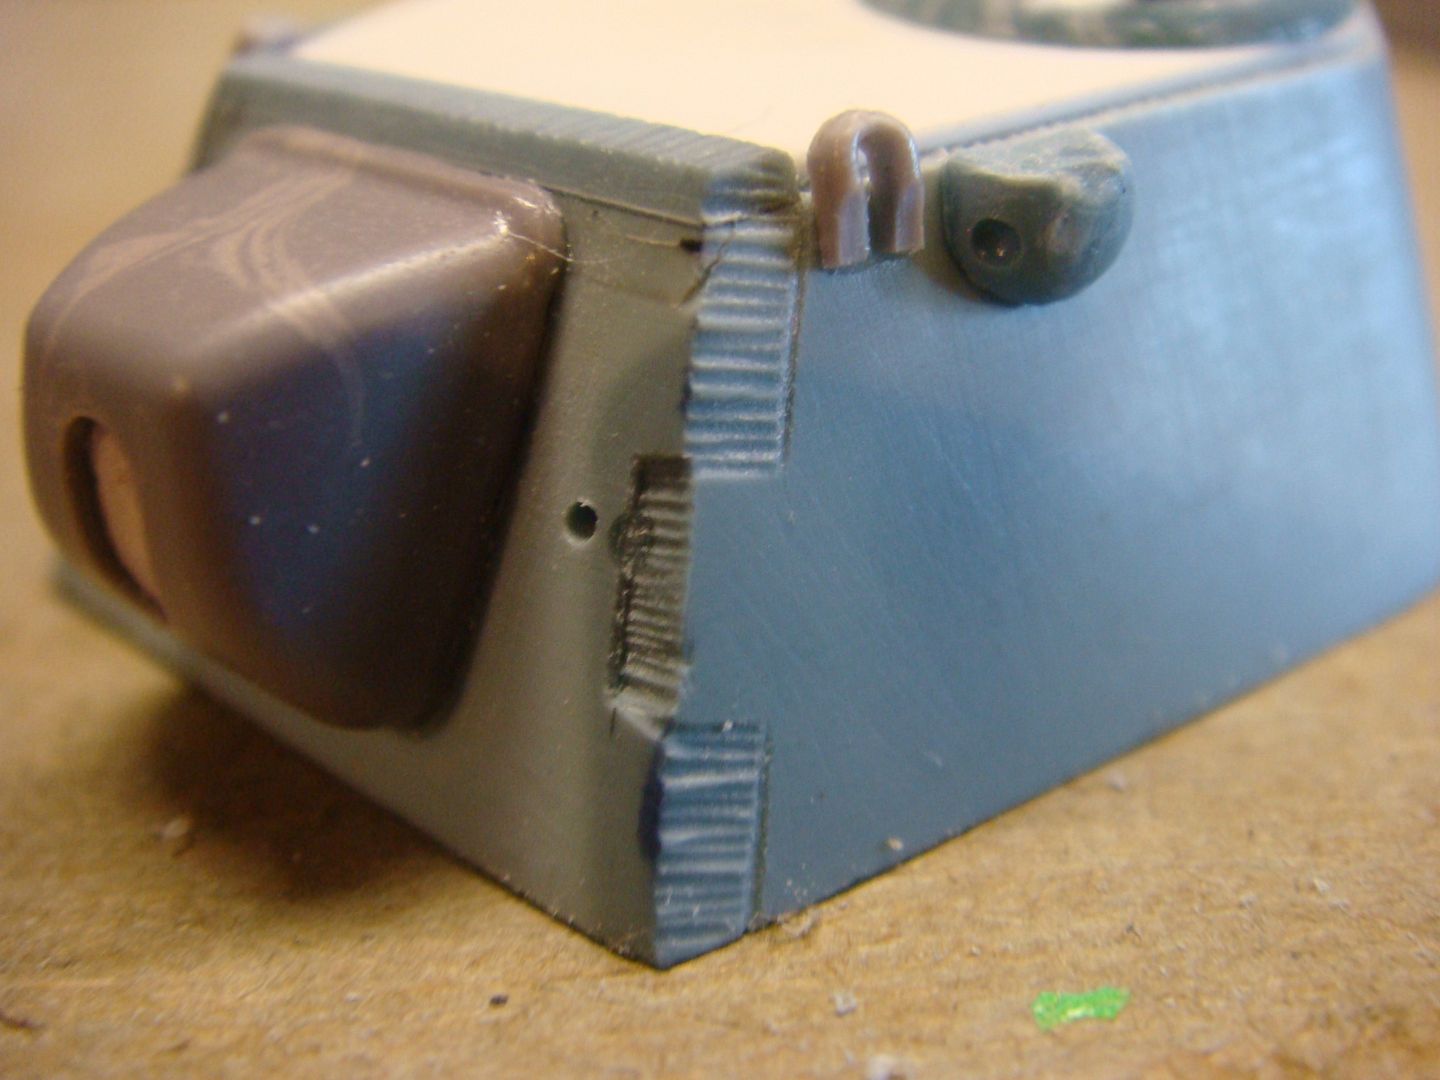 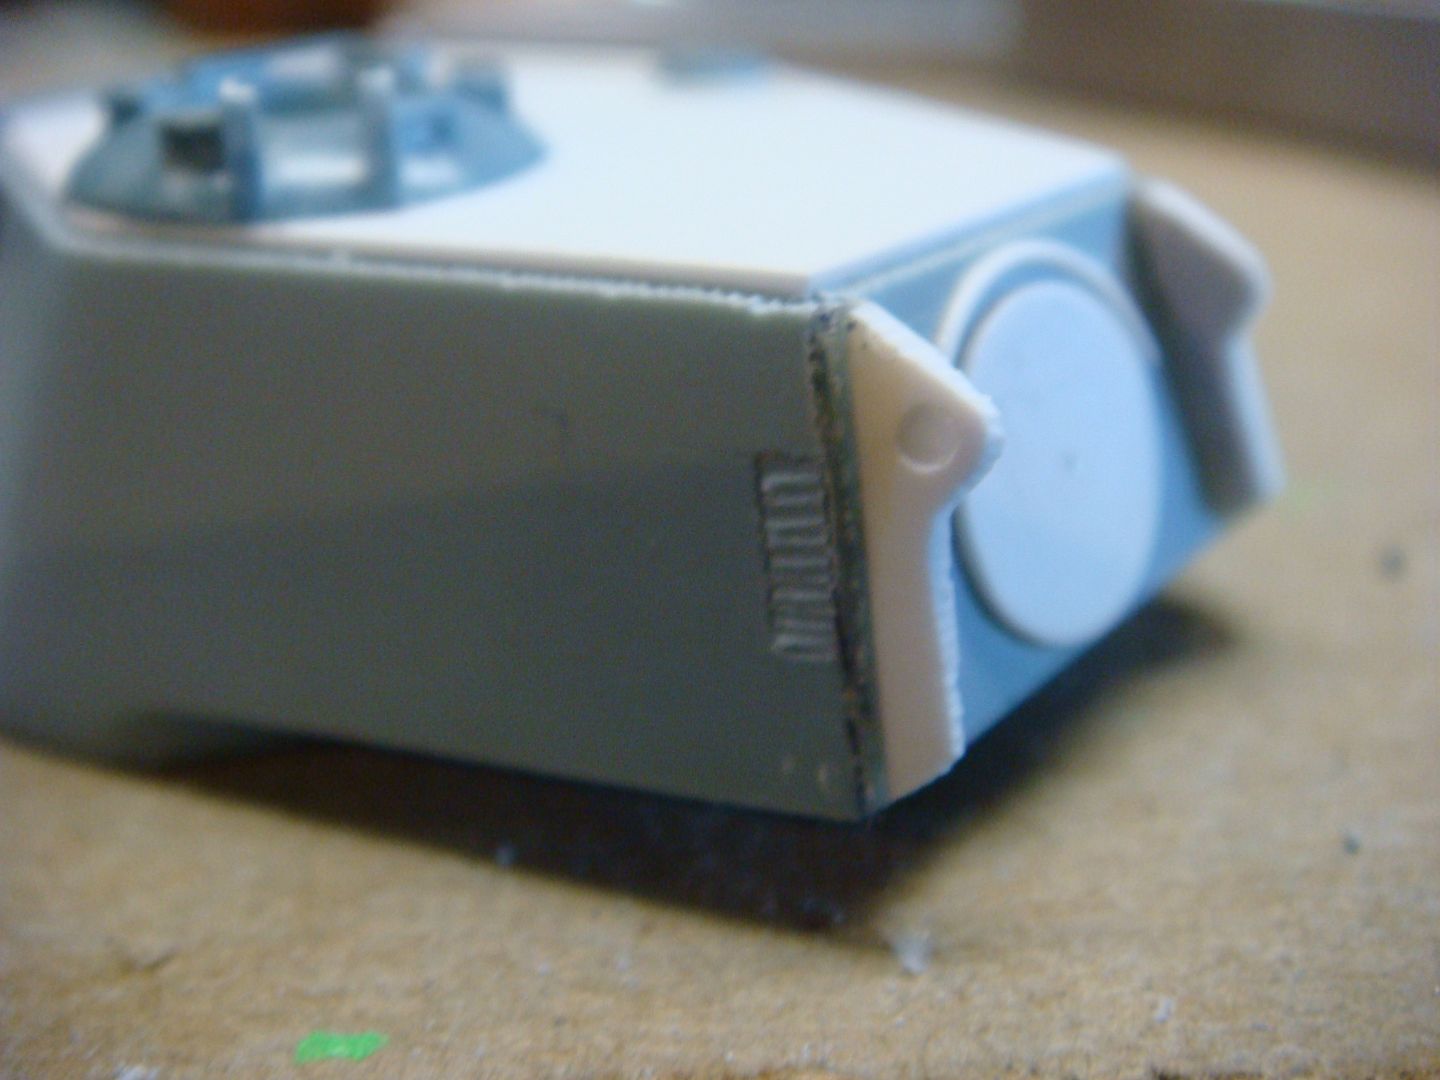 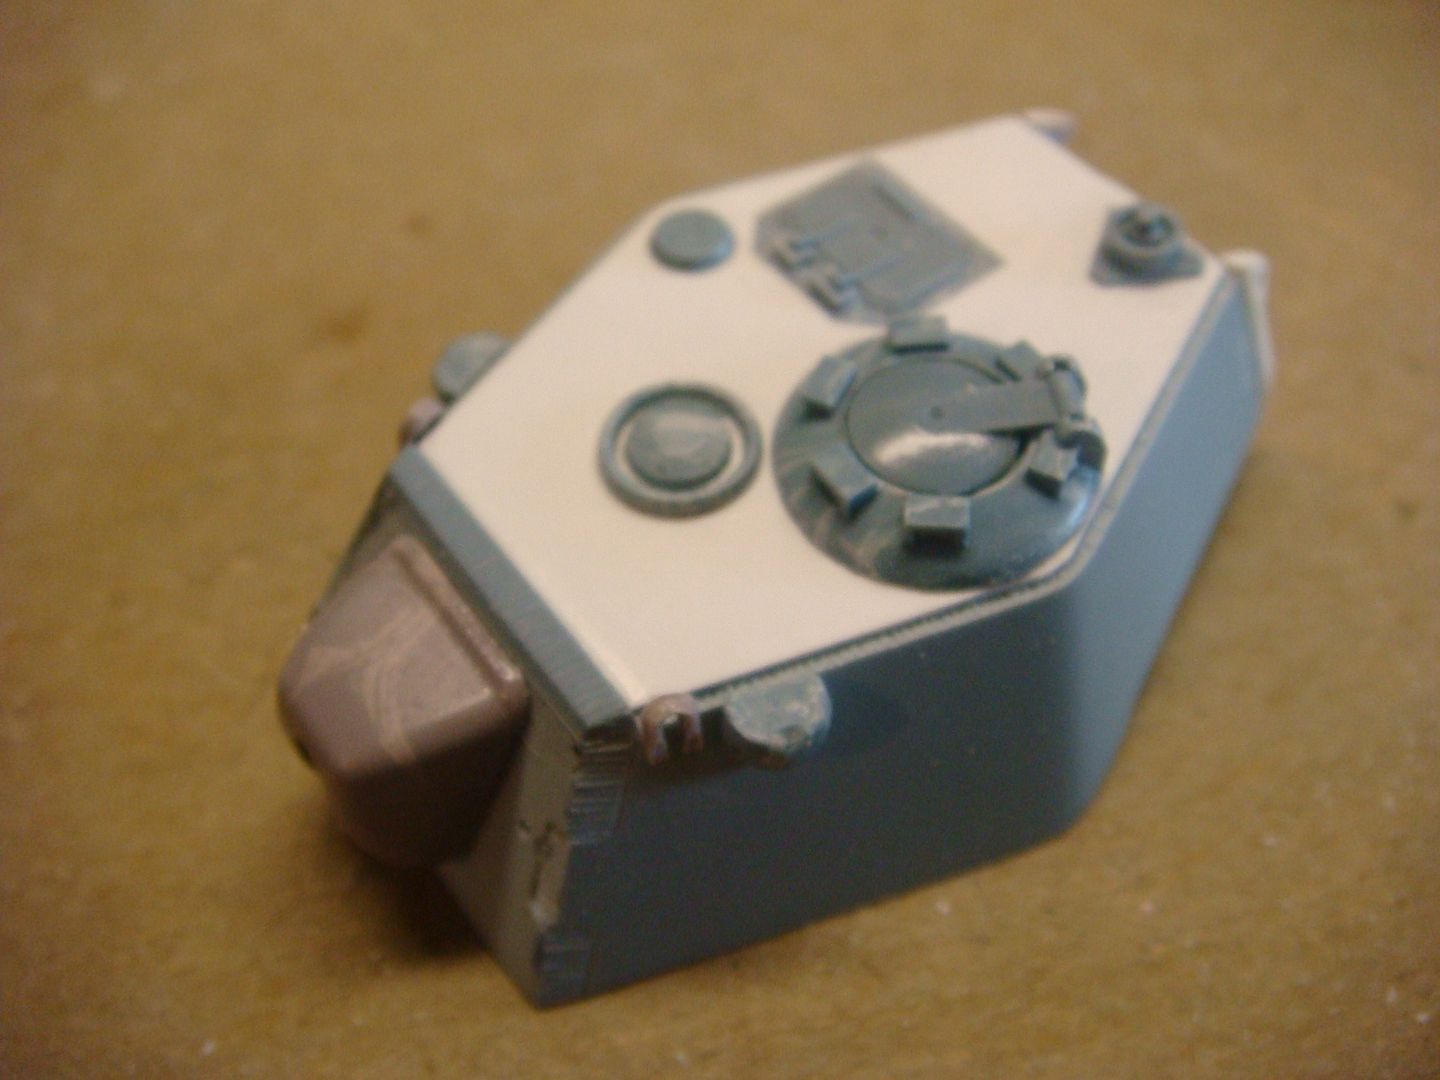 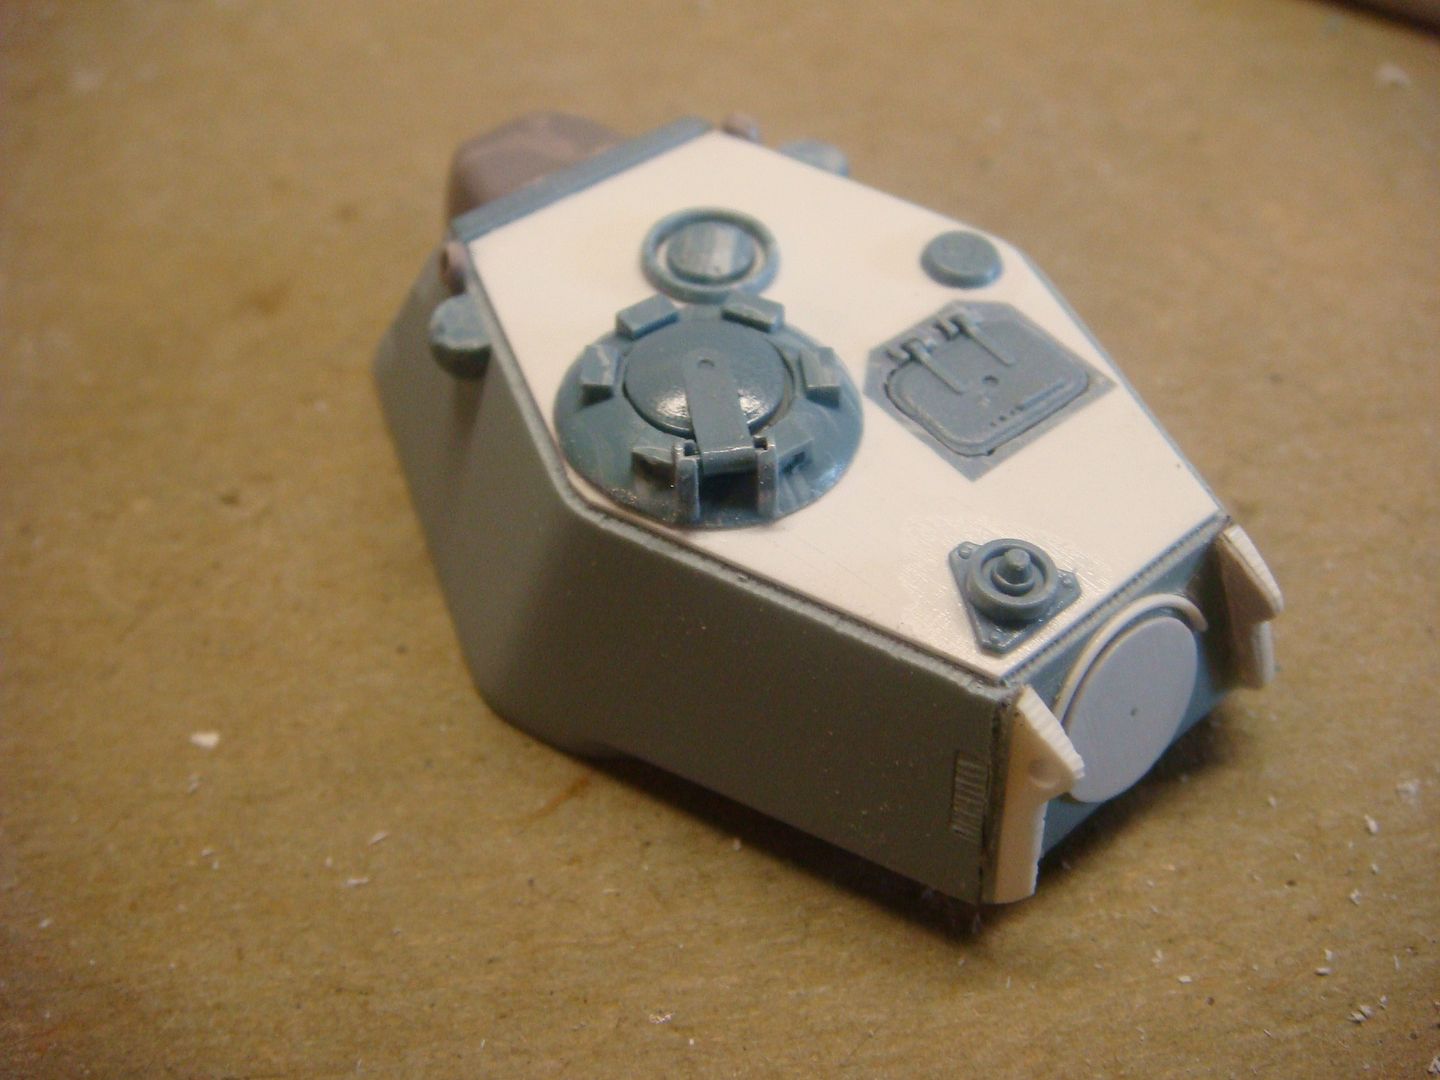 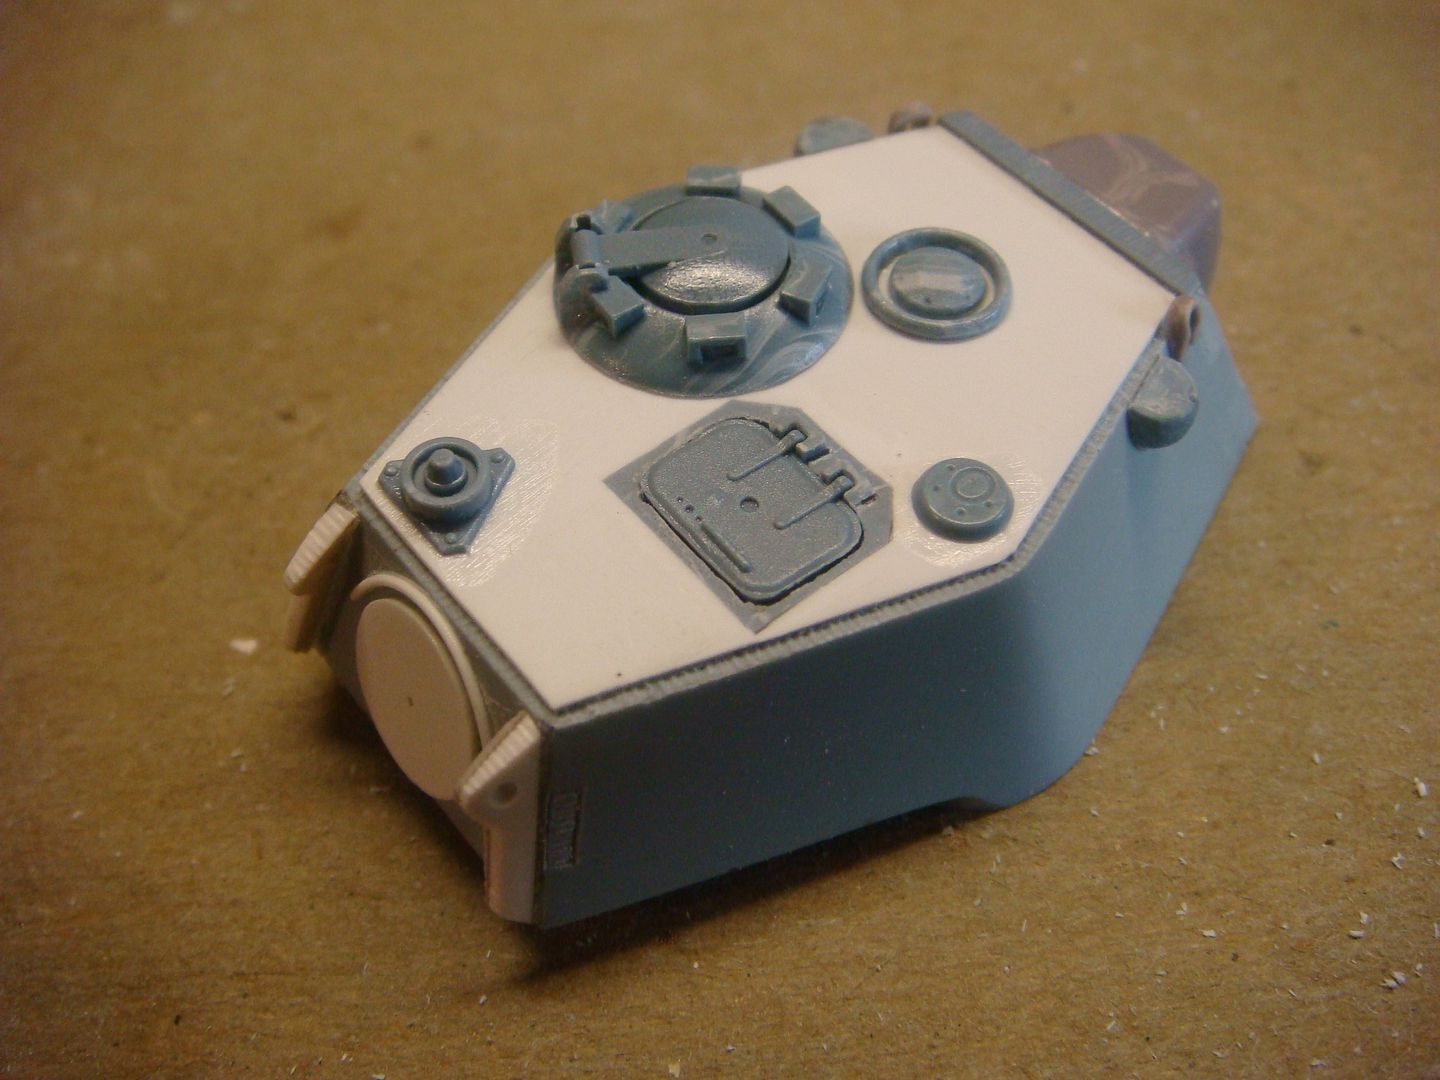 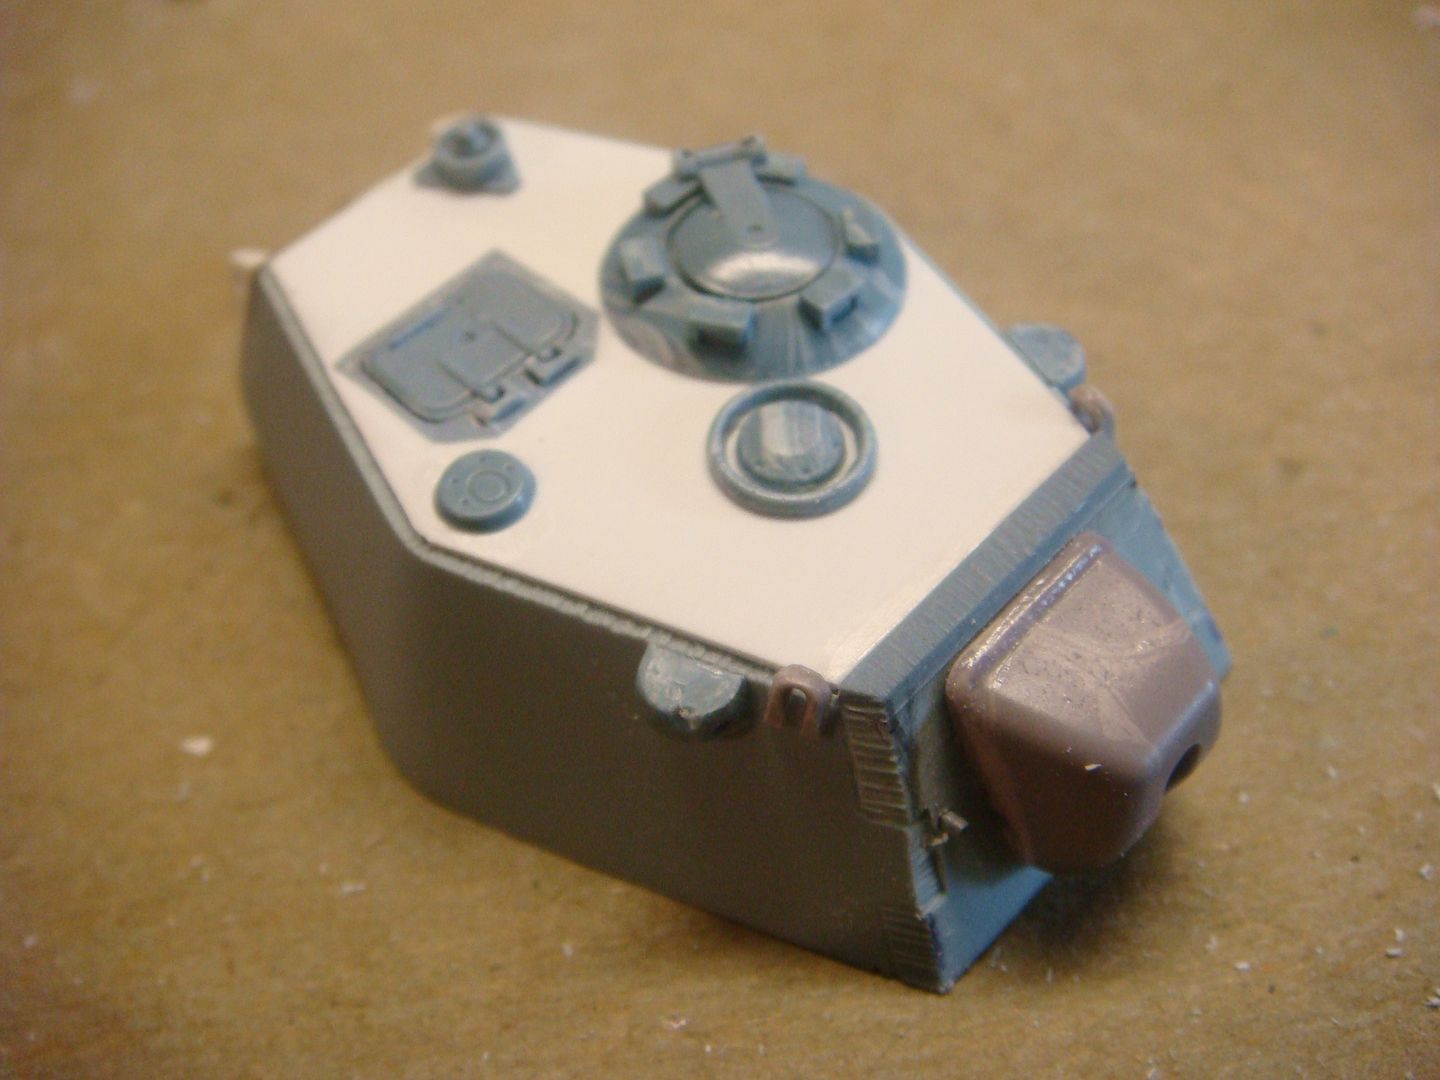 I then turned my attention to the choice of guns for it 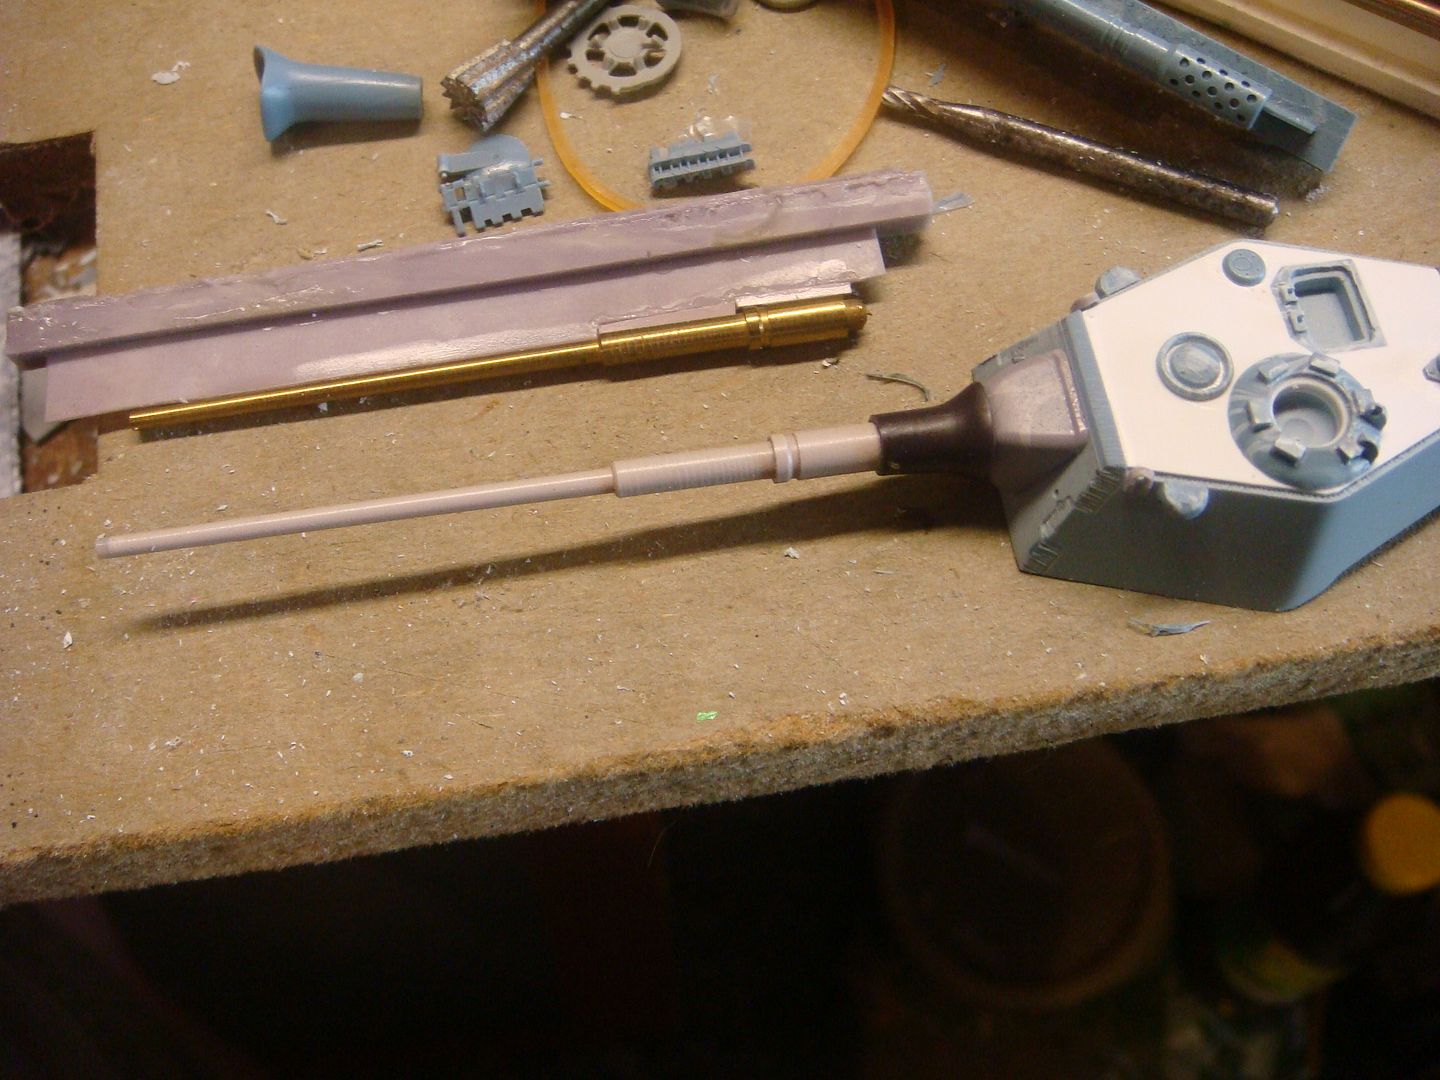 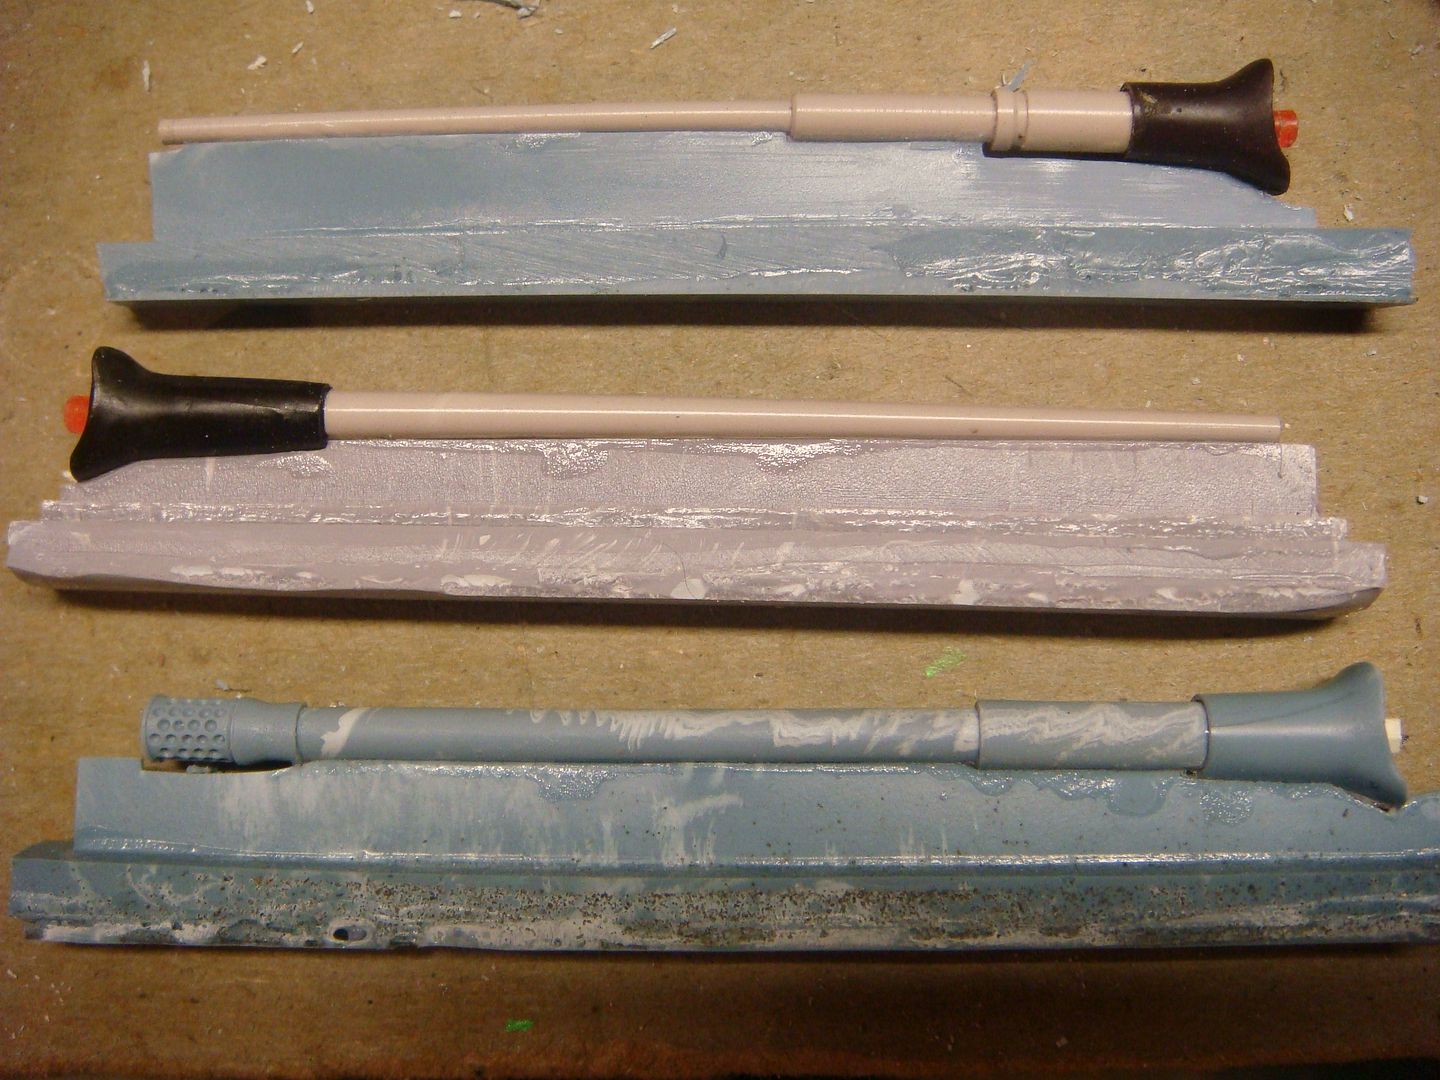 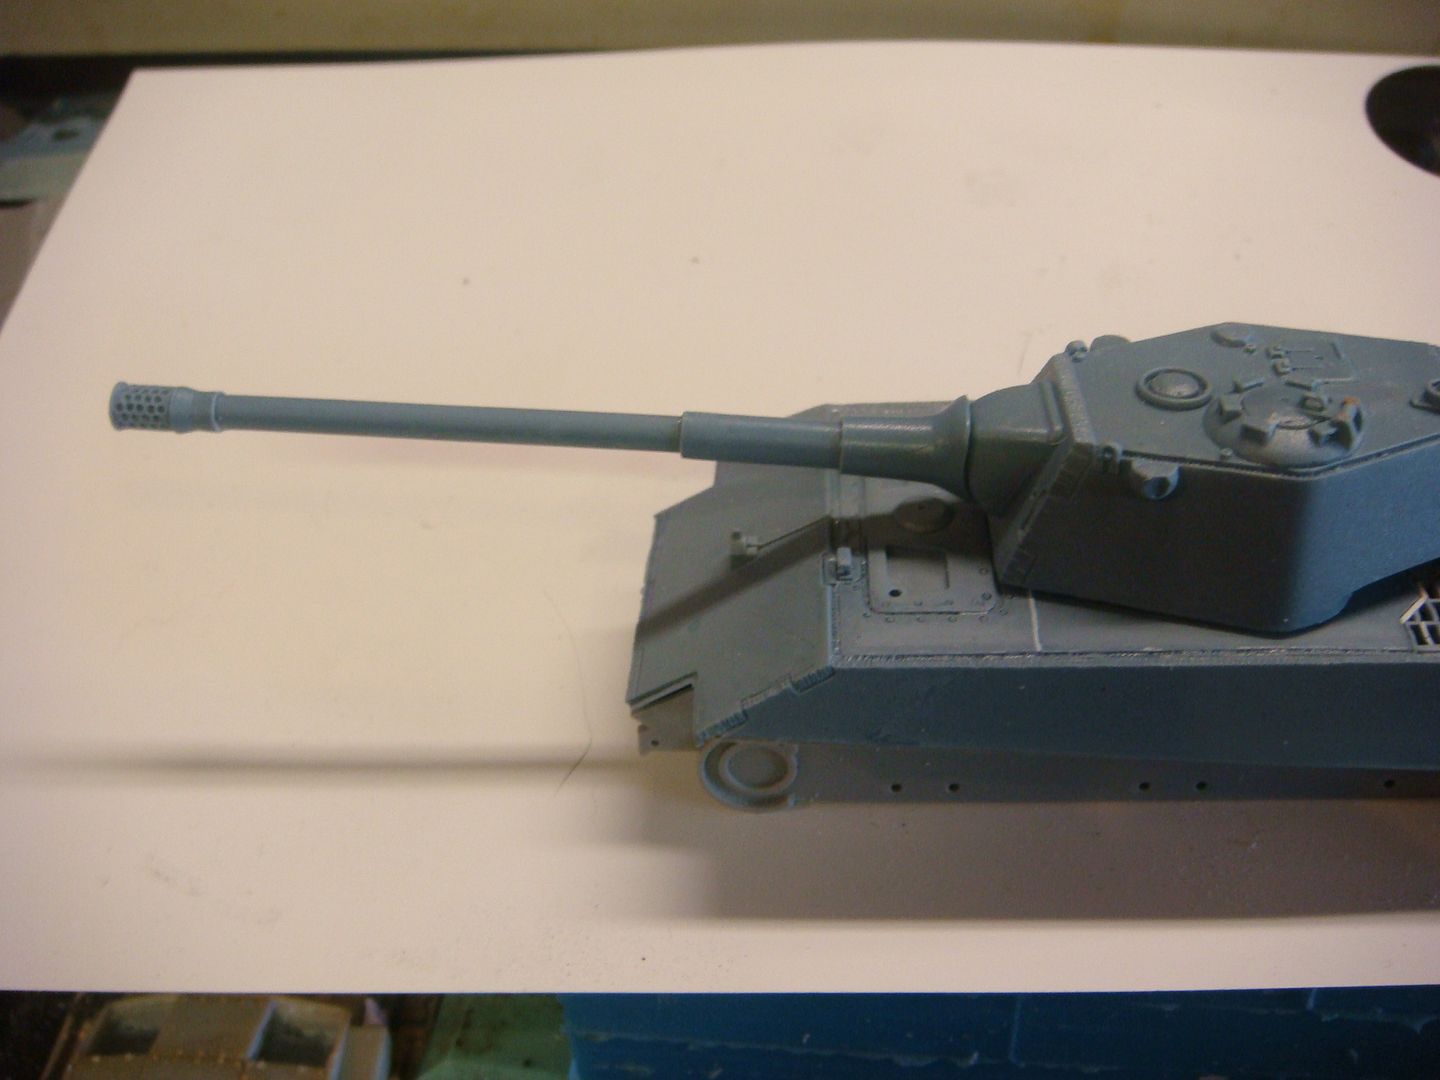 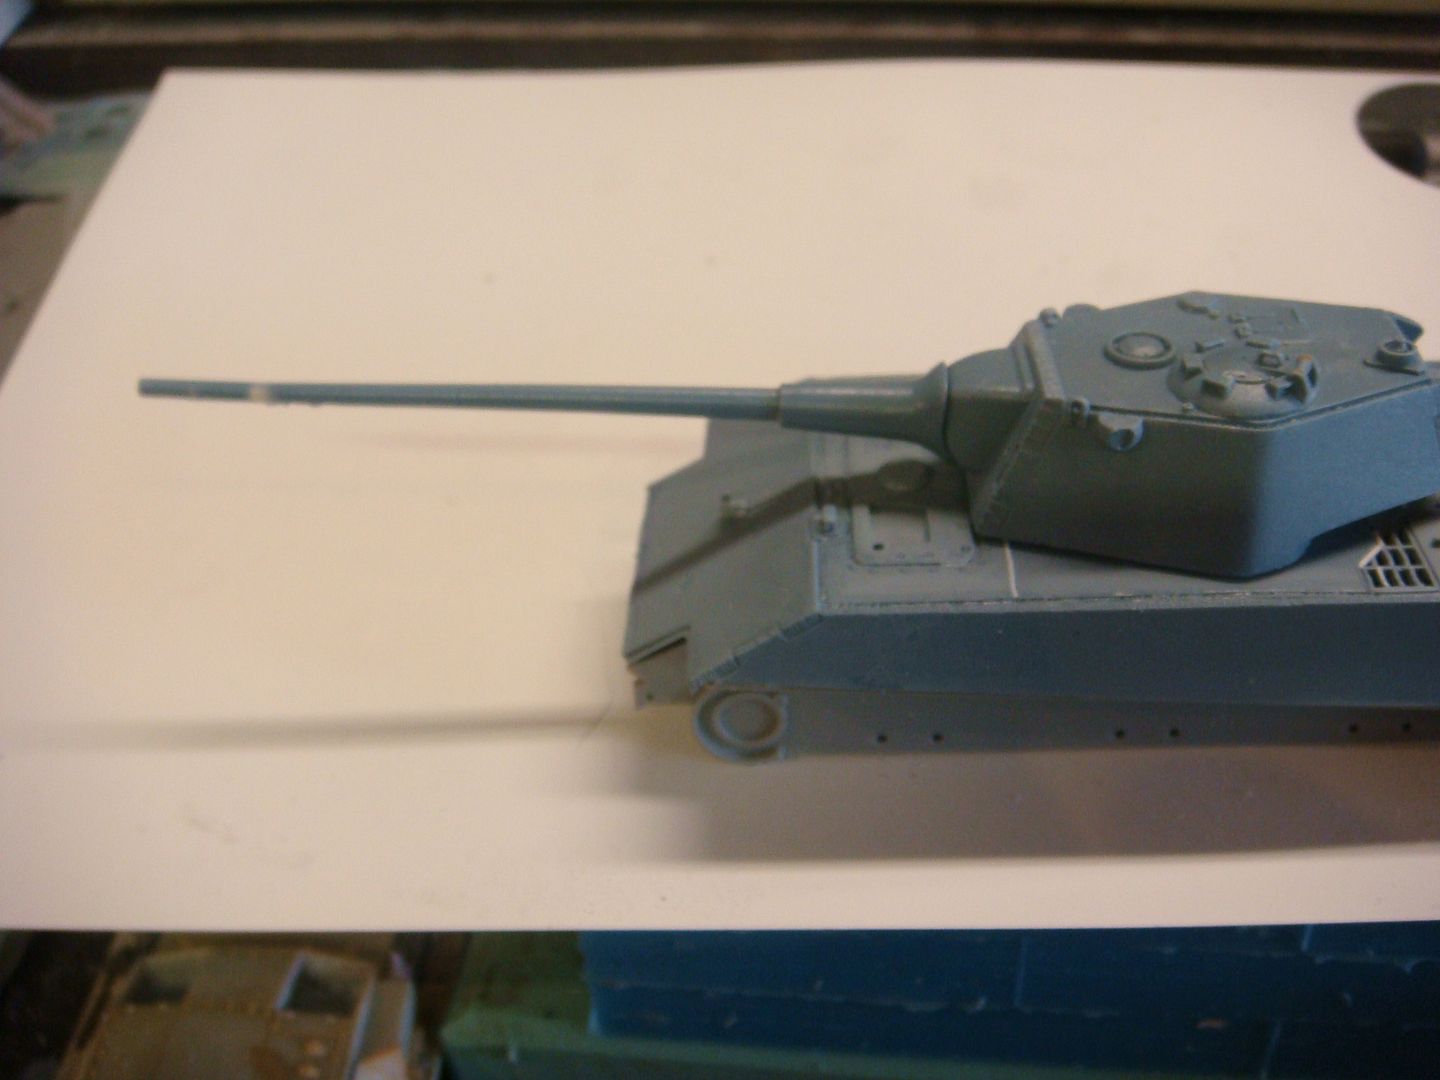 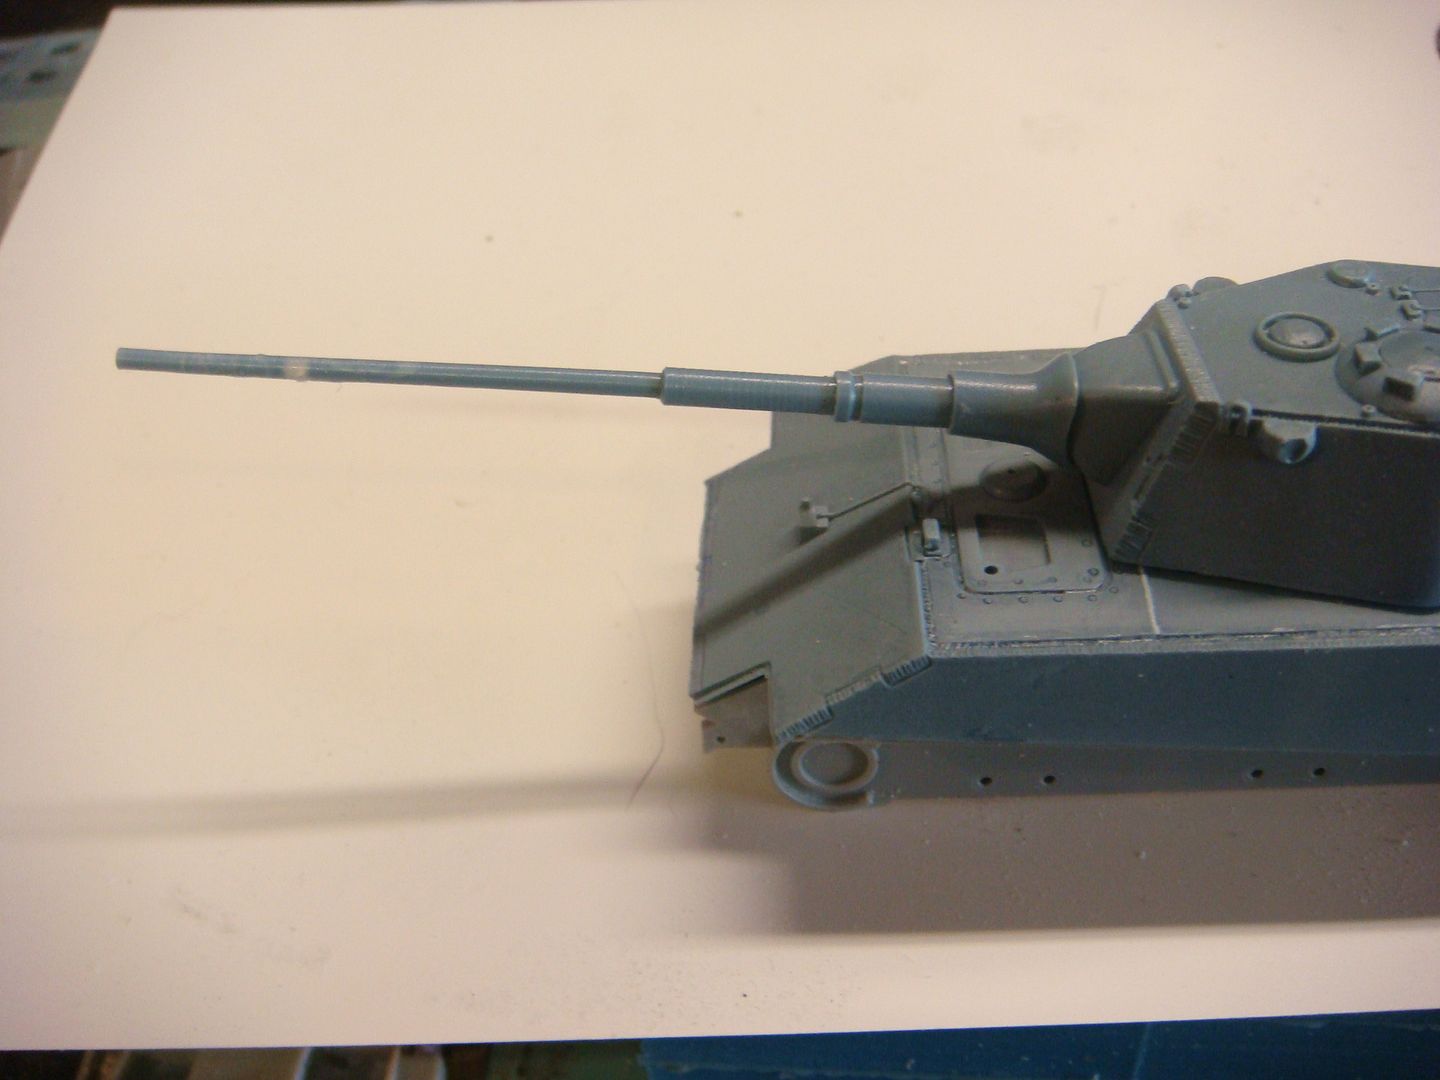 after this I decided to give the turret a coat of primer to bring out any flaws before molding. 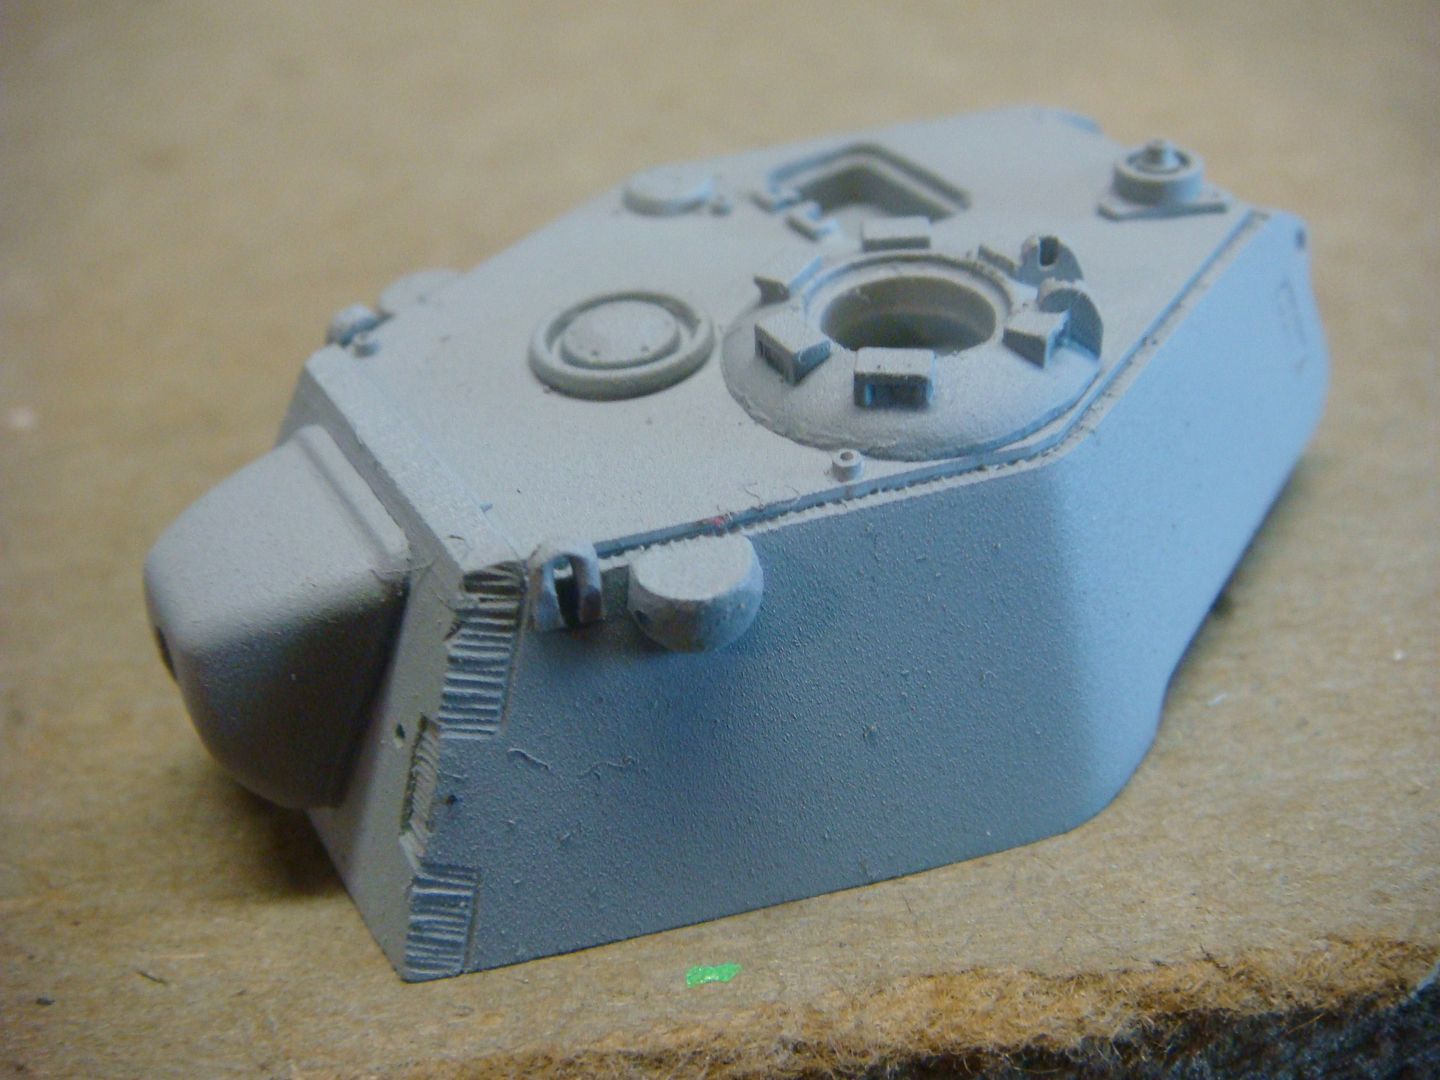 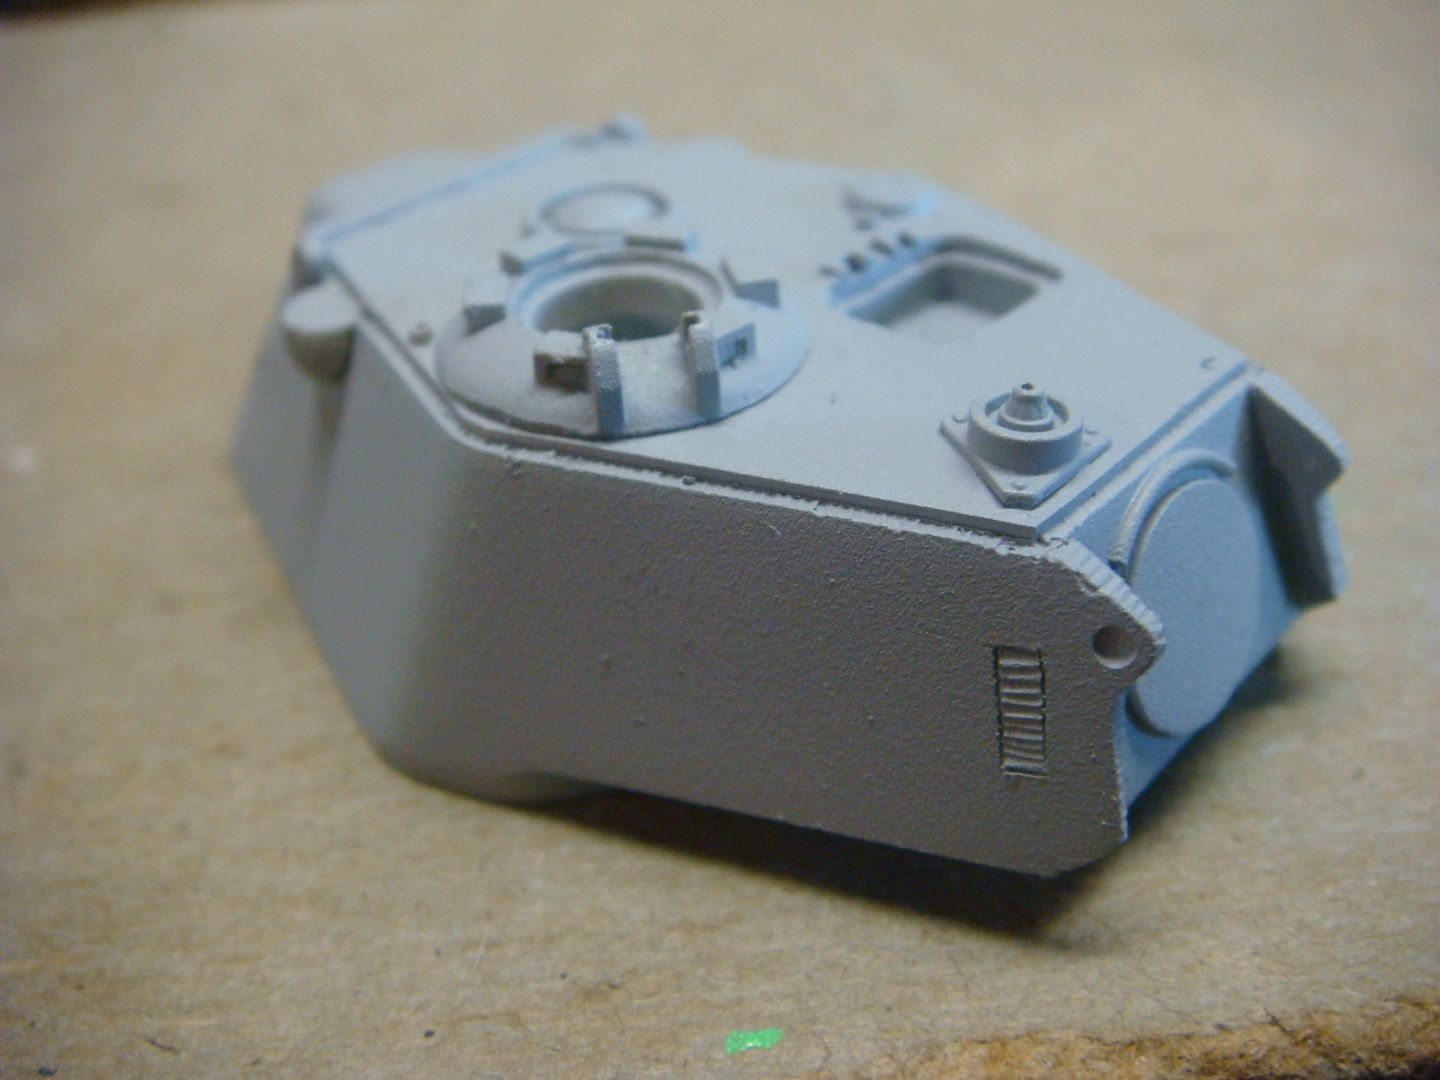 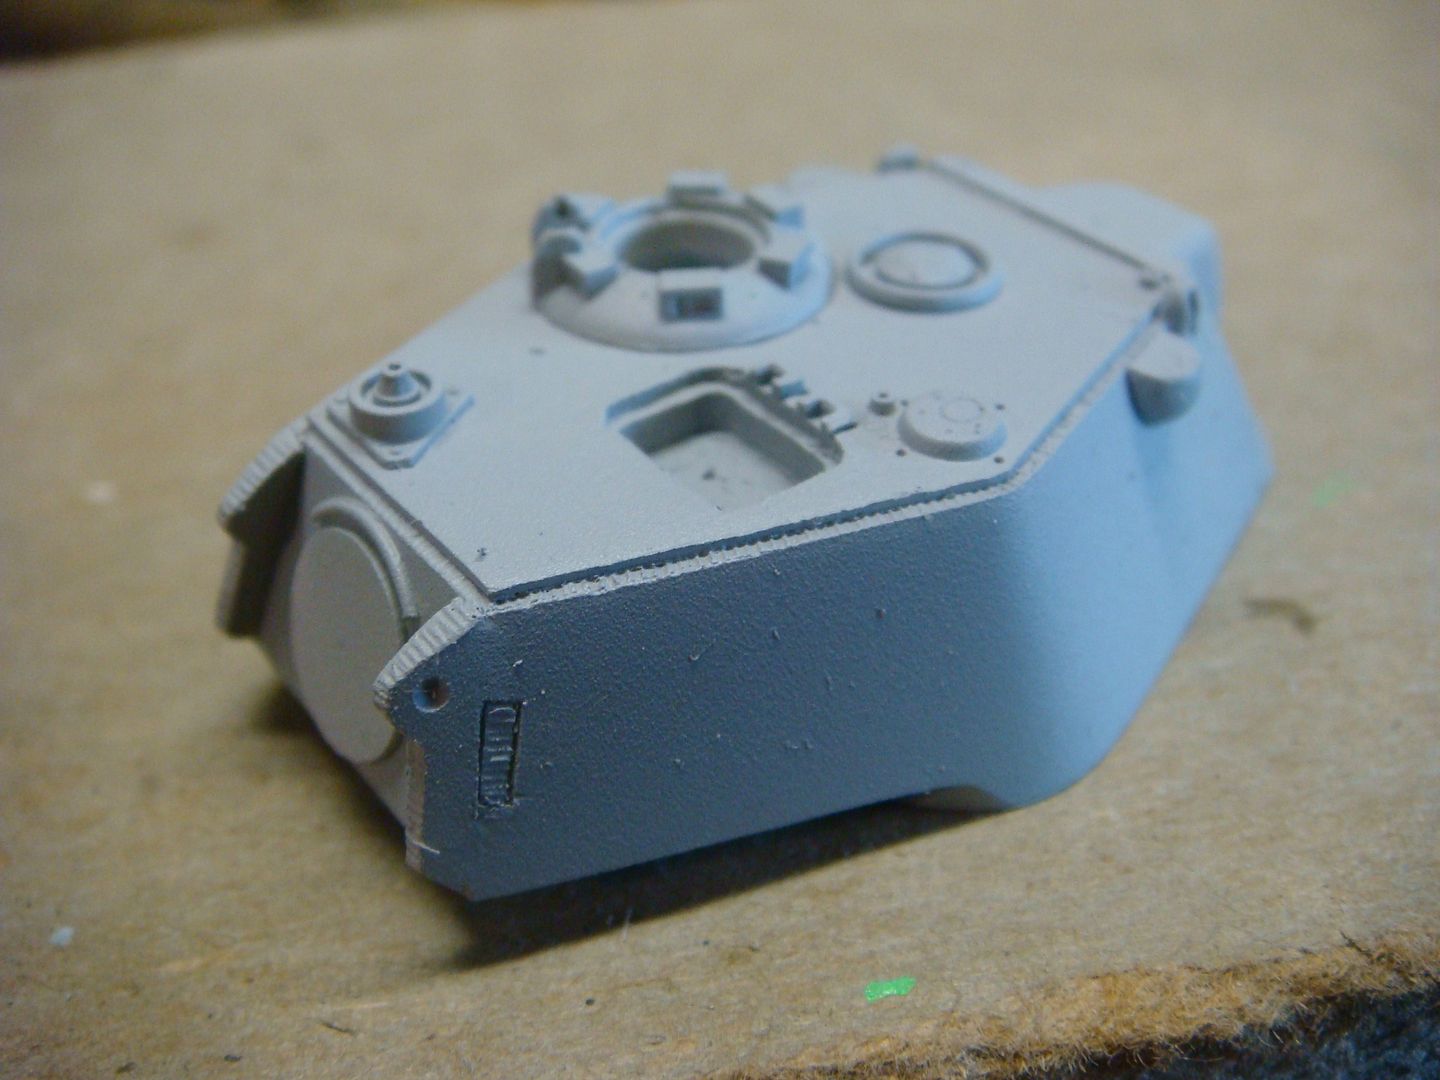 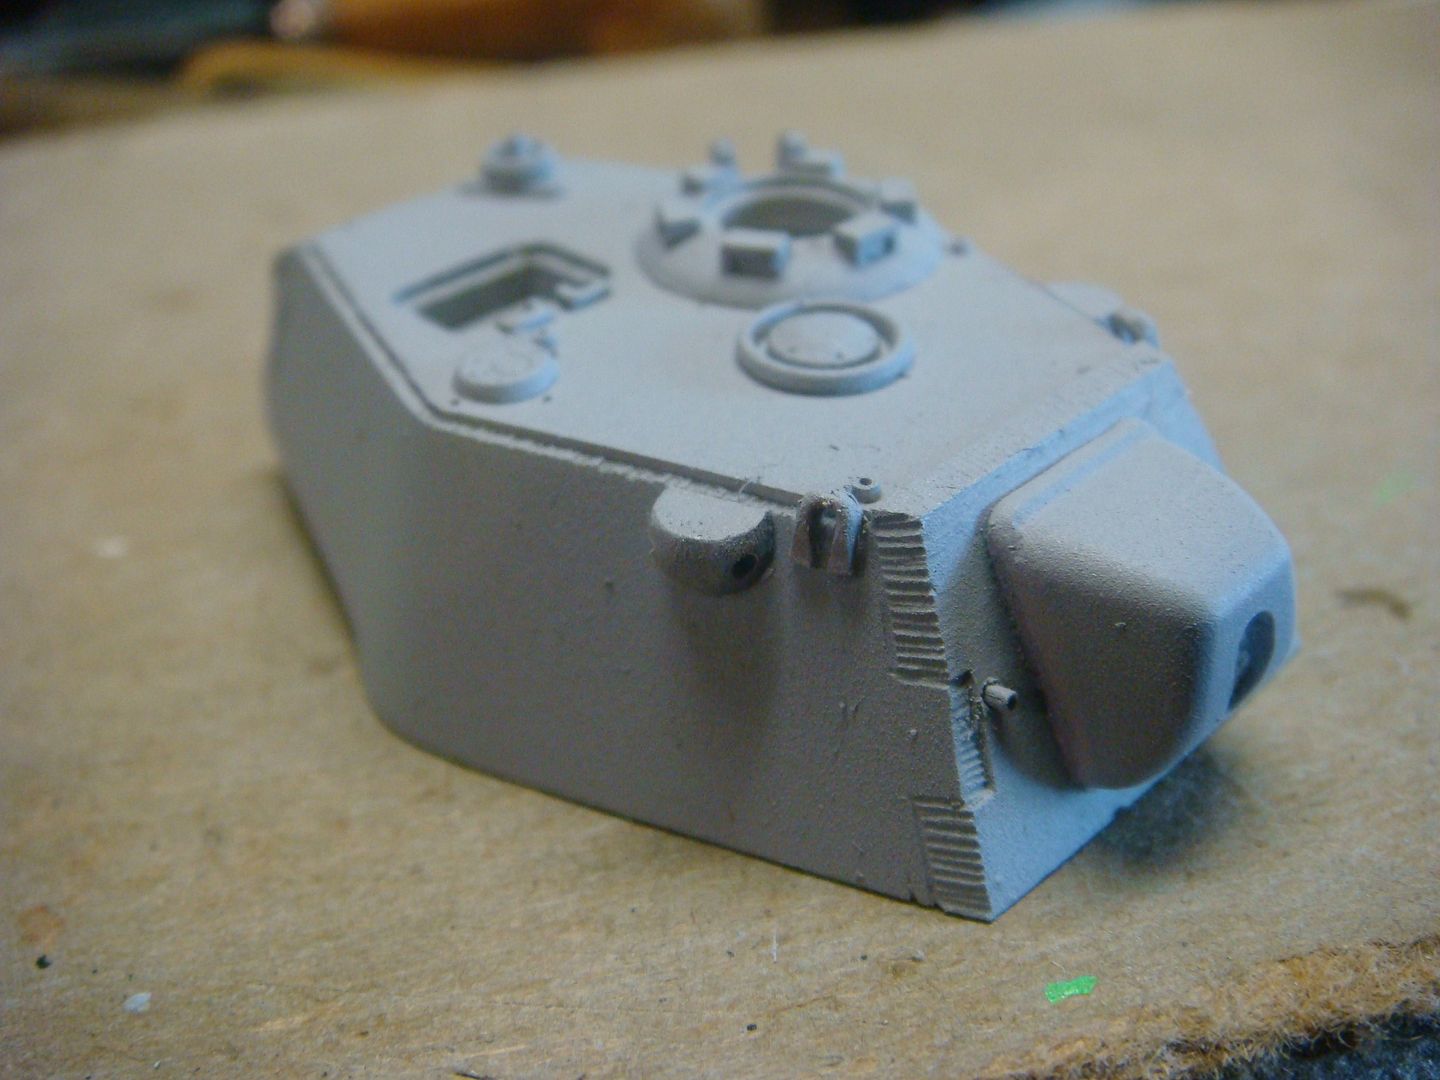 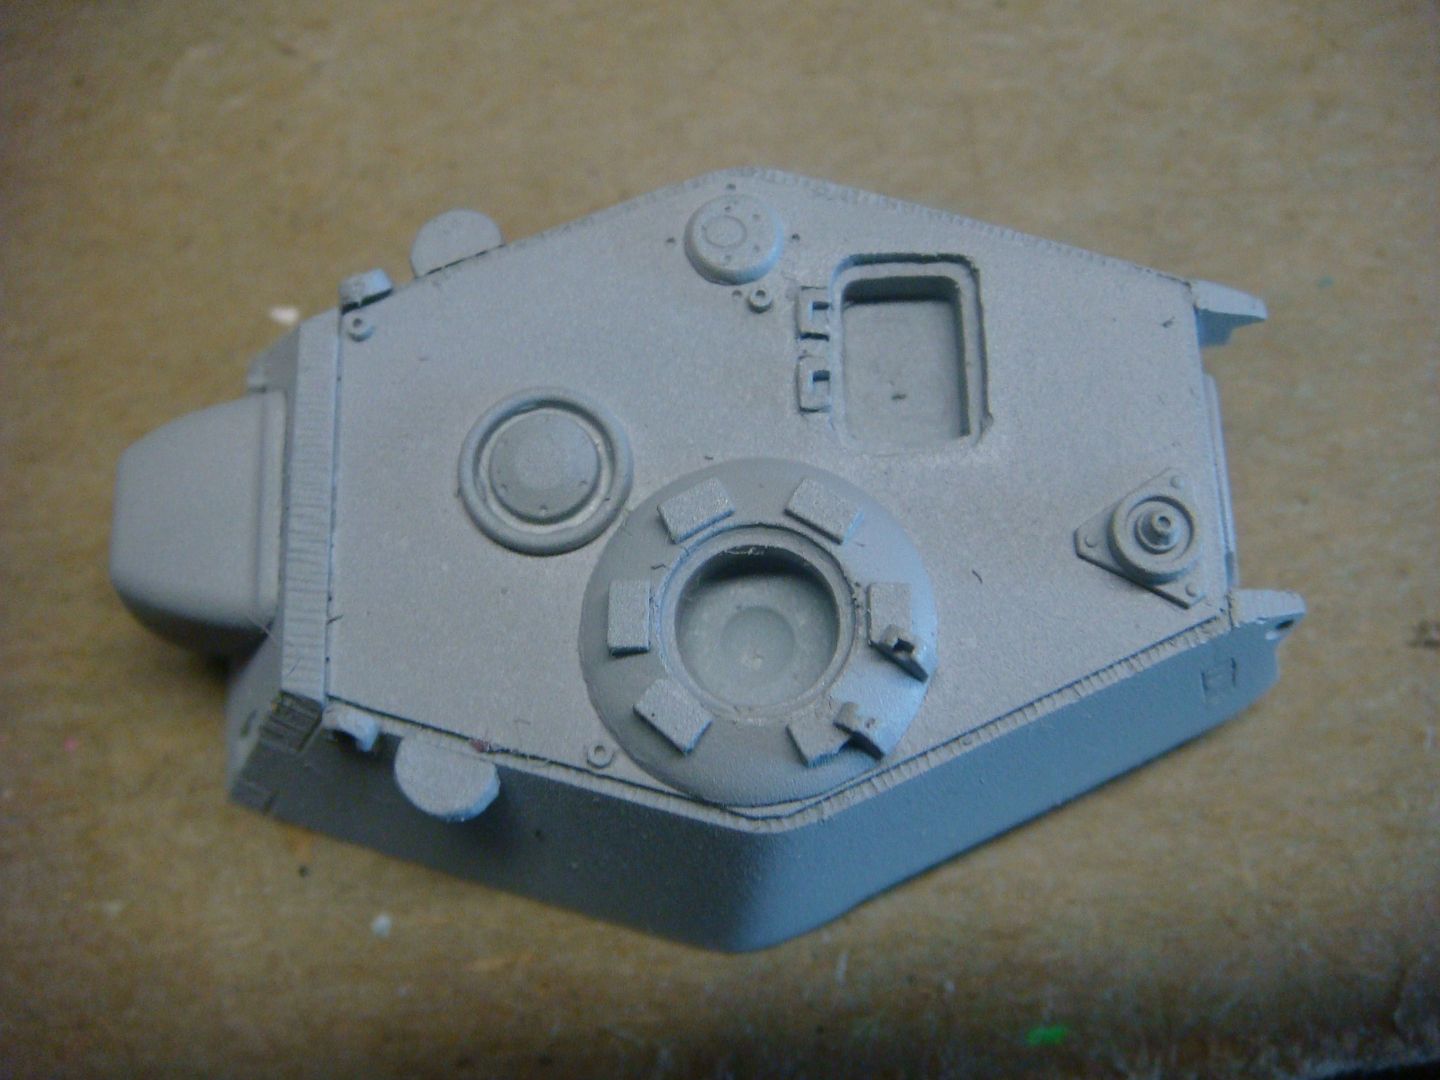 I decided that if I keep handling the "master part" of the turret, as I worked on the rest of the tank...... the chances grew each day that I could screw it up. So I molded and cast the turret, this will stand up to the constant handling better than the master would. 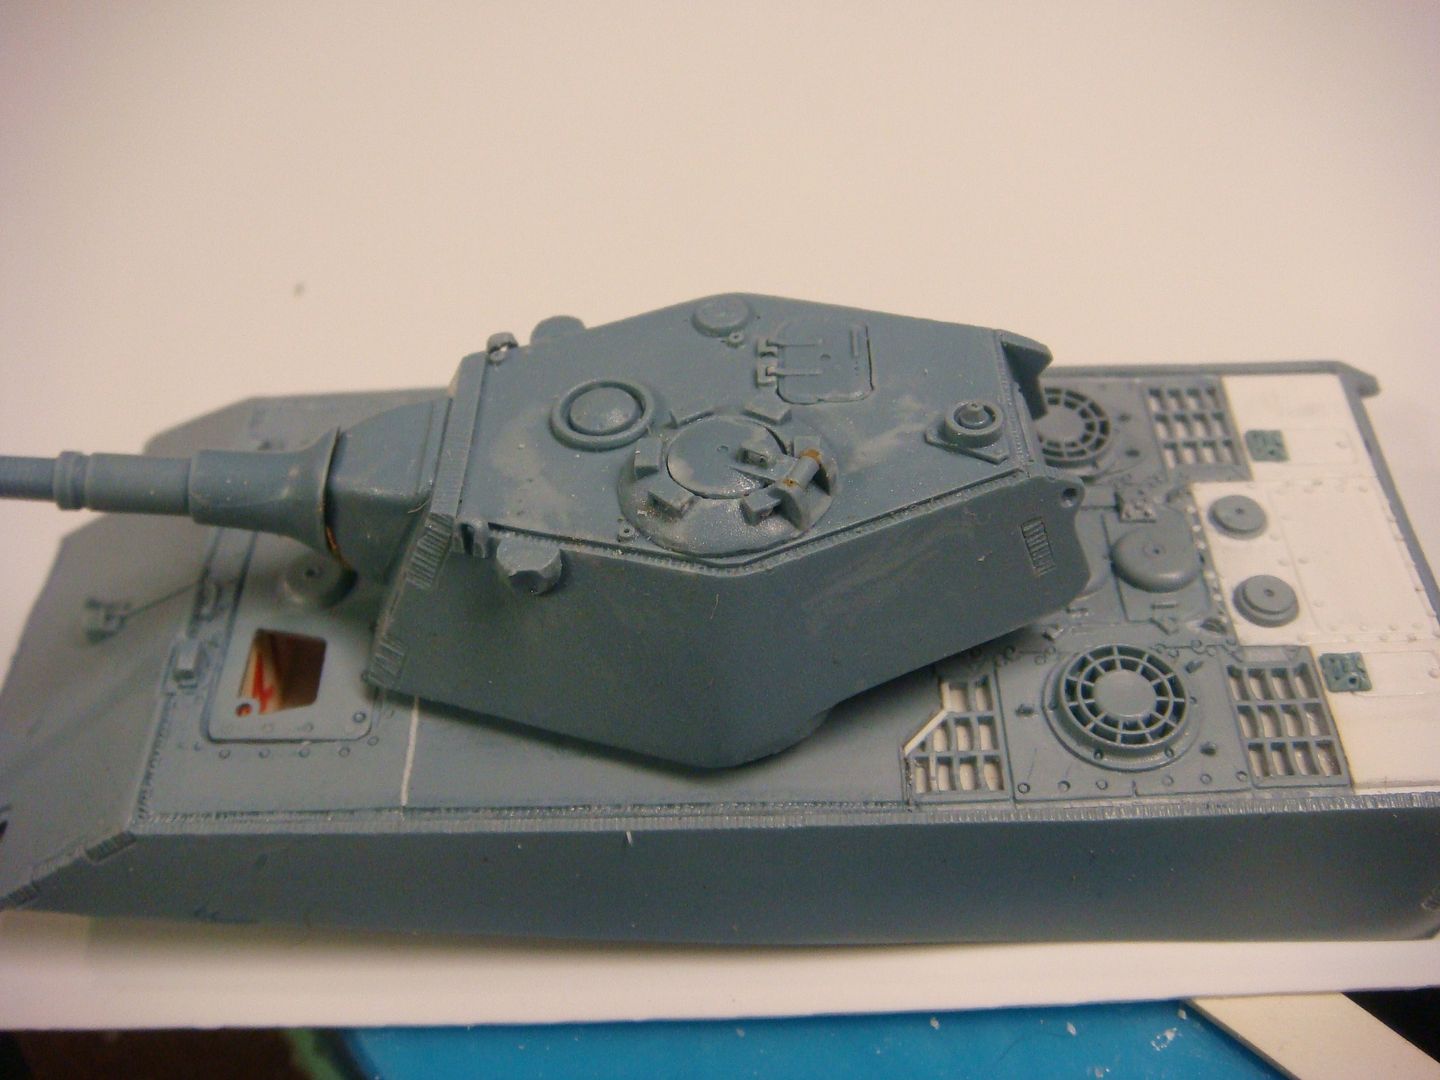 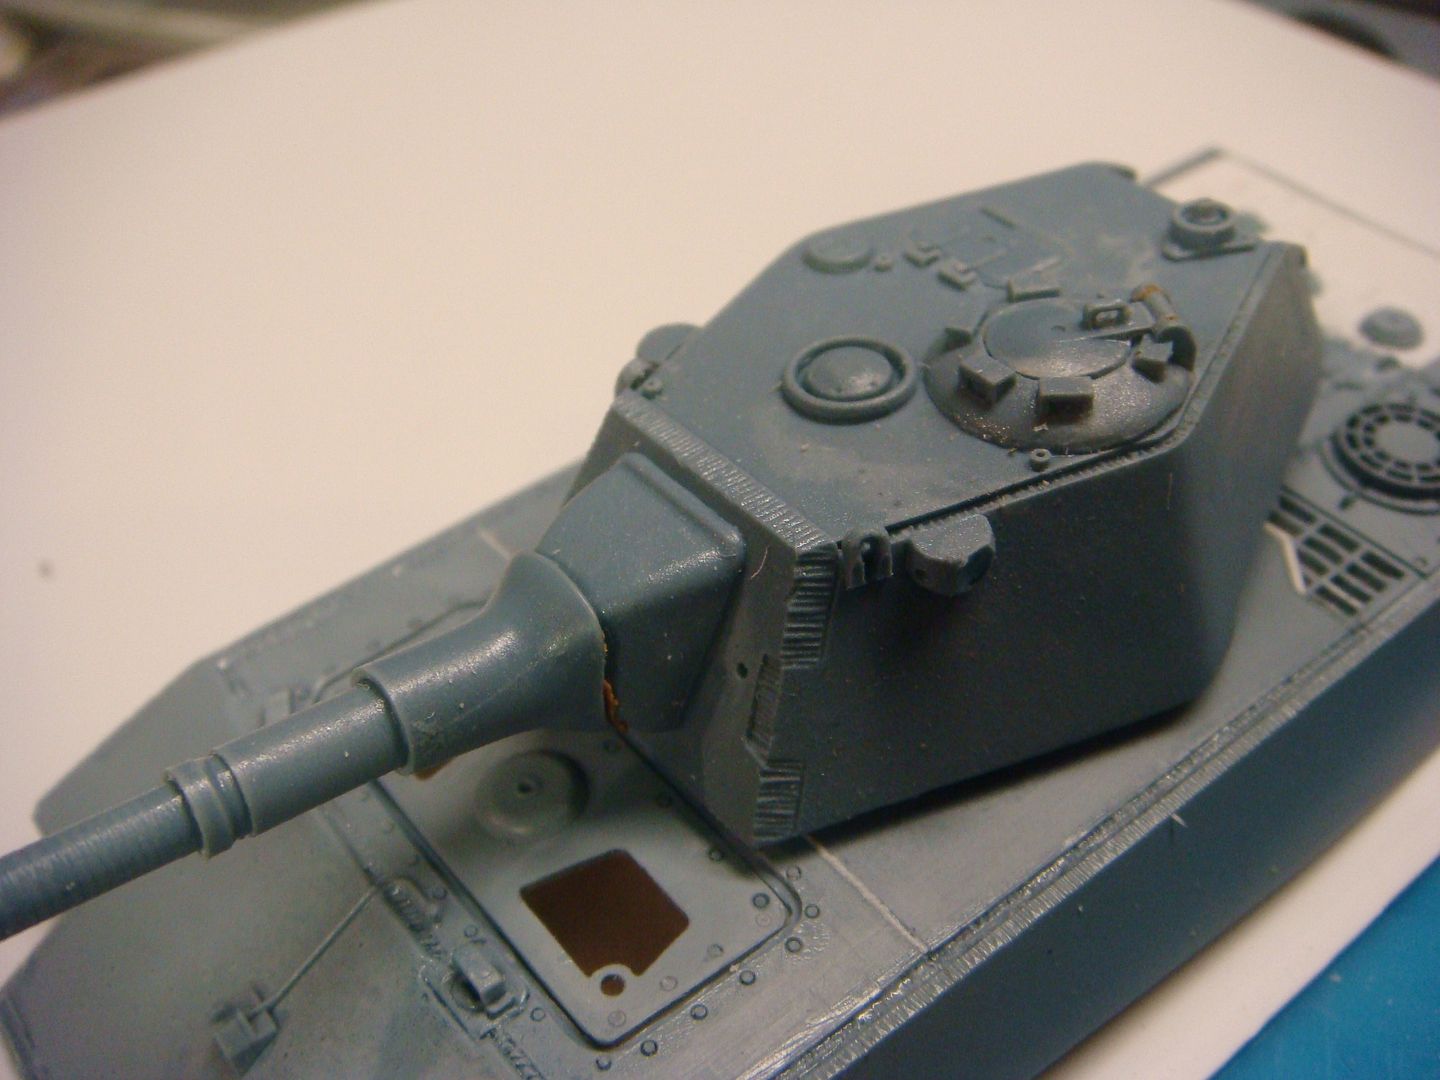 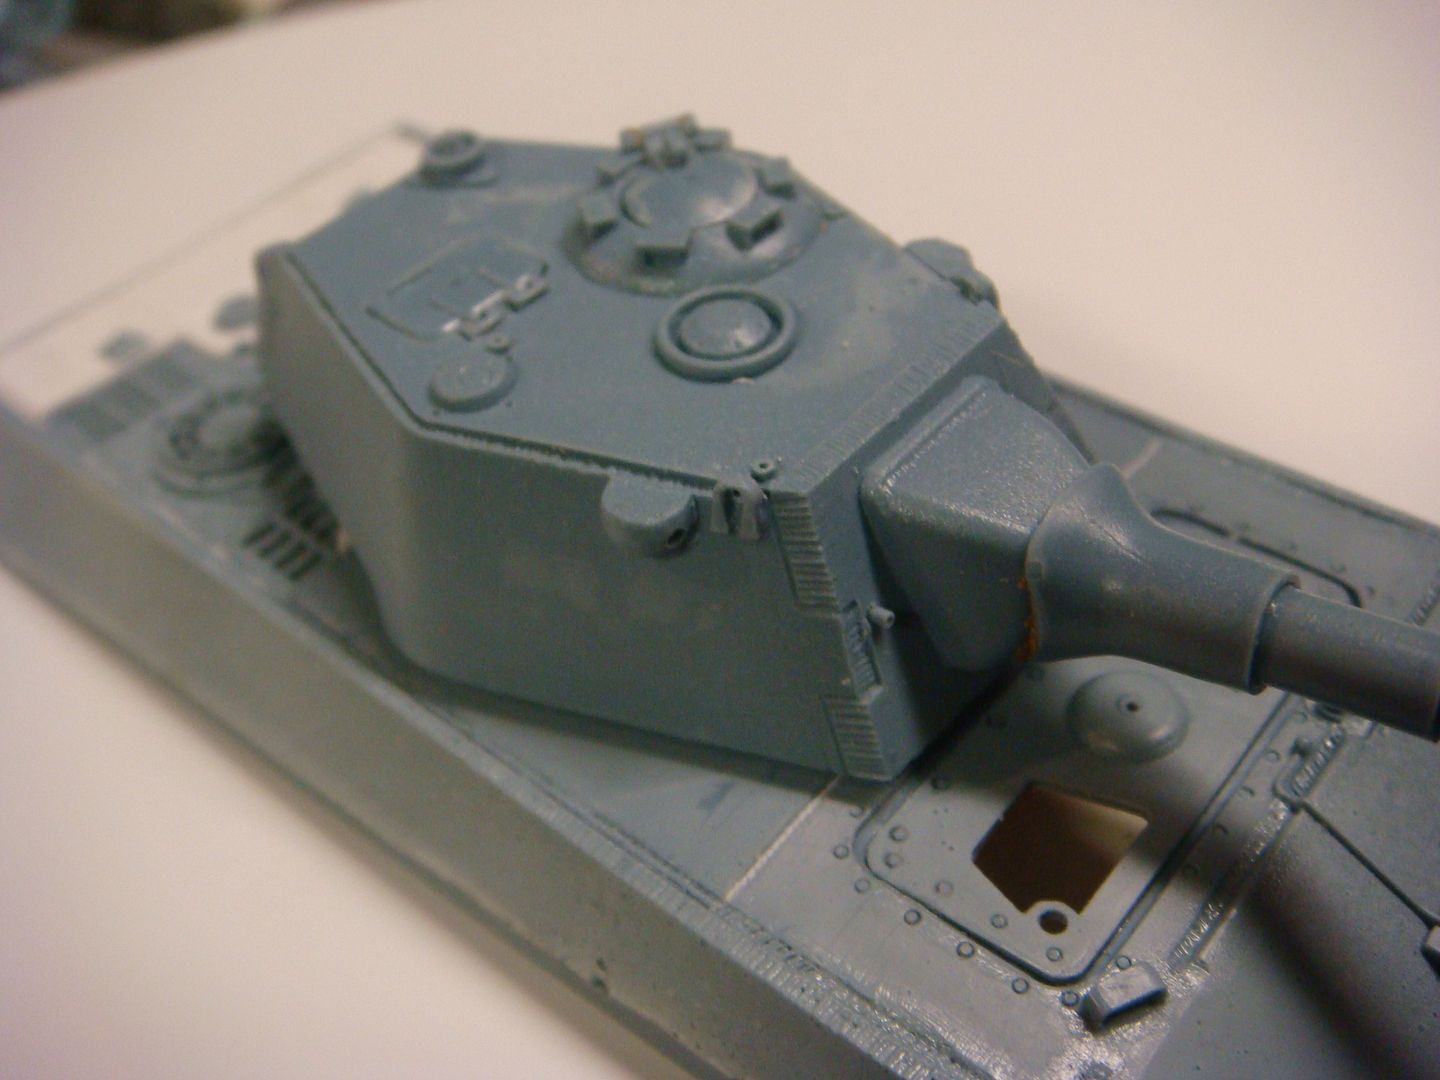 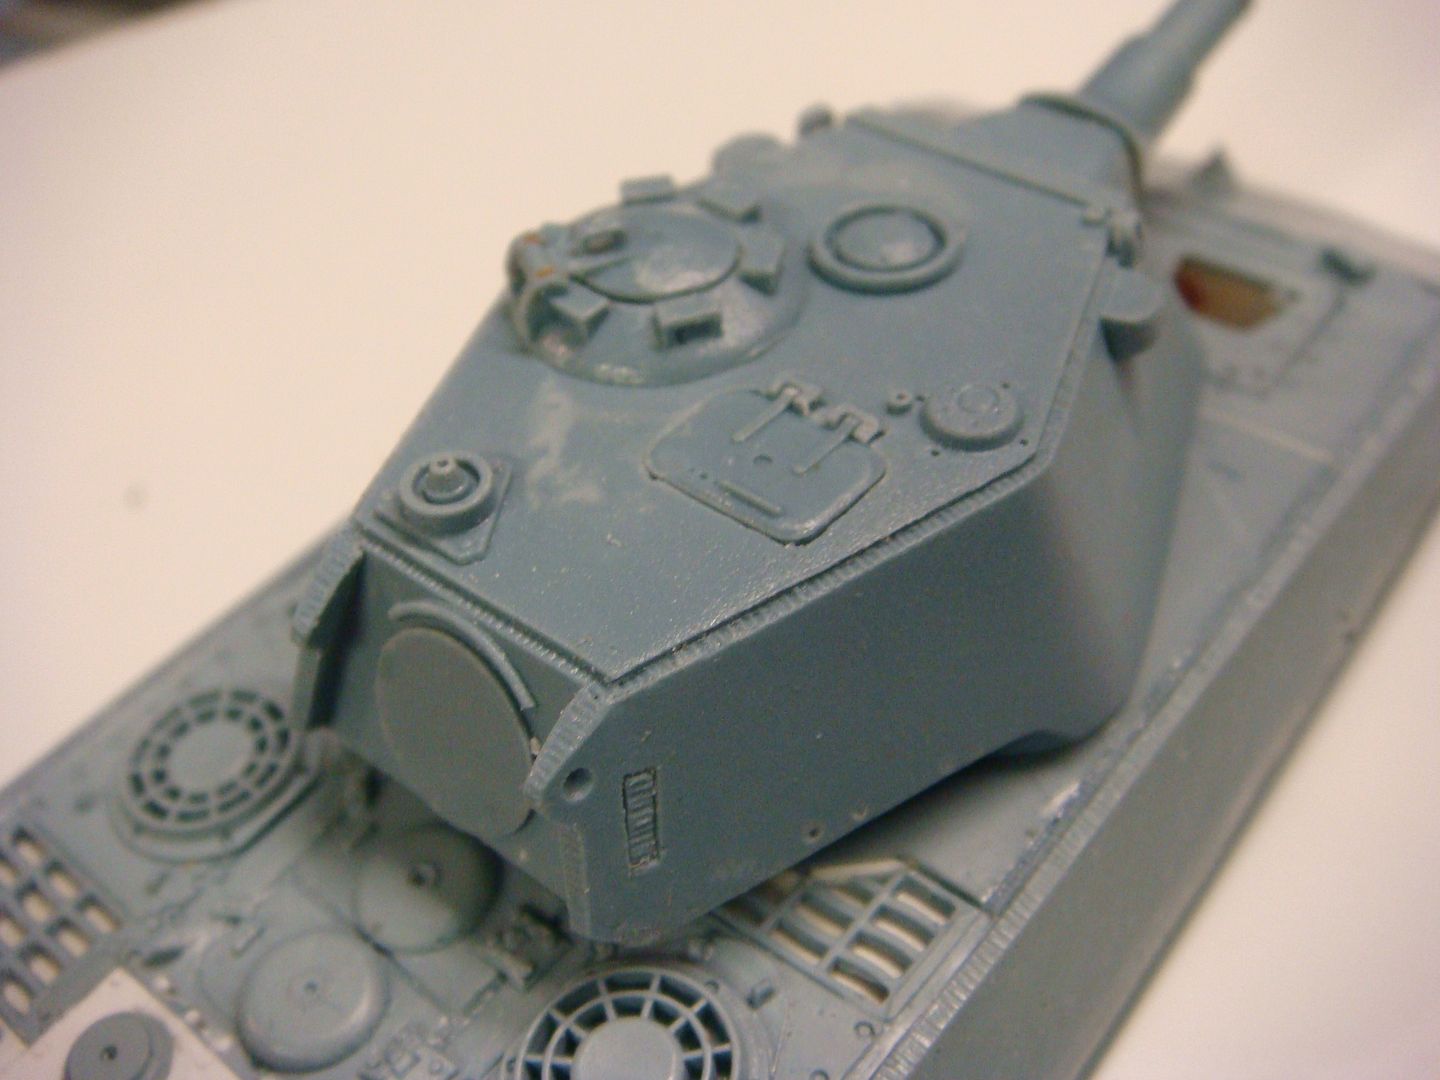 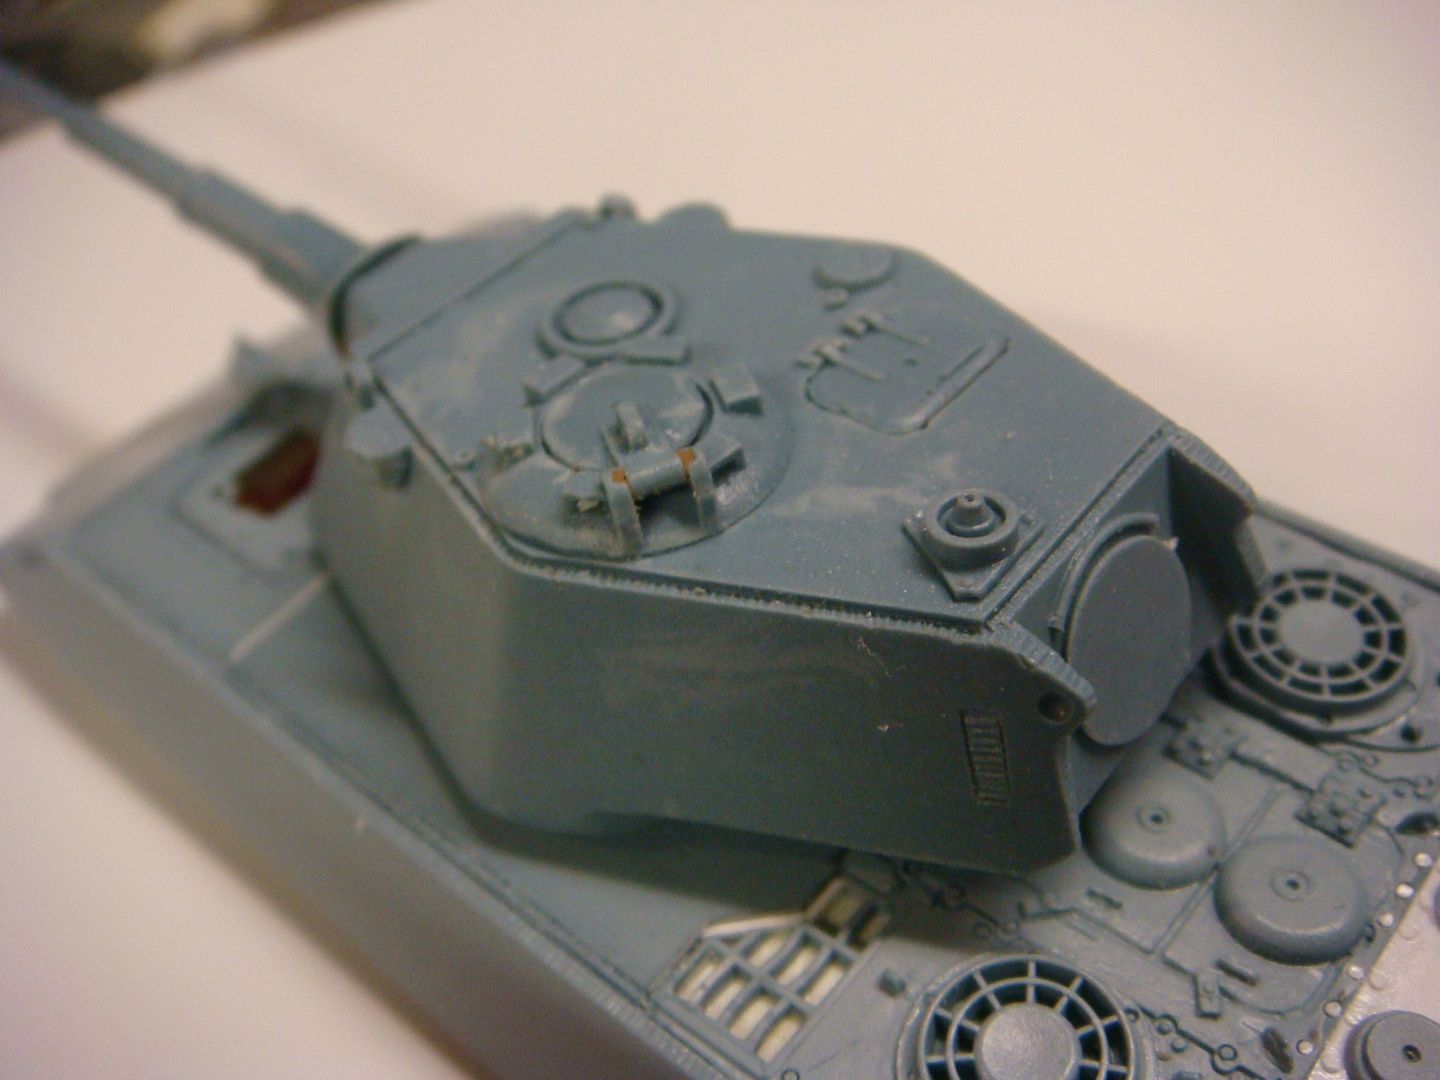 now... the upper hull is also quite a fragile thing as well..... so I decided to mate it up to a lower hull and make it solid. first I built a box around the spot where the Driver and Radio Operator go, then I plated over the turret ring. glued in the rear plate, and glued them all together. once that dried I cut a hole in the bottom and poured in resin. This makes the whole thing "solid" and it can then stand up to the constant handling. 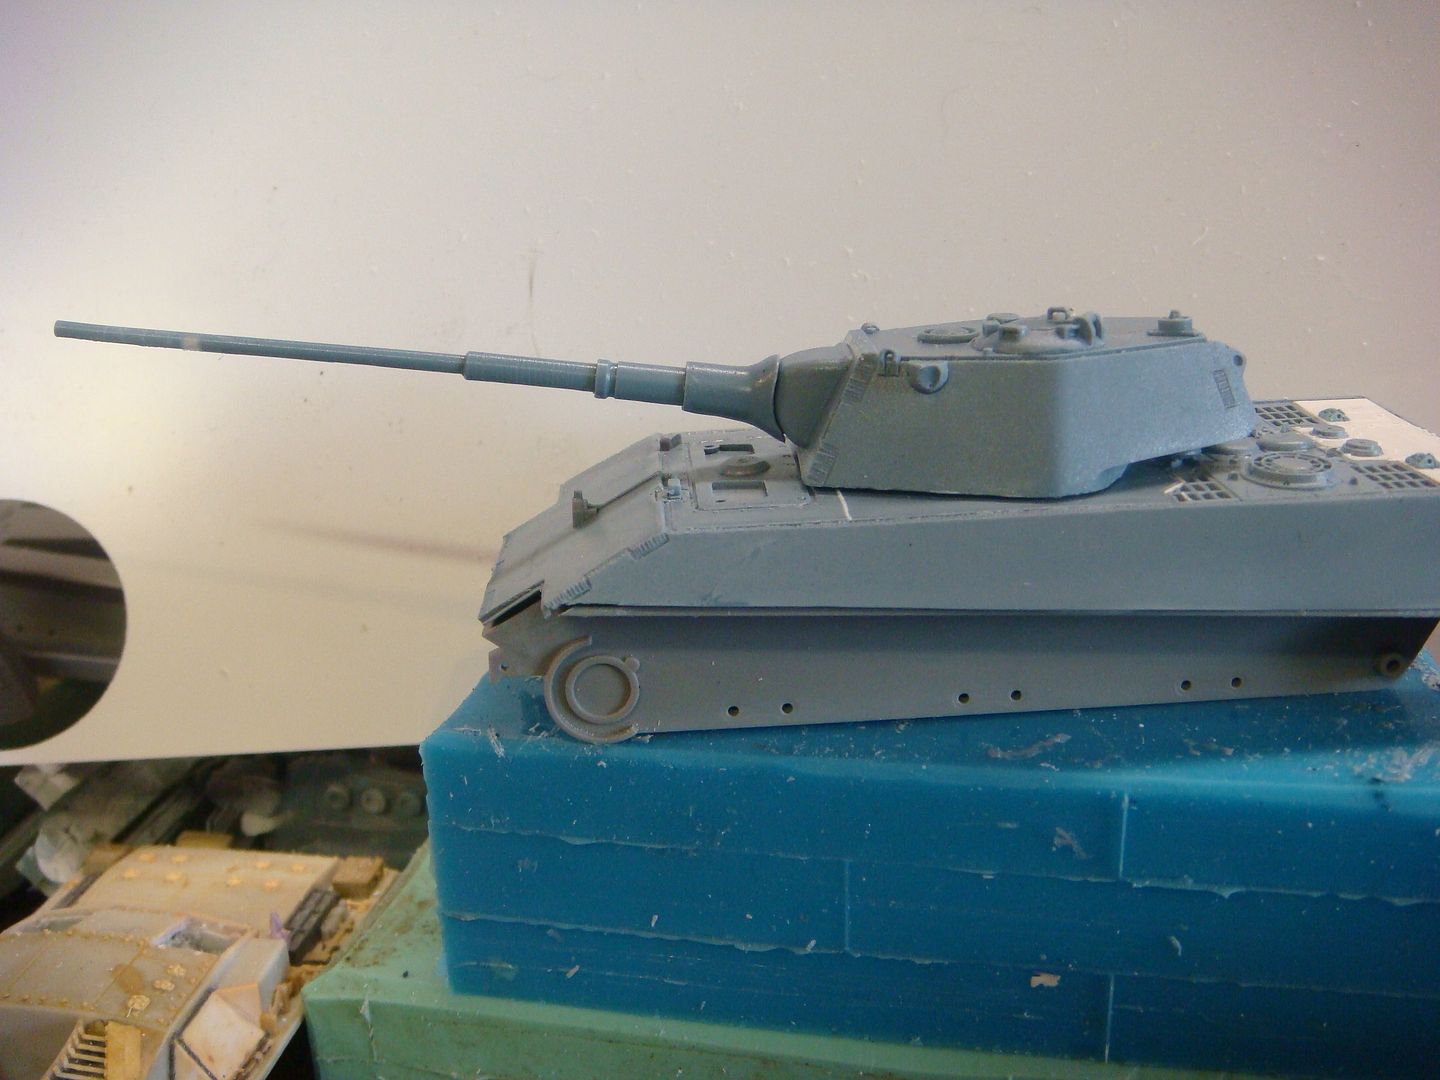 now the rear end needed some details 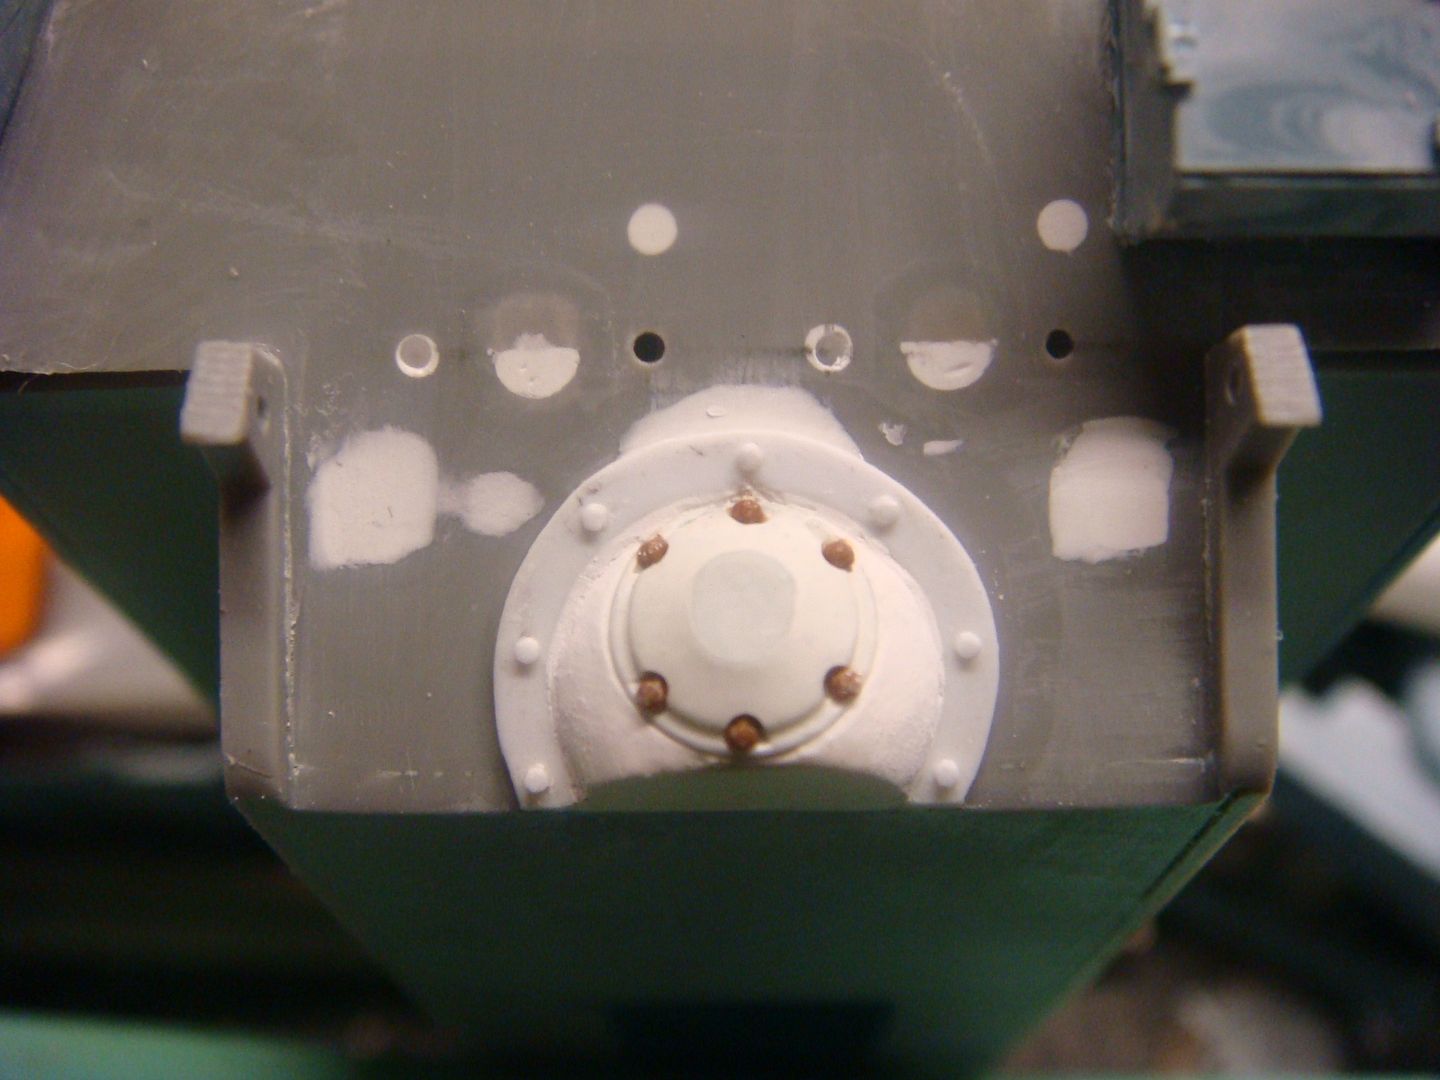 as well as the front 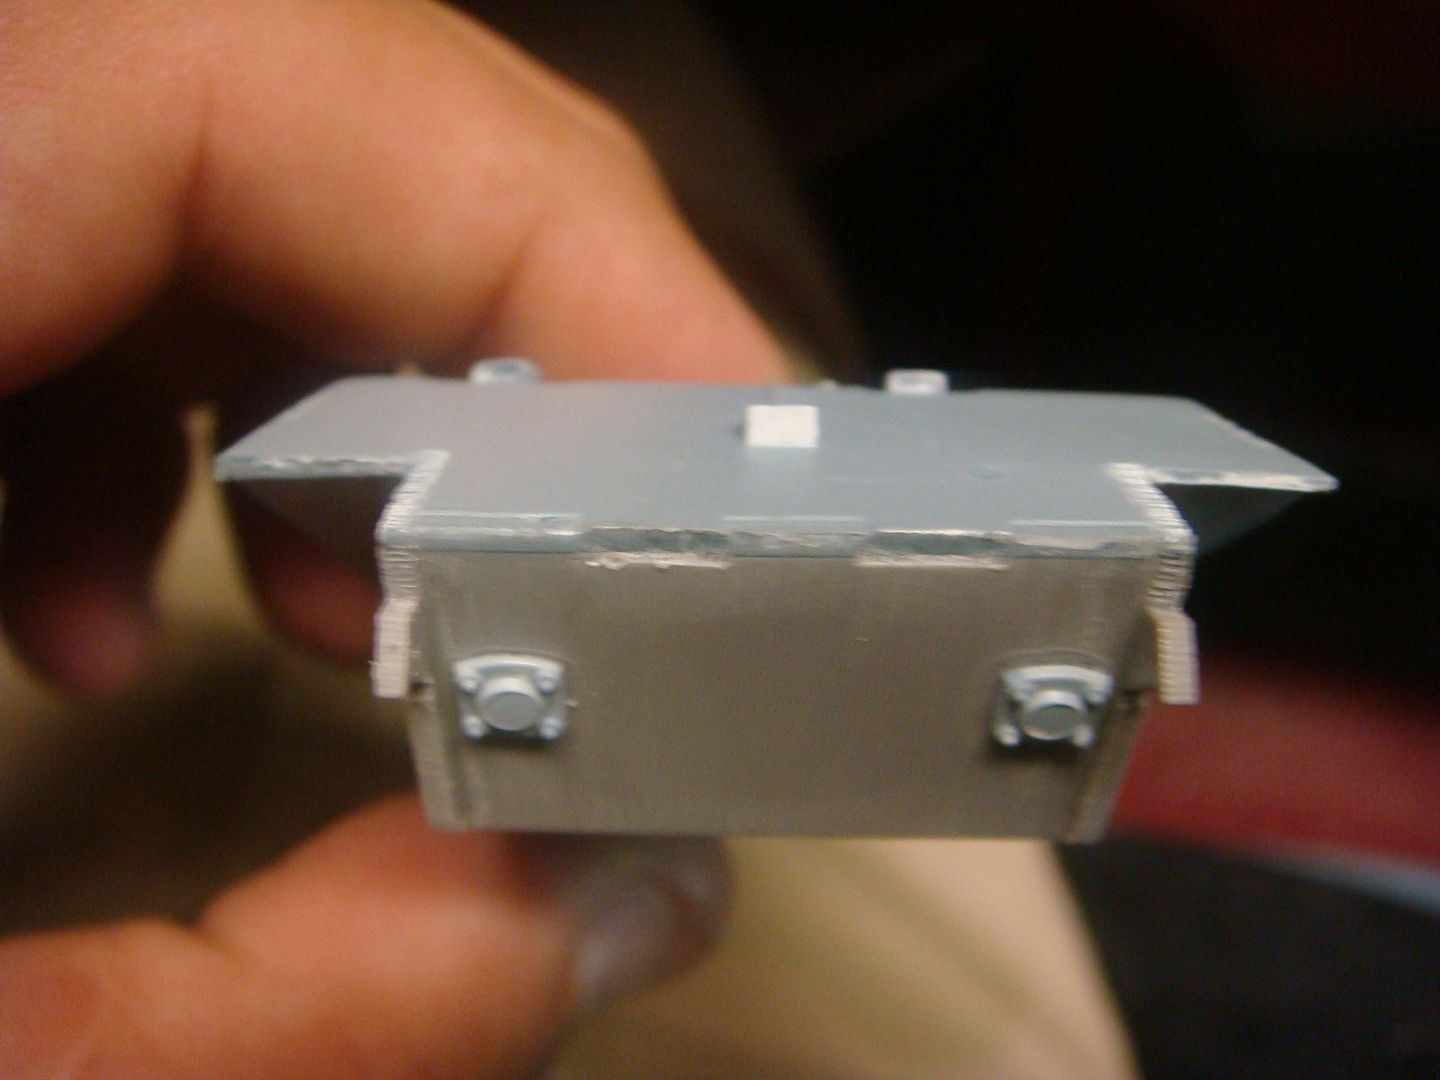 with this all done, I started on the tracks 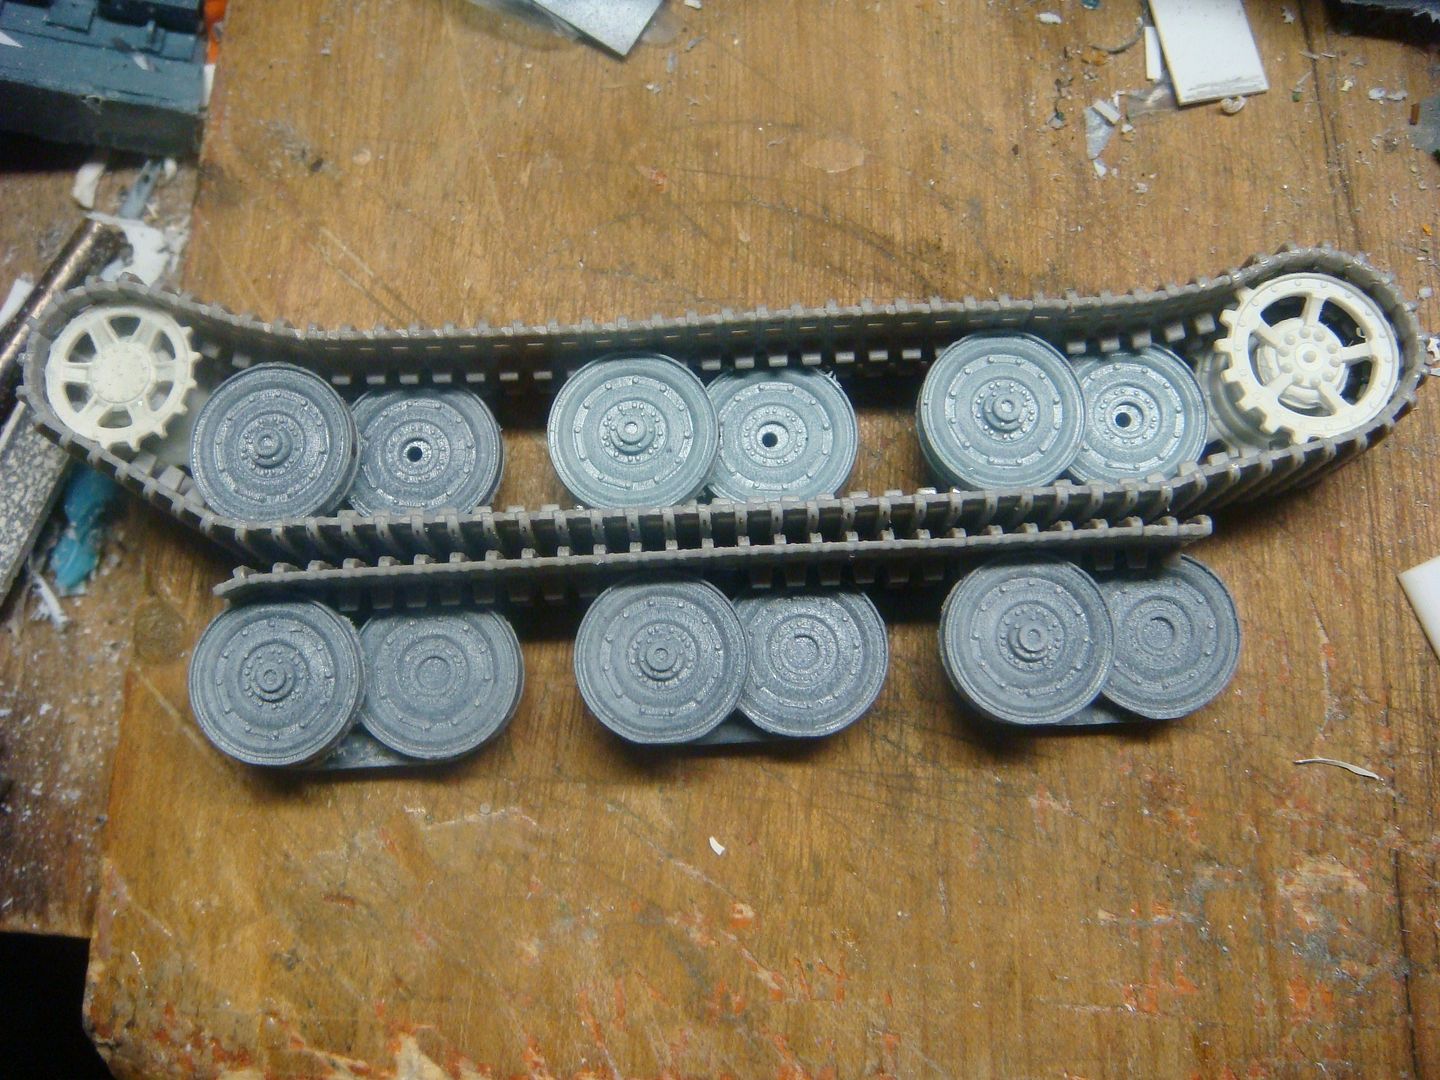 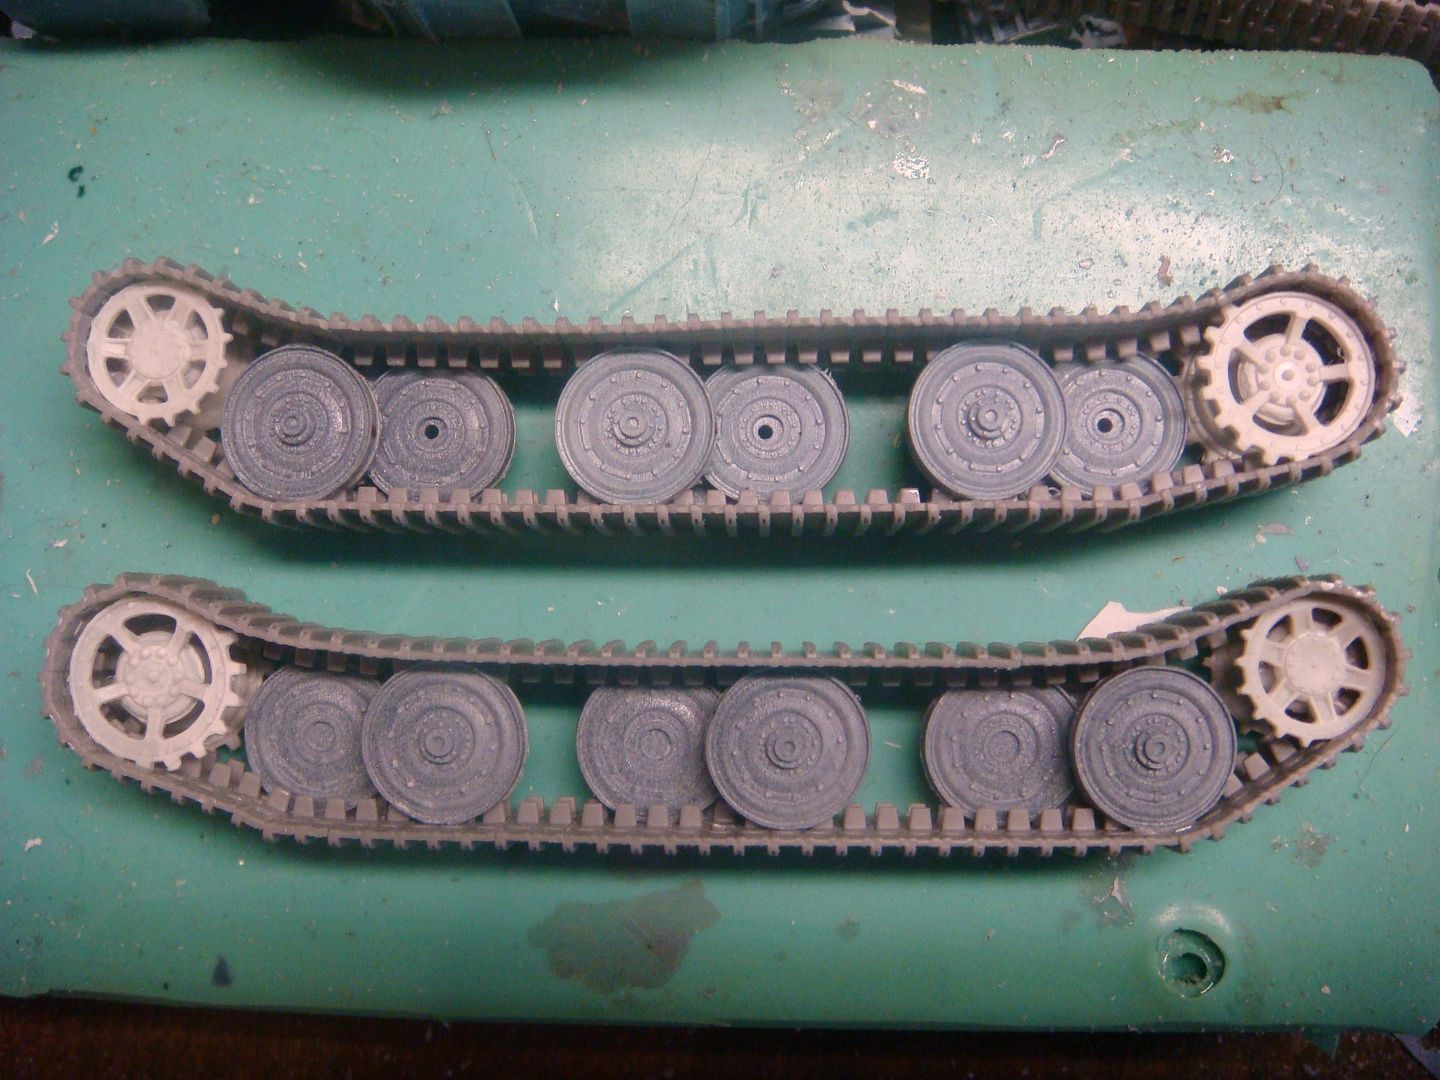 I am still working out many of the finer details but here is where I am for now. |
|
afvfan
Senior Member
   
Member since: December 2012
Bob
Posts: 1,772
Dec 10, 2012 17:32:38 GMT -5
Dec 10, 2012 17:32:38 GMT -5
|
Post by afvfan on Apr 11, 2016 22:57:09 GMT -5
Impressive work there.
|
|
cploverby.
Full Member
  
Member since: August 2012
Posts: 129
Aug 14, 2012 14:15:54 GMT -5
Aug 14, 2012 14:15:54 GMT -5
|
Post by cploverby. on Apr 11, 2016 23:37:14 GMT -5
Glad you like it  |
|
|
|
Post by panzerjager2 on Apr 11, 2016 23:45:32 GMT -5
VERY NICE.....just one silly question, What scale is this??
|
|
cploverby.
Full Member
  
Member since: August 2012
Posts: 129
Aug 14, 2012 14:15:54 GMT -5
Aug 14, 2012 14:15:54 GMT -5
|
Post by cploverby. on Apr 12, 2016 2:36:48 GMT -5
VERY NICE.....just one silly question, What scale is this?? ha ha ha ....it's 1/72 |
|
|
|
Post by dupes on Apr 12, 2016 5:41:54 GMT -5
72nd? Wow. I suppose that makes casting the hull a good bit easier than in 35th!
|
|
cploverby.
Full Member
  
Member since: August 2012
Posts: 129
Aug 14, 2012 14:15:54 GMT -5
Aug 14, 2012 14:15:54 GMT -5
|
Post by cploverby. on Apr 12, 2016 8:30:52 GMT -5
72nd? Wow. I suppose that makes casting the hull a good bit easier than in 35th! Just a "little"  |
|
|
|
Post by deafpanzer on Apr 12, 2016 8:54:38 GMT -5
Looking REAL good!
|
|
cploverby.
Full Member
  
Member since: August 2012
Posts: 129
Aug 14, 2012 14:15:54 GMT -5
Aug 14, 2012 14:15:54 GMT -5
|
Post by cploverby. on Apr 12, 2016 8:58:52 GMT -5
Many Thanks  |
|
cploverby.
Full Member
  
Member since: August 2012
Posts: 129
Aug 14, 2012 14:15:54 GMT -5
Aug 14, 2012 14:15:54 GMT -5
|
Post by cploverby. on Apr 17, 2016 9:22:23 GMT -5
Doing the tracks is a Fail when I tried to mold them...... I had to destroy the tracks (masters) pulling them from the rubber.  Even though that is an accepted outcome, it resulted in the same for any resin casts. 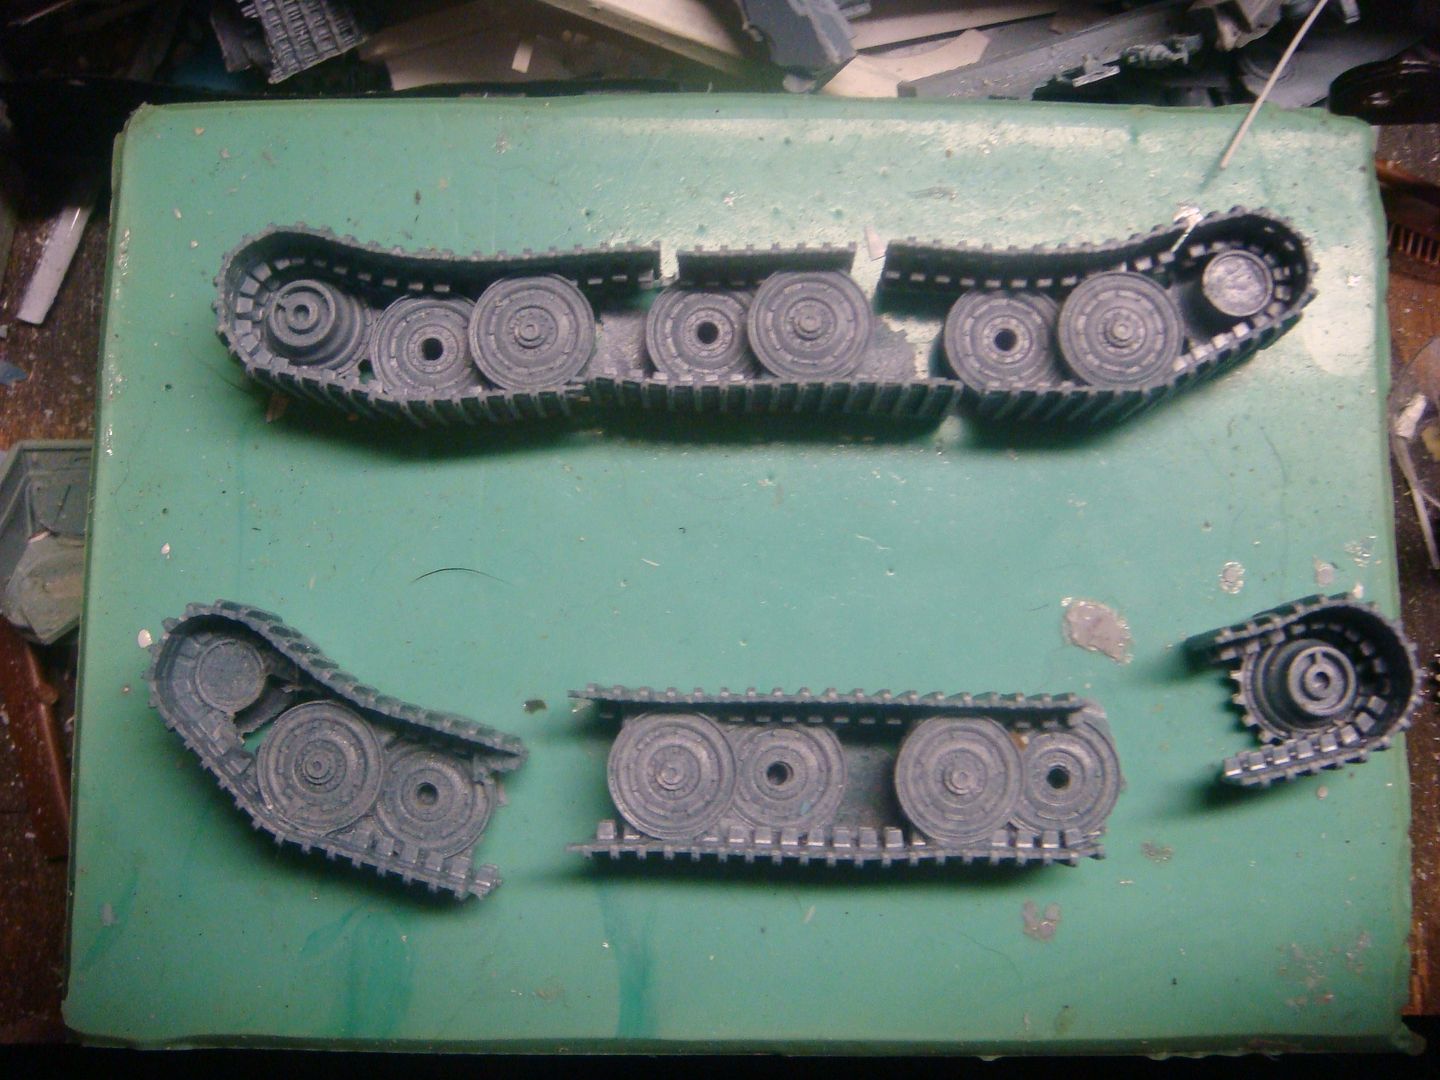 I reassembled one set to show how "Ideally" they should look when placed on the hull 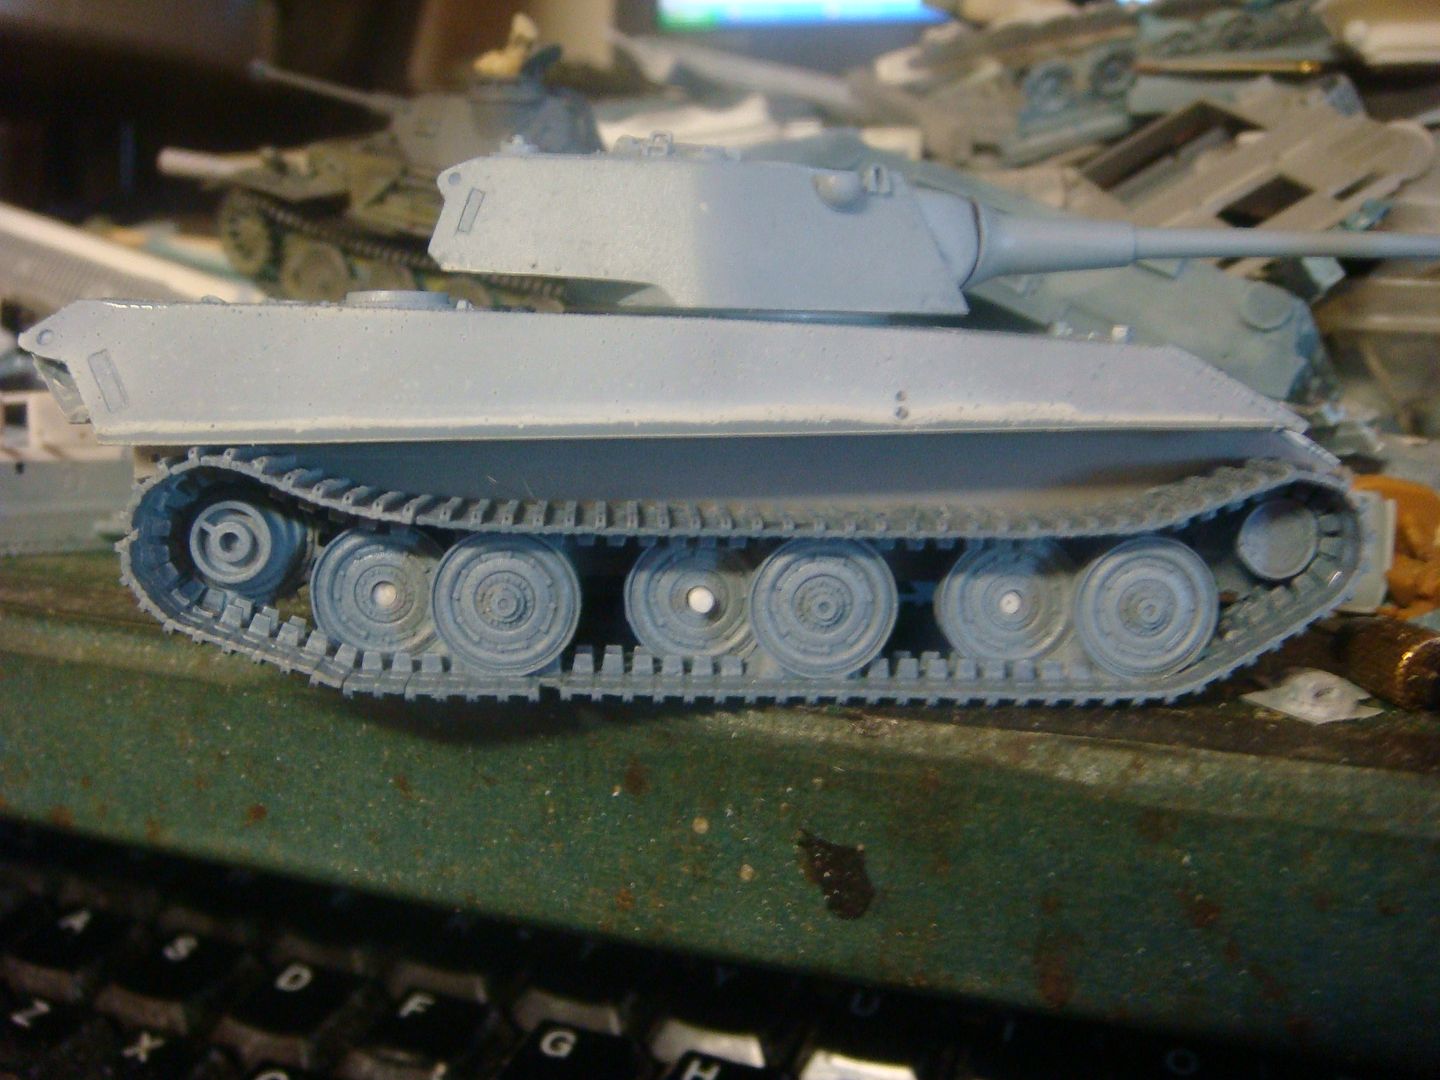 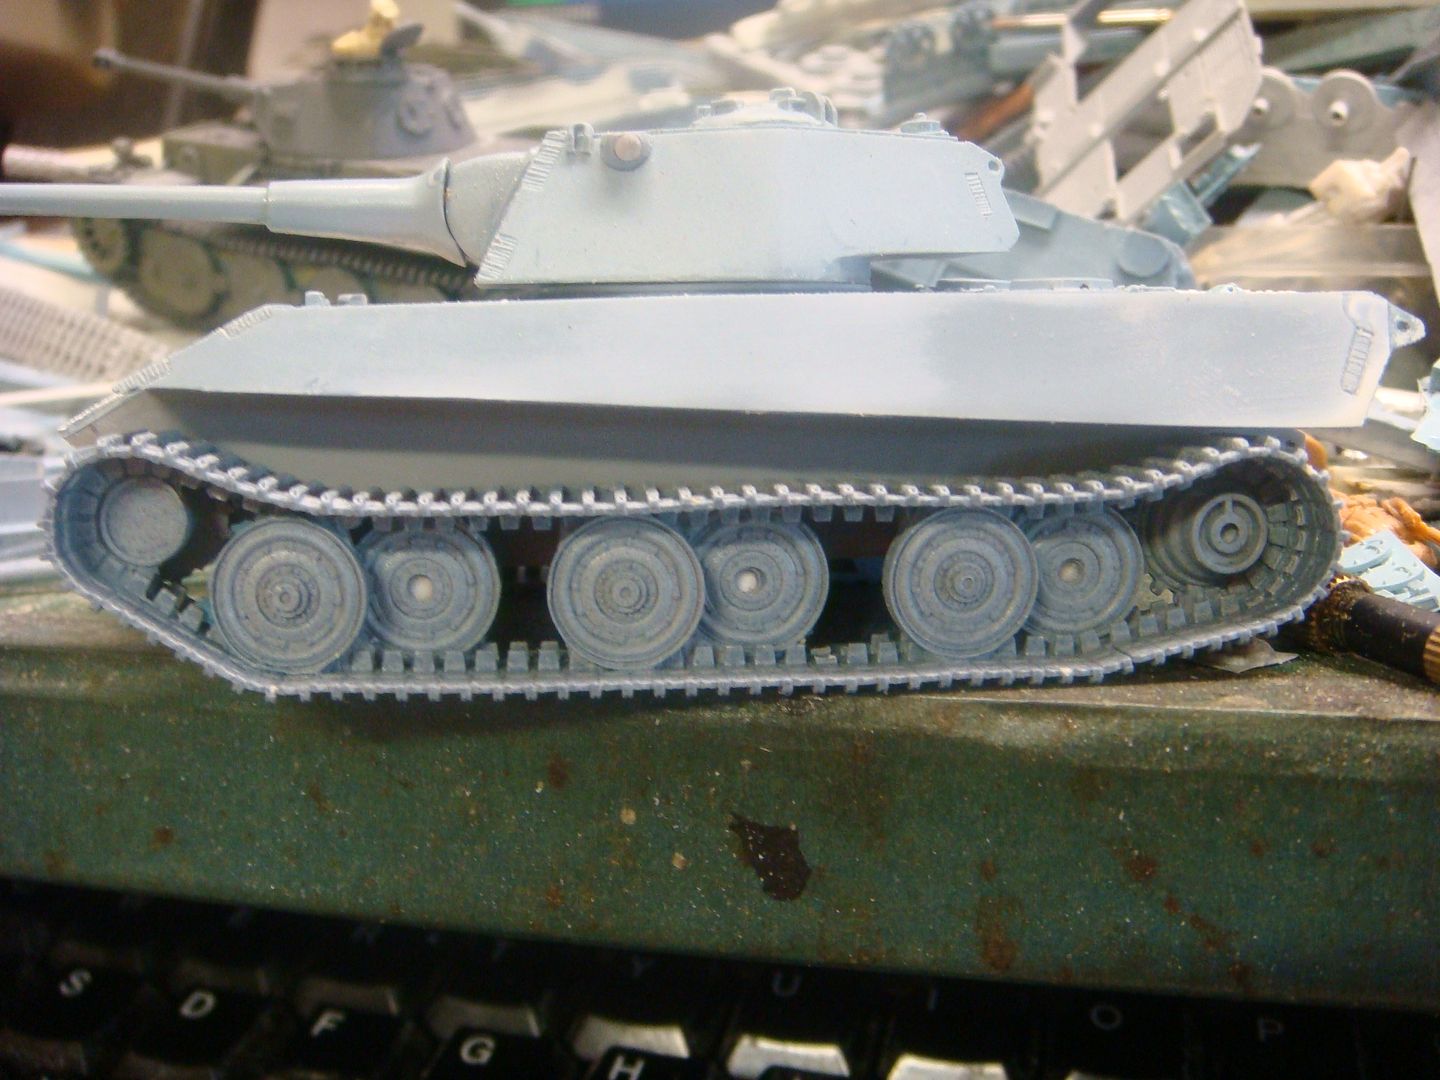 so for the past 2 1/2 days I have been trying to "re-engineer" the masters, to improve the casting and allow for easier pulling from a mold. they will be molded in sections like this. 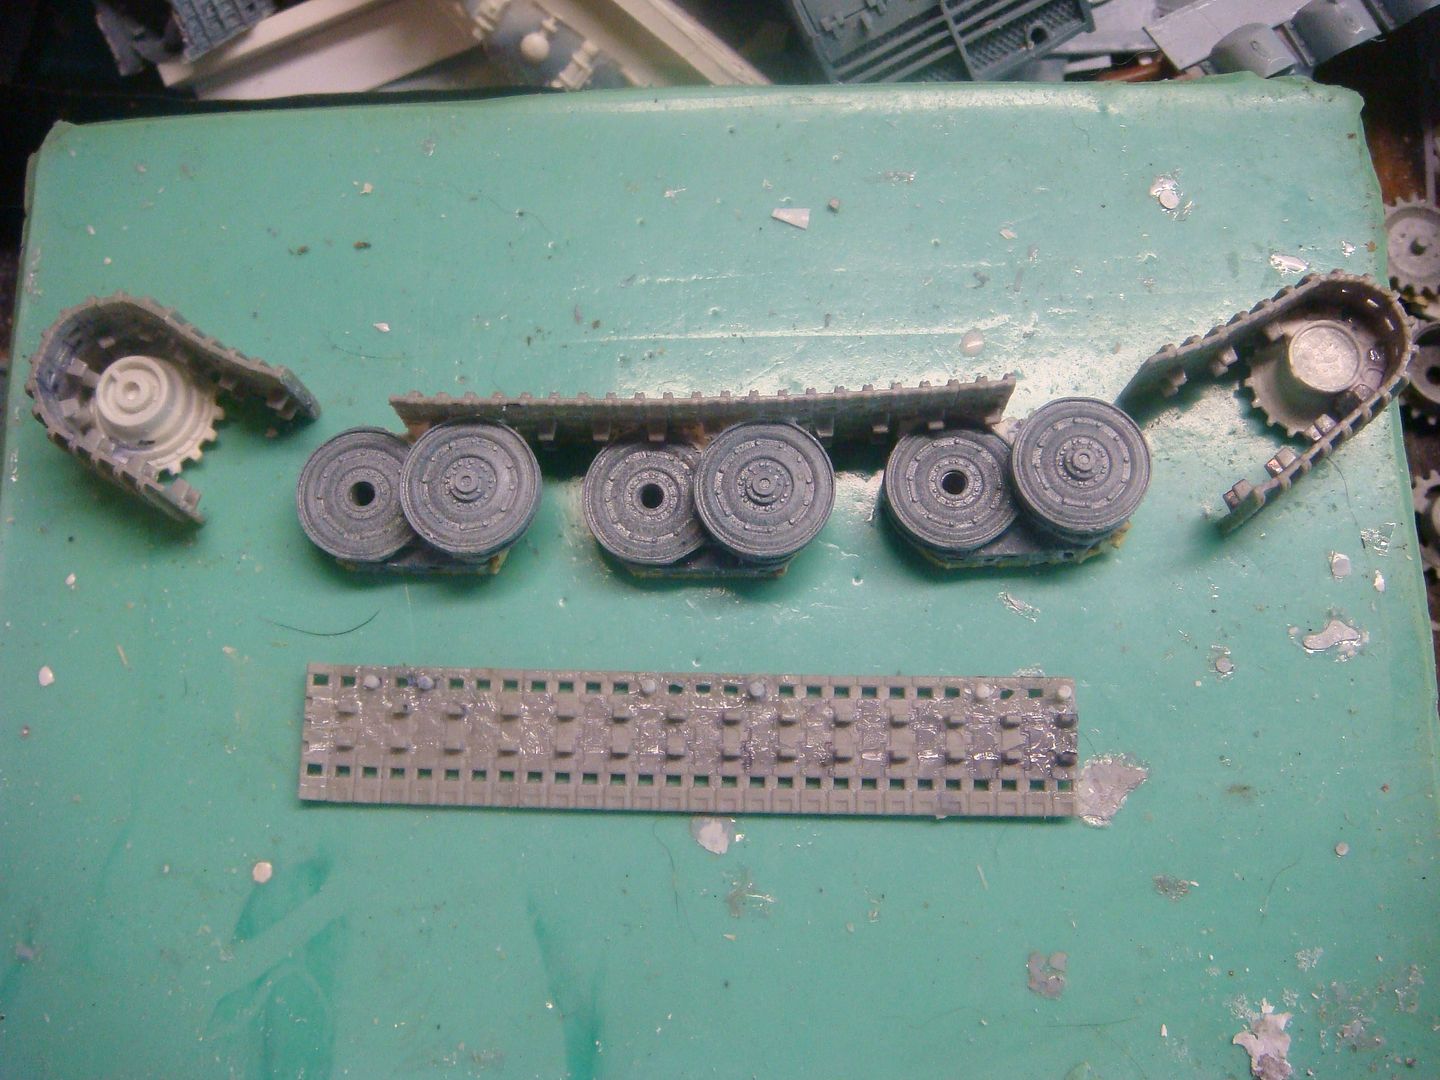 to easy assembly the bottom will will have holes for locking pins 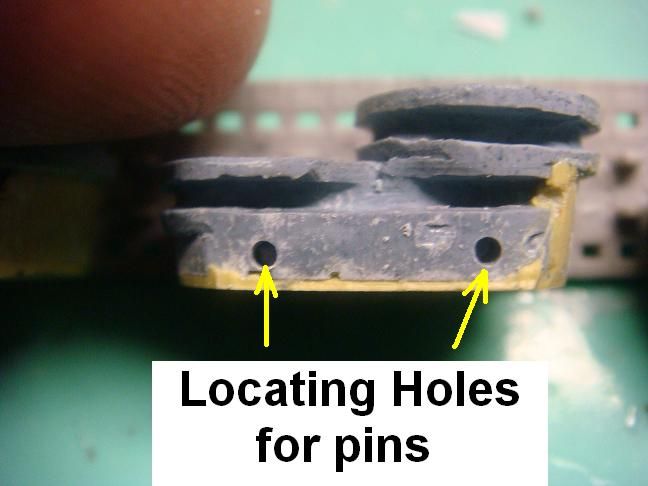 and the bottom run of the track will have the "locking pins" 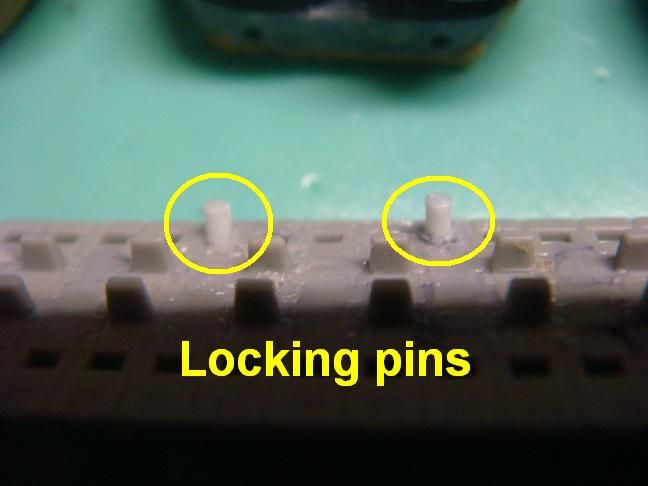 when assembled they will look like this 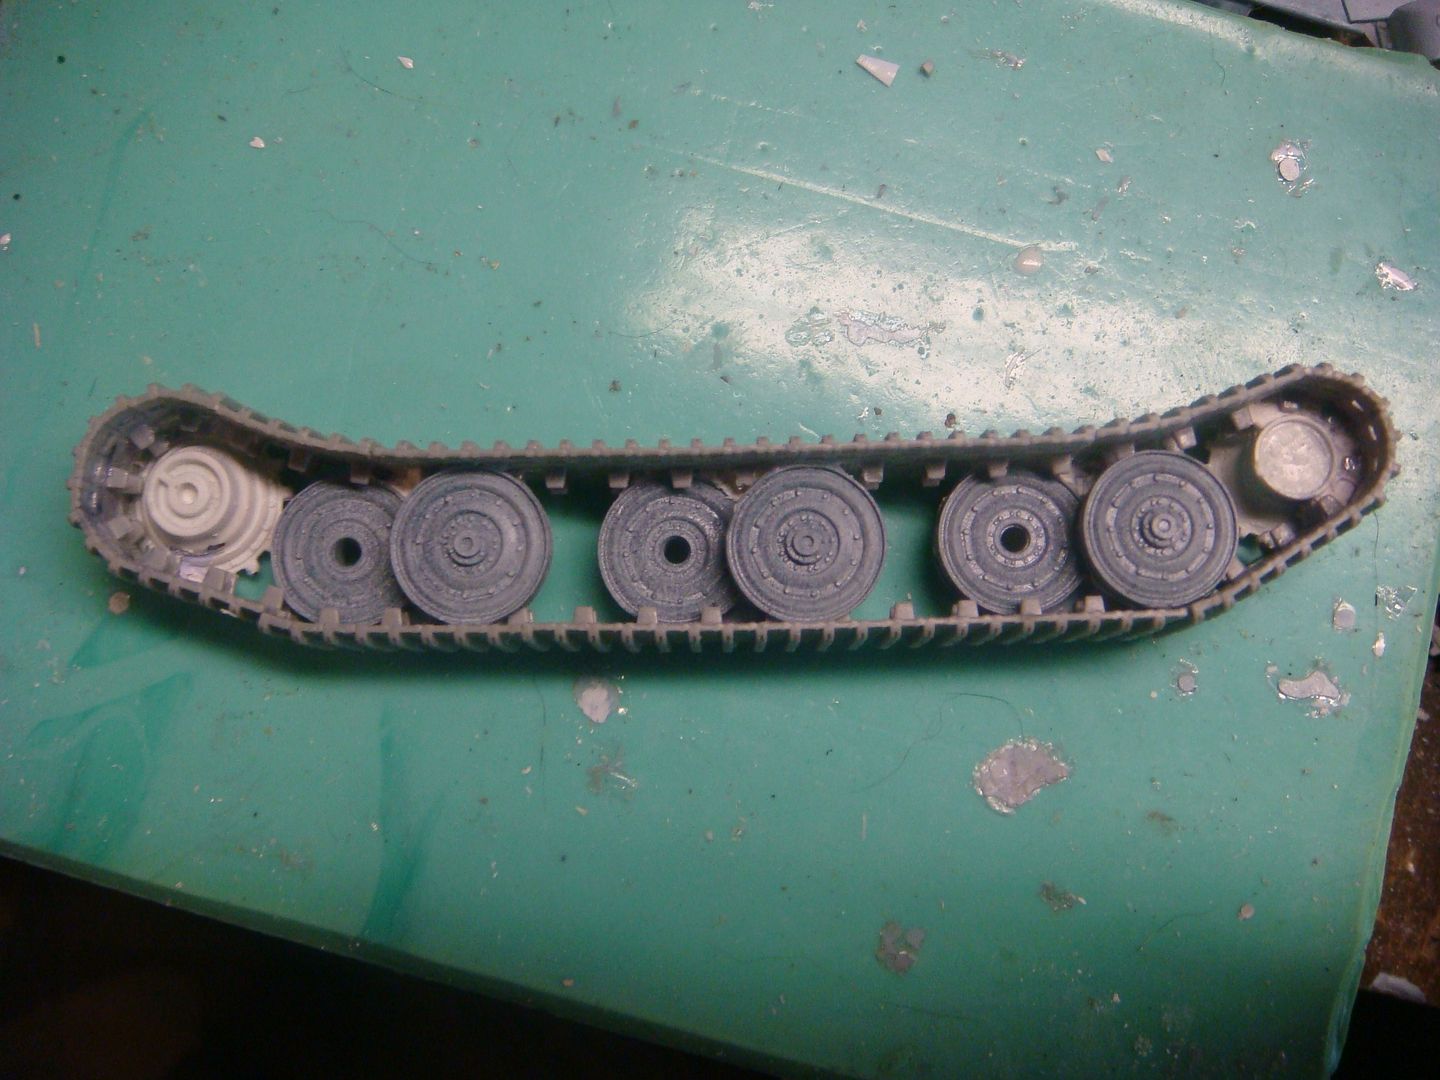 I pushed myself kinda hard doing this part...... was awake for 48 hours making them work. Ended up sleeping for 12 hours after that. |
|
|
|
Post by panzerjager2 on Apr 17, 2016 9:33:43 GMT -5
REALLY Nice work.......
How can you even see 1/72nd scale..... I mean that's teeny....LOL
|
|
|
|
Post by wbill76 on Apr 17, 2016 10:17:38 GMT -5
Looks like the pin solution is the best way to go. Sure beats casting them as Indy's!  |
|
|
|
Post by Leon on Apr 17, 2016 10:42:20 GMT -5
Nice to see the track issue sorted out!  That's a lot of dedication being up for 48 hours.  |
|
|
|
Post by deafpanzer on Apr 19, 2016 18:42:22 GMT -5
Dig your avatar... wheels & tracks look lovely!
|
|
cploverby.
Full Member
  
Member since: August 2012
Posts: 129
Aug 14, 2012 14:15:54 GMT -5
Aug 14, 2012 14:15:54 GMT -5
|
Post by cploverby. on Apr 21, 2016 5:36:45 GMT -5
REALLY Nice work.......
How can you even see 1/72nd scale..... I mean that's teeny....LOL Many Thanks, I wear # 250 reading glasses, and an "optivizor" with a X 10 lens |
|
cploverby.
Full Member
  
Member since: August 2012
Posts: 129
Aug 14, 2012 14:15:54 GMT -5
Aug 14, 2012 14:15:54 GMT -5
|
Post by cploverby. on Apr 21, 2016 5:38:27 GMT -5
Looks like the pin solution is the best way to go. Sure beats casting them as Indy's!  It seems to have worked, although I prefer to cast them as a single piece. that saves me on mold rubber  |
|
cploverby.
Full Member
  
Member since: August 2012
Posts: 129
Aug 14, 2012 14:15:54 GMT -5
Aug 14, 2012 14:15:54 GMT -5
|
Post by cploverby. on Apr 21, 2016 5:39:41 GMT -5
Nice to see the track issue sorted out!  That's a lot of dedication being up for 48 hours.  Sometimes I start working on something, and I skip meals, sleep, anything that keeps me from getting the job done. |
|
cploverby.
Full Member
  
Member since: August 2012
Posts: 129
Aug 14, 2012 14:15:54 GMT -5
Aug 14, 2012 14:15:54 GMT -5
|
Post by cploverby. on Apr 21, 2016 5:44:48 GMT -5
Dig your avatar... wheels & tracks look lovely! Yes I like it too...... took me forever to get it done to the right size. you'll like the next post  |
|
cploverby.
Full Member
  
Member since: August 2012
Posts: 129
Aug 14, 2012 14:15:54 GMT -5
Aug 14, 2012 14:15:54 GMT -5
|
Post by cploverby. on Apr 21, 2016 5:45:26 GMT -5
have been working so hard on this....... here is how the tracks have come out. the top set (left side) are assembled, the bottom set (right side)are not yet assembled. 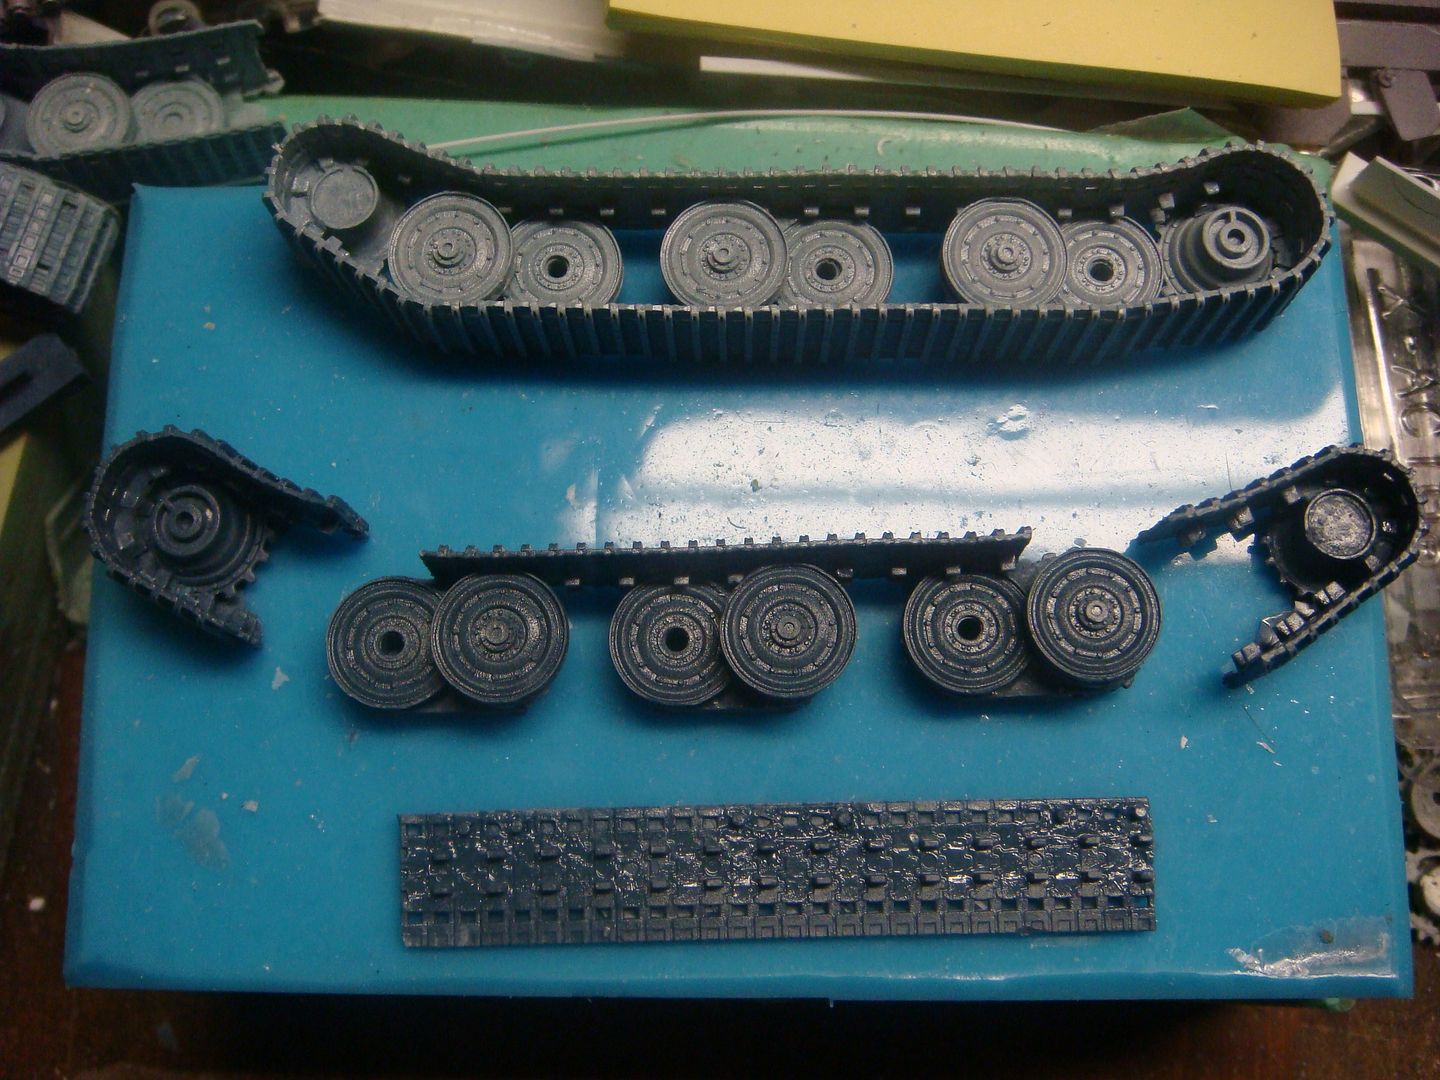 here is how they look on the tank with the drive sprocket, idler sprocket and the "inner" wheel hubs. i did this in two shades of resin so you can see the different parts. 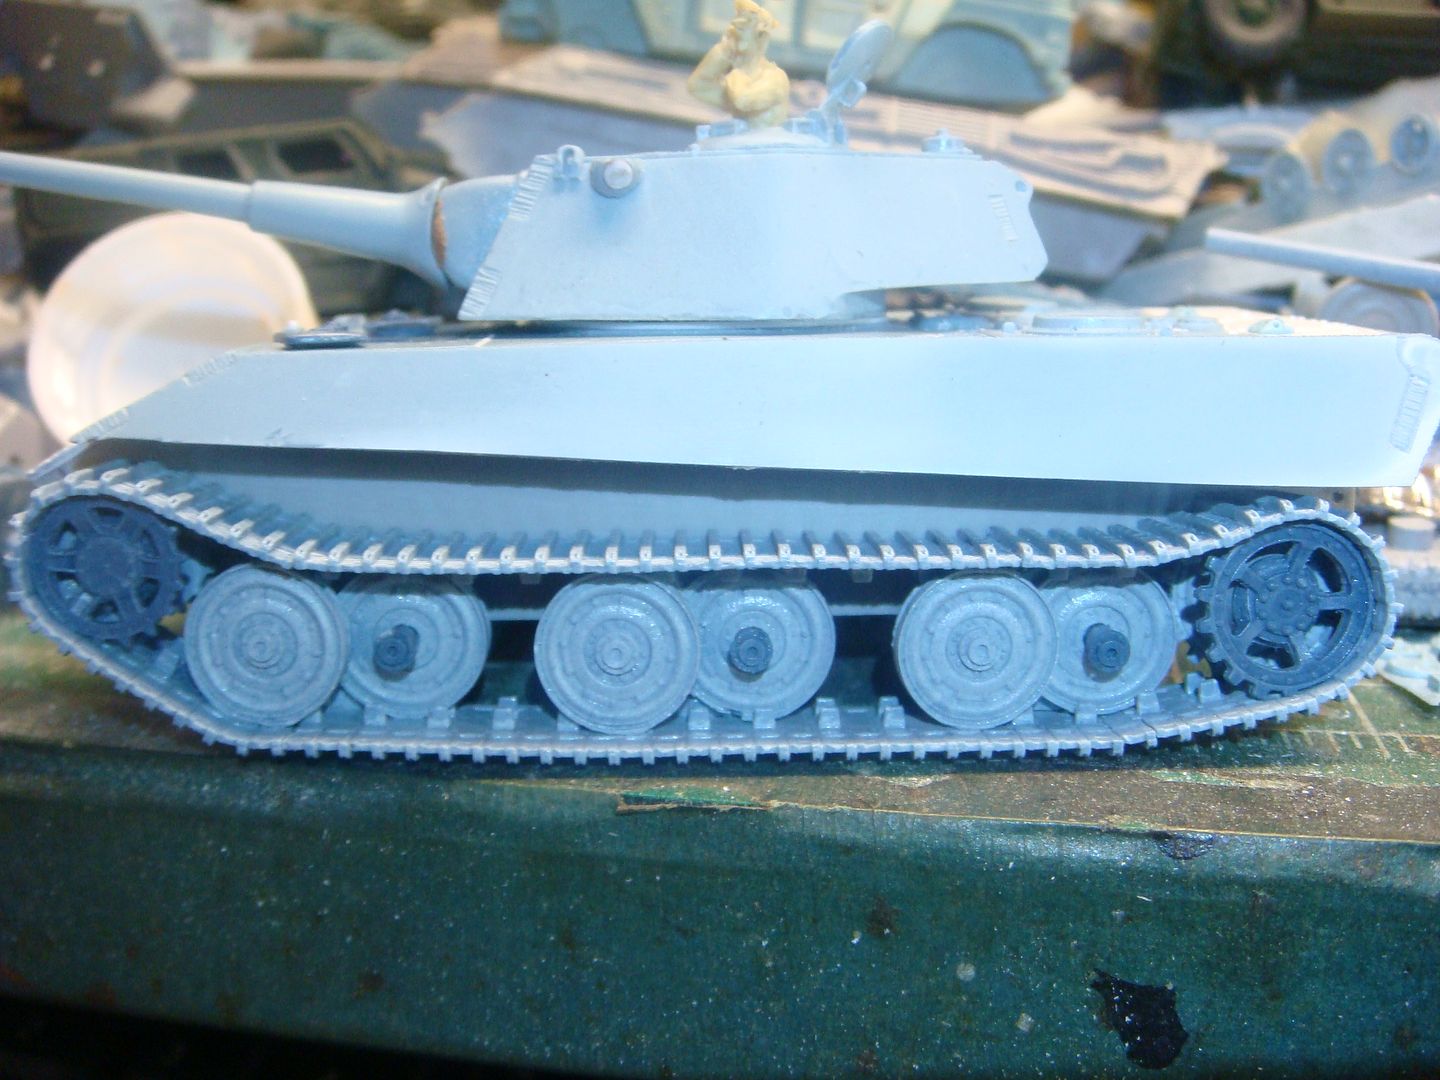 I decided from the beginning that the front hatches would be open hatches, So I made that area in the hull as an open space 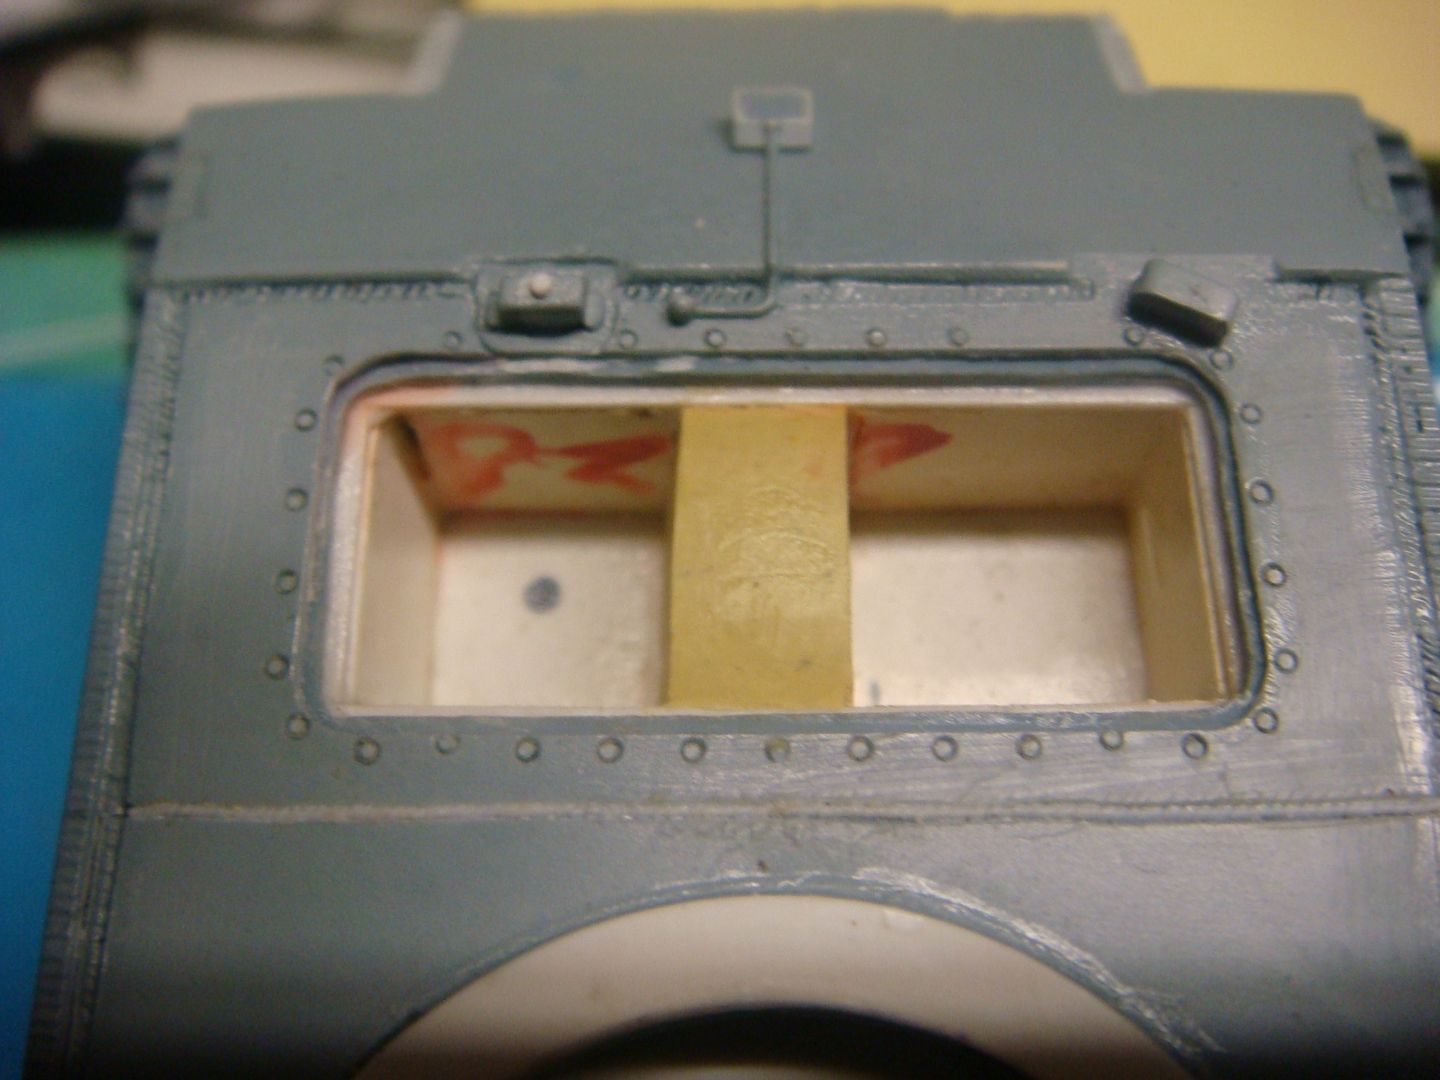 I molded the plate with the hatch openings, and cast it. here it is without the hatches 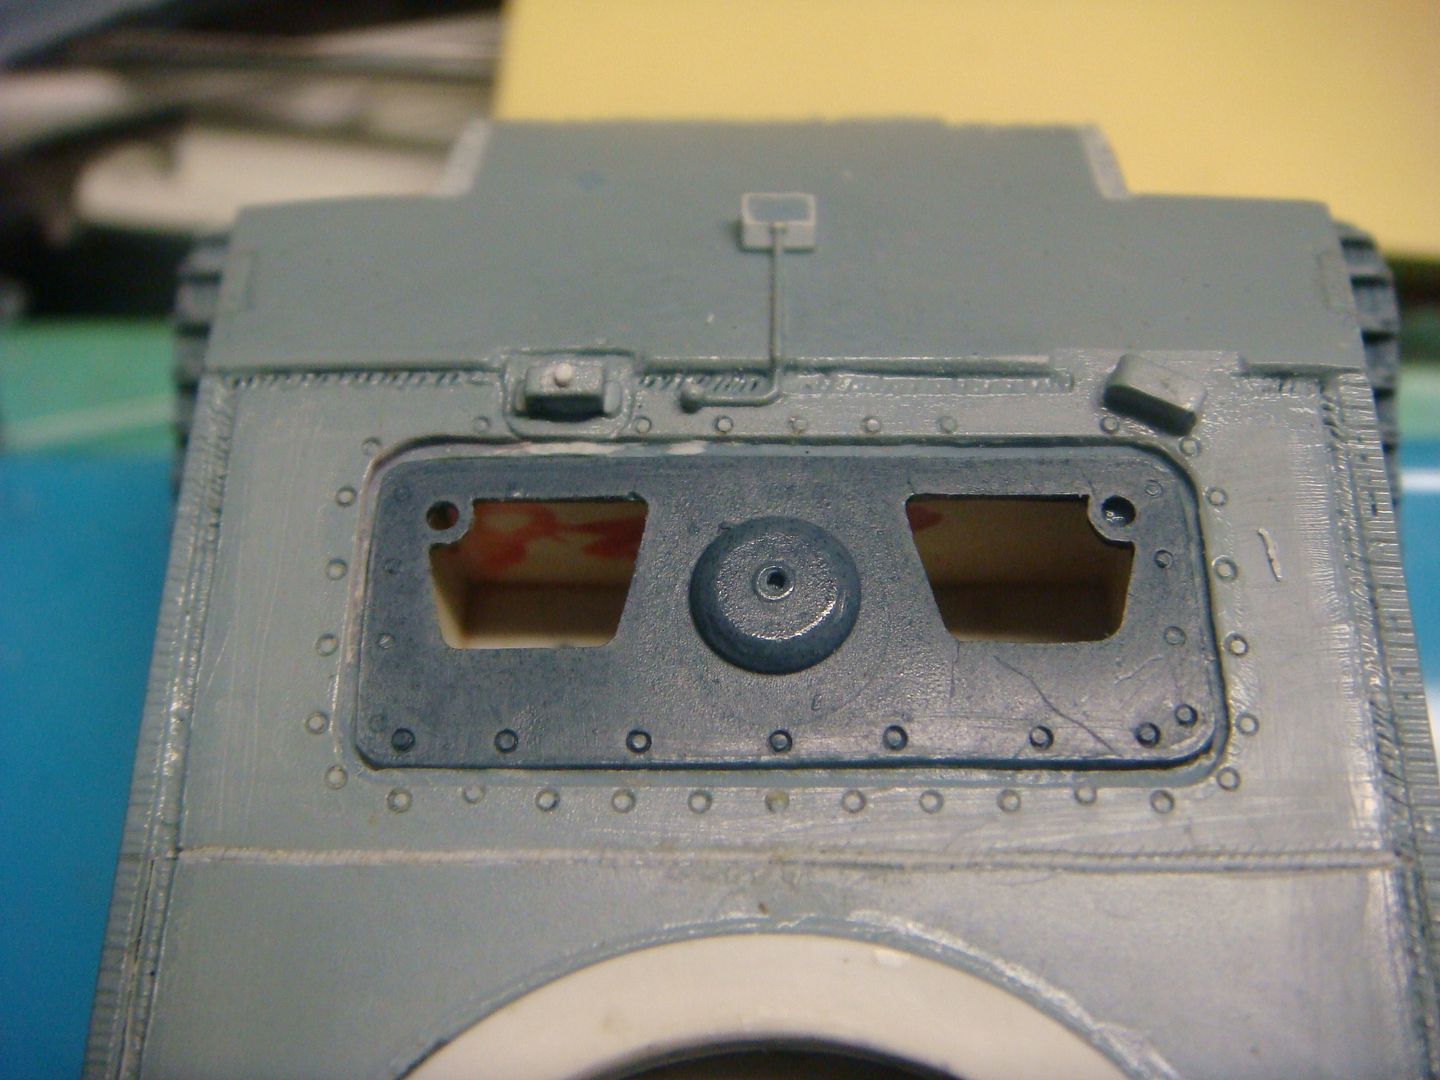 here it is with the hatches 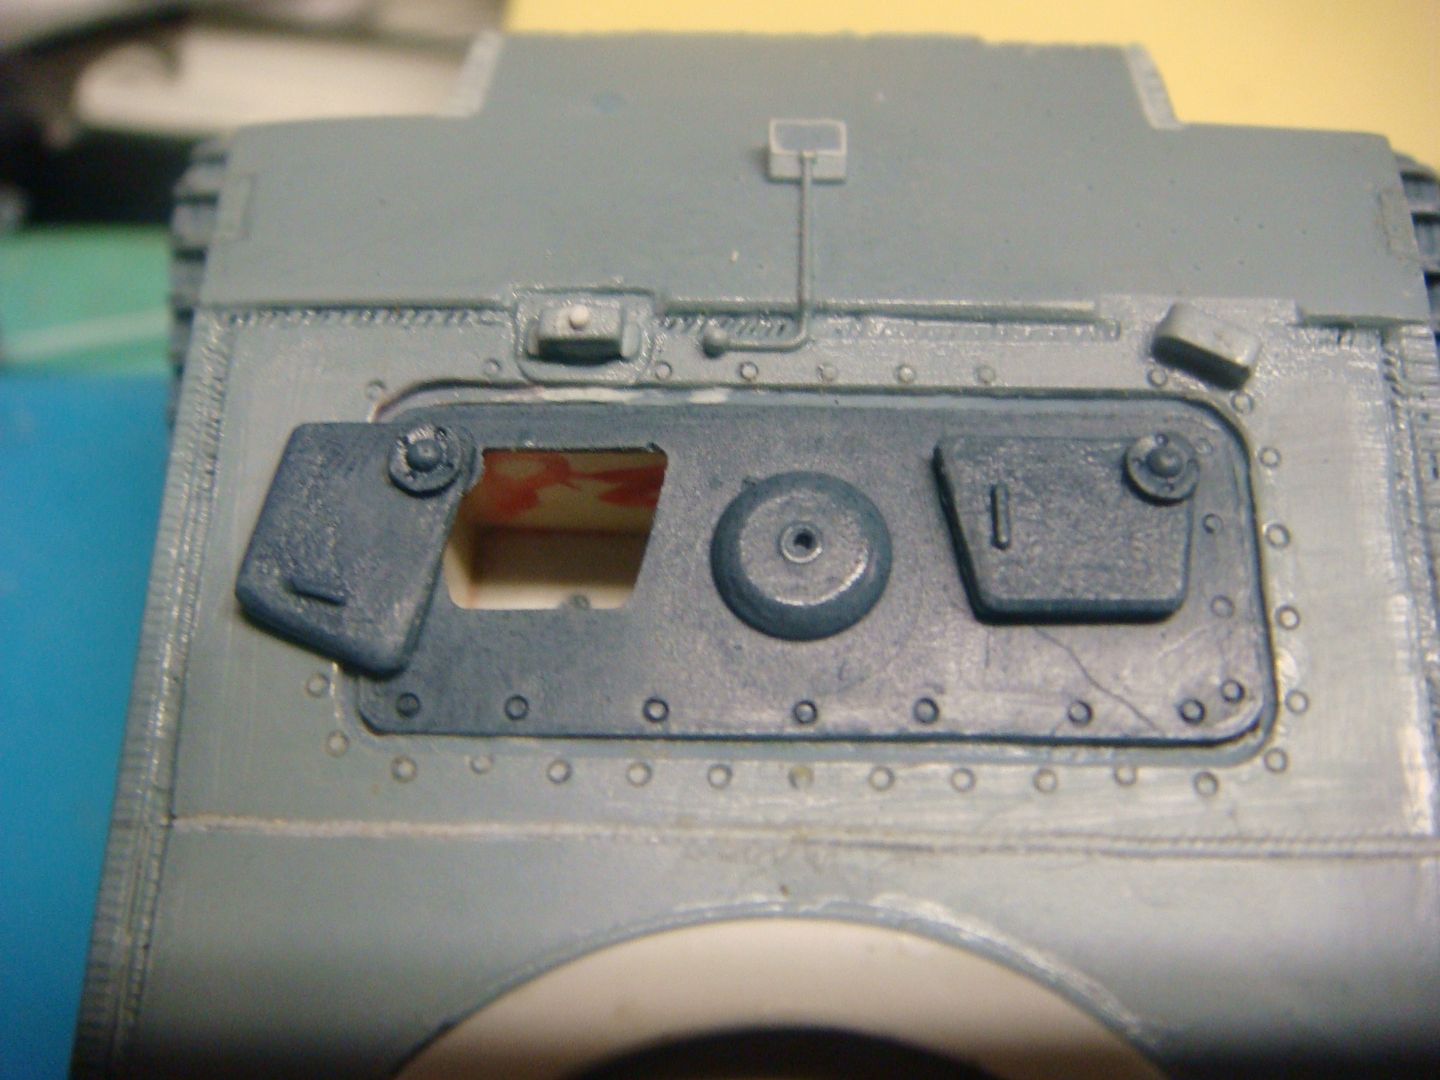 here it is with a fig 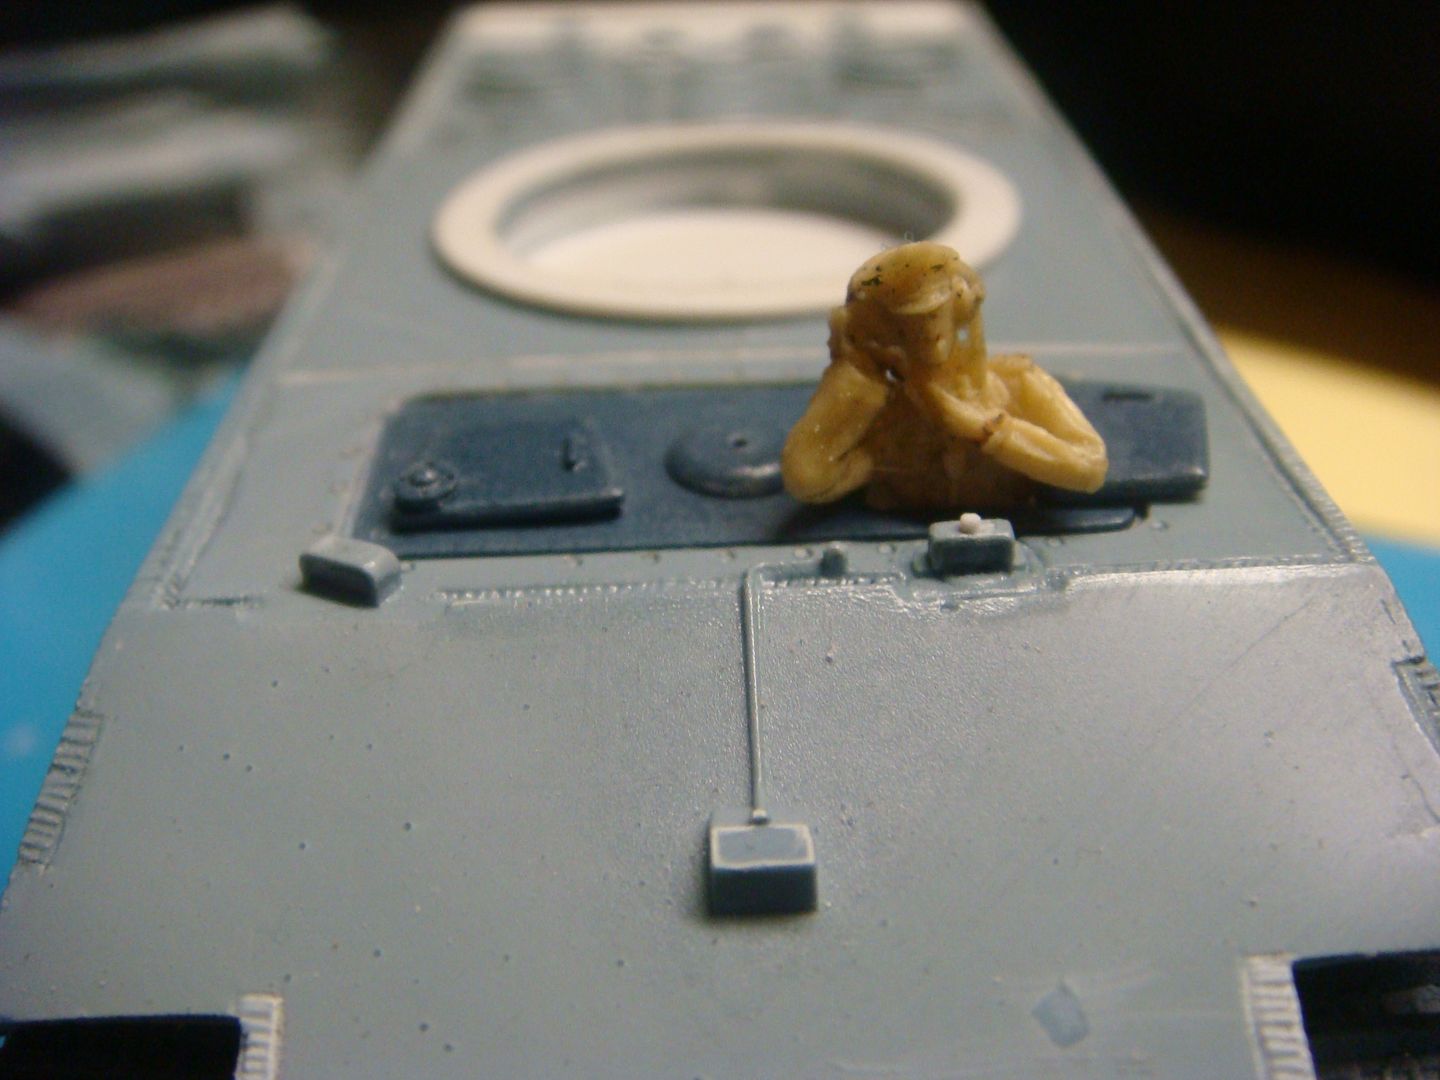 I made it quite deep to allow different figs 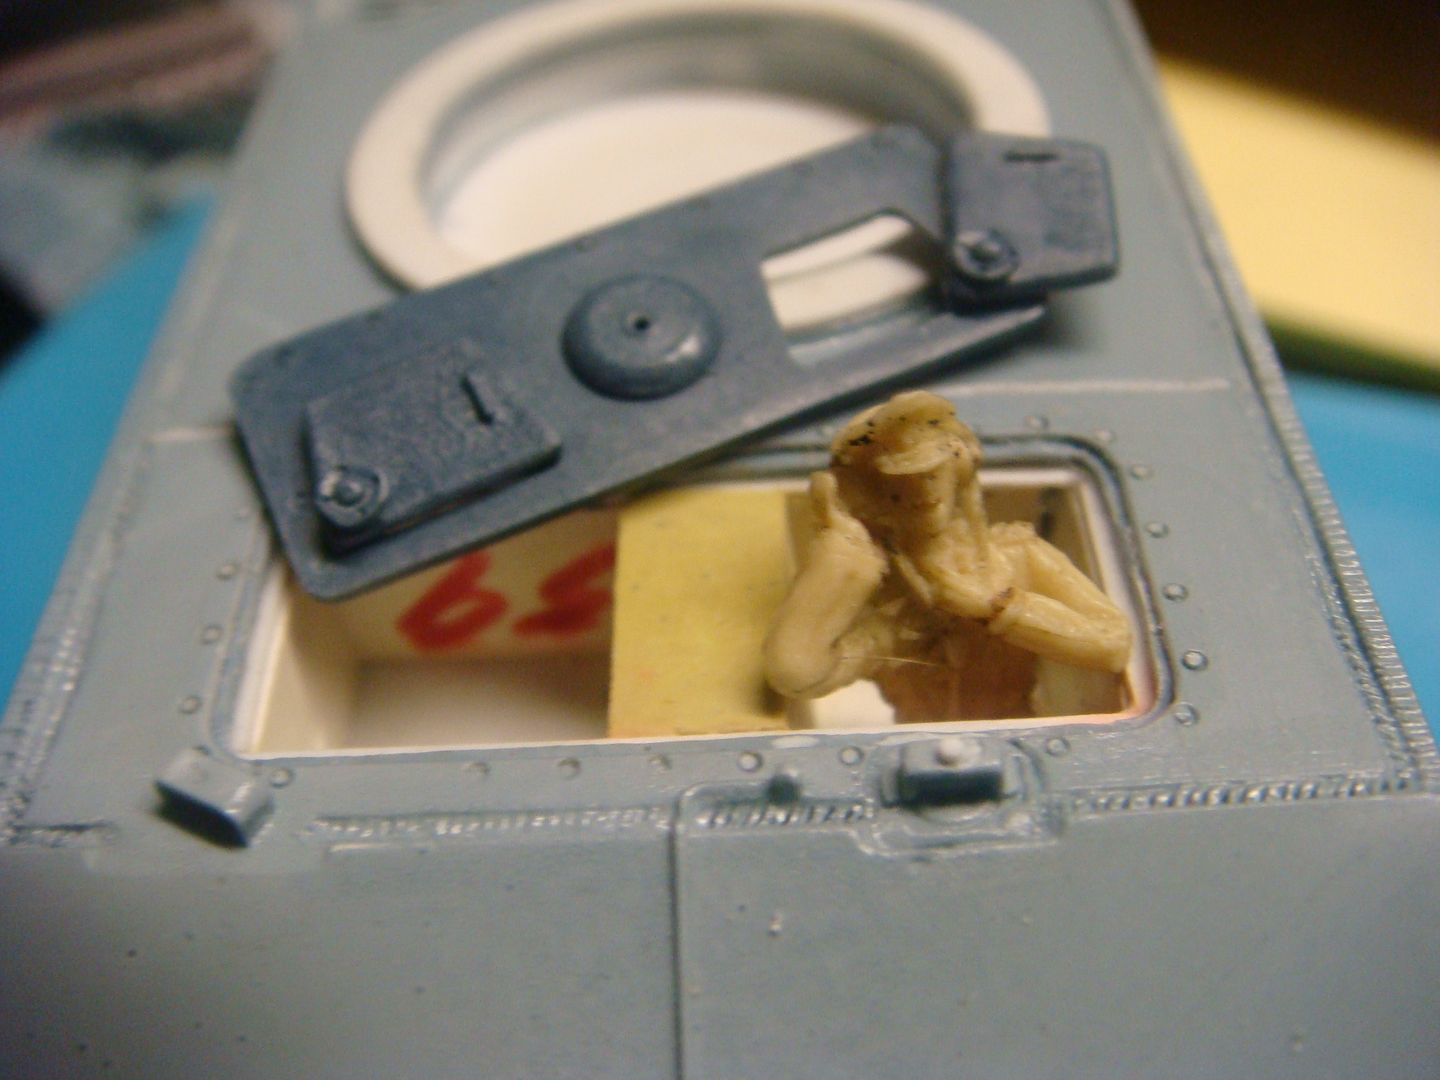 now....for the front.... there are two different "schools of thought" as to weather or not there should be a bow / hull MG so I added the parts for the model builder to exercise his options here it is as a plain hull 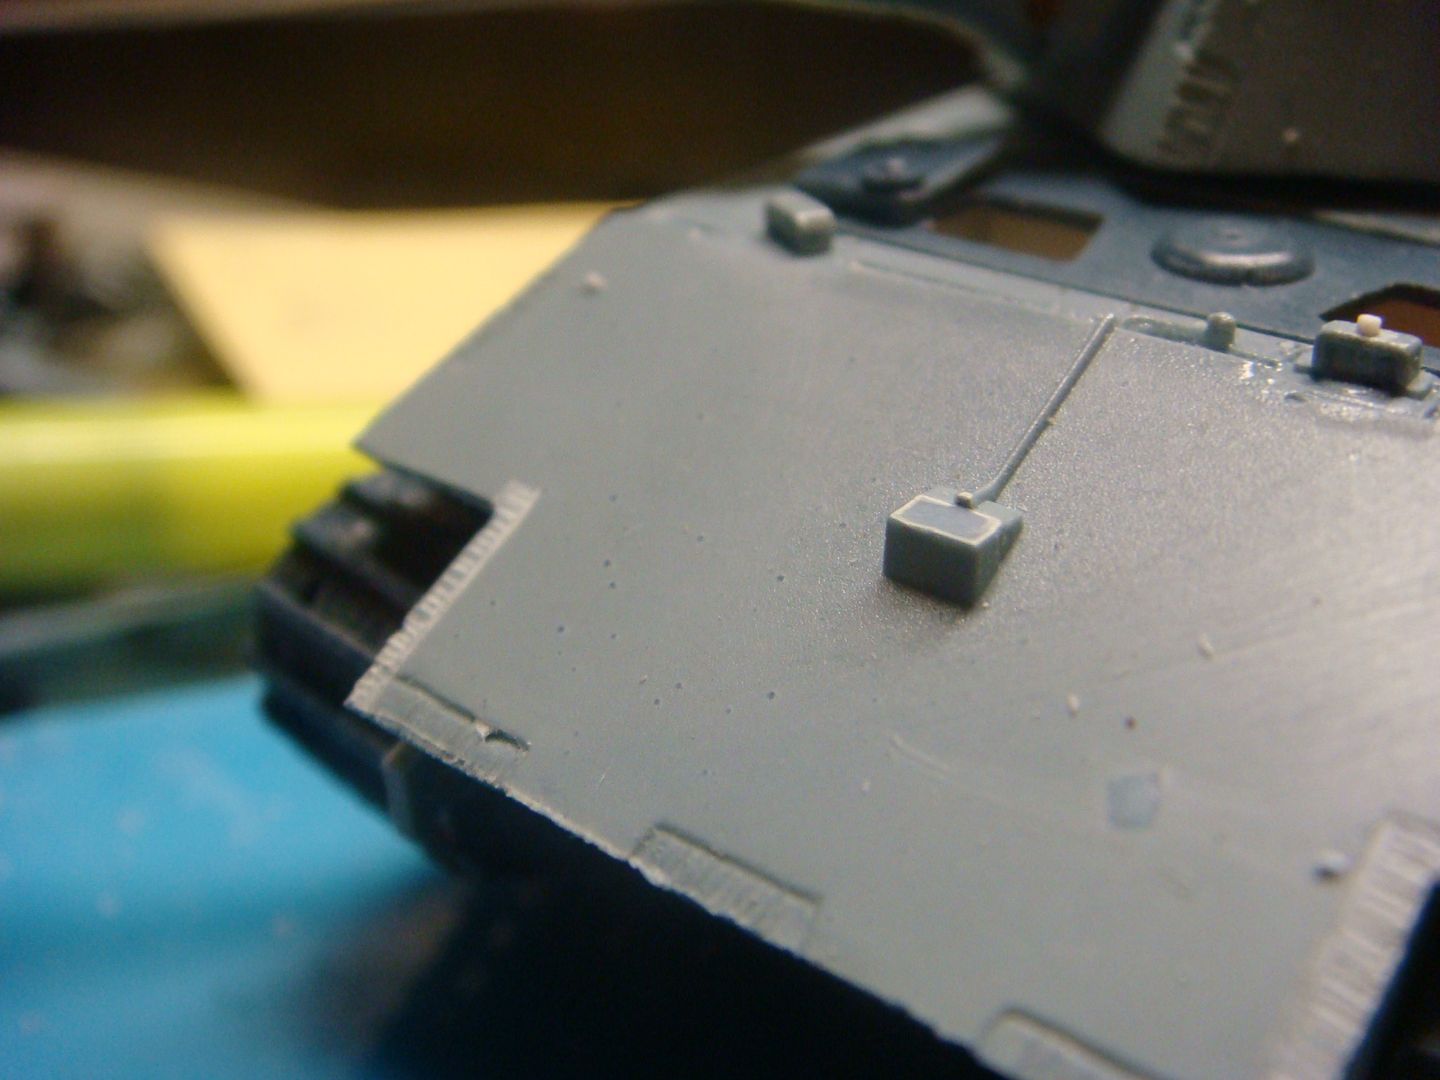 here it is with the ball mount in place. 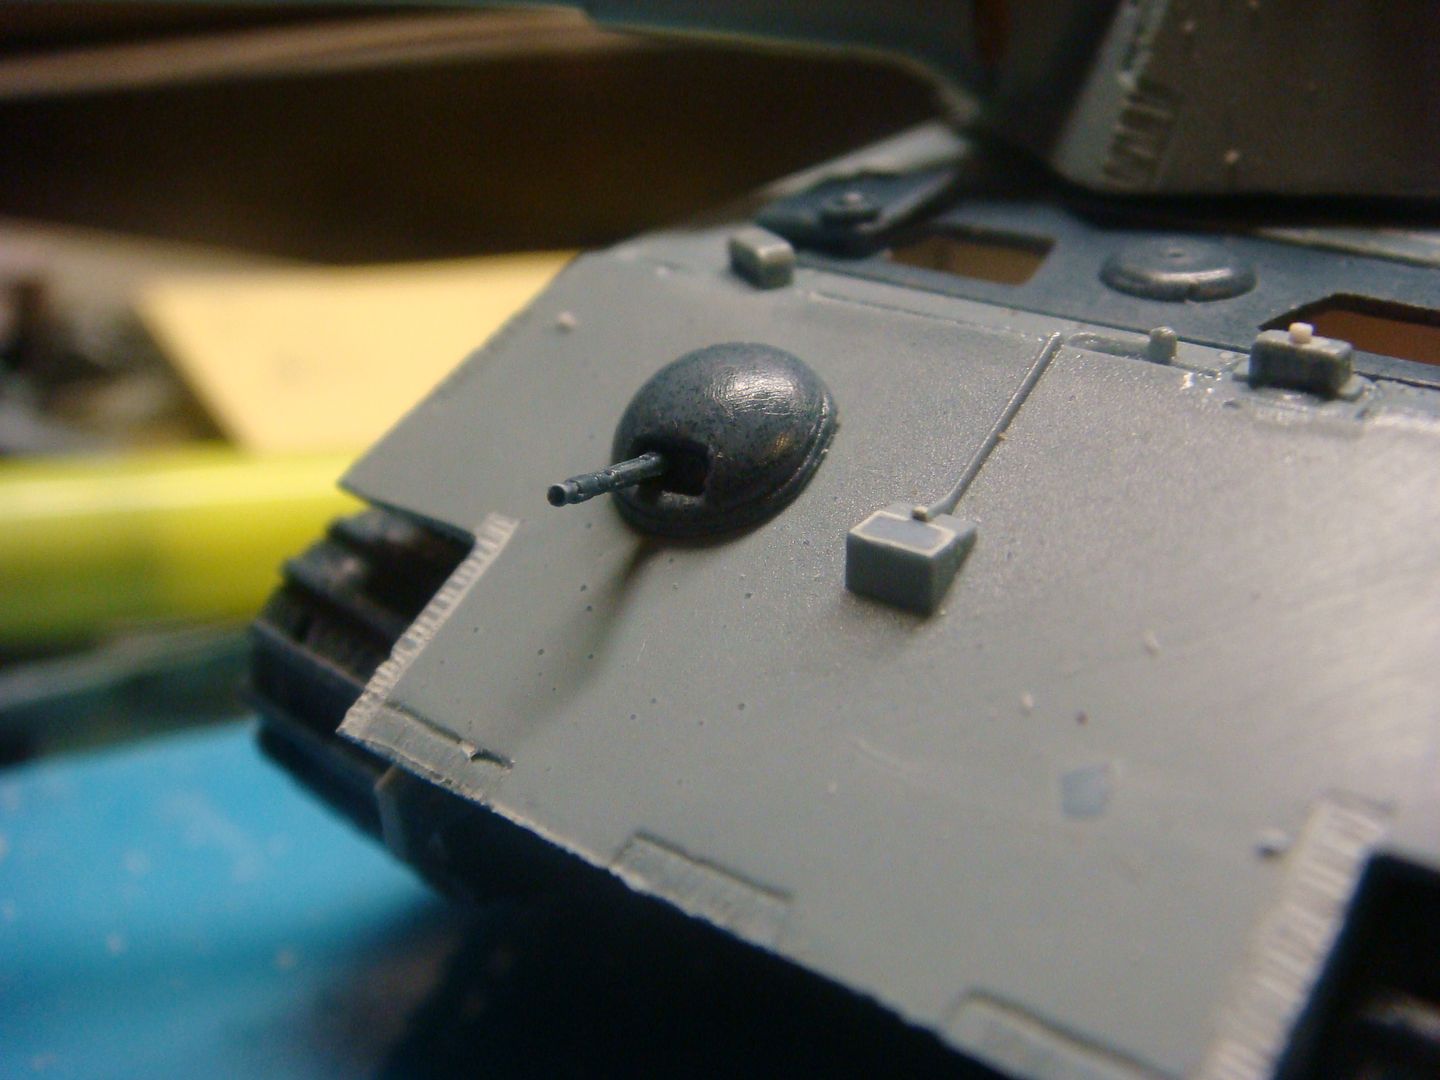 That's where I am for now. |
|
|
|
Post by Leon on Apr 21, 2016 5:54:25 GMT -5
Looking really good!
|
|
|
|
Post by deafpanzer on Apr 23, 2016 17:06:21 GMT -5
Looking real good!
|
|
cploverby.
Full Member
  
Member since: August 2012
Posts: 129
Aug 14, 2012 14:15:54 GMT -5
Aug 14, 2012 14:15:54 GMT -5
|
Post by cploverby. on Apr 26, 2016 5:13:14 GMT -5
Many Thanks Happy you like it  |
|
cploverby.
Full Member
  
Member since: August 2012
Posts: 129
Aug 14, 2012 14:15:54 GMT -5
Aug 14, 2012 14:15:54 GMT -5
|
Post by cploverby. on Apr 26, 2016 5:13:47 GMT -5
So Glad you like it  |
|
cploverby.
Full Member
  
Member since: August 2012
Posts: 129
Aug 14, 2012 14:15:54 GMT -5
Aug 14, 2012 14:15:54 GMT -5
|
Post by cploverby. on Apr 28, 2016 21:19:55 GMT -5
|
|
|
|
Post by Leon on Apr 29, 2016 5:49:40 GMT -5
Awesome build! Looking forward to seeing paint.
|
|
cploverby.
Full Member
  
Member since: August 2012
Posts: 129
Aug 14, 2012 14:15:54 GMT -5
Aug 14, 2012 14:15:54 GMT -5
|
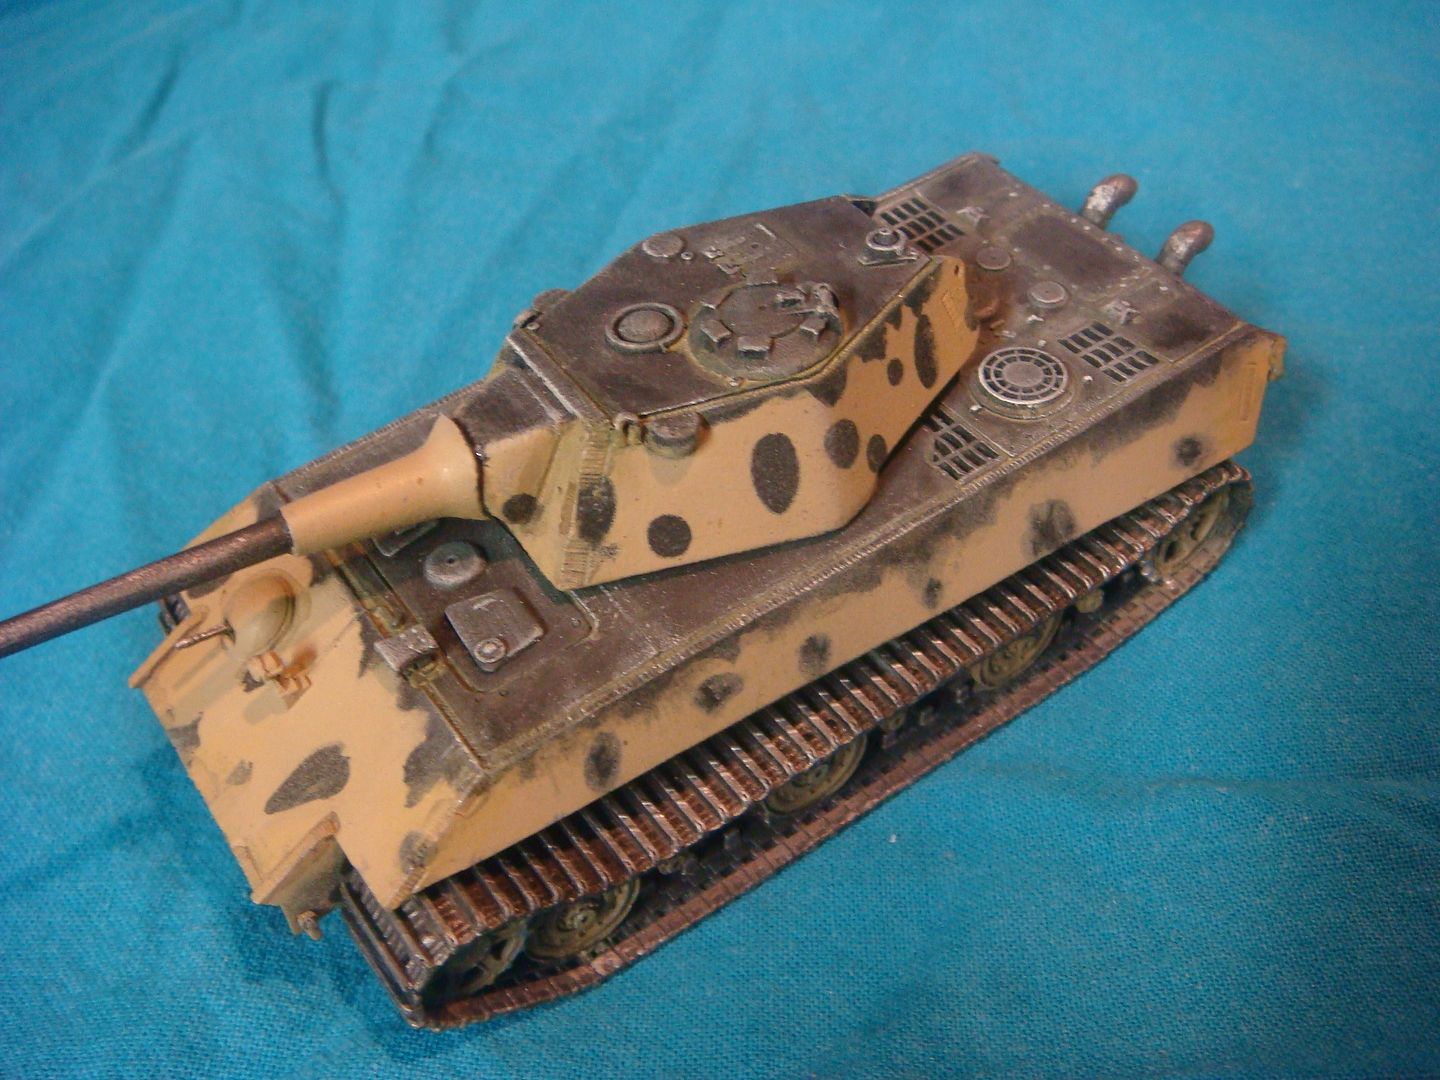
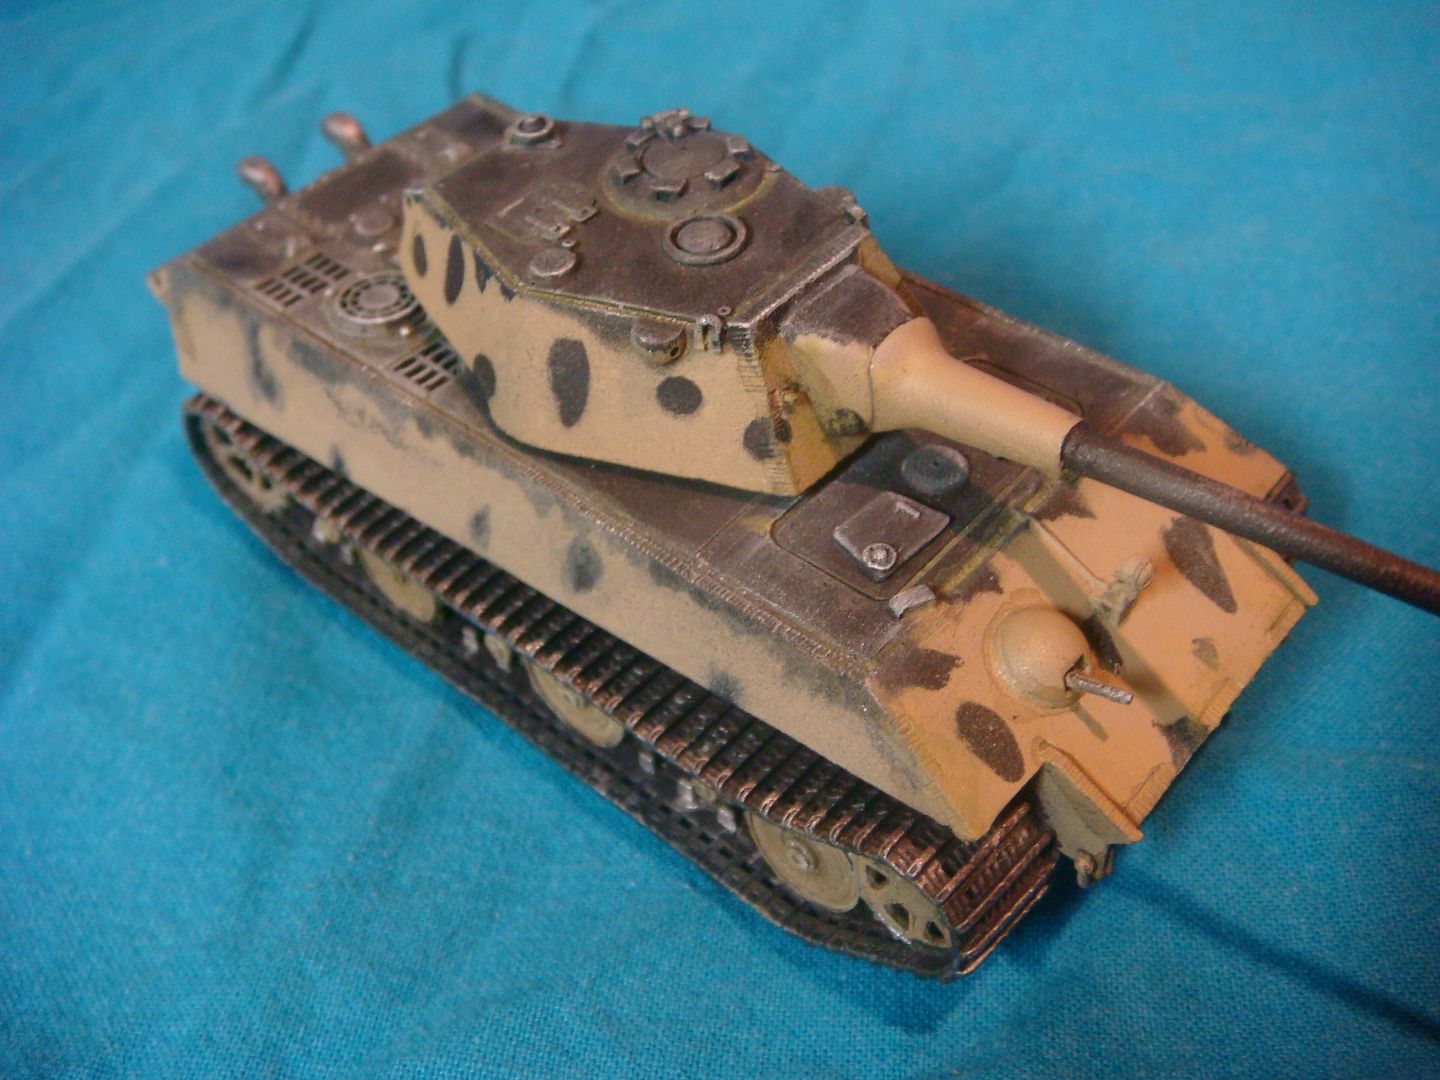
Post by cploverby. on Apr 29, 2016 6:30:50 GMT -5
|
|
Tojo72
Forum Moderator      Sept '24 Showcased Model Awarded
Member since: November 2012
Posts: 5,317
Member is Online
MSC Staff
|
Post by Tojo72 on Apr 29, 2016 6:46:23 GMT -5
Tiger on steroids,nice job.
|
|
|
|
Post by Leon on Apr 29, 2016 7:55:14 GMT -5
Paint looks great! I like it.
|
|
|
|
Post by deafpanzer on Apr 29, 2016 10:58:54 GMT -5
Great finish! Pretty cool camo scheme too.
|
|
cploverby.
Full Member
  
Member since: August 2012
Posts: 129
Aug 14, 2012 14:15:54 GMT -5
Aug 14, 2012 14:15:54 GMT -5
|
Post by cploverby. on May 4, 2016 19:35:23 GMT -5
Tiger on steroids,nice job. Glad you like it  |
|


