bish
Full Member
  
Member since: January 2013
Horatio Nelson 'I am a Norfolk man, and i glory in being so'
Posts: 555
Jan 13, 2013 8:57:43 GMT -5
Jan 13, 2013 8:57:43 GMT -5
|
Post by bish on Jun 30, 2016 12:54:25 GMT -5
After an Italeri aircraft, its time for some Italeri armour. I have had this kit in the stash longer than just about any other. I think a couple of AMT Star Wars kits might have been there longer. So, after sitting there 20 years, its about time this one got built. 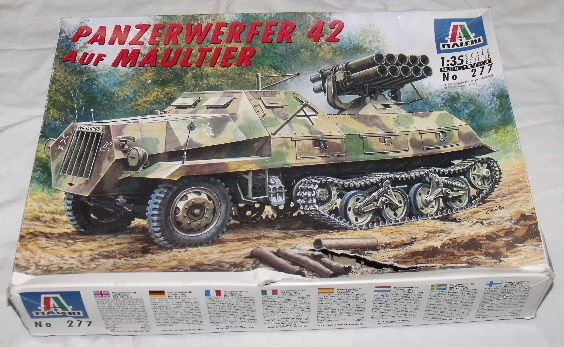 I originally got an Eduard PE set for this. But then i found a set from Royal Model which has PE and plenty of resin. 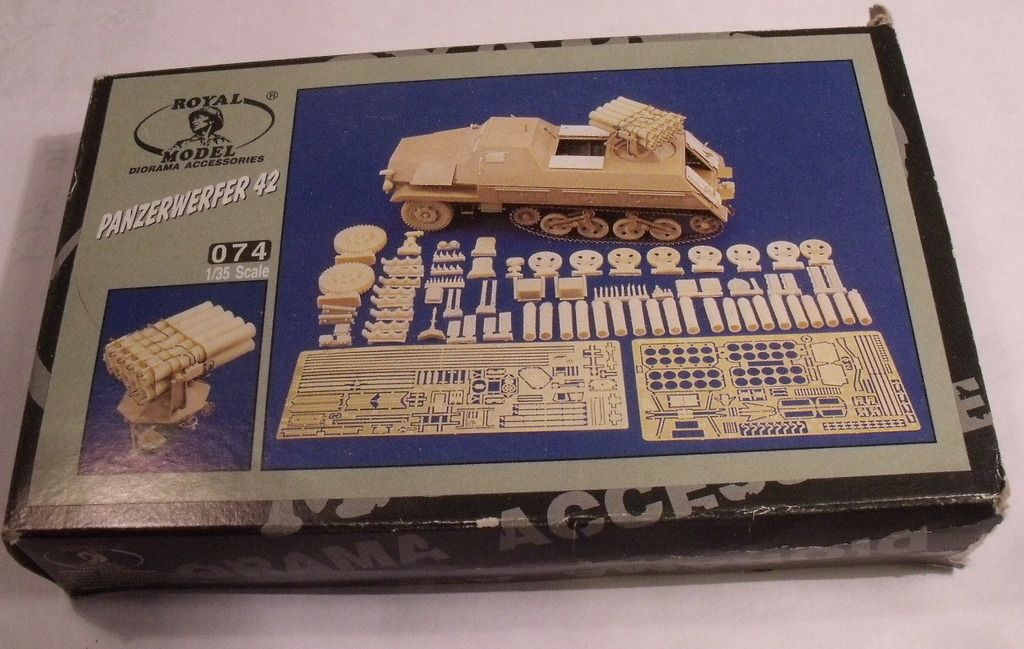 I am still keeping the Eduard set to hand, it has already come in handy. As well as the RM set, i have a set of fruil tracks. 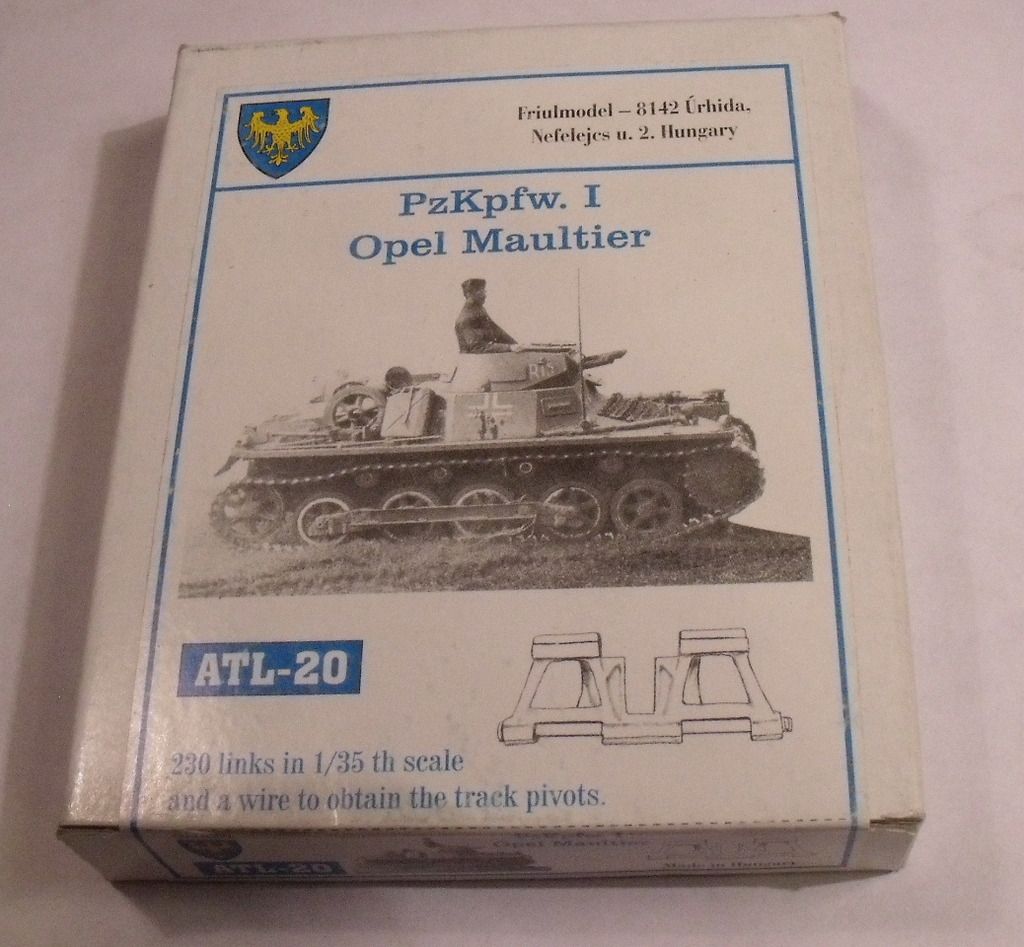 And some RM figures. 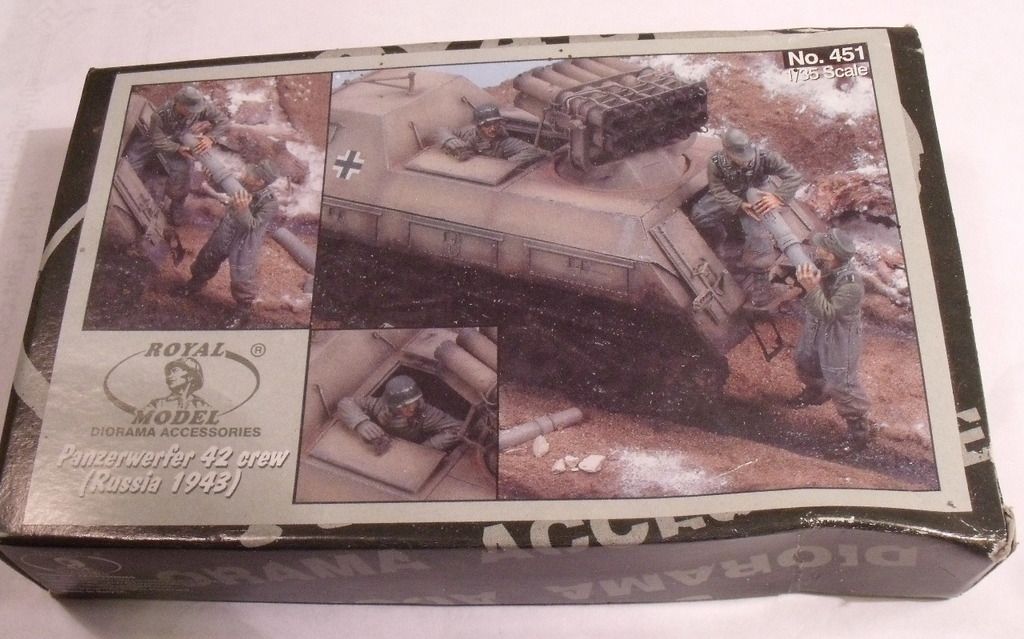 I started working on both the interiour lower half and the chassis. First, the inside. This is how it looks before i start removing bits. You can see a sink mark which runs along the sides and rear of the floor. 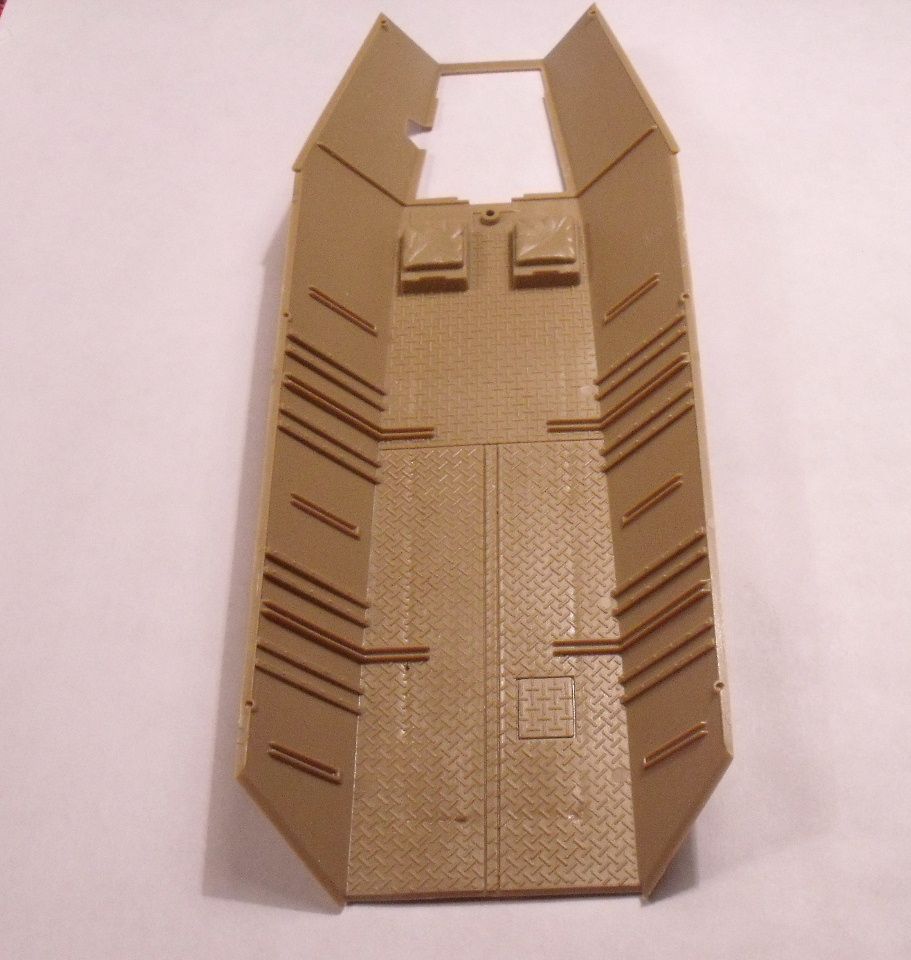 This corresponds with the raised parts to mount the hull to the chassis. 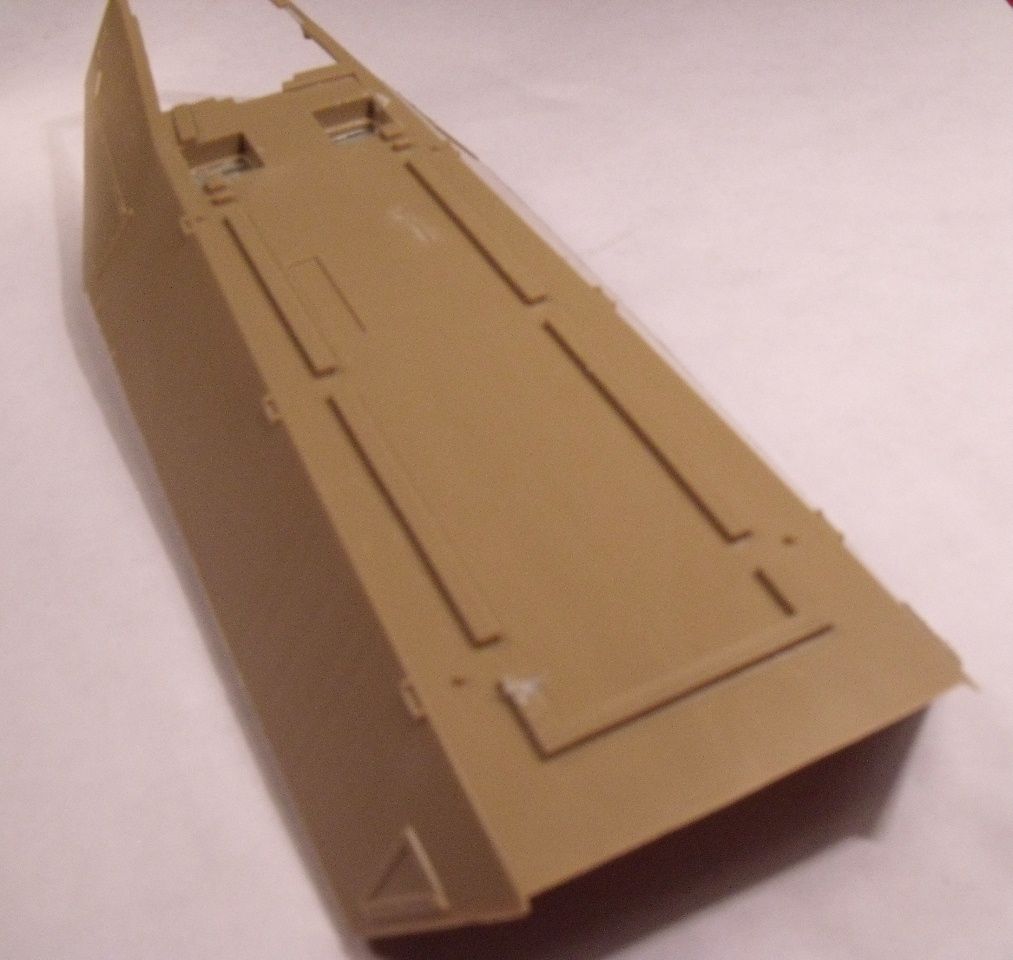 RM does make PE floor plating and give the number of the set to use on this. Had i been doing this with the doors open and un-obstructed, i would have used that. But the floor will be covered with rockets waiting to be loaded and the figures will be blocking the hatch's, so i will not worry about that. I stared by removing the mouldings on the right and adding the AM parts. This way i could use the mouldings on the left as a guide. 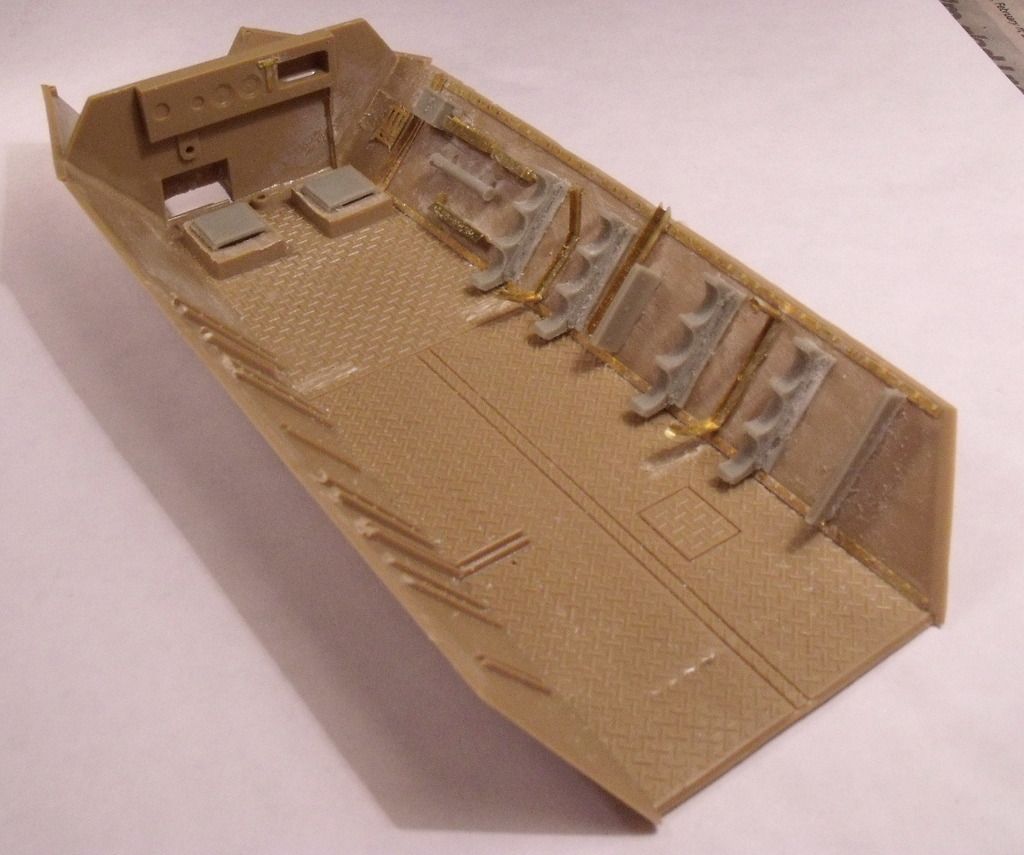 I then repeated for the left and added the parts at the front, including a couple of resin bits. 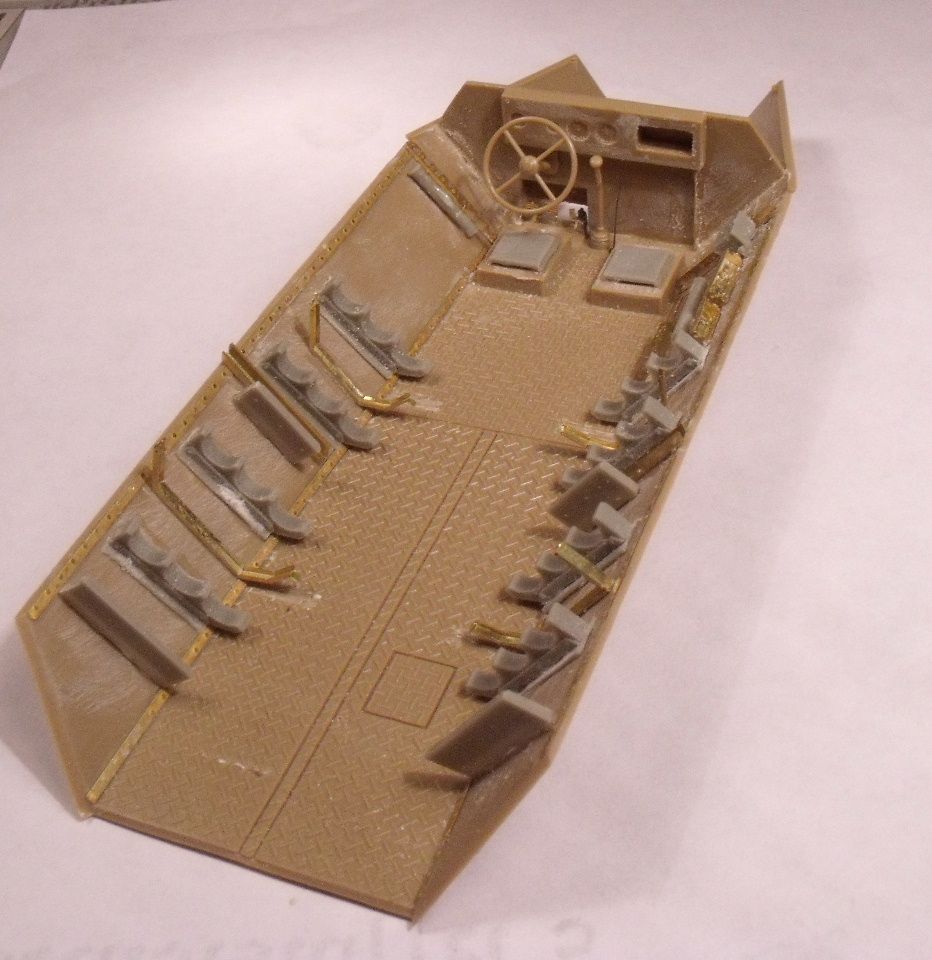 When i opened the RM resin parts at the weekend i found a couple of parts missing. These are the top of the securing brackets that hold the rockets in place. I have contacted RM and they are sending me the parts, great service from them. So apart from those and the frame for the radio, the lower part is done. I have taken a radio from the spares box as neither kit or AM set includes one. And then the chassis. I am leaving the road wheels and bogies of for painting, so this went together quickly. 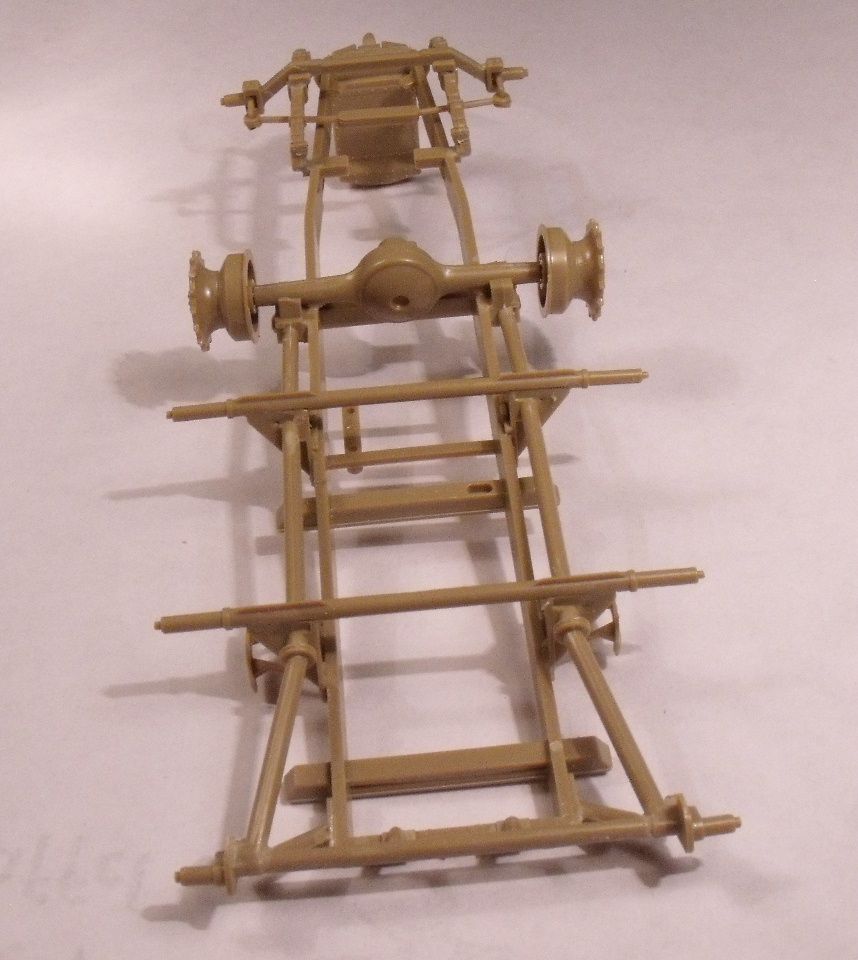 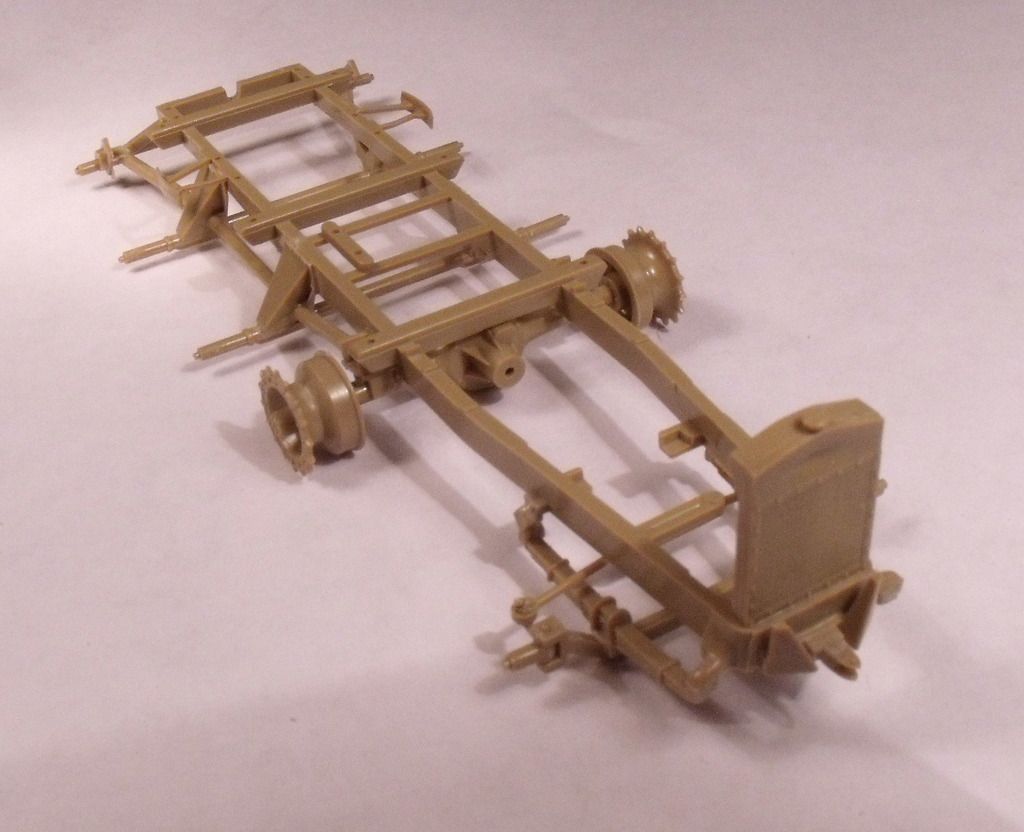 I won't be bothering with the engine which comes with the kit. I do have a little filling to do, including this sink mark on the radiator. 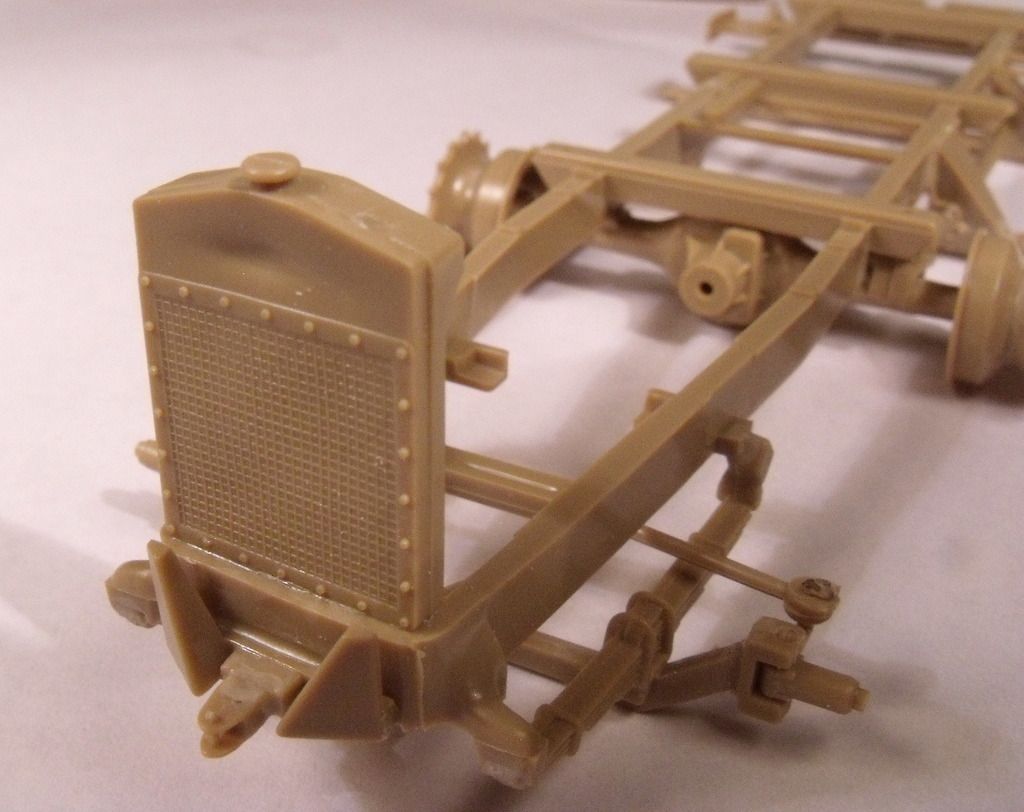 So, next up will be the internal upper half and hopefully the missing parts will be here soon so i can get some paint on. |
|
flmlm
Full Member
  
Member since: March 2016
Crack open that kit and smell the build ????
Posts: 170 
|
Post by flmlm on Jun 30, 2016 13:53:01 GMT -5
Looking good. That project should keep ya busy with all those aftermarket add-ons. Enjoy
Regards
Mike
|
|
bish
Full Member
  
Member since: January 2013
Horatio Nelson 'I am a Norfolk man, and i glory in being so'
Posts: 555
Jan 13, 2013 8:57:43 GMT -5
Jan 13, 2013 8:57:43 GMT -5
|
Post by bish on Jun 30, 2016 14:02:53 GMT -5
Thanks Mike. The launcher makes up a good chunk of it, that will be fun. Will be starting that soon.
|
|
|
|
Post by deafpanzer on Jun 30, 2016 14:03:53 GMT -5
Sweet!!! Count me in too...
|
|
|
|
Post by mustang1989 on Jun 30, 2016 14:04:47 GMT -5
Looks like another great build coming from you Bish!
|
|
|
|
Post by dierk on Jun 30, 2016 15:07:46 GMT -5
Nice! I'll pop by whenever time allows!
|
|
bish
Full Member
  
Member since: January 2013
Horatio Nelson 'I am a Norfolk man, and i glory in being so'
Posts: 555
Jan 13, 2013 8:57:43 GMT -5
Jan 13, 2013 8:57:43 GMT -5
|
Post by bish on Jun 30, 2016 15:39:22 GMT -5
Thanks for popping in guys, will have more soon.
|
|
|
|
Post by Leon on Jun 30, 2016 15:46:47 GMT -5
Nice start Bish! I though about getting one of these a few times.  |
|
bish
Full Member
  
Member since: January 2013
Horatio Nelson 'I am a Norfolk man, and i glory in being so'
Posts: 555
Jan 13, 2013 8:57:43 GMT -5
Jan 13, 2013 8:57:43 GMT -5
|
Post by bish on Jun 30, 2016 16:27:34 GMT -5
Thanks Leon. Tamiya has re-boxed it and it doesn't seem to have the mould issues this does and has Indy link tracks.
|
|
|
|
Post by wbill76 on Jun 30, 2016 18:15:48 GMT -5
Pulling up a chair for this one! Off to a great start Bish.
|
|
S e r z h--Rest In Peace
Full Member
  
Member since: November 2014
RIP- December 2023
Posts: 650 
|
Post by S e r z h--Rest In Peace on Jul 1, 2016 2:24:31 GMT -5
It will be very interesting - lots of photo-etching and resin! Good luck!
|
|
bish
Full Member
  
Member since: January 2013
Horatio Nelson 'I am a Norfolk man, and i glory in being so'
Posts: 555
Jan 13, 2013 8:57:43 GMT -5
Jan 13, 2013 8:57:43 GMT -5
|
Post by bish on Jul 4, 2016 13:20:34 GMT -5
Glad to have you on board guys. After finishing of the lower portion of the inside, it was time to work on the top half. I started off with the vision slits. The AM set has you block these off with plastic card and then re-open them with provided templates to correct the shape. 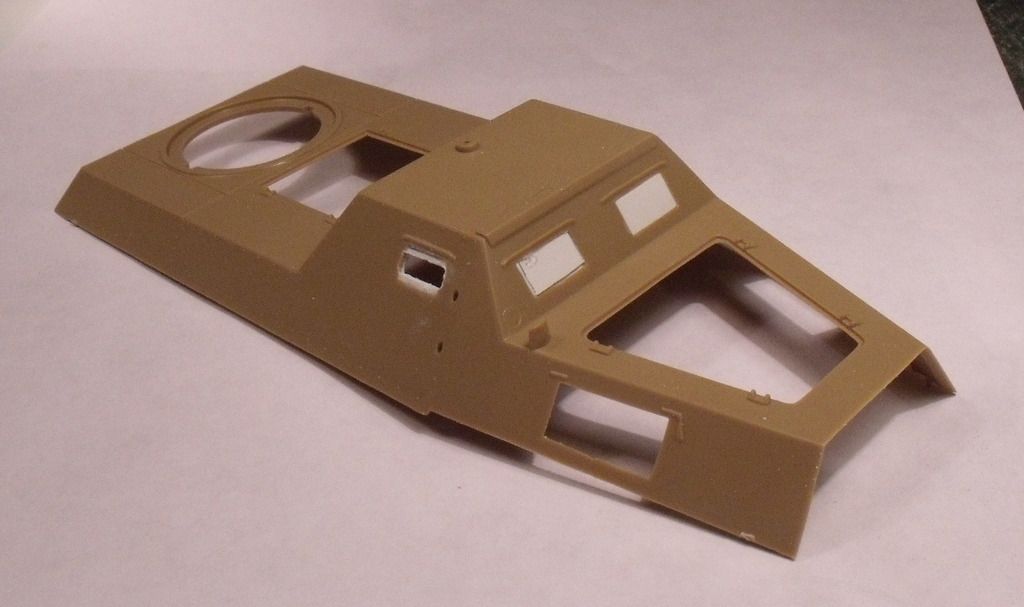 Once all these were open again, the outer resin pieces were added. 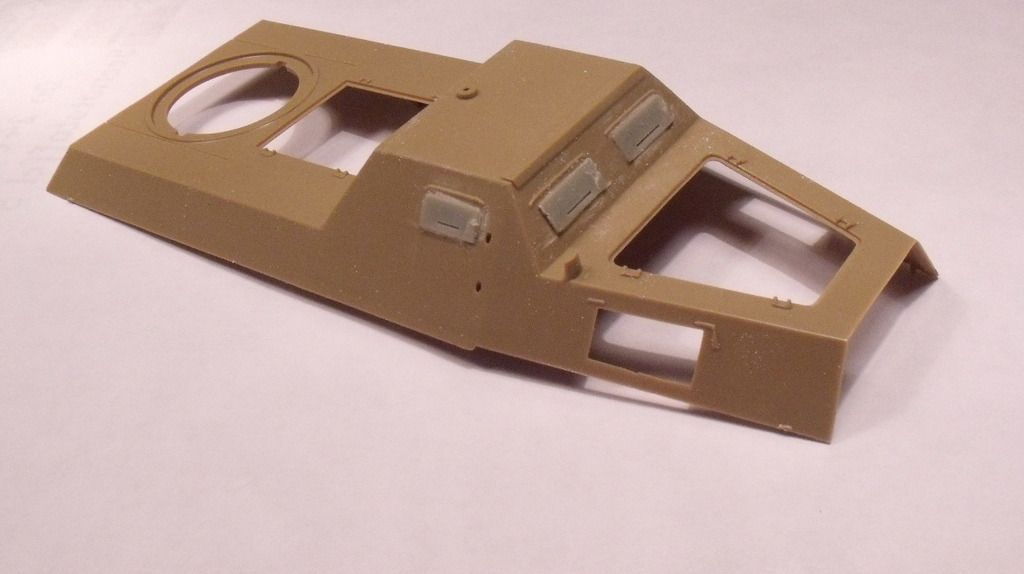 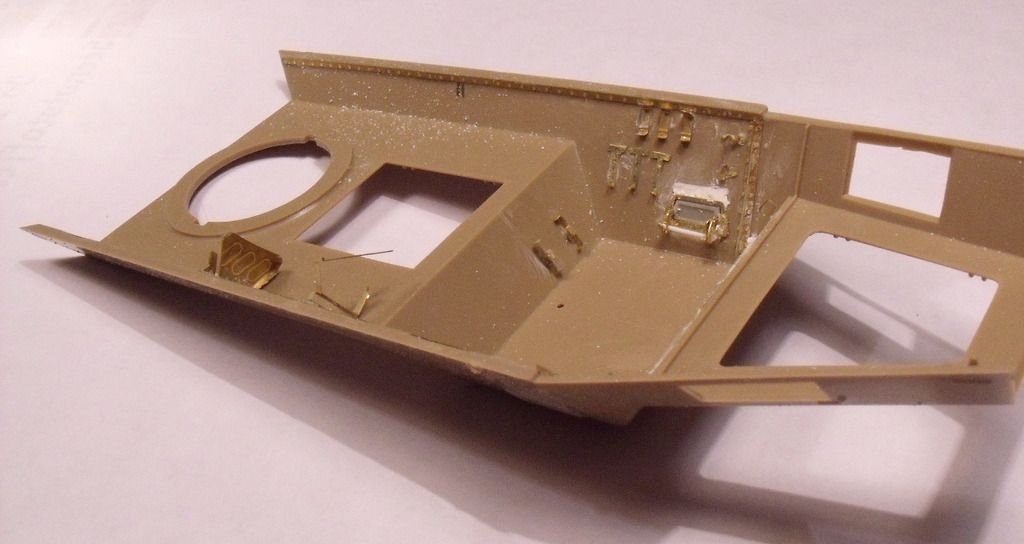 So there is not much left to add to the inside, i can finish that and hopefully the missing parts will be here from RM soon. So Sat night i made a start on the launcher. My hope was that i could finish that and the tracks yesterday. I had the whole day to myself with the Mrs at work and all the kids away. So i got about 7 hours at the bench. But, things did not go quite to plan. The 10 resin launch tubes are each in 2 parts. Each part of hollow at its open end, but 2/3's of each once is solid resin. So, they all had to be drilled and filed out, and of course being resin they are rather brittle and i had to get them very thin. So after a few hours and with a large pile of resin dust on the bench, they were ready to go together. I put all 10 of the lower sections and 2 of the top sections into the PE frames. 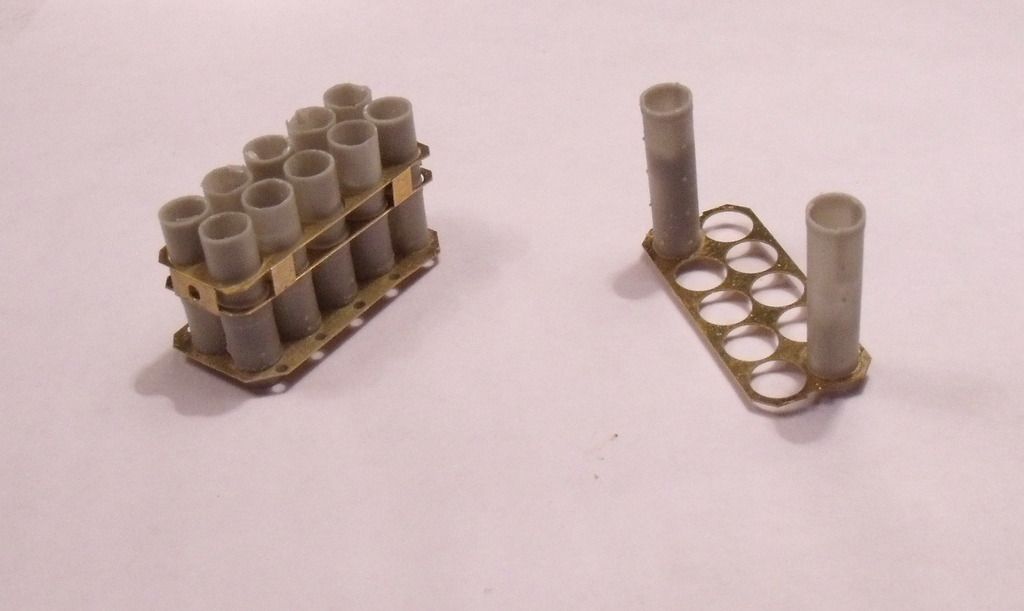 These were then fitted together and the other 8 tubes fitted. 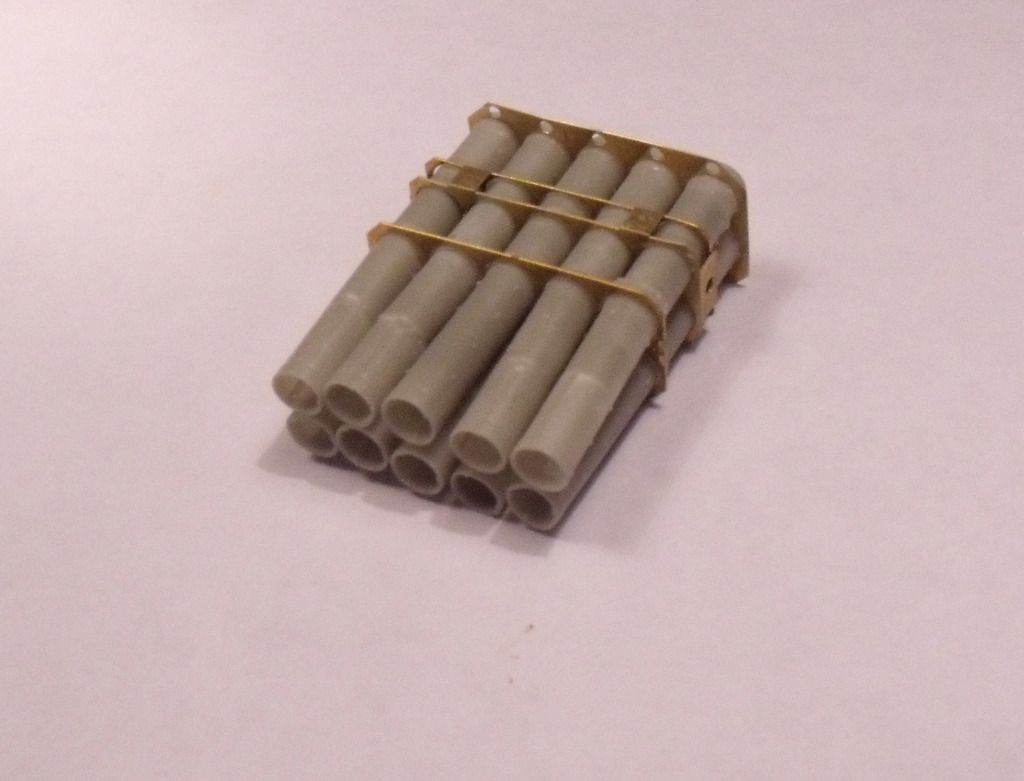 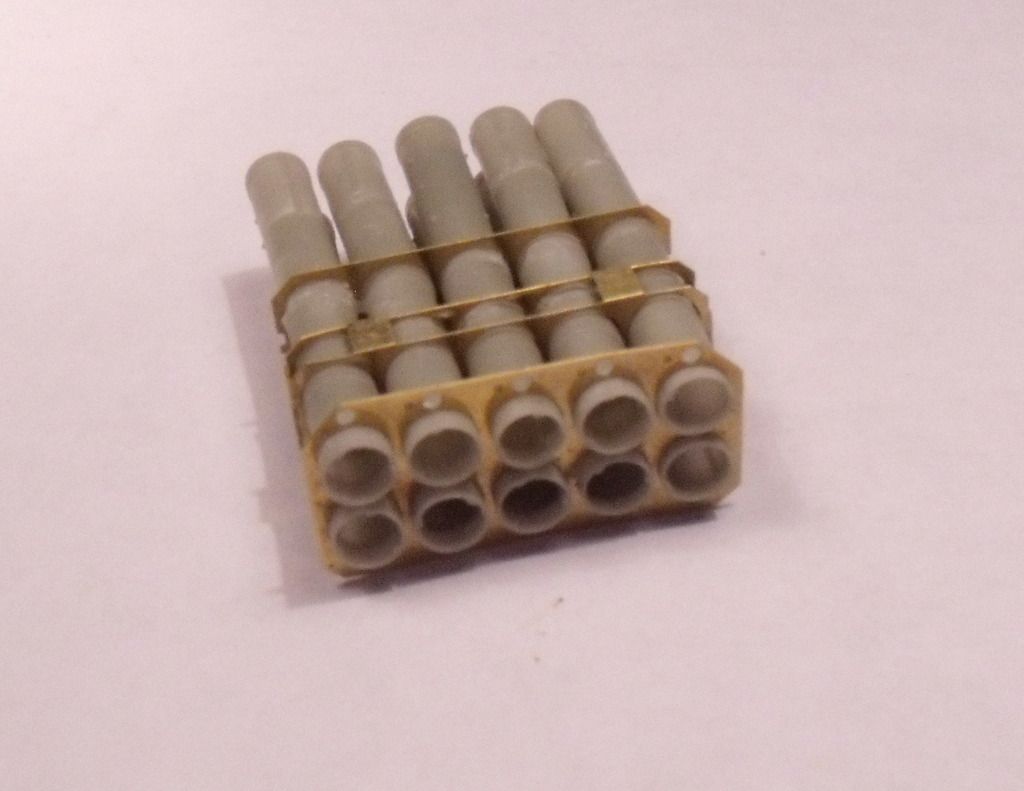 A couple of the tubes are a little kinked so will need to be straightened up. And then there is a lot more PE detail and wiring to add. And i did manage to get one track finished. This were not as fiddly as i was expecting given the size, certainly not as bad as their 251 tracks. 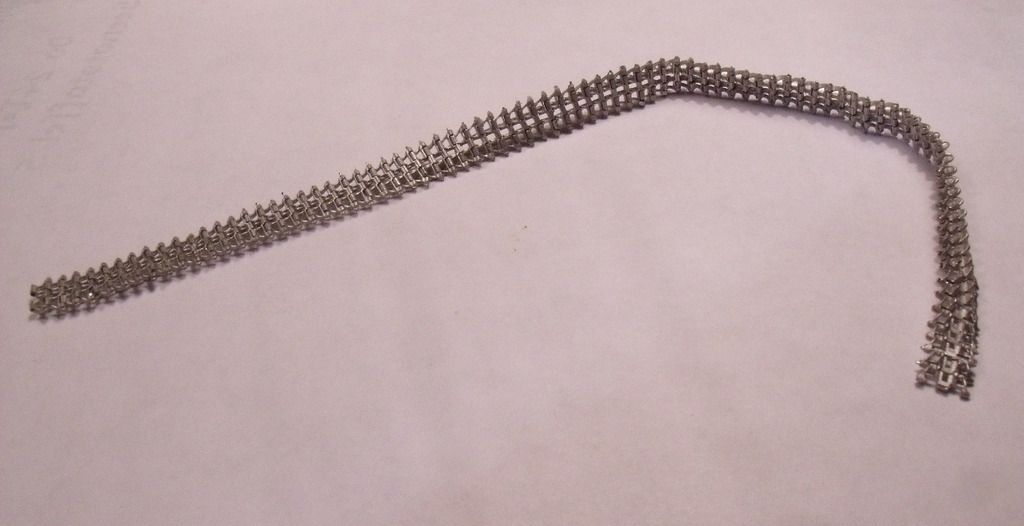 i246.photobucket.com/albums/gg111/Bish_012/Panzerwerfer%2042/20_zpsfkb1vlen.jpg i246.photobucket.com/albums/gg111/Bish_012/Panzerwerfer%2042/20_zpsfkb1vlen.jpg |
|
|
|
Post by panzerjager2 on Jul 4, 2016 13:47:06 GMT -5
Very cool
|
|
|
|
Post by armorguy on Jul 4, 2016 14:22:22 GMT -5
Interesting build, have fun ! I'll check in regularly !
|
|
bish
Full Member
  
Member since: January 2013
Horatio Nelson 'I am a Norfolk man, and i glory in being so'
Posts: 555
Jan 13, 2013 8:57:43 GMT -5
Jan 13, 2013 8:57:43 GMT -5
|
Post by bish on Jul 4, 2016 14:25:53 GMT -5
Thanks guys.
|
|
sturmbird
Full Member
  
Member since: June 2012
Posts: 1,406
Jun 21, 2012 13:51:45 GMT -5
Jun 21, 2012 13:51:45 GMT -5
|
Post by sturmbird on Jul 4, 2016 14:55:43 GMT -5
Thanks Leon. Tamiya has re-boxed it and it doesn't seem to have the mould issues this does and has Indy link tracks. This is my all time favorite half track. Kinda want Bronco or GWH to tackle this one. I have two or three of these kits stashed away with the Verlinden resin. I like what I see in the Royal resin much better. gary |
|
|
|
Post by Leon on Jul 4, 2016 15:04:29 GMT -5
Nice progress Bish! Those launch tubes look great.  |
|
desertrat
Full Member
  
Member since: October 2013
Posts: 934 
|
Post by desertrat on Jul 4, 2016 15:07:15 GMT -5
very nice, that R/M upgrade kit looks the bizz, plenty to keep you busy, pulling up a chair....
|
|
|
|
Post by wing_nut on Jul 4, 2016 18:31:46 GMT -5
very nice, that R/M upgrade kit looks the bizz, plenty to keep you busy, pulling up a chair.... Excuse me is that seat next to you taken? |
|
bbrowniii
Full Member
  
Member since: March 2012
If you are not part of the solution, you are part of the precipitate.
Posts: 1,238
Mar 25, 2012 22:08:04 GMT -5
Mar 25, 2012 22:08:04 GMT -5
|
Post by bbrowniii on Jul 4, 2016 19:30:06 GMT -5
Move over Wing_nut....I wanna see too!!!
|
|
|
|
Post by dierk on Jul 5, 2016 2:37:36 GMT -5
Seven hours well spent sir!
|
|
|
|
Post by deafpanzer on Jul 5, 2016 11:24:40 GMT -5
Only PE can make tubes look great!!!
|
|
desertrat
Full Member
  
Member since: October 2013
Posts: 934 
|
Post by desertrat on Jul 5, 2016 11:54:42 GMT -5
very nice, that R/M upgrade kit looks the bizz, plenty to keep you busy, pulling up a chair.... Excuse me is that seat next to you taken? sit yourself down sir, kettle is on, just bring bickies!!!! |
|
|
|
Post by tobias5555 on Jul 5, 2016 12:28:41 GMT -5
A lot of good extra parts for this oldy.
|
|
bish
Full Member
  
Member since: January 2013
Horatio Nelson 'I am a Norfolk man, and i glory in being so'
Posts: 555
Jan 13, 2013 8:57:43 GMT -5
Jan 13, 2013 8:57:43 GMT -5
|
Post by bish on Jul 5, 2016 12:58:00 GMT -5
Thanks' for jumping in and for all the comments guys.
Gary, I have seen someone use the Verlinden set on the Tamiya boxing. that does have some bits that the RM set doesn't, and visa versa. So in an ideal world, you could combine both. But from what I can tell, the bits in the Verlinden set that are not in this are mainly on the inside of the roof, so damn hard to see. The drivers bulkhead on the Verlinden looks nice as well, the RM only has a few PE editions. The best bit is the launcher which I don't think Verlinden include.
deaf, ye, I agree. PE tubes with small PE detail parts would have been better.
|
|
|
|
Post by wbill76 on Jul 5, 2016 13:42:58 GMT -5
Rolling right along on this one Bish, those tubes are enough to test your sanity for sure!
|
|
bish
Full Member
  
Member since: January 2013
Horatio Nelson 'I am a Norfolk man, and i glory in being so'
Posts: 555
Jan 13, 2013 8:57:43 GMT -5
Jan 13, 2013 8:57:43 GMT -5
|
Post by bish on Jul 5, 2016 16:25:55 GMT -5
Thanks Bill. Ye, they are a bit, just been trying to get them straight. One piece barrels would have been better. But I thin I have it. Just waiting on those missing parts now.
|
|
|
|
Post by TRM on Jul 5, 2016 17:26:07 GMT -5
Sorry, had to play a little catch up on this one! Nice pile of goodies and things to be looking like they are heading in the right direction!! Keep it going!  |
|
sturmbird
Full Member
  
Member since: June 2012
Posts: 1,406
Jun 21, 2012 13:51:45 GMT -5
Jun 21, 2012 13:51:45 GMT -5
|
Post by sturmbird on Jul 5, 2016 23:52:40 GMT -5
Thanks' for jumping in and for all the comments guys. Gary, I have seen someone use the Verlinden set on the Tamiya boxing. that does have some bits that the RM set doesn't, and visa versa. So in an ideal world, you could combine both. But from what I can tell, the bits in the Verlinden set that are not in this are mainly on the inside of the roof, so damn hard to see. The drivers bulkhead on the Verlinden looks nice as well, the RM only has a few PE editions. The best bit is the launcher which I don't think Verlinden include. deaf, ye, I agree. PE tubes with small PE detail parts would have been better. Without digging the Verlinden out, I can't remember what or whether they did anything with the rocket launcher assembly. The new Bronco SWS Panzer Werfer appears to use the same launcher. I suspect they also do a better job! Panzer Werfers traveled with a similar halftrack, but not with the launcher. It carried the extra rockets for the other unit. I'm thinking the Bronco launcher will end up on the Italeri. Getting back to the Italeri kit, Eduard, Voyager, or maybe Aber makers a nice photo etch fret. I have the same AM tracks as you. Gary P.S. mine will end up in winter whit wash! |
|
bish
Full Member
  
Member since: January 2013
Horatio Nelson 'I am a Norfolk man, and i glory in being so'
Posts: 555
Jan 13, 2013 8:57:43 GMT -5
Jan 13, 2013 8:57:43 GMT -5
|
Post by bish on Jul 6, 2016 14:16:41 GMT -5
Thanks TRM, I will certainly try. Gary, I checked out the other build with the Verlinden set, and he is using the kit one. Ye, the SWS does use the same launcher, would not mind one of those kits as well. The guys doing the other build recommended the Nuts and Bolts book on the nebelwerfers which covers the 42. It does include some pics of the ammo carriers, I had not heard of those before. Apparently they could carry 30 rockets, so I am guessing not much rom for the crew. I do have the Eduard set as I had that before I got the RM one and I have used a couple of parts from that as well, including the drivers IP. I know the Verlinden set replaces that completely. I like to try and build my vehicles from known units, and as I am sure you know, info on these is rare. But there is an image in the book of a vehicle from Wf. Abt. 11. Finland matches nicely for the terrain I was planning for the base an d the RM figures. so I will do that one. I found the same photo on line. This is the vehicle I am doing. 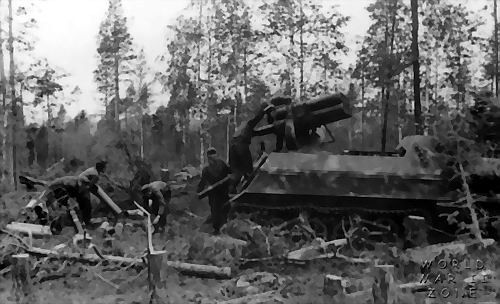 And this is something like I will go for on the base. 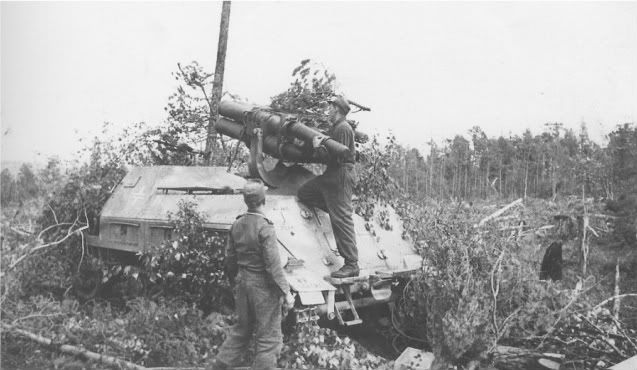 |
|


