sturmbird
Full Member
  
Member since: June 2012
Posts: 1,406
Jun 21, 2012 13:51:45 GMT -5
Jun 21, 2012 13:51:45 GMT -5
|
Post by sturmbird on Jul 6, 2016 15:38:52 GMT -5
if memory serves me right the typical Panzer Werfer carried ten rockets internally, so I always assumed that the munitions carrier carried another ten rockets. This always seemed kinda light to me, but thirty seems closer.
I bought an SWS kit a couple years ago from GWH. Think it was a flak battery, and was stunned by the quality! Now Bronco and GWH seem to have joined forces. This is good, as it opens the door for a greater cross section of half tracks. I can only assume that they'll move into the Opal sooner than later. Then there's almost an endless supply of variations to choose from.
gary
|
|
bish
Full Member
  
Member since: January 2013
Horatio Nelson 'I am a Norfolk man, and i glory in being so'
Posts: 555
Jan 13, 2013 8:57:43 GMT -5
Jan 13, 2013 8:57:43 GMT -5
|
Post by bish on Jul 6, 2016 16:05:15 GMT -5
Ye, the Panzer Werfer did carry 10, so a full reload. 30 does sound like a decent amount and I guess they only need the 2 crew, so they could store rockets on the floor.
I have not got any of those GWH kits, but they do look nice and there is a nice selection. I would be happy with more halftracks, there several 251 versions at least I would like to see. Will be nice to see what the 2 come up with.
Am I right in thinking that GWH are part of Lion Roar.
|
|
|
|
Post by Leon on Jul 6, 2016 16:41:12 GMT -5
Bish,Looks like you have a nice plan for the base!  |
|
|
|
Post by wbill76 on Jul 6, 2016 16:49:56 GMT -5
Am I right in thinking that GWH are part of Lion Roar. Yep, GWH is the kit-producing brand for Lion Roar.  |
|
sturmbird
Full Member
  
Member since: June 2012
Posts: 1,406
Jun 21, 2012 13:51:45 GMT -5
Jun 21, 2012 13:51:45 GMT -5
|
Post by sturmbird on Jul 6, 2016 23:45:36 GMT -5
Ye, the Panzer Werfer did carry 10, so a full reload. 30 does sound like a decent amount and I guess they only need the 2 crew, so they could store rockets on the floor. I have not got any of those GWH kits, but they do look nice and there is a nice selection. I would be happy with more halftracks, there several 251 versions at least I would like to see. Will be nice to see what the 2 come up with. Am I right in thinking that GWH are part of Lion Roar. They actually produce an armored supply half track (SWS) that is pretty much the Panzer Werfer without the rocket launcher. gary |
|
bish
Full Member
  
Member since: January 2013
Horatio Nelson 'I am a Norfolk man, and i glory in being so'
Posts: 555
Jan 13, 2013 8:57:43 GMT -5
Jan 13, 2013 8:57:43 GMT -5
|
Post by bish on Jul 17, 2016 1:55:35 GMT -5
Just a short update as its been well over a week now. Things slowed down a bit Firstly, i not received those missing parts from RM. So I turned to plan B. The Eduard set has the metal parts but does not include the wooden blocks that hold the rockets in place. So i used so resin to make the blocks and have used those. But then what do you know, I primed those and the bit from RM turned up on Fri. To their credit, they had been posted on the 2nd July, so I can't blame RM for the delay. So i have now been able to get the inside primed and can start painting, so some pics of that at the soon. But my main focus has been the launcher which was a long slow and tedious process. But now its all done. 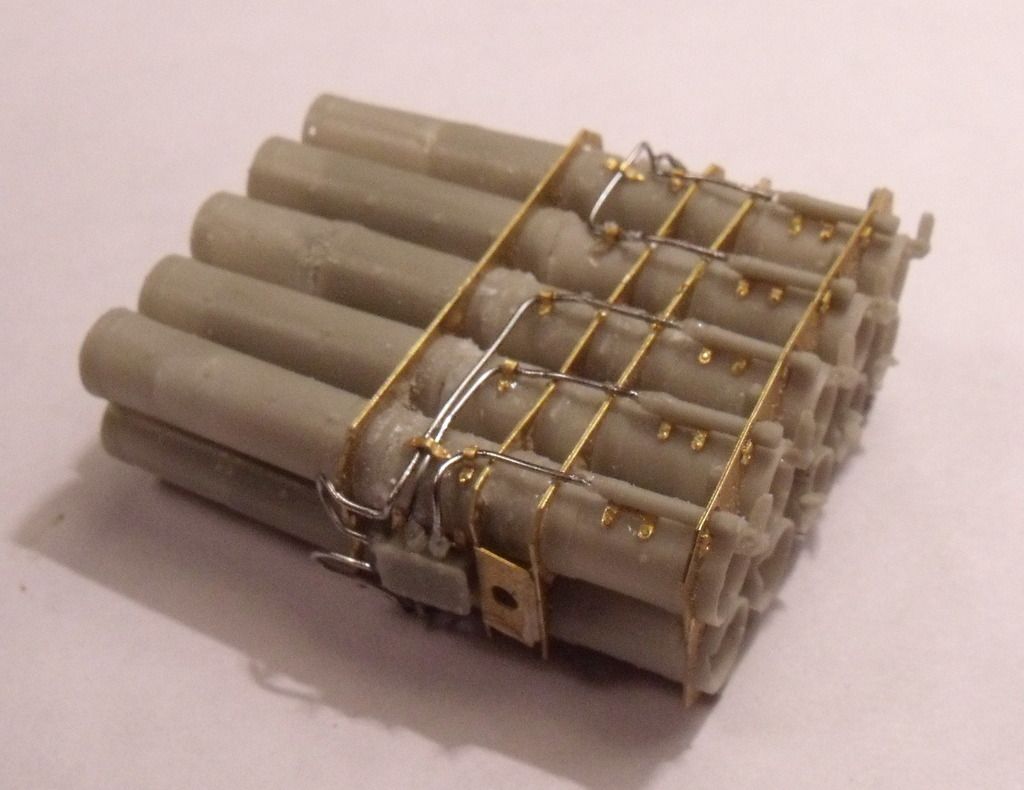 The two tubes on the types right as you look here, which will be bottom left once fitted, have had the locking clamps left off. These will have rockets loaded so the clamps will be added later. 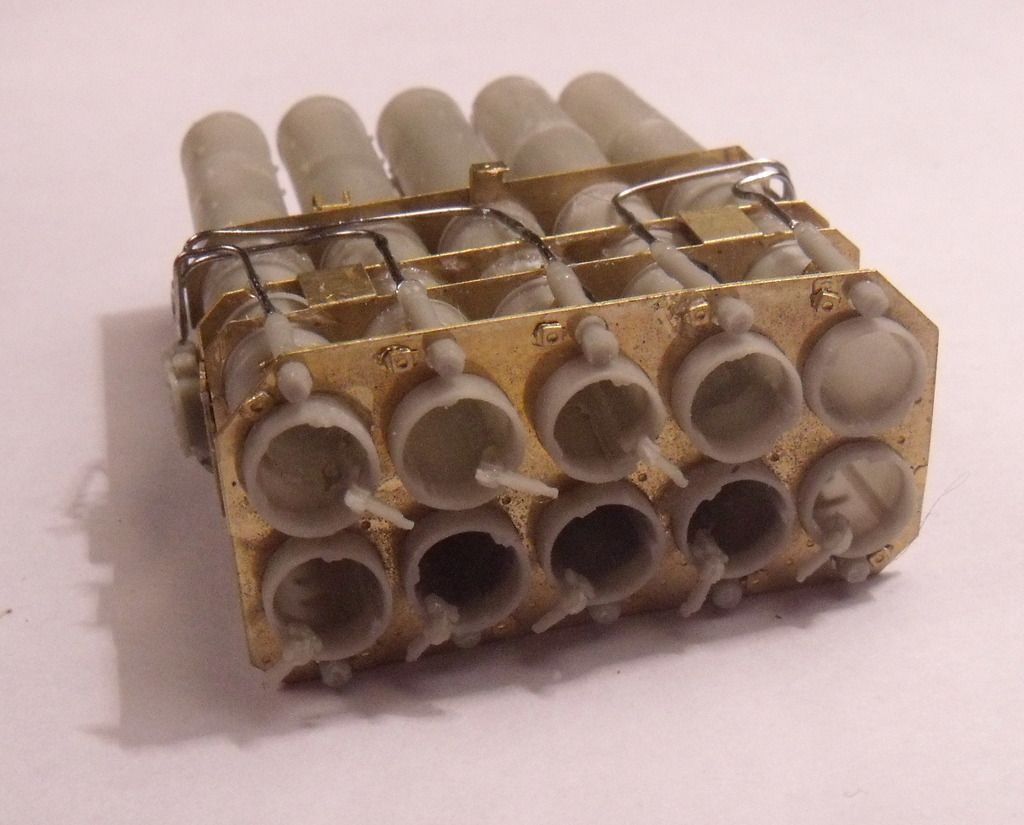 Its had one coat of primer and then some clean up, so its now all ready to paint. I also got the turret built and that was primed tonight as well. The white rod replaces the kit parts. Its the elevating rod but it was the wrong shape and set in the lowered position. I can trim this to correct length once i determine the angle. 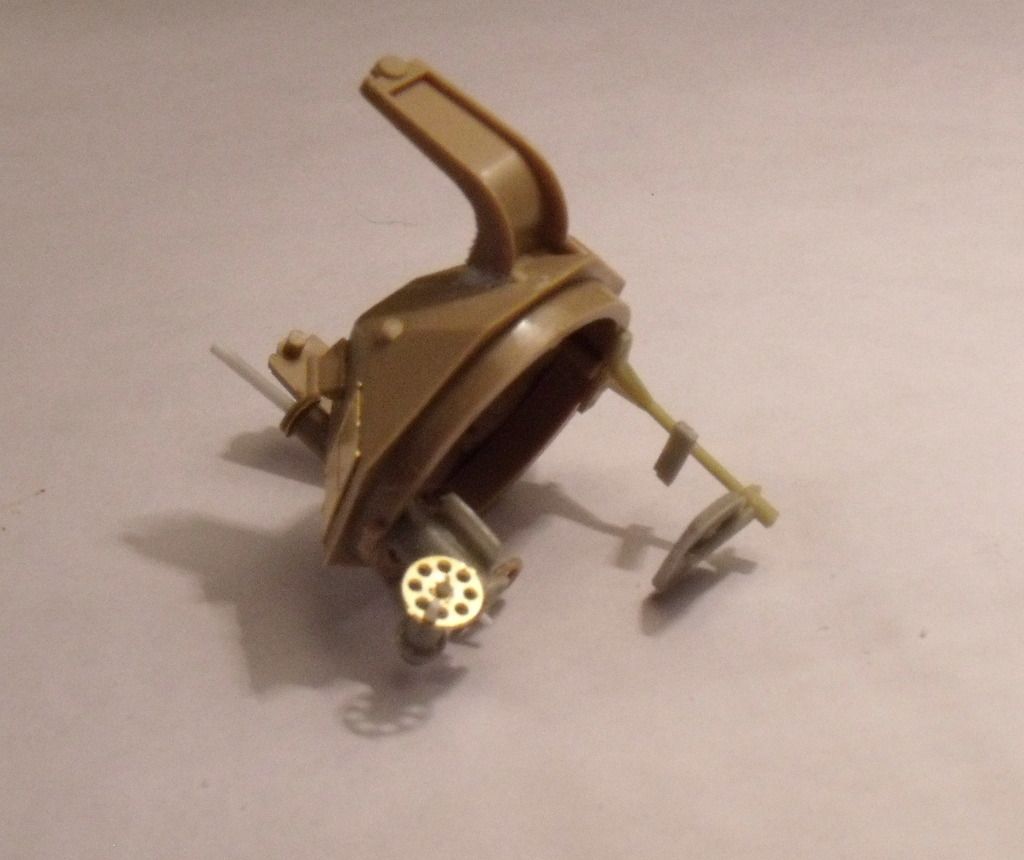 And that's it. But hopefully now i can get some good progress. Got quite a bit of painting done the last couple of days and the chassis weathered, so should have a decent update soon. |
|
|
|
Post by mustang1989 on Jul 17, 2016 6:24:40 GMT -5
That's some really nice detail there Bish. Lookin' good buddy.
|
|
|
|
Post by Leon on Jul 17, 2016 10:54:08 GMT -5
The launcher looks awesome Bish and nice work on the turret!  |
|
bish
Full Member
  
Member since: January 2013
Horatio Nelson 'I am a Norfolk man, and i glory in being so'
Posts: 555
Jan 13, 2013 8:57:43 GMT -5
Jan 13, 2013 8:57:43 GMT -5
|
Post by bish on Jul 17, 2016 11:22:43 GMT -5
Thanks guys.
|
|
|
|
Post by wbill76 on Jul 17, 2016 17:38:36 GMT -5
Well worth the effort to get the detail in place on the tubes Bish. Nice!
|
|
|
|
Post by Tojo72 on Jul 17, 2016 19:22:33 GMT -5
Again Bish,fantastic detailing.
|
|
bbrowniii
Full Member
  
Member since: March 2012
If you are not part of the solution, you are part of the precipitate.
Posts: 1,238
Mar 25, 2012 22:08:04 GMT -5
Mar 25, 2012 22:08:04 GMT -5
|
Post by bbrowniii on Jul 17, 2016 19:57:06 GMT -5
Looks great Bish. As always, great work.
|
|
flmlm
Full Member
  
Member since: March 2016
Crack open that kit and smell the build ????
Posts: 170 
|
Post by flmlm on Jul 18, 2016 7:52:11 GMT -5
Spectacular! love the detail very nice.
Regards
Mike
|
|
bish
Full Member
  
Member since: January 2013
Horatio Nelson 'I am a Norfolk man, and i glory in being so'
Posts: 555
Jan 13, 2013 8:57:43 GMT -5
Jan 13, 2013 8:57:43 GMT -5
|
Post by bish on Jul 18, 2016 14:21:01 GMT -5
Thanks guys, almost ready to get this closed up now, so some more soon.
|
|
c3p0.
Full Member
  
Member since: January 2016
The harder you sweat in here the less you gonna bleed on the special project this is a must have.
Posts: 157 
|
Post by c3p0. on Jul 18, 2016 18:09:01 GMT -5
Looking good so far sir. I got the rebox tamiya version which is exactly the same but tosses in two figures and bang just like that it's a Tamiya. Please post some extra pictures of construction of those micro track links my carpet like so much. Keep up the build I got a papa johns think crust along with a bottle of Diet Coke so I will be here for the play by play. So far I am liking what I see sir.
|
|
bish
Full Member
  
Member since: January 2013
Horatio Nelson 'I am a Norfolk man, and i glory in being so'
Posts: 555
Jan 13, 2013 8:57:43 GMT -5
Jan 13, 2013 8:57:43 GMT -5
|
Post by bish on Jul 19, 2016 0:40:34 GMT -5
Thanks C3PO. I have scene that kit being built over on FSM. As I think I mentioned, it doesn't suffer from the sink problems my kit has, and I think yours comes with Indy link tracks doesn't it. I managed to get my tracks done and some how I didn't lose a single one.
|
|
bish
Full Member
  
Member since: January 2013
Horatio Nelson 'I am a Norfolk man, and i glory in being so'
Posts: 555
Jan 13, 2013 8:57:43 GMT -5
Jan 13, 2013 8:57:43 GMT -5
|
Post by bish on Jul 22, 2016 11:09:06 GMT -5
Right, time for a more hefty update. And time to hit the spray booth. Starting with the chassis and running gear, it got a primer coat and the DY. 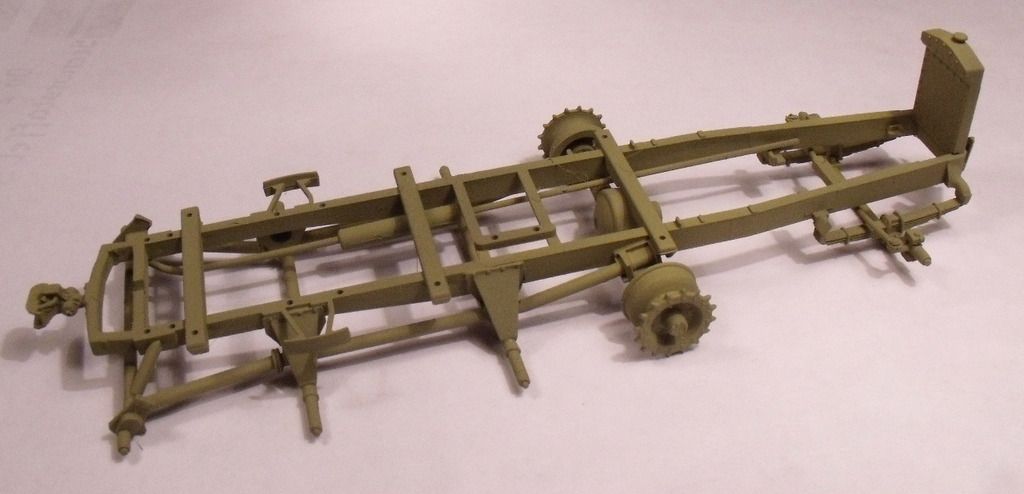 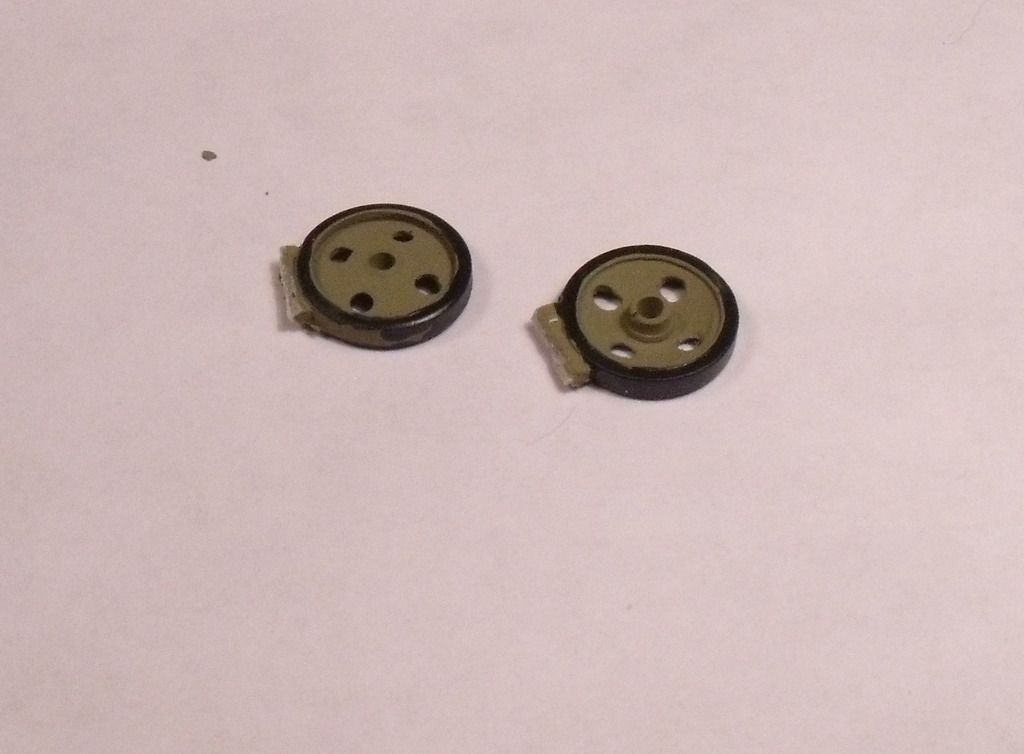 And then an overall wash of AK wash for DAK vehicles. 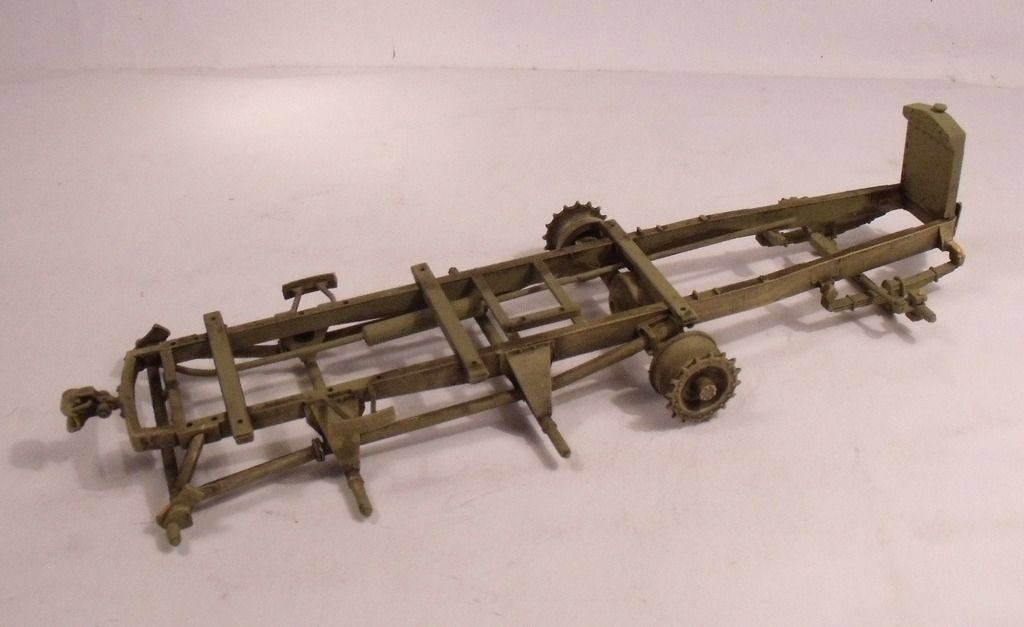 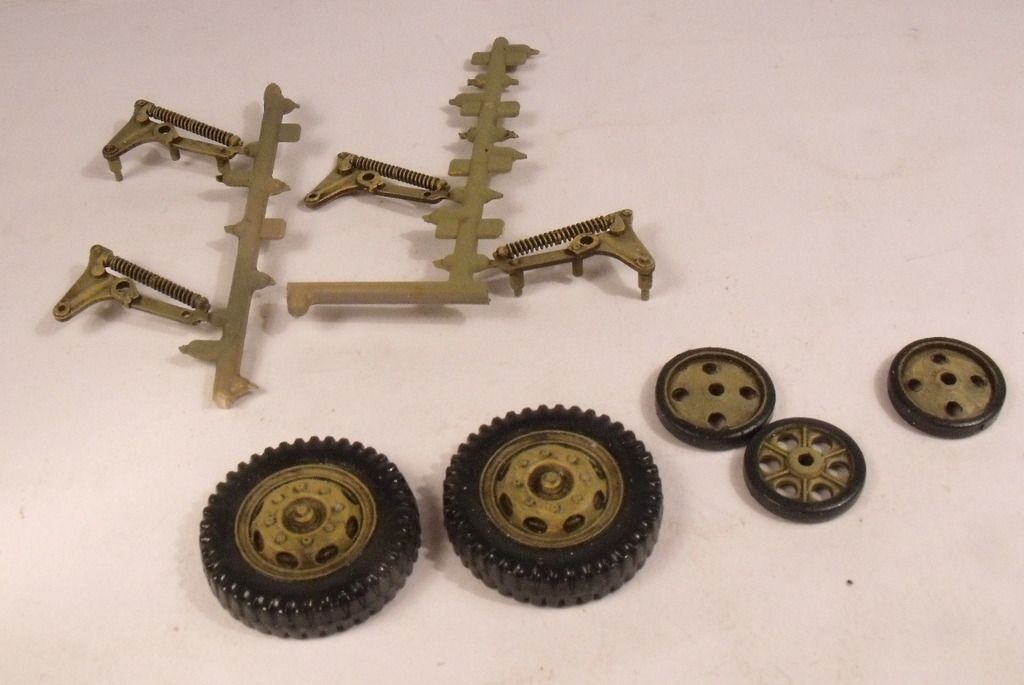 And then i was able to get the bogies together. 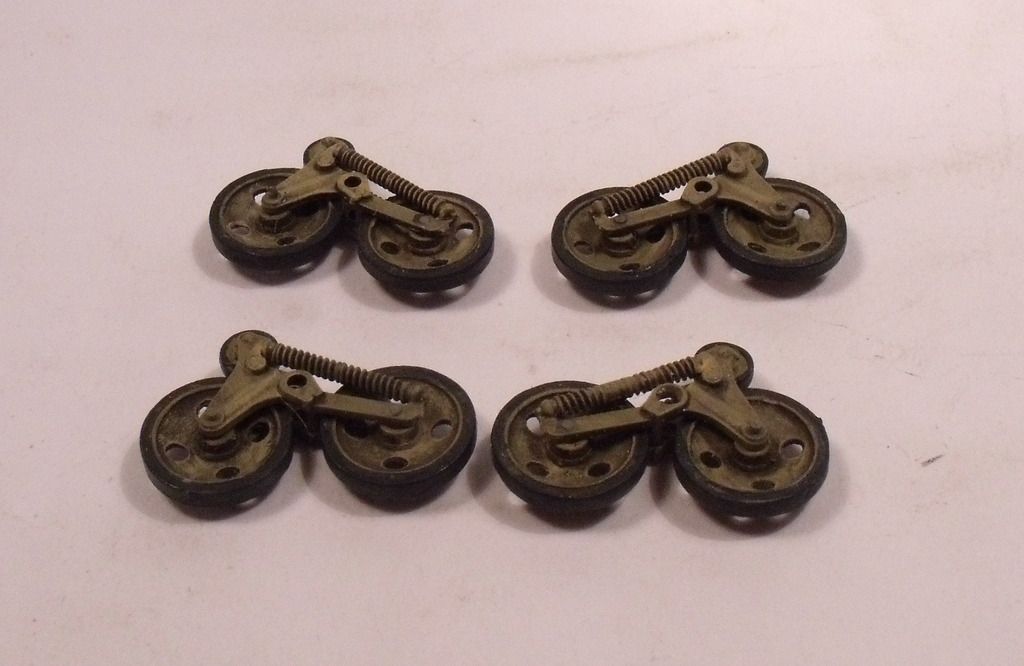 Then it was the turn of the inside of the hull. For the floor i mixed up a German red primer with Tamiya and the rest got a coat of Xtracolor interior cream. 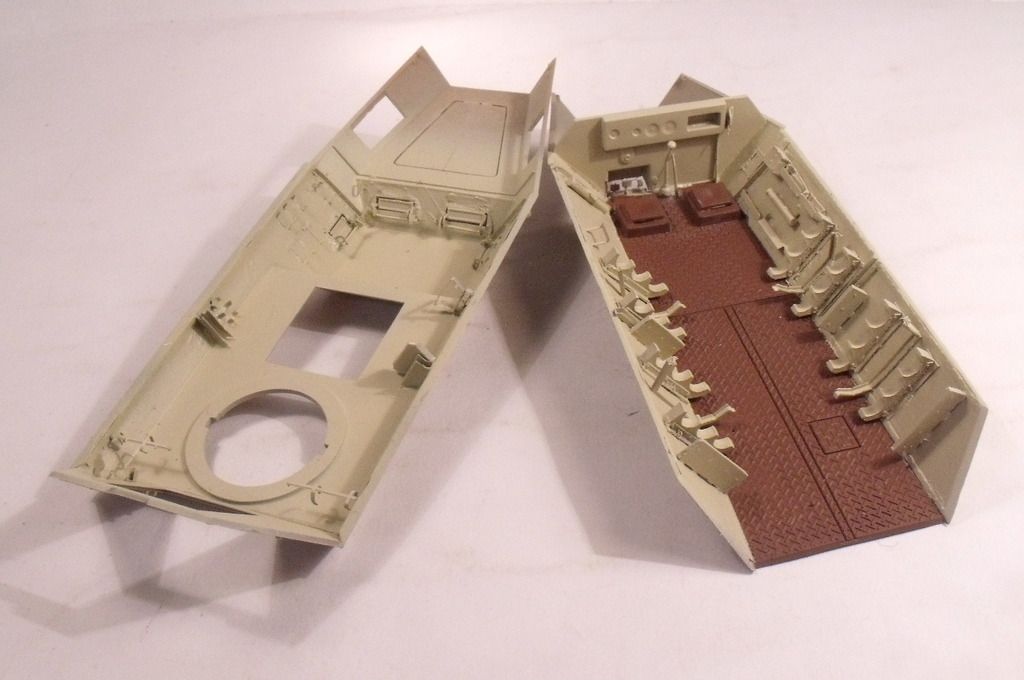 Then the floor got an raw umber oil wash. I had to be careful i didn't damage the Enamel paint on the side, which i would used Flory washes on. 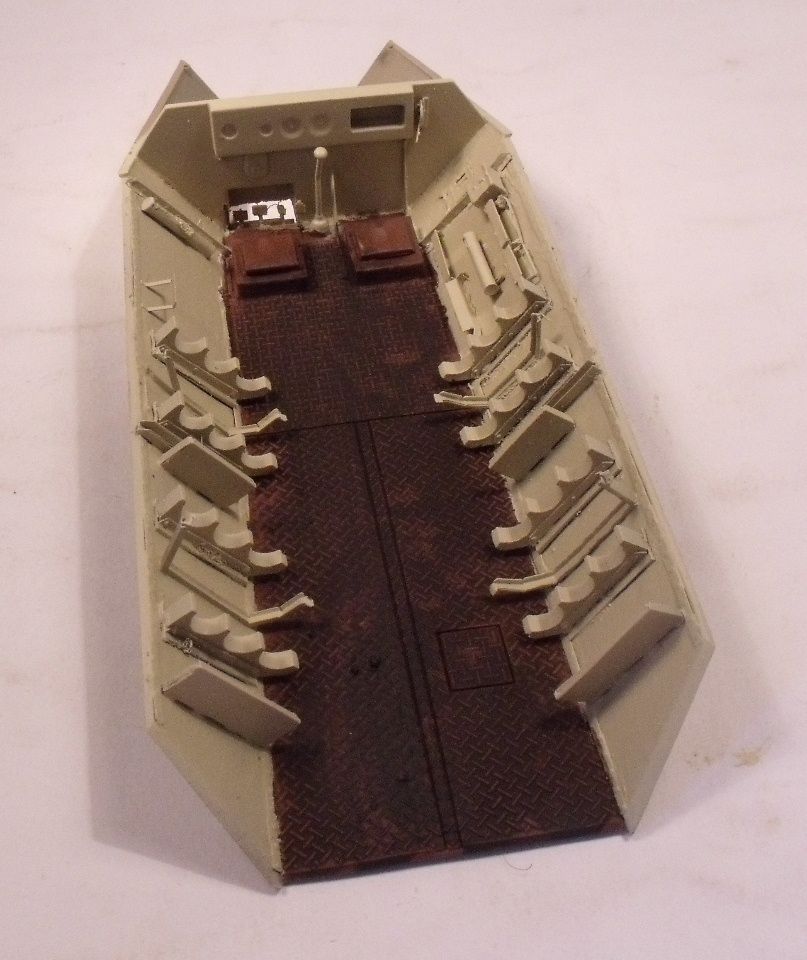 Now i know what you thinking, why not use Flory on the whole thing. The answer is simple. Because i am stupid. It just never occurred to me to use Flory on the floor, i usually leave that wash for aircraft but just wanted to avoid a future coat. So the rest got a wash, the floor, after removing excess wash, got a dry brush for chipping and the wood parts were painted. For the wood, i painted Tamiya red brown and went over it with a sepia ink wash. This matches nicely the wood parts in the photo's and is a tip i found out by accident when i tried to paint my 251/6 leather seats a red leather. That was a bad idea that turned good. I also added the final parts including a few bit of crew equipment. 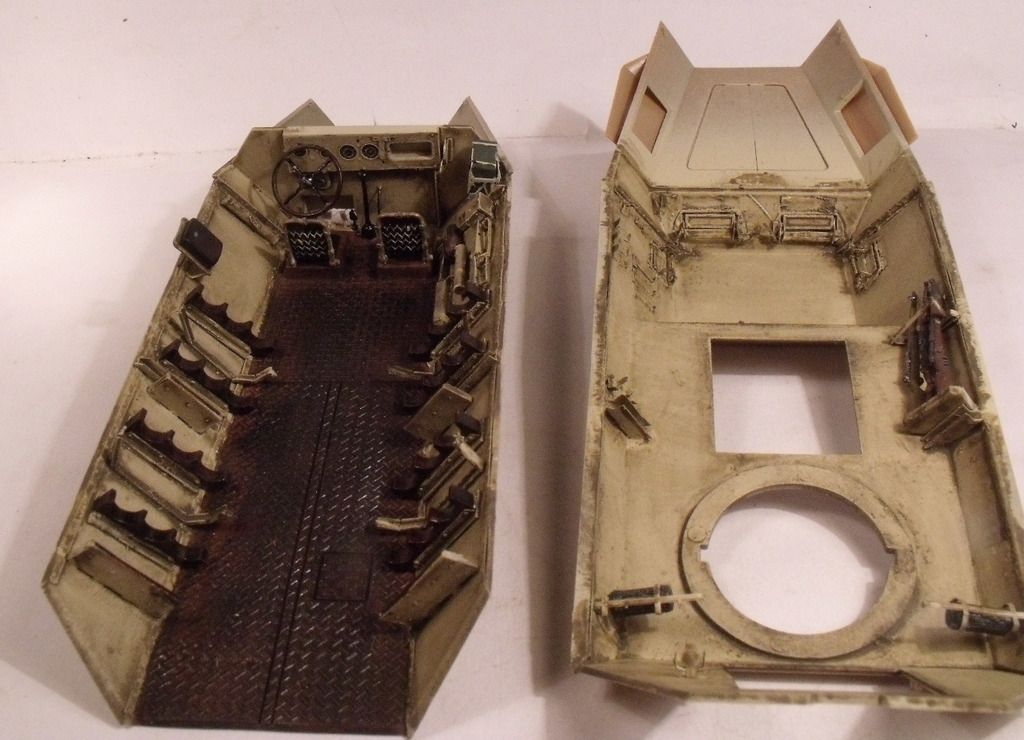 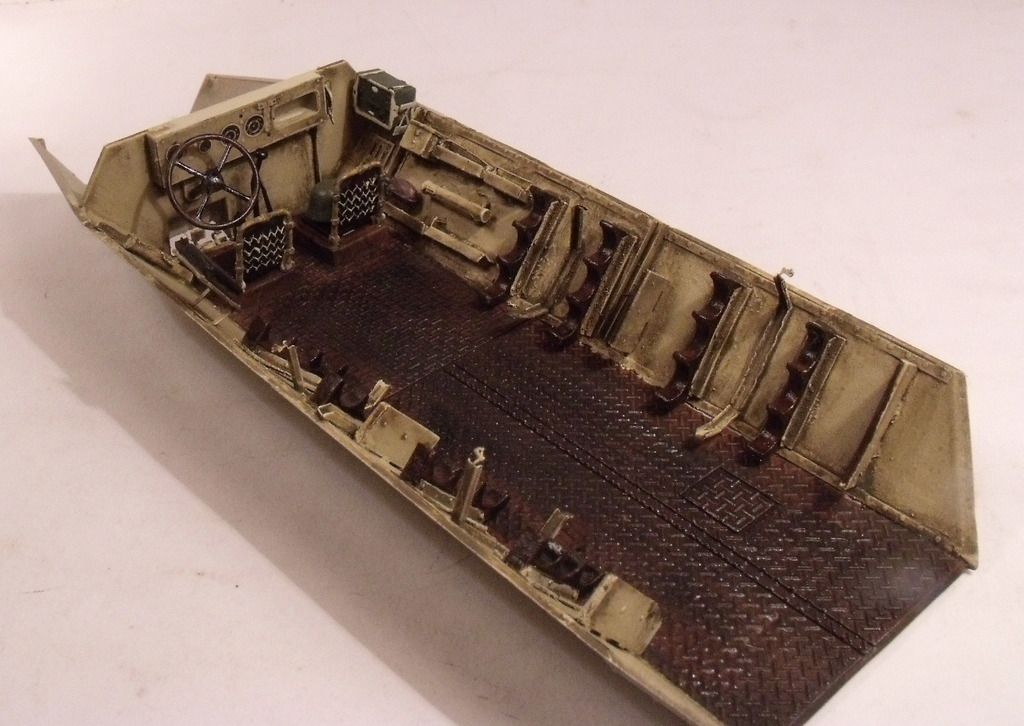 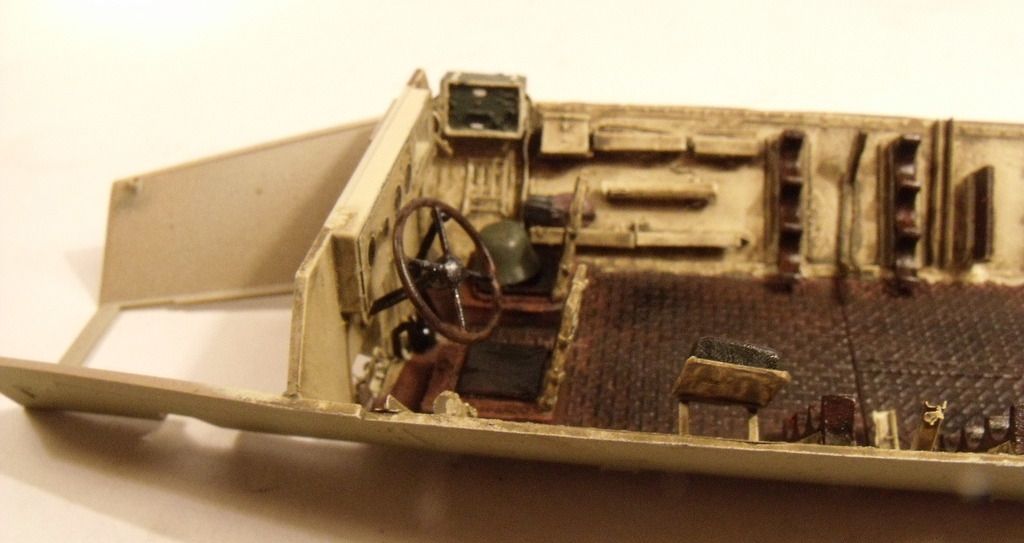 The final bit to add before i can close up is the rockets. These have been painted and decal added using a set from Peddinghaus which has a nice selection of German rocket markings. 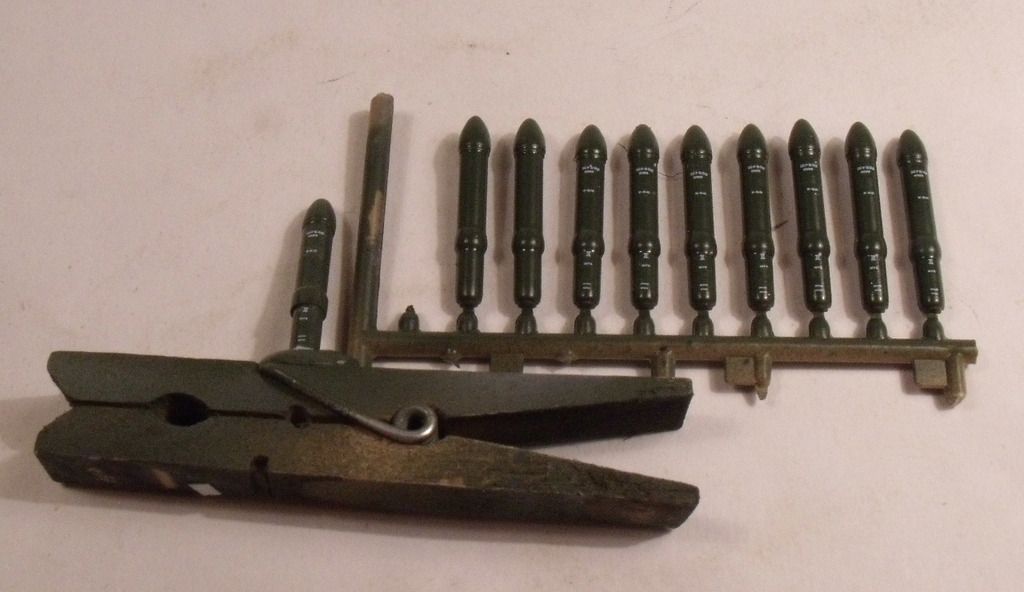 Also got the tracks together. 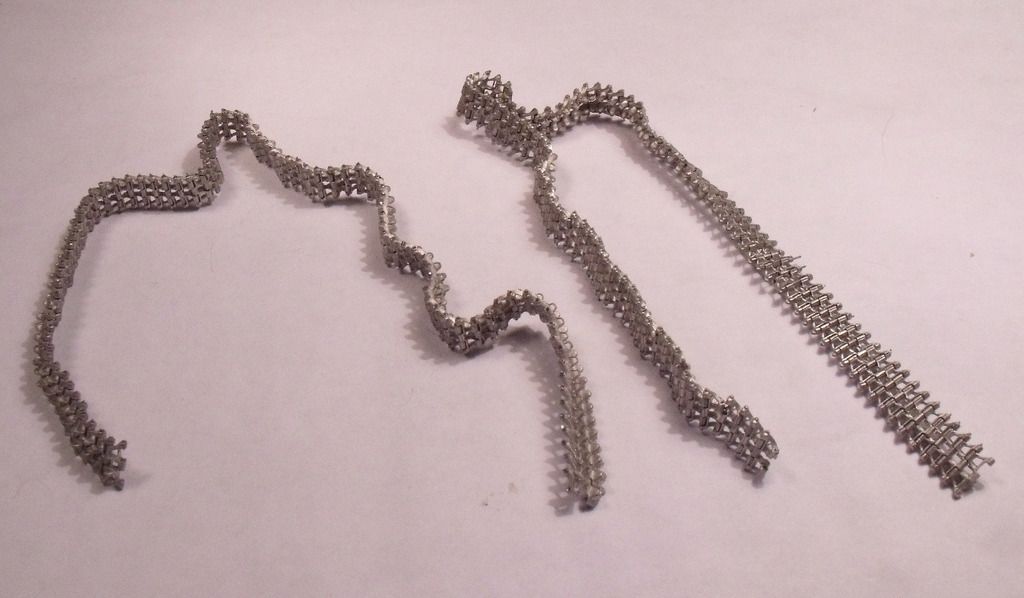 And painted tamiya NATO black. 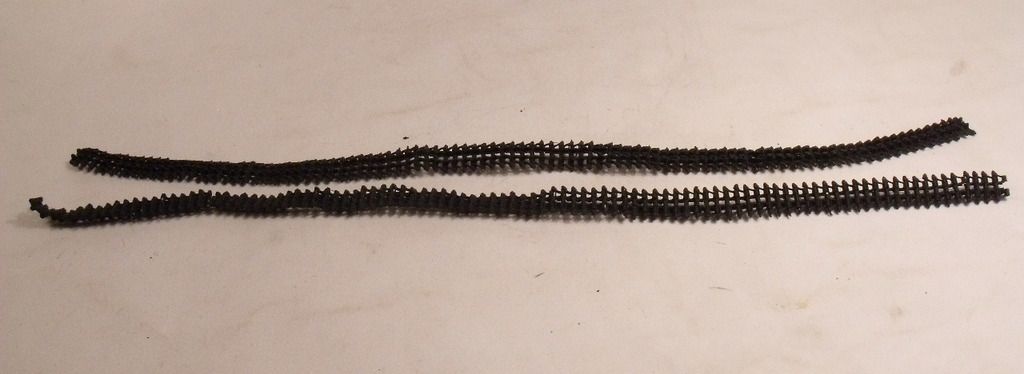 And finally the base. A piece of chipboard glued to a bit of MDF to get the thickness i wanted surrounded by my usual balsa wood. 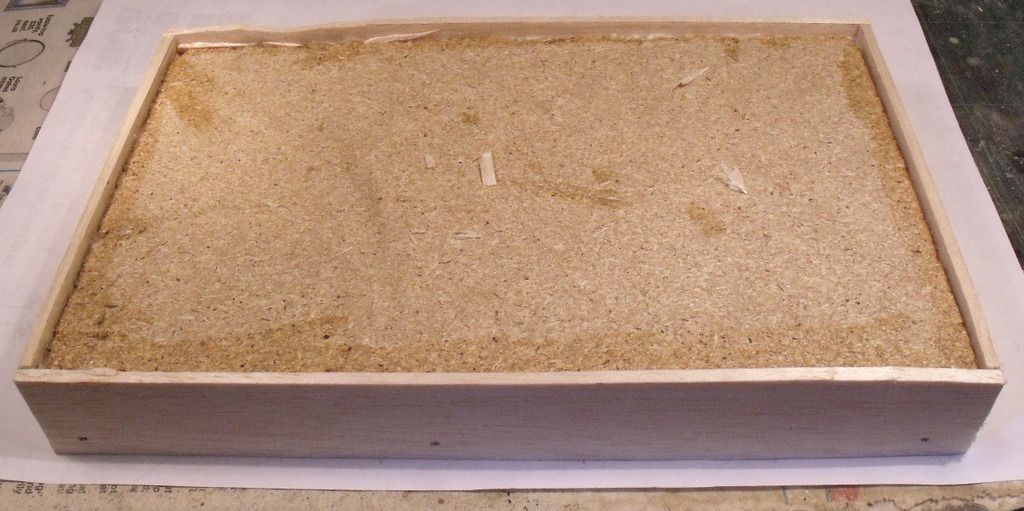 Then stained and varnished. This can now be put to one side until i am ready to add the celluclay. 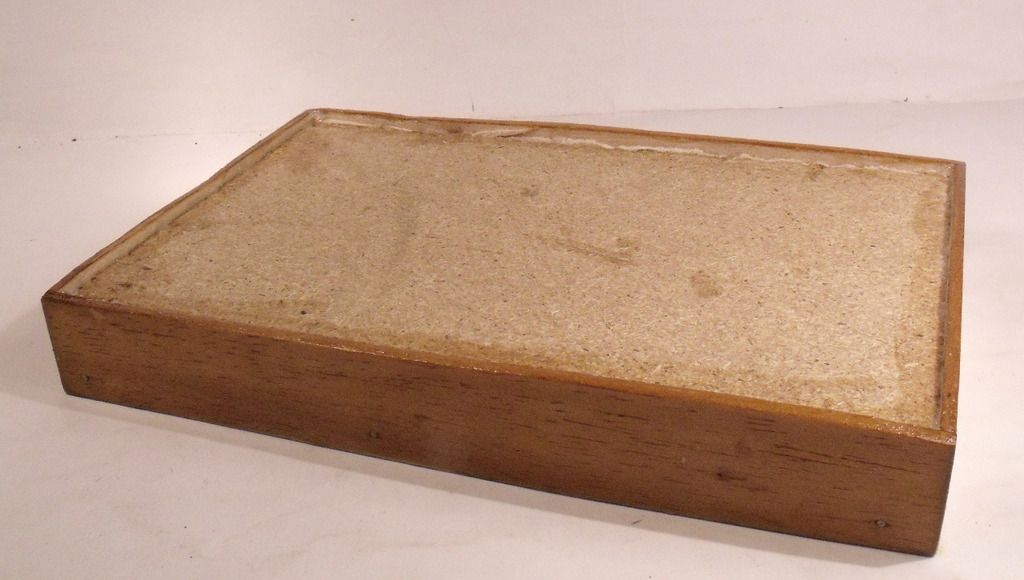 And thats all for now. I am hoping by the end of the weekend, i can start on painting the outside of the hull. |
|
|
|
Post by Leon on Jul 22, 2016 11:48:54 GMT -5
Great progress Bish! The interior weathering looks awesome.
|
|
Wes
Full Member
  
Member since: November 2011
Posts: 686
Nov 16, 2011 9:34:50 GMT -5
Nov 16, 2011 9:34:50 GMT -5
|
Post by Wes on Jul 22, 2016 13:28:31 GMT -5
What an action packed update Bish. Top notch progress buddy.
Gonna go back and read it all again.
|
|
flmlm
Full Member
  
Member since: March 2016
Crack open that kit and smell the build ????
Posts: 170 
|
Post by flmlm on Jul 22, 2016 13:47:19 GMT -5
Wow! Outstanding Piece of work!
|
|
|
|
Post by wbill76 on Jul 22, 2016 23:29:39 GMT -5
You've been busy with this one Bish, interior is looking good!
|
|
bish
Full Member
  
Member since: January 2013
Horatio Nelson 'I am a Norfolk man, and i glory in being so'
Posts: 555
Jan 13, 2013 8:57:43 GMT -5
Jan 13, 2013 8:57:43 GMT -5
|
Post by bish on Jul 23, 2016 1:15:19 GMT -5
Thanks guys, ye Bill, I have been rather.
|
|
bish
Full Member
  
Member since: January 2013
Horatio Nelson 'I am a Norfolk man, and i glory in being so'
Posts: 555
Jan 13, 2013 8:57:43 GMT -5
Jan 13, 2013 8:57:43 GMT -5
|
Post by bish on Jul 25, 2016 0:36:03 GMT -5
Had quite a busy wekend so thought i would share it with you. having got the rockets finished, i fitted some inside, along with the long awaited missing parts from RM. 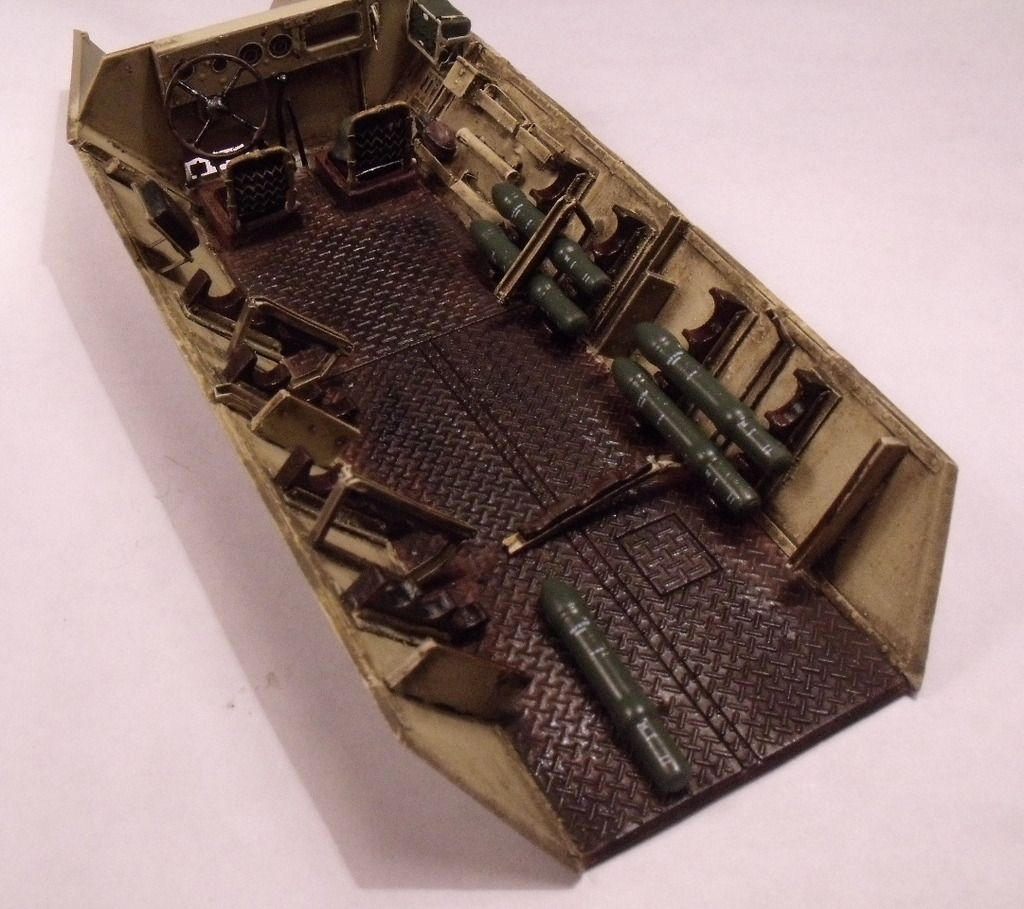 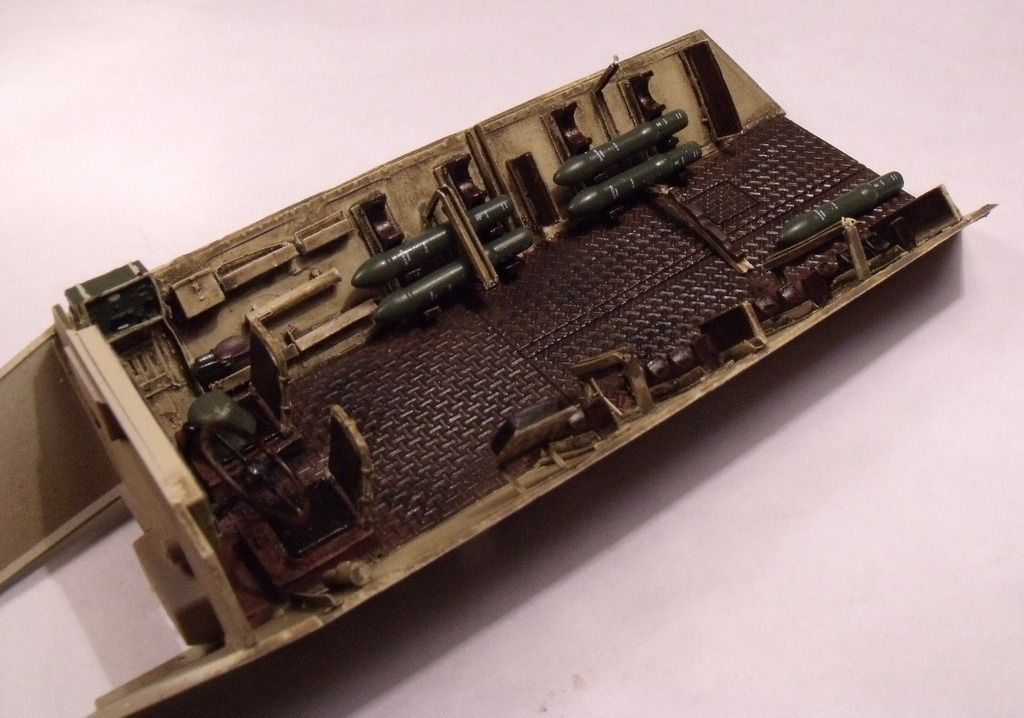 I was then able to get the top on which went on pretty well. I then laid a couple more rockets on the floor once i worked out where the loader would stand. It seems as though this kit is based on the vehicle at the Samur tank museum. It includes moulded on hooks for holding the hatch open. These are fitted to the Samur vehicle but according to Nuts and Bolts, these are probably a post war addition as there is not sign of these in war time photo's, and i have looked and think they are right. 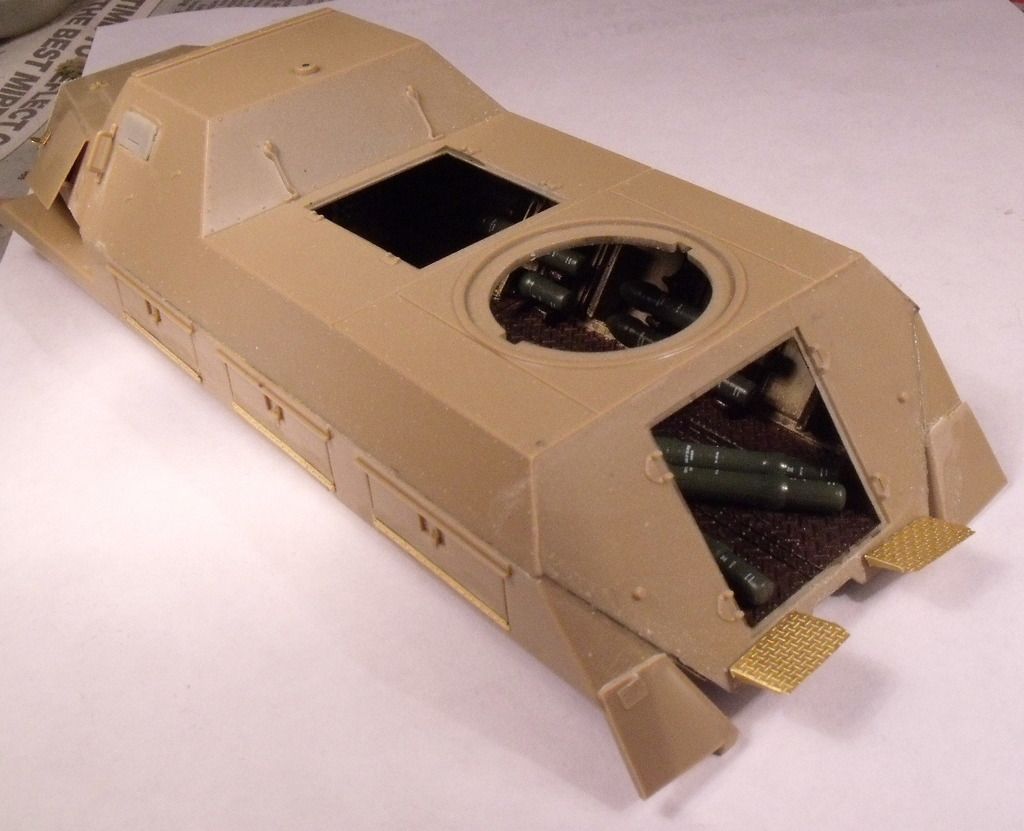 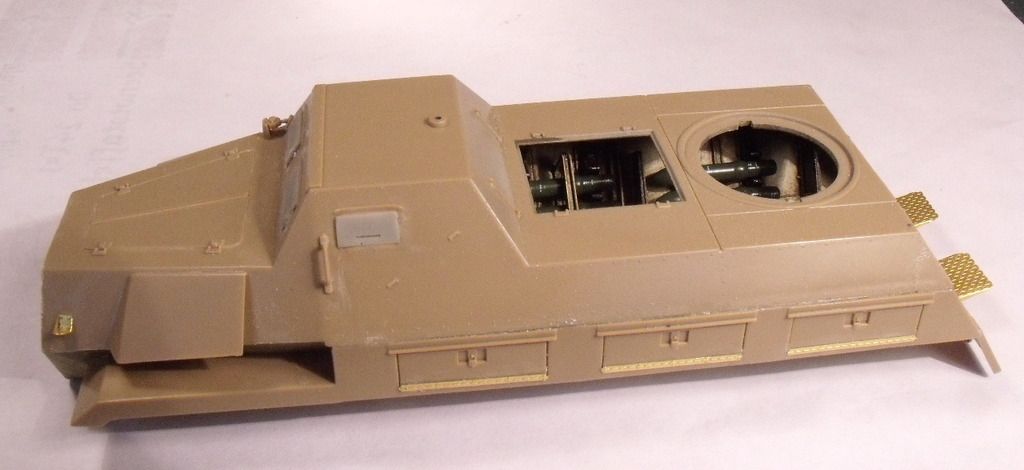 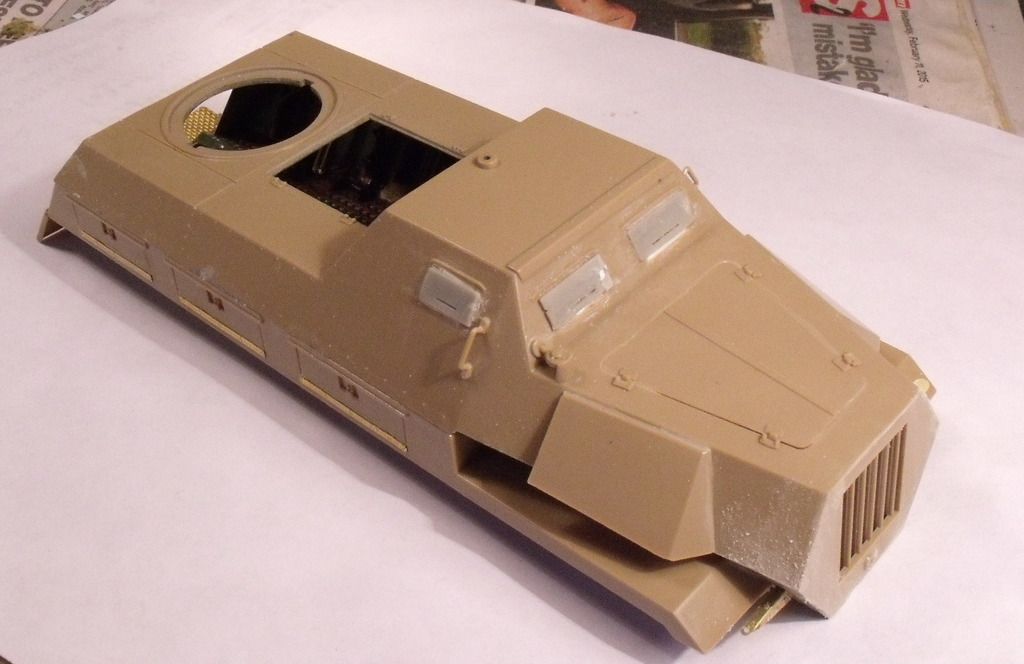 It was then just down to the last bits of PE on the outside. I used Aber tool clamps as the RM set did not include these. The inside was also filled with tissue to mask off the openings. You can see those hooks have been removed. 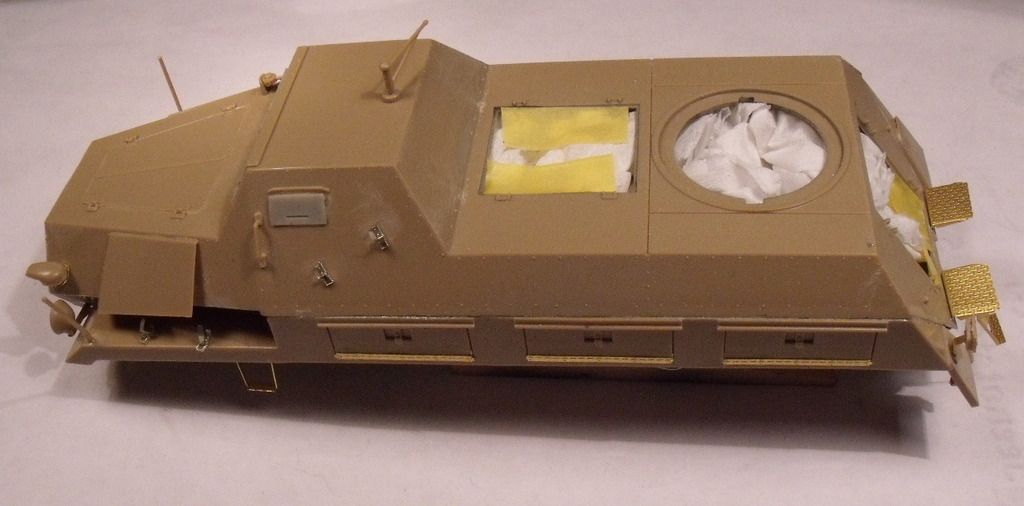 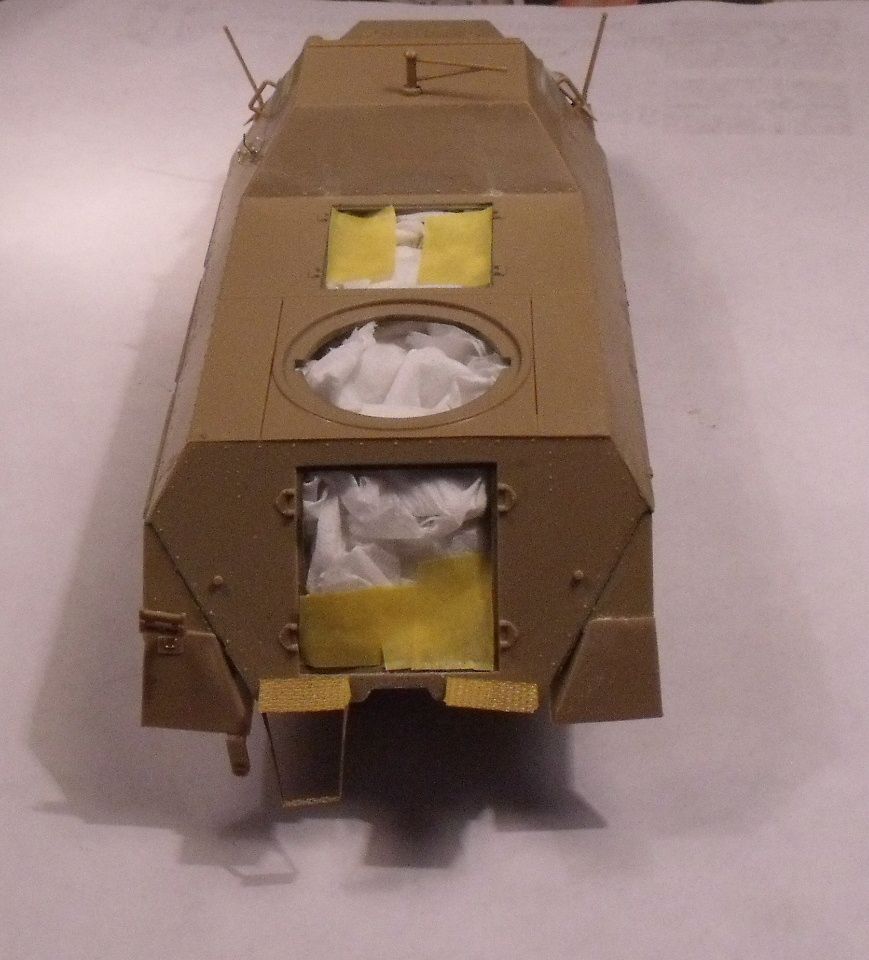 Then off to the paint booth. Saturday i gave it a primer coat, then yesterday i got up early before we went out for the day and sprayed the Dark Yellow using Xtracolour enamels. When we came home, i then sprayed the random squiggles of green and red brown which i could do in one sitting as i didn't have to worry about masking. 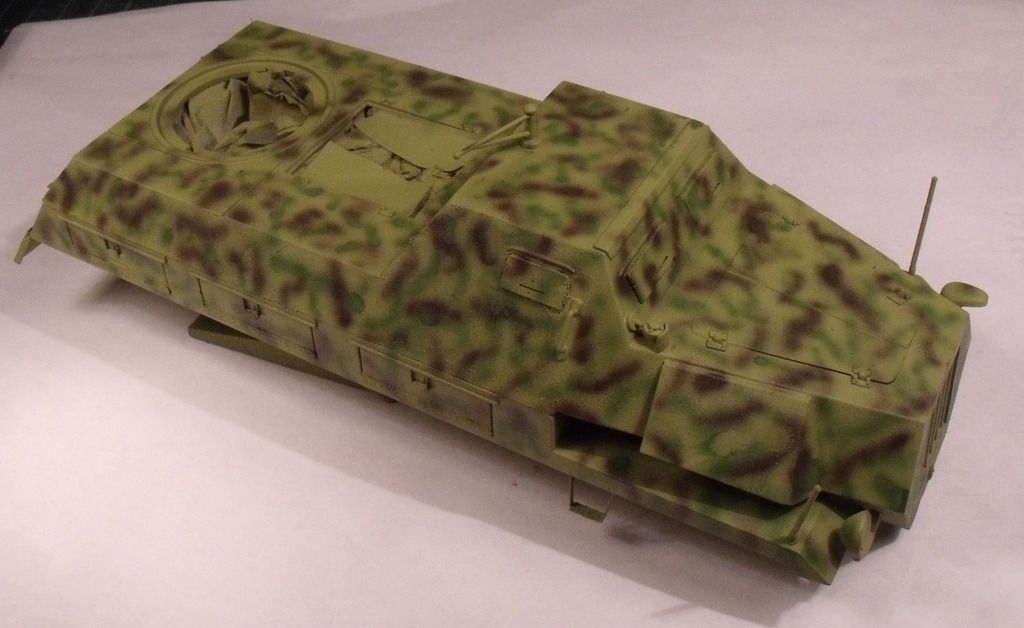 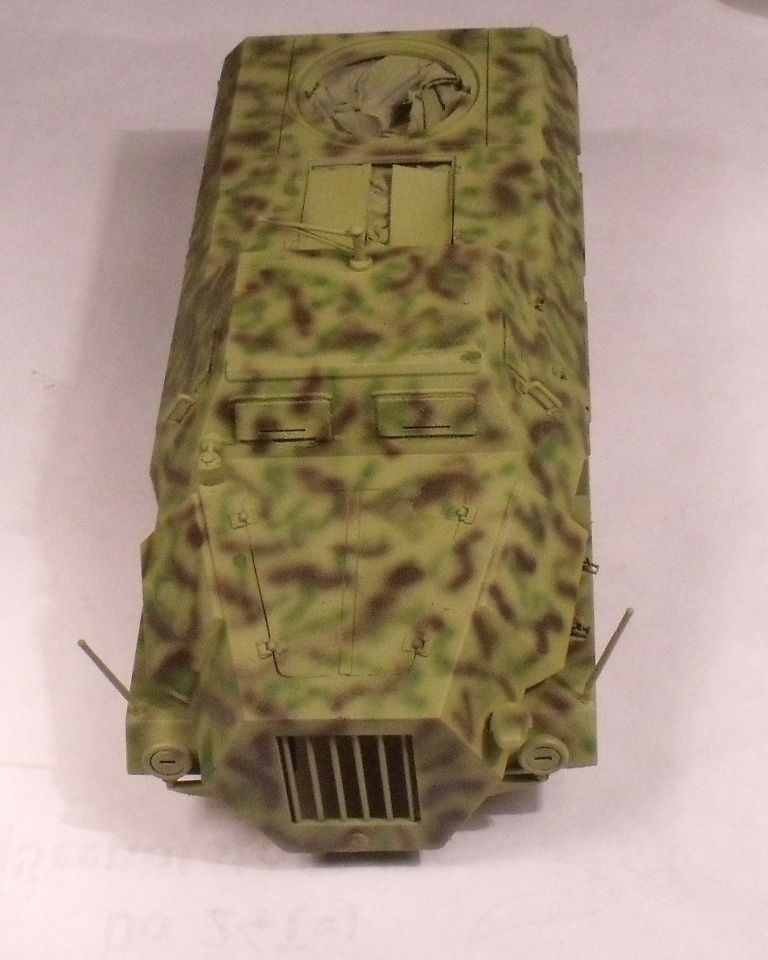 And the launcher was done as well. 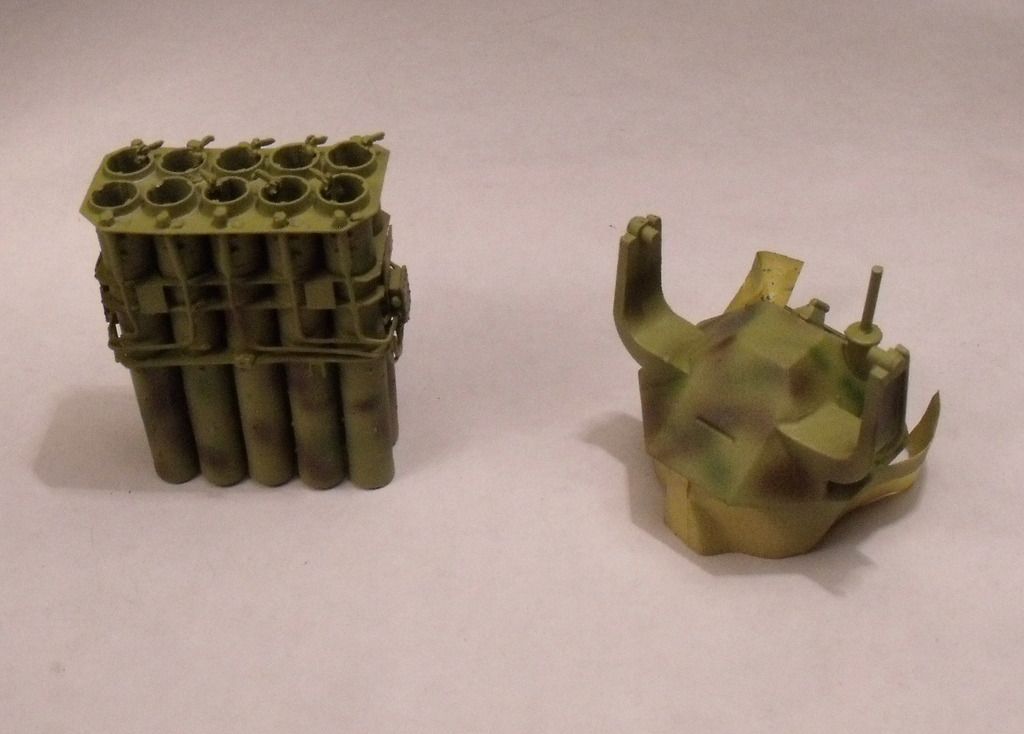 And after leaving it a couple of hours, i gave the whole thing a dry brush using MiG oils. 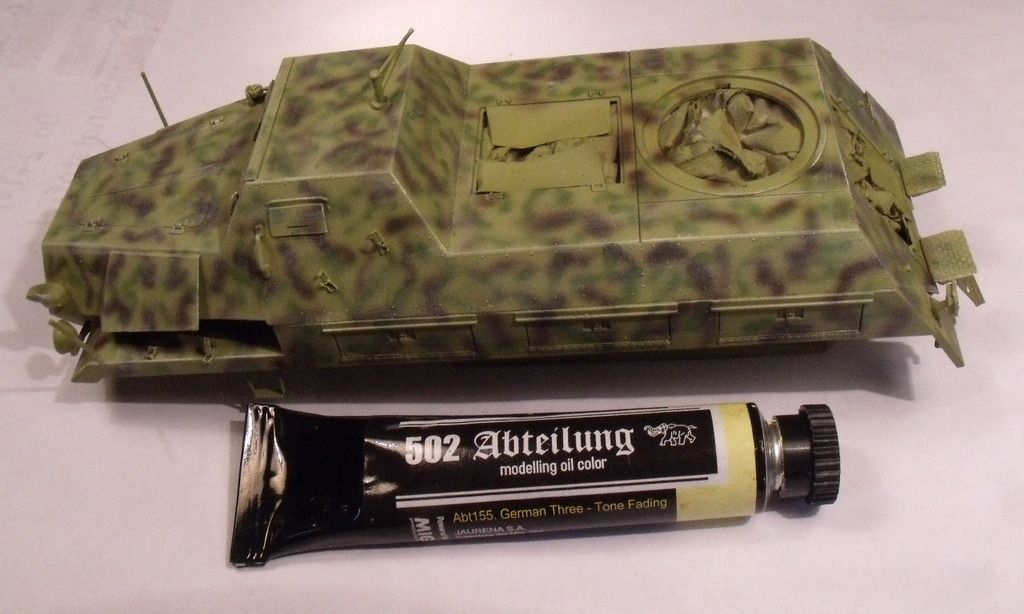 And yes, i was using enamels, yes i did say a couple of hours and yes it was touch dry. A complete paint job and dry brush in 12 hours, who says using enamels is slow. And finally, my first pic of the figures. I put the two standing figures together a couple of weeks ago. But i waited until the two hull halves were together before doing the kneeling figure to get his arm position right. 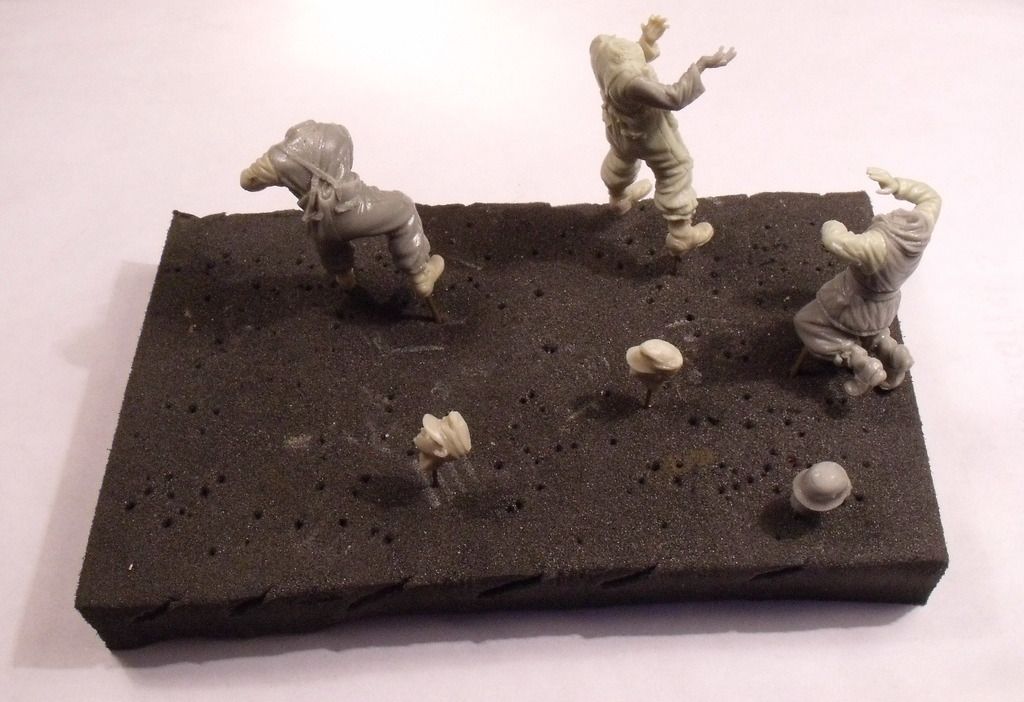 So now i will let the oil dry brush dry for a couple of days before a coat of future and the weathering. In the menatime i can work on the figures and finish and fit the tracks. |
|
|
|
Post by Leon on Jul 25, 2016 4:29:06 GMT -5
WOW, great update Bish! Looking really awesome with the rockets and camo.
|
|
|
|
Post by wbill76 on Jul 25, 2016 11:24:02 GMT -5
Definitely a productive weekend Bish. Nice work on the camo pattern and fading/blending. And you're spot on about enamels, just have to know the tricks!  |
|
bish
Full Member
  
Member since: January 2013
Horatio Nelson 'I am a Norfolk man, and i glory in being so'
Posts: 555
Jan 13, 2013 8:57:43 GMT -5
Jan 13, 2013 8:57:43 GMT -5
|
Post by bish on Jul 25, 2016 14:14:01 GMT -5
Thanks guys. I was quite pleased with how it come out. there are a couple of dodgy spots, but those can be dealt with. Now I just have to make sure I don't get to heavy handed with the weathering.
Bill, I have always found Enamels far easier to use than many people seem to suggest. Sure, if I am masking I will leave them 2 days just to be safe. I have been using Xtracolour for close to 30 years now, so I am getting the hang of it.
|
|
|
|
Post by dupes on Jul 25, 2016 20:40:24 GMT -5
Man...lot of nice work here Bish!
|
|
bish
Full Member
  
Member since: January 2013
Horatio Nelson 'I am a Norfolk man, and i glory in being so'
Posts: 555
Jan 13, 2013 8:57:43 GMT -5
Jan 13, 2013 8:57:43 GMT -5
|
Post by bish on Jul 25, 2016 23:58:20 GMT -5
Cheers dupes.
|
|
modsrule1976
Junior Member
 
Member since: December 2015
Posts: 98 
|
Post by modsrule1976 on Jul 26, 2016 2:35:37 GMT -5
Looking very nice
|
|
Wes
Full Member
  
Member since: November 2011
Posts: 686
Nov 16, 2011 9:34:50 GMT -5
Nov 16, 2011 9:34:50 GMT -5
|
Post by Wes on Jul 26, 2016 4:54:37 GMT -5
Great work Bish
Im keen to see the weathering stages unfold.
|
|