|
|
Post by dupes on Dec 10, 2016 18:08:48 GMT -5
Nice work on those weld beads! I need to use that trick more often.
|
|
|
|
Post by chromdome35 on Dec 10, 2016 18:11:02 GMT -5
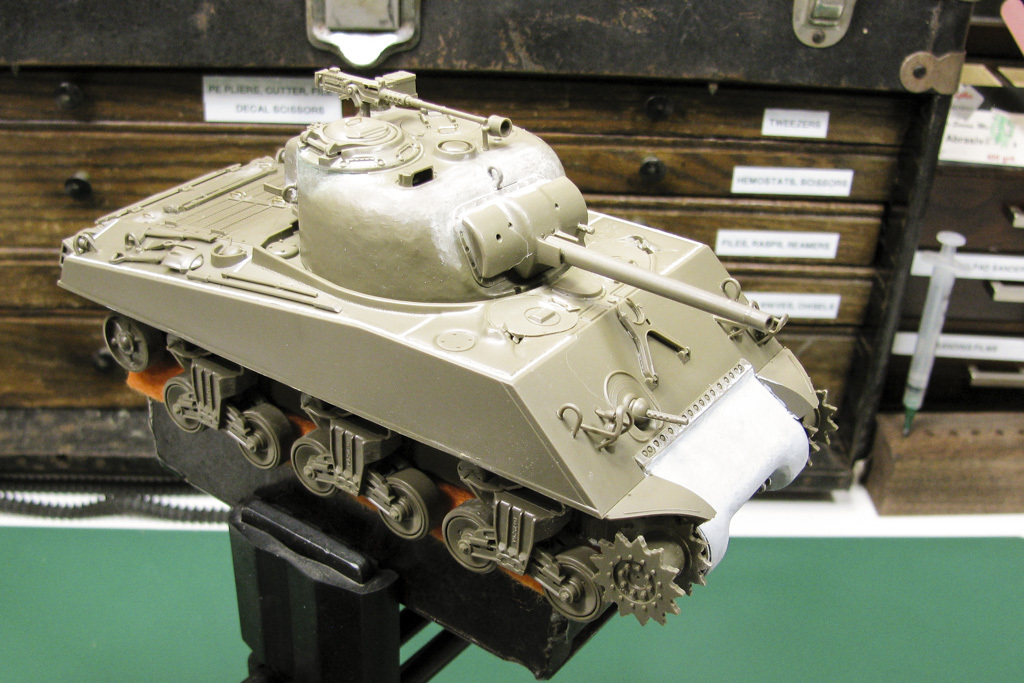
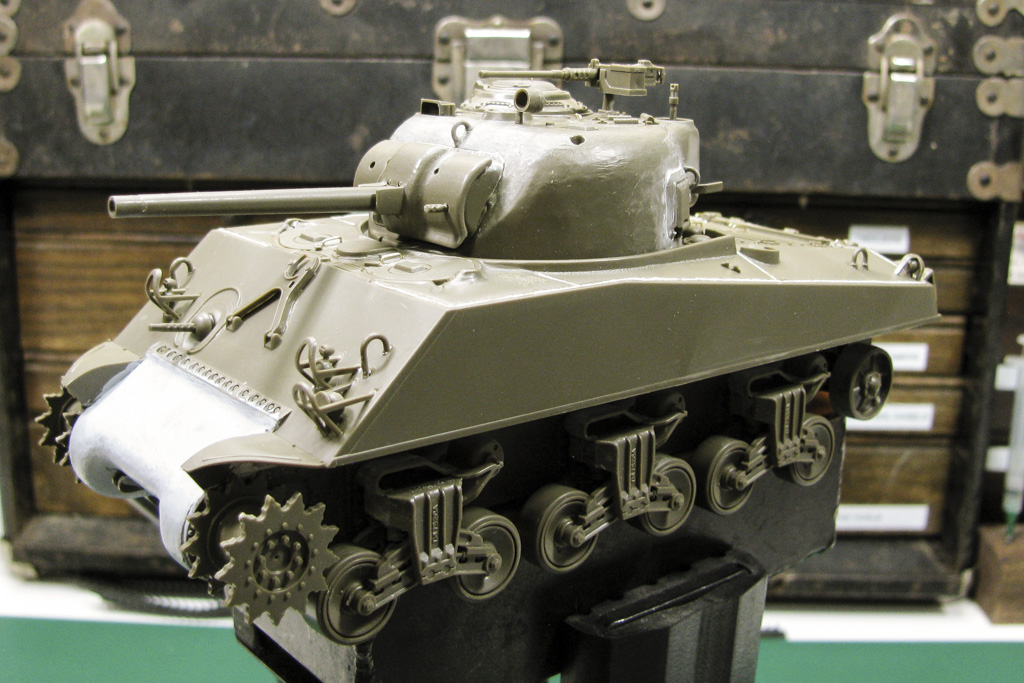
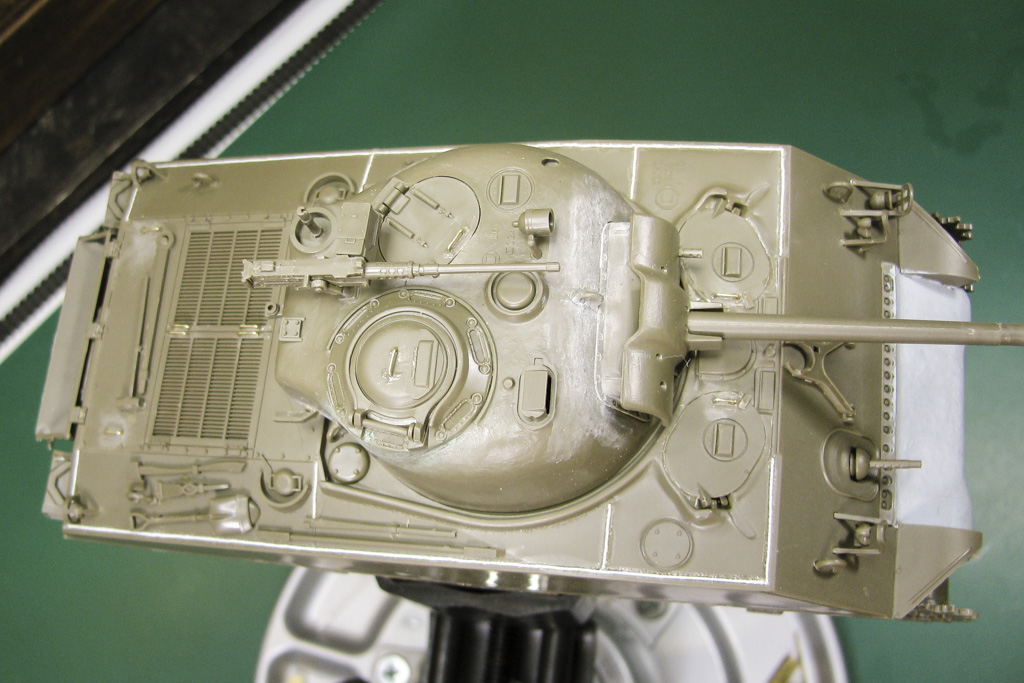
I have to say, that I'm 1 part intimidated, 2 parts awed and 3 parts inspired by the work you guys display on this board. Well here is my attempt at replacing the molded on handholds. This is the first time I've ever done these, mrt51's fine work inspired it. I ended up using 26 gauge (.4mm) brass wire, the closest thing I had to the size you recommended Joel. I bent the wire using the 3mm setting on the hand hold forming tool I got from UMM. I haven't permanently attached them to the model yet, they are just sitting in the holes I drilled which is why the one on the top left looks a bit crooked. All in all, I'm pretty happy with the way they turned out. Check off another model building bucket list item. 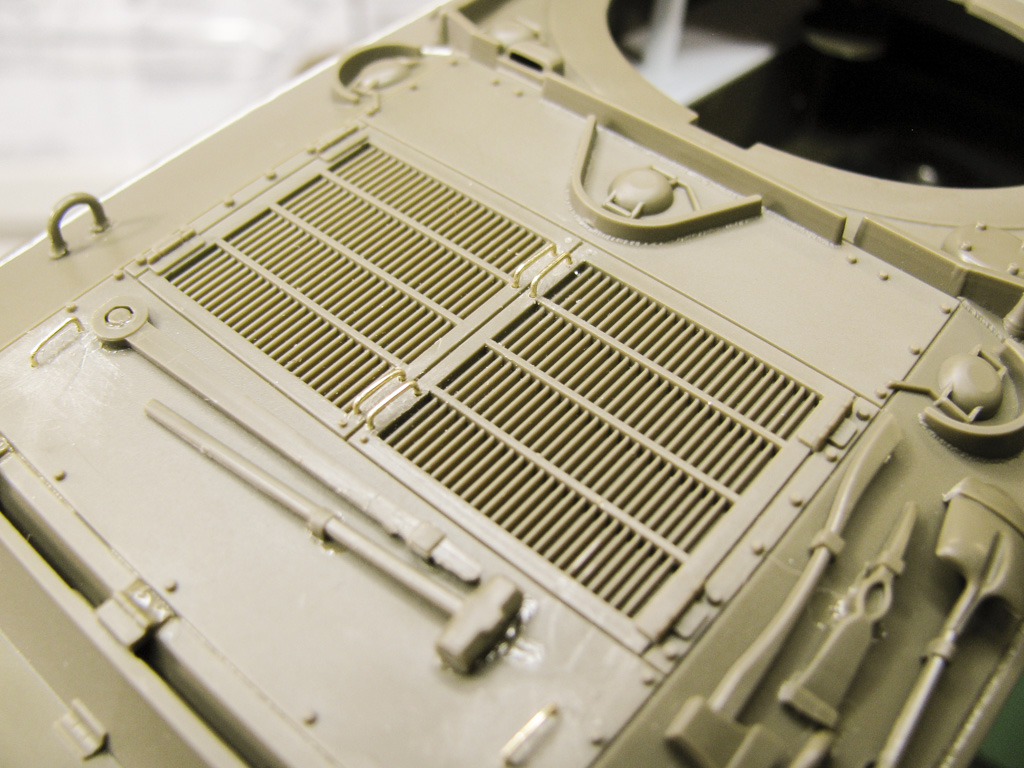 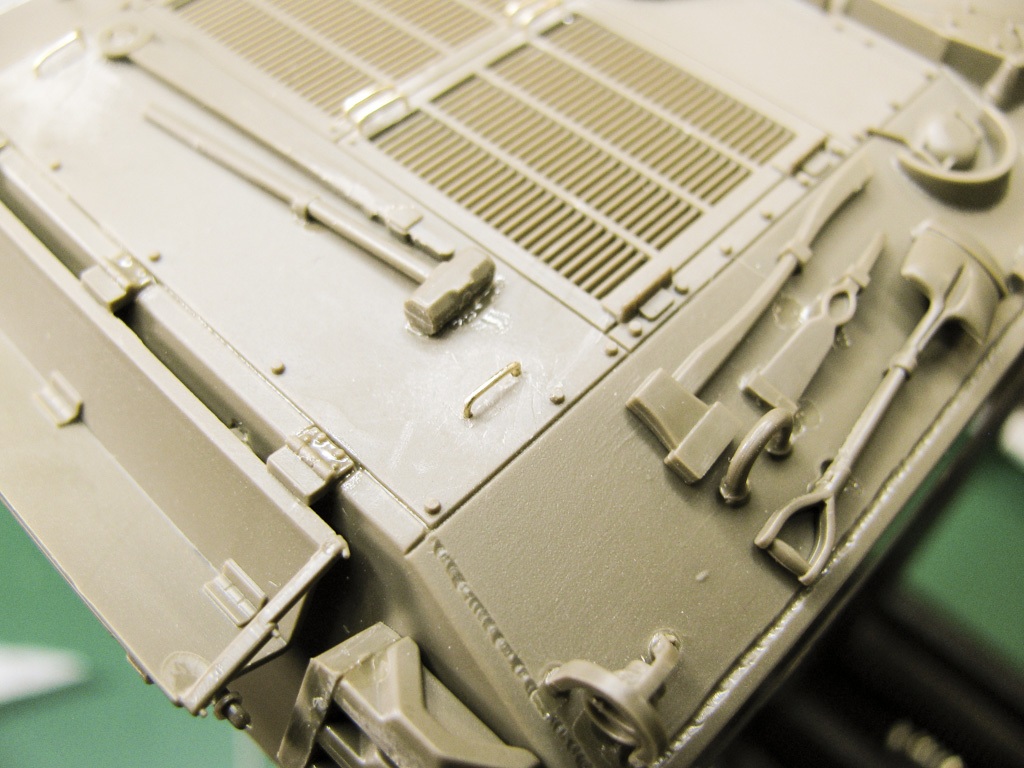 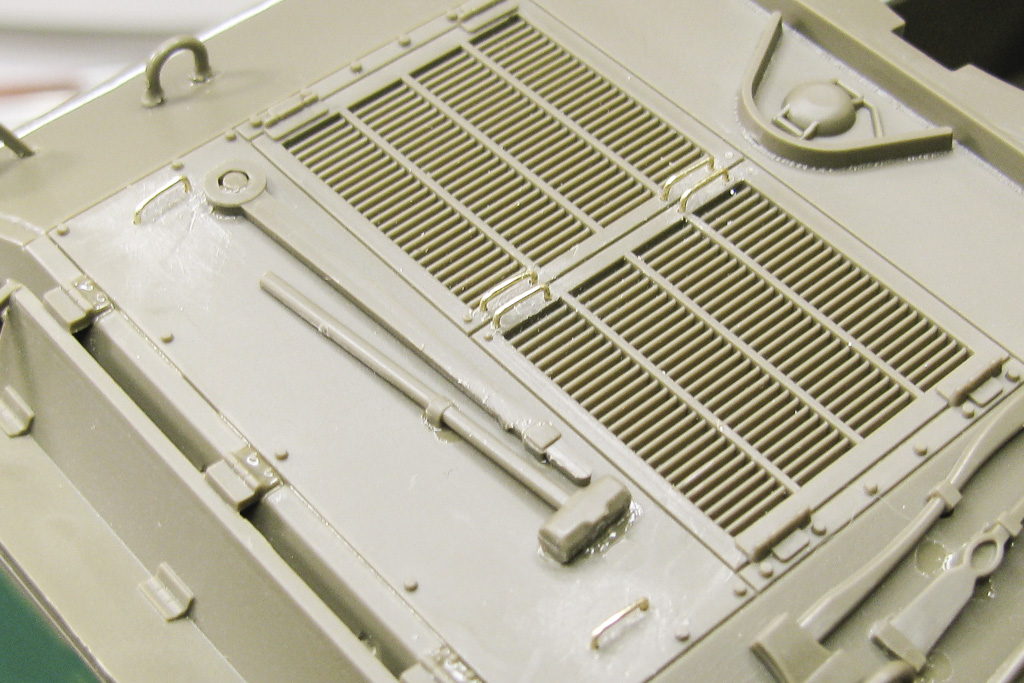 |
|
|
|
Post by dupes on Dec 10, 2016 18:14:10 GMT -5
Those look spot on to me...you even got the holes to match the wire diameter - doesn't look like you'll need any putty at all.
|
|
|
|
Post by chromdome35 on Dec 10, 2016 18:16:00 GMT -5
Those look spot on to me...you even got the holes to match the wire diameter - doesn't look like you'll need any putty at all. According the the chart I posted in the tips section, 26 gauge wire is .0159" in diameter. I used a .0160" drill bit. I tested it out on a piece of scrap first to make sure it was a proper fit. |
|
|
|
Post by Leon on Dec 10, 2016 18:23:39 GMT -5
Glad to see i'm not the only machinist on the forum!  |
|
|
|
Post by Leon on Dec 10, 2016 18:27:24 GMT -5
Nice work on those handles CD! Your learning fast.
Karma to you.
|
|
joelsmith
Full Member

Member since: July 2012
There no winners in war, only survivors.
Posts: 1,404
Jul 5, 2012 22:33:58 GMT -5
Jul 5, 2012 22:33:58 GMT -5
|
Post by joelsmith on Dec 10, 2016 18:58:37 GMT -5
Leon, I don't know that I would call myself a machinist. I can operate machine tools if I pay close attention to what I'm doing. It is such a fragile skill, I haven't touched a mill or lathe in 3 years, and I feel that I would need a refresher to be safe. Talk soon, Joel.
|
|
george
Full Member
Member since: February 2014
Posts: 266 
|
Post by george on Dec 10, 2016 21:10:39 GMT -5
You are natural born welder, sir. Great job on weldseams and nice work with details.
|
|
|
|
Post by chromdome35 on Dec 12, 2016 0:21:00 GMT -5
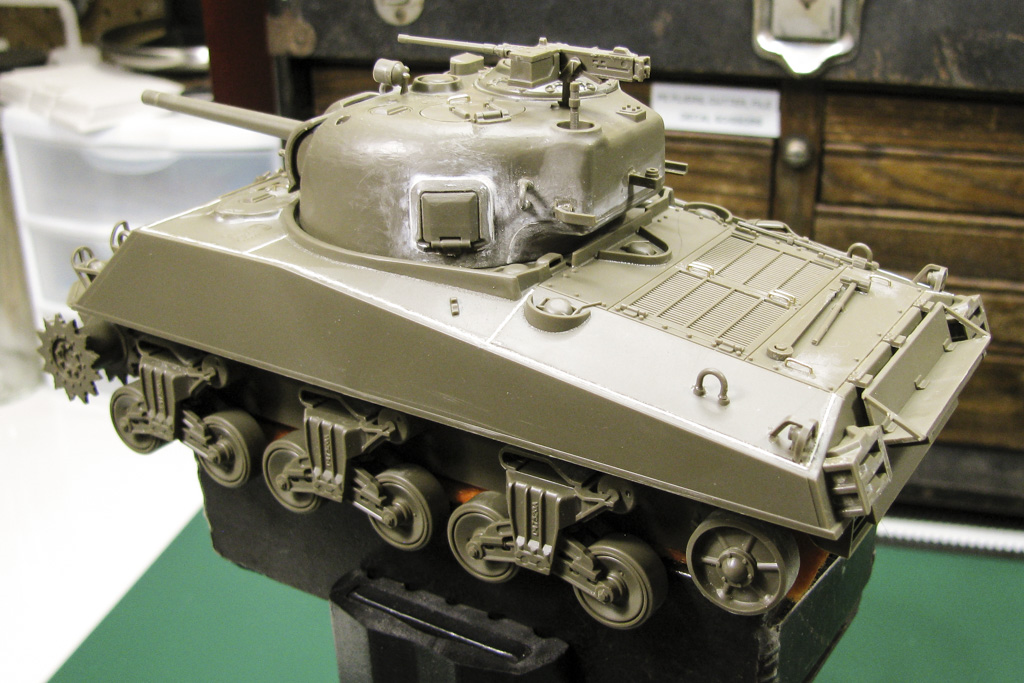
Made some good progress today, primary construction is almost done. I had a small disaster as I dropped my pin vise and of course Murphy's law dictated that it landed in such a way that my .0160 bit broke. I ordered a new one via Amazon, but it won't be here until Tuesday. I'll have to wait to drill the final 6 holes for the wire hand holds. I have a question about the holes that remain in the mantlet, should I fill those in? 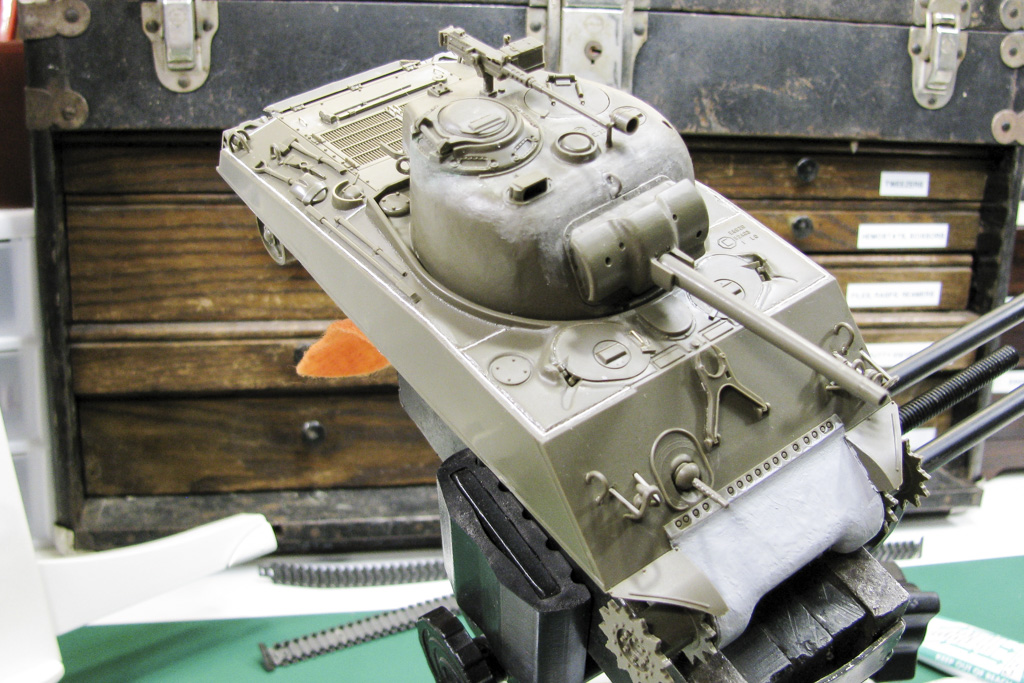 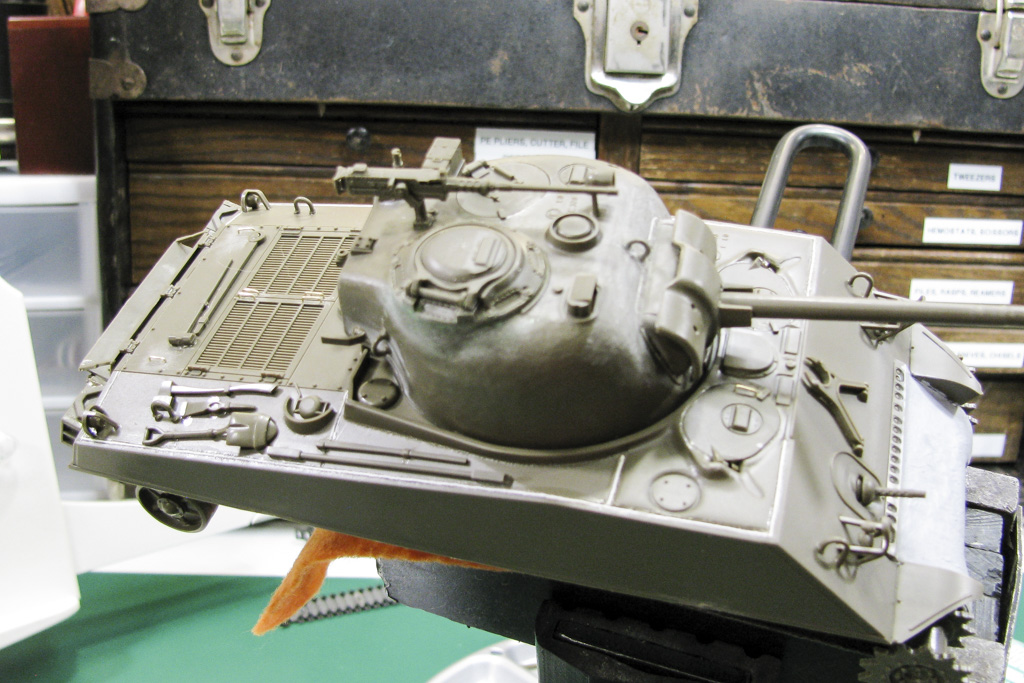 |
|
george
Full Member
Member since: February 2014
Posts: 266
|
Post by george on Dec 12, 2016 6:34:20 GMT -5
|
|
|
|
Post by chromdome35 on Dec 12, 2016 8:46:43 GMT -5
Thanks George, thats a great website!!!
For the two upper holes that appear to have screws, is there any technique you use to create those?
|
|
|
|
Post by mrt51 on Dec 12, 2016 11:43:15 GMT -5
The grab handles look great, but don't forget the commander and loader hatches. 
|
|
|
|
Post by chromdome35 on Dec 12, 2016 11:48:02 GMT -5
The grab handles look great, but don't forget the commander and loader hatches.
I have already removed the molded on handles; however, I broke the pin vise bit I was using so I have to wait for UPS to deliver me a new one tomorrow. I'll do those handles as soon as I can drill out the holes. |
|
|
|
Post by mrt51 on Dec 12, 2016 11:52:57 GMT -5
The grab handles look great, but don't forget the commander and loader hatches.
I have already removed the molded on handles; however, I broke the pin vise bit I was using so I have to wait for UPS to deliver me a new one tomorrow. I'll do those handles as soon as I can drill out the holes. I get mine from Harbor Freight. I break bits all the time. They are so tiny it's hard not to. The Harbor Freight bits come in a set, but you may have to look through them to get the bit sizes you want because the bits are packaged randomly. |
|
|
|
Post by chromdome35 on Dec 12, 2016 11:54:45 GMT -5
I have already removed the molded on handles; however, I broke the pin vise bit I was using so I have to wait for UPS to deliver me a new one tomorrow. I'll do those handles as soon as I can drill out the holes. I get mine from Harbor Freight. I break bits all the time. They are so tiny it's hard not to. The Harbor Freight bits come in a set, but you may have to look through them to get the bit sizes you want because the bits are packaged randomly. Thanks for the HF tip, I didn't know they sold the small bits. I have one not far from my house. |
|
|
|
Post by mrt51 on Dec 12, 2016 12:00:39 GMT -5
I get mine from Harbor Freight. I break bits all the time. They are so tiny it's hard not to. The Harbor Freight bits come in a set, but you may have to look through them to get the bit sizes you want because the bits are packaged randomly. Thanks for the HF tip, I didn't know they sold the small bits. I have one not far from my house. Well I hope they still do because I need some. |
|
joelsmith
Full Member
Member since: July 2012
There no winners in war, only survivors.
Posts: 1,404
Jul 5, 2012 22:33:58 GMT -5
Jul 5, 2012 22:33:58 GMT -5
|
Post by joelsmith on Dec 12, 2016 12:08:48 GMT -5
If you have a industrial supply house near you, it is a great source for small drill bits in both fractional and metric. They also have small burrs and mini mills available. Grainger is a good online source for drill bits. Talk more soon, Joel
|
|
|
|
Post by chromdome35 on Dec 12, 2016 12:09:28 GMT -5
|
|
|
|
Post by deafpanzer on Dec 12, 2016 15:46:49 GMT -5
Thanks for the HF tip, I didn't know they sold the small bits. I have one not far from my house. Well I hope they still do because I need some. I didn't know either... running low on tiny bits so I smell a trip to local HF shop. Your Sherman is looking real good! |
|
george
Full Member
Member since: February 2014
Posts: 266
|
Post by george on Dec 12, 2016 18:24:38 GMT -5
Thanks George, thats a great website!!! For the two upper holes that appear to have screws, is there any technique you use to create those? I would insert the plastic rod (or stretched sprue) a little deeper than surface level and try to cut with exacto-knife to simulate the slot in the middle. 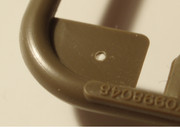 |
|
|
|
Post by chromdome35 on Dec 16, 2016 0:06:44 GMT -5
|
|
joelsmith
Full Member
Member since: July 2012
There no winners in war, only survivors.
Posts: 1,404
Jul 5, 2012 22:33:58 GMT -5
Jul 5, 2012 22:33:58 GMT -5
|
Post by joelsmith on Dec 16, 2016 7:08:53 GMT -5
Looking real good CD. Did you replace the handles on the turret hatches? Keep it up, Joel. PS don't forget the round wire periscope guards on the hull hatches, and the loaders periscope on the turret.
|
|
|
|
Post by mrt51 on Dec 16, 2016 9:08:55 GMT -5
Looking good!

|
|
|
|
Post by chromdome35 on Dec 16, 2016 9:25:27 GMT -5
Looking real good CD. Did you replace the handles on the turret hatches? Keep it up, Joel. PS don't forget the round wire periscope guards on the hull hatches, and the loaders periscope on the turret. Joel, Yes I did replace the hand holds on the turret hatches, it's just hard to see in the pictures. You are right I had forgotten about the periscope guards. My initial thought would be to use the same wire I used to make the hand holds. I would start by forming the ends, drilling and attaching to the vehicle. Then come back and solder in the two horizontal pieces that connect with both ends? Or should I do them fully off the vehicle then mount each as one unit? Any advice you or others could offer on making those would be more than appreciated! |
|
joelsmith
Full Member
Member since: July 2012
There no winners in war, only survivors.
Posts: 1,404
Jul 5, 2012 22:33:58 GMT -5
Jul 5, 2012 22:33:58 GMT -5
|
Post by joelsmith on Dec 16, 2016 10:31:30 GMT -5
CD, I am lucky in that I have a bunch of left over guards from Sherman kits, primarily the M51 and E8. I wouldn't solder on the kit, because it might damage the kit, super glue might work. However you can obtain a lot from Shapeways. They have them 3D printed for a fairly inexpensive price, Hope this helps, Joel.
|
|
joelsmith
Full Member
Member since: July 2012
There no winners in war, only survivors.
Posts: 1,404
Jul 5, 2012 22:33:58 GMT -5
Jul 5, 2012 22:33:58 GMT -5
|
Post by joelsmith on Dec 16, 2016 10:56:52 GMT -5
CD, I just checked Shapeways, and they have the guards still available. 50 guards for 12.99 plus shipping. They are listed as "C100914 guard assembly periscope". Hope this helps, Joel.
|
|
|
|
Post by chromdome35 on Dec 16, 2016 11:15:44 GMT -5
CD, I just checked Shapeways, and they have the guards still available. 50 guards for 12.99 plus shipping. They are listed as "C100914 guard assembly periscope". Hope this helps, Joel. Thanks for the Shapeway link, I've never seen that before. I've been browsing and WOW... 3D printing is going to really hurt Resin and take a bite out of PE I suspect. I ordered the set of periscope guards. |
|
joelsmith
Full Member
Member since: July 2012
There no winners in war, only survivors.
Posts: 1,404
Jul 5, 2012 22:33:58 GMT -5
Jul 5, 2012 22:33:58 GMT -5
|
Post by joelsmith on Dec 16, 2016 13:03:06 GMT -5
CD, you are returning to the hobby after a long absence, you have nothing to be self-depreciating about. All these bits of info, tips & tricks that are dispensed on this site came from making mistakes, asking questions, etc. You are doing good work on your Sherman and should be very proud of it!. Talk more soon, Joel.
|
|
|
|
Post by chromdome35 on Dec 16, 2016 16:17:46 GMT -5
Well I tried to make them by soldering brass...yea no. I got the two vertical pieces made no problem, by making them like I did the hand holds then using my BUG to bend them slightly. That was pretty easy to do. Attaching the two horizontal pieces of brass to the verticals gave me fits, I finally got one in place, but after an hour of trying I gave up trying to solder the second in place. I'm wondering if just using CA wouldn't be easier. Easiest would be to wait for the 3D printed ones to come in, but that will be a couple of weeks and I'm impatient  |
|
|
|
Post by chromdome35 on Dec 28, 2016 23:07:03 GMT -5
I received the 3D printed periscope guards I ordered off of Shapeways (Thank you joelsmith for the site) For $12.99 you get 50 guards. This was the first order I've ever placed from Shapeways and it really went off without a hitch. I placed the order on December 16th and received the package on December 23rd. The guards came in a translucent white color, 5 strips of 10 guards. 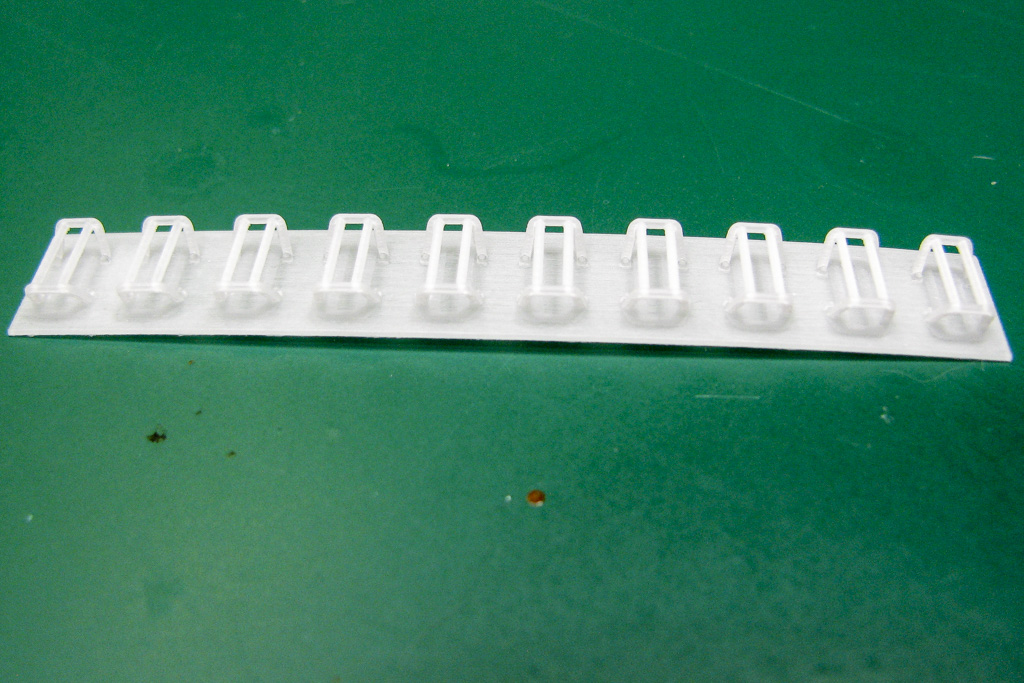 The first one I removed from the strip I ended up breaking, they are somewhat brittle and require a light touch. I used a scalpel with a #11 blade to cut them off. I cut them off by holding the strip vertically and bracing it on my cutting pad. I then placed the blade of the scalpel flat side against the strip and gently sliced each leg of the guard at the point it joined the strip. I had a little cleanup work to do. This is what they look like on the model 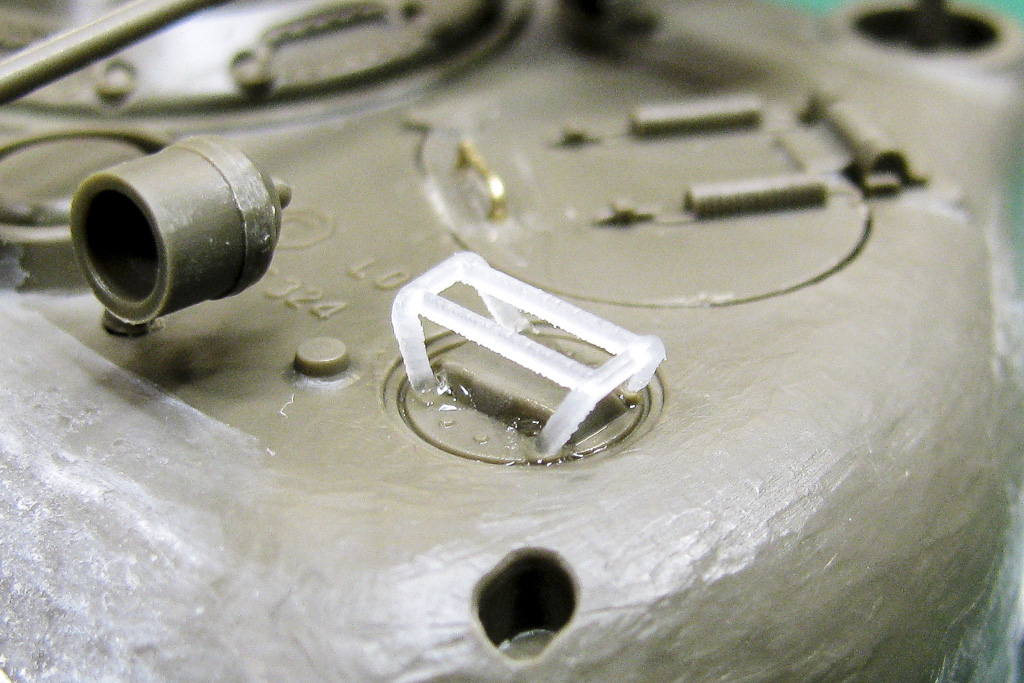 Once I had them all attached, I soaked the model in soapy water and let it dry for a few days. I primed it in Mr Surfacer 1200 thinned with Mr. Color Leveling thinner. I then put down a coat of Tamiya Nato Black again thinned with Mr. Color Leveling Thinner. Hopefully over the next few days I'll get to atomize some more paint. Sorry for the crappy picture...I was in a hurry.  |
|