Rick
Full Member
  
Member since: March 2013
what to build, what to build . . . Ok THAT one!
Posts: 854 
|
Post by Rick on Jan 25, 2017 22:45:36 GMT -5
Well, I have to confess, I've been cheating on my Heinkel. In between bouts of paint and tape, I've been playing around across the channel getting busy with a bird that spent very little time in RAF colors. In a time of desperate shortages, the RAF purchase a number of Airacobra's from the US to supplement the ranks of front line fighters. The Airacobra's performance was a disappointment from the start. The RAF operational experience last for 1 mission of four aircraft. It was with withdrawn and the aircraft was "gifted to the Russians. This aircraft will represent 601 squadron. The kit is Special Hobby's 1/32 offering. The detail is extremely good and crisp. It comes with very nice resin exhausts and two photo etch frets with color detail. I was very excited the see the details and extra goodies and felt this was going to build up into a very nice kit. Once I started test fitting (playing) parts, I quick realized this beauty actually had all the makings of a turd. Poor fit and rough seams abound throughout even though detail is very crisp and rivals some of the better kits out there. Let's start with some of the good stuff: Very nice box art and various sprues: 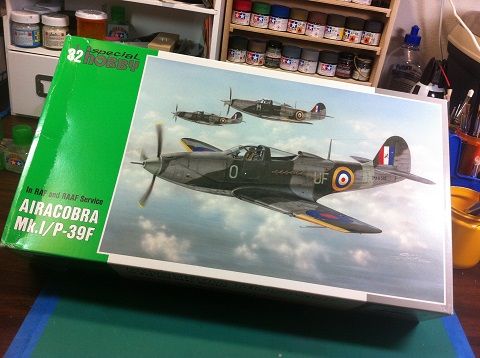 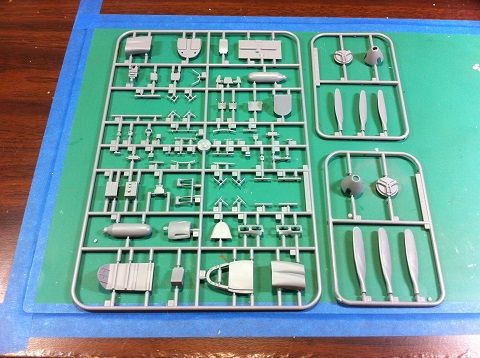 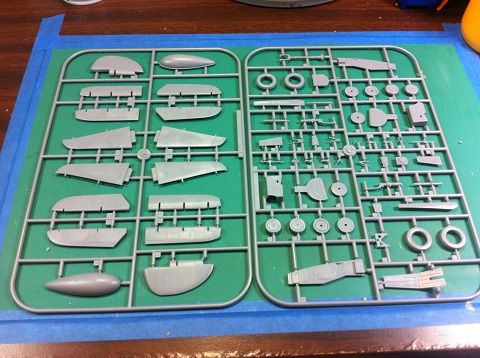 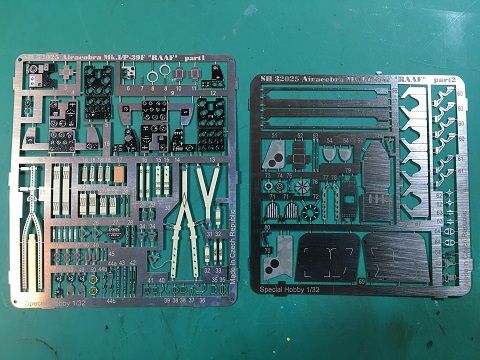 Some clarity plus several resin exhausts 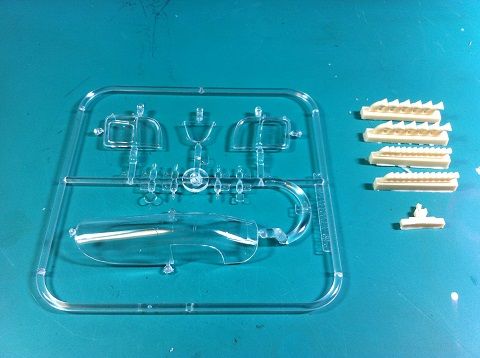 |
|
|
|
Post by panzerjager2 on Jan 25, 2017 23:03:44 GMT -5
P-39 Aircobra VERY VERY COOL
|
|
|
|
Post by deafpanzer on Jan 26, 2017 10:08:13 GMT -5
|
|
midnightprowler
Full Member
  
Member since: February 2016
Posts: 701 
|
Post by midnightprowler on Jan 26, 2017 18:54:18 GMT -5
Looking forward to this. The P39 is my favorite WWII aircraft.
|
|
sturmbird
Full Member
  
Member since: June 2012
Posts: 1,406
Jun 21, 2012 13:51:45 GMT -5
Jun 21, 2012 13:51:45 GMT -5
|
Post by sturmbird on Jan 27, 2017 1:23:40 GMT -5
actually the Brits were in error. It was found that the P39 was near the equal in performance to the BF109f4 from about 16,000 feet and lower. Later versions were the near equal to the G series 109 under 20K feet. I might add that it also was better than the P51d under 15,000 feet. Russians found this out early on.
gary
|
|
Rick
Full Member
  
Member since: March 2013
what to build, what to build . . . Ok THAT one!
Posts: 854 
|
Post by Rick on Jan 27, 2017 6:33:54 GMT -5
Thanks DP for keeping my secret. And Sturm, well I've never heard any claims a P39 was better than a P51 at anything, but all I know is the Brits thought it was a POS and it did not suit their needs at the time. If the US had left the supercharger on it, we might not have ever needed a P51. At any rate, I'd gotten interrupted the other night after I started this thread so I'll pick back up at that point. I started cleaning up parts and quick found the plastic is very soft and easy to work with but I also noticed many edges were also quite soft and not always smooth along with some sketchy alignment pins. Dry fitting a few parts confirmed my worst fears. This Special Hobby kit was fast becoming a "Not So" Special Hobby kit. Air intakes and vents did not fit flush or evenly in some cases. I began going through my evergreen plastic inventory and warming up my filler supply. 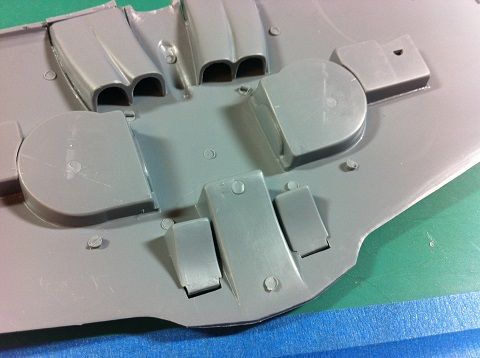 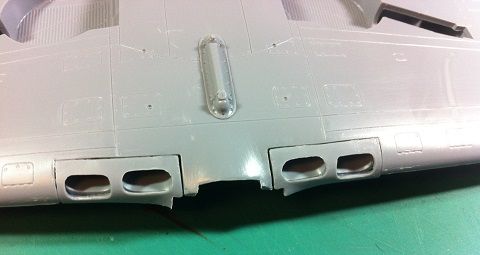 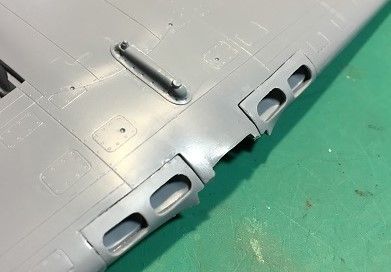 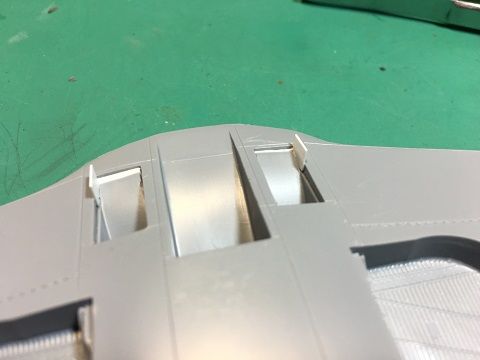 Despite poor fit in most of the wing components, I continue to be impressed with the detail of the exterior surfaces and interior pieces. But how well they might fit together was still unanswered. Shimming and filling of gaps ensued and even had to commit to gluing the wings together in order to get reasonable alignment to fill the massive gaps around the air intakes. A lot of work had to be done on leading edges as well to get them to align as well. 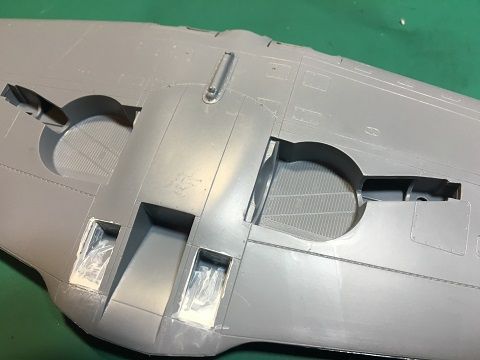 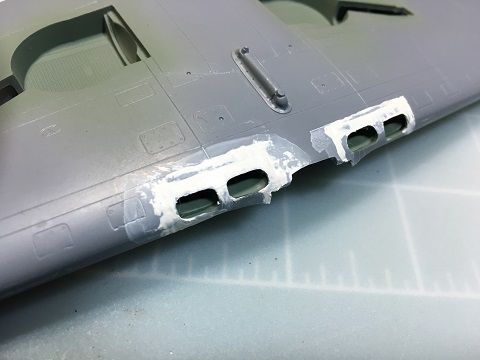 Had Eduard's 1/32 release come out yet, at this point I likely would have followed the Brit's lead and gifted this turd to the Russians but since it was still the only game in town, press on. I cleaned up and painted the landing gear and nose wheel well and got some renewed hope. 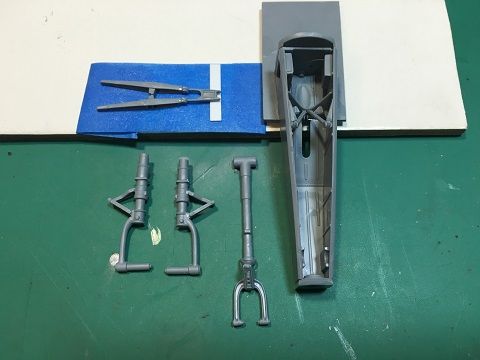 Cockpit comes next. |
|
sturmbird
Full Member
  
Member since: June 2012
Posts: 1,406
Jun 21, 2012 13:51:45 GMT -5
Jun 21, 2012 13:51:45 GMT -5
|
Post by sturmbird on Jan 29, 2017 18:46:50 GMT -5
Thanks DP for keeping my secret. And Sturm, well I've never heard any claims a P39 was better than a P51 at anything, but all I know is the Brits thought it was a POS and it did not suit their needs at the time. If the US had left the supercharger on it, we might not have ever needed a P51. At any rate, I'd gotten interrupted the other night after I started this thread so I'll pick back up at that point. I started cleaning up parts and quick found the plastic is very soft and easy to work with but I also noticed many edges were also quite soft and not always smooth along with some sketchy alignment pins. Dry fitting a few parts confirmed my worst fears. This Special Hobby kit was fast becoming a "Not So" Special Hobby kit. Air intakes and vents did not fit flush or evenly in some cases. I began going through my evergreen plastic inventory and warming up my filler supply.     Despite poor fit in most of the wing components, I continue to be impressed with the detail of the exterior surfaces and interior pieces. But how well they might fit together was still unanswered. Shimming and filling of gaps ensued and even had to commit to gluing the wings together in order to get reasonable alignment to fill the massive gaps around the air intakes. A lot of work had to be done on leading edges as well to get them to align as well.   Had Eduard's 1/32 release come out yet, at this point I likely would have followed the Brit's lead and gifted this turd to the Russians but since it was still the only game in town, press on. I cleaned up and painted the landing gear and nose wheel well and got some renewed hope.  Cockpit comes next. A few years ago, I saw a newspaper article about a guy flying a P39. He was flying with a guy in a P51d, and both left at the same time to get here. The guy in the P39 arrived several minutes quicker than the Mustang. Reason why was the altitude they were flying. Thought it was strange, but after reading several German accounts dog fighting with P39's and P40's I wondered who was right? Germans had great respect for the P39 at 10K feet. The P39 was very agile, and would turn inside a BF109G (read Lipfert's book). Then I come into this book out of Russia. It pretty much paralled what I'd read before. They conducted tests with other aircraft verses the Mustang. They found that at lower altitudes (15K and lower)there were several better air frames than the Mustang. One Lagg outclassed it all the way to 30K feet. They did comparisons with most all the lend lease equipment, and some captured aircraft. gary |
|
thug626
Senior Member
   
Member since: January 2013
Posts: 2,030
Jan 15, 2013 13:05:28 GMT -5
Jan 15, 2013 13:05:28 GMT -5
|
Post by thug626 on Jan 29, 2017 19:49:19 GMT -5
Putting the brain pan and opposable thumbs to work, beating back the styrene beast.
|
|
Rick
Full Member
  
Member since: March 2013
what to build, what to build . . . Ok THAT one!
Posts: 854 
|
Post by Rick on Jan 29, 2017 23:12:27 GMT -5
|
|
thug626
Senior Member
   
Member since: January 2013
Posts: 2,030
Jan 15, 2013 13:05:28 GMT -5
Jan 15, 2013 13:05:28 GMT -5
|
Post by thug626 on Jan 30, 2017 2:07:28 GMT -5
Good evening Rick. That IP and CP look splendid.
|
|
|
|
Post by wbill76 on Jan 31, 2017 8:11:30 GMT -5
Beat it into submission Rick! Looking good so far.
|
|
adt70hk
Forum Moderator     
Member since: November 2015
Currently attempting to build something decent!!! ;)
Posts: 2,831 
MSC Staff
|
Post by adt70hk on Jan 31, 2017 8:20:56 GMT -5
Rick
Very nice work on the cockpit indeed and you're right, it must have been very noisy when the trigger got pressed.
As for PhotoBucket, I moved to Flickr a year ago and it's sooooooooooo much better - no freezes, it's quick and I've always been able to access it! Leon also made the change more recently and I think he's found it to be much better.
Andrew
|
|
Rick
Full Member
  
Member since: March 2013
what to build, what to build . . . Ok THAT one!
Posts: 854 
|
Post by Rick on Jan 31, 2017 21:19:06 GMT -5
Thanks Andrew, I did not know Flickr was an option and honestly, I am probably one of the few that have never used it. I'll have to do some checking on it to get up to speed with it. I'd like to drop kick Photobucket into the last century. It's one of the main reasons I either don't create a thread for a build or have long gaps in between updates. I can't stand it locking up or taking an insane amount of time to load.
Rick
|
|
adt70hk
Forum Moderator     
Member since: November 2015
Currently attempting to build something decent!!! ;)
Posts: 2,831 
MSC Staff
|
Post by adt70hk on Feb 1, 2017 8:53:42 GMT -5
Thanks Andrew, I did not know Flickr was an option and honestly, I am probably one of the few that have never used it. I'll have to do some checking on it to get up to speed with it. I'd like to drop kick Photobucket into the last century. It's one of the main reasons I either don't create a thread for a build or have long gaps in between updates. I can't stand it locking up or taking an insane amount of time to load. Rick Rick I only realised it was an option after seeing someone on here use it. I already had a Yahoo account so in effect I was already signed up. It has some minor quirks about being in the right screen for uploading and then another one for getting the URL for sharing, which took me a while to work out. I have also found that you have to go into the BBCode tab and paste the URL it gives you straight in. I can't get the 'Insert Image' option to work - but that might be me and it's hardly a biggie. I should warn you though that (unhelpfully in my opinion) it automatically includes your full name in the post but all you have to do is delete some of the raw BBCode and it's gone. One of the best things I like is that you can upload a full size 5MB+ photo but when it comes to sharing it gives you the option of selecting a size appropriate to the situation. It also has a helpful little app. I use my mobile phone for those quick shots where quality is not paramount and so all I upload photos straight from my phone without having to get them onto my laptop and then upload then to my account. If you run into any problems please don't hesitate to drop me a PM! All the best. Andrew |
|
Rick
Full Member
  
Member since: March 2013
what to build, what to build . . . Ok THAT one!
Posts: 854 
|
Post by Rick on Feb 1, 2017 9:43:55 GMT -5
Thanks Andrew. Good info. I'll check into it possibly this weekend
|
|
|
|
Post by dierk on Feb 1, 2017 11:50:25 GMT -5
Sorry to hear that the kit's quality doesn't match the pricetag. But you're doing a good job of showing it who's boss. If it's any consolation - makes for a more interesting read than 'I shook the box, opened it and out came this finished model'
|
|
Rick
Full Member
  
Member since: March 2013
what to build, what to build . . . Ok THAT one!
Posts: 854 
|
Post by Rick on Feb 1, 2017 18:23:30 GMT -5
Definitely not a shake and bake kit Dierk!
|
|
|
|
Post by TRM on Feb 1, 2017 18:56:45 GMT -5
Can't make a cake without breaking some eggs!  Love the looks of that office!!! |
|
|
|
Post by Leon on Feb 1, 2017 18:59:53 GMT -5
Nice progress Rick The IP and pit look great.  |
|
Rick
Full Member
  
Member since: March 2013
what to build, what to build . . . Ok THAT one!
Posts: 854 
|
Post by Rick on Feb 10, 2017 0:18:53 GMT -5
Airacobra Update Cockpit is same as done, except for the assorted PE I keep knocking off. Figure I may as well protect it a bit by wrapping the fuselage around it. Before doing that I had to invest in a bunch of Pinewood Derby car lead weights to try to keep her standing on three legs. Most were installed before fuselaging. The very front had a convenient opening where the nose machine gun cover would eventually cover. (But only after a bunch of filler and sanding!  ) 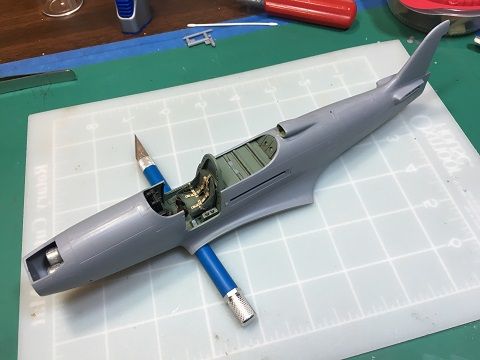 I went ahead and worked up the doors. The doors are molded in clear brittle plastic. PE door panels, pouch, and window cranks were nicely molded but the fit was not as flush as it could have and I am suspecting this will pose a fit problem later on. I was glad I mistakenly ordered a duplicate set of paint masks as the inside of the windows benefited from my additional set. 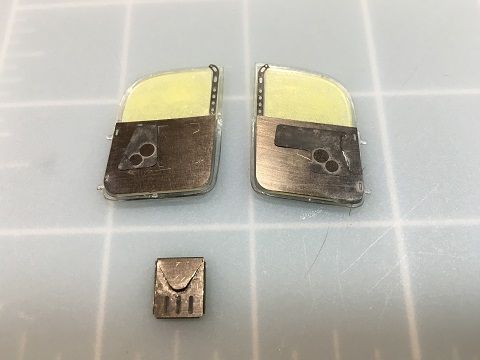 The fuselage haves did not offer much in the way of aligning pins so the two halves were carefully positioned while the glue dried. Here again is where the "Not so Special" quality molding process again failed miserabley. Soft edges and in some areas not even flush. 90% of the fuselage join requires filler. Closely placed tape, filler and worked in with a damp brush to remove most of the excess kept the sanding to a minimum but sure took a lot of time. 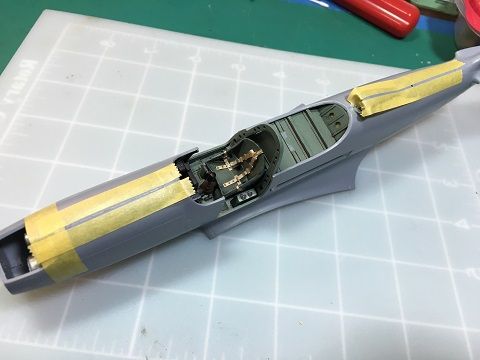 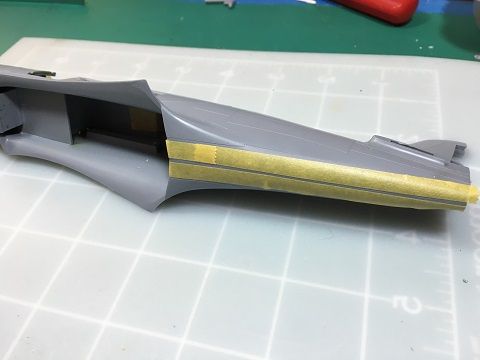 Despite poor fit, the cockpit and front wheel well fit and lined up perfectly. Once the fuselage came together, expecting the worst, I anxiously dry fit the wings in place to check for any gaps or other fit issues. Well, CRAP! I wasn't at all surprised by what I saw... 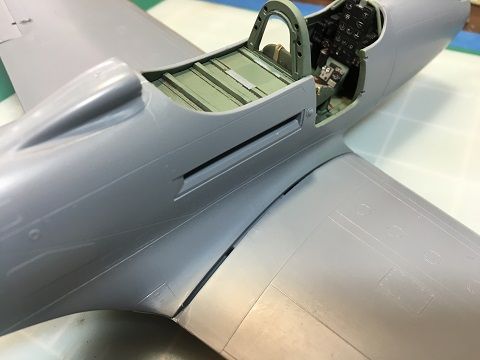 Worst case of gap-itis I've ever seen on a model. since the cockpit was firmly glue in place, I could not close the chasm on either side by adding spreaders to the fuselage. I taped up to the edges and worked in a generous filler of Apoxie Sculpt. I really like this stuff for large gap-itis. Equal parts A and B kneaded together and pressed into the chasms with a flat edge. Smooth it with a damp brush to remove excess. Pull off the tape and a few more strokes with the damp brush leveled the fill. Let it cure over night. It doesn't shrink like putty because there is very little moisture in the material itself. Just a quick light sand and gaping gaps are gone. Had to follow-up these pics with some re-scribing and a final sanding to finish up. 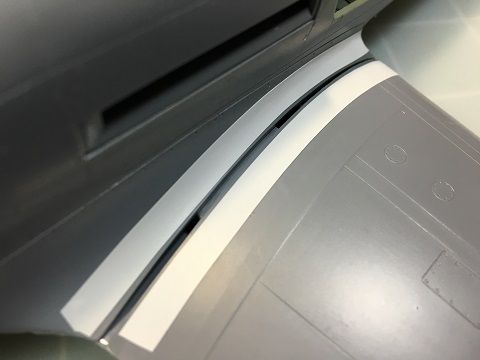 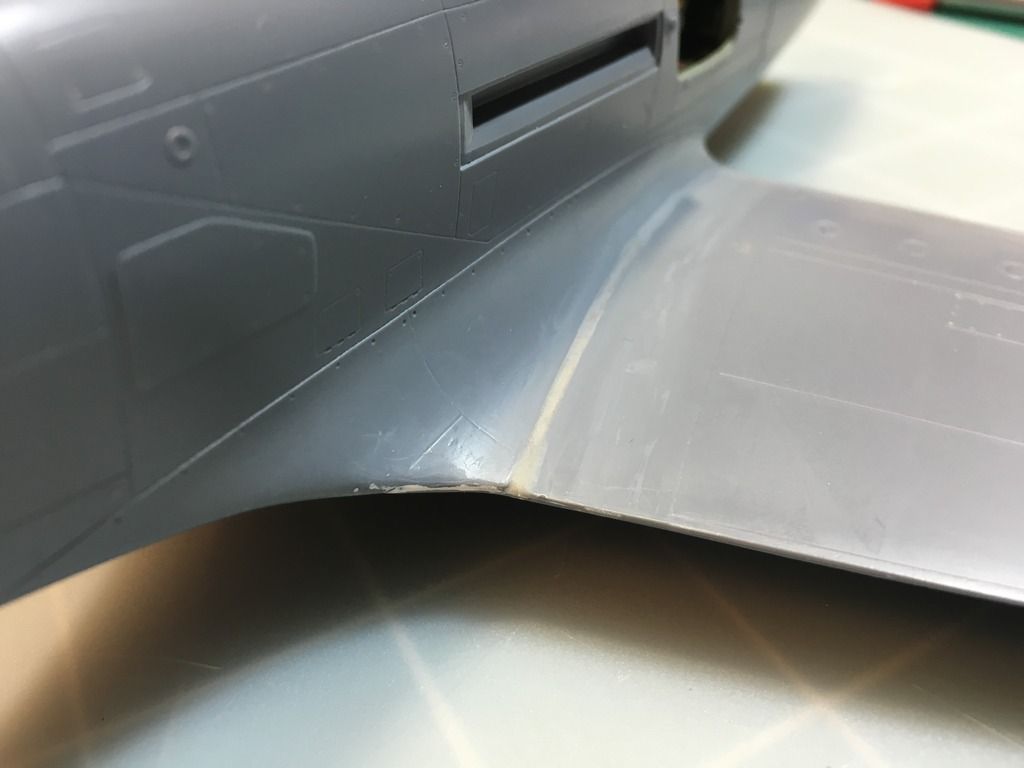 On this side, the gap mainly was a result of the hollow wing did not match up with the curve of the fillet. 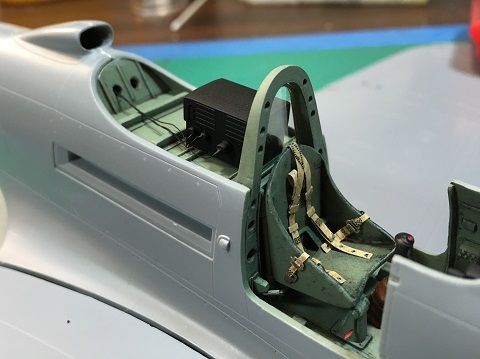 Easy fix was to add some evergreen plastic blocks to the opening to raise the upper wing to meet the edge of the fillet. Added the radio and several wires to the deck behind the armored glass in preparation for adding the canopy. 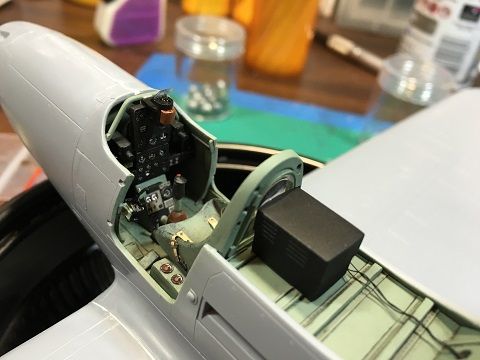 Canopy fit was decent, except for the front and rear where I had to fill some gaps and sand. Eduard masks had the best fit over pretty much everything else in the kit. 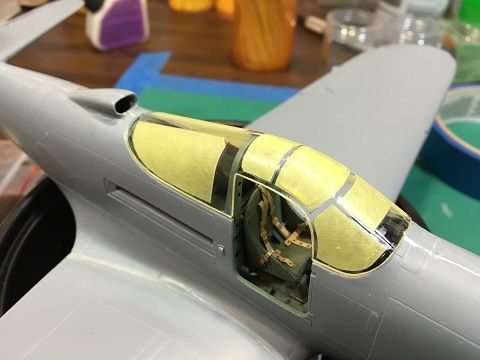 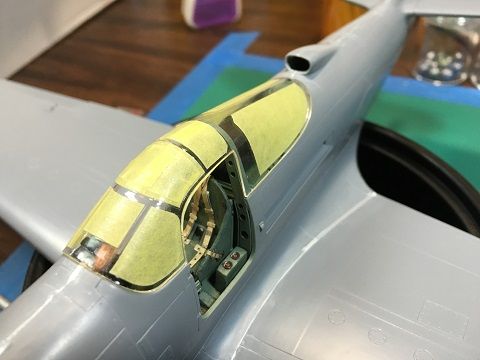 So far, it seems "Not so Special" Hobby's rendition of the P39 is a mixed bag of very good surface detail and a great cockpit as well as disappointment due to the fit and filling issues. Despite these I feel I've overcome most of the issues reasonably well enough to not give up on this turd and see it through. Next up paint will be flying. In my mind, this will really determine if it's to be an Airacobra or a Chupacobra. |
|
Thomas_M/
Full Member
  
Member since: May 2013
Don´t panic! I am German!
Posts: 217 
|
Post by Thomas_M/ on Feb 10, 2017 3:27:40 GMT -5
Very informative WIP here, Rick! Hope my 1/32 Tempest from "Very Special Hobby" will fit better...
|
|
|
|
Post by Leon on Feb 10, 2017 5:47:47 GMT -5
Nice progress despite the fit issues Rick!
|
|
|
|
Post by panzerjager2 on Feb 10, 2017 6:42:38 GMT -5
Awesome updates..... Great work
|
|
John Everett
Full Member
  
Member since: January 2012
July, 2016 MoM Winner
Posts: 1,278
Jan 17, 2012 0:53:48 GMT -5
Jan 17, 2012 0:53:48 GMT -5
|
Post by John Everett on Feb 10, 2017 23:09:22 GMT -5
That is a SERIOUSLY good repair to the wing root.
In Chuck Yeager's autobiography he wrote that of all the WWII fighter he operated that the P-39 was far and away his favorite. He wrote that the aft mounted engine gave the airplane an aft C.G. which made it somewhat unstable. This was a virtue rather than a vice during dogfights.
|
|
midnightprowler
Full Member
  
Member since: February 2016
Posts: 701 
|
Post by midnightprowler on Feb 11, 2017 7:36:58 GMT -5
Awesome work. I will wait untill a better fitting kit comes along. Disapointing that a kit with such a high price tag has such bad fit.
|
|
Rick
Full Member
  
Member since: March 2013
what to build, what to build . . . Ok THAT one!
Posts: 854 
|
Post by Rick on Feb 11, 2017 8:12:49 GMT -5
Thomas, fingers crossed your Tempest is one of the "Special" offerings. This one has some of the best detail I've seen in a long time. It just doesn't go together well thus adding it to the "NOT so Special" categories. I'm willing to bet the dimensions have some opportunity as well but I'll leave that to those that must use tiny flashlights and calipers to say.
John, I've read that as well. Safe to say pilots liked it or hated the Airacobra.
Prowler, a much newer kit is out there with Eduard releasing a 1/32 kit not to long ago. I would already have built that one had I not picked this one up for $20 at a model show. To much time invested in this one plus a burning desire to fix this one into submission rather than to repair the wall on the other side of the room ...
Thanks all for checking in.
|
|
adt70hk
Forum Moderator     
Member since: November 2015
Currently attempting to build something decent!!! ;)
Posts: 2,831 
MSC Staff
|
Post by adt70hk on Feb 11, 2017 9:02:15 GMT -5
Rick
That's a great job you did in the gap/chasm.
The doors look pretty cool too. Hopefully the fit won't be too much of an issue.
All the best.
Andrew
|
|
|
|
Post by dierk on Feb 11, 2017 10:13:31 GMT -5
Respect Rick, totally impressive degapping on your part!  |
|
Rick
Full Member
  
Member since: March 2013
what to build, what to build . . . Ok THAT one!
Posts: 854 
|
Post by Rick on Feb 20, 2017 21:49:02 GMT -5
Paint finally flies! 02-20-2017 Did some work with the undercarriage and miscellaneous parts. The hinges on the nose gear are PE requiring them to be bent into shape. Who knows how well they will stay attached with so little surface area to hold them in place. The cockpit doors are molded in clear plastic so panels and window cranks are all PE. The inside of the windows required masking as well. The exhausts are resin and really improve upon the plastic offerings. 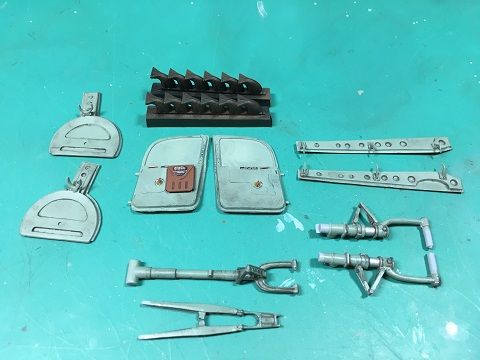 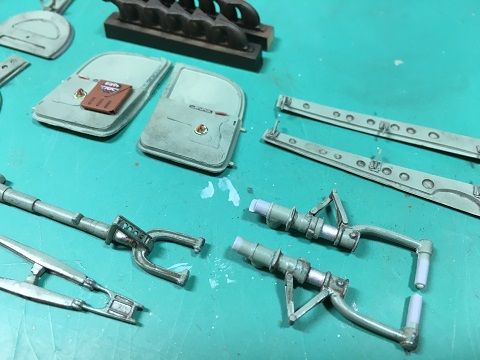 Wheel wells were painted with RAF interior green, masked and the bottom gets it's pre-shade. Leading edges were sprayed in RLM 04 Yellow and after curing were masked off. All this was then followed by RAF Light Gull Grey. This is where it begins to get nervous. Major concerns how well all the filler concealed or not at this point. 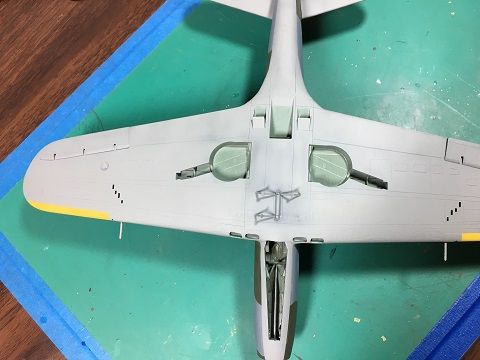 (Yes, that is the prop shaft at the top of the gear well.) 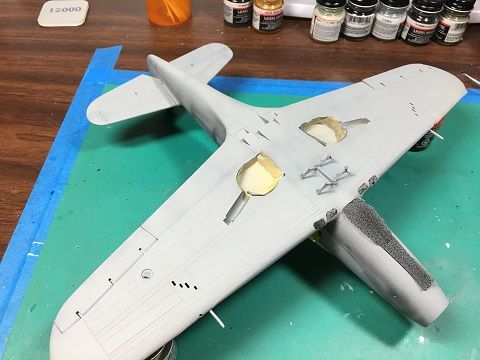 When preparing for the upper surfaces, the large gaping openings created by the entry doors create some unique issues. How easy it would be to secure the doors closed to protect the interior. Once again, fit issues reveal themselves. The doors do not fit in the closed position. Always a rub somewhere. The throttle is mounted on the door frame of all places. What was Bell thinking! A hazzard to any pilot wanting to get out in a hurry as well as to a modeller wanting to close the door. On top of that, the inside of the canopy needs to be protected if a good seal on the door opening is not achieved. I used a combination of tape and post it notes to hopefully block errant paint spray. Deep breath and go for base coat! Masking the undersides followed by more pre-shading and a base of RAF Dark Ocean Grey on all upper surfaces. 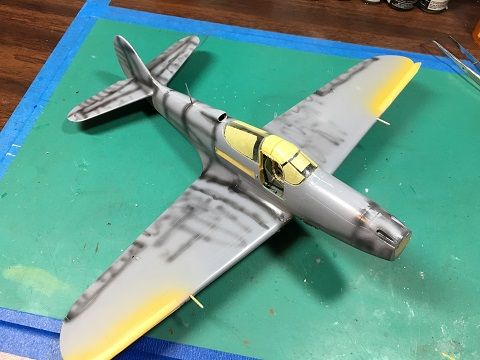 The RAF painted camo on their aircraft by laying heavy rubber mats over the surface. This usually resulted in that not so hard edge found on most RAF types. On previous builds I've used rolled putty to create the curves but always either got the thickness to great or an excessive amount of overspray. I wanted to try to get that same soft-hard edge so I tried a technique I'd heard about some years ago but never tried. This involved cutting masks from tape and raising the edges with a thicker than average sewing thread to reduce the height of the mask to create the fine feathered edge. It took a long time to cut the masks and apply the thread but finally the masks were in place. 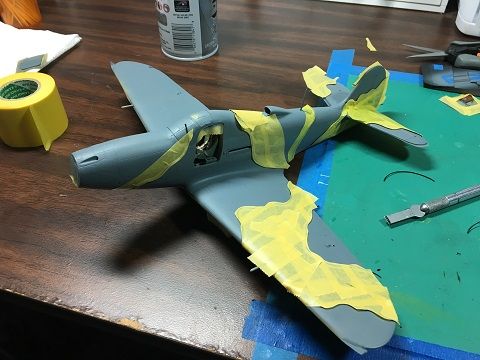 After closing up the cockpit and hoping I wouldn't snap off all the assorted PE there, it was time to let the paint fly. Either I would get the fine feathered edge or a complete mess. In other words, will it be an Airacobra or an Airachupacabra??? 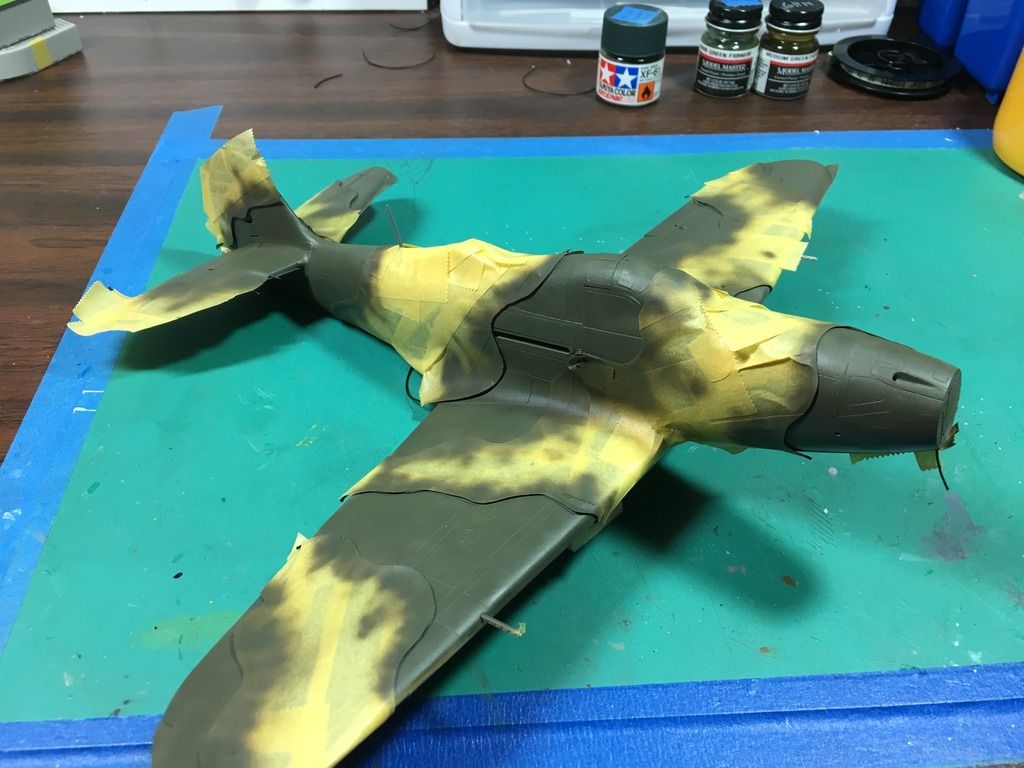 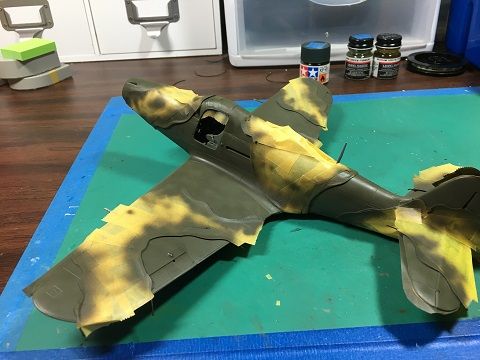 Time passes slowly while waiting to be sure paint dries to point of ripping off the tape to see if months of aggravation would be rewarded with a decent paint job or dent in the sheet rock on the other side of the room ... 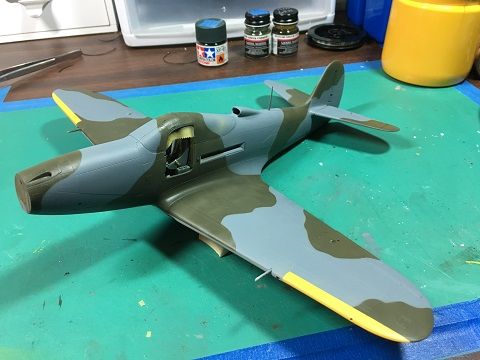 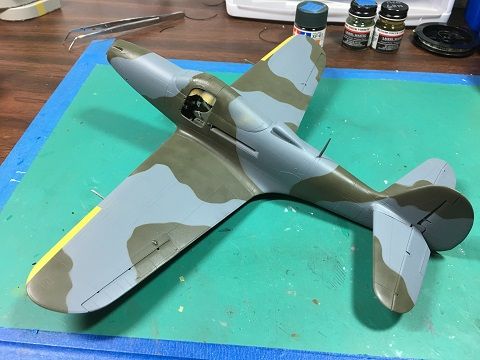 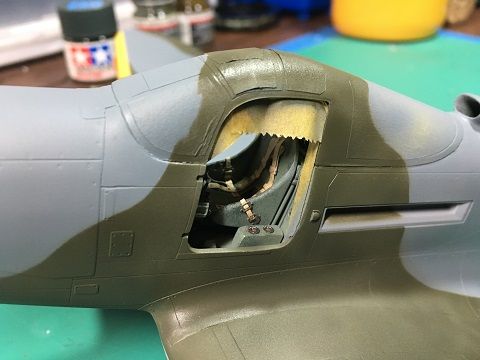 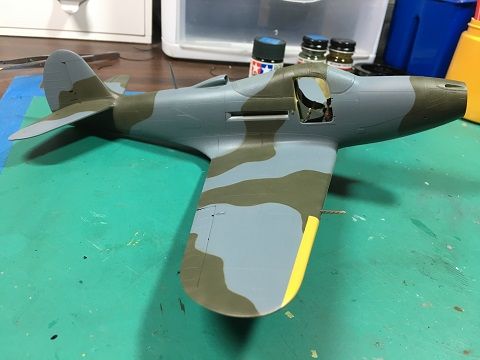 Doesn't show up very well in the photos but the raised masking actually worked. There is just the slightest hint of feathering and no overspray that I've found as of yet. I am very thankful I don't have to repair the sheet rock anytime soon and I just might give this same masking process a try on my 1/24 Spitfire V 16 year build that's been begging to get finished. I guess I'll keep the Airacobra since there's not much else to have to worry about fit wise at this point. But then there are those decals ... |
|
|
|
Post by dierk on Feb 21, 2017 5:32:38 GMT -5
Excellent result Rick!
|
|