kingpin141
Full Member

Member since: March 2013
Posts: 308 
|
Post by kingpin141 on May 10, 2017 6:26:21 GMT -5
Mornin all. Here starts another blog. Hopefully i'll see this one through to the end. Joshua Dalzelle has written a series of books called Omega Force. They're basically The A Team in space. I can't recommend these books enough. Big action scenes but mostly for the characters and dialogue. Hugely entertaining. Now onto the subject of this blog. One of the main chararters in the books is the spaceship they use. A Jepson Aero DL7 gunship. This is what I intend to build. Described as a lifting body delta wing with a V tail. I have spoken the the author over facebook ( I love that I can do this) . He flew B1B Lancers for the USAF so that figures heavily in the design. So the basis for the ship is these two. 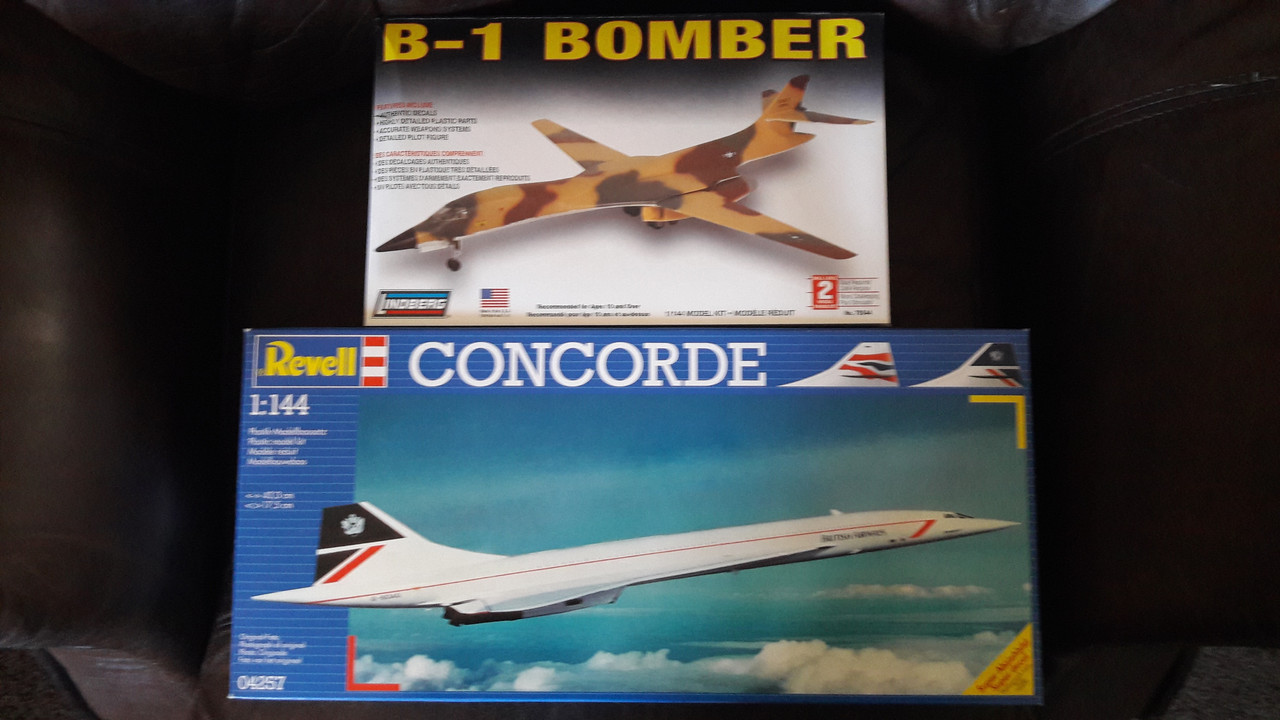 I'm using the front end of the Lancer and the back end and wings of the Concorde for the basic shape. 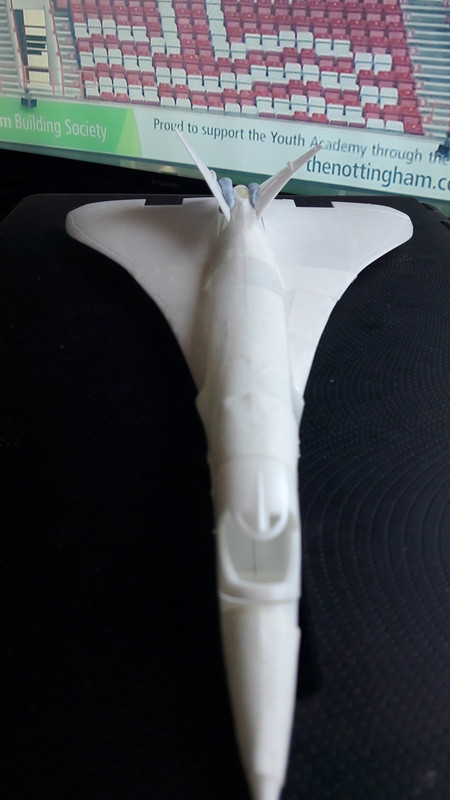 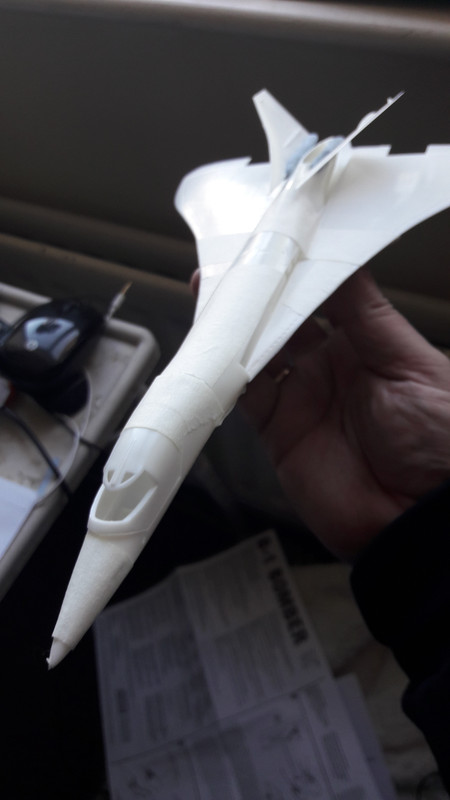 For the tail I cut the tail off both halves of the fuselage of the concorde. Glued some platicard on the back sides of the and then scribed in the panel lines.  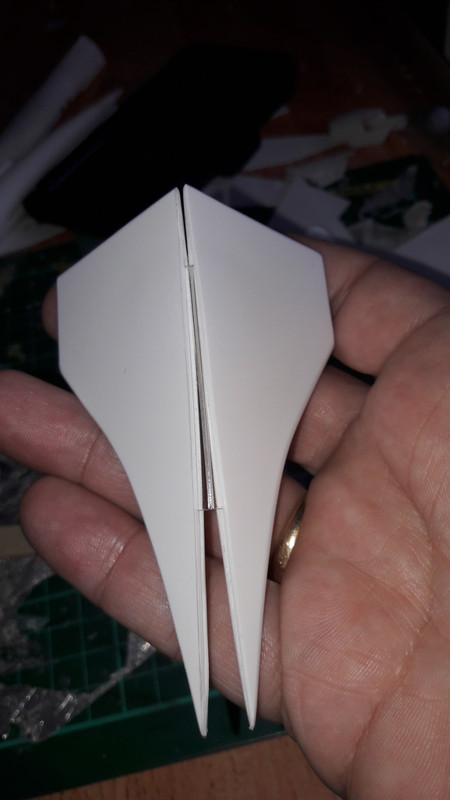 Joining the two different fuselages together is the next task. They're about the same width but where the Concorde is basically circular the Lancer is more triangular. I snse much blending ahead.  I'm currently waiting to hear back from the author as to whether he prefers the Concorde or Lancer engines. 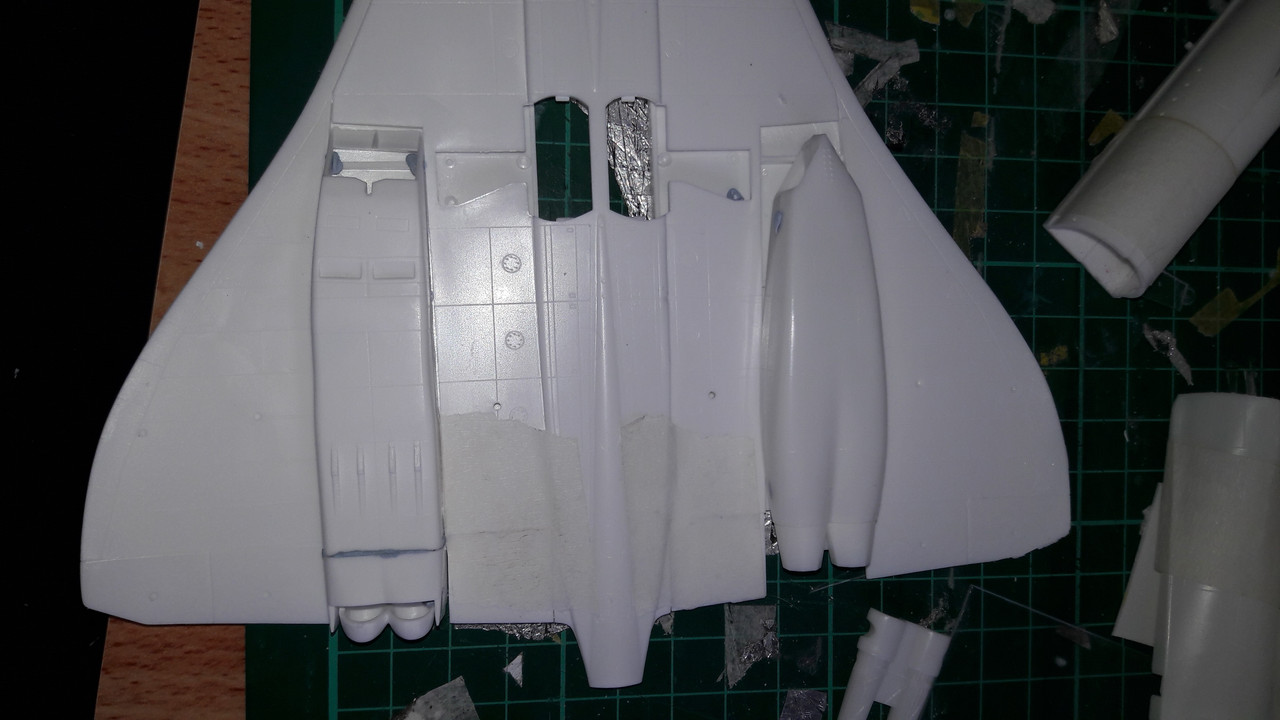 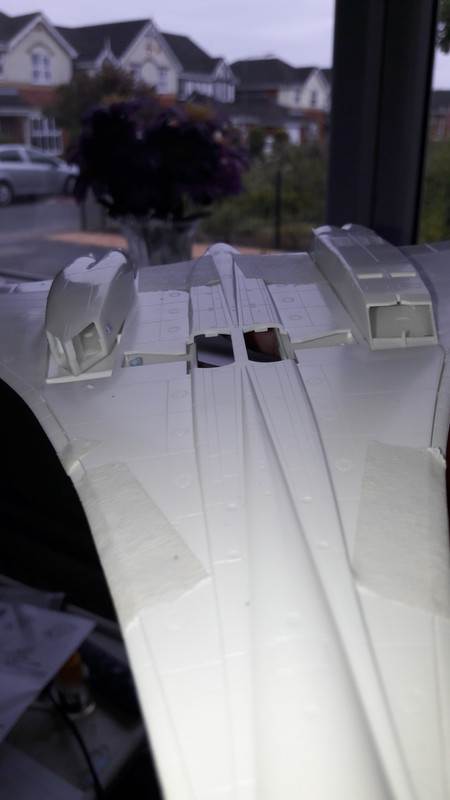 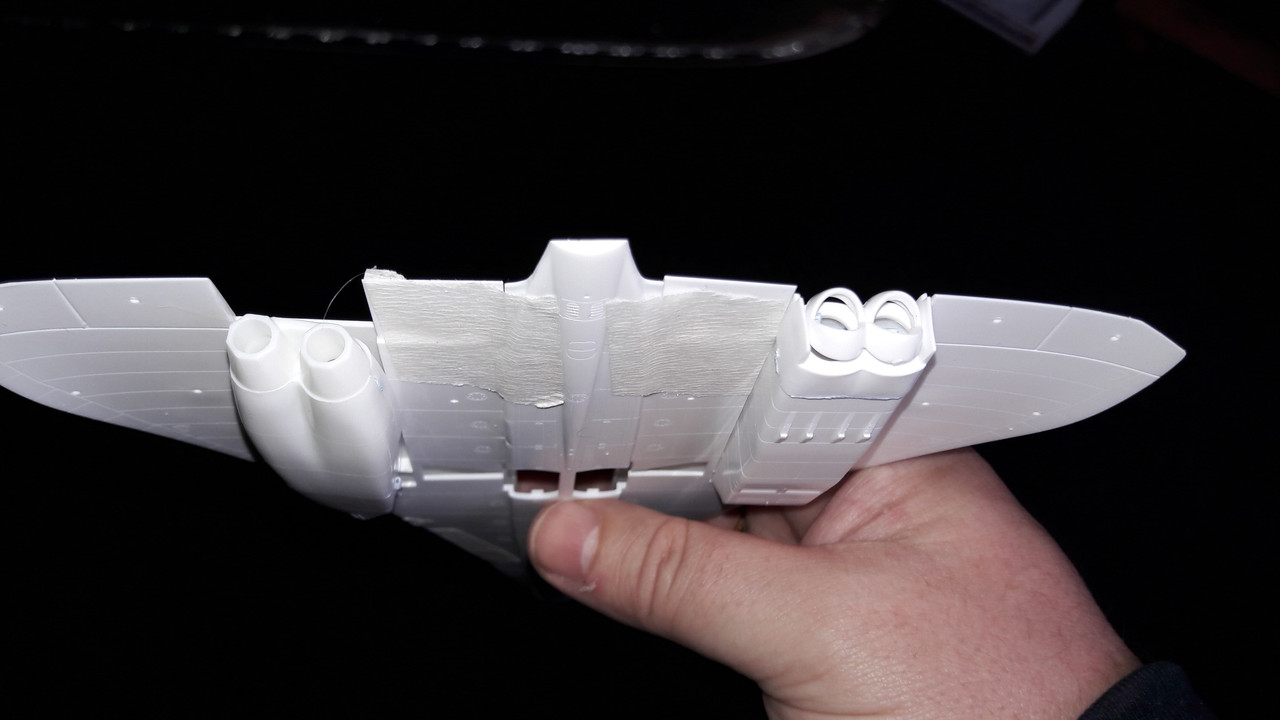 And here ends the first post in this blog. See you all soon |
|
jpc1968
Full Member
Member since: May 2015
May '17 Co-Mom Winner, October '17 MoM Winner
Posts: 504
|
Post by jpc1968 on May 10, 2017 6:31:27 GMT -5
This is going to be interesting
|
|
|
|
Post by panzerjager2 on May 10, 2017 7:18:43 GMT -5
COOL build 
PJ2
|
|
|
|
Post by Leon on May 10, 2017 8:47:22 GMT -5
Cool looking project KP! I like it.
|
|
kingpin141
Full Member
Member since: March 2013
Posts: 308
|
Post by kingpin141 on May 12, 2017 16:17:48 GMT -5
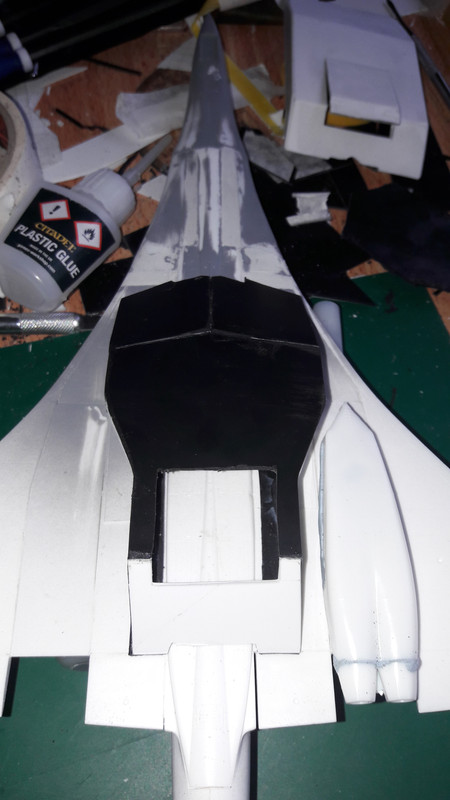
Up date number two. I asked the author which engines to fit. The B1 ones. So I cut out two plasticard panels where the concorde engine site to mount the B1 nacelles to. I've also started on the cargo bay that sits between the engines. This will have a ramp that I'll have lowered. 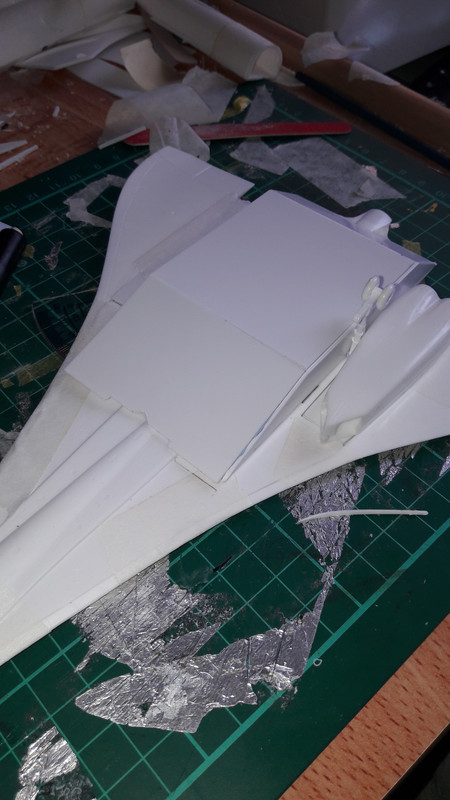 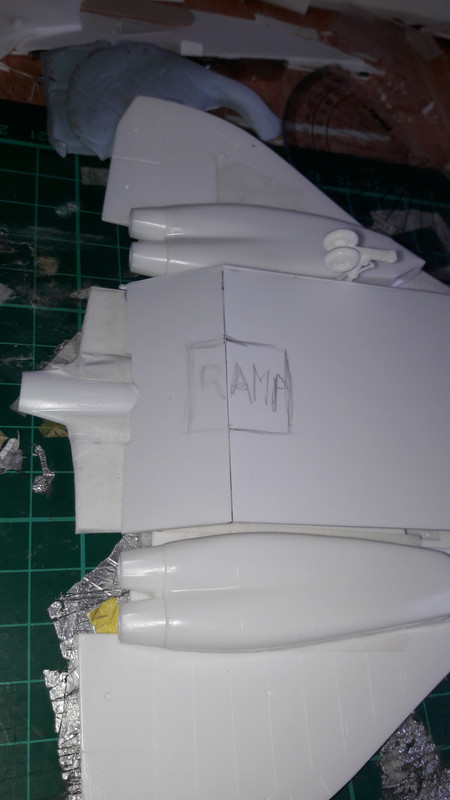 The craft itself is huge. C5 sized. The kits are 1/144 scale. To change the scale I'm going to use 1/350 figures. The cockpit has now been turned into a bridge. 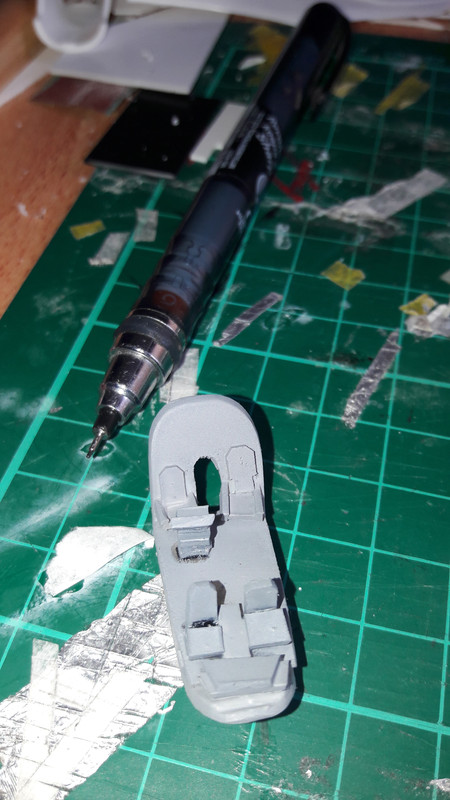 On a final note the author Joshua Dalzelle posted this vid on Facebook describing the Phoenix. m.facebook.com/story.php?story_fbid=10213131146972765&id=1217141504I'm not named but it's me he mentions at the end. This has made my year |
|
|
|
Post by Leon on May 12, 2017 16:33:47 GMT -5
Nice progress KP! This is looking good so far.
|
|
kingpin141
Full Member
Member since: March 2013
Posts: 308
|
Post by kingpin141 on May 23, 2017 16:49:09 GMT -5
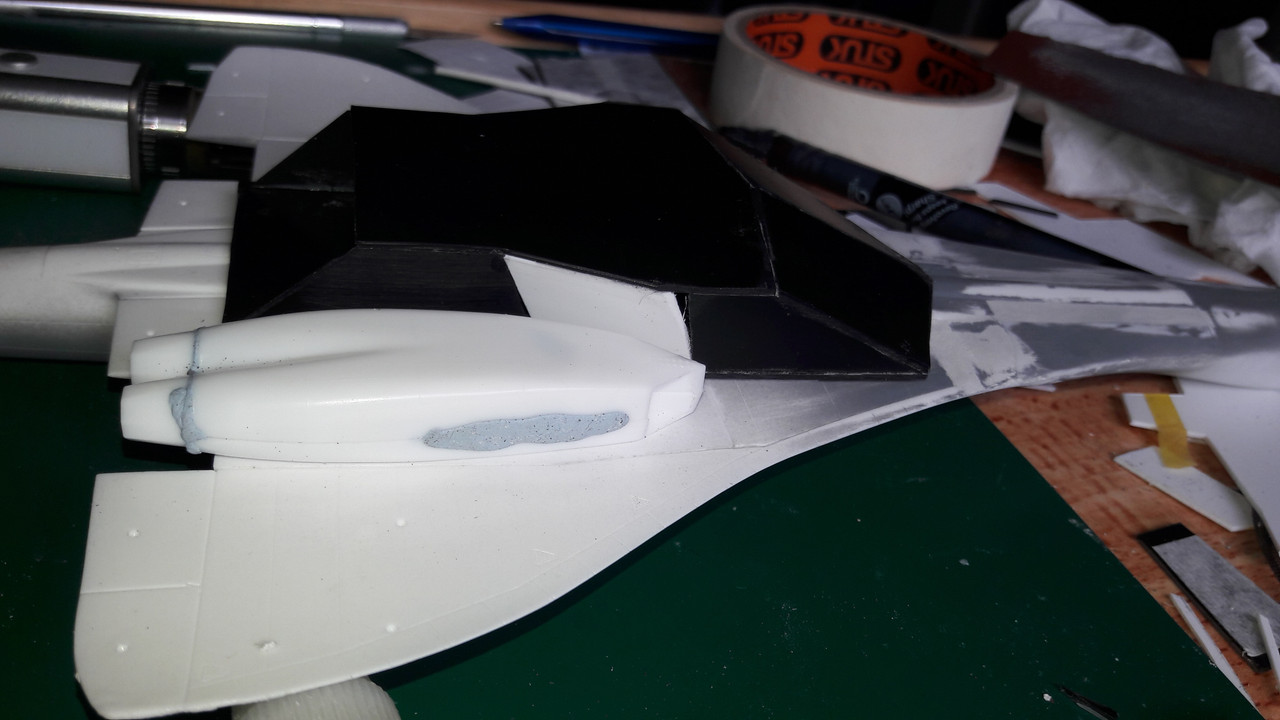
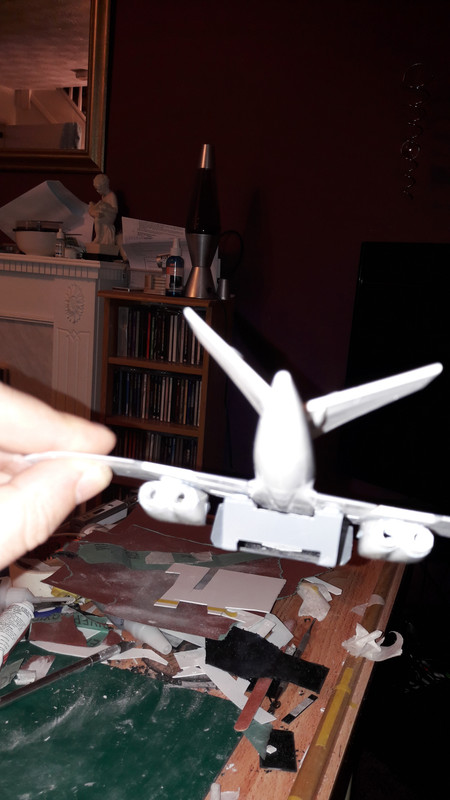
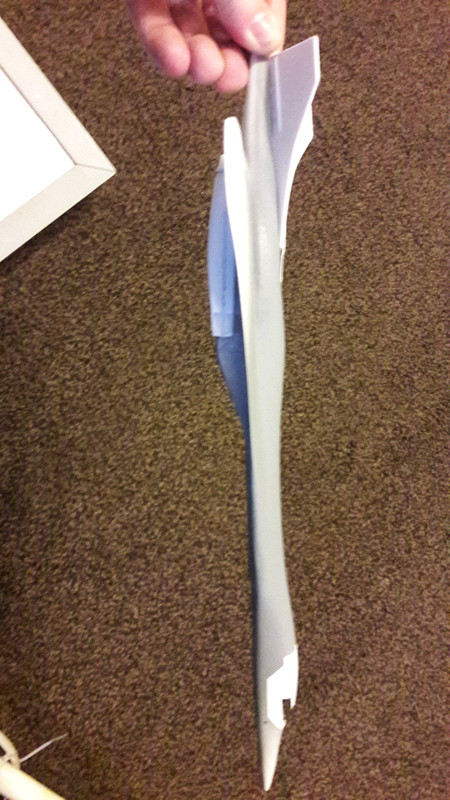
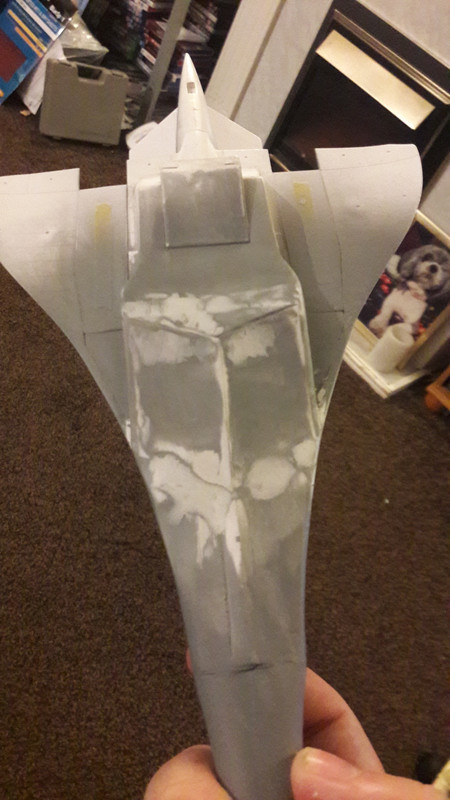
Evenin all. I've had a couple of quiet days so i've got a fair amount done. First upthe cargo bay. In the previous pic of it what you can't see is the huge amount of blu tac holding it together. Now it's been glued, the ramp has been added and i've put some interior details in. 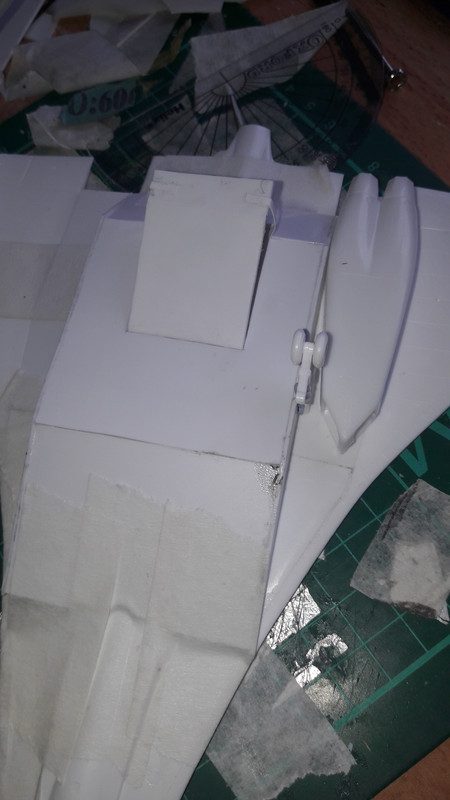 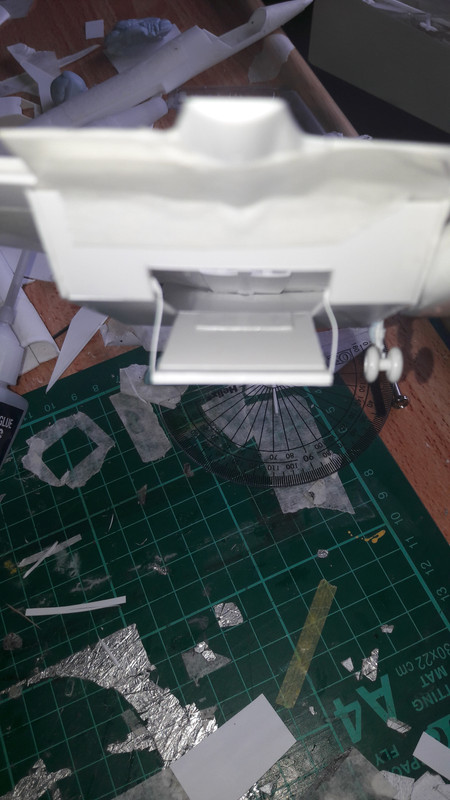 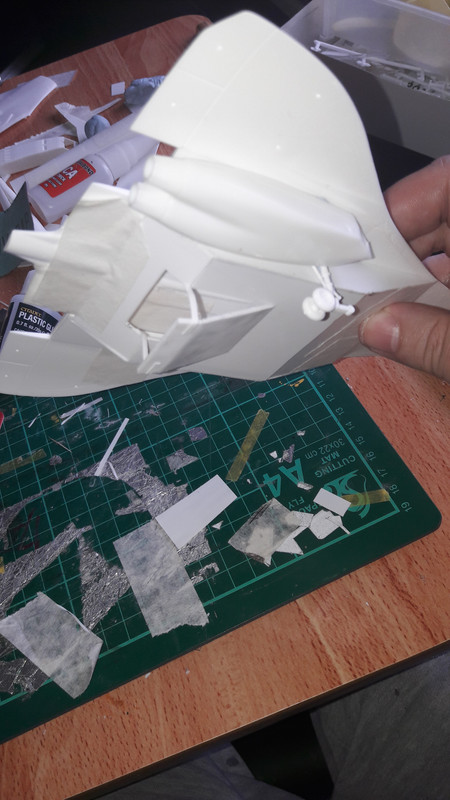  The bay has a mezzanine level on the front bulkhead and I'm posing it with the ramp and undercarriage lowered. One thing i do need to go in there is a 67 Camaro convertible, so if anyone knows where to find one.... The two fuselage halves have been mated to the wings. I had to trim the inside edges of the wings to get the B1 fuselage inand sand the top of the B1 where it meets Concordeas it's triangular shape sits about 4mm proud. 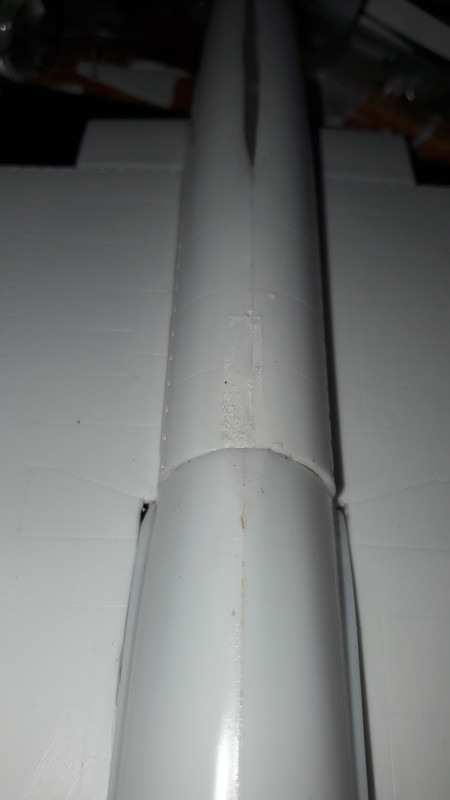 Also you'll notice the gaps on either side. I'm going to try filling them first and if that doesn't work a plasticard bandage. And this is the overall work so far 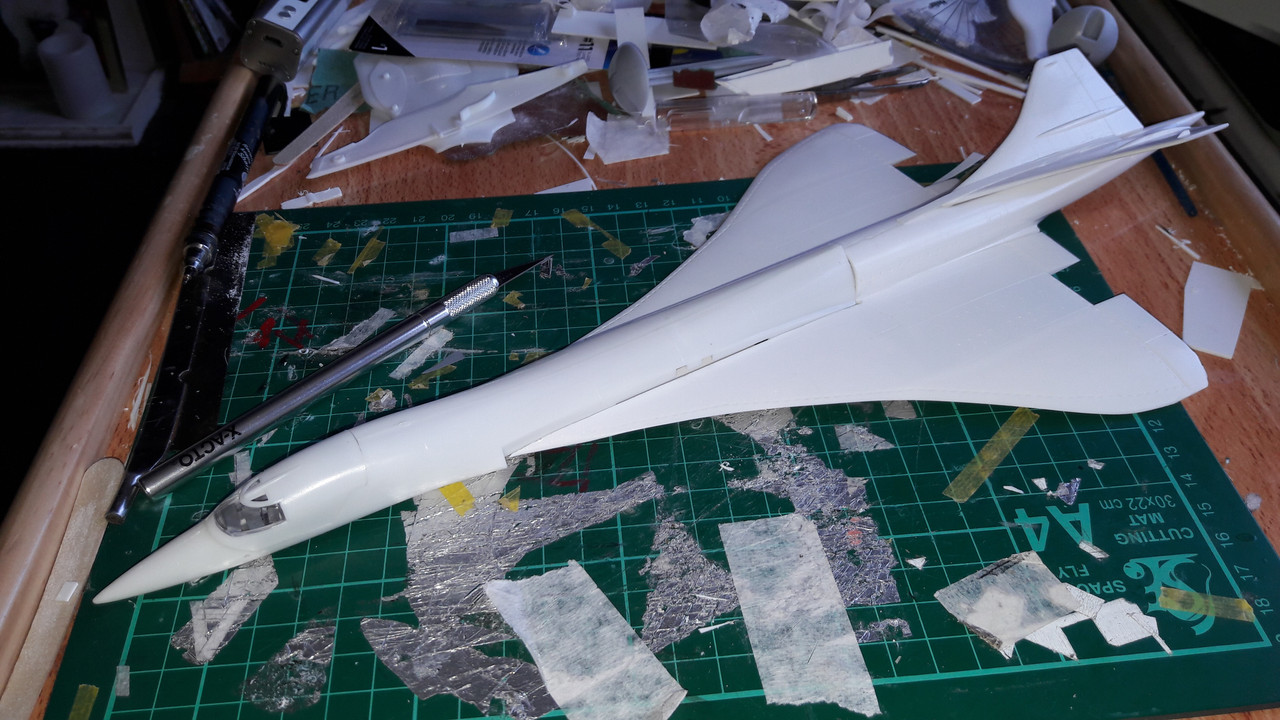 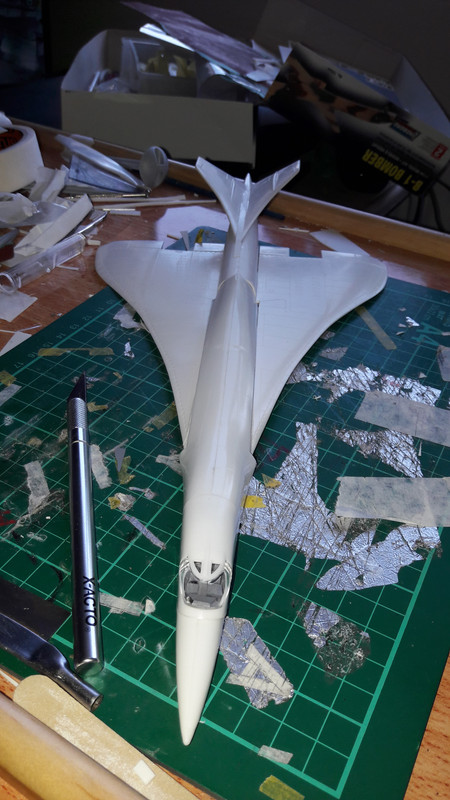 The next job is blendin the wings into the fuselageas the Concorder wings are a lot thinner than the B1s swing wings 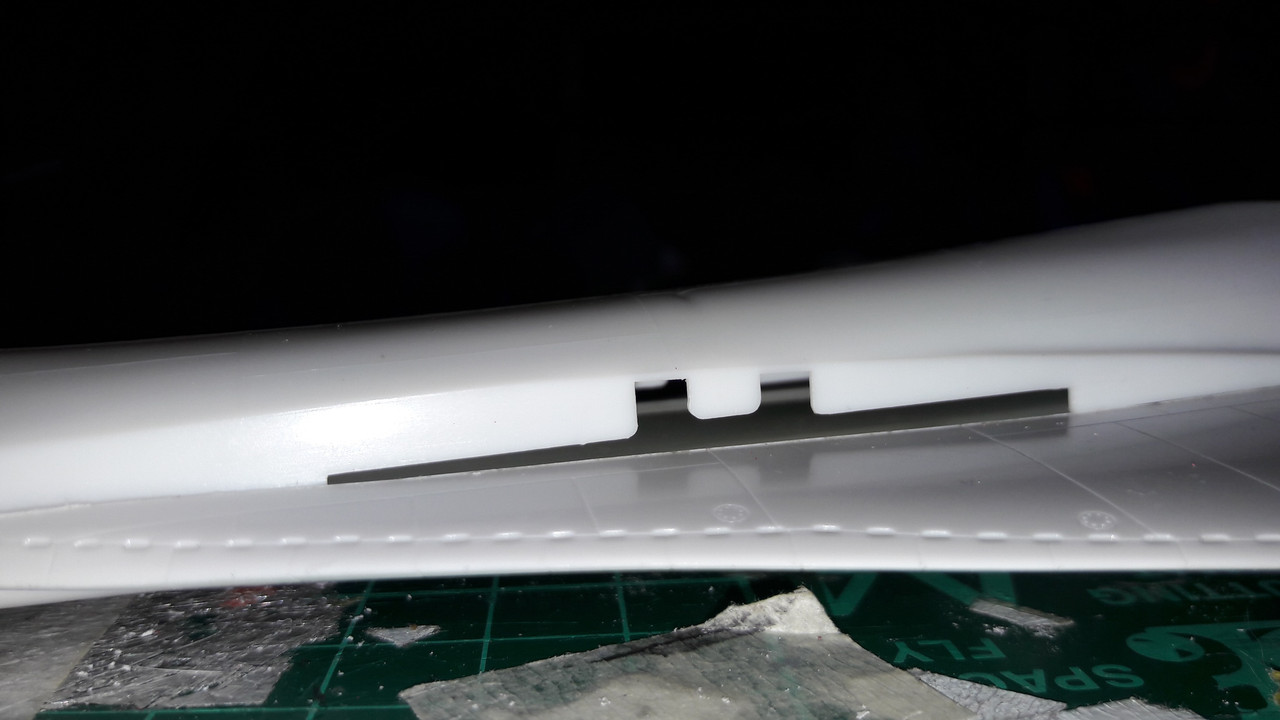 I hope you're enjoying reading this as much as I am making it. |
|
|
|
Post by Leon on May 23, 2017 16:54:08 GMT -5
Nice progress KP! This is looking fantastic.  |
|
jpc1968
Full Member
Member since: May 2015
May '17 Co-Mom Winner, October '17 MoM Winner
Posts: 504
|
Post by jpc1968 on May 24, 2017 6:23:14 GMT -5
now you know, since the author mentioned you on Facebook, this thing is going to have to look fantastic. You know that.......right?
|
|
kingpin141
Full Member
Member since: March 2013
Posts: 308
|
Post by kingpin141 on May 24, 2017 8:39:44 GMT -5
now you know, since the author mentioned you on Facebook, this thing is going to have to look fantastic. You know that.......right? No pressure then lol. |
|
kingpin141
Full Member
Member since: March 2013
Posts: 308
|
Post by kingpin141 on May 24, 2017 19:51:02 GMT -5
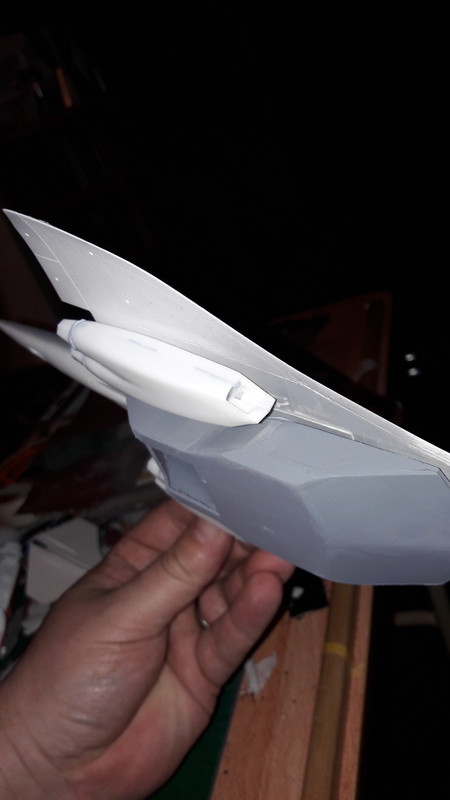
Hello again. I've had a hugely productive day today. It started off ok. Tailed off in the middle but ended well. I tried filling the join where the two fuselage halves meet. I used Vallejo plastic putty. Great stuff but definately not the right thing for this job, so I tried gluing some really thin plasticard over it. A spectacular failure where the glue melted the plastic. One quick shopping trip and a tube Squadron putty later and modeling nirvana arrives. I sanded the melted plastic then applied the putty. One quick pass and it's already looking loads better. And then I filled along thw wings and where I'd added the wing roots of the B1.  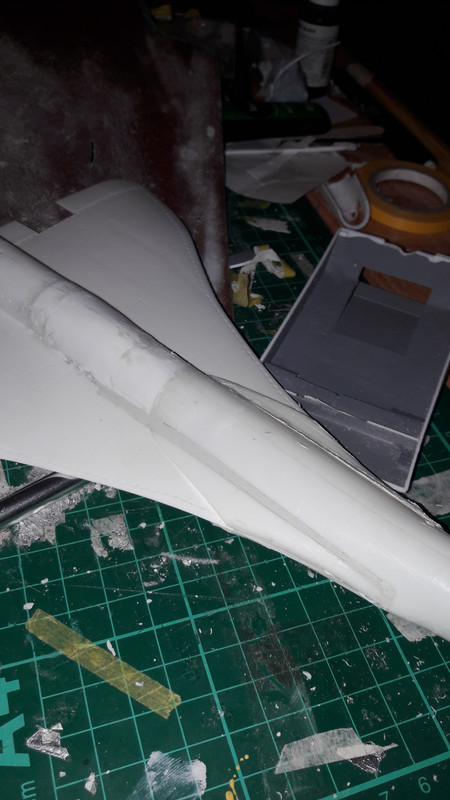 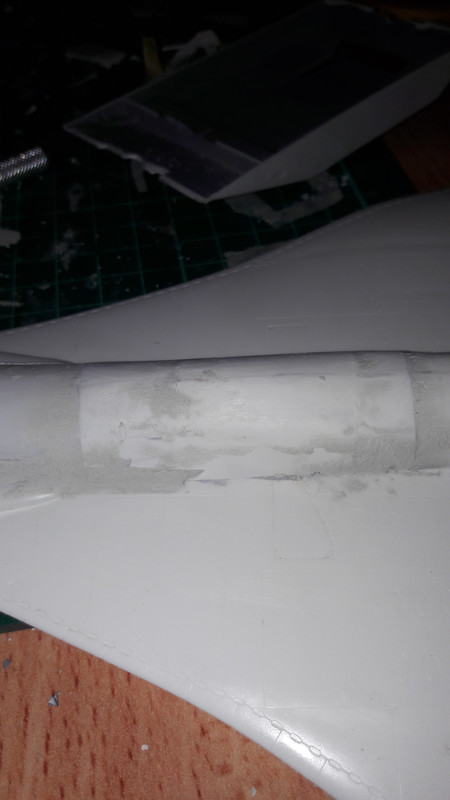 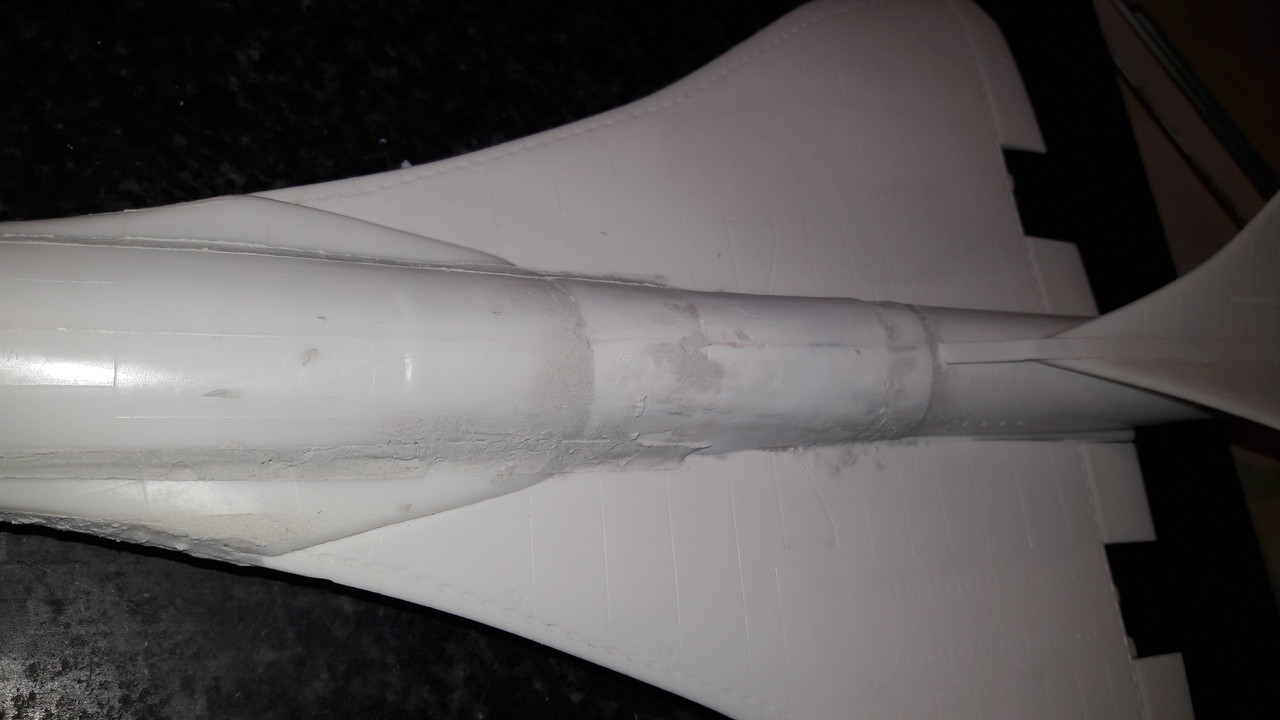 There's many hours of filling and sanding ahead. Now for an incredible display of my computer drawing skills 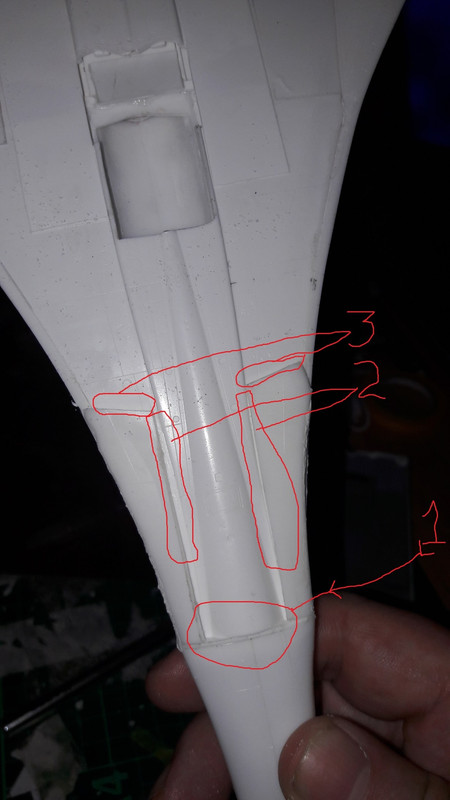 Jobs for tomrrow. This is the underside of the wing roots No 1. The rear of this sits about 3mil proud. I'm going to carry on the raise forward rather than sanding it flat. No 2. Fill in the gap bewteen the central ridge and the added wing roots No 3. Blend the rear of the roots into the fuselage. And finally.. My most decadent idea ever  Apple juice in the water dispenser. |
|
|
|
Post by Leon on May 25, 2017 4:48:26 GMT -5
Nice progress KP! Your doing a fine job on this. |
|
kingpin141
Full Member
Member since: March 2013
Posts: 308
|
Post by kingpin141 on May 25, 2017 16:23:29 GMT -5
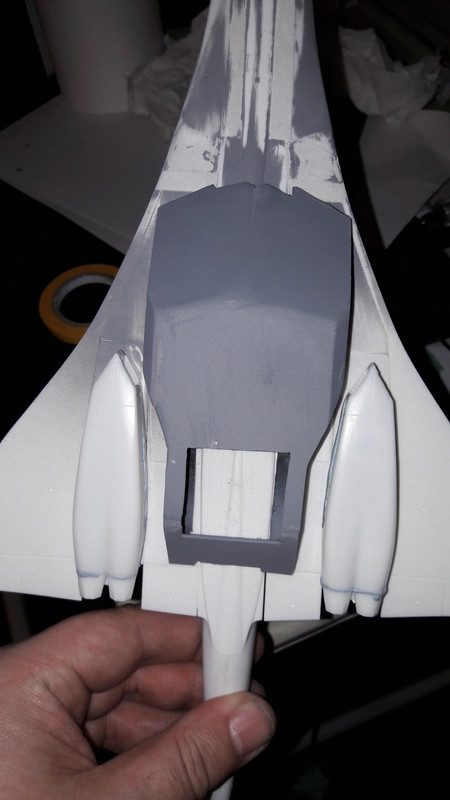
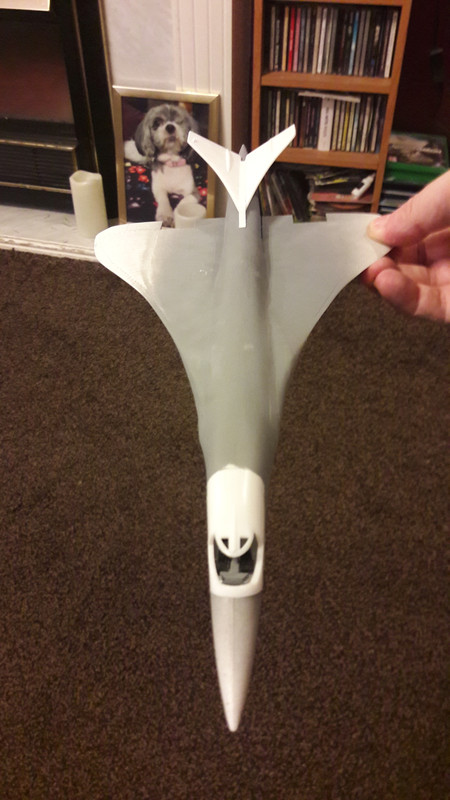
Today has been Fill.Sand. Repeat. Fill.Sand.Repeat. Fill. Sand. Repeat ad infinitum. So heres very few pic of an entire days work. 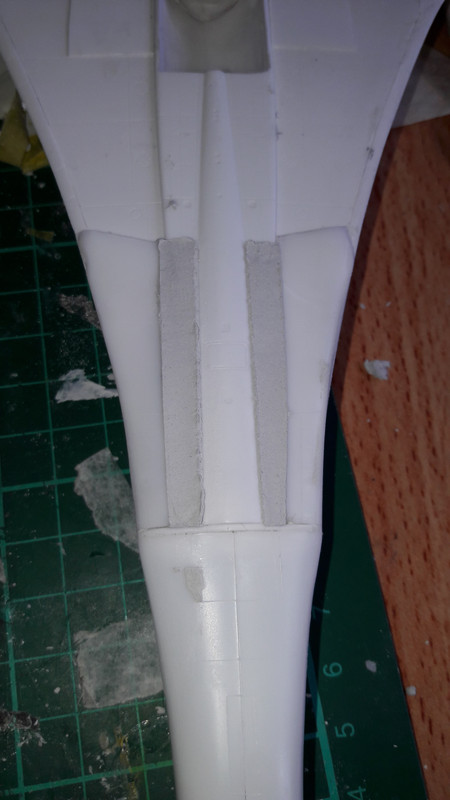 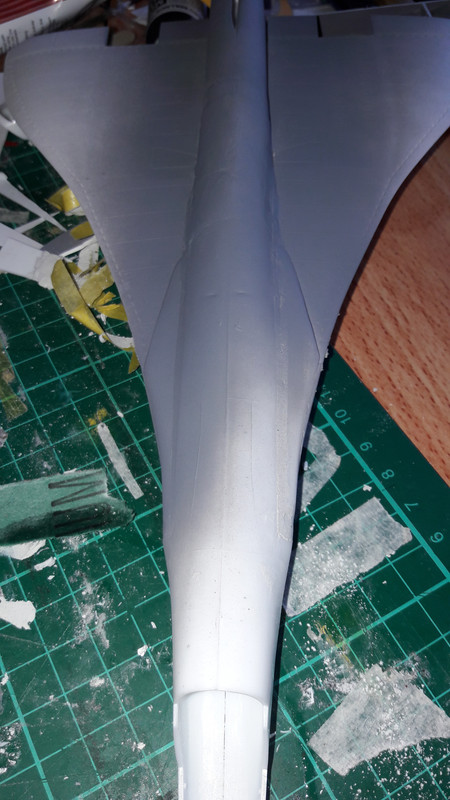 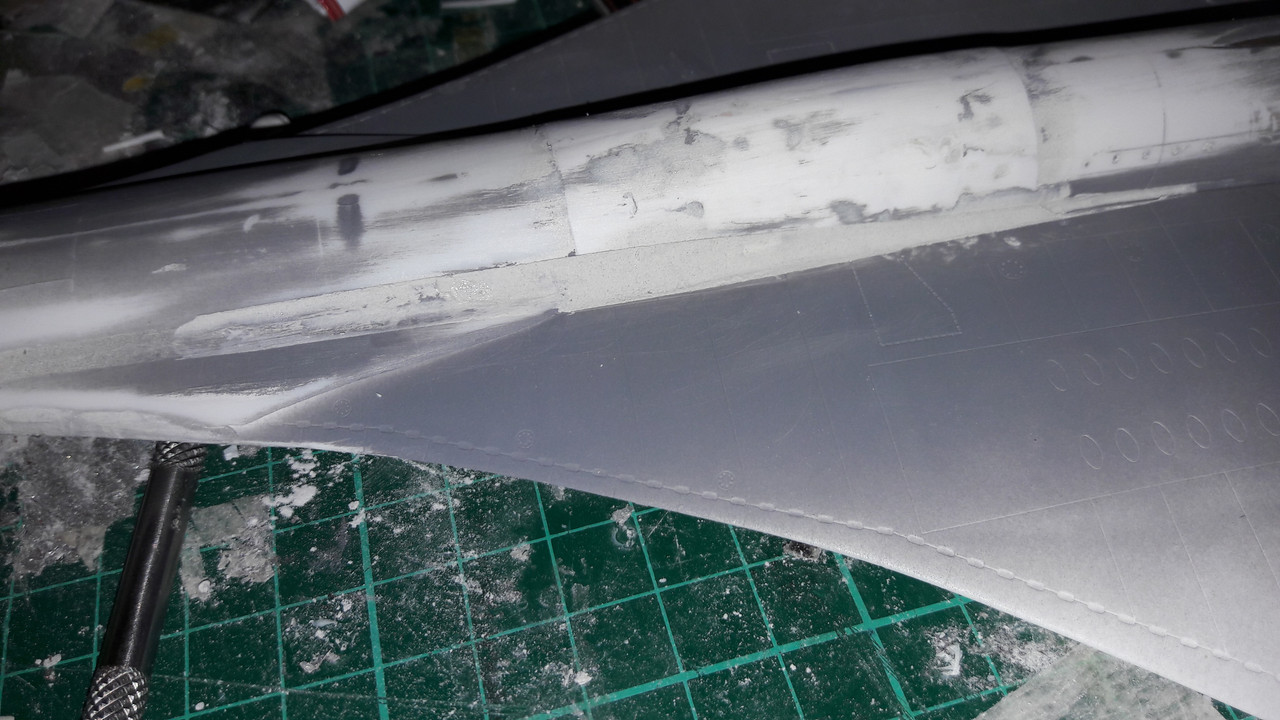 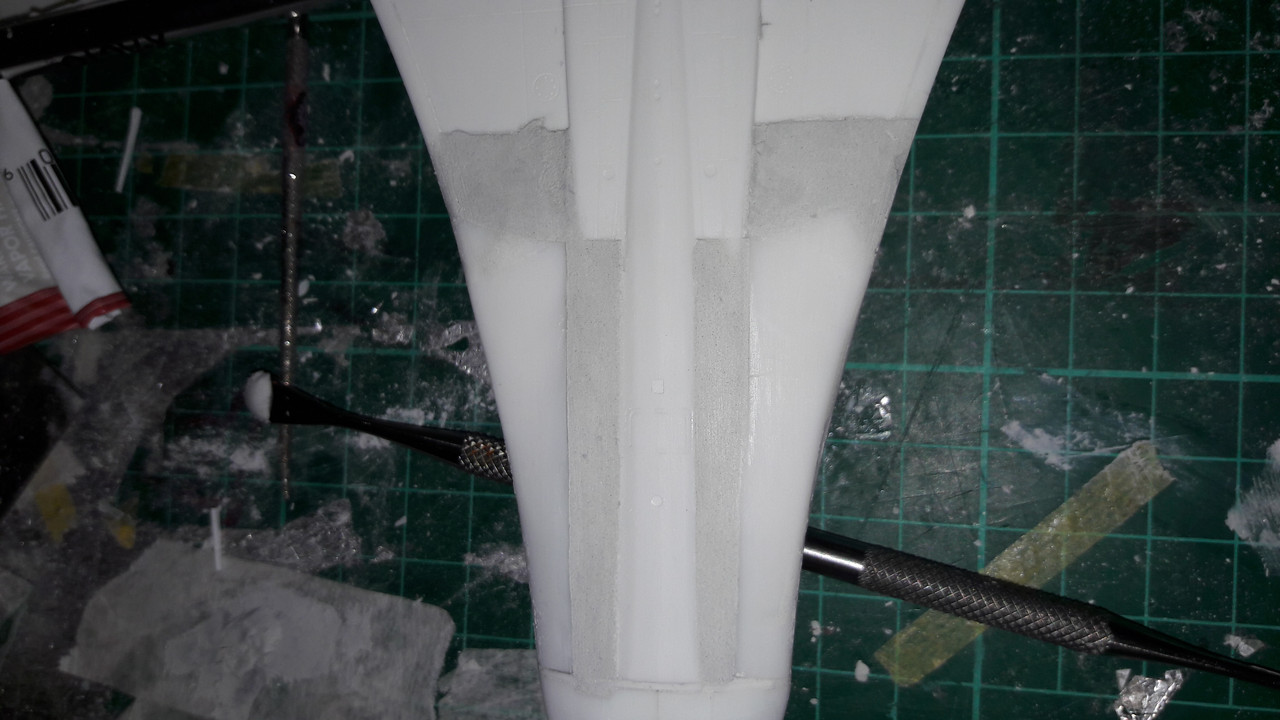 I then gave it a quick blast of primer to see how it's going. 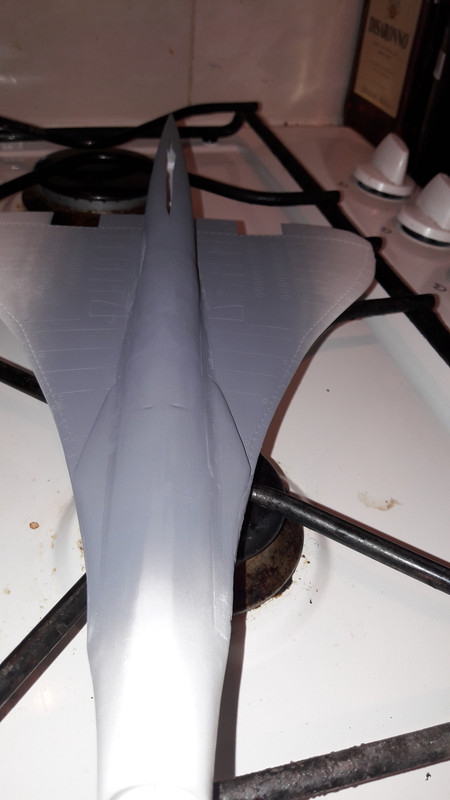  And I'm seriously chuffed. Still lots to do but it looks far better than I was expecting |
|
|
|
Post by Leon on May 25, 2017 16:42:03 GMT -5
Nice work on rework KP! |
|
kingpin141
Full Member
Member since: March 2013
Posts: 308
|
Post by kingpin141 on May 27, 2017 16:09:07 GMT -5
|
|
kingpin141
Full Member
Member since: March 2013
Posts: 308
|
Post by kingpin141 on May 31, 2017 17:54:27 GMT -5
|
|
kingpin141
Full Member
Member since: March 2013
Posts: 308
|
Post by kingpin141 on Jun 1, 2017 16:08:19 GMT -5
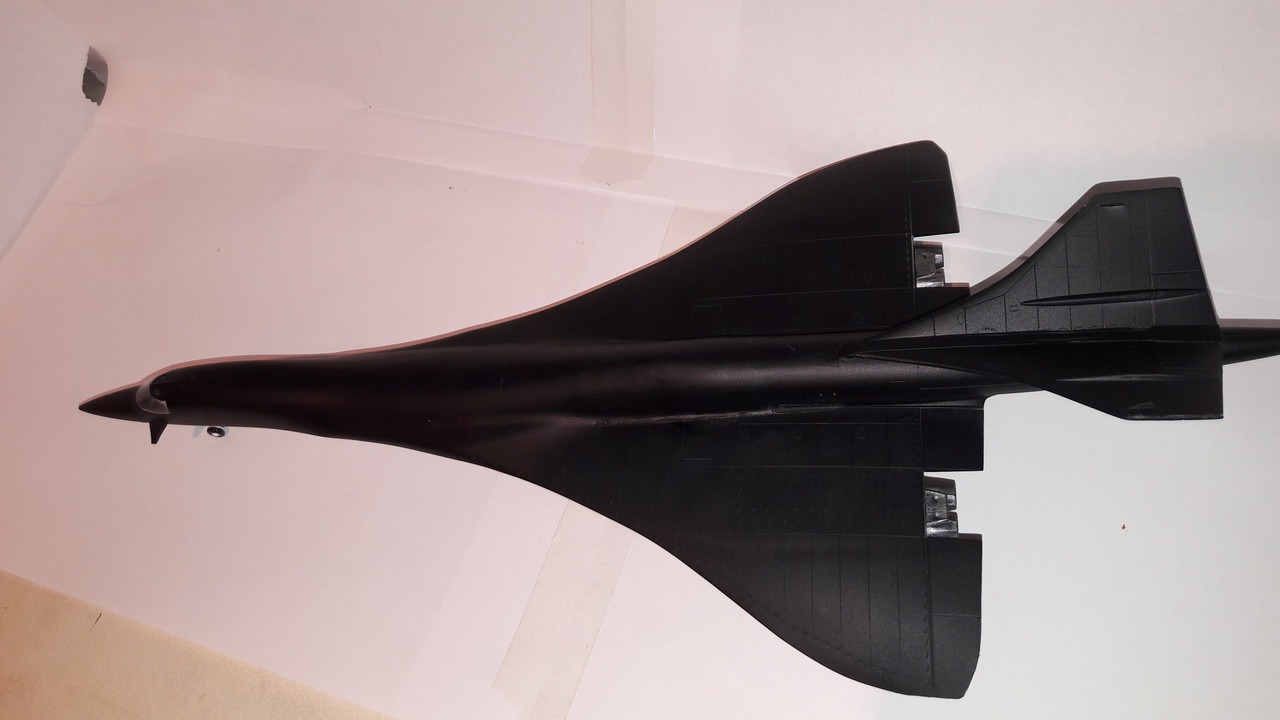
Much much filling and sanding and a coat of black primer later 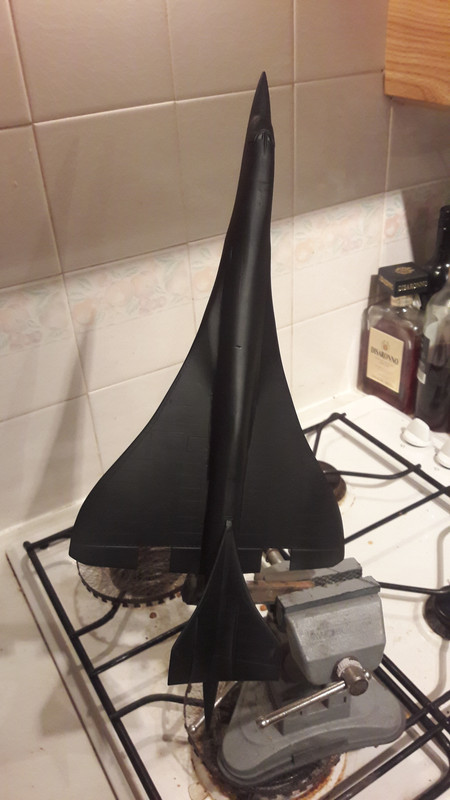 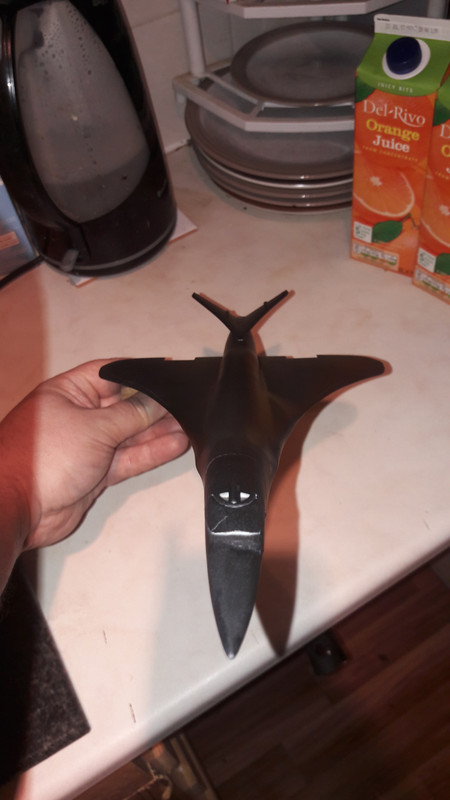 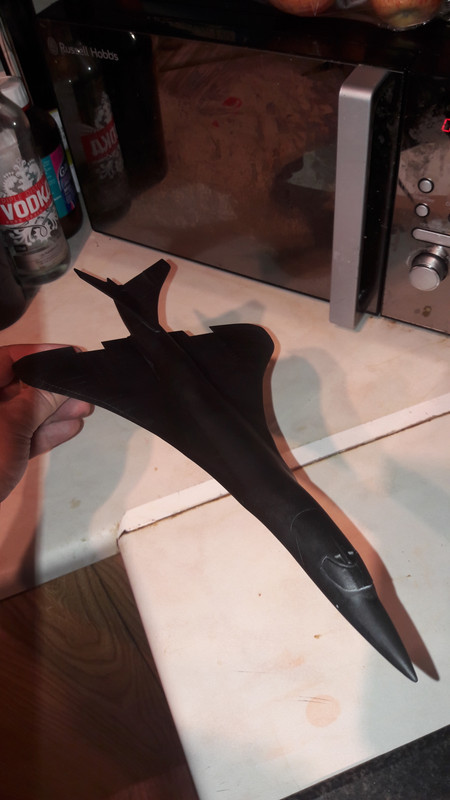 I'd like to take this opportunity to that the Lindberg B1 kit is absolute crap. Appalling fit all round |
|
bbrowniii
Full Member
Member since: March 2012
If you are not part of the solution, you are part of the precipitate.
Posts: 1,227
Mar 25, 2012 22:08:04 GMT -5
Mar 25, 2012 22:08:04 GMT -5
|
Post by bbrowniii on Jun 2, 2017 7:54:27 GMT -5
I'm not familiar with the books and I just stumbled on this thread, but I've got to tell you - wow! What a great project! I'm more than impressed, especially since you've used that fiasco of a kit as your base.
Kudos to you sir. Great work!
|
|
kingpin141
Full Member
Member since: March 2013
Posts: 308
|
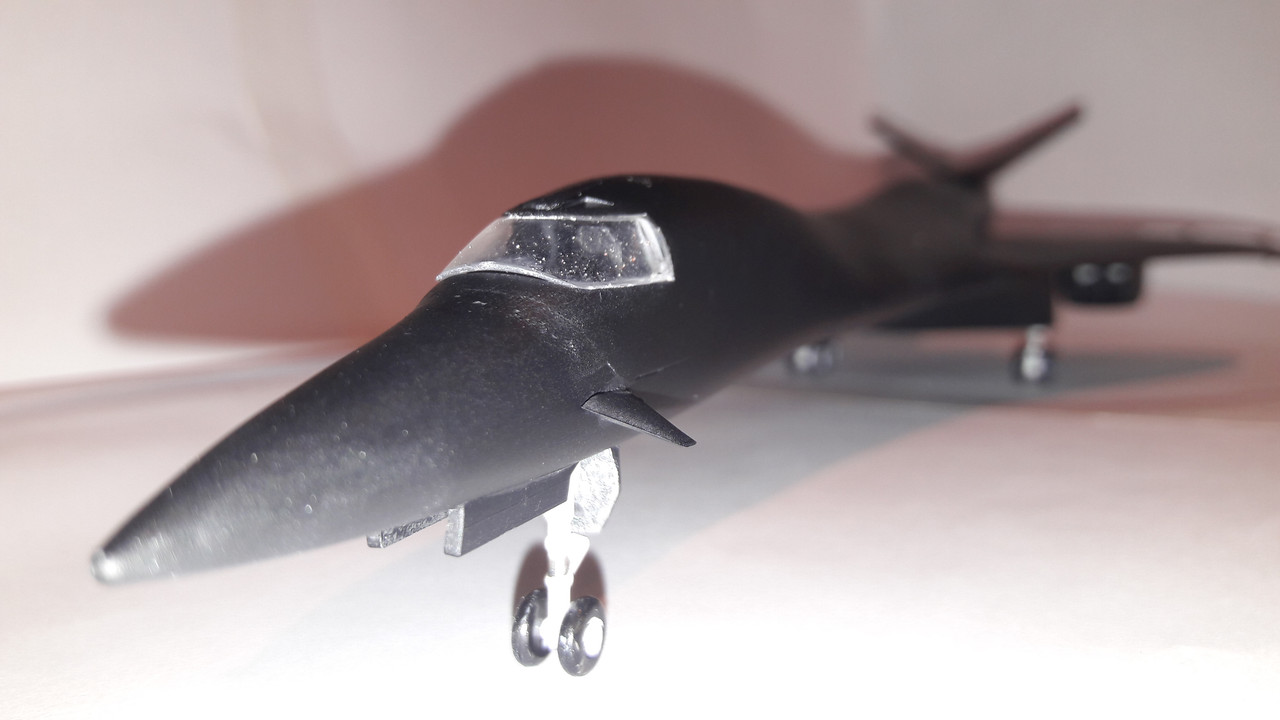
Post by kingpin141 on Jun 2, 2017 14:31:36 GMT -5
|
|
|
|
Post by Leon on Jun 2, 2017 15:02:45 GMT -5
WOW....That is sharp looking KP! Very nicely done. |
|
M1Carbine
Senior Member

Member since: November 2012
Posts: 1,630
Nov 16, 2012 2:49:11 GMT -5
Nov 16, 2012 2:49:11 GMT -5
|
Post by M1Carbine on Jun 2, 2017 23:16:44 GMT -5
Awesome!
Bob
|
|