|
|
Post by tiking on Dec 3, 2017 23:37:18 GMT -5
Looking Good John.
|
|
John Everett
Full Member

Member since: January 2012
July, 2016 MoM Winner
Posts: 1,278
Jan 17, 2012 0:53:48 GMT -5
Jan 17, 2012 0:53:48 GMT -5
|
Post by John Everett on Dec 4, 2017 18:45:39 GMT -5
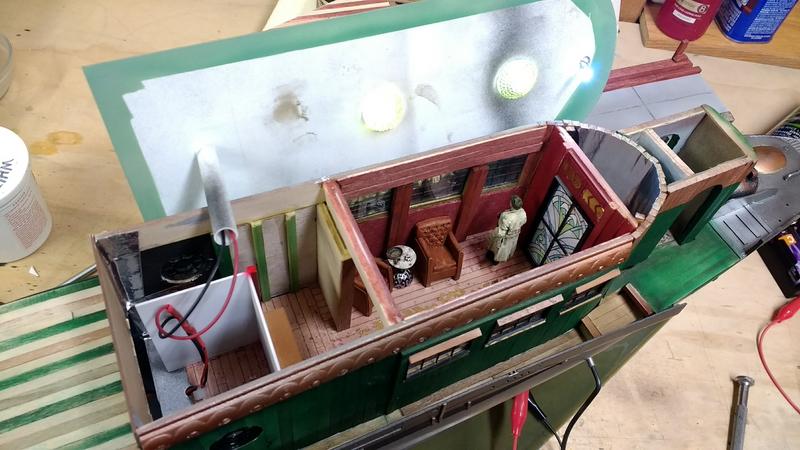
Are those home-made decals you are using for the patterns on the fabrics? M Correct. I stole the pattern from the internet and then printed it to decal sheet. The decals are transparent and will allow through the color of the surface underneath. In this case I chose the red/tan because it was a good match for the the whole room as well as the leather chairs. The divan sofa is a resin casting. The master was made from sheet plastic and a few items from Grandt Line. Here's the finished part in position: (I'll go back and fix that bare spot before the roof is glued on.)   |
|
|
|
Post by Leon on Dec 4, 2017 18:56:09 GMT -5
Beautiful work John!  |
|
joeydee
Full Member
Member since: July 2015
Posts: 180 
|
Post by joeydee on Dec 5, 2017 10:59:41 GMT -5
Nice steampunk style
|
|
|
|
Post by deafpanzer on Dec 5, 2017 15:42:12 GMT -5
Too cool! I am afraid yours looks a lot nicer than my real house now.
|
|
k1w1
Full Member
Member since: February 2015
Posts: 873
Feb 18, 2015 8:07:41 GMT -5
Feb 18, 2015 8:07:41 GMT -5
|
Post by k1w1 on Dec 6, 2017 8:03:09 GMT -5
Nice
|
|
|
|
Post by TRM on Dec 6, 2017 11:10:33 GMT -5
Sweet!!  |
|
John Everett
Full Member
Member since: January 2012
July, 2016 MoM Winner
Posts: 1,278
Jan 17, 2012 0:53:48 GMT -5
Jan 17, 2012 0:53:48 GMT -5
|
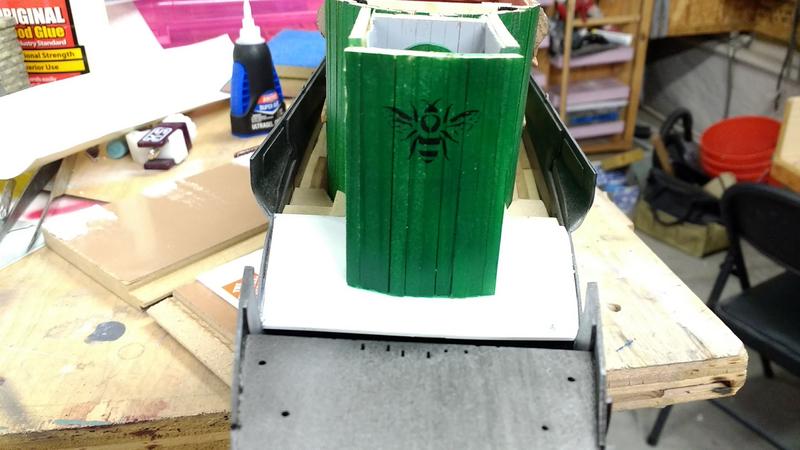
Post by John Everett on Dec 9, 2017 0:43:25 GMT -5
|
|
|
|
Post by Leon on Dec 9, 2017 6:42:21 GMT -5
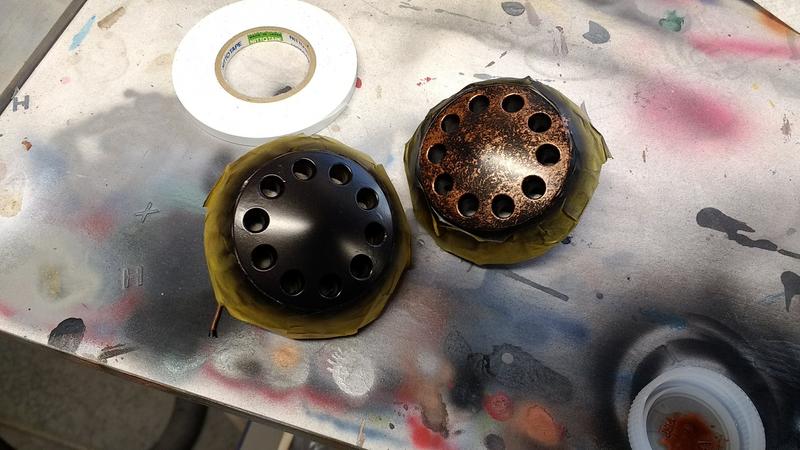
Cool idea with the bumble bee John! I like it. |
|
captfue
Full Member
Member since: October 2012
Posts: 311
Oct 1, 2012 22:25:19 GMT -5
Oct 1, 2012 22:25:19 GMT -5
|
Post by captfue on Dec 10, 2017 16:08:50 GMT -5
Way to cool a build. Great detail
|
|
John Everett
Full Member
Member since: January 2012
July, 2016 MoM Winner
Posts: 1,278
Jan 17, 2012 0:53:48 GMT -5
Jan 17, 2012 0:53:48 GMT -5
|
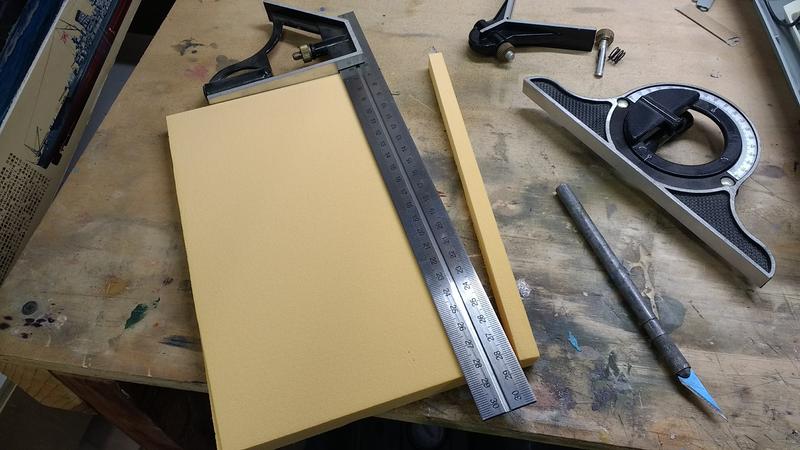
Post by John Everett on Dec 12, 2017 2:12:07 GMT -5
|
|
|
|
Post by deafpanzer on Dec 12, 2017 11:34:50 GMT -5
It is starting to come together... looking great!
|
|
|
|
Post by Leon on Dec 12, 2017 12:04:07 GMT -5
I like the addition of the crates and wall John!
|
|
|
|
Post by tiking on Dec 12, 2017 14:40:54 GMT -5
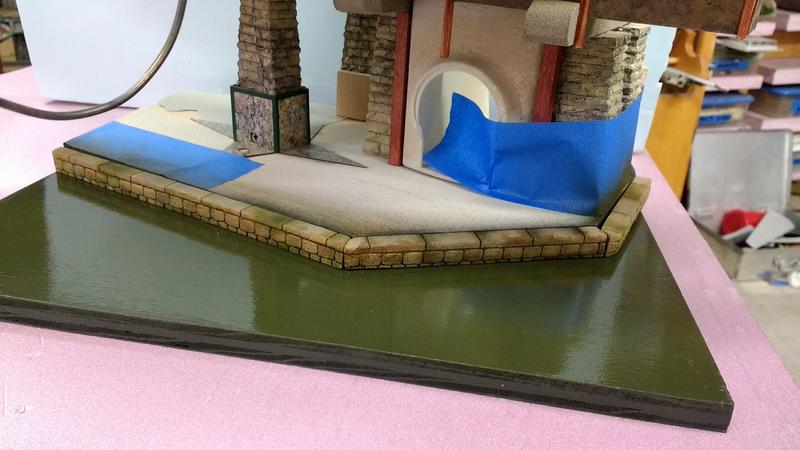
This looks gorgeous. What color did you use to paint the water base?
|
|
|
|
Post by TRM on Dec 12, 2017 15:44:30 GMT -5
All the piece are coming together now! The Keurig-Musashi is looking awesome! |
|
John Everett
Full Member
Member since: January 2012
July, 2016 MoM Winner
Posts: 1,278
Jan 17, 2012 0:53:48 GMT -5
Jan 17, 2012 0:53:48 GMT -5
|
Post by John Everett on Dec 12, 2017 18:23:05 GMT -5
That's funny. I'm actually drinking a cup of Kurig coffee as I write this.
|
|
John Everett
Full Member
Member since: January 2012
July, 2016 MoM Winner
Posts: 1,278
Jan 17, 2012 0:53:48 GMT -5
Jan 17, 2012 0:53:48 GMT -5
|
Post by John Everett on Dec 12, 2017 18:30:22 GMT -5
This looks gorgeous. What color did you use to paint the water base? I'm not sure, actually. It may be Tamiya DEEP GREEN. But I can't be certain. This is just the first layer. I'll be giving this water the same surface treatment given to another diorama done about 2 years back. 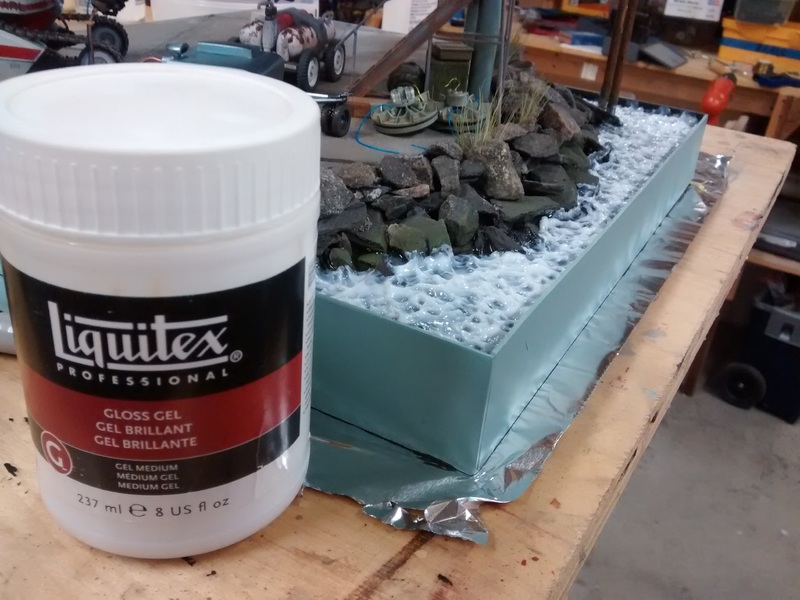 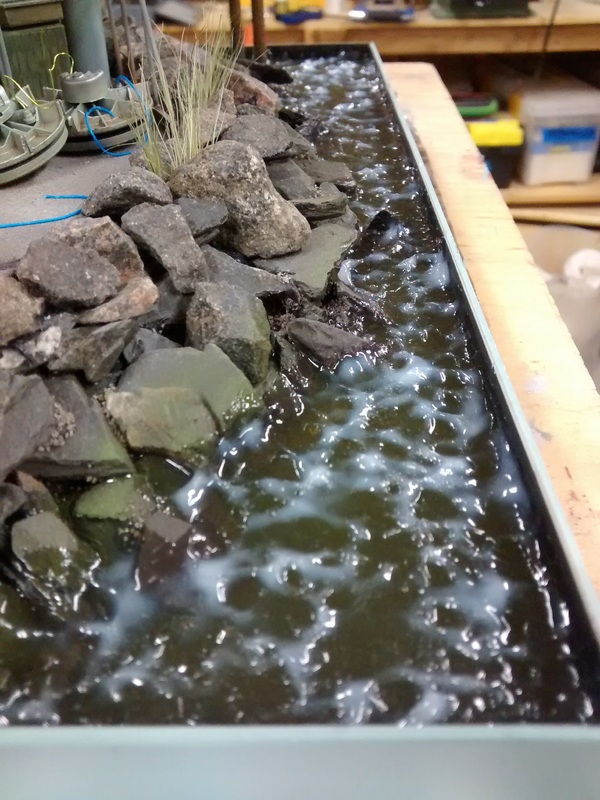  |
|
moramarth
Full Member
Member since: March 2014
Posts: 455
|
Post by moramarth on Dec 12, 2017 23:50:15 GMT -5
Starting to get some idea of where you're going now - and I like it!
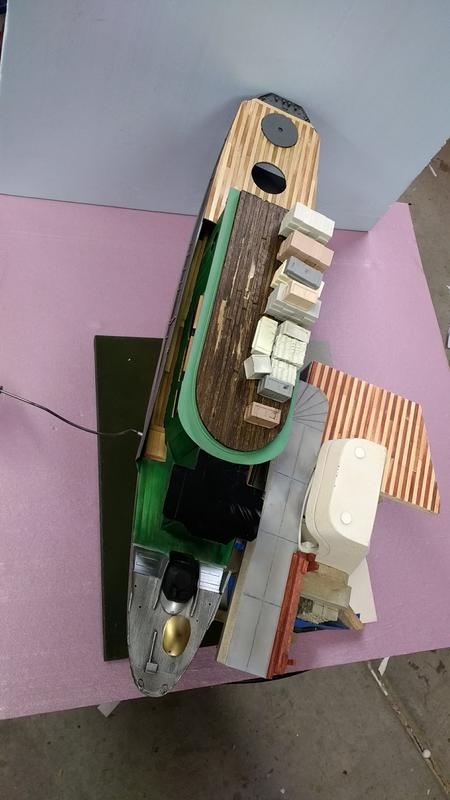
Only thing that worries me a bit is all the cargo up top. I know it's VSF, but I'm worried people will still look at it with eyes accustomed to normal floaty things and think it's a bit top heavy. Besides, wouldn't an flying thingy sling cargo underneath, in nets or on pallets, helicopter style? I think If you're going for a craft which is ferrying just a few passengers in pretty comfortable circumstances, wouldn't just their luggage be more in keeping? Perhaps a few steamer trunks, suitcases and hatboxes; you could have a small area of the cabin roof railed off roof-rack style for these and a net over them? You could then rail off the rest of the cabin roof as a promenade area, perhaps with a bench for those who can't afford to ride inside? However, if it's purely transport for the well-to-do, your underslung cargo could be their Steampunk Horseless carriage...
I hope you don't think I want to hijack your build, I know whatever you build will be marvelous: I just keep having these thoughts...
Regards,
M
|
|
|
|
Post by Steve Zuleski on Dec 13, 2017 20:31:24 GMT -5
Steamboat Willie, toot, toot. Ya, Steamboat Willie.
Wow, what a transformation, looking like4 a beauty from here!
John, that Liquitex is what made the ripples, right? Or, is that the layer for on top of the ripples?
Cheers, Ski.
|
|
John Everett
Full Member
Member since: January 2012
July, 2016 MoM Winner
Posts: 1,278
Jan 17, 2012 0:53:48 GMT -5
Jan 17, 2012 0:53:48 GMT -5
|
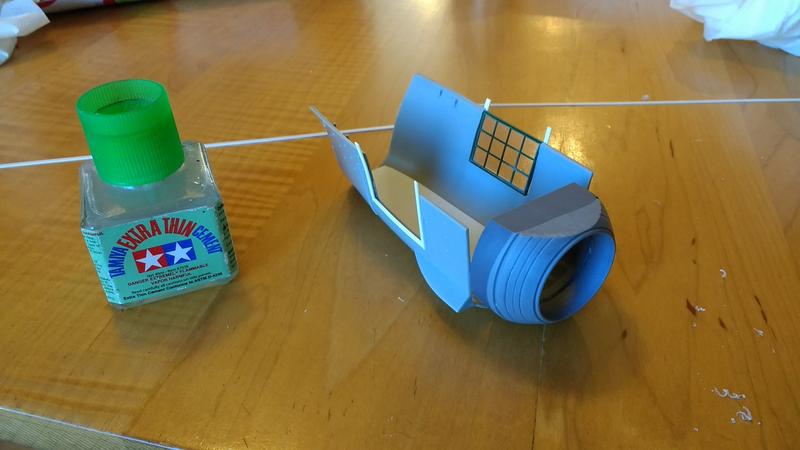
Post by John Everett on Dec 14, 2017 14:38:48 GMT -5
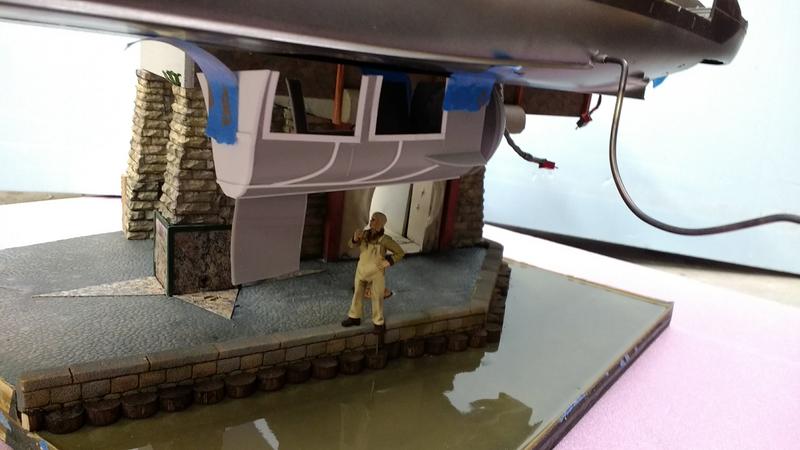
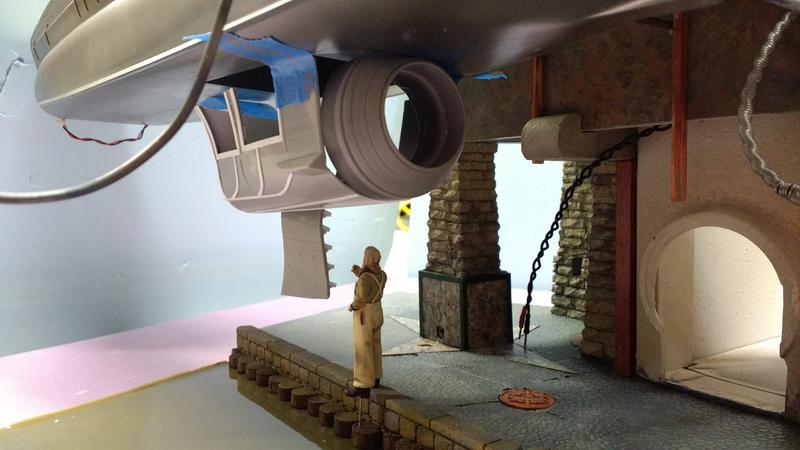
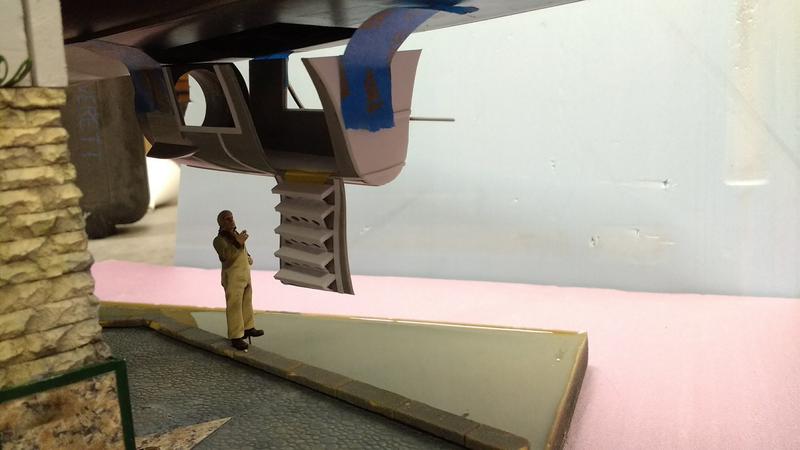
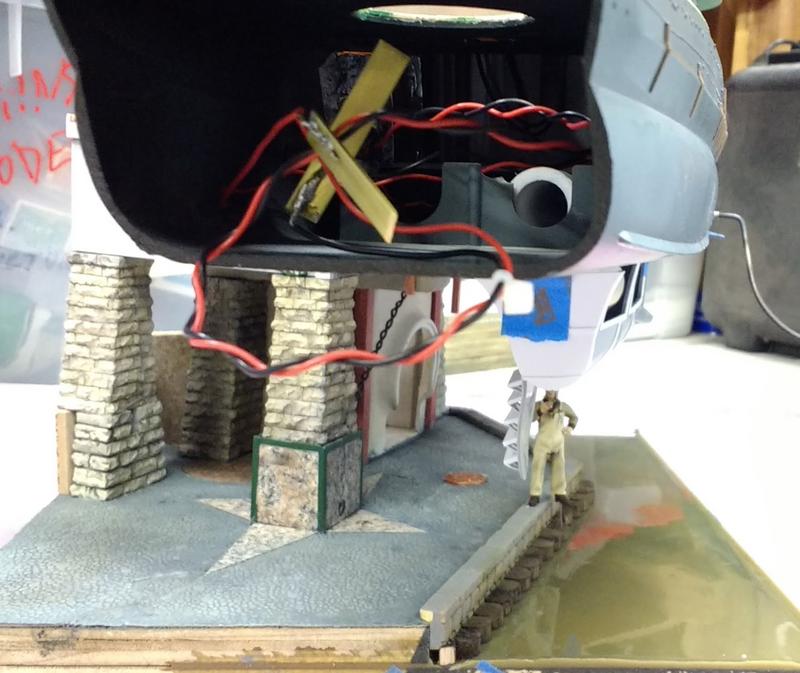
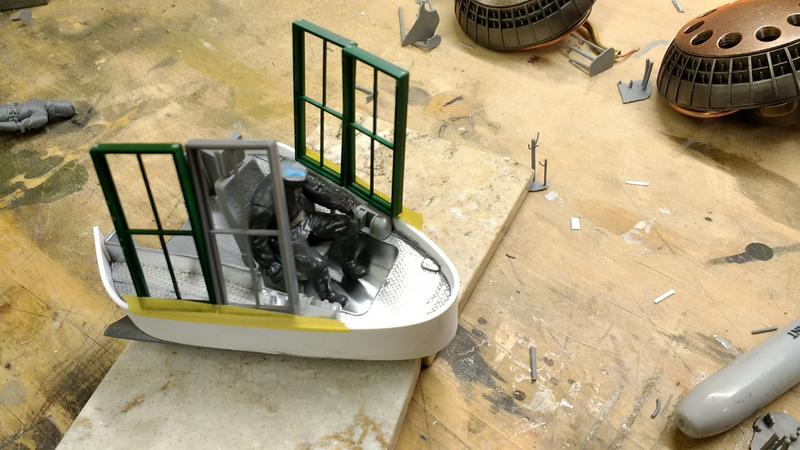
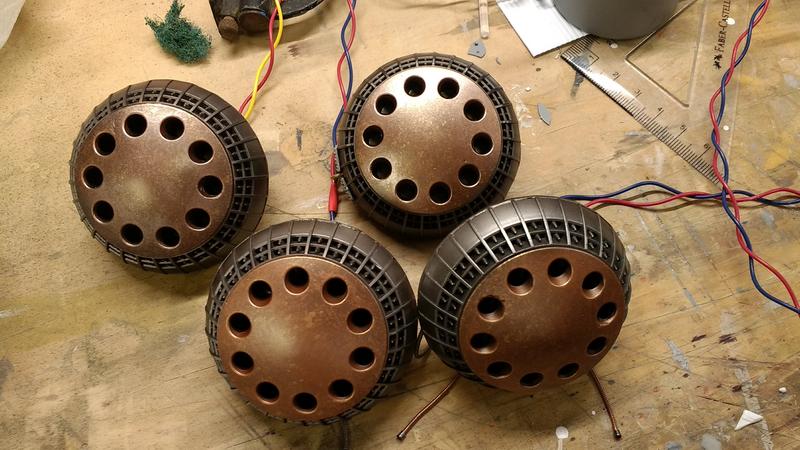
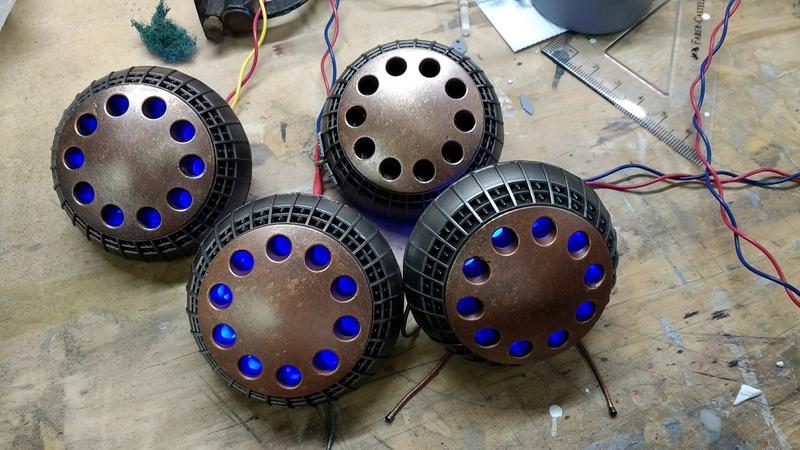
...wouldn't a flying thingy sling cargo underneath, in nets or on pallets, helicopter style? M You may be right with the cargo on the roof. But I need to keep at least some of the wooden boxes on the ship so that, like the bee symbol, it continues to fit in with the story. I've got plans for underneath the ship. It will be a tradeoff of space between the anti gravity pods, the passenger gondola and finally the cockpit. I'm waiting to get to top of the ship completed before I begin the underside. All of the planned structures will cause the model to become awkward and difficult to handle. Small update:  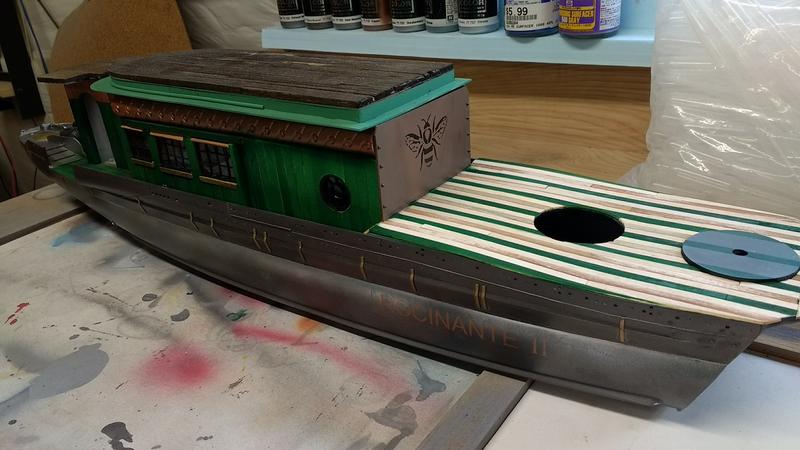   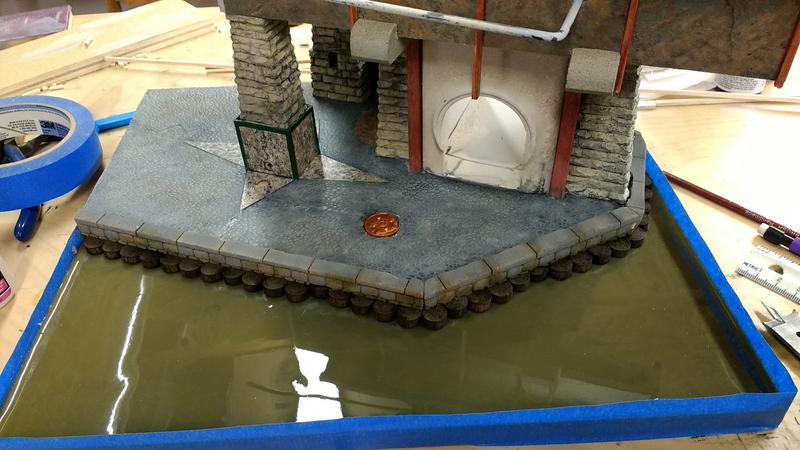 |
|
nicusi
Full Member
Member since: September 2013
Posts: 776
|
Post by nicusi on Dec 14, 2017 14:49:12 GMT -5
An amazing project, I'm watching you with great interest. Warm thanks for sharing with us your efforts!
Have fun and inspiration!
Nicolae
|
|
|
|
Post by Steve Zuleski on Dec 16, 2017 10:53:26 GMT -5
John, if you get a chance can you explain you water affect?
Cheers, Ski.
|
|
Neo Phyte
Full Member
Member since: March 2017
Posts: 188
|
Post by Neo Phyte on Dec 17, 2017 1:29:50 GMT -5
John, I am very impressed with your project. Keep up the good work and creative imaginings.
|
|
|
|
Post by Leon on Dec 17, 2017 6:44:41 GMT -5
Making great progress John! |
|
John Everett
Full Member
Member since: January 2012
July, 2016 MoM Winner
Posts: 1,278
Jan 17, 2012 0:53:48 GMT -5
Jan 17, 2012 0:53:48 GMT -5
|
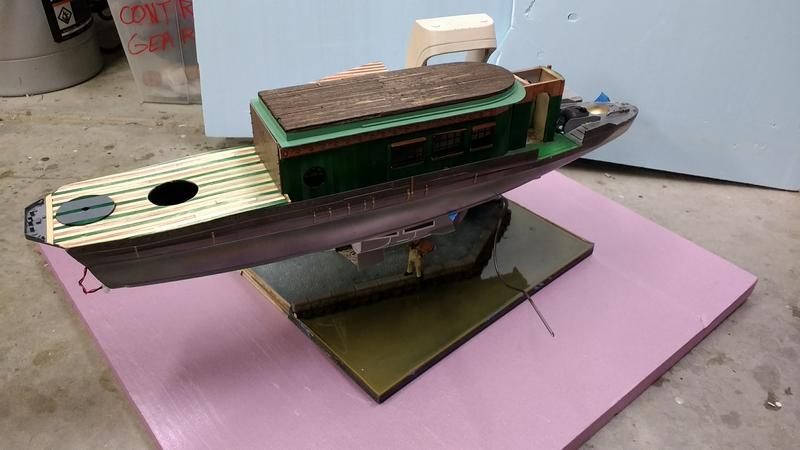
Post by John Everett on Dec 17, 2017 17:31:21 GMT -5
John, if you get a chance can you explain you water affect? Cheers, Ski. This one’s been pretty simple thus far. It’s a base of paint in the desired color and I just mixed up a batch of 30 minute epoxy with rubbing alcohol. The alcohol thins the mixture, slows the cure time but won’t affect the final hardness. Be mindful of rubbing alcohol over the paint. It may lift it if you try to tweak the epoxy too much. Vellejo or similar water based paint is generally impervious to alcohol. If you use Tamiya, protect it with a layer of clear. I then apply a layer of clear gloss acrylic to achieve waves. Careful, though. If the acrylic is too thick it will dry to a cloudy finish. The cloudiness can be reduced somewhat with a layer of clear gloss but the key is to build up the acrylic gradually.     |
|
John Everett
Full Member
Member since: January 2012
July, 2016 MoM Winner
Posts: 1,278
Jan 17, 2012 0:53:48 GMT -5
Jan 17, 2012 0:53:48 GMT -5
|
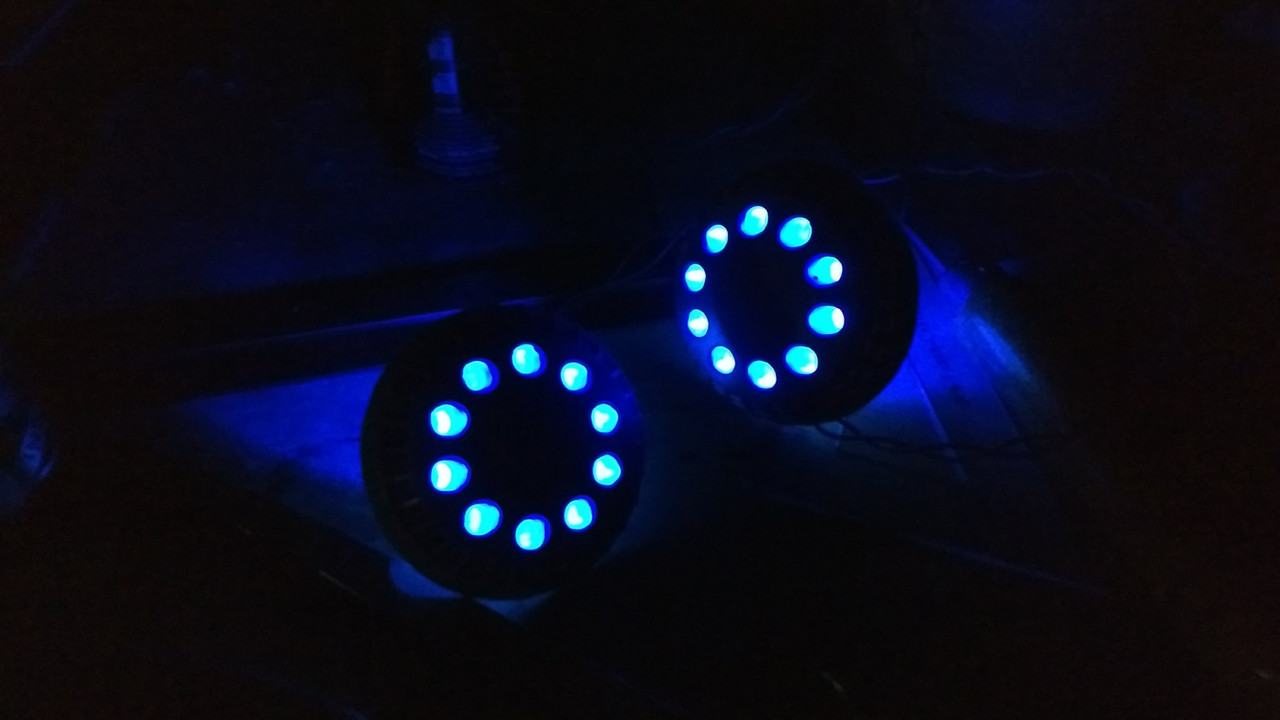
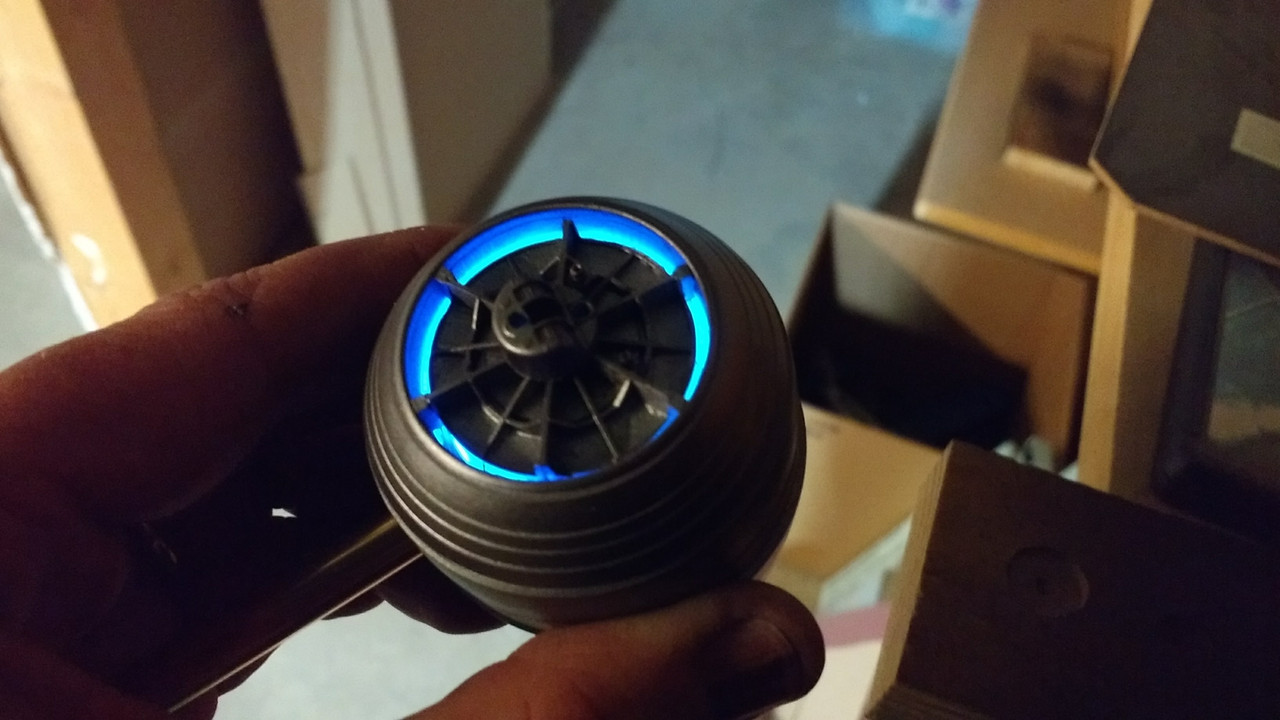
Post by John Everett on Dec 17, 2017 17:41:48 GMT -5
|
|
|
|
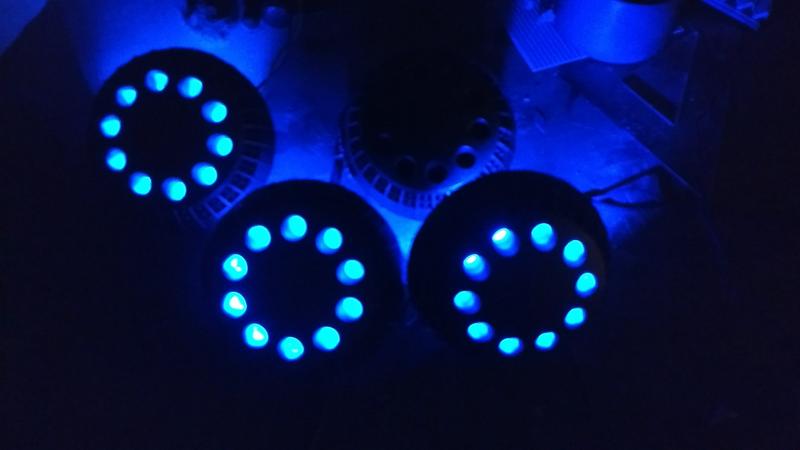
Post by Leon on Dec 17, 2017 19:07:21 GMT -5
WOW...This is way to cool John! Lighting looks good. |
|
|
|
Post by deafpanzer on Dec 18, 2017 11:51:29 GMT -5
HOLW COWWW!!!  |
|
|
|
Post by Steve Zuleski on Dec 21, 2017 1:50:34 GMT -5
John, if you get a chance can you explain you water affect? Cheers, Ski. This one’s been pretty simple thus far. It’s a base of paint in the desired color and I just mixed up a batch of 30 minute epoxy with rubbing alcohol. The alcohol thins the mixture, slows the cure time but won’t affect the final hardness. Be mindful of rubbing alcohol over the paint. It may lift it if you try to tweak the epoxy too much. Vellejo or similar water based paint is generally impervious to alcohol. If you use Tamiya, protect it with a layer of clear. I then apply a layer of clear gloss acrylic to achieve waves. Careful, though. If the acrylic is too thick it will dry to a cloudy finish. The cloudiness can be reduced somewhat with a layer of clear gloss but the key is to build up the acrylic gradually. Beauty, thx for the intel John. I'll be venturing into the water soon myself, so any help is appreciated. It's coming along nicely! Cheers, Ski. |
|
John Everett
Full Member
Member since: January 2012
July, 2016 MoM Winner
Posts: 1,278
Jan 17, 2012 0:53:48 GMT -5
Jan 17, 2012 0:53:48 GMT -5
|
Post by John Everett on Dec 24, 2017 15:56:18 GMT -5
|
|