|
|
Post by dierk on Apr 2, 2018 9:31:25 GMT -5
Just started this for a GB elsewhere. It's been a while since I've built a T-34, and haven't ever done a T-34/85 - strange, considering my faible for soviet armour, I know. The Academy kit of the 112 factory T-34 had been sitting in my stash for a while. Somewhere along the line I picked up the DEF set for this kit, which has a metal barrel some PE and resin. This is what I'm aiming for - a tank from the Manchurian campaign right at the end of WWII after Germany had already surrendered: 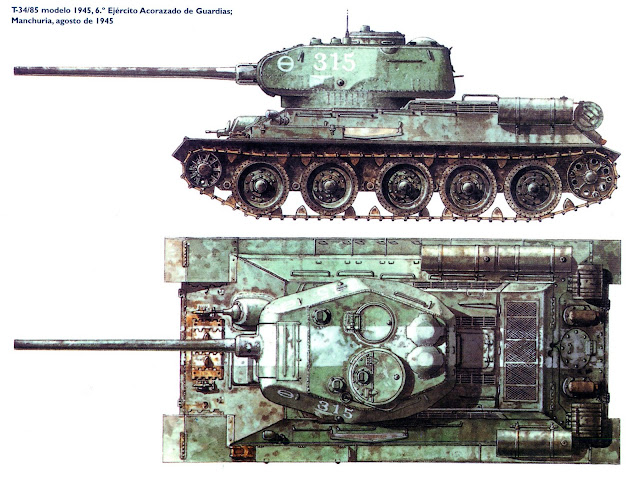 The Academy kit isn't too bad, about the same as a new Zvezda kit. It offers a choice of two versions: one late WWII and a Korean one. The instructions were trying to lead me up the garden path, by telling me a number of bolts should be removed from the rear plate and replaced with other parts. My reference book on WWII 112 factory tanks does not back this up - maybe it's for the Korean version, but the instructions don't specify this. Lower hull and wheels are done: 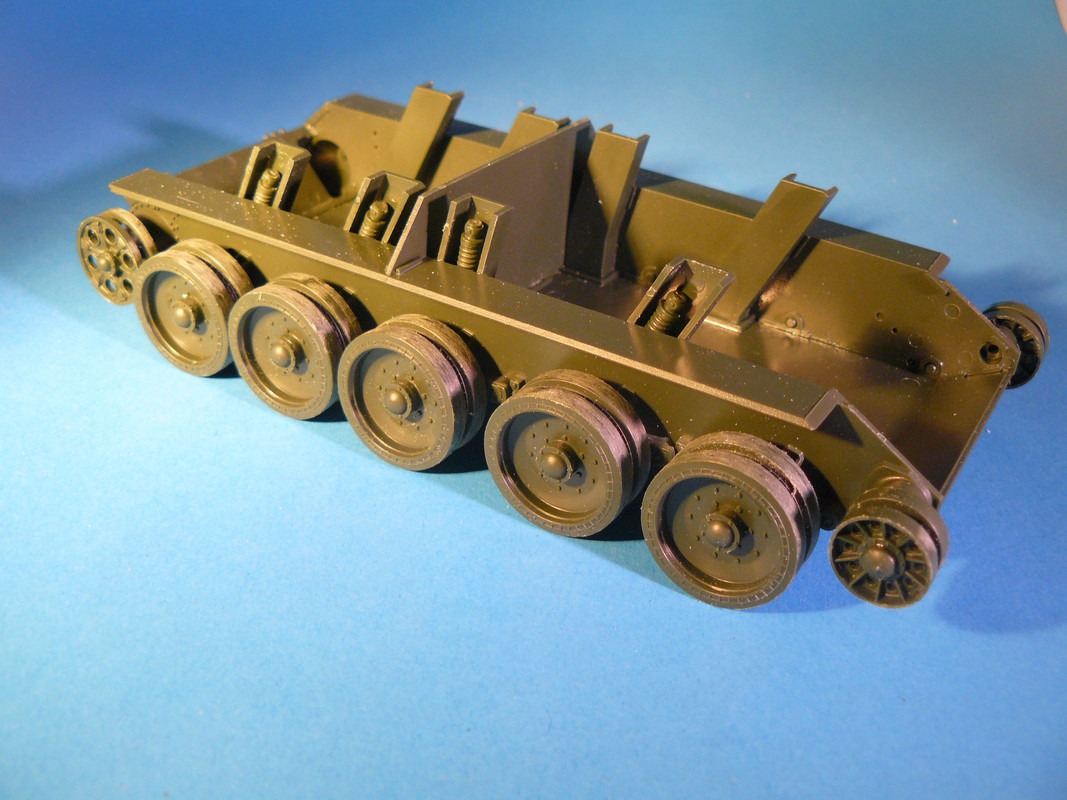 The DEF set does include a resin mantlet, but I liked the looks of the kit part better: 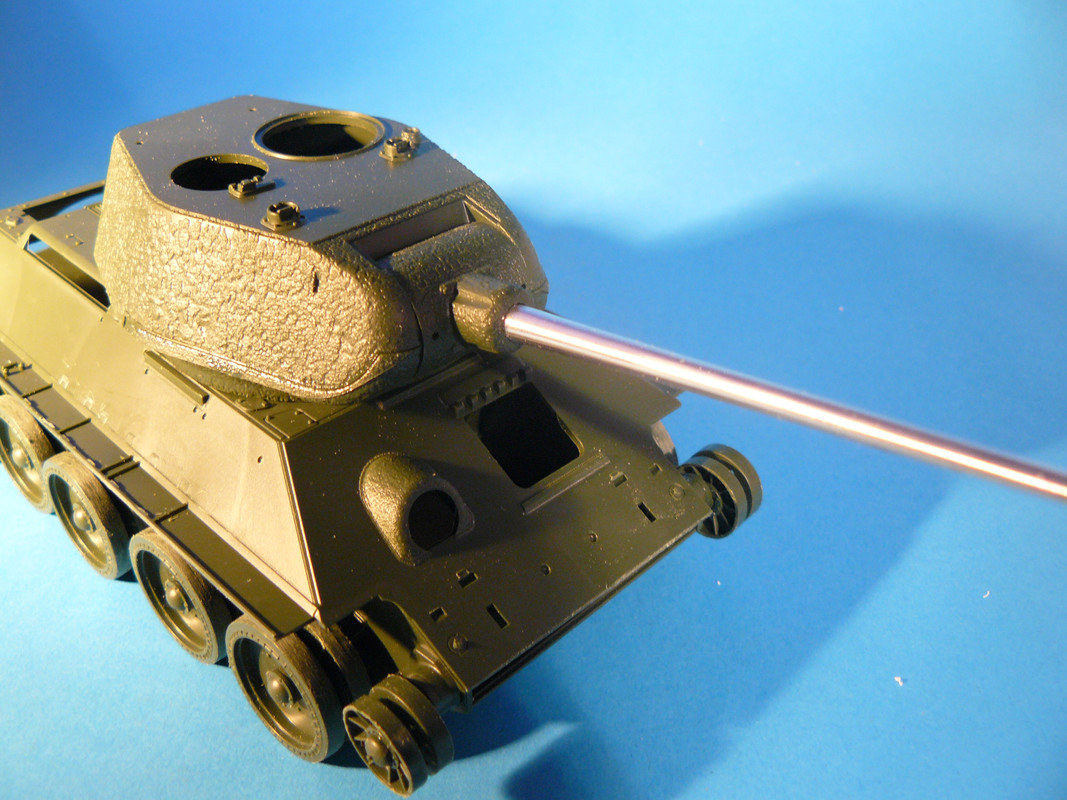 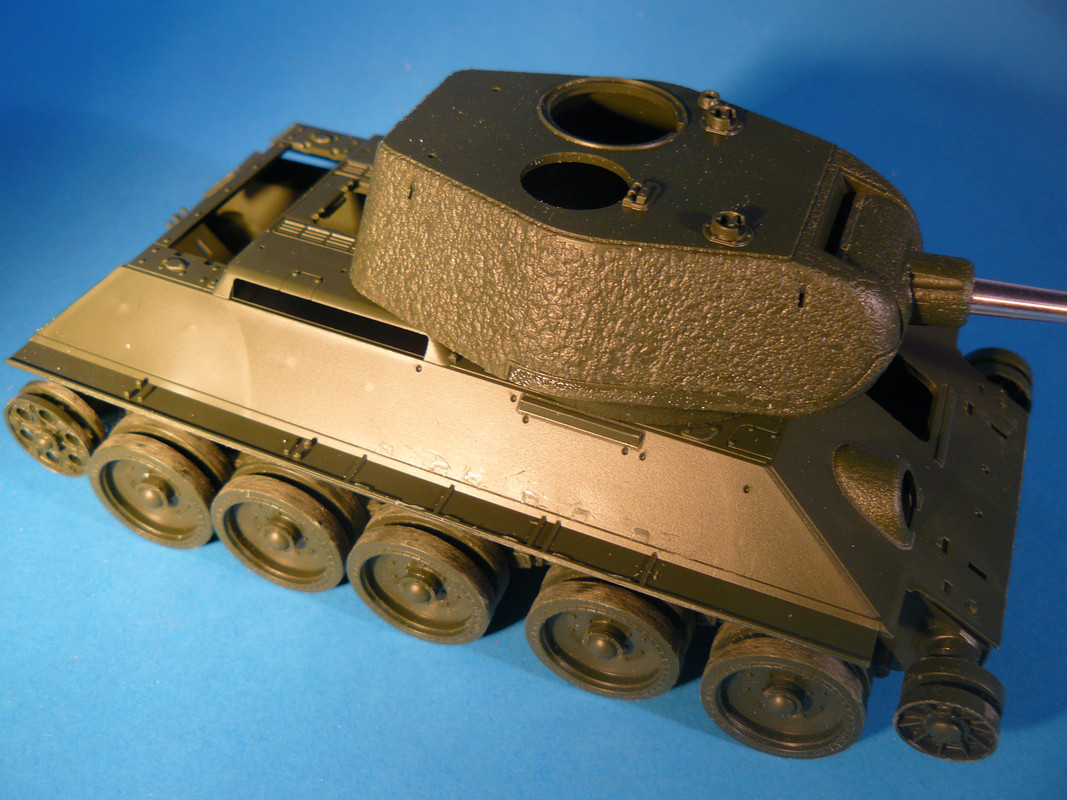 Some reviewers consider the cast texture of the kit parts to be over-done - however, here's a pic from my reference book (for discussion purposes only) 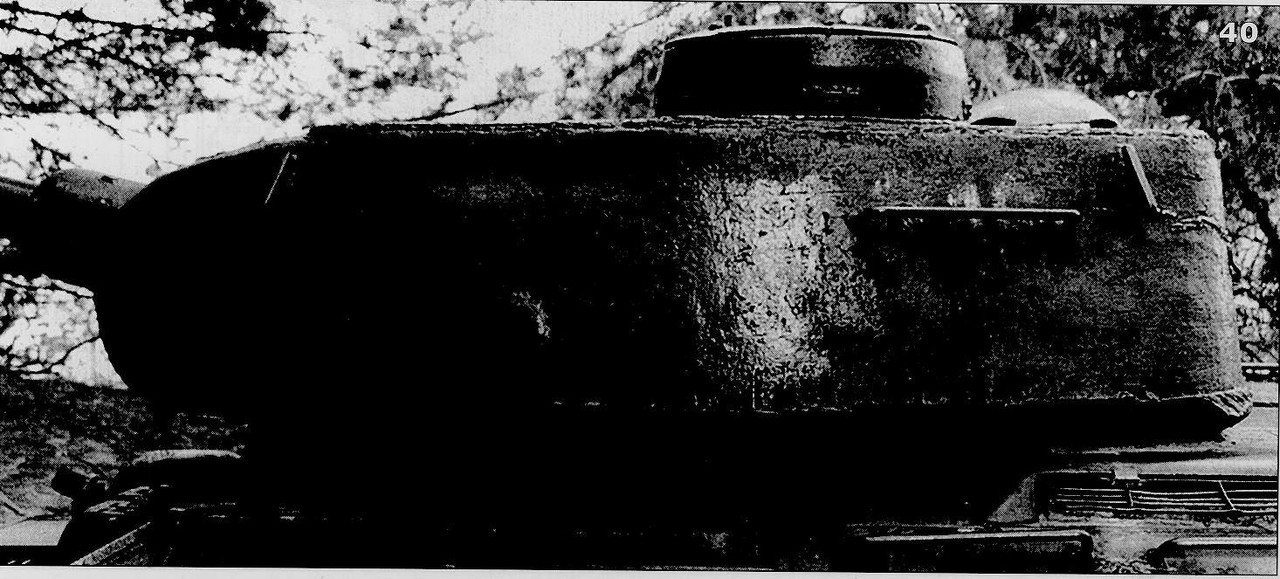 The welds, however are WAY too neat. I'll be replacing the grab handles with ones made from wire - the kit parts aren't too bad, but most of them have an attachment point in the middle of the handle, so clean-up would be a PITA. The cleats on the hull are moulded on and solid, so will be replaced with resin items from Tiger. The link and length tracks from the kit will make way for Friuls. That's it for now. |
|
|
|
Post by dierk on Apr 3, 2018 7:07:33 GMT -5
|
|
|
|
Post by dierk on Apr 7, 2018 3:52:59 GMT -5
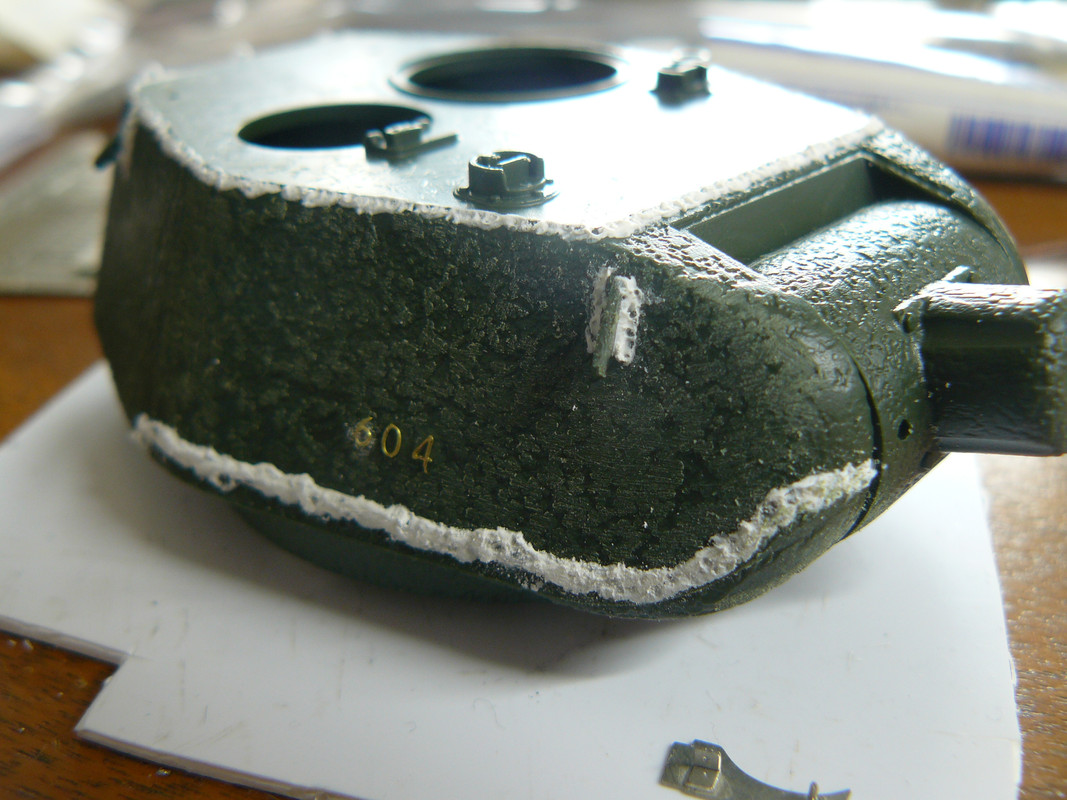
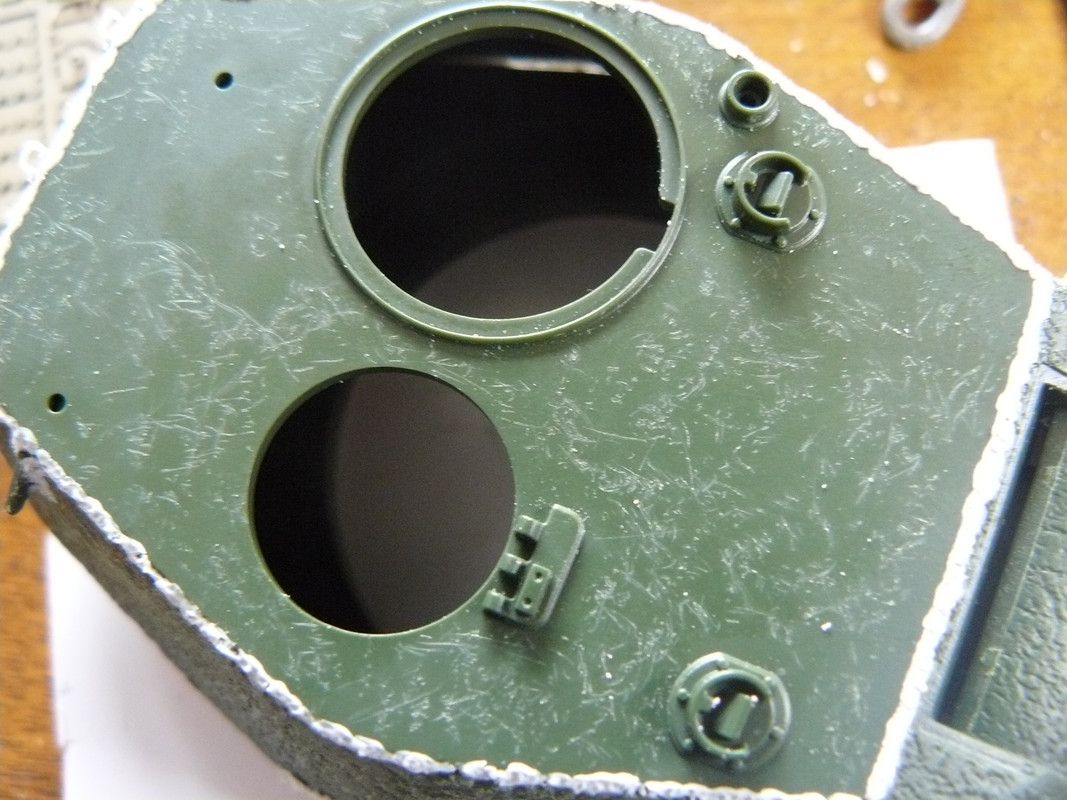
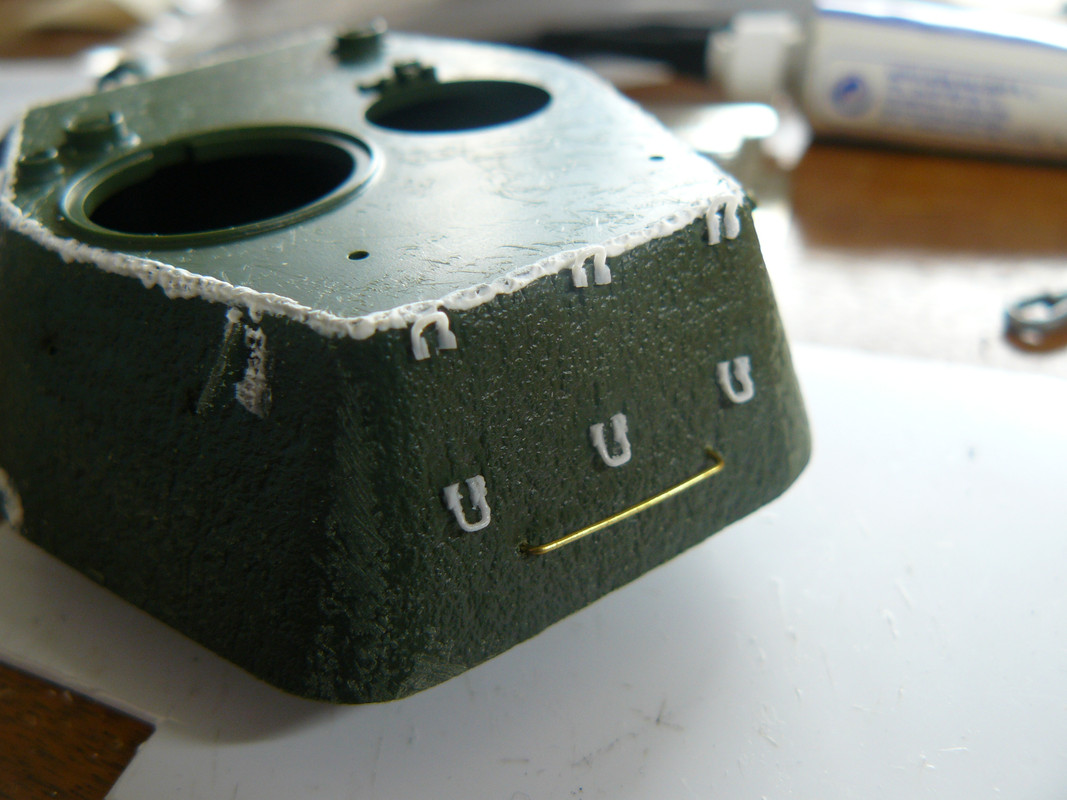
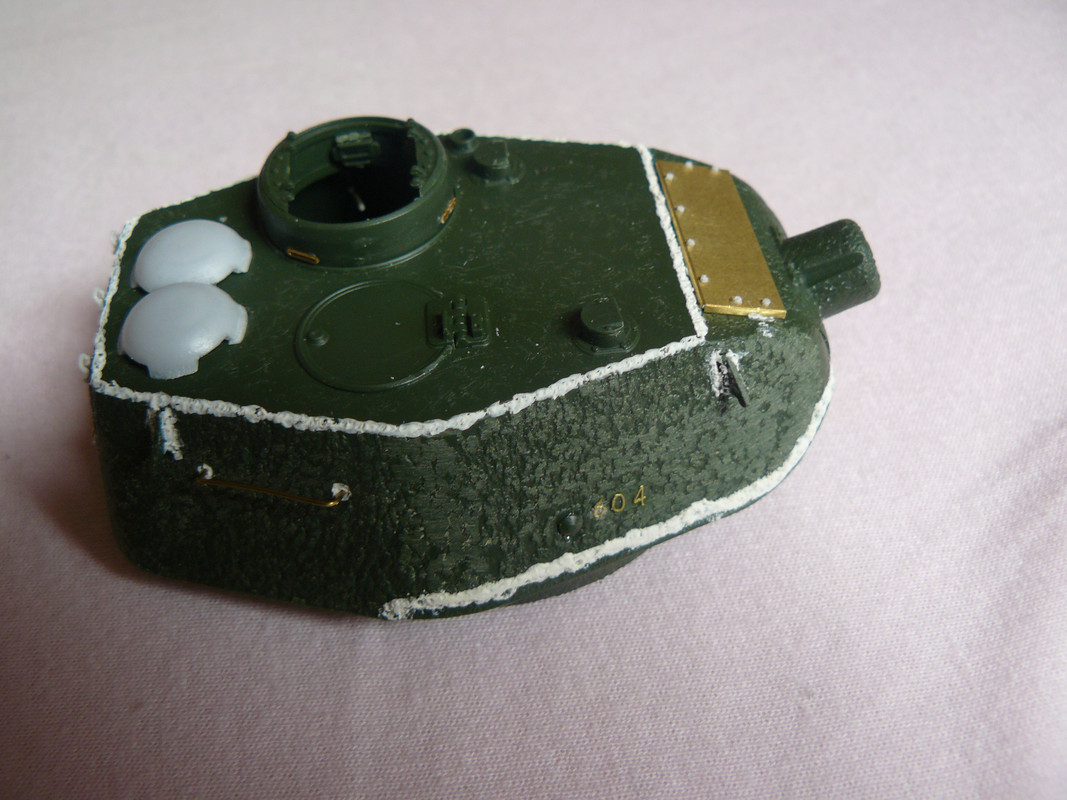
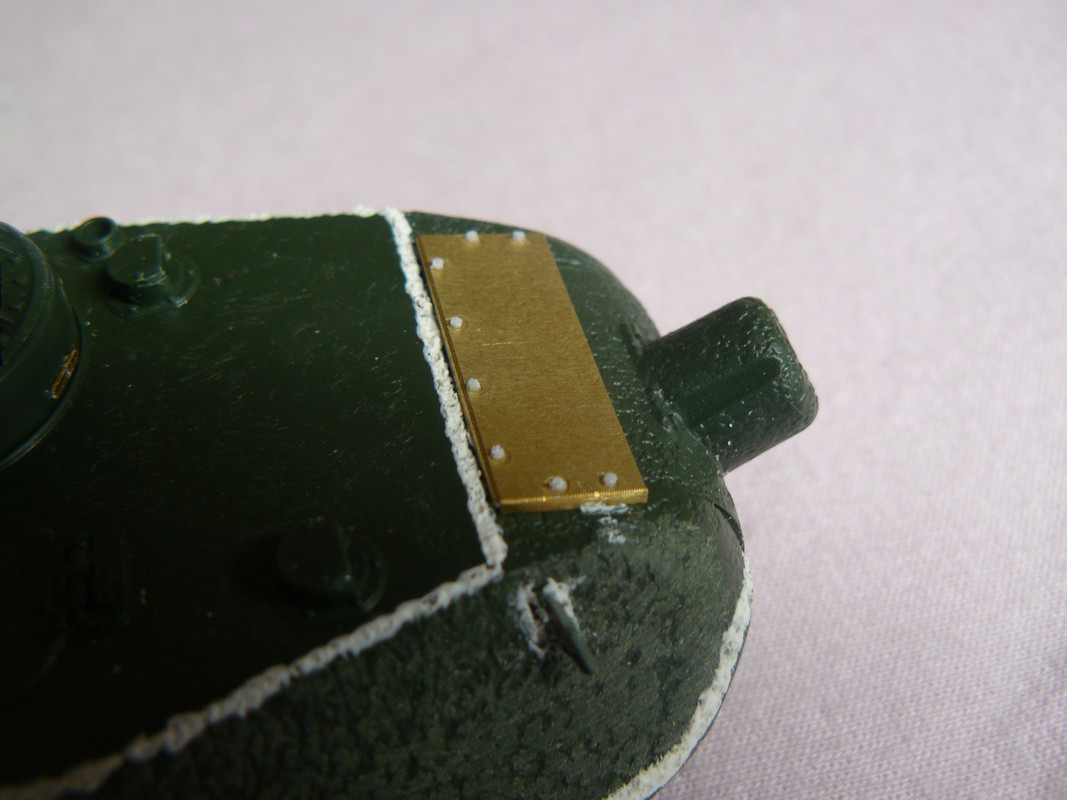
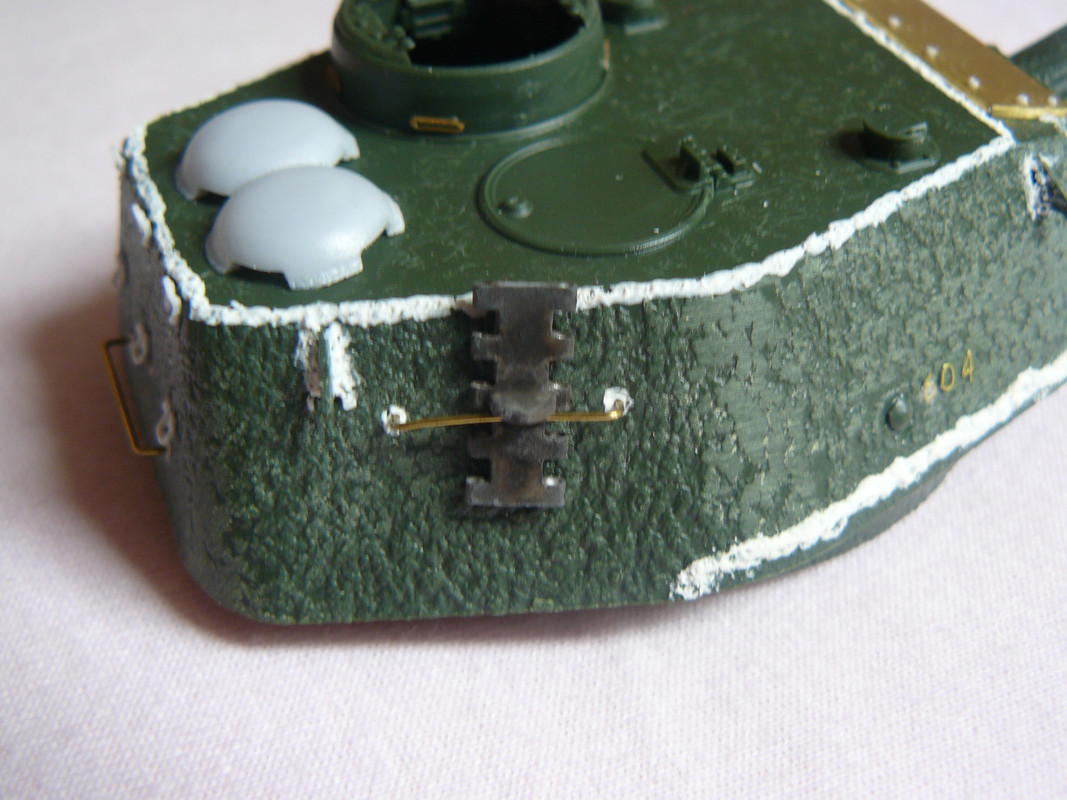
Little update: added a few more welds using Vallejo putty from the tube. The grab handles are 0.5mm wire, and the PE grille is from the DEF set. Also added a bit of texture to the very flat surfaces like the turet roof and side walls. 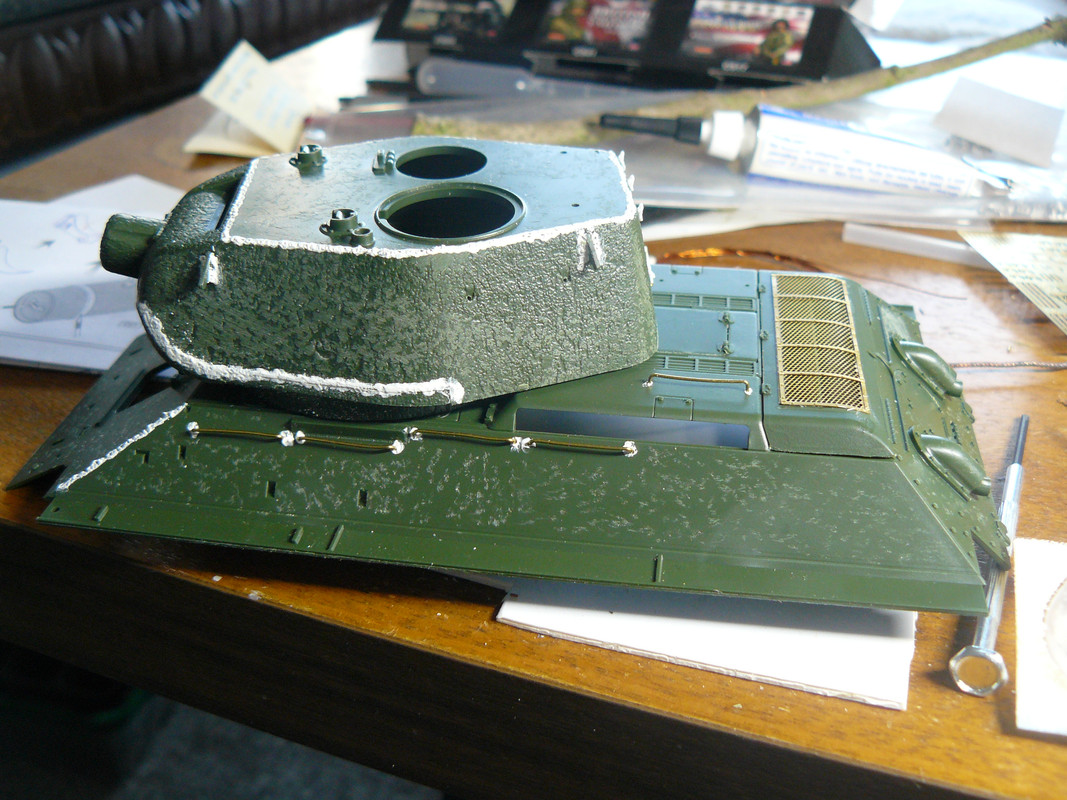 Since taking the pics I've toned down the welds around the grab handles. 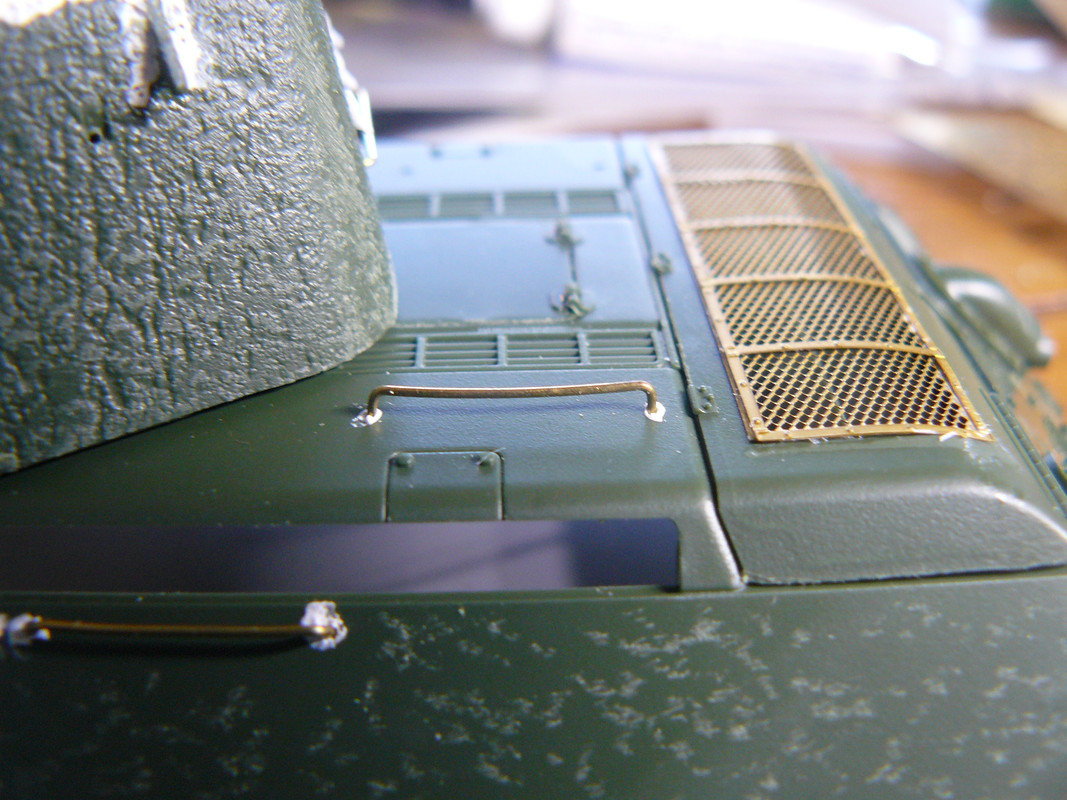 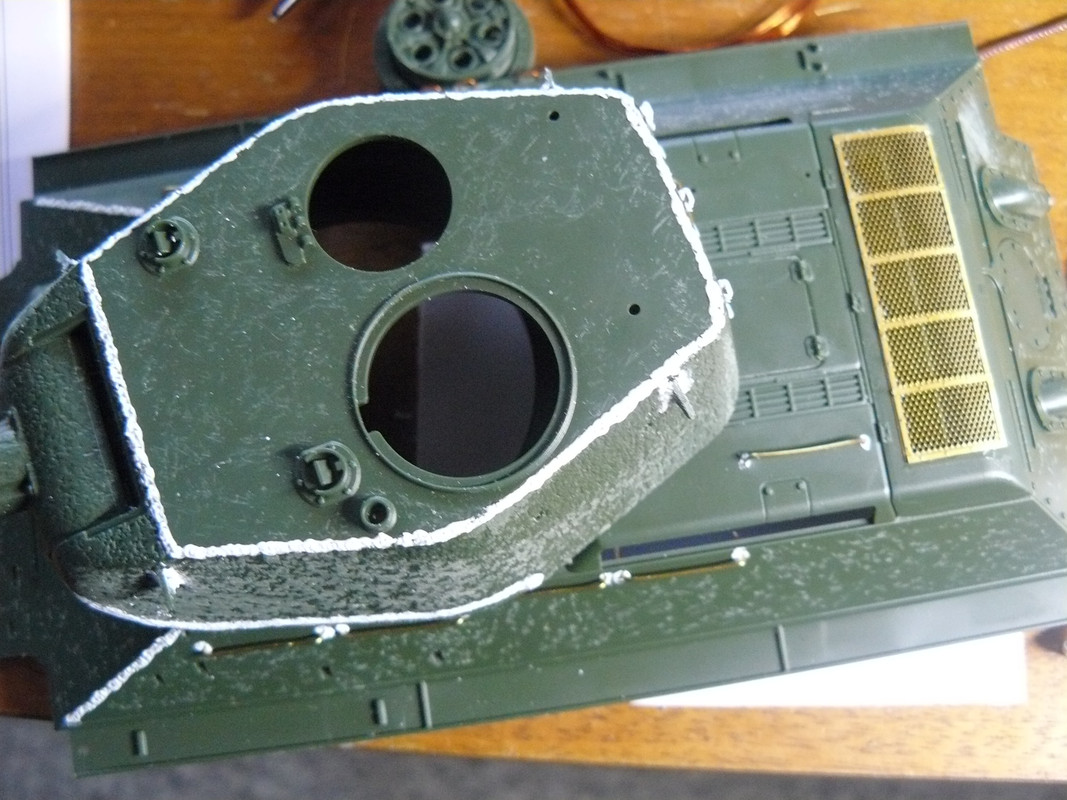 My favourite part of this kit: the exhaust pipes actually have the crimped edges - first time I've seen this in a kit. Just needed the walls thinning a bit.  Unfortunately, the road-wheels have the same weakness common to Dragon kits: the fasteners are bolts, not nuts. Ordered a set of Miniart wheels to fix this problem. |
|
|
|
Post by Tobi on Apr 7, 2018 6:32:01 GMT -5
Nice job Dierk, the molded on cast texture looked indeed a little bit exaggerated.
You could also use a stiff brush soaked with acetone to make some surfaces even more irregular.
If applied in multiple layers it creates an orange peel over time.
With which tools did you work the sides and the turret roof?
|
|
|
|
Post by dierk on Apr 7, 2018 7:12:48 GMT -5
Hi Tobi! I used a ball-shaped diamond burr (part of a cheap bit set from Lidl) and a battery powered Bosch drill, touching the model to it with a stippling motion. I may work the turret over with some Mr. Surfacer - I'm sure your tip would work well, but I don't have any acetone, whereas I do have Mr. Surfacer  |
|
|
|
Post by Leon on Apr 7, 2018 8:08:29 GMT -5
Looking good Dierk! I like the cast turret.  |
|
|
|
Post by dierk on Apr 12, 2018 6:44:28 GMT -5
The Miniart wheels have arrived! And they are brilliant! Makers of resin AM wheels must be kicking themselves. 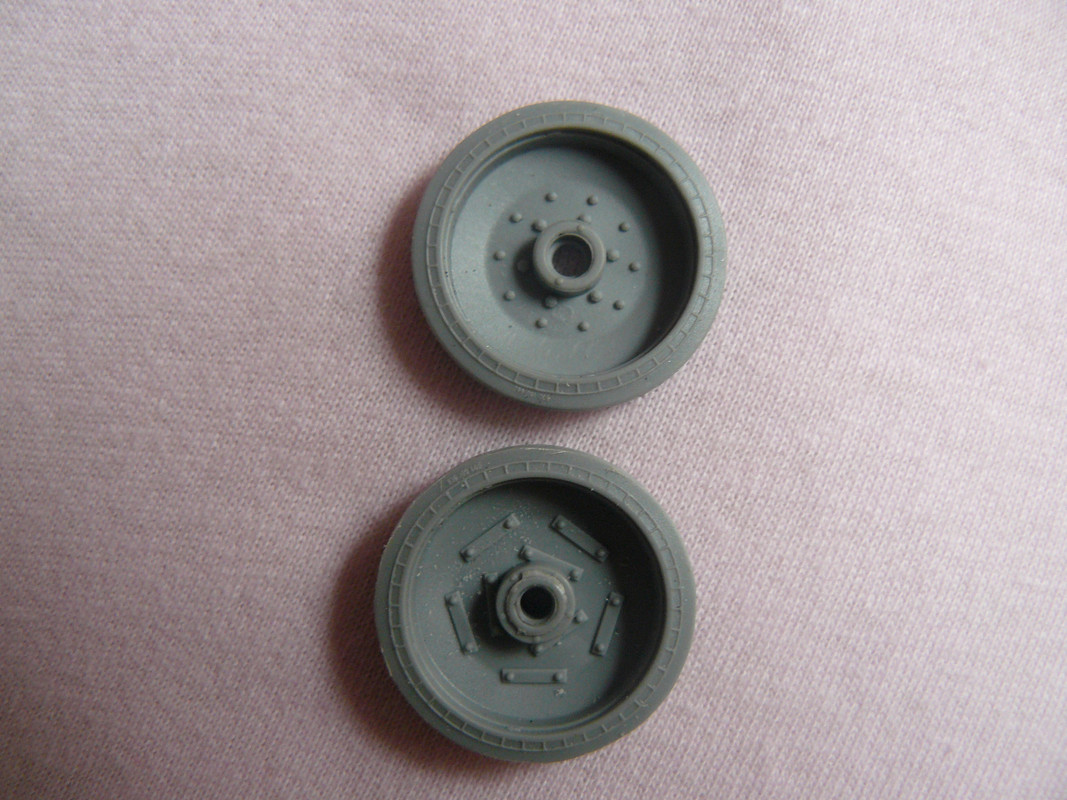 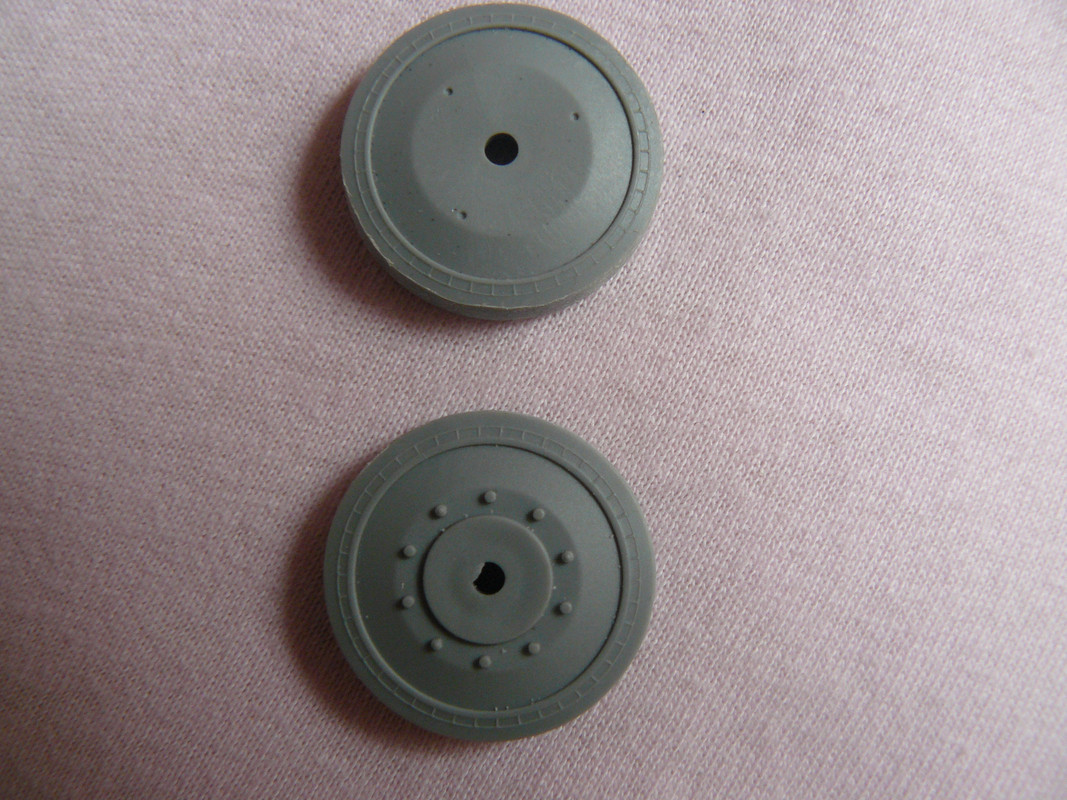 |
|
|
|
Post by panzerjager2 on Apr 12, 2018 8:04:14 GMT -5
Pretty cool 
PJ2
|
|
|
|
Post by dierk on Apr 14, 2018 6:46:21 GMT -5
|
|
|
|
Post by panzerjager2 on Apr 14, 2018 8:01:37 GMT -5
NICE WORK. I really like the attention paid on the details........
PJ2
|
|
|
|
Post by dierk on Apr 16, 2018 5:10:56 GMT -5
More stuff done.   |
|
|
|
Post by dierk on Apr 17, 2018 7:54:49 GMT -5
Some pics for ya of the Miniart wheels and Friuls fitted. Had to replace the drive wheel axle stubs with rod, as I'd have only had about half a mil of mating surface to play with otherwise:  [/a]  [/a]  [/a]  [/a]  [/a] |
|
adt70hk
Forum Moderator 
Member since: November 2015
Currently attempting to build something decent!!! ;)
Posts: 2,476 
MSC Staff
|
Post by adt70hk on Apr 17, 2018 8:44:01 GMT -5
Looking good mate. Those tracks do look the business!!
I've got to say though the styrene really is top class and is the standout piece!! 😋
ATB
Andrews
|
|
|
|
Post by dierk on Apr 17, 2018 11:29:32 GMT -5
Cheers Andrew, gald you're linking it! Got some more work done on the hull, adding welds and torch cut marks   |
|
|
|
Post by tonylee on Apr 17, 2018 18:52:55 GMT -5
Sign on the wall of a Soviet Tank Factory: "Make them SIMPLE,Quickly and a LOT OF THEM" Uncle Tony |
|
reserve
Senior Member

Member since: July 2012
Si vis pacem para bellum
Posts: 2,345
Jul 11, 2012 9:11:45 GMT -5
Jul 11, 2012 9:11:45 GMT -5
|
Post by reserve on Apr 17, 2018 19:03:10 GMT -5
Nice stuff brother I agree the turret texture seems more than a little overdone for what that's worth
Regards,
Mark
|
|
|
|
Post by Tobi on Apr 18, 2018 0:06:52 GMT -5
Nothing beats friut-loops mounted on a tank model! |
|
|
|
Post by dierk on Apr 18, 2018 2:37:24 GMT -5
Sign on the wall of a Soviet Tank Factory: "Make them SIMPLE,Quickly and a LOT OF THEM" Uncle Tony Unfortunately, the same sign seems to have made it onto the Academy wall   Nice stuff brother I agree the turret texture seems more than a little overdone for what that's worth Regards, Mark Cheers Mark, TBH I only bought this kit because I got it cheap - picked it up at the end of a show. Waited till the guy was packing up - knew he had a long way to go, as I noticed he spoke with a Dutch accent, and as I used to live there many moons ago, I made him a silly offer in Dutch But I think I'll give Academy kits a miss in the future. Nothing beats friut-loops mounted on a tank model! Unless it's 'Herrenknüppel' - MasterClub  |
|
|
|
Post by Tobi on Apr 18, 2018 3:42:34 GMT -5
Could be subject to debate! Personally I like the product from Hungary better, even with the new softer wire. Resin track bolts are..., phew, not necessarily my cup of tea! Not to forget Spaten-As! |
|
|
|
Post by dierk on Apr 18, 2018 4:25:25 GMT -5
I agree: the resin bolts can be a pain! Depends very much on the track though: the IS type tracks are a doddle as the pins are 0,6mm. However, I did do a set for a T-70 - and that contravened the Human Rights Convention. Got a set of Valentine tracks, and the pins are too long  The technique I use for Friuls makes the softness of the wire immaterial. Only used Spade Ace once - Stug III if memory serves, and the links took longer to clean up than the asembly. but I liked the steel wire |
|
|
|
Post by TRM on Apr 18, 2018 6:28:02 GMT -5
Looking pretty good there Dierk! All the added details are certainly going to pay off in the end!
|
|
|
|
Post by dierk on Apr 18, 2018 8:37:42 GMT -5
Looking pretty good there Dierk! All the added details are certainly going to pay off in the end! Welcome to the party Todd. As you know I like to add the 'occasional' AM goody, but with this kit you really have to, as it is somewhat basic. |
|
|
|
Post by tonylee on Apr 18, 2018 18:55:08 GMT -5
From what I hear Academy here recently are doing a better job. Tony lee |
|
|
|
Post by mustang1989 on Apr 18, 2018 19:13:58 GMT -5
Great progress so far dierk!
|
|
|
|
Post by dierk on Apr 19, 2018 4:03:22 GMT -5
From what I hear Academy here recently are doing a better job. Tony lee Like going from 'F' to 'D-' is doing a better job Seriously though, the kit isn't really that bad, but it pales into insignificance compared to the AFV Club and some of the DML T-34s. Anyhoo, here's yesterday's stuff. Replaced the kit bow MG with a barrel from Panzerart, and added a handle from the DEF set to the driver's hatch. Sanded off the cast texture from the hatch and the visor covers.  Added the PE saw and bracket from the DEF set, as the kit part looked like a throw-back to the 90's, and filled the cavernous attachment points for the headlight and horn with a mix of baby powder and CA  Stangely, the DEF set provides a PE bracket for the headlight, but not the horn The horn is another one of those parts best consigned to the spares bin, so I'm replacing it with a metal item. The bracket's made using a set of hole-punch pliers and a piece of scrap brass sheet    I'll be replacing the headlight with a DML item from the spares box. Again, the kit part is a bit chunky. Thankfully the DEF set provied a clear lens, as the kit part is just a disk of green plastic. |
|
|
|
Post by Leon on Apr 19, 2018 4:08:12 GMT -5
MG and handle are a nice improvement Dierk! |
|
|
|
Post by dierk on Apr 19, 2018 4:16:52 GMT -5
Cheers Leon - although you should've waited till I'd finished editing the post with the additional picures. Still, there are worst times for being premature |
|
|
|
Post by Leon on Apr 19, 2018 4:47:26 GMT -5
I sure jumped the gun this time!  The additional PE work look great. |
|
|
|
Post by 406 Silverado on Apr 19, 2018 8:33:31 GMT -5
Some nice details being added, looks great. Nothing beats a T-34 to have fun with....quick build and fun to paint.
|
|
|
|
Post by dierk on Apr 21, 2018 3:24:00 GMT -5
Some nice details being added, looks great. Nothing beats a T-34 to have fun with....quick build and fun to paint. Cheers Rob, and welcome! Strange thing is, although I build almost exclusively soviet armour, I haven't done very many T-34s (one, to be precise ) But I think that might be changing this year. Weather's been too nice these last few days to do much in the way of modelling. I did do some prep work on one of my long-term projects, though. Let's just say the numbers 4,3, and 2 will be making an appearance  |
|


 The additional PE work look great.


