|
|
Post by wbill76 on Jun 25, 2018 21:05:41 GMT -5
Nice build thus far. Looks like a nice kit Thanks! I like the way Meng designed the kit so far. I've built a couple of their other kits and haven't been disappointed. |
|
|
|
Post by wbill76 on Jun 28, 2018 17:27:04 GMT -5
Managed to get the main gun armament done today and completed Step 15. The instructions have this step laid out in sub-steps with arrows guiding you from one to the next and it is important to follow that order to avoid any incidents along the way. Before I could set out on that path though there was one thing I had to do first. The Aber turned aluminum barrel replacement is designed to install right at the attachment points for the gun shield, so the plastic barrel has to be removed in front of that first. I used a razor saw to remove most of it followed by careful work with a #11 blade to trim it back the rest of the way. Light sanding leveled the face and a drill bit and pin vise opened it up to take the support pin on the aluminum barrel. 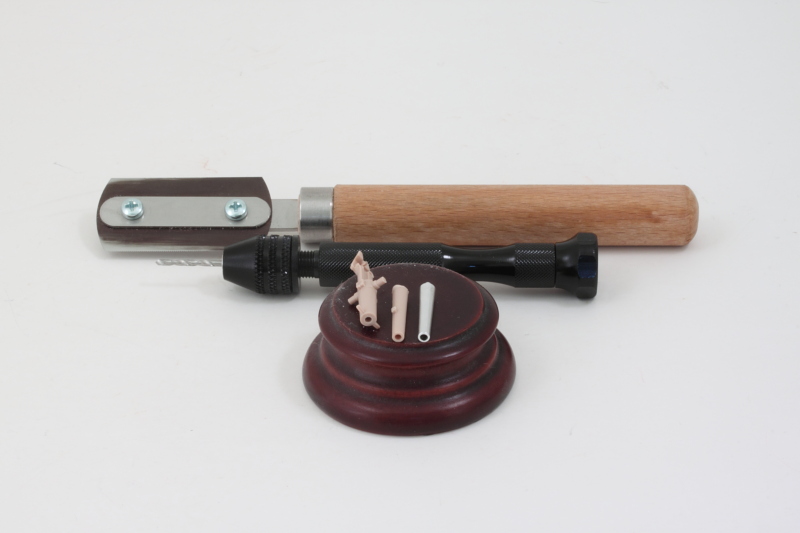 I used CA gel to mount the aluminum barrel and then headed down the first 3 parts of the path to get the gun and breech elements assembled. I waited to add the curved shield, part G22, until after it was all set though in case I needed to make any modifications for it to fit correctly. 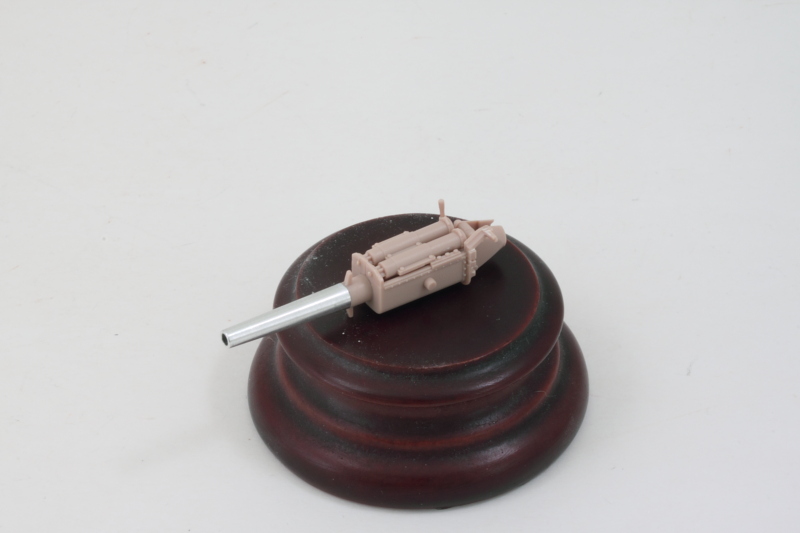 The next steps on the path add the elevation supports and the gunner's seat along with other details that go with them. Careful work with glue and following the instructions means that the gun can fully elevate but still with enough friction to keep it in position even with the added weight of the metal barrel. The curved shield fit pretty tightly around the barrel replacement, I only needed to do some very slight sanding at the join edge to get it all together cleanly. 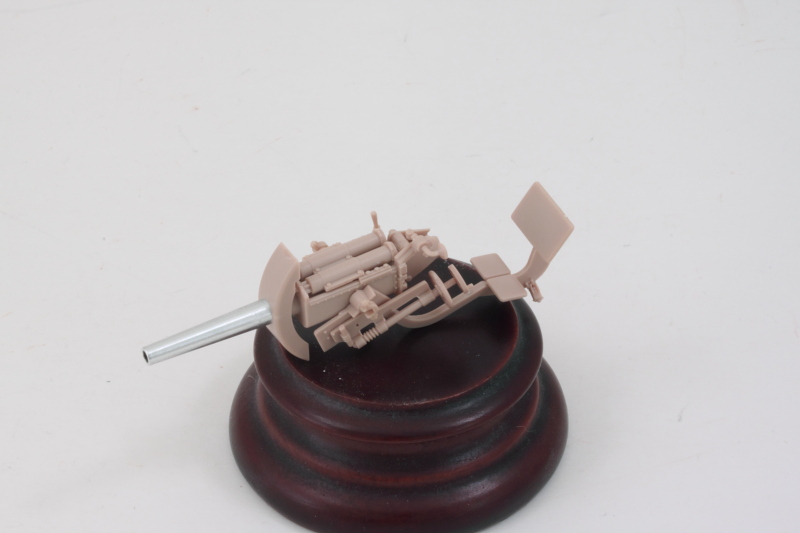 The last few steps on the path add the drum shield for the whole gun and the pedestal mount. This is a little tricky due to the use of a locking c-shaped part that allows the gun to swivel on the mount, but careful work with the glue and tweezers got it to work as designed. It fits a little loosely on top of the pedestal but nothing that should cause a problem. 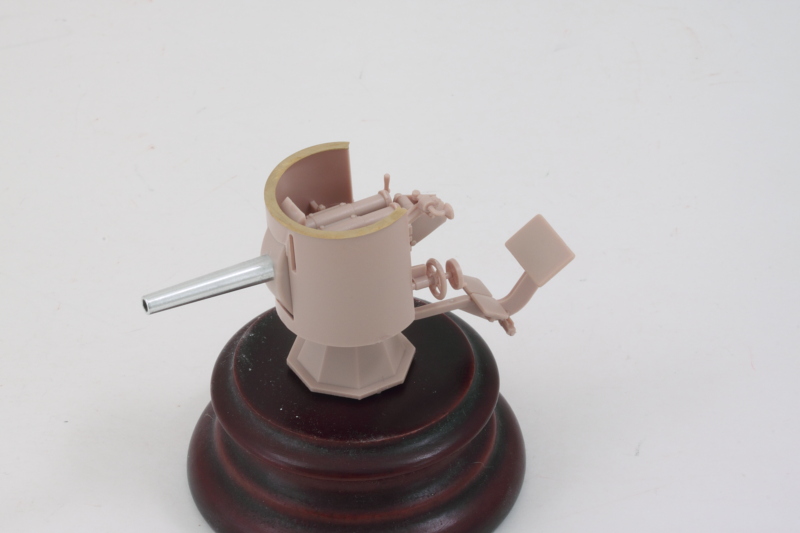 To be sure that everything was playing nice with each other, I did a quick test fit of the pedestal and gun with the fighting compartment floor. The gunner's chair base just clears the floor when the gun rotates, so everything looks good at this point. 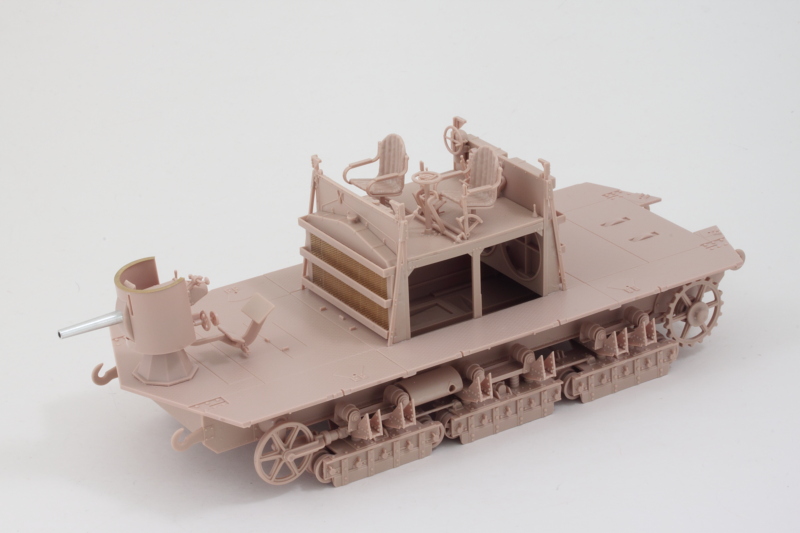 Next up will be working on more of the fighting compartment elements. |
|
|
|
Post by Leon on Jun 28, 2018 18:25:21 GMT -5
Nice work on the modules and gun Bill! Starting to look like a tank now.  |
|
|
|
Post by dierk on Jun 29, 2018 4:19:22 GMT -5
Looking more impressive by the update!
|
|
|
|
Post by wbill76 on Jun 29, 2018 11:03:39 GMT -5
Thanks Leon! Can't have a tank without the gun!  Dierk Dierk, Meng did a great job thinking through all the parts and details on this kit. Parts are designed to go together only one way whenever there's the possibility of mixing things up but without getting super complicated in the way they do it. Doesn't make it completely mistake-proof but does show that they had buildability in mind in their design process, always a good thing!  |
|
|
|
Post by Tobi on Jun 29, 2018 11:53:03 GMT -5
I still try to imagine how it must have been like in there, cramped with men, the heat of 70°C+, the deafening noise, the vibrations, the air full of sweat, oil and powder smoke. If given the choice, you might rather want to get out again and try your luck in the trenches.
|
|
|
|
Post by wbill76 on Jun 29, 2018 12:37:36 GMT -5
I still try to imagine how it must have been like in there, cramped with men, the heat of 70°C+, the deafening noise, the vibrations, the air full of sweat, oil and powder smoke. If given the choice, you might rather want to get out again and try your luck in the trenches. Definitely a case of 'pick your poison'! Didn't much matter if you were a pilot, a soldier in the trenches, or a tanker, they all had their particular dangers and hazards to contend with. |
|
|
|
Post by wbill76 on Jun 29, 2018 17:36:36 GMT -5
Got the rest of the fighting compartment stuff done today courtesy of Steps 16-18 on the instructions. First up were the crew seats for all the MG gunners and the large ammo chest for the main gun. The seats are divided into two types, the lower pair that are for the rear-facing MGs and the four that are for all the other side-mounted MGs. The side-mounted seats are taller and are a little trickier to get together. I found the best way was to add the side supports first, then the top seat, and slide in the middle ladder rack last so that it was tight enough to support it. The kit provides optional ammo boxes to go in the racks under the seats but I kept those for the spares box since I'm not showing the interior. The main gun ammo box builds up around a base that includes detail for the rounds stored inside it but there's no real easy way to show the lid open other than to just leave it off...which may have been the way the real thing worked based on the clasp detail that is present on both sides but no hinges. 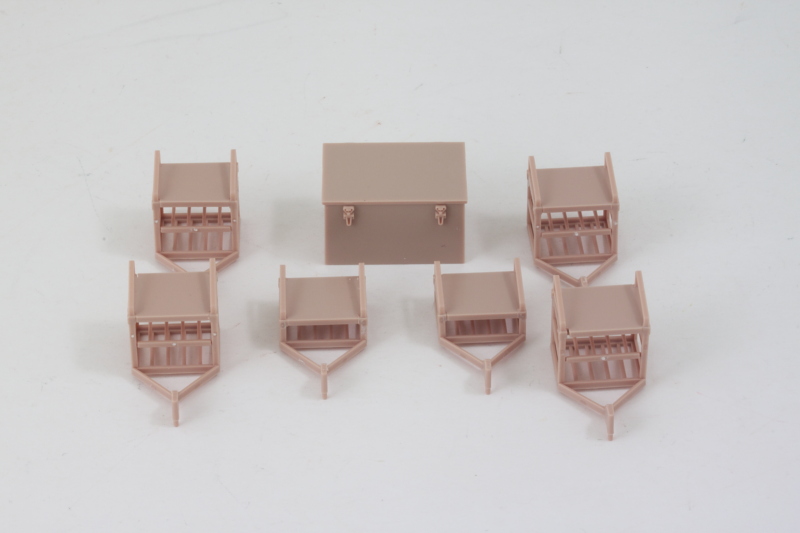 With all the seats built up, step 17 deals with adding them along with other front-end details to the front of the compartment in the form of the angled braces for the nose armor plates and the loader's stool. I used the armored plate (part F2) to help ensure the placement of the braces lined up to avoid problems later on. Ammo box, MG seats, and the 57mm pedestal mount were permanently placed to round things out. 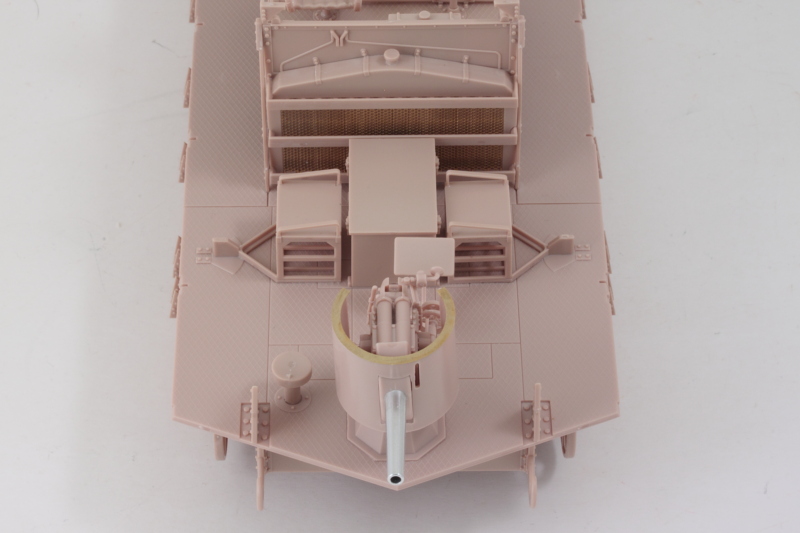 Step 18 does the same thing for the rear compartment and I used the rear plate (part F1) to check its angled braces as well. The rear-facing MG seats have to be carefully placed so that they clear the little half-moon shaped bulges in the floor but still line up straight. I also didn't install the four crew personal weapon rifles as called for, those also will go into the spares bin along with the MG ammo boxes. The sprues that they come on have some additional weapons as well including rifles with full bayonets mounted, so that's a nice bonus. 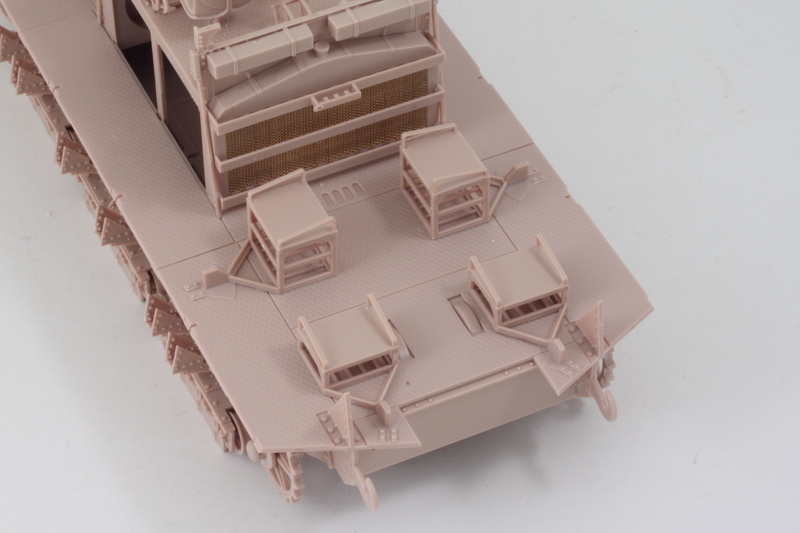 That pretty much covers off the fighting compartment details with the exception of the MGs and their mounts which will be the next effort. 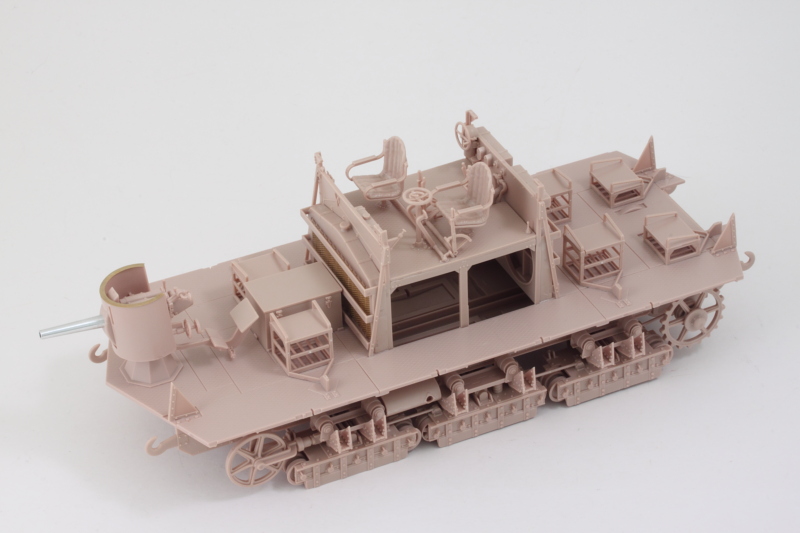 |
|
|
|
Post by Leon on Jun 29, 2018 18:09:21 GMT -5
WOW...Nice update Bill! That's a lot crew just for the MGs.  |
|
|
|
Post by wbill76 on Jun 29, 2018 18:39:25 GMT -5
WOW...Nice update Bill! That's a lot crew just for the MGs.  Thanks Leon! These monsters had a crew of 16 guys. 2 each for the six MG stations, 2 for the main gun, and the commander and driver! |
|
|
|
Post by wbill76 on Jul 1, 2018 20:09:09 GMT -5
Today's efforts were all about the firepower on this beast! There are 6 water-cooled MGs that make up the secondary armament and Step 19 deals with their assembly. It's important to note that between the 6 total there are 4 that build up as type "A" and the other two are designated "B" and "C" since they use similar looking but slightly different parts. The biggest difference is that B and C are the rear-mounted pair and have different support posts but they also have different elevation mechanisms that are slightly shorter, so it pays to look carefully at the sprues and instructions throughout this process to avoid any problems. Since the Aber barrel set includes replacements for the MGs, I needed to do some prep-work with them first before they could be used. The brass cooling jackets have a pre-drilled hole designed to take a short length of brass rod to create the mount points in the kit parts but the holes are slightly too small for the rod to fit easily into. I used a round needle file to clean out the holes on either side and then used a jeweler's hammer to literally hammer the rod into place to create the support pins for each one. Definitely no glue required to secure them in place! The length of rod included in the set is longer than needed but not a whole lot longer, so I had to be careful when and how I cut the pins to ensure I had enough to create all 6. The MG barrels and flash suppressors are separate little jewels with hollow muzzles and attached cleanly with just a touch of CA. 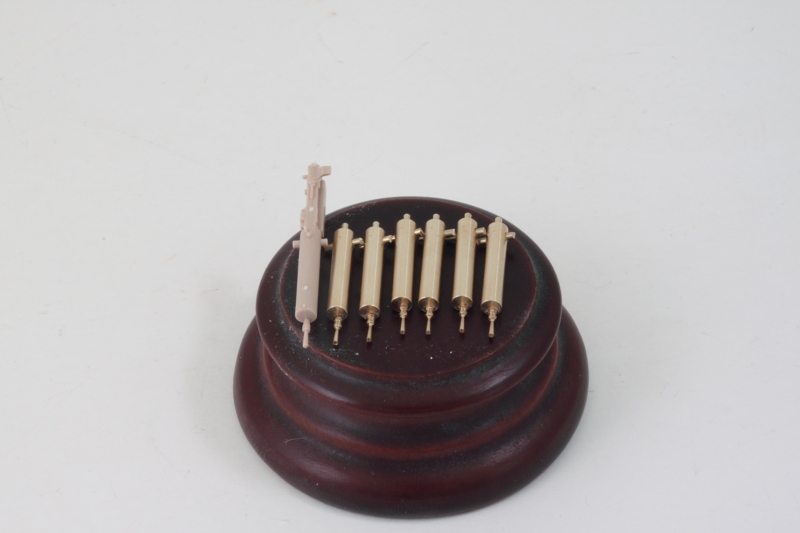 Getting those beautiful brass parts in place with the other mount components does take a little more work due to their added weight. Rather than attach the rest of the MG gun body to the barrel, I opted to trap the barrel in the swivel mount separately and assembled the rest of the gun body including the elevation support brace separate. The plastic parts are designed to work together to allow the guns to swivel in position but not elevate, so this approach allowed me to keep that function intact. I drilled out the mount hole for the brass barrel with a pin vise and then used CA gel to combine the two together along with the mount support post that will attach to the hull plate directly later on.  Once I had figured out how to get all the parts together and to play nice with each other, the end result was a single MG complete with its support post as a full unit. Since I'm not displaying the interior, I didn't bother with mounting the ammo belt, but it is worth noting that the length of the brass mounting pin requires a hole deep enough past the belt feed slot if the pin isn't trimmed shorter. 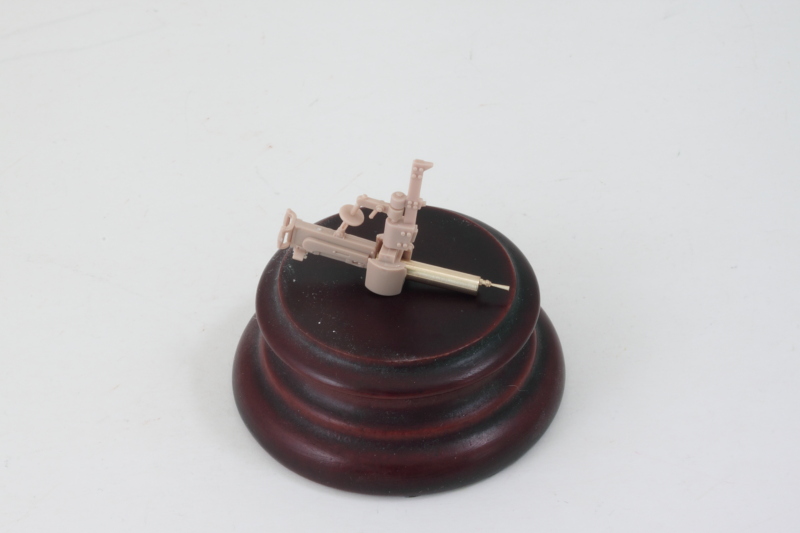 Rinse and repeat and before you know it, all 6 were done and ready to go for painting. I gave it my best shot to cut off the barrel detail from the kit parts and add it to the brass, but on my first attempt I managed to lose it to the carpet monster not 2 minutes after successfully gluing it in position. It's a good thing that happened on the first try and not the sixth I guess! 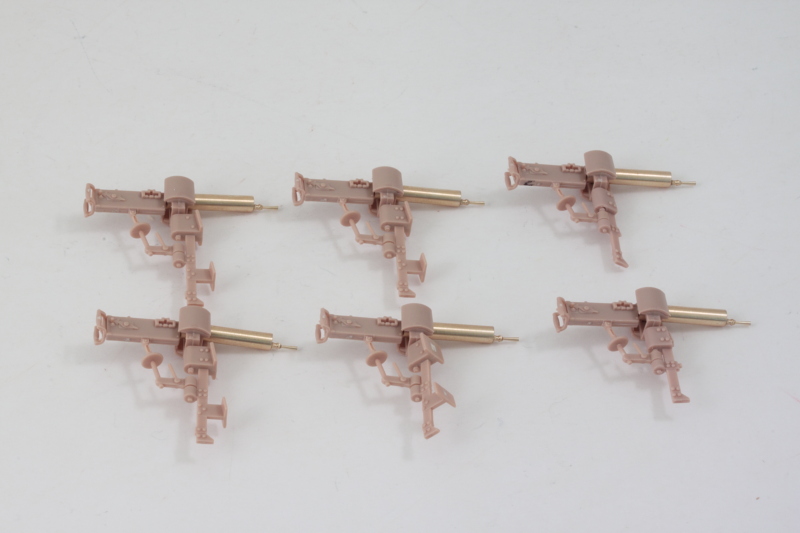 Next up will be doing some small work on the hull plates before breaking out the airbrush and doing some paint work on the lower hull and tracks. |
|
|
|
Post by Leon on Jul 1, 2018 20:32:05 GMT -5
Those MGs look great Bill!  |
|
|
|
Post by wbill76 on Jul 2, 2018 10:14:32 GMT -5
Thanks Leon! Aber impressed me with the detail on those tiny muzzle/flash suppressor parts. They were provided as separate parts with a small circular base part that is clipped off easily before installation. Makes a huge difference IMHO when compared to the kit parts which have solid muzzles.
|
|
adt70hk
Forum Moderator      November '24 Showcased Model Awarded
Member since: November 2015
Currently attempting to build something decent!!! ;)
Posts: 2,849 
MSC Staff
|
Post by adt70hk on Jul 2, 2018 16:24:51 GMT -5
Looking good Bill - as always!!
|
|
reserve
Senior Member
   
Member since: July 2012
Si vis pacem para bellum
Posts: 2,373
Jul 11, 2012 9:11:45 GMT -5
Jul 11, 2012 9:11:45 GMT -5
|
Post by reserve on Jul 2, 2018 19:53:47 GMT -5
Well at least you don't have to paint tires on the roadwheels with this one. Seems like you're staying out of the heat no?
This looks like a top shelf molding. As it's being stuck together by a top shelf builder I have no doubt regarding its outcome, nice stuff brother
Regards,
Mark
|
|
|
|
Post by dierk on Jul 3, 2018 1:40:00 GMT -5
Some great work, on a quality kit and AM, Bill. Unlike Mark, though, I won't call it 'top shelf' - has a somewhat different meaning on this side of the pond  However nice it may be, I don't find it arousing, if you know what I mean  |
|
reserve
Senior Member
   
Member since: July 2012
Si vis pacem para bellum
Posts: 2,373
Jul 11, 2012 9:11:45 GMT -5
Jul 11, 2012 9:11:45 GMT -5
|
Post by reserve on Jul 3, 2018 8:11:03 GMT -5
Tut tut you guys mind in the gutter again?
|
|
|
|
Post by dierk on Jul 3, 2018 8:18:04 GMT -5
Tut tut you guys mind in the gutter again? A dirty mind is a joy forever  |
|
|
|
Post by 406 Silverado on Jul 3, 2018 8:39:39 GMT -5
The metal gun barrels make a huge difference. Looking good buddy. Can't wait for the fun part....the painting.
|
|
|
|
Post by wbill76 on Jul 3, 2018 10:55:49 GMT -5
adt, thanks as always for stopping by and for the comments!  Mark Mark, rubber rims would've been an added torture on this one for sure, glad to do without it. Vast majority of the suspension is hidden away by the side armor plates but Meng does provide the option of showing off some of it via access panels if you're so inclined. As far as the heat goes, I do live in west Texas and it's July...so 100+ temps is the norm for this time of year. Refrigerated AC is a must-have.  Dierk Dierk, got to love the variety of linguistic interpretations the world over!  But then I would expect nothing less from a guy who spends most of his time working on Russian stuff.    Rob Rob, the Aber set was well worth the price of admission. I was surprised to see that they are pretty much the only ones who produced anything for this kit, I guess it doesn't have quite the same broad appeal as the British Mark I-IV family perhaps? Paint is definitely going to be fun on this one, have to do it in stages due to the way the suspension, tracks, and hull plates come together but that's life on an armor build. 
|
|
johnt
Full Member
   Feb 2012 MoM and 2012 Model of the Year Winner
Member since: November 2011
Posts: 1,174
Nov 15, 2011 5:38:32 GMT -5
Nov 15, 2011 5:38:32 GMT -5
|
Post by johnt on Jul 3, 2018 12:33:24 GMT -5
It still amazes me when I see subjects like this in a detailed modern kit form. Nice work mate!
|
|
|
|
Post by wbill76 on Jul 3, 2018 15:24:53 GMT -5
It still amazes me when I see subjects like this in a detailed modern kit form. Nice work mate! Thanks John! You're right, if it weren't for the 100-year anniversary, I doubt anyone would have gone through the effort to produce modern kits of the WW1 stuff. |
|
|
|
Post by wbill76 on Jul 4, 2018 16:36:06 GMT -5
In honor of the 4th of July holiday, I spent some time with the airbrush since I've reached the point where I can't do anything more until the hull sides are attached and the tracks installed. I used Model Master enamel Italian Dark Brown as a primer/shading coat mostly because it covers well and also is dark enough to ensure I can easily spot any bare plastic areas before committing to the overall paint colors as the case may be. There are a lot of nooks and crannies in the suspension and hull undersides, so this comes in particularly handy on this vehicle. This is going to get an overall dark green coat as called out in the color plate illustrations and much of the suspension gets hidden away by the side armor plates, but there's still stuff visible from various angles, so always better to be safe than sorry when it's too late to do much about it! 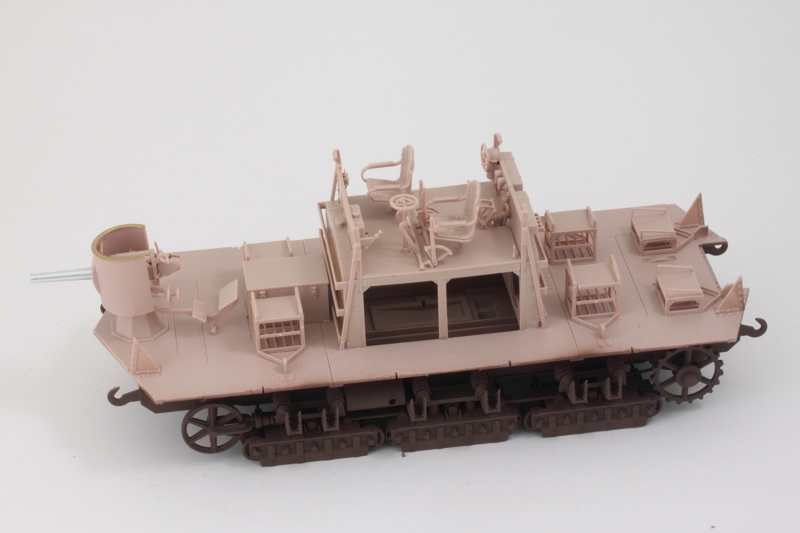 With that same thought in mind, I also airbrushed the inside portions of the side plates that overhang the suspension. I used blue painter's tape to temporarily place the access hatches so they would get coverage but without compromising their contact surfaces for gluing later on. The workable track runs also got some attention in the form of an airbrushed coat of Model Master enamel Burnt Umber as their base color. There's still a good bit more to do with them before they are mounted, but the process has started at least. 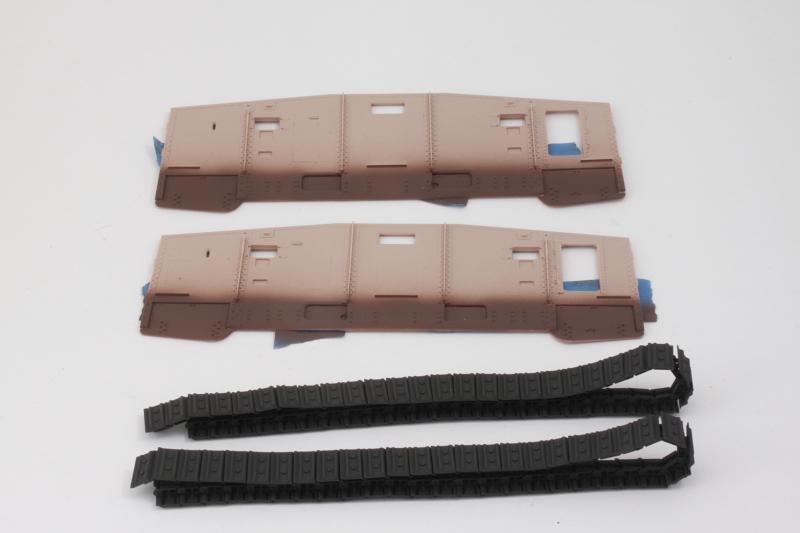 Now I'm off to do the usual celebration for the holiday in the form of grilling meat for the family unit.  |
|
|
|
Post by Leon on Jul 4, 2018 16:55:21 GMT -5
Nice to see a little paint going on Bill!  Happy 4th,enjoy.  |
|
|
|
Post by Tobi on Jul 5, 2018 12:25:20 GMT -5
Already decided which paint job she will receive?
|
|
adt70hk
Forum Moderator      November '24 Showcased Model Awarded
Member since: November 2015
Currently attempting to build something decent!!! ;)
Posts: 2,849 
MSC Staff
|
Post by adt70hk on Jul 6, 2018 1:12:39 GMT -5
Looking good Bill.
ATb
Andrew
|
|
flmlm
Full Member
  
Member since: March 2016
Crack open that kit and smell the build ????
Posts: 170 
|
Post by flmlm on Jul 6, 2018 7:11:32 GMT -5
Stunning workmanship. Thanks for all the hints. I as well have one of these in my stash for the future.
Regards
Mike
|
|
|
|
Post by wbill76 on Jul 6, 2018 13:30:56 GMT -5
Thanks Leon and Andrew! Already decided which paint job she will receive? I'm going with the three-tone scheme that's laid out on the color plates in the instructions and on the box art. The kit only provides markings for a single vehicle so if I wanted to do something else (like a post-war Freikorps for example), I'd have to source different markings to support that. Stunning workmanship. Thanks for all the hints. I as well have one of these in my stash for the future. Regards Mike Thanks Mike, my pleasure! It's got a lot of options/potential depending on which way you want to go with it, always a good thing IMHO.  |
|
|
|
Post by wbill76 on Jul 6, 2018 17:51:58 GMT -5
More progress in the painting and detailing department. First up, a change from brown to green! I airbrushed a coat of Model Master enamel Italian Olive Green over the lower hull plates and the suspension to provide the required color as called out in the three-tone color plate scheme that goes with the markings. 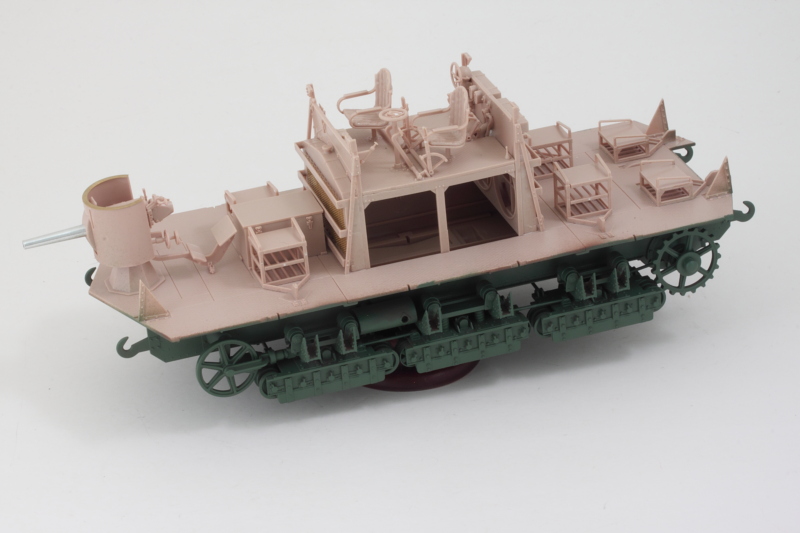 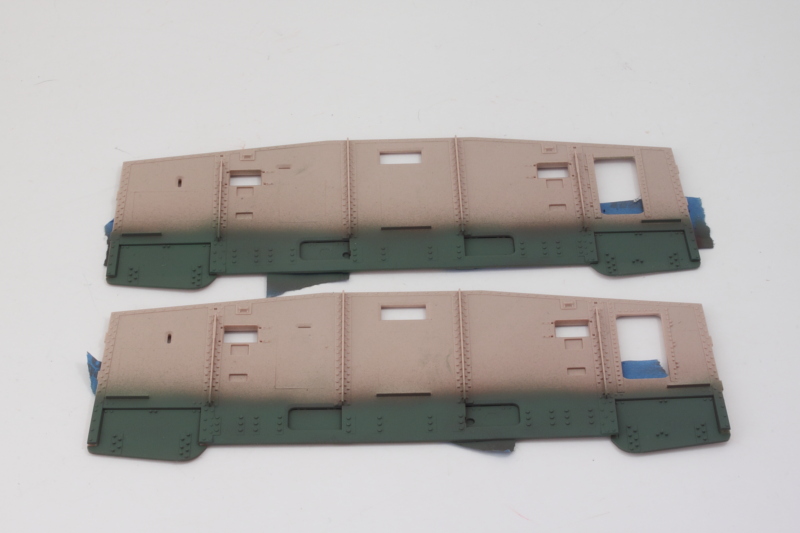 I also spent some time on the tracks. I applied a heavy dry-brushing of Model Master enamel Steel to create the metallic tones and then followed that with a wash of MM enamel Raw Umber. The process creates a nice layered look/foundation for pigment weathering later on once they are mounted. The fact that the runs are workable helps a lot with this of course. 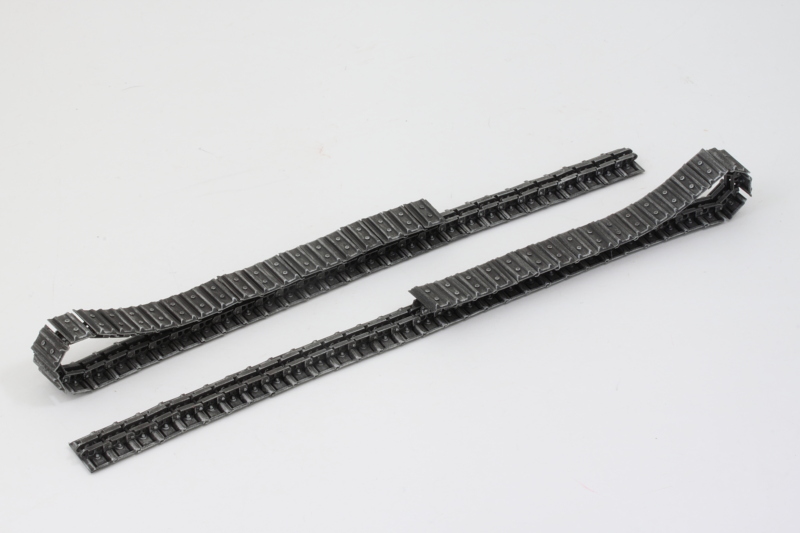 Next up will be getting the tracks in place along with the hull box. |
|
reserve
Senior Member
   
Member since: July 2012
Si vis pacem para bellum
Posts: 2,373
Jul 11, 2012 9:11:45 GMT -5
Jul 11, 2012 9:11:45 GMT -5
|
Post by reserve on Jul 7, 2018 14:52:54 GMT -5
Nice stuff Bill
It's my guess the hatches are not numerous or large on this which is too bad; that interior could be developed quite well if it could be seen post assembly
Regards,
Mark
|
|