|
|
Post by Leon on Jul 13, 2018 19:33:16 GMT -5
Nice work on the camo Bill! Looks really good.  |
|
|
|
Post by wbill76 on Jul 14, 2018 10:05:02 GMT -5
Nice work on the camo Bill! Looks really good.  Thanks Leon! My trigger-finger got quite the work-out, it's still recovering a day later.  |
|
|
|
Post by wbill76 on Jul 14, 2018 17:32:10 GMT -5
Following on from yesterday's marathon airbrush session, I dry-brushed some of the Panzer Dunkelgelb/Light Gray mix where needed to remove the overspray in some of the tighter spots where the patterns intersected. Once that was done, one more round with the airbrush involved applying a mist coat of highly thinned Panzer Dunkelgelb/Light Gray (roughly 90% thinner-to-paint) over the entire model to tie the scheme together. I masked off the suspension and tracks during this stage with blue painter's tape as a quick-and-dirty approach to protecting them during handling. 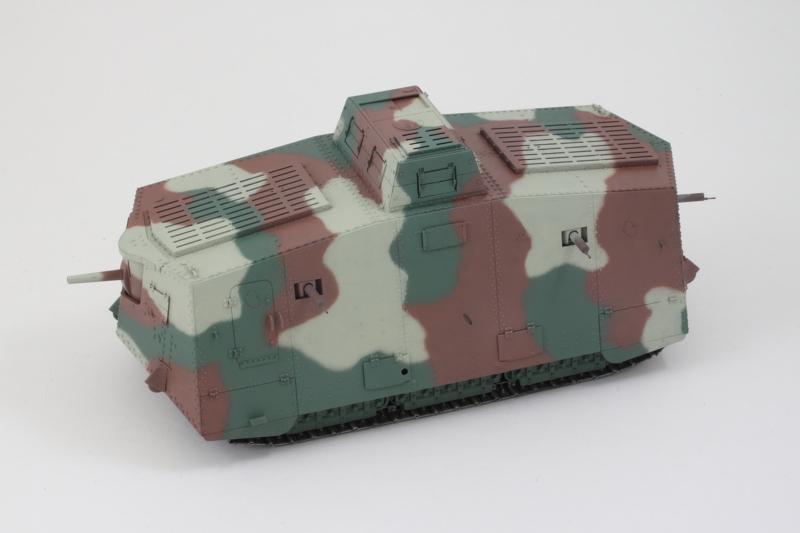 Next order of business was to pick out the 6 machine guns and add the exhaust pipes to either side of the hull. For the machine guns, I used Model Master Non-buffing Metalizer Gunmetal and a detail brush to carefully pick out the cooling barrels. For the exhaust pipes, I applied a basecoat of the same metalizer Gunmetal and then followed it with a heavy dry-brushing of MM enamel Leather. The pipes were installed and their separate clamps painted to match the camo pattern with the hull by hand. 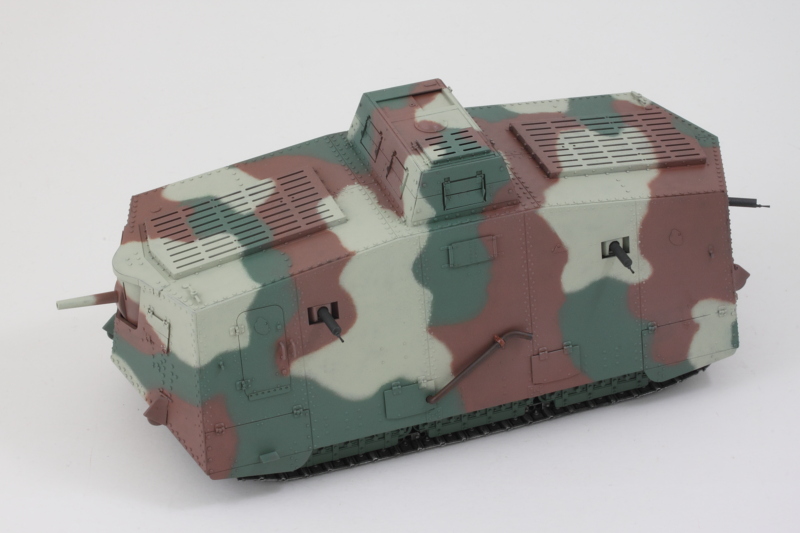 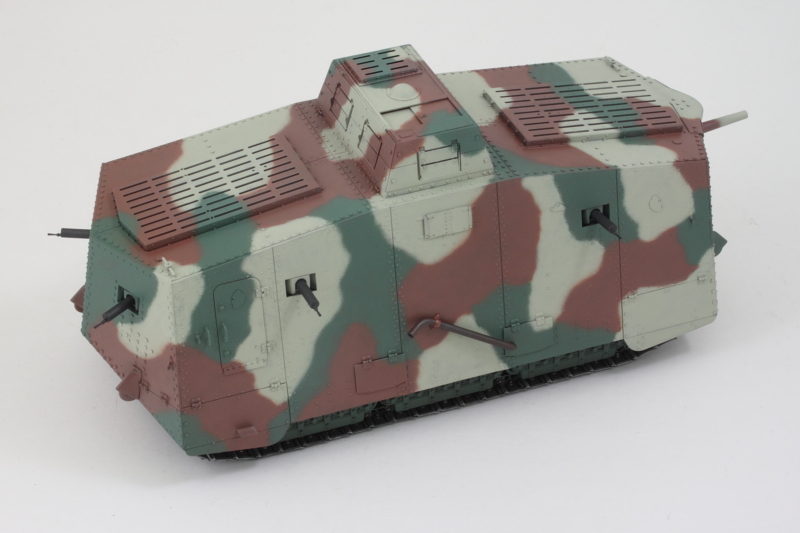 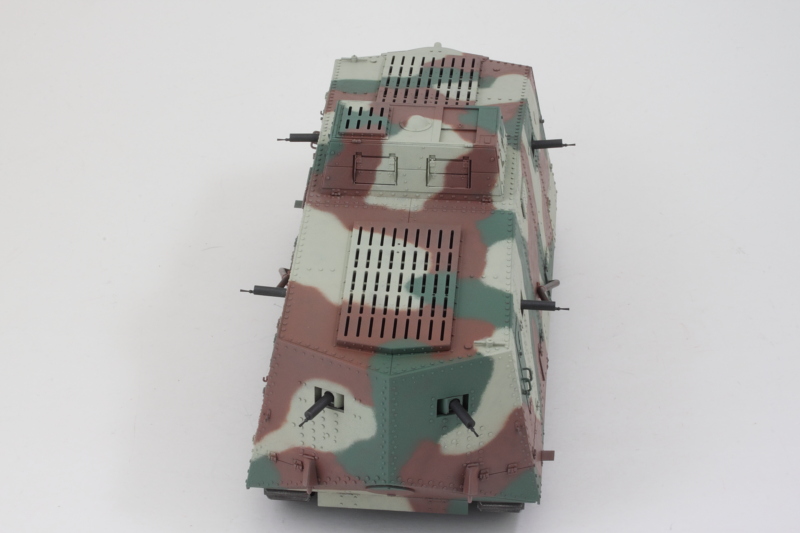 Next up will be working on the markings! |
|
|
|
Post by Leon on Jul 14, 2018 18:15:41 GMT -5
Getting close now Bill!  |
|
|
|
Post by Tobi on Jul 15, 2018 3:34:27 GMT -5
Nice job on the camo!
The sand yellow is a little too light perhaps, as the Reichswehr color was yellow ochre, but nothing that some filters couldn't solve.
|
|
|
|
Post by Tojo72 on Jul 15, 2018 8:20:02 GMT -5
Looks good,really looking forward to the weathering
|
|
|
|
Post by wbill76 on Jul 15, 2018 8:59:29 GMT -5
Thanks Leon and Anthony! Nice job on the camo! The sand yellow is a little too light perhaps, as the Reichswehr color was yellow ochre, but nothing that some filters couldn't solve. I agree Tobi, my intention was to add some Deep Yellow as part of the dot filter/weathering process instead of trying to mix my own shade. I figured that way it would be easier to tinker/correct if needed vs. being fully committed in the applied color as the weathering process typically darkens the finish as a general rule. We'll see!  |
|
|
|
Post by wbill76 on Jul 16, 2018 19:45:42 GMT -5
I spent a good bit of time over the weekend working on the markings. I applied an airbrushed coat of Future over the paintwork to protect it and provide a uniform surface for the markings as a first step. The kit decals are very nice with virtually no carrier film around the edges, especially on the iron crosses. I used Walther's Solvaset to treat the decals once they were placed so they would conform over the raised details. This was particularly helpful at the nose and rear since they go right over the angled plates and rivet lines. For the large roof markings, I applied the Solvasest and let the decals sink into the grate depressions then used a sharp #11 blade point to gently slice them in the middle followed by more Solvaset so they could then conform down into the openings. I also used wooden toothpicks to gently shape the curves inside the grates where needed. It took some patience and multiple applications but it paid off with the end result. After the decals had thoroughly dried and conformed, I airbrushed the 2nd coat of Future to seal them in. 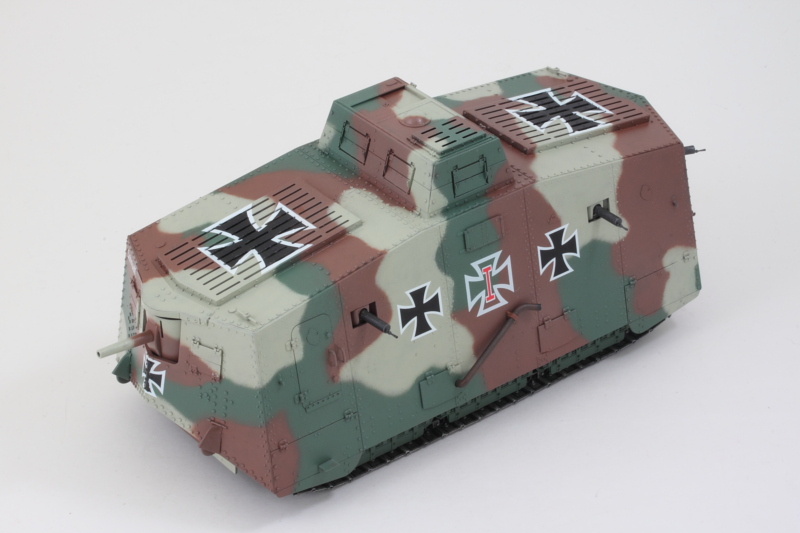 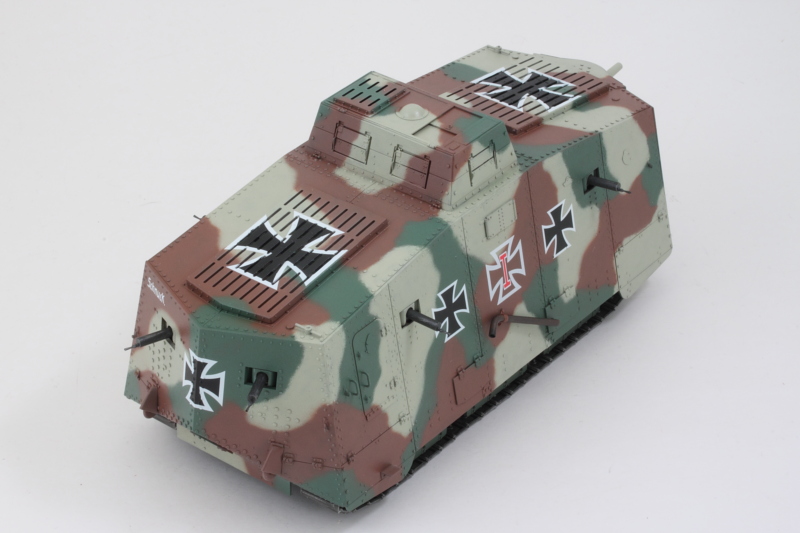 Now it's on to the weathering process! |
|
|
|
Post by Leon on Jul 17, 2018 4:51:50 GMT -5
Markings look great Bill!
|
|
|
|
Post by Tojo72 on Jul 17, 2018 10:48:55 GMT -5
They did go down nice
|
|
|
|
Post by Tobi on Jul 17, 2018 13:35:59 GMT -5
Wow, the decals over the vents look mighty sharp! Never expected them to come out like that.
I think I would've rather relied on painting the iron crosses by airbrush.
|
|
|
|
Post by wbill76 on Jul 17, 2018 16:34:23 GMT -5
Thanks Leon and Anthony! Wow, the decals over the vents look mighty sharp! Never expected them to come out like that. I think I would've rather relied on painting the iron crosses by airbrush. I gave it some serious thought in terms of using stencils (would have had to create my own, not a small task given the size of the markings in question)...but the decals were precisely sized with no carrier film border to worry about, so I gave them a shot. I've used Meng decals before (they are printed by Cartograf) on other kits and they've always responded well to the Solvaset treatment, so that helped tip my decision as well. In the end, it would've probably taken about the same amount of time/effort to do it either way. |
|
reserve
Senior Member
   
Member since: July 2012
Si vis pacem para bellum
Posts: 2,373
Jul 11, 2012 9:11:45 GMT -5
Jul 11, 2012 9:11:45 GMT -5
|
Post by reserve on Jul 18, 2018 19:05:35 GMT -5
The box is looking good brother
Bet those things were tippy on uneven ground
Regards,
Mark
|
|
|
|
Post by dierk on Jul 19, 2018 4:17:42 GMT -5
That's looking really boss, as the used to say in Liverpool! Bet those things were tippy on uneven ground Regards, Mark From what I've read they weren't just tippy-over, but pretty useless off-road. |
|
|
|
Post by wbill76 on Jul 19, 2018 12:22:57 GMT -5
Thanks Mark and Dierk! That's looking really boss, as the used to say in Liverpool! Bet those things were tippy on uneven ground Regards, Mark From what I've read they weren't just tippy-over, but pretty useless off-road. It wasn't exactly a speed demon with a top speed of around 5 km/h, so I doubt it was going to be taking any sharp curves or doing a Tokyo drift!  They didn't have very good trench-crossing capability compared to the British Mk IVs for example, which is ironic when you consider that the Germans had captured many of them and even used them in their own units along with the few A7Vs that were produced, so it's not like they didn't have good working examples to use in their own design process. So in the end what they had was a big, slow, armored box with lots of MGs and a decent gun for blowing holes in entanglements and such and that was about it. |
|
reserve
Senior Member
   
Member since: July 2012
Si vis pacem para bellum
Posts: 2,373
Jul 11, 2012 9:11:45 GMT -5
Jul 11, 2012 9:11:45 GMT -5
|
Post by reserve on Jul 19, 2018 18:31:20 GMT -5
Well I guess there's a learning curve to most everything even for the Krauts
Regards,
Mark
|
|
|
|
Post by wbill76 on Jul 20, 2018 9:54:41 GMT -5
Well I guess there's a learning curve to most everything even for the Krauts Regards, Mark They weren't alone in that respect, WWI and the years immediately afterward produced some 'interesting' concept designs as everyone basically tried whatever popped into their engineer's minds!  |
|
|
|
Post by Tobi on Jul 20, 2018 10:20:56 GMT -5
On paper the A7V was superior to every Entente design of the period. No other tank was as heavily armed, as good armored or had equal speed values considering the weight.
Protection of the tracks was a main focus as they were found the most vulnerable part of British Marks. This led to a bad self cleaning capability of the running gear in muddy terrain and thus track breakdowns. A main reason for disabled A7V's, together with overheated engines. The fact that not a single of the twenty built examples was identical to it's predecessor is showing the half-baked experimental characteristic of the design. A shortcoming of raw materials also had its fair share in the lack of success.
|
|
adt70hk
Forum Moderator      November '24 Showcased Model Awarded
Member since: November 2015
Currently attempting to build something decent!!! ;)
Posts: 2,849 
MSC Staff
|
Post by adt70hk on Jul 21, 2018 3:12:34 GMT -5
Looking good Bill, as always. They actually had a replica 'running' at Tankfest a few weeks ago. I say 'running' because I'm pretty sure it never moved throughout the WW1 reenactment it took part in, and was convered with a tarpaulin for the rest of the day. Perhaps it was suffering the same reliability issues of its forebares... ATB Andrew Ps apparently is does normally work. tank100.com/tanks/a7v-galery/ |
|
|
|
Post by wbill76 on Jul 21, 2018 19:12:08 GMT -5
Andrew, I saw a video on Facebook that showed it trundling, slowly, around the track. Was very interesting to compare it to the other vehicles also included in the show!
|
|
|
|
Post by wbill76 on Jul 21, 2018 19:14:10 GMT -5
One of the challenges in weathering this particular vehicle is that there's a lot of surface area to work with! I had a couple of objectives in mind with the weathering process, to dirty it up but also color-shift the lightest of the three-tone colors more to a yellow-ochre color. As a first step, I applied an overall wash of thinned MM enamel Raw Umber to the whole vehicle. After that, I applied a dot-filter process using MM enamel Flat White, Panzer Dunkelgelb, and Deep Yellow in varying amounts with the Deep Yellow added only to the light areas. This process involves using a square blender brush lightly dampened with thinner to blend and draw the dots together, which means it's both time-consuming and fume-heavy, so I worked in stages using the breather mask over a couple of days to get all the different surfaces done. 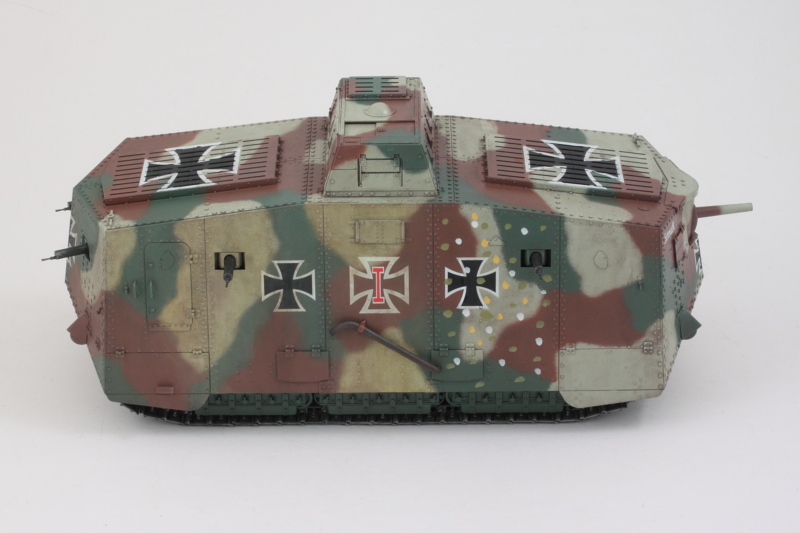 After that was complete, I realized that I'd achieved most of what I was after but it didn't have quite the consistency I was looking for overall, so I used the same square-tip brush to lightly dry-brush some of the Deep Yellow in the panels. This was followed by another dry-brush round of the Panzer Dunkelgelb in spots to tone it back down and avoid it being too bright in the yellow department. 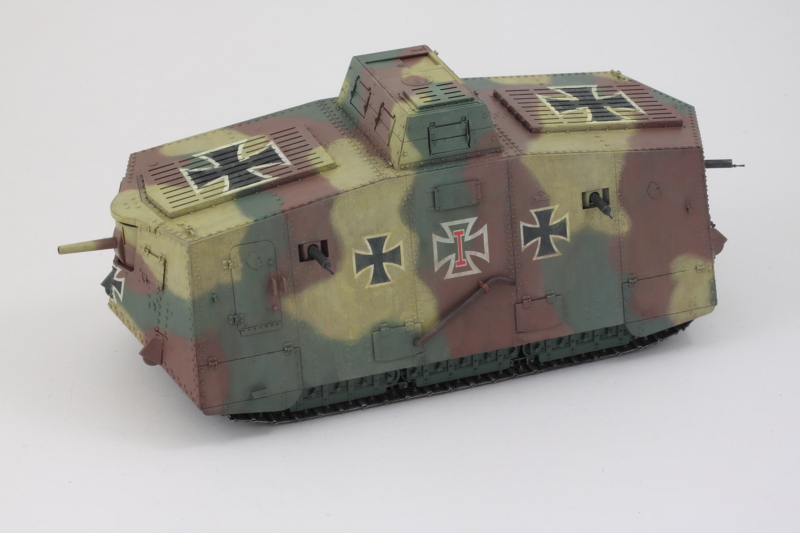 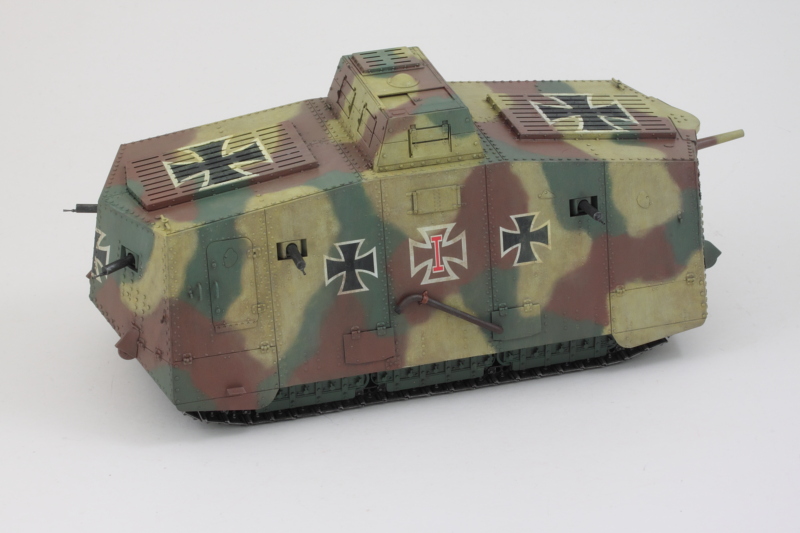 That approach does mean that I'll need to apply another sealing coat before I tackle the last step, a pin wash to pop out the detail, but it's much closer to being done that it was previously. |
|
|
|
Post by Leon on Jul 21, 2018 19:45:18 GMT -5
Nice work on the weathering Bill!
|
|
|
|
Post by dierk on Jul 22, 2018 4:43:28 GMT -5
Coming along nicely, Bill!
|
|
|
|
Post by wbill76 on Jul 22, 2018 9:27:45 GMT -5
Thanks Leon and Dierk, getting close to the finish line.  |
|
|
|
Post by wbill76 on Jul 26, 2018 16:39:30 GMT -5
The next step in the weathering process proved to be even more time-intensive than I expected it would be. Normally, the application of a pin-wash is a single day exercise. This vehicle, however, is not normal in any respect when it comes to all the raised detail and rivets that are present. I mixed my own wash using Model Master enamel Burnt Umber with about 90% thinner. I applied the wash with a pointed 10/0 brush to allow for more control and targeted dosing in the various places.  This process involves a lot of thinner fumes between the wash itself and the next step that tightens it up and removed the excess. That means a lot of time with the breather mask on! Using the same 10/0 brush and clean thinner, I combined an Optivisor with the breather mask so I could see up close what was happening with all the detail. I had to set a timer so I could remember to take frequent breaks and spread out the work over several days as well. 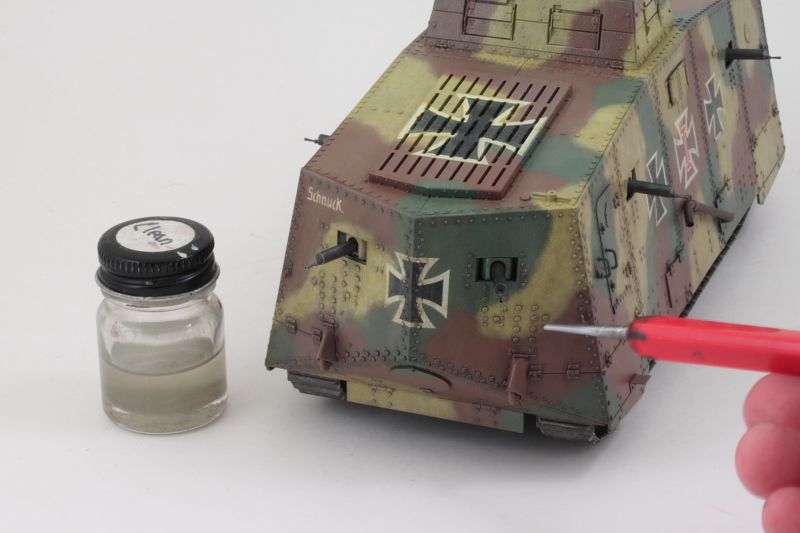 You don't realize just how many rivets there are until you do a process like this (or try to replace them with something else I suppose!). Just one long side of the hull took 2.5 hours to go through the process. In the end, it took a total of about 10 hours to do it all. 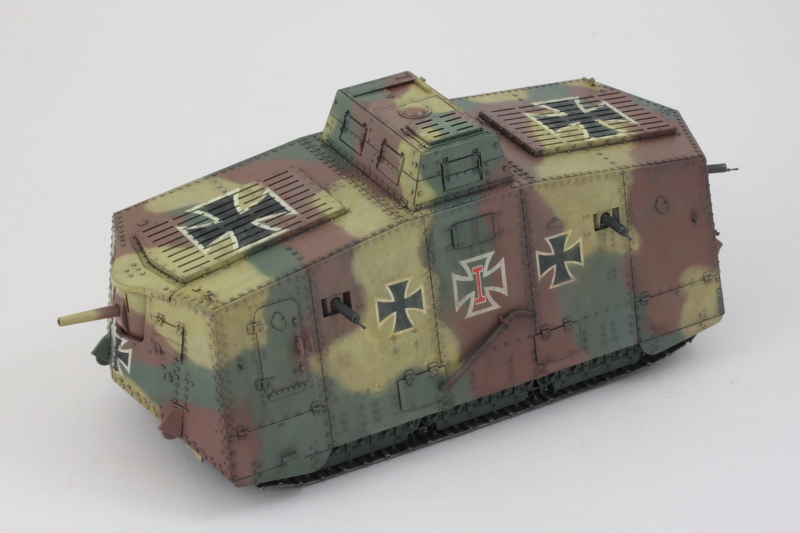 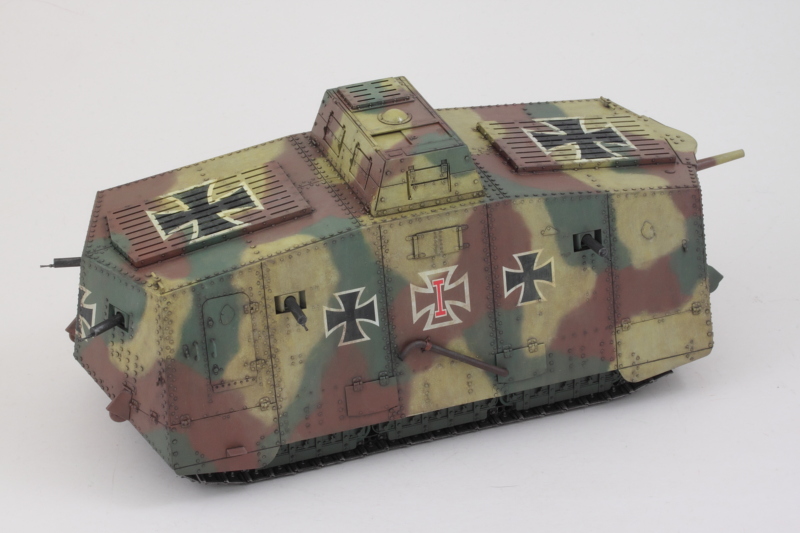 I'll let that sit for a bit so I can look it over with an unbiased eye to determine if there are any further adjustments/changes I want to make. Right now all I can see are rivets, rivets, and more rivets!  |
|
|
|
Post by Leon on Jul 26, 2018 17:10:29 GMT -5
Nice work on the wash Bill!  Not sure if i could sit there for period of time with a mask on.  |
|
|
|
Post by wbill76 on Jul 26, 2018 17:24:42 GMT -5
Nice work on the wash Bill!  Not sure if i could sit there for period of time with a mask on.  My limit is about 2 hours at a single stretch...any more than that would produce neck and back issues from the torture combination of hunched over and extra weight!  |
|
|
|
Post by Leon on Jul 26, 2018 19:29:14 GMT -5
I hear you on the neck and back issues! I get the same way.  |
|
reserve
Senior Member
   
Member since: July 2012
Si vis pacem para bellum
Posts: 2,373
Jul 11, 2012 9:11:45 GMT -5
Jul 11, 2012 9:11:45 GMT -5
|
Post by reserve on Jul 27, 2018 1:48:11 GMT -5
But it's a good pain, right?
Fine results on the box bother, worth the visit to the chiropractor
Regards,
Mark
|
|
|
|
Post by Tojo72 on Jul 27, 2018 6:25:00 GMT -5
Nice job of dirtying her up
|
|