mrversatile
Full Member

Member since: January 2013
Posts: 627
Jan 20, 2013 10:52:24 GMT -5
Jan 20, 2013 10:52:24 GMT -5
|
Post by mrversatile on Jun 25, 2018 21:05:46 GMT -5
Hi folks, I will be taking a well deserved break from my posted ship build to reset the eyes before delving back into the micro surgery known as 1/350 photo etch. This is the Revell 1970 Dodge Charger with aftermarket dog dish wheels and AMT pre printed "Good Year" polyglas tires. As most know that follow my car builds, I only build factory stock examples and this will be no different. I saw a real photo of Dodge EB3 blue Charger with vinyl top and white quarter panel striping, and just had to build it. I usually say that certain cars need to be certain colors and this one really catches the eye. I also got the factory color from Scalefinishes in lacquer. So, I will be adding a vinyl top, (my first), while adding some other details to a great starting point. This is the aforementioned car: 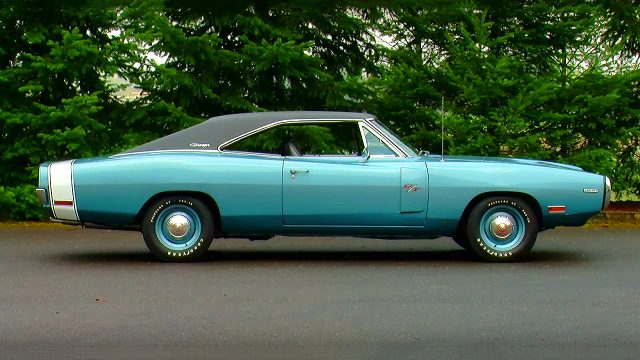 And the kit with tire pack: 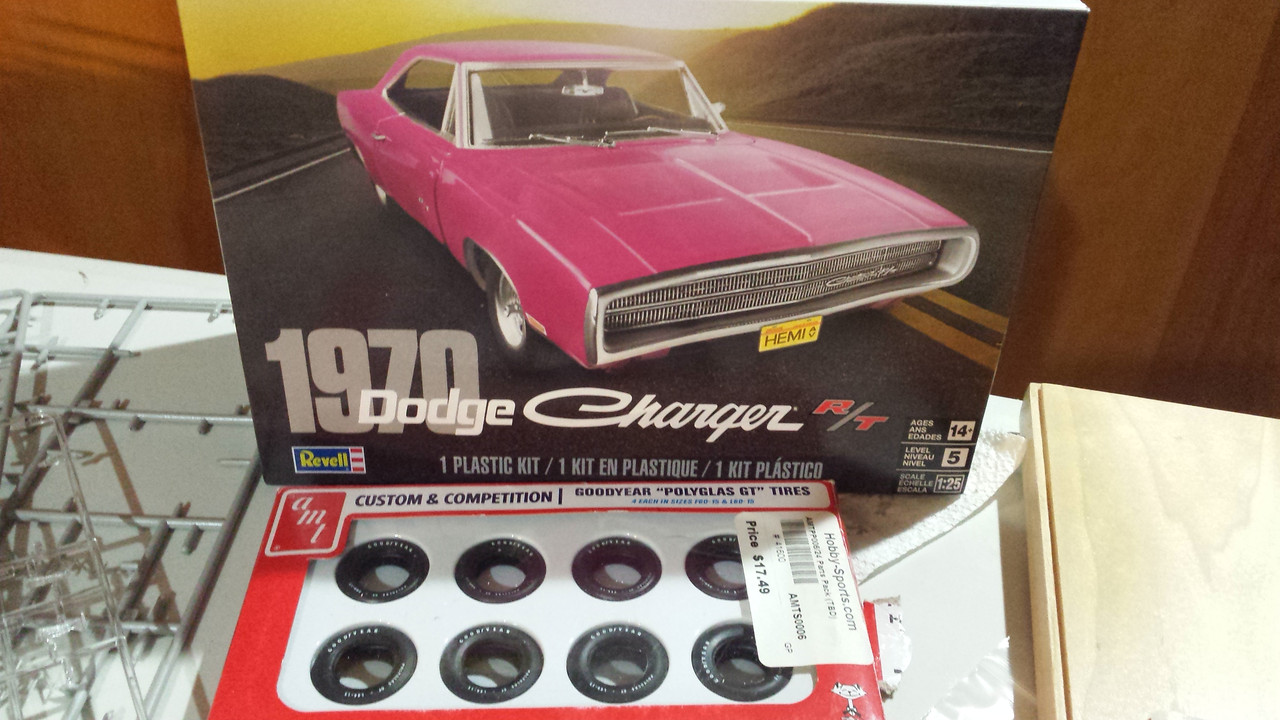 |
|
midnightprowler
Full Member
Member since: February 2016
Posts: 701 
|
Post by midnightprowler on Jun 29, 2018 3:52:53 GMT -5
Beautiful color, watching this. You want to trade off a set of those tires?
|
|
|
|
Post by mustang1989 on Aug 11, 2018 5:29:08 GMT -5
Hi folks, I will be taking a well deserved break from my posted ship build to reset the eyes before delving back into the micro surgery known as 1/350 photo etch. This is the Revell 1970 Dodge Charger with aftermarket dog dish wheels and AMT pre printed "Good Year" polyglas tires. As most know that follow my car builds, I only build factory stock examples and this will be no different. I saw a real photo of Dodge EB3 blue Charger with vinyl top and white quarter panel striping, and just had to build it. I usually say that certain cars need to be certain colors and this one really catches the eye. I also got the factory color from Scalefinishes in lacquer. So, I will be adding a vinyl top, (my first), while adding some other details to a great starting point. This is the aforementioned car: Man I can't wait to feast my eyes on this build Gil. When are we getting started here? |
|
mrversatile
Full Member
Member since: January 2013
Posts: 627
Jan 20, 2013 10:52:24 GMT -5
Jan 20, 2013 10:52:24 GMT -5
|
Post by mrversatile on Aug 14, 2018 16:12:14 GMT -5
Got some update pics to post soon. Stay tuned.
|
|
joelsmith
Full Member
Member since: July 2012
There no winners in war, only survivors.
Posts: 1,404
Jul 5, 2012 22:33:58 GMT -5
Jul 5, 2012 22:33:58 GMT -5
|
Post by joelsmith on Aug 14, 2018 17:18:38 GMT -5
Can't wait!
|
|
mrversatile
Full Member
Member since: January 2013
Posts: 627
Jan 20, 2013 10:52:24 GMT -5
Jan 20, 2013 10:52:24 GMT -5
|
Post by mrversatile on Aug 14, 2018 20:15:22 GMT -5
Finally got started on this one and the mandatory chore of filling and sanding "knock out" marks begins. There are six located on the underside of the hood which proved a bit challenging as they are conveniently placed between plenty of detail which had to be avoided. There are also four large examples on the headliner. These are common on Revell kits and something I take into account when I judge a car category at an show. Surprisingly, this is an oft overlooked basic task, even when modelers pose the hood open. Before 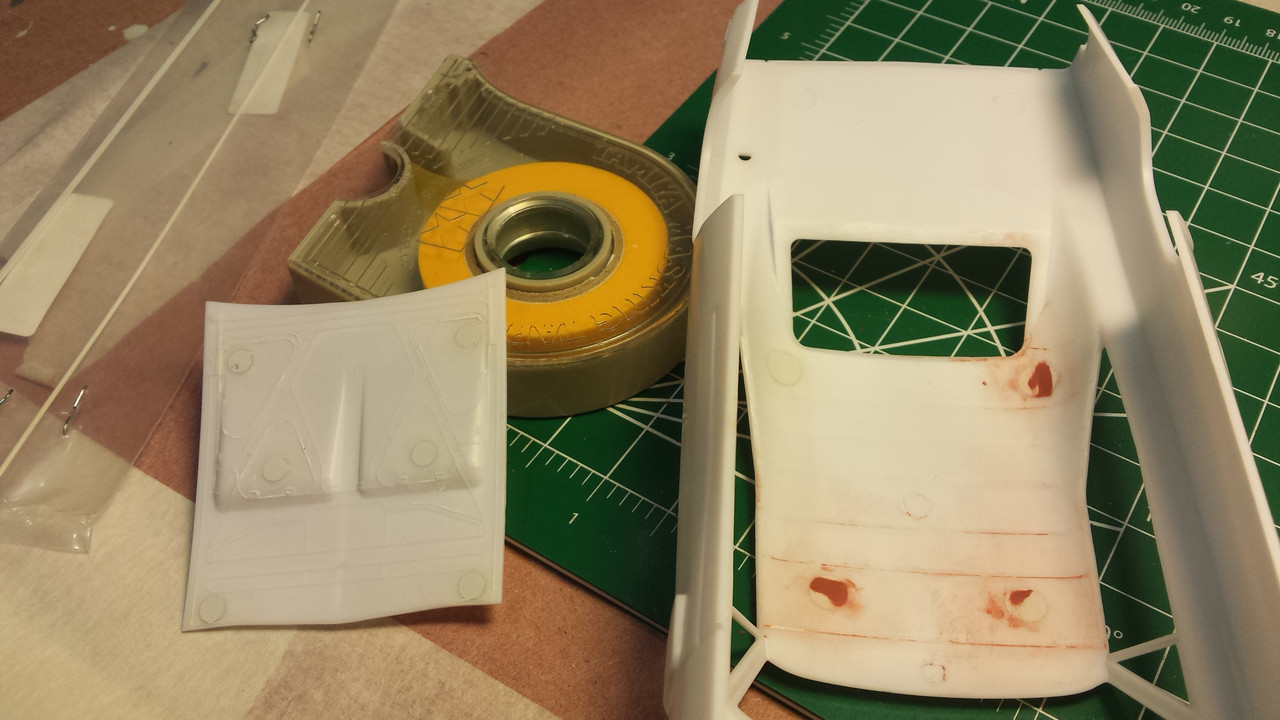 After 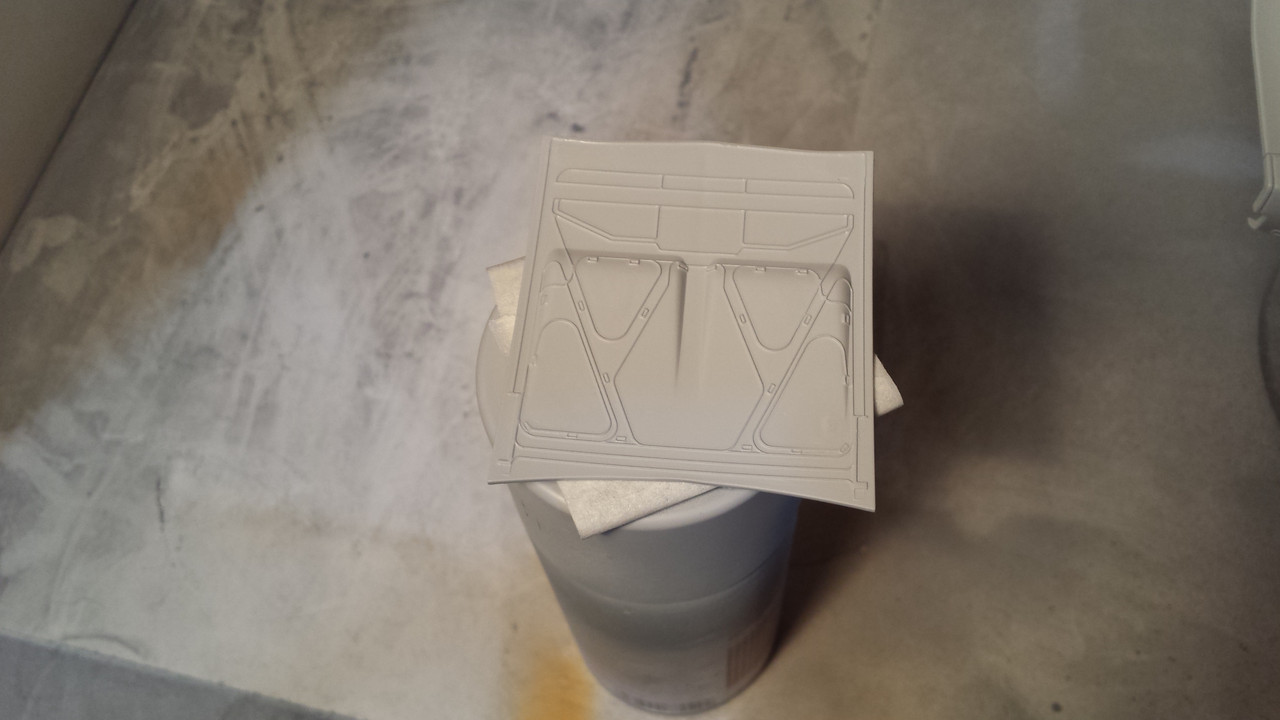 Since I plan to add a vinyl top, I had to add some half round plastic trim to B pillar on either side which is obviously absent on a hardtop. 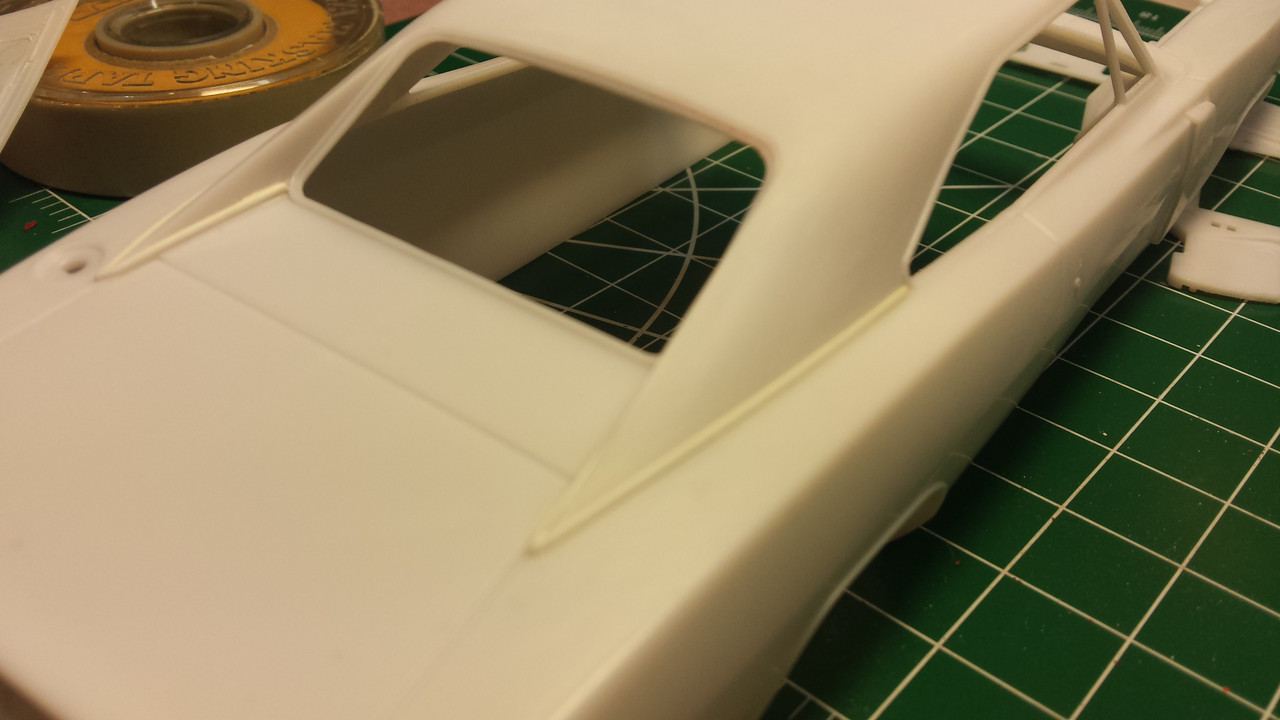 And the body is primed and ready for masking for the vinyl top: 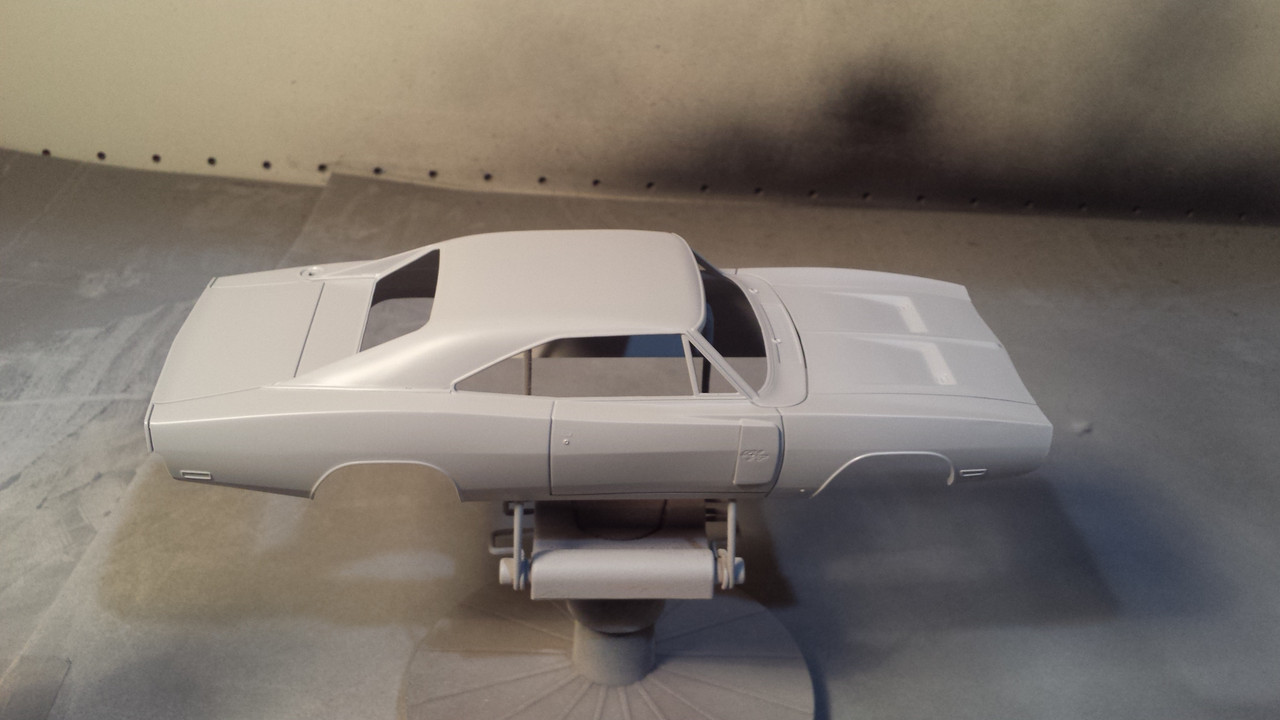 |
|
|
|
Post by Leon on Aug 14, 2018 20:42:58 GMT -5
Off to good start Gil!
|
|
|
|
Post by mustang1989 on Aug 14, 2018 20:49:29 GMT -5
 Dang those pin marks are all over the place!!! I can't tell you how many times I've seen a fantastic build ruined by leaving mold lines and pin marks on their builds. Dang those pin marks are all over the place!!! I can't tell you how many times I've seen a fantastic build ruined by leaving mold lines and pin marks on their builds.
Really glad to see you building on this one Gil! |
|
mrversatile
Full Member
Member since: January 2013
Posts: 627
Jan 20, 2013 10:52:24 GMT -5
Jan 20, 2013 10:52:24 GMT -5
|
Post by mrversatile on Aug 22, 2018 20:09:14 GMT -5
Here is an update. I finished the vinyl top by masking around all the chrome trim, and after covering the rest of the primed car, sprayed a coat of Rustoleum textured paint. The result was good but I realized after that I forgot to add the seams. No problem, I just cut two appropriate sized pieces of tamiya tape, installed them on the roof and then recoated. Here are the pics. Next up: reverse masking of the roof and applying the color and clear coats. 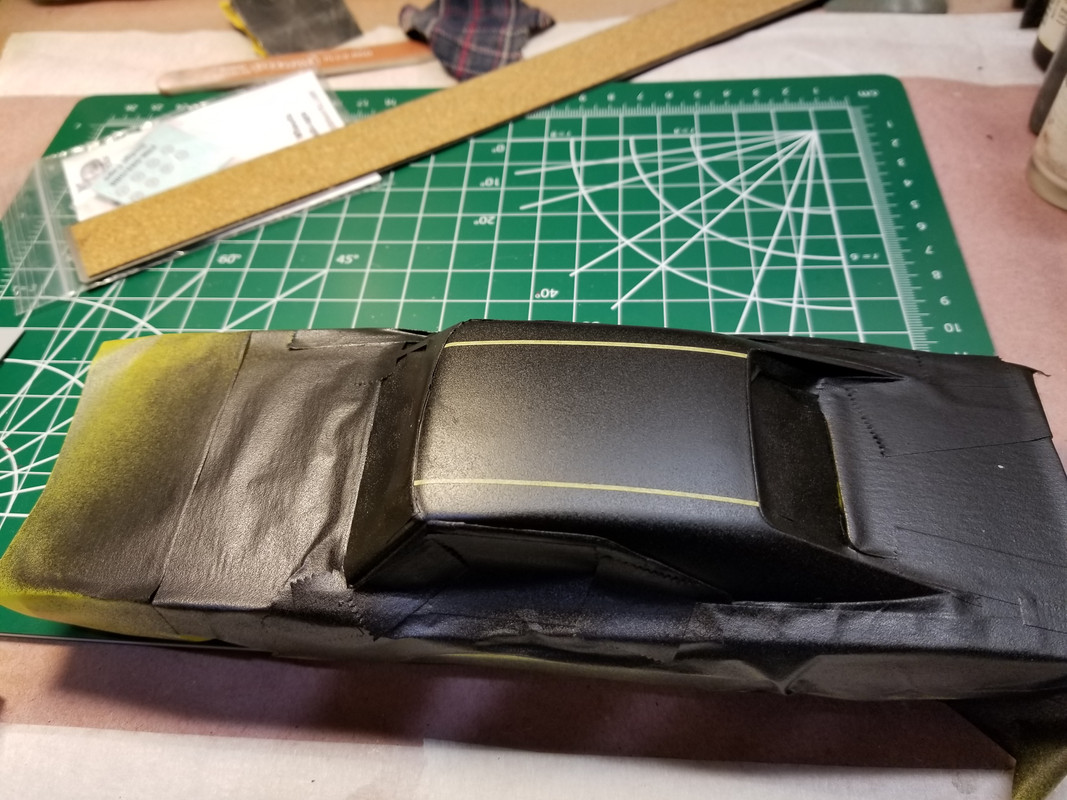 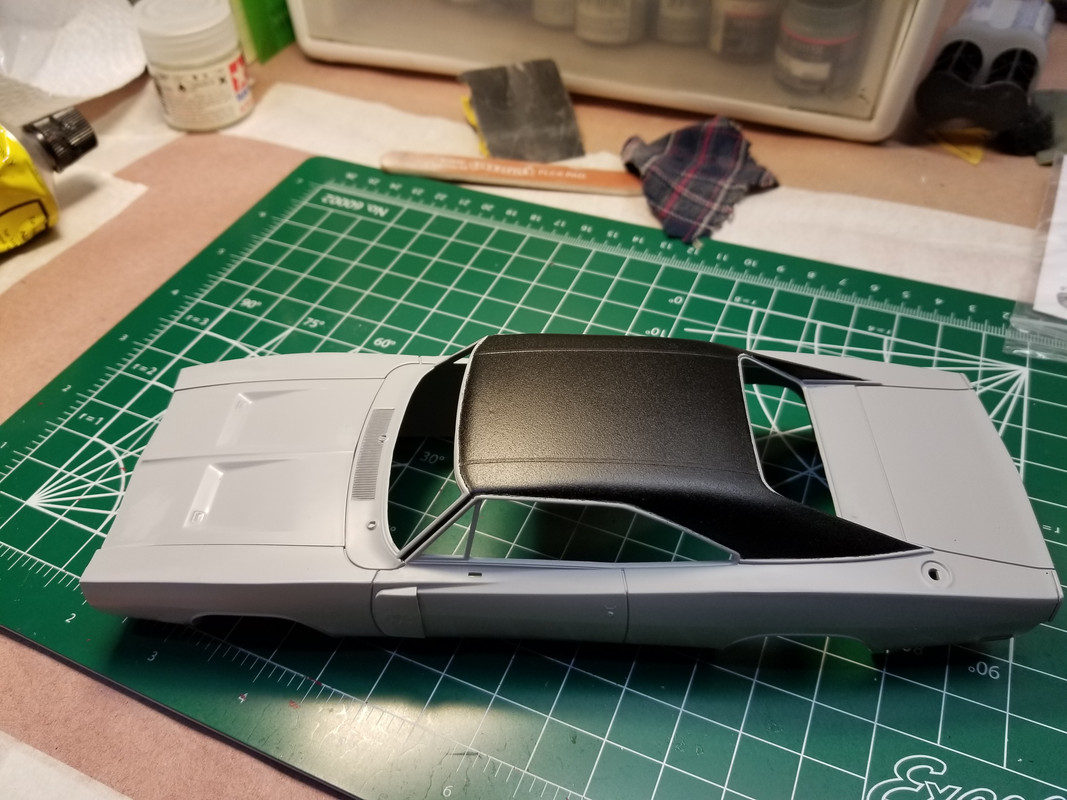 |
|
joelsmith
Full Member
Member since: July 2012
There no winners in war, only survivors.
Posts: 1,404
Jul 5, 2012 22:33:58 GMT -5
Jul 5, 2012 22:33:58 GMT -5
|
Post by joelsmith on Aug 22, 2018 22:56:19 GMT -5
Looking very nice! Which powerplant are you using?
|
|
|
|
Post by Leon on Aug 23, 2018 4:43:28 GMT -5
That came out really nice Gil!
|
|
mrversatile
Full Member
Member since: January 2013
Posts: 627
Jan 20, 2013 10:52:24 GMT -5
Jan 20, 2013 10:52:24 GMT -5
|
Post by mrversatile on Aug 23, 2018 6:23:41 GMT -5
Thanks, I am going with the hemi.
|
|
|
|
Post by mustang1989 on Aug 23, 2018 21:05:25 GMT -5
That vinyl top looks TOPS Gil!! Very sharp work on that!!!
|
|
|
|
Post by mustang1989 on Aug 23, 2018 21:06:04 GMT -5
Thanks, I am going with the hemi. You know I'll be pullin up a chair for that! I can hardly wait to see this. |
|
|
|
Post by mustang1989 on Aug 31, 2018 21:40:48 GMT -5
Picked it up today with birthday money! 

|
|
midnightprowler
Full Member
Member since: February 2016
Posts: 701
|
Post by midnightprowler on Sept 1, 2018 6:54:32 GMT -5
Looking great. I really need one of these. What would it take to get you to part with the 383/440?
|
|
|
|
Post by mustang1989 on Sept 1, 2018 12:23:44 GMT -5
Looking great. I really need one of these. What would it take to get you to part with the 383/440? I looked at mine last night and didn't see an option for the 440. Maybe I need to look again because that's what I want to go with for mine. |
|
midnightprowler
Full Member
Member since: February 2016
Posts: 701
|
Post by midnightprowler on Sept 2, 2018 8:56:55 GMT -5
Strange, all the others in this series had both a hemi and a 440.
|
|
moramarth
Full Member
Member since: March 2014
Posts: 455
|
Post by moramarth on Sept 2, 2018 20:57:23 GMT -5
I'm not so sure about this. I have the '67 which has only the Hemi, and the '69 which has only the 440. The instructions on the Revell website for the '68 (2 in 1 or Special Edition) show that it does have both but this applies only to the U.S. boxing: on-line info regarding the "Revell of Germany" boxing indicates it has only the 440. The AMT 1968 Plymouth Roadrunner has only the Hemi, but when the basic kit was given new parts for the 1969 GTX with a 440 the Hemi was retained as the 440 uses some parts from it (at least the Alternator and the transmission). The instructions make no mention of the Hemi parts and the 440 is shown as built with a single four-barrel carb, but the relevant sprue includes at least the manifold for a triple two-barrel set up. When the MPC '70 Dodge Coronet was re-released most of the GTX mechanicals and chassis were ported across to replace the equivalent Pro-Street parts (there are still some redundant Pro-Street bits in the box but apparently not those to convert the Hemi to the prototype DOHC version) and the 440 six-pack is used for this.
Regards,
M
|
|
mrversatile
Full Member
Member since: January 2013
Posts: 627
Jan 20, 2013 10:52:24 GMT -5
Jan 20, 2013 10:52:24 GMT -5
|
Post by mrversatile on Sept 5, 2018 6:14:39 GMT -5
I don't believe there is anything but a Hemi in this kit
|
|
mrversatile
Full Member
Member since: January 2013
Posts: 627
Jan 20, 2013 10:52:24 GMT -5
Jan 20, 2013 10:52:24 GMT -5
|
Post by mrversatile on Sept 5, 2018 20:21:11 GMT -5
Got the Charger painted in factory B3 light blue from Scalefinishes with decanted UPOL lacquer clear coat. Now on to the bare metal foil. 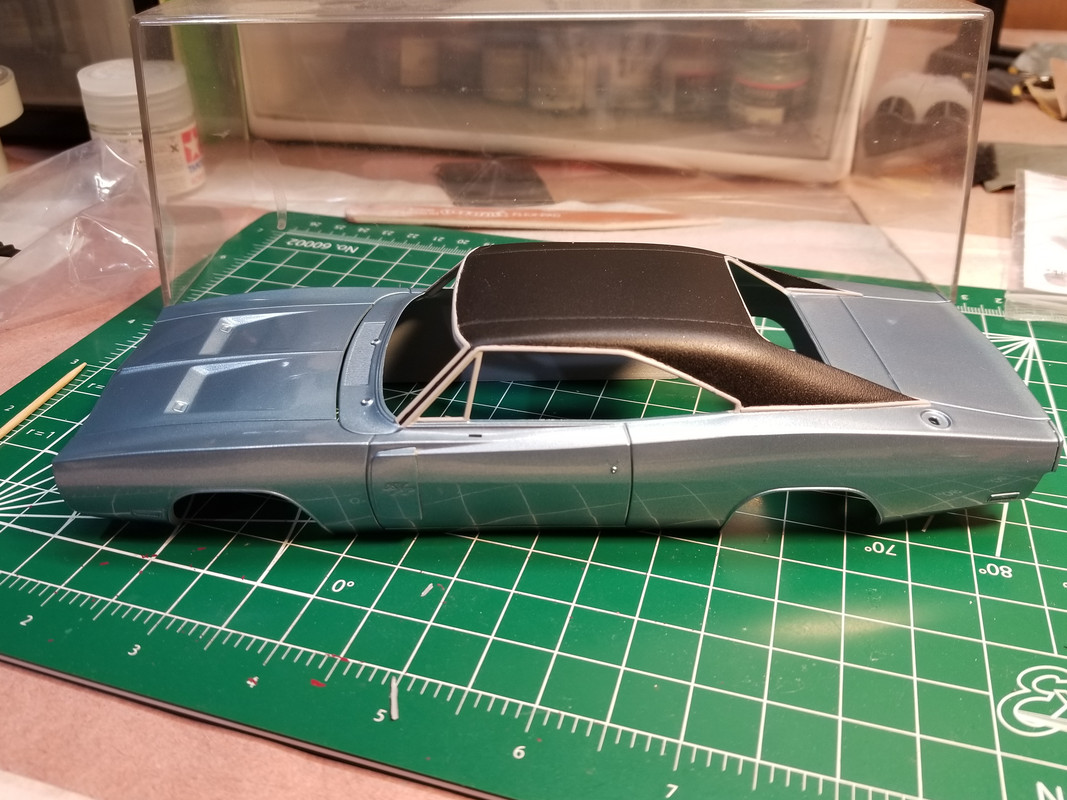 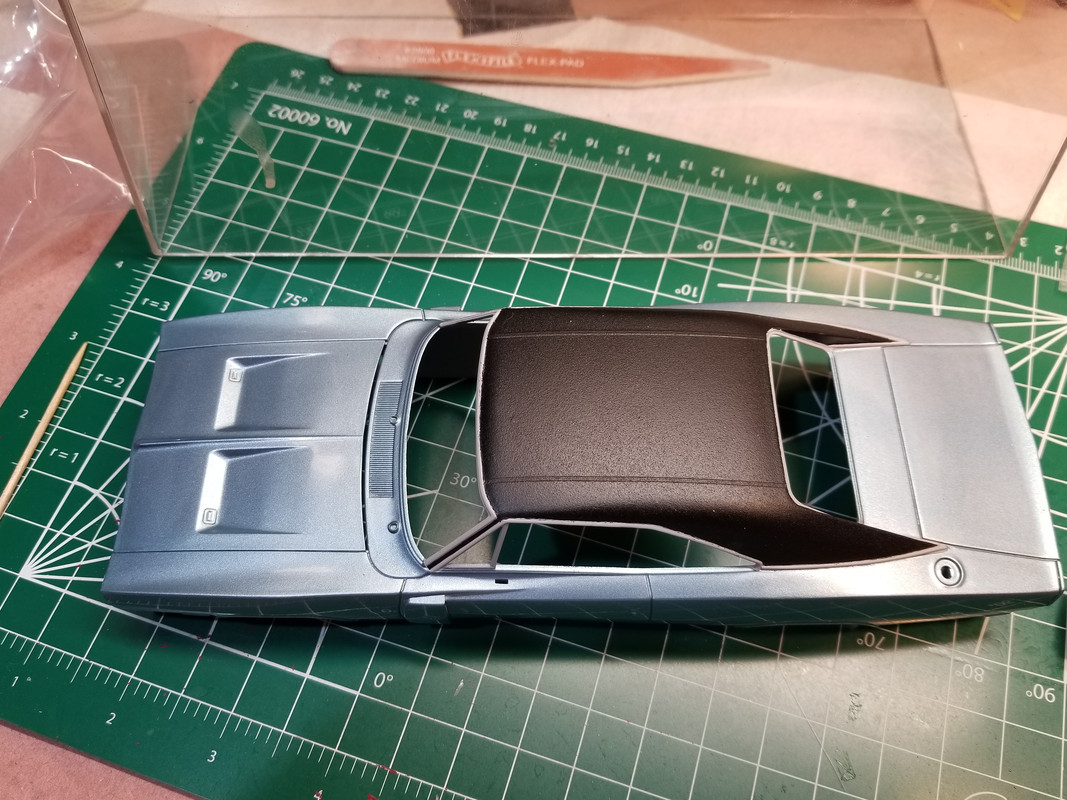 |
|
|
|
Post by Leon on Sept 6, 2018 4:36:40 GMT -5
Nice job on the paint Gil!
|
|
|
|
Post by mustang1989 on Sept 6, 2018 11:55:43 GMT -5
Man that thing looks great so far Gil. Nice gloss!!!
|
|
Tojo72
Forum Moderator 
Member since: November 2012
Posts: 4,916
Member is Online
MSC Staff
|
Post by Tojo72 on Sept 6, 2018 16:31:09 GMT -5
Very nice,I always admire those paint jobs you car guys achieve.
|
|
joelsmith
Full Member
Member since: July 2012
There no winners in war, only survivors.
Posts: 1,404
Jul 5, 2012 22:33:58 GMT -5
Jul 5, 2012 22:33:58 GMT -5
|
Post by joelsmith on Sept 6, 2018 17:00:01 GMT -5
Sweet paint!
|
|
midnightprowler
Full Member
Member since: February 2016
Posts: 701
|
Post by midnightprowler on Sept 6, 2018 17:12:29 GMT -5
Nice!
|
|
mrversatile
Full Member
Member since: January 2013
Posts: 627
Jan 20, 2013 10:52:24 GMT -5
Jan 20, 2013 10:52:24 GMT -5
|
Post by mrversatile on Sept 6, 2018 18:15:18 GMT -5
Thanks guys. If you noticed, the pic of the 1:1 car looks a little more teal bc of the sunlight but it really matches the color on my model. Here is a different pic of the same car: 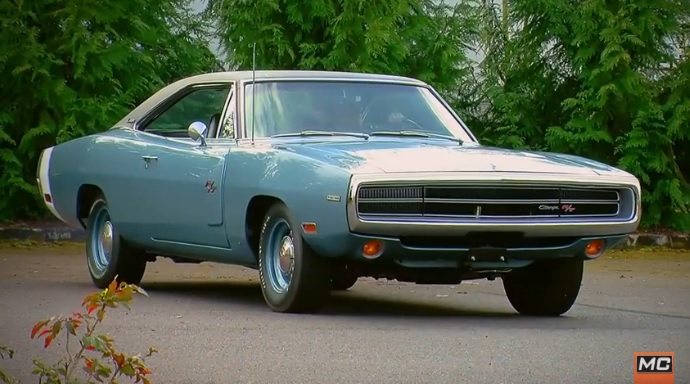 |
|
|
|
Post by mustang1989 on Sept 7, 2018 12:35:24 GMT -5
I'd say that's as close as it gets Gil!
|
|
mrversatile
Full Member
Member since: January 2013
Posts: 627
Jan 20, 2013 10:52:24 GMT -5
Jan 20, 2013 10:52:24 GMT -5
|
Post by mrversatile on Sept 20, 2018 16:05:17 GMT -5
Well I again reminded myself why I would rather do a modern car than an old car....Bare Metal Foil! I am finally finished this mundane task. BTW, because the wheel well trim was molded into the model I decided to "go with it" even though my research example had it deleted. I thought the extra bling would look good.  |
|
|
|
Post by Leon on Sept 20, 2018 16:16:38 GMT -5
Nice work on the BMF Gil! I have yet to try that stuff.
|
|