|
|
Post by mustang1989 on Feb 27, 2023 21:41:09 GMT -5
That's the good thing about armor and field vehicle modeling. One can always throw "stuff" on any given area they don't want shown. Good recovery Russ.
|
|
|
|
Post by Tobi on Feb 28, 2023 0:06:05 GMT -5
And I thought the different fender types existed in parallel...
Now I can see. :-)
|
|
|
|
Post by hasenpfeffer on Mar 1, 2023 22:00:28 GMT -5
Totally digging this Russ. I haven't built much in the way of post WWII armor, but I know those new Takom M-48s caught my eye when they arrived on the scene. Just what I need.. more kits in the stash! At least I'll have this for some guidance.  |
|
|
|
Post by rbaer on Mar 4, 2023 10:54:06 GMT -5
Careful, I'll lead you astray.  The Magach is ready for primer, just need to beat up the rubber on the road wheels first and shoot it. I have a couple of small bits to add still, but nothing major. I'm thinking I'll close the driver's hatch but use a TC, just head and shoulders showing to show the detail I did inside the TC's hatch.  IMG_3892 IMG_3892 by Russel Baer, on Flickr 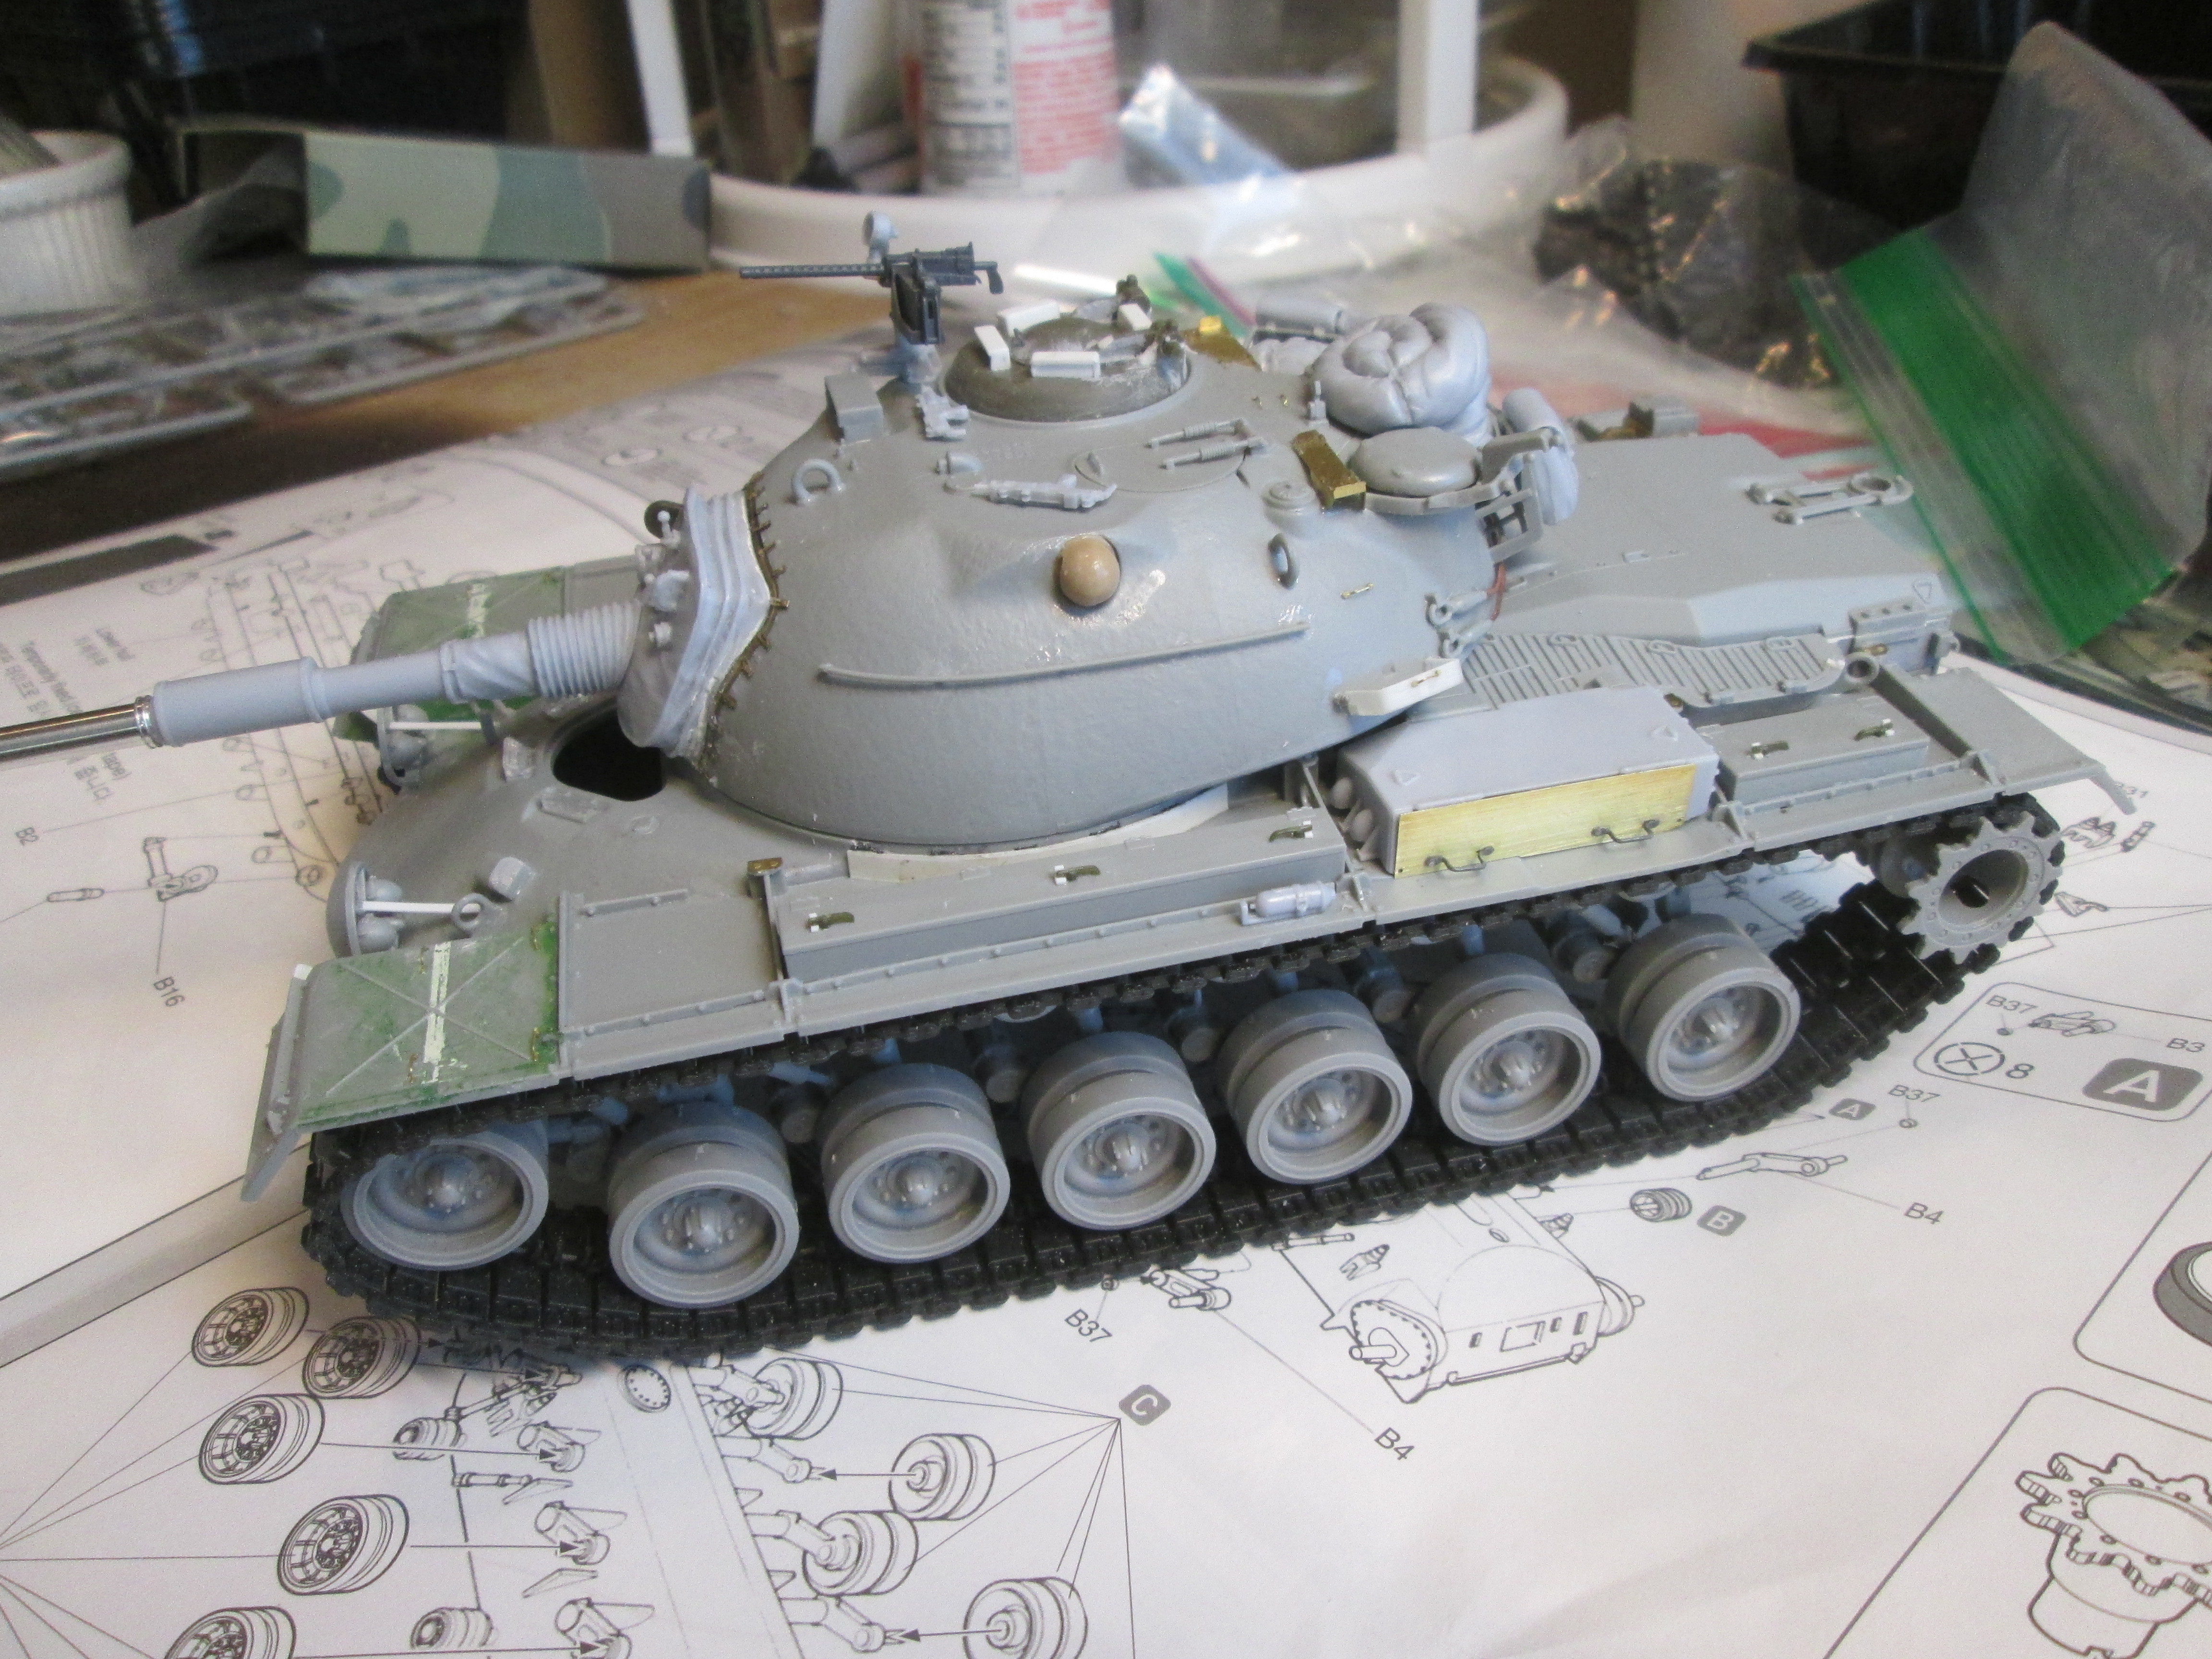 IMG_3893 IMG_3893 by Russel Baer, on Flickr Normally a folded and stowed stretcher would be on the right front fender but I used the DEF part on another build so I'll probably use rolled tarps on both sides, to cover my imperfect stiffeners there. I'll decide after primer. I also had to dig out an Academy 30 cal MG for the TC: I tried, really tried to use the very nice DEF parts but the PE defeated me. |
|
|
|
Post by mustang1989 on Mar 4, 2023 11:18:39 GMT -5
This is coming along very nicely so far Russ. Looking forward to the painting process. Any specific paint scheme you going with?
|
|
|
|
Post by rbaer on Mar 6, 2023 19:56:23 GMT -5
The one above will be IDF, so sand-gray with no chipping or rust streaks, only dust and oil stains. The one below, US OD for sure.  IMG_3894 IMG_3894 by Russel Baer, on Flickr I did some stowage today and added some more of the sand bags that were in the bag with the turret parts, turret basket stowage and the TC's MG. Also on is the spot light, an AFV Club part. More stowage will be added on the hull and turret.  IMG_3895 IMG_3895 by Russel Baer, on Flickr 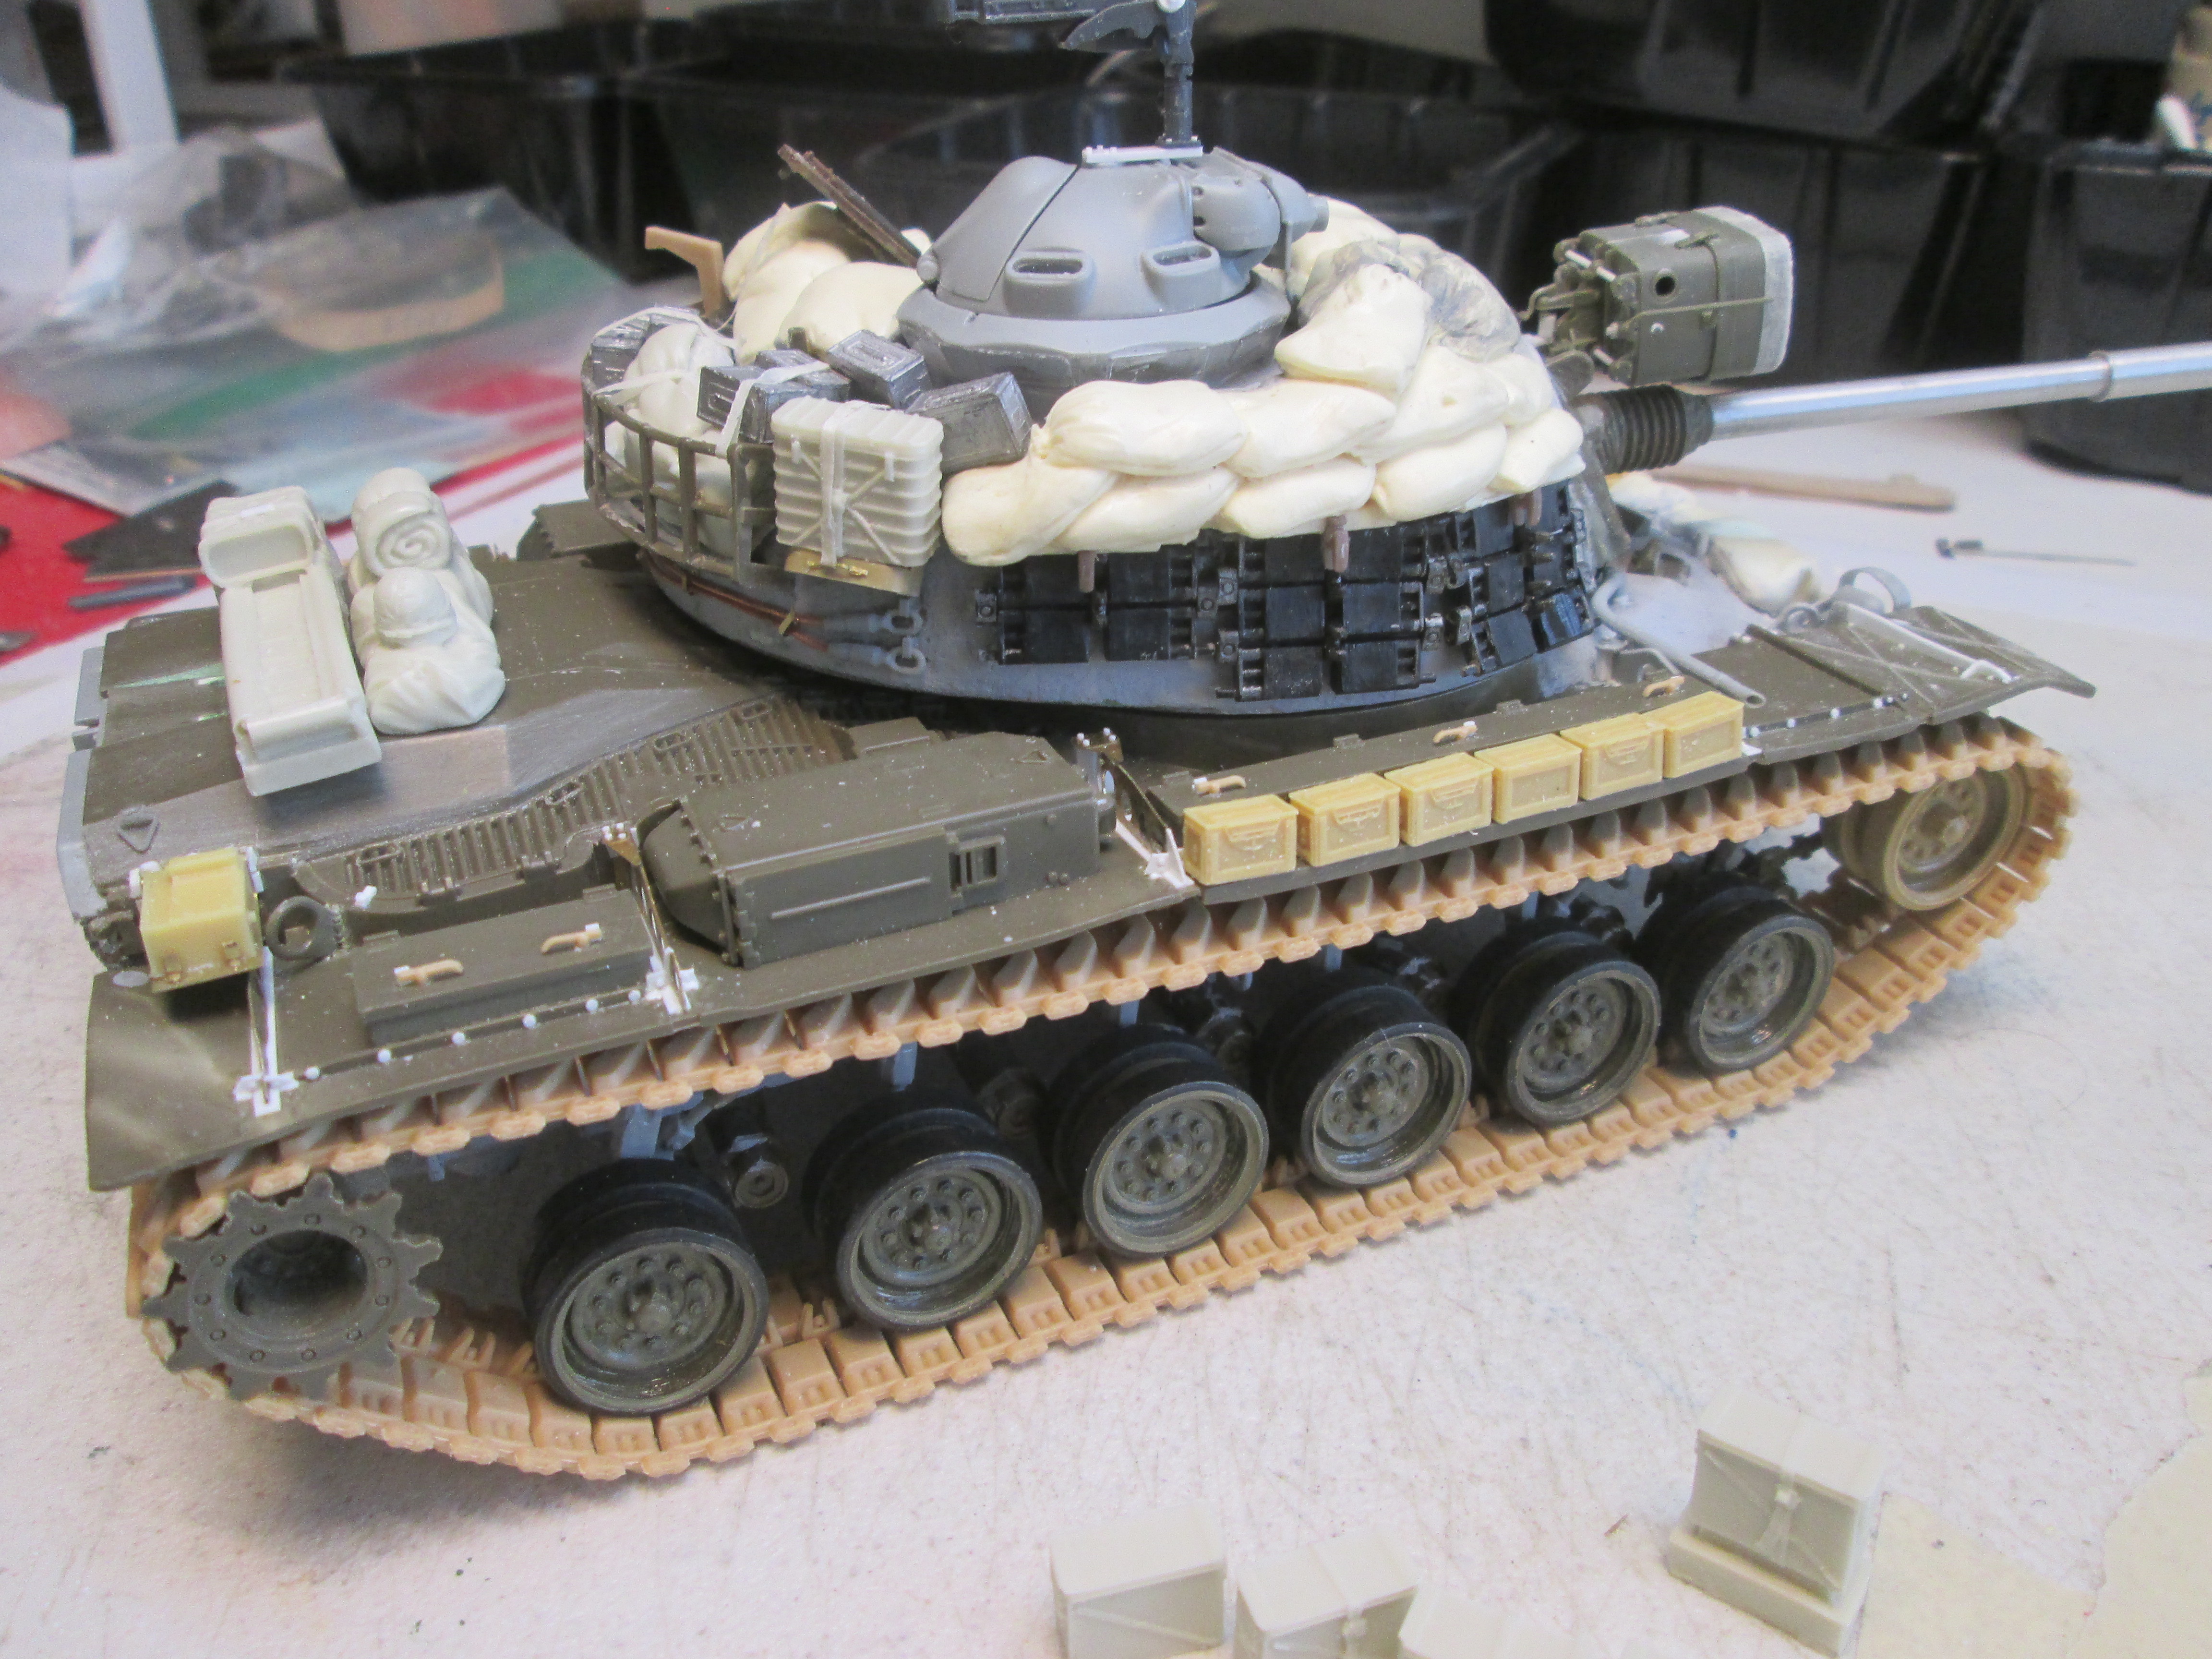 IMG_3896 IMG_3896 by Russel Baer, on Flickr The last pic shows stuff that may or may not make it onto the model, just testing things out. |
|
reserve
Senior Member

Member since: July 2012
Si vis pacem para bellum
Posts: 2,355
Jul 11, 2012 9:11:45 GMT -5
Jul 11, 2012 9:11:45 GMT -5
|
Post by reserve on Mar 6, 2023 20:56:59 GMT -5
Good detail up sir
|
|
|
|
Post by rbaer on Mar 7, 2023 19:35:59 GMT -5
Thanks! Pic following shows the ammo cans outboard of the tool boxes secured. I copied a pic I saw somewhere, might have even been on an M46 in Korea but who's to say it couldn't have been used later? The pic showed a piece of pipe holding the cans and held in place with either cable or rope run through it and tied off to the fender mounts. Simple to duplicate and functional. The ammo cans and ration boxes further forward are just laying there for the moment, to see if I like it or not. 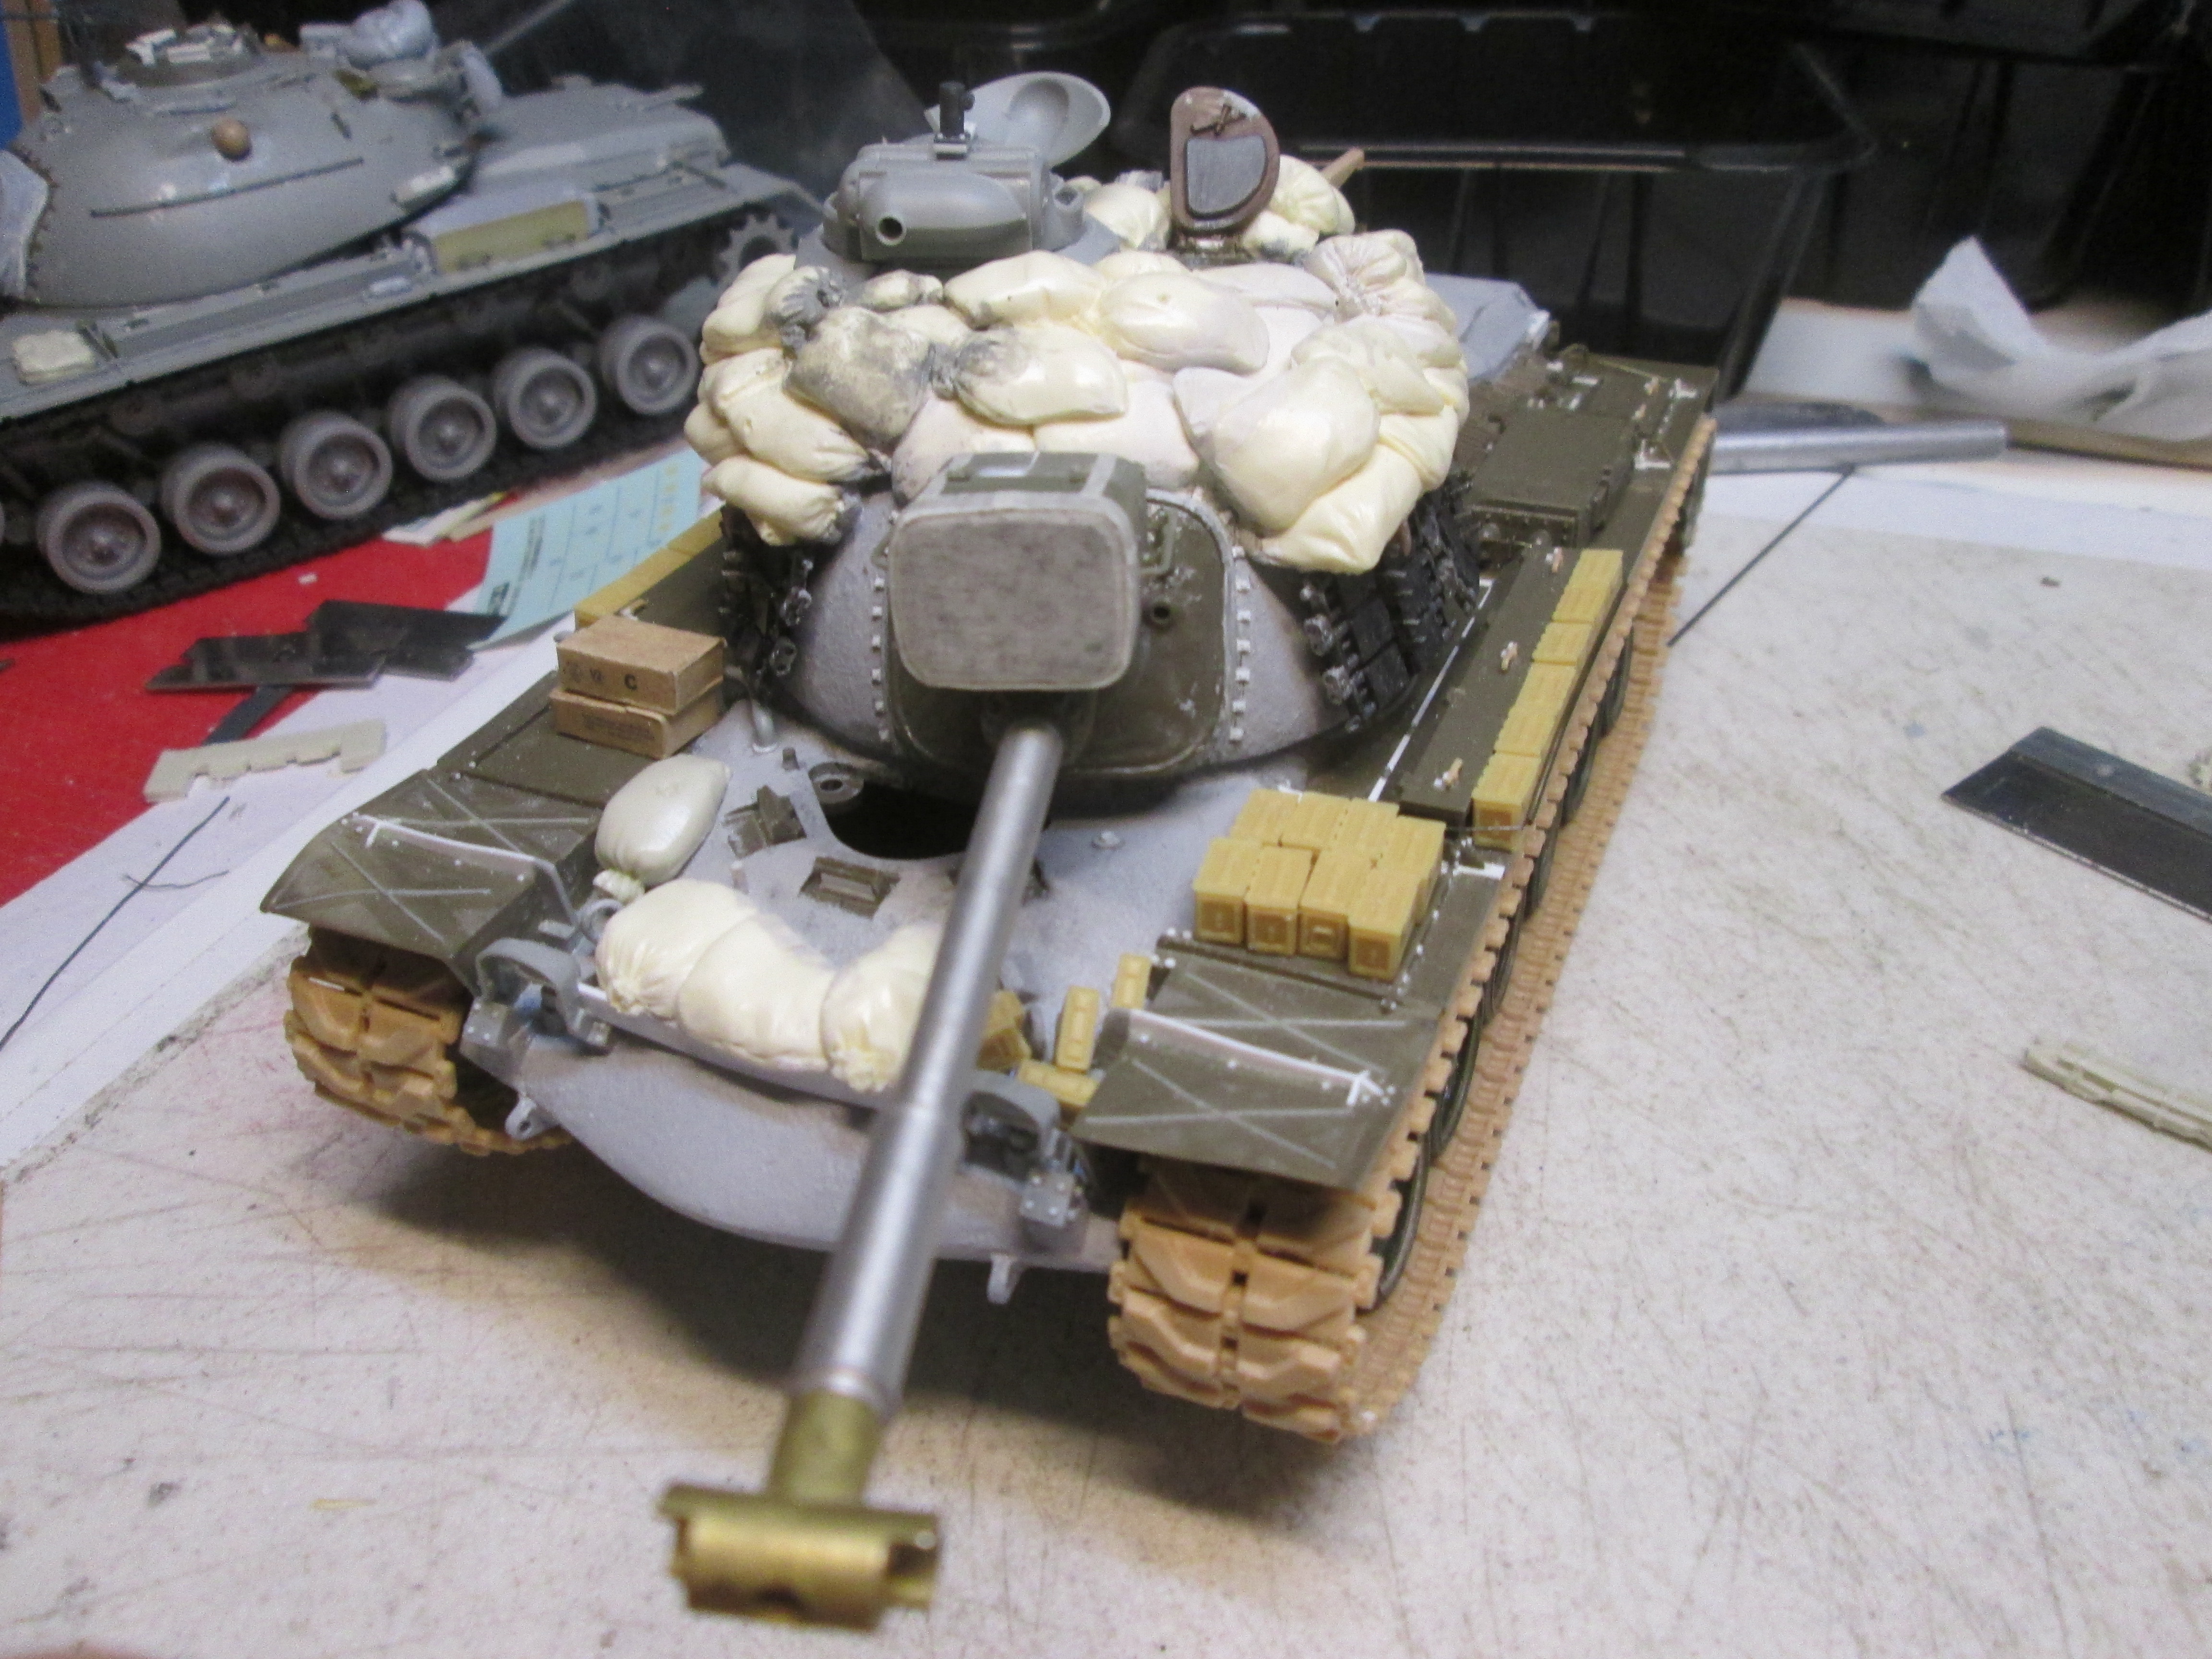 IMG_3899 IMG_3899 by Russel Baer, on Flickr |
|
|
|
Post by mustang1989 on Mar 7, 2023 19:48:39 GMT -5
Man you are just loading this thing up with the details Russ. That's one of the things I like about armor builds, you can just put stuff any old where and it looks right at home there. That and it covers up the "boo-boos" as you referred to earlier in this build. You're really bringing this one home nicely brother.
|
|
|
|
Post by rbaer on Mar 8, 2023 17:53:53 GMT -5
Yeah Joe, as long as it would be out of the way and stay put, it can go on somewhere...
|
|
|
|
Post by rbaer on Mar 17, 2023 14:13:40 GMT -5
A Quick shot of the Tamiya kit just before primer:  IMG_3903 IMG_3903 by Russel Baer, on Flickr  IMG_3904 IMG_3904 by Russel Baer, on Flickr I have some small items of stowage to be added after paint but other than that, I think it's suitably loaded down. |
|
|
|
Post by Leon on Mar 17, 2023 15:32:55 GMT -5
Looks like she's ready for action now Russ!
|
|
|
|
Post by mustang1989 on Mar 17, 2023 18:38:42 GMT -5
That almost looks perfect the way it is. lol
Looking forward to seeing what this beast is gonna look like with some color on it Russ.
|
|
|
|
Post by rbaer on Mar 17, 2023 18:56:10 GMT -5
Me too. I shot the commander's cupola with Vallejo OD a few minutes ago and I think I like it. In the meantime, it's in primer: 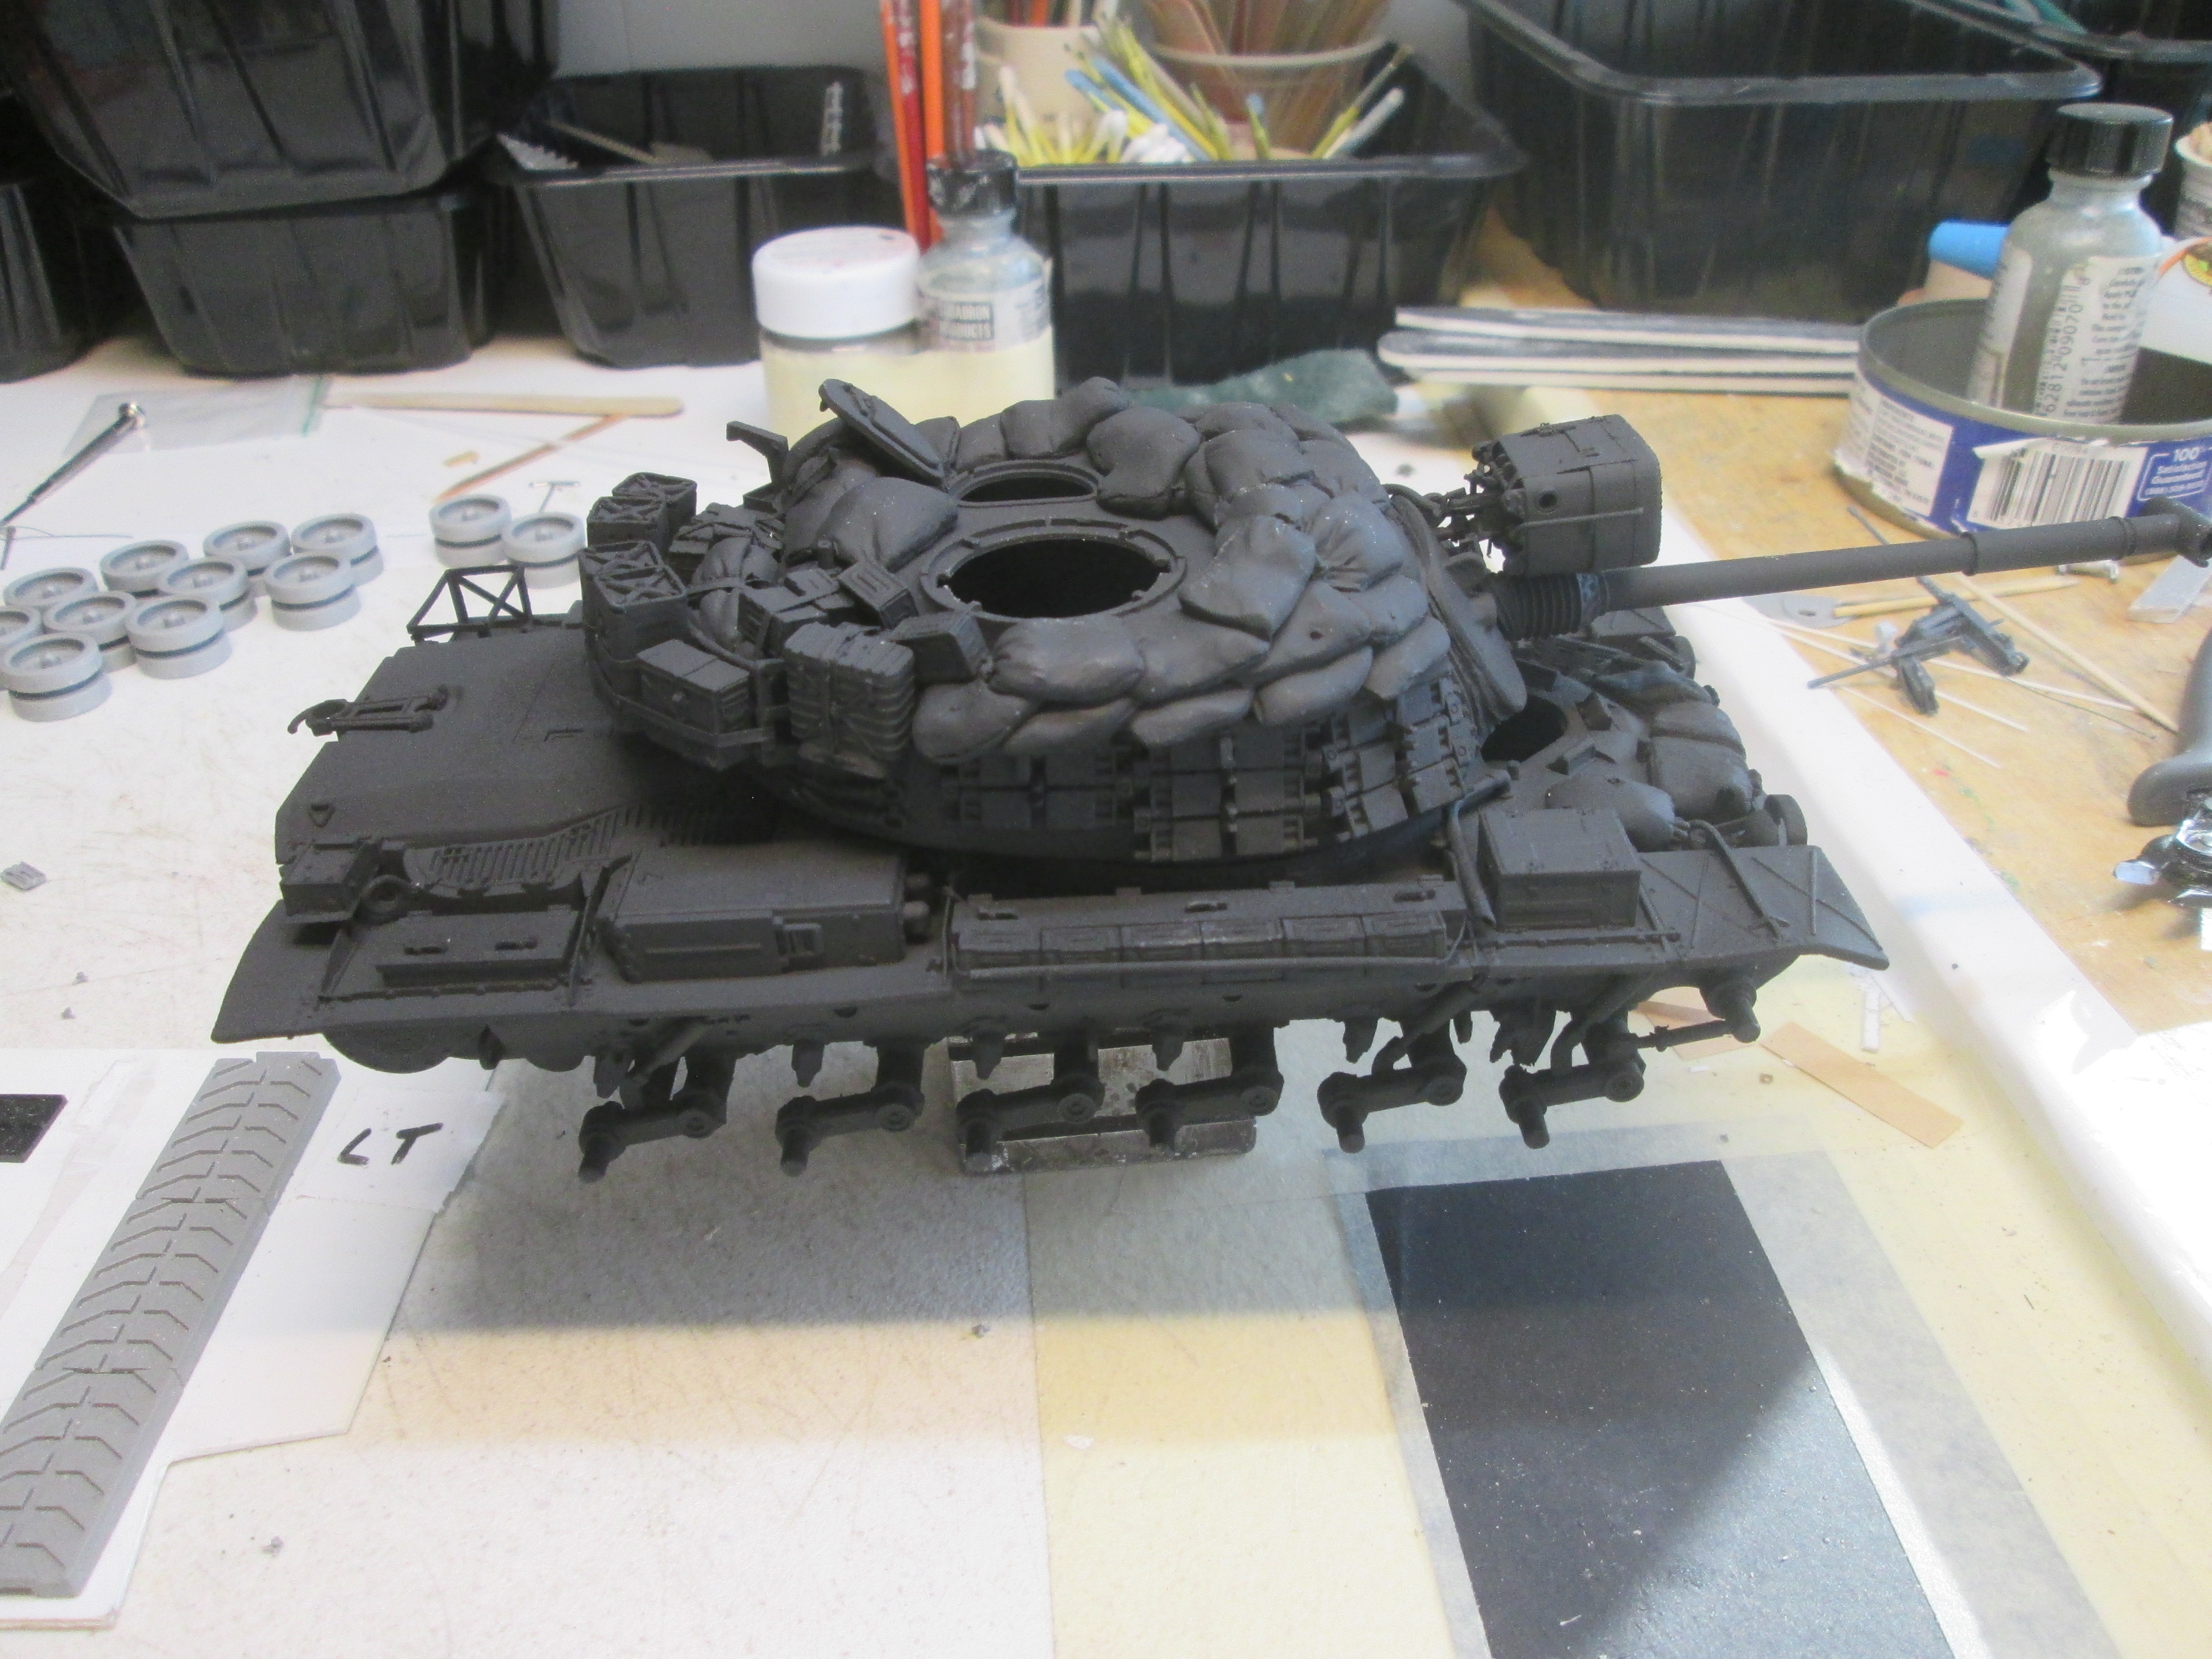 IMG_3906 IMG_3906 by Russel Baer, on Flickr And just for fun (not) I started a set of Takom tracks for the Magach. They're good, really good, and for plastic multi-part indies go together okay, just slow. It took me three hours or so to do 50 links. The end connectors have a definite outer and inner face, with the outers having hollow pins, extremely nice.  IMG_3905 IMG_3905 by Russel Baer, on Flickr |
|
|
|
Post by rbaer on Mar 24, 2023 17:36:40 GMT -5
Color on the Model B:  IMG_3910 IMG_3910 by Russel Baer, on Flickr Sandbags will probably be a raw burlap look, so brown was a logical first color. For the tank itself, I used Vallejo OD from the spray can, followed with a Vallejo olive green wash. Detail painting to follow, along with the few markings visible. Then it gets dusty. The Magach is in primer, gray so there's really nothing to show. I also spent several hours building the Takom tracks for it, Tee Dee US! |
|
|
|
Post by rbaer on Apr 1, 2023 12:35:03 GMT -5
I'm still working on this, even though I really should have stripped it and started over. I guess having a Takom Model B sitting on the shelf makes finishing this one more of a priority before starting something else.  IMG_3911 IMG_3911 by Russel Baer, on Flickr Sandbags have most of the highlighting done, old school drybrushing used. |
|
|
|
Post by `Boots` on Apr 1, 2023 12:49:01 GMT -5
They do look rather splendid with all the stowage and great to see the colour going on..........sand bags look excellent  |
|
Whiterook
Full Member

Member since: March 2013
Posts: 837
Mar 13, 2013 15:29:19 GMT -5
Mar 13, 2013 15:29:19 GMT -5
|
Post by Whiterook on Apr 9, 2023 15:07:41 GMT -5
WOW, what a thread! Learned so much and am extremely impressed with this build. The paint work is great… I’m looking forward to seeing the next stages in this one.
|
|
|
|
Post by rbaer on Apr 14, 2023 17:26:34 GMT -5
Thanks all. I'm slowing down a bit, mostly because I hate painting. I'd much rather build, and have a heck of a time staying focused ona model once it's into the painting stages. If you look in the background of the pics below, you'll see what I mean... Anyway, both are coming along, just slowly. 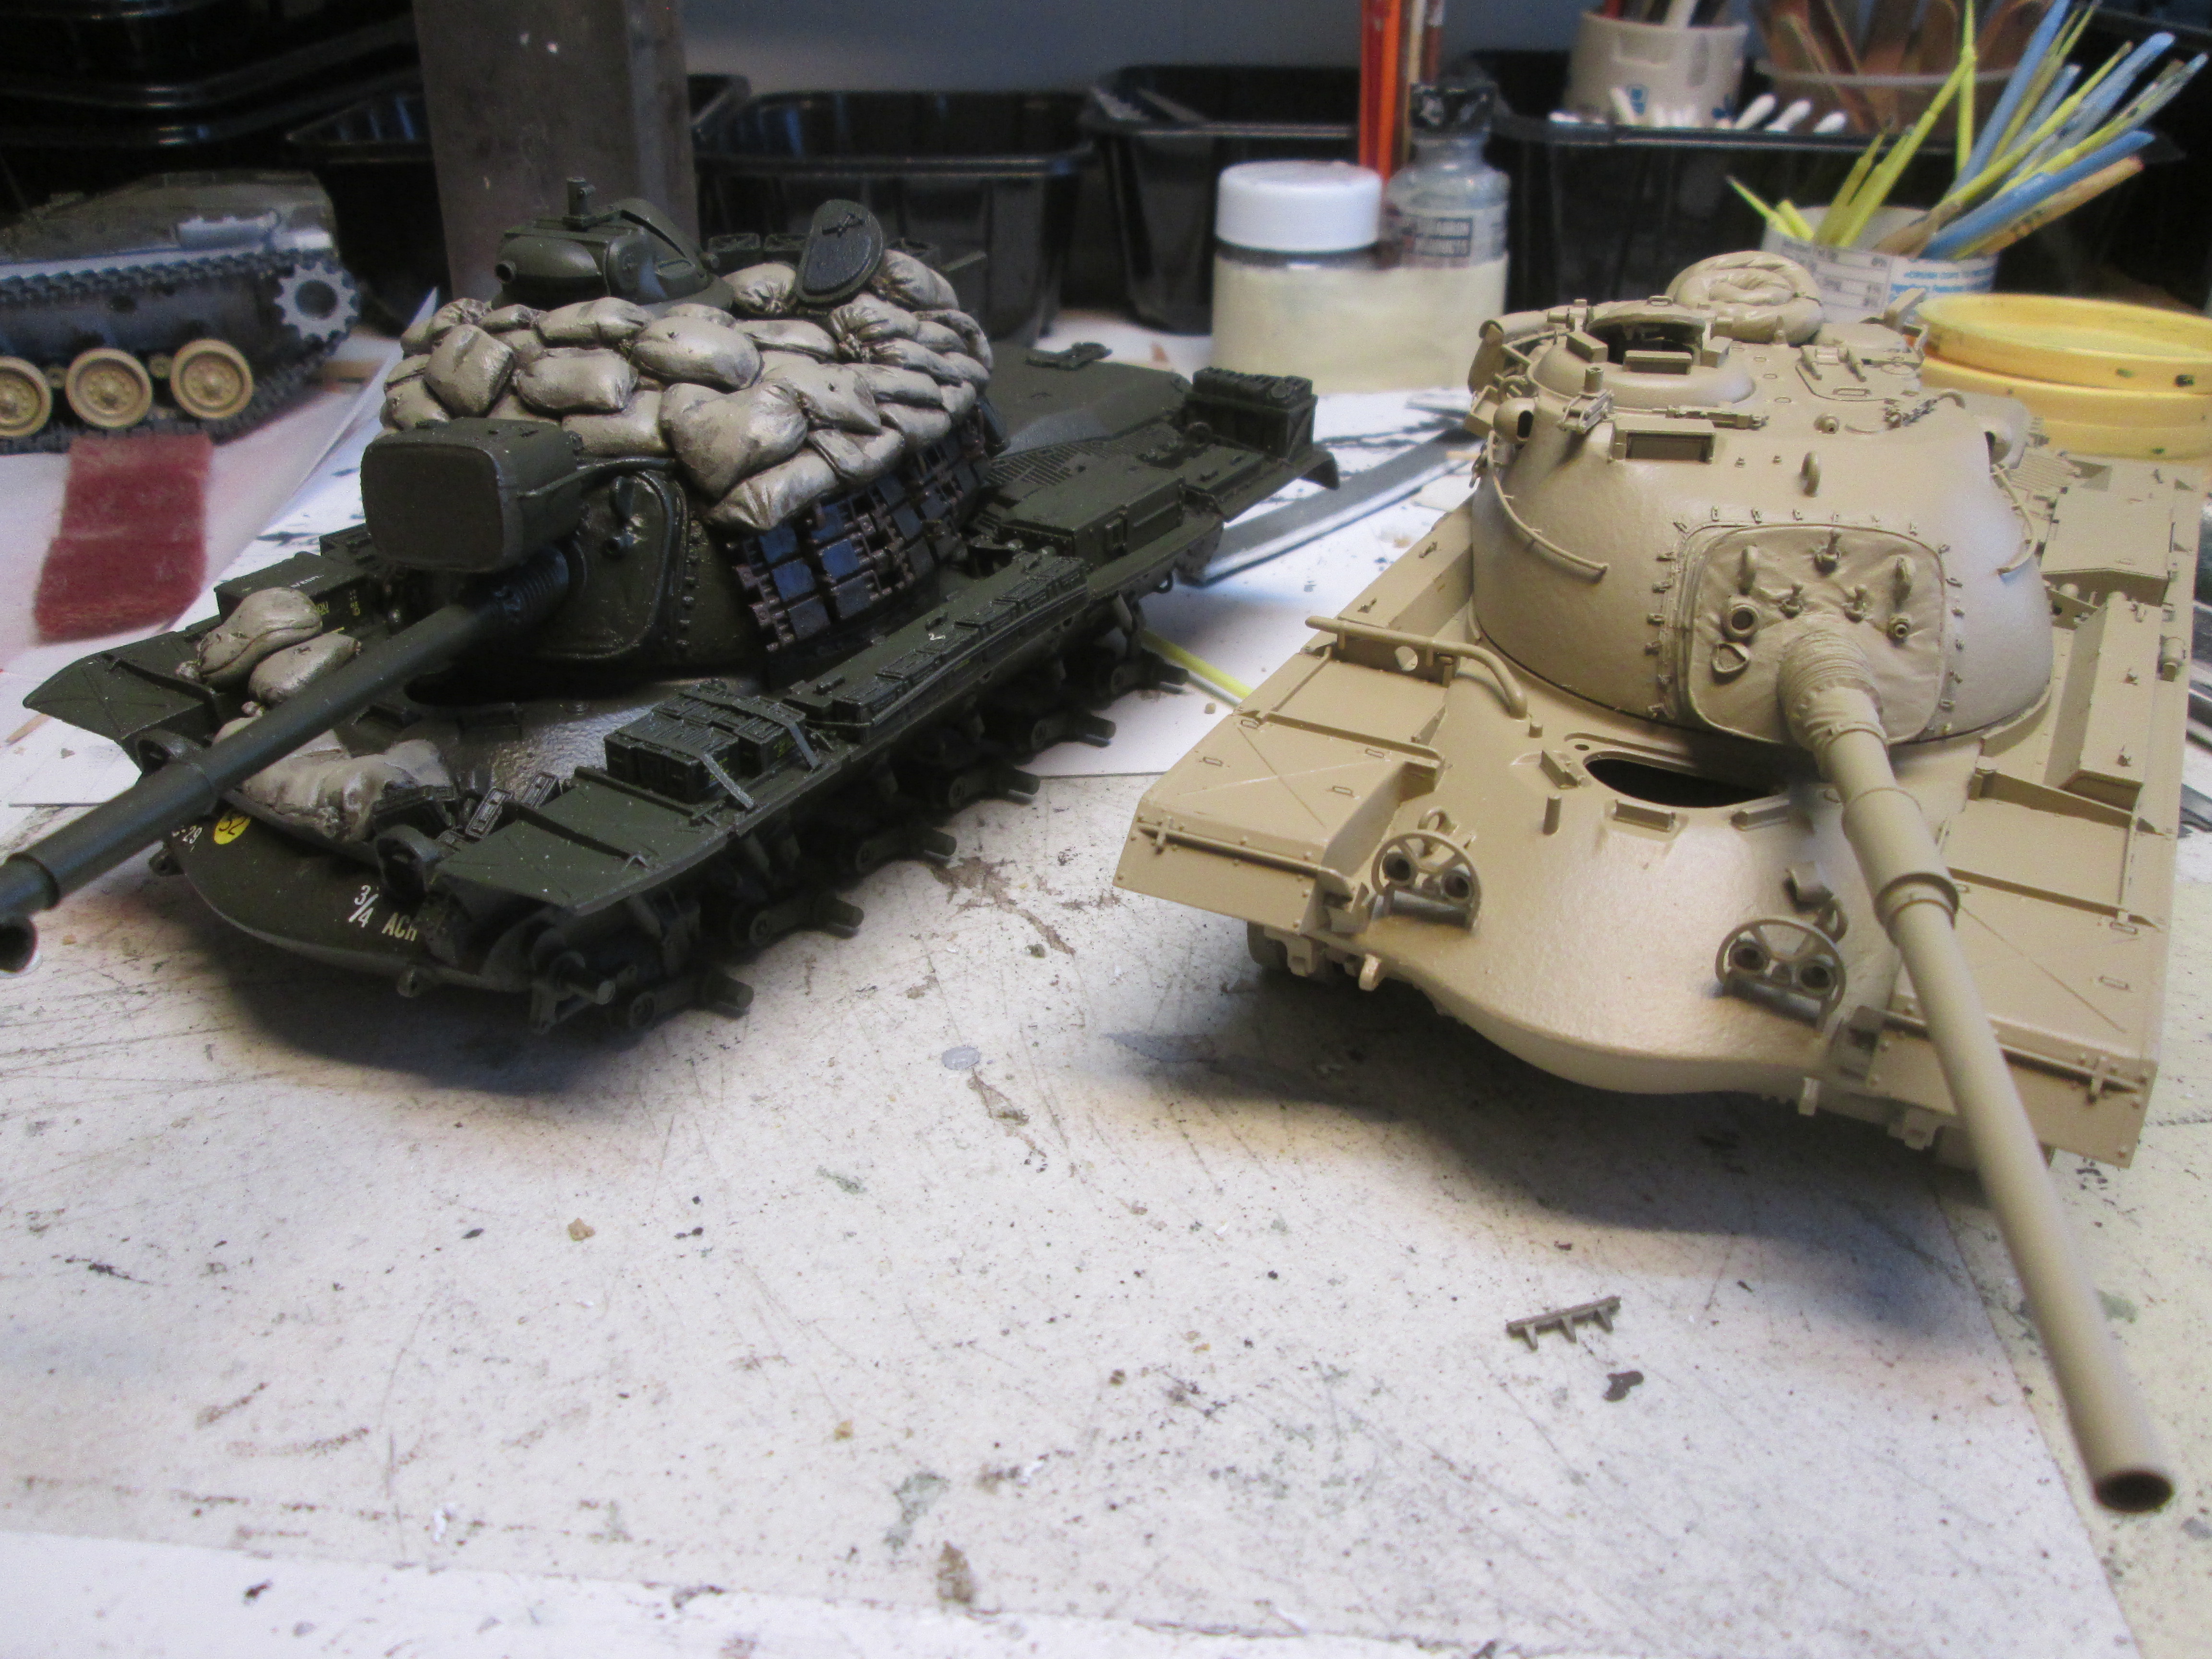 IMG_3913 IMG_3913 by Russel Baer, on Flickr 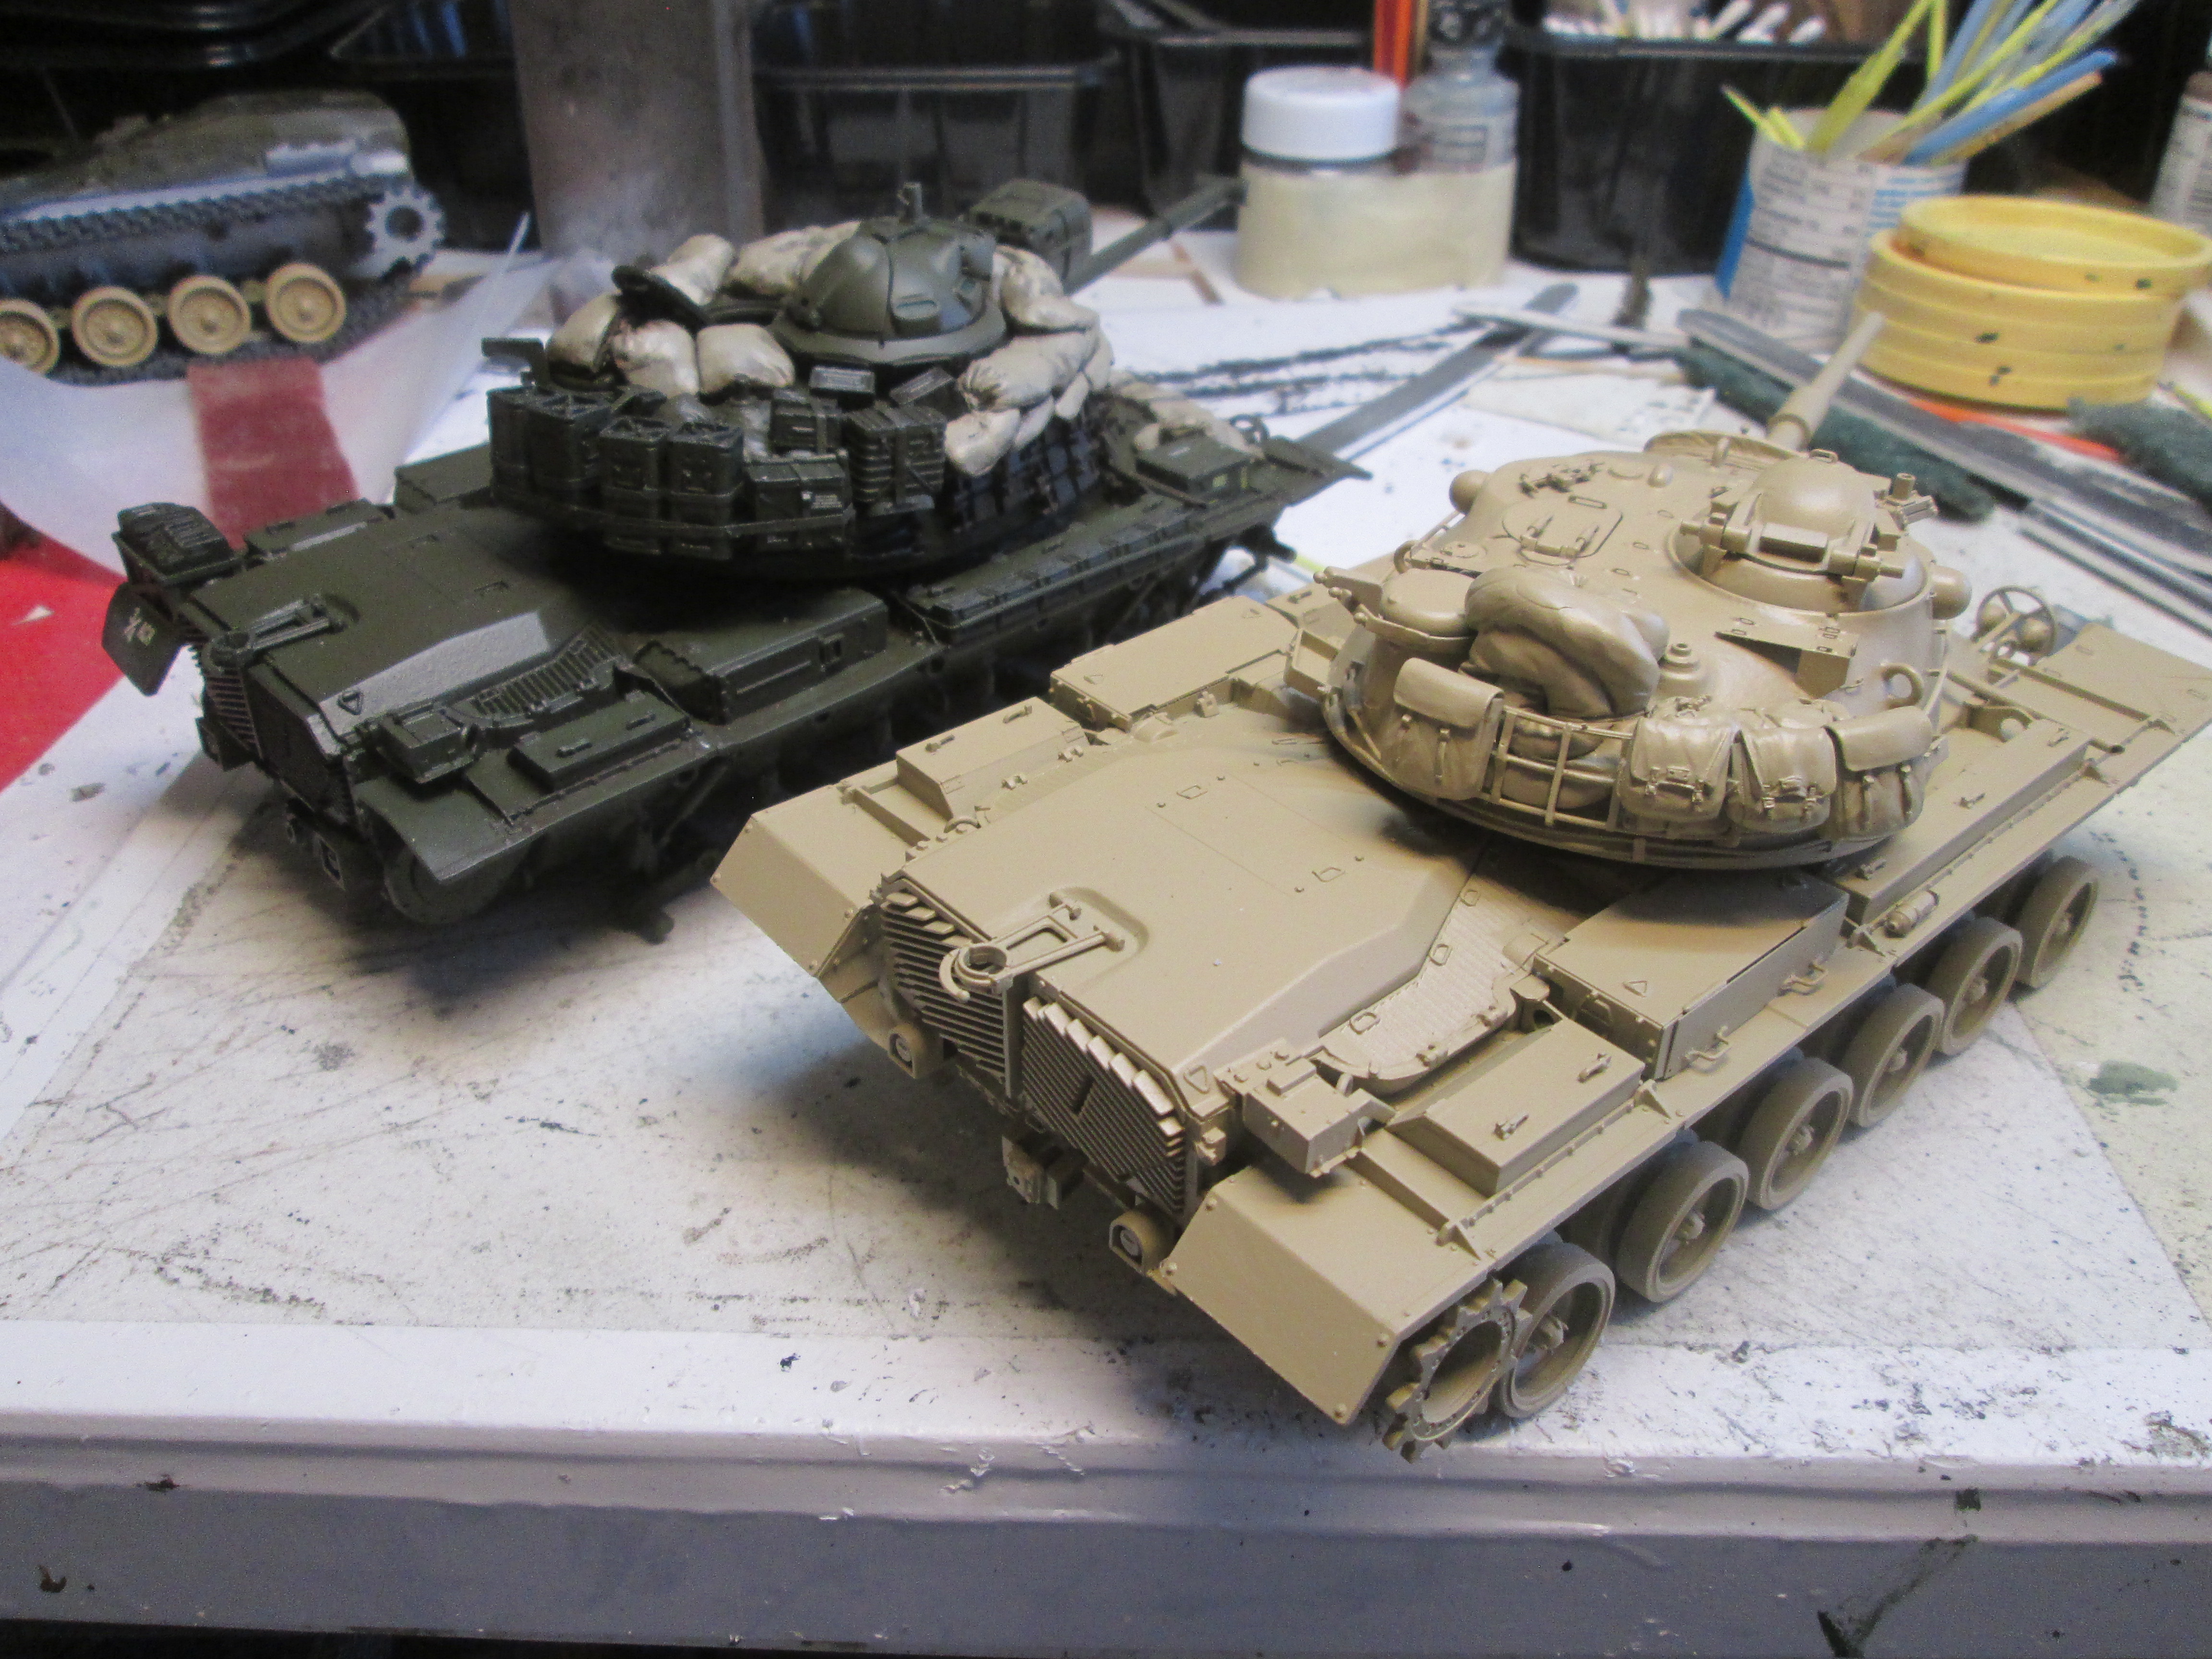 IMG_3912 IMG_3912 by Russel Baer, on Flickr Yup, it's another M48 hull, this one to be a Magach 5 made from an M48A2. I just thought I was out of Tamiya M48 parts.... |
|
|
|
Post by Tobi on Apr 15, 2023 1:35:17 GMT -5
Everybody has his preferences. Some enjoy building, some painting, I like both equally. Nothing wrong with having several projects running simultaneously so one can go according his mood.
I find it interesting to see how green the base color was before it started looking OD. Came it just from the washing?
|
|
|
|
Post by mustang1989 on Apr 15, 2023 7:34:54 GMT -5
I'm still in awe at how you guys can put all this stuff on a vehicle like this and paint it all up as one color and then pick out the details. Un.............believable.
|
|
|
|
Post by chromdome35 on Apr 15, 2023 9:42:18 GMT -5
I am really digging both of these! Your detail work is spot on.
|
|
ogrejohn
Full Member
Member since: June 2012
Go away or I shall taunt you a second time!
Posts: 1,259
Jun 1, 2012 17:33:59 GMT -5
Jun 1, 2012 17:33:59 GMT -5
|
Post by ogrejohn on Apr 16, 2023 9:29:25 GMT -5
Very nice indeed Russ!
|
|
|
|
Post by rbaer on Apr 16, 2023 18:04:47 GMT -5
Thanks y'all.
Tobi, the short answer: yes, with a small amount of filling in or as it was called in ancient times "mapping", using a lighter OD from the Scale 75 "Warfront" range. It's great paint for dry brushing or using heavily diluted and adding a tint to a base coat. It's a technique or method Andy Argent was demonstrating 15 or so years ago and I like it. I think of it as the same thing as "color modulation", just using a brush instead of an airbrush.
|
|
|
|
Post by robbo on Apr 17, 2023 3:31:47 GMT -5
Great build again, very nice
|
|
|
|
Post by rbaer on May 8, 2023 17:55:08 GMT -5
Some progress, finally (I haven't quit!). The -A3 is very close to being finished. Only a couple of parts need to go on (driver's hatch, return rollers...) and then I can add figs and move on. 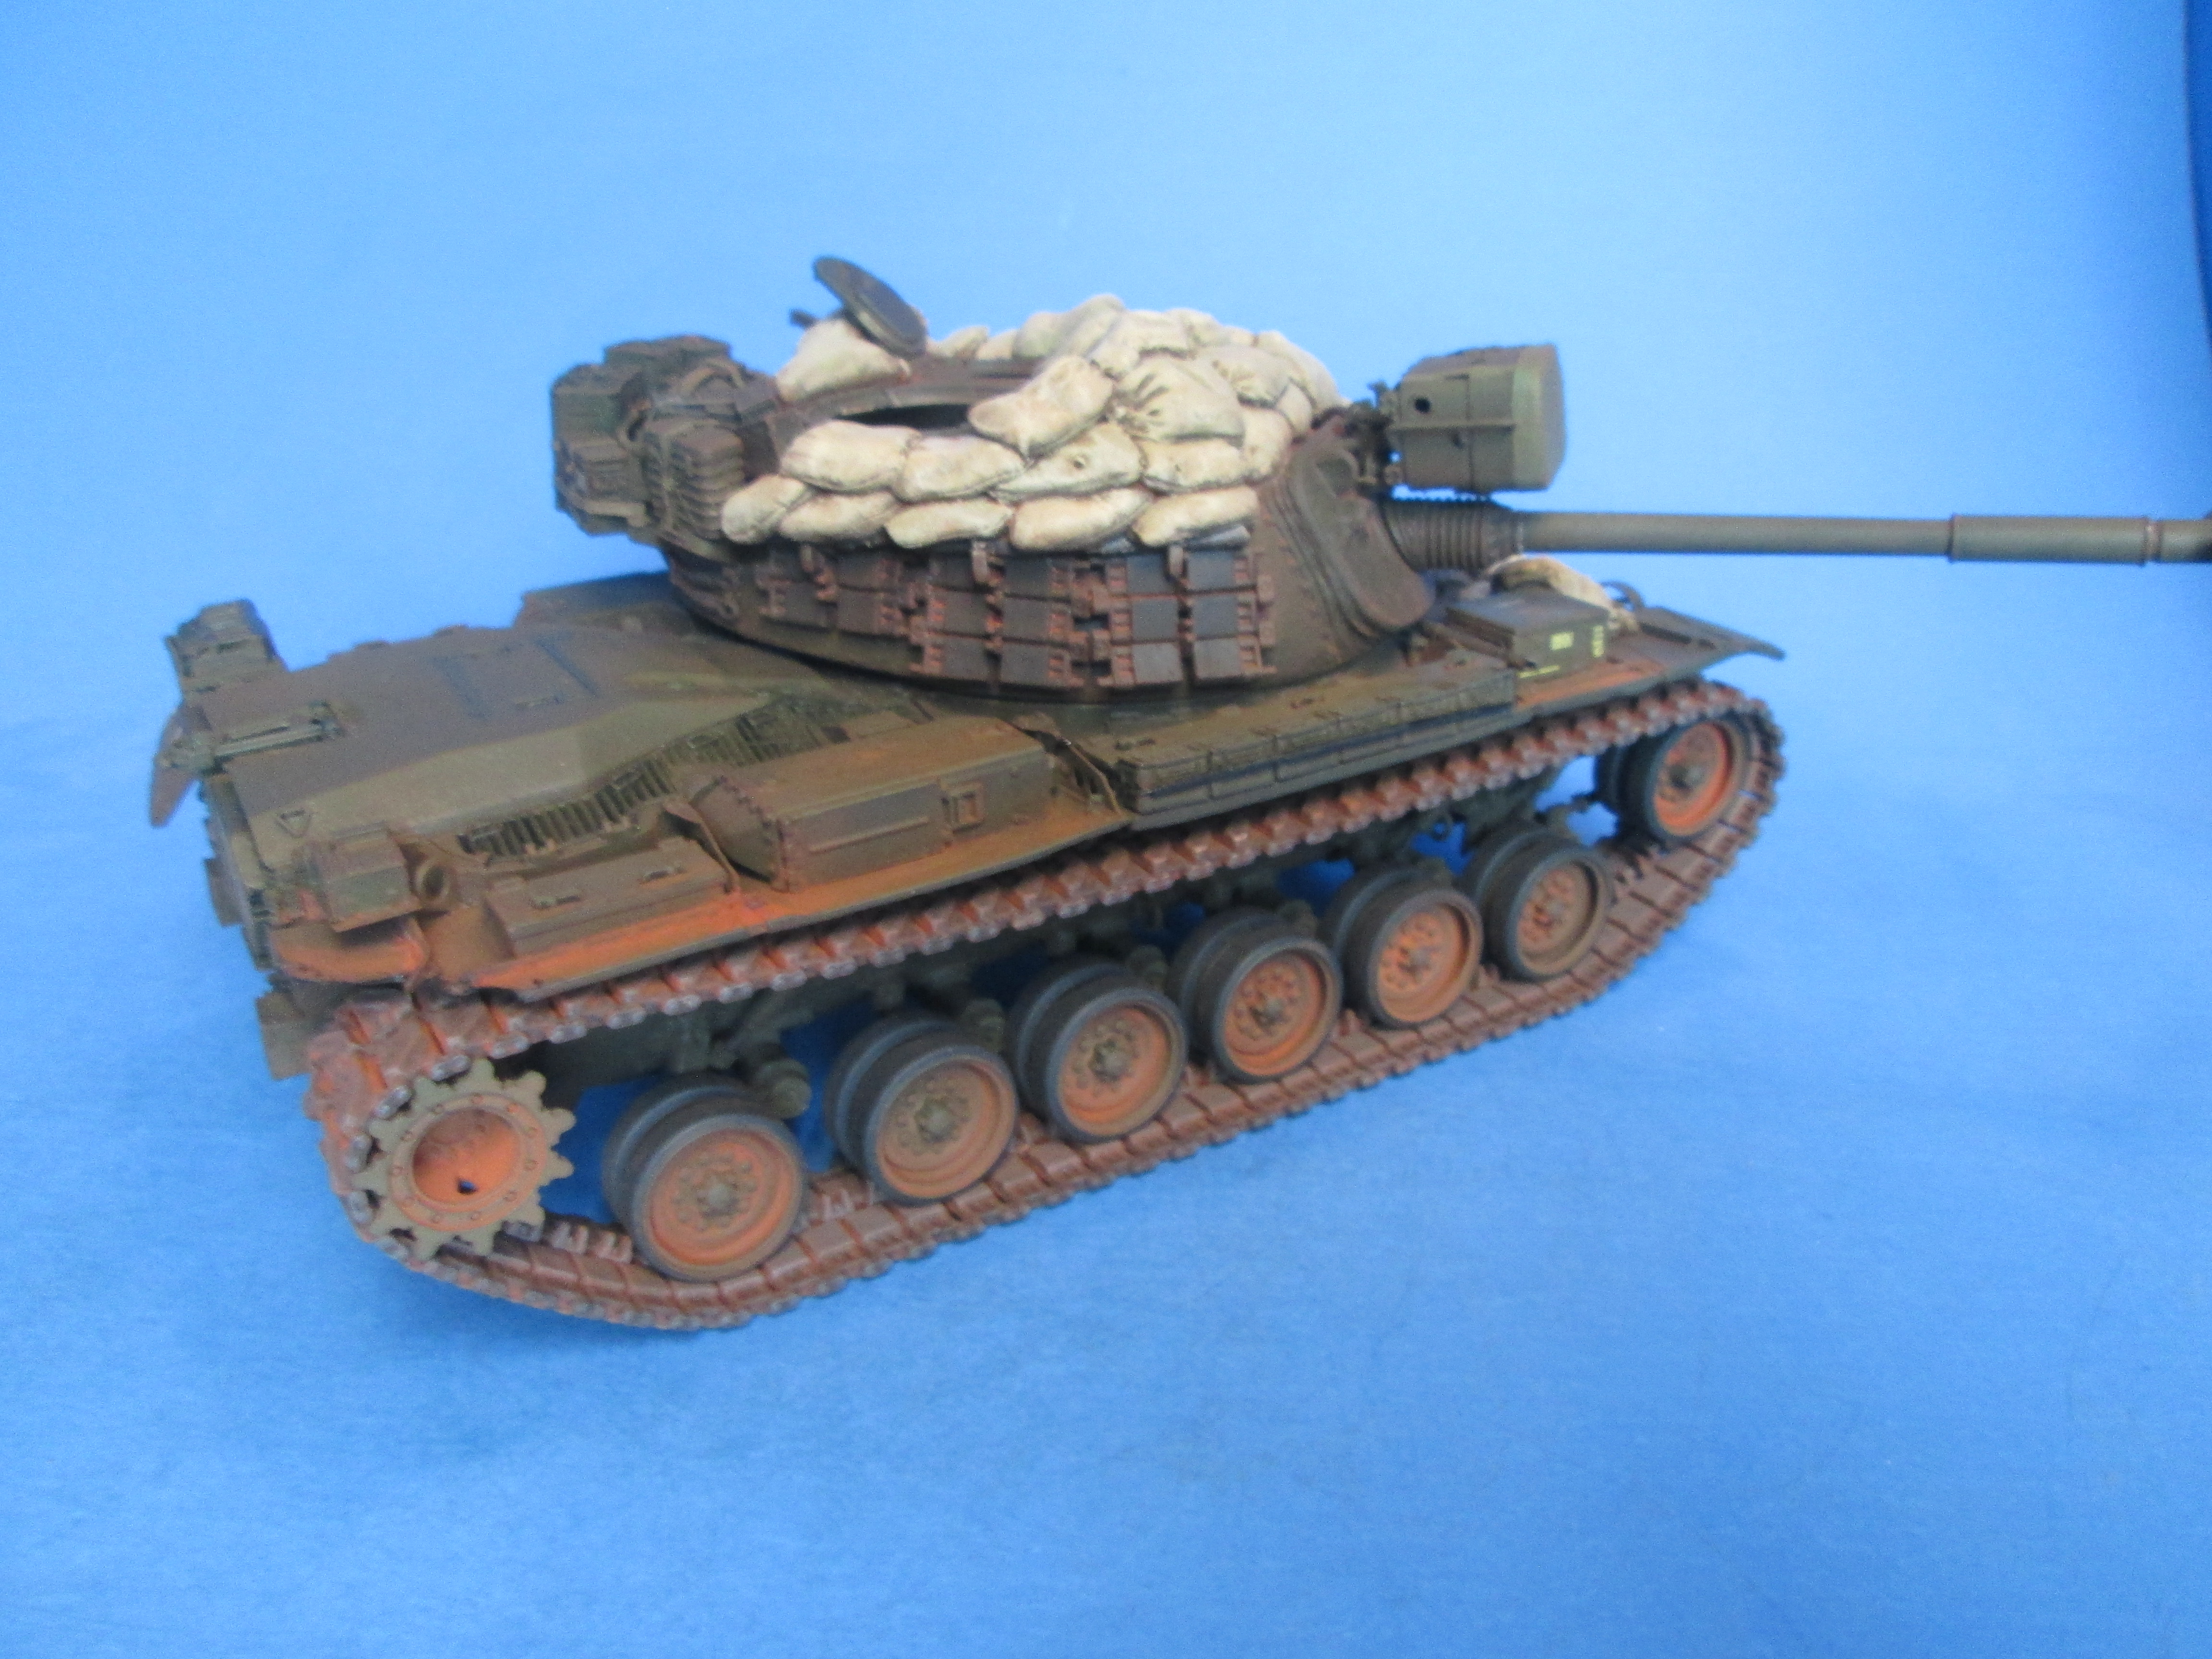 IMG_3915 IMG_3915 by Russel Baer, on Flickr  IMG_3916 IMG_3916 by Russel Baer, on Flickr The Magach has decals on it and I've done a little detail painting, just base coats so far.  IMG_3918 IMG_3918 by Russel Baer, on Flickr  IMG_3919 IMG_3919 by Russel Baer, on Flickr And just because I have so many parts, I started another one, to be a weird-o that has very little documentation and no good pics of the area that's the most different from a "standard" Magach 3: A Magach 3 converted by the Israelis from an M48A2C, or Magach 2. Basicaly, that means they did the same thing the US and a number of other users of the gas engined M48A2 and -A2C did, convert to the same diesel engine as the M48A3. The diffenrnce in the IDF version was the engine deck cooling grills between the engine cover and air filter housings. The IDF didn't buy the whole conversion kit from BMY, apparently, since their grills inboard of the air filter housings are different than other converted tanks. The converted tanks are easy to spot in pics since they have the big armored air filter housings but only three return rollers. For a long time pics of these tanks were captioned as M48A3's with two return rollers removed. In fact, they are tanks that were built as M48A2C's with only three return rollers. The problem for me and any other modeler wanting to do this conversion accurately is the scarcity of pics of the engine deck. So far, I've got a hull started, just basic stuff so far and the very nice M48 turret from a Takom "Brave Tiger":  IMG_3914 IMG_3914 by Russel Baer, on Flickr I've made the same correction to the very front of the hull as I did on the -A3, easier the second time around.... and then the area of the engine deck that needs reworking: 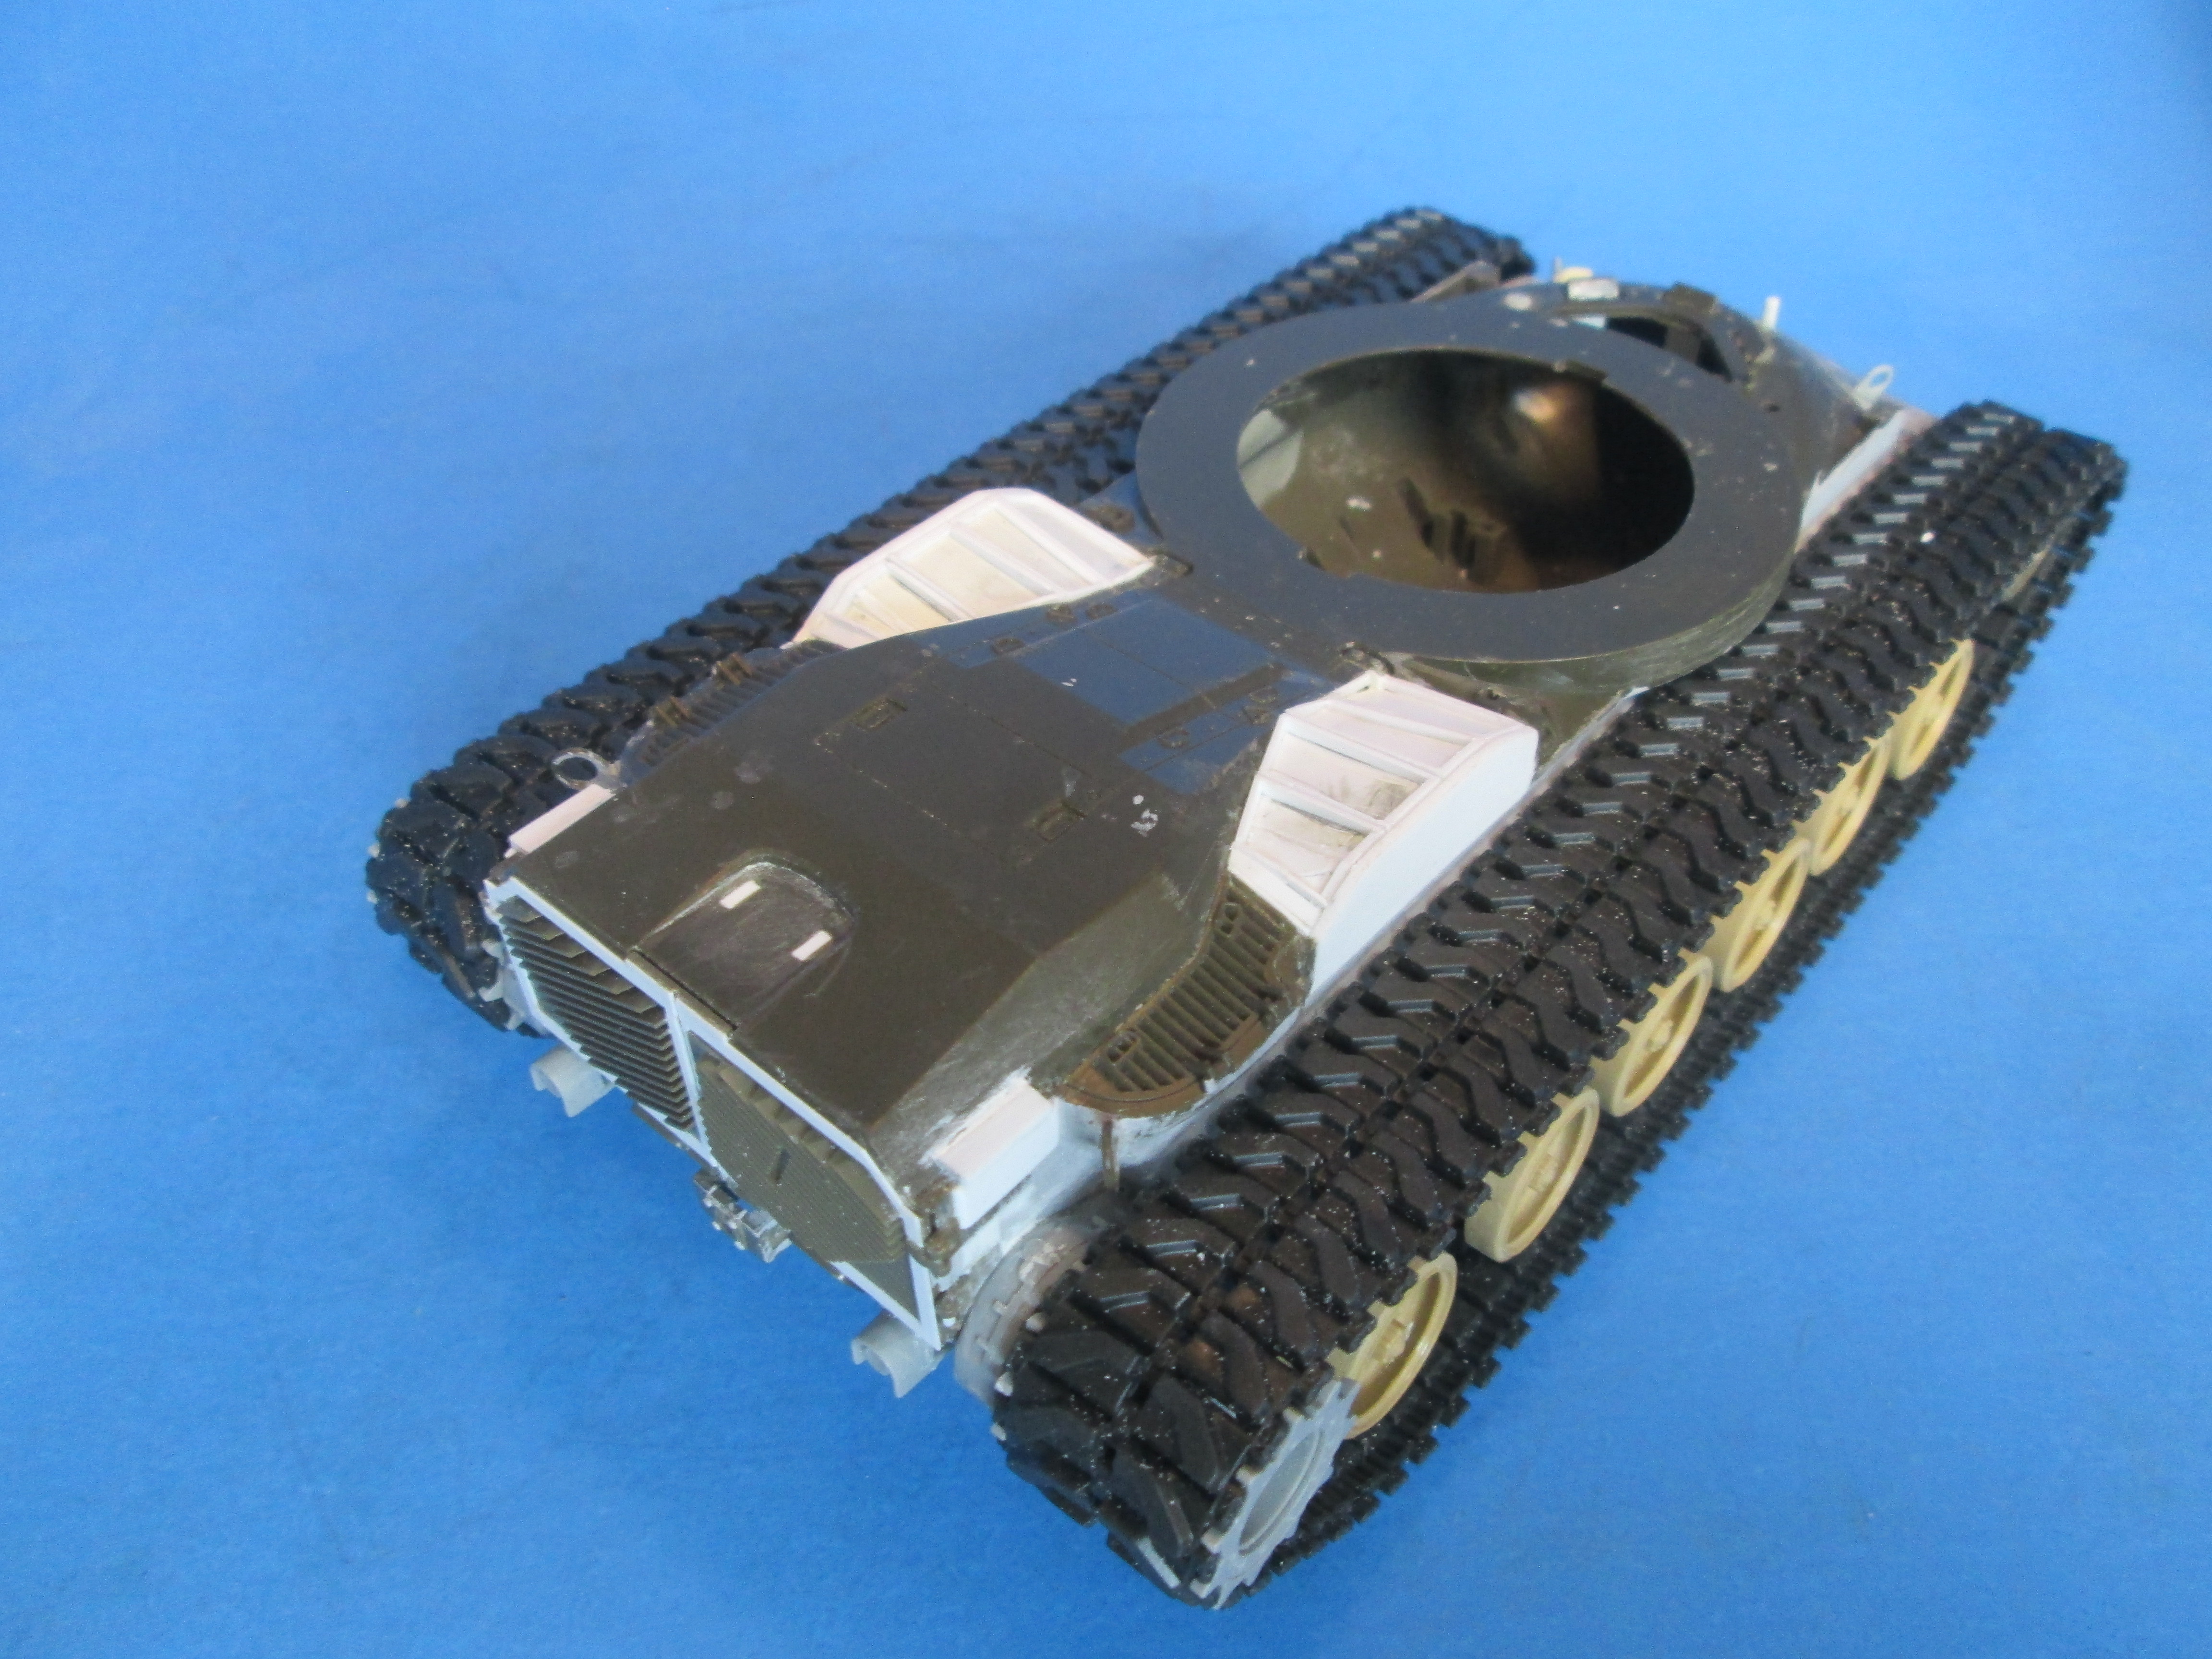 IMG_3917 IMG_3917 by Russel Baer, on Flickr It's kind of hard to see but I have the basic frames for the new grills made, still need to do all the individual slats and new hinges. Here I need a "pounding head on a wall GIF". Sorry for the lengthy post. |
|
|
|
Post by 406 Silverado on May 8, 2023 18:05:18 GMT -5
Some progress, finally (I haven't quit!). The -A3 is very close to being finished. Only a couple of parts need to go on (driver's hatch, return rollers...) and then I can add figs and move on. G_3915 by Russel Baer, on Flickr MG_3916 by Russel Baer, on Flickr The Magach has decals on it and I've done a little detail painting, just base coats so far. MG_3918 by Russel Baer, on Flickr G_3919 by Russel Baer, on Flickr And just because I have so many parts, I started another one, to be a weird-o that has very little documentation and no good pics of the area that's the most different from a "standard" Magach 3: A Magach 3 converted by the Israelis from an M48A2C, or Magach 2. Basicaly, that means they did the same thing the US and a number of other users of the gas engined M48A2 and -A2C did, convert to the same diesel engine as the M48A3. The diffenrnce in the IDF version was the engine deck cooling grills between the engine cover and air filter housings. The IDF didn't buy the whole conversion kit from BMY, apparently, since their grills inboard of the air filter housings are different than other converted tanks. The converted tanks are easy to spot in pics since they have the big armored air filter housings but only three return rollers. For a long time pics of these tanks were captioned as M48A3's with two return rollers removed. In fact, they are tanks that were built as M48A2C's with only three return rollers. The problem for me and any other modeler wanting to do this conversion accurately is the scarcity of pics of the engine deck. So far, I've got a hull started, just basic stuff so far and the very nice M48 turret from a Takom "Brave Tiger": MG_3914 by Russel Baer, on Flickr I've made the same correction to the very front of the hull as I did on the -A3, easier the second time around.... and then the area of the engine deck that needs reworking: IMG_3917 by Russel Baer, on Flickr It's kind of hard to see but I have the basic frames for the new grills made, still need to do all the individual slats and new hinges. Here I need a "pounding head on a wall GIF". Sorry for the lengthy post. First off, you're doing some mighty fine work here with this build. I really enjoy each and every update that you bring to the table with all the details and weathering. Secondly, you my friend, are definitely hooked. I'm a hotrodder on 1:1 scale projects and I swear I've got spare parts for everything but you.........you have that and then some for modeling, It's always fun to see what combination you're going to put together next. Your work is pure entertainment buddy and I love every second of it. |
|
|
|
Post by Tojo72 on May 8, 2023 18:10:49 GMT -5
Hey Russ,
Great to have you and your Frankenstein buds around,details are looking great.
|
|
|
|
Post by chromdome35 on May 9, 2023 14:27:35 GMT -5
Russ, that A3 really looks good with the red dusting. Looks right off the field in Vietnam.
I'm in awe of your ability to kitbash these into a solid model...that takes real skills!
|
|
|
|
Post by rbaer on May 21, 2023 21:27:22 GMT -5
I haven't had a lot of bench time lately, but I'm still piddling along. The Magach has a wash on it now, using a Vallejo acrylic to richen the color a little. 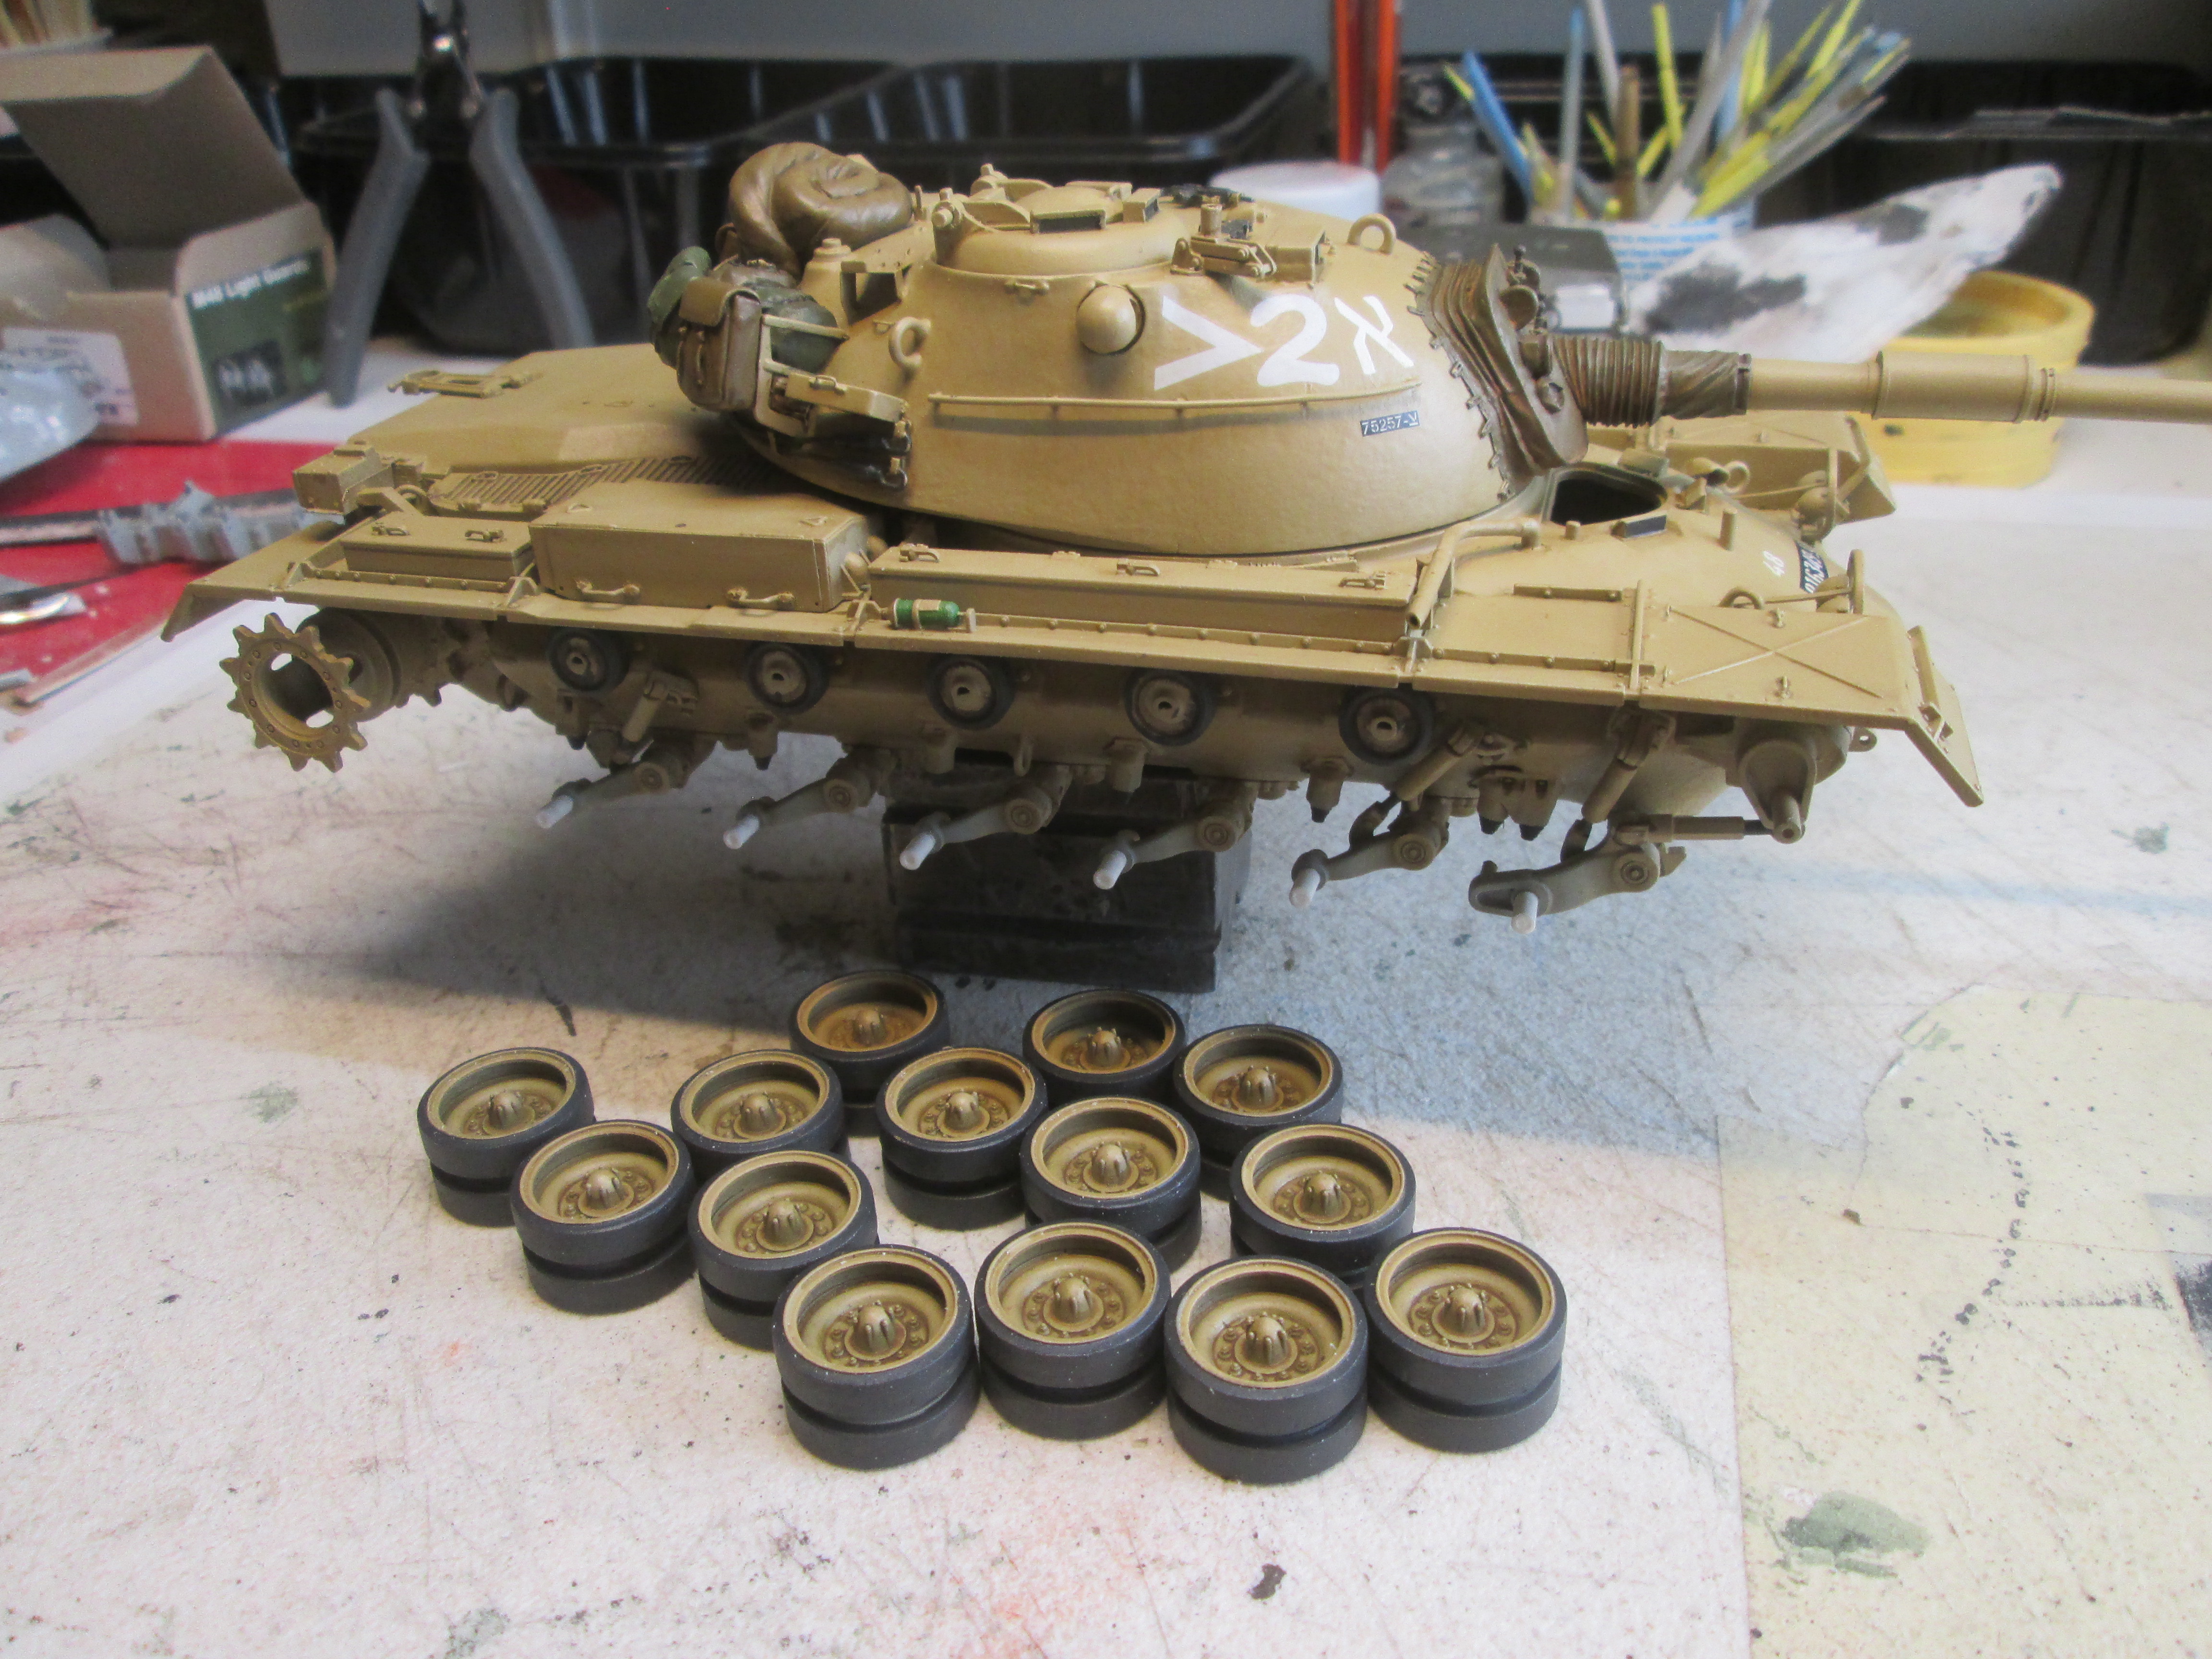 IMG_3921 IMG_3921 by Russel Baer, on Flickr But... what I've spent more time on is the converted -A2C, which has maybe slowed the completion of the other two. Oh well. I have the engine cover grills done. I used plastic stock for all the separate grills and louvers, then MJ Products pulls on the new grills and the rest of the engine cover. Tee.Dee.Us. Hinges are more plastic stock. I used a light wash to check for flaws.  IMG_3923 IMG_3923 by Russel Baer, on Flickr |
|