Post by mrt51 on Feb 9, 2023 22:27:40 GMT -5
Ok I've been posting a lot of finished stuff. Well this one is finished too, but there was a lot of wip pictures with this one. So I though I would recount build here. It was done in time for IPMS Nationals last year.
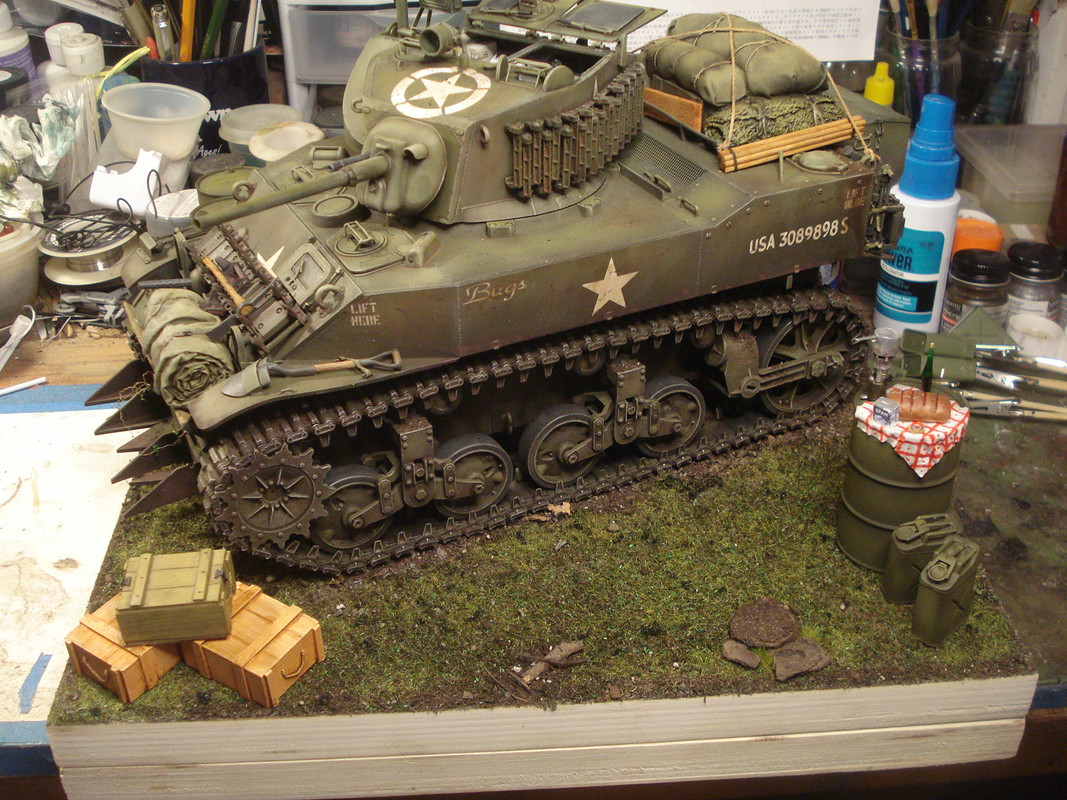
This all got started when I discovered a 1/16th M5A1 Stuart from Classy Hobby.


It is a real nice kit with good detail. It also has a near complete turret interior. Work began with the lower hull an running gear.

Everything was dry fitted at this point. Of course all the running gear is workable. I added some minor details to the boggie wheels and then began painting and some early washes.


While I am doing this I began to consider doing some interior work. While the turret had a pretty good interior you could see past it when looking in the turret hatches. The result you could see all that empty space or the lower hull. I began by designing a seat. Using Solidworks CAD system I created a 3D model of a seat I rescaled from a 1/35 seat. Using this model I was able to make flat patterns to use to make the seat out of sheet styrene.

Ok back to the model. I continue to work on the running gear paint and weathering. Also started some the interior work and dry fitting upper hull parts. You can see how you can see past the turret interior. I desided not the open the hull hatches because I didn't intend to do a complete interior. Just enough to fill in what could be seen through the turret hatches. This will turn out to be more than I thought.


Every tank need some pin up pictures. I found these and reduced them to fit the turret walls, but more on that later.


Now for a musical interlude.
youtu.be/xFTZ2--5xTc
To get ready to start work on the interior I began to collect reference pictures.


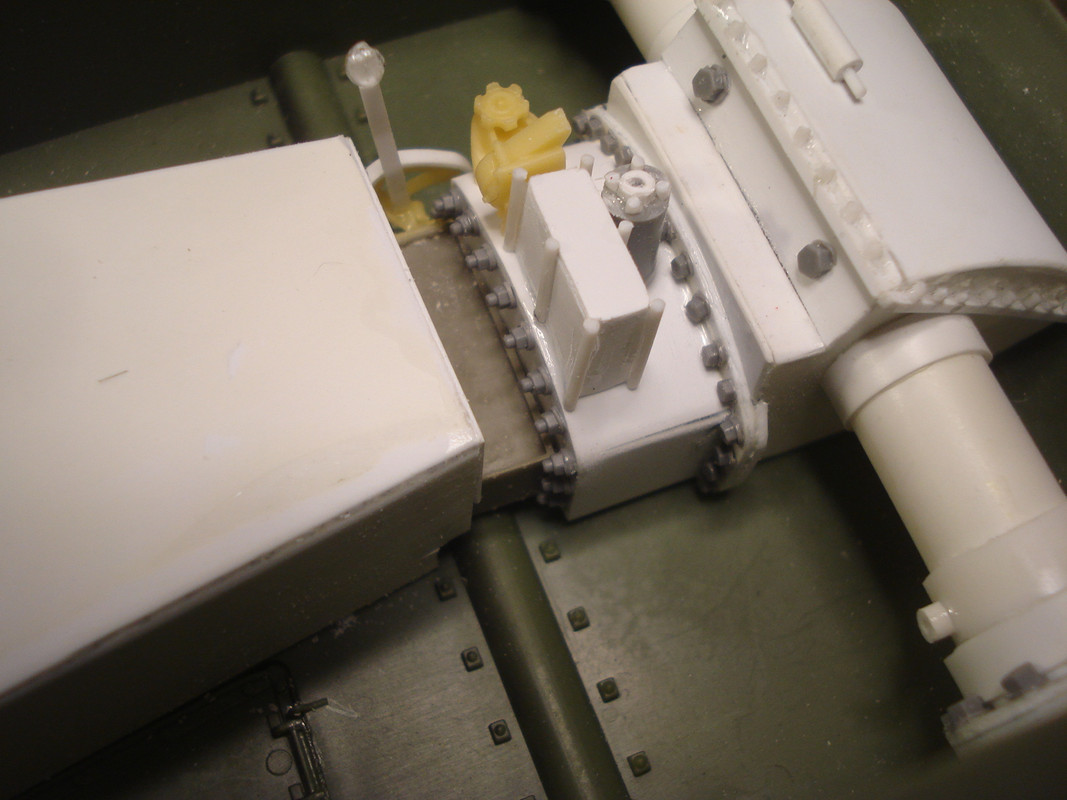
I began to fabricate the transmission and drive shaft tunnel. Also you can see the seats are under construction.


Transmission details coming together.


Seat assembles installed. The seat cushions are made of Epoxy Sculpt.


More interior details and some painting. Everything shown is scratch built.


Test fitting some Value Gear stowage.


Turret interior progress. Added scatch made intercom microphones. Also you can see the pinups and range chart.


Interior view through the turret hatches.

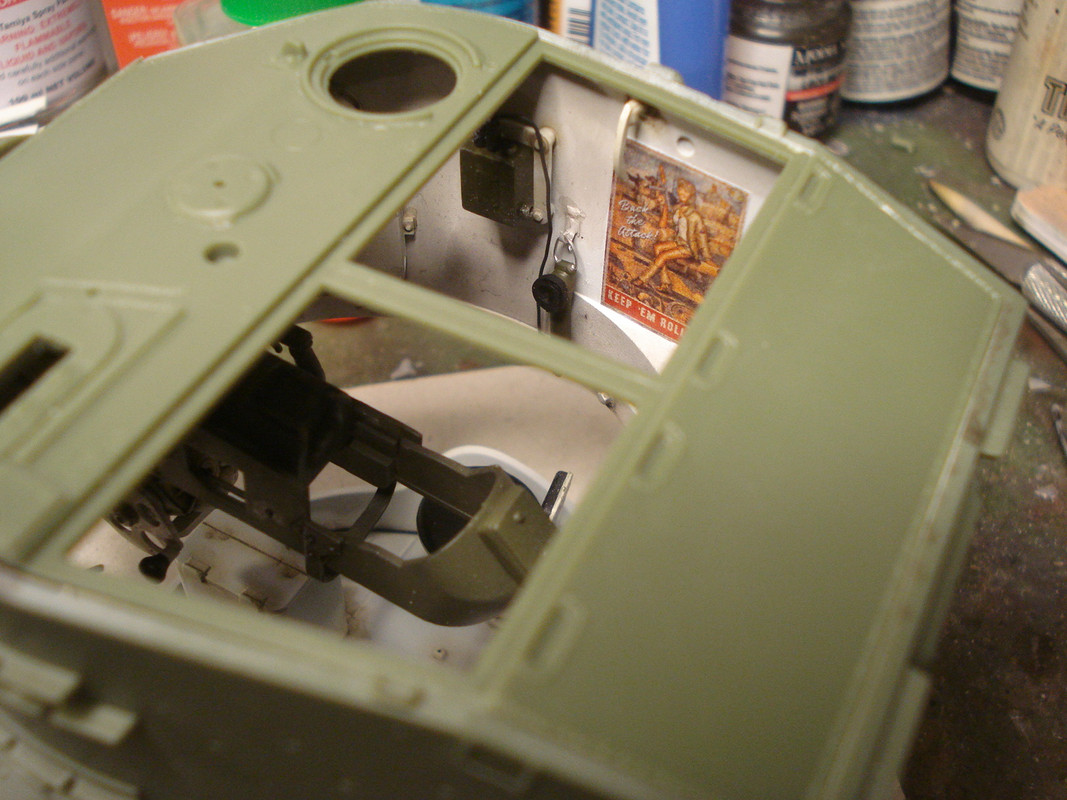


Doing the radio work. Scratch made radio headset. Added some strips of tape to hold the pinups to the turret wall.


Always checking the view.

Adding the human factor. And yes it's Jim Belushi


More turret interior details. Created a spent shell bag or the gun. Made from lead foil and tissue paper.


Turret closed up. Painting is underway. And as always, checking the view.


More details. K-ration box and hull details. Oh if you look there is a copy of Stars-n-Stripes.


Laying things out.

Hull details.


Hull painting.
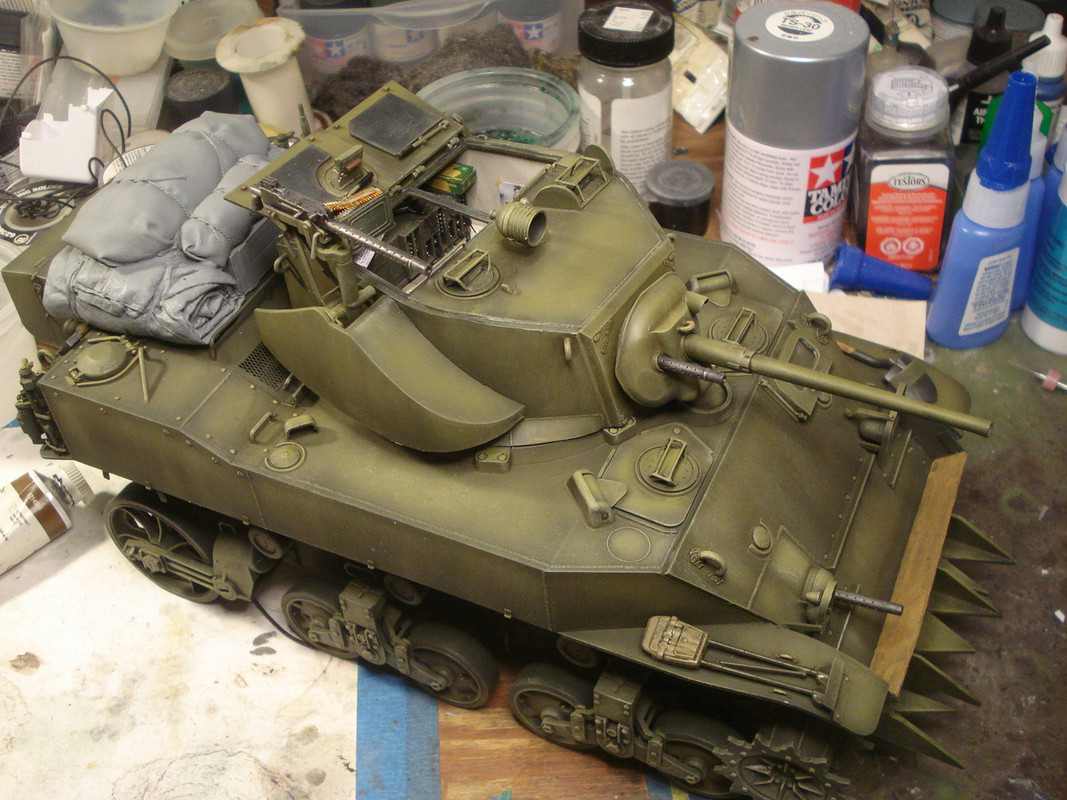


Marking go on. Chipping and weathering continues.


More weathering and tracks installed.


Loading the gear.


Next post building the base.
Thanks for dropping by.
This all got started when I discovered a 1/16th M5A1 Stuart from Classy Hobby.
It is a real nice kit with good detail. It also has a near complete turret interior. Work began with the lower hull an running gear.
Everything was dry fitted at this point. Of course all the running gear is workable. I added some minor details to the boggie wheels and then began painting and some early washes.
While I am doing this I began to consider doing some interior work. While the turret had a pretty good interior you could see past it when looking in the turret hatches. The result you could see all that empty space or the lower hull. I began by designing a seat. Using Solidworks CAD system I created a 3D model of a seat I rescaled from a 1/35 seat. Using this model I was able to make flat patterns to use to make the seat out of sheet styrene.
Ok back to the model. I continue to work on the running gear paint and weathering. Also started some the interior work and dry fitting upper hull parts. You can see how you can see past the turret interior. I desided not the open the hull hatches because I didn't intend to do a complete interior. Just enough to fill in what could be seen through the turret hatches. This will turn out to be more than I thought.
Every tank need some pin up pictures. I found these and reduced them to fit the turret walls, but more on that later.
Now for a musical interlude.
youtu.be/xFTZ2--5xTc
To get ready to start work on the interior I began to collect reference pictures.
I began to fabricate the transmission and drive shaft tunnel. Also you can see the seats are under construction.
Transmission details coming together.
Seat assembles installed. The seat cushions are made of Epoxy Sculpt.
More interior details and some painting. Everything shown is scratch built.
Test fitting some Value Gear stowage.
Turret interior progress. Added scatch made intercom microphones. Also you can see the pinups and range chart.
Interior view through the turret hatches.
Doing the radio work. Scratch made radio headset. Added some strips of tape to hold the pinups to the turret wall.
Always checking the view.
Adding the human factor. And yes it's Jim Belushi
More turret interior details. Created a spent shell bag or the gun. Made from lead foil and tissue paper.
Turret closed up. Painting is underway. And as always, checking the view.
More details. K-ration box and hull details. Oh if you look there is a copy of Stars-n-Stripes.
Laying things out.
Hull details.
Hull painting.
Marking go on. Chipping and weathering continues.
More weathering and tracks installed.
Loading the gear.
Next post building the base.
Thanks for dropping by.