mz3
Full Member
  
Member since: October 2012
Posts: 649
Oct 14, 2012 21:09:43 GMT -5
Oct 14, 2012 21:09:43 GMT -5
|
Post by mz3 on May 22, 2023 14:31:36 GMT -5
 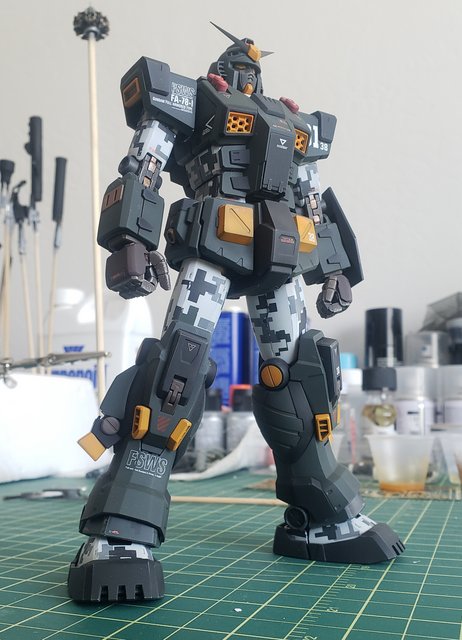 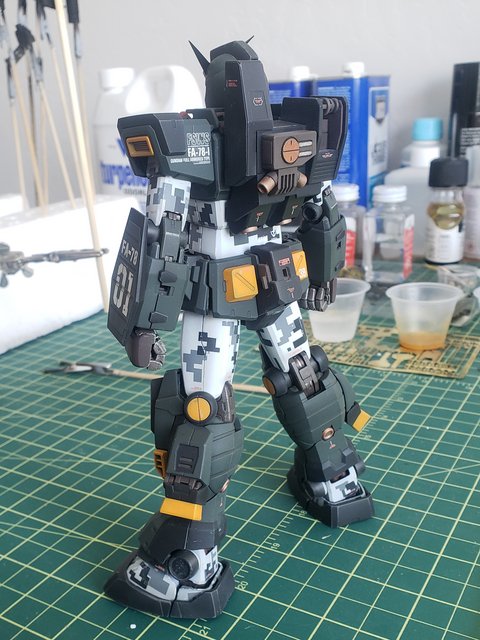 Not done. Just test fitting the armor parts to make sure there are no issues. Any scratches or damage will be worked into the weathering from this point on. Weapons are still being painted. There are several parts being repainted. One magnet is not cooperating so it might be replaced. For weathering I'll start with post shading on the lighter colored parts. Then oils to fade some of the darker parts. Then I have no plan after that, I'll just do whatever looks nice.
|
|
|
|
Post by 406 Silverado on May 23, 2023 3:54:16 GMT -5
 Not done. Just test fitting the armor parts to make sure there are no issues. Any scratches or damage will be worked into the weathering from this point on. Weapons are still being painted. There are several parts being repainted. One magnet is not cooperating so it might be replaced. For weathering I'll start with post shading on the lighter colored parts. Then oils to fade some of the darker parts. Then I have no plan after that, I'll just do whatever looks nice. Looks like the things that you're doing along the way are making this whole thing look nice. All of your work is definitely paying off here bud. |
|
mz3
Full Member
  
Member since: October 2012
Posts: 649
Oct 14, 2012 21:09:43 GMT -5
Oct 14, 2012 21:09:43 GMT -5
|
Post by mz3 on May 29, 2023 11:32:24 GMT -5
Thanks man. From this point on is where I really start having fun. So, the order of the steps I take kinda go out the window. I try to start uniform across all parts, but at some point I start going in different directions. It's just the way I like to work with a kit like this. There are 2 rules I am working with. The first rule, no gravity. This is a space based unit, so no gravity means no oil/grime streaks. The second is 1/100 scale weathering. This is a "duh" rule, but I see tons of people weather these kits the same way they would weather a 35th scale kit. It looks out of place and bad to me. I start with airbrushing a VERY thinned layer of tamiya smoke on the edges of the white parts. Like 120 to 1 ratio. That gives just a hint of color change. I use about half of that then added a drop of flat brown. Let that dry. Then use a piece of a 2000 grit sanding sponge to remove and shape the dirtiness(there's that word again). On the green and black parts I start with a dusting if buff thinned about 75 to 1. Going over the edges and angles. Then hit all of that with the 2000 sponge. Then pinned washed them with raw umber oil. I only let it set up for about an hour at most before I cleaned the excess. I didn't want to scrub oils off the flat surface and ruin the dusting. After that the order goes away. I'll just describe the steps. Black parts get german grey chips sanded with 2000. Green gets dark green 2 sanded. Oil dots all over using 3/0 and 0/0 brushes for the smallest dots I can get. Straight oil paint for oil leaks and grime, no streaking! Thin cement to damage areas. I "learned" this technique a while back and started using it in controlled ways for damage from beam weapons. Very very small flat aluminum chips on top of other chips. Very sparingly. 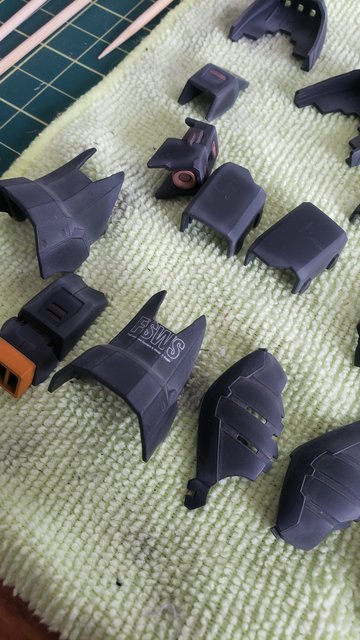 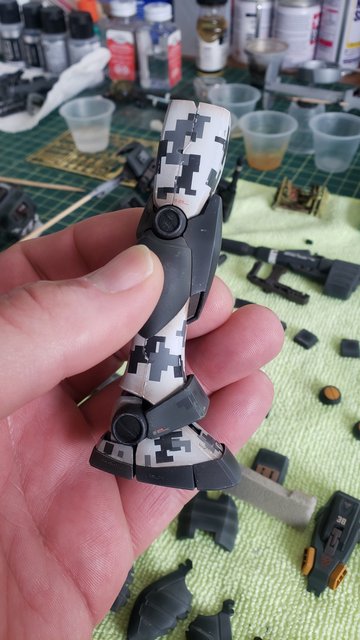 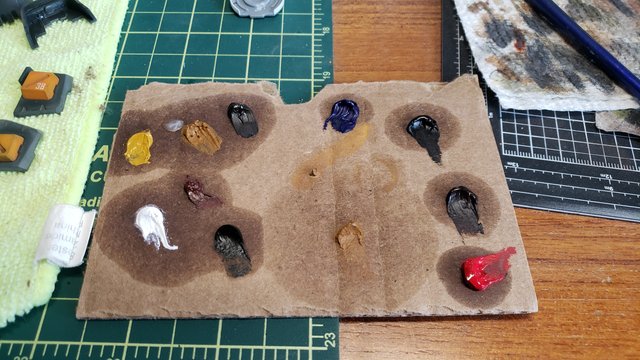 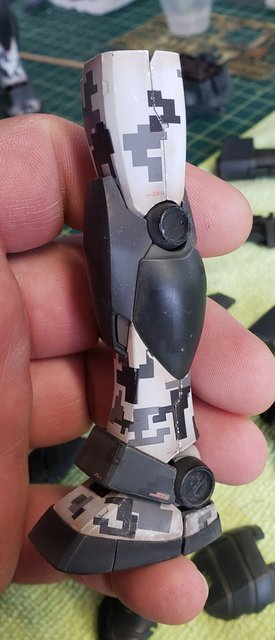 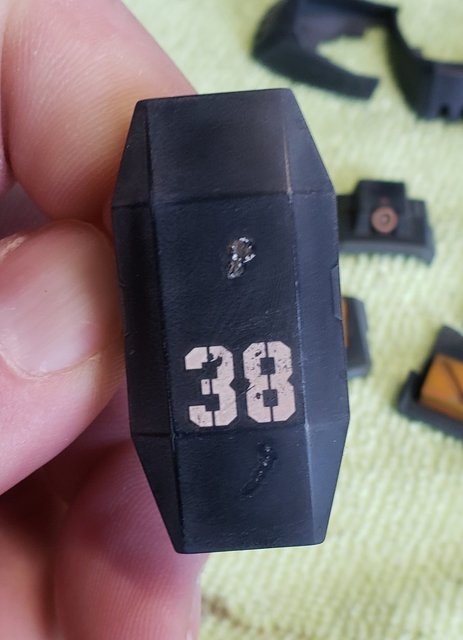 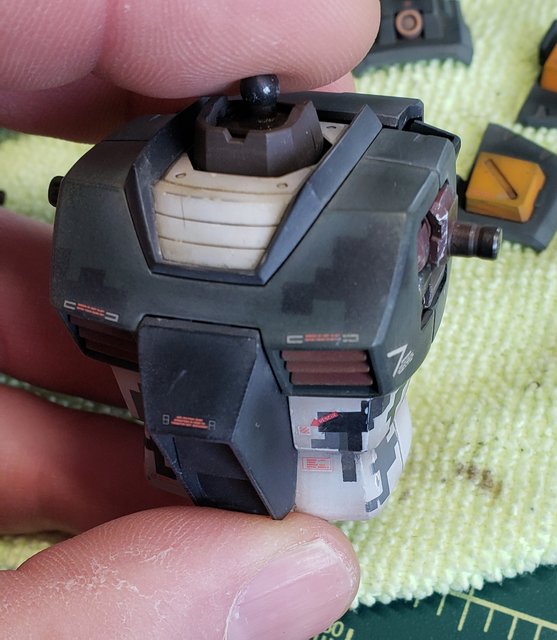 I try to build up the weathering in very thin layers until I'm happy with it. I probably have about a days worth of painting with the oils left to go. Ends in sight! Edit- I forgot another rule. Something I just follow for gundams without really thinking about it. Gundams are made from a Titanium alloy that does not rust. So no rust! |
|
|
|
Post by dupes on May 29, 2023 11:33:35 GMT -5
Mmmmmmmm...this is guy is looking GOOD!
|
|
stikpusher
Forum Moderator      May '23 Showcased Model Awarded
Member since: April 2023
Living The Dream
Posts: 4,119 
MSC Staff
|
Post by stikpusher on May 29, 2023 13:19:46 GMT -5
Oh very cool! I like the worn look that you’ve got going on this build.
|
|
|
|
Post by chromdome35 on May 29, 2023 18:06:28 GMT -5
That is looking stellar. Thank you for providing the Step by Step of your process. +1 Karma for that.
What brand of paint and thinner are you using?
|
|
mz3
Full Member
  
Member since: October 2012
Posts: 649
Oct 14, 2012 21:09:43 GMT -5
Oct 14, 2012 21:09:43 GMT -5
|
Post by mz3 on May 29, 2023 20:54:44 GMT -5
Tamiya and x20a.
Default settings basically 😆 I was thinking about trying mr level 400, which I have. But when I started I grabbed the tamiya without even thinking about it. Hard to break old habits.
Oils are Winston and Newton
|
|
|
|
Post by 406 Silverado on May 29, 2023 21:08:31 GMT -5
What a great result and LOTS of thought is going into weathering this like the whole zero gravity/ no oil streaks fact for instance. Lovin' this!!
|
|
|
|
Post by chromdome35 on May 29, 2023 21:39:31 GMT -5
Tamiya and x20a. Default settings basically 😆 I was thinking about trying mr level 400, which I have. But when I started I grabbed the tamiya without even thinking about it. Hard to break old habits. Oils are Winston and Newton I am a huge fan of Tamiya thinned with mr leveling thinner. It sprays oh so fine when mixed 50/50. The closest thing to bullet proof I have found. |
|
|
|
Post by deafpanzer on May 29, 2023 21:50:17 GMT -5
I am late to the party. My son builds those and he will like what he sees. Excellent work especially the chipping part. Now you have another fan following your build.
|
|
|
|
Post by dupes on May 30, 2023 10:10:17 GMT -5
I am late to the party. My son builds those and he will like what he sees. Excellent work especially the chipping part. Now you have another fan following your build. Andy - try building one with him! They're a hoot. Even if you don't paint it, you can throw on a gloss/flat clear coat and go to town with the weathering. |
|
|
|
Post by deafpanzer on May 30, 2023 12:04:51 GMT -5
I am late to the party. My son builds those and he will like what he sees. Excellent work especially the chipping part. Now you have another fan following your build. Andy - try building one with him! They're a hoot. Even if you don't paint it, you can throw on a gloss/flat clear coat and go to town with the weathering. That would be awesome! Actually my son and I talked about building one of those Star Wars little walkers as a joint build since we both are huge fans of Star Wars. Andy |
|
|
|
Post by dupes on May 30, 2023 13:39:34 GMT -5
The AT-ST? Go to Hobby Lobby - they stock those all the time! Hit them on the week they have the 40% off coupon.
|
|
|
|
Post by chromdome35 on May 30, 2023 14:18:56 GMT -5
Andy - try building one with him! They're a hoot. Even if you don't paint it, you can throw on a gloss/flat clear coat and go to town with the weathering. That would be awesome! Actually my son and I talked about building one of those Star Wars little walkers as a joint build since we both are huge fans of Star Wars. Andy I just built the AT-ST walker, easy build. It would make a great kit to build with your son. I concur with Dupes, Hobby Lobby has 40% off model kits at least once a month, it makes the cost of the AT-ST pretty cheap. |
|
|
|
Post by dupes on May 30, 2023 16:26:15 GMT -5
Hobby Lobby is 40% off models all week, every other week. Who would buy models on the off weeks...? 😂
|
|
stikpusher
Forum Moderator      May '23 Showcased Model Awarded
Member since: April 2023
Living The Dream
Posts: 4,119 
MSC Staff
|
Post by stikpusher on May 30, 2023 21:01:28 GMT -5
Hobby Lobby is 40% off models all week, every other week. Who would buy models on the off weeks...? 😂 People who have no idea, or way too much money… |
|
mz3
Full Member
  
Member since: October 2012
Posts: 649
Oct 14, 2012 21:09:43 GMT -5
Oct 14, 2012 21:09:43 GMT -5
|
Post by mz3 on Jun 3, 2023 21:26:18 GMT -5
Time to fun... Couple more steps- Drybrushed a brown oil onto all the thrusters, then black over the tips. I might hit them again with the black once more. Drybrushed Testor silver on the bottom of the feet. I'll probably hit that with a satin coat then some darkish wash. Vandyke brown pin wash randomly over the additional armor parts. The oil dots weren't going as well as I wanted, so I sparingly used watercolor pencils to do some dots. 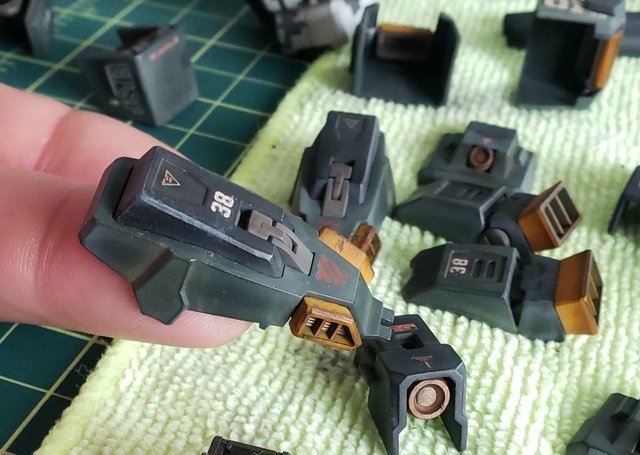 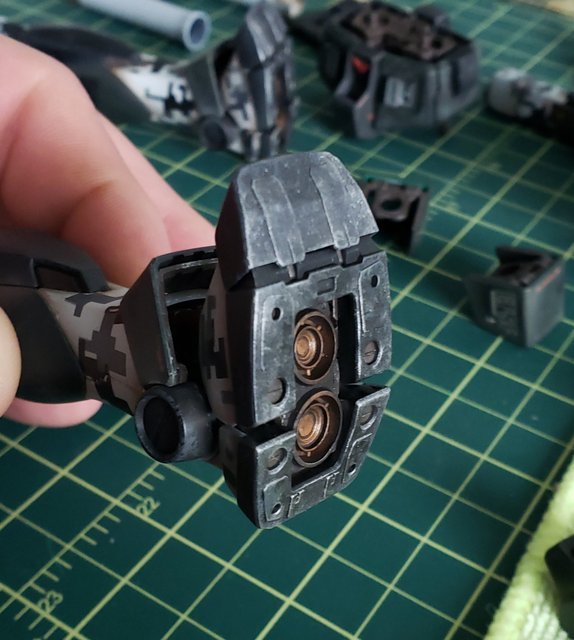 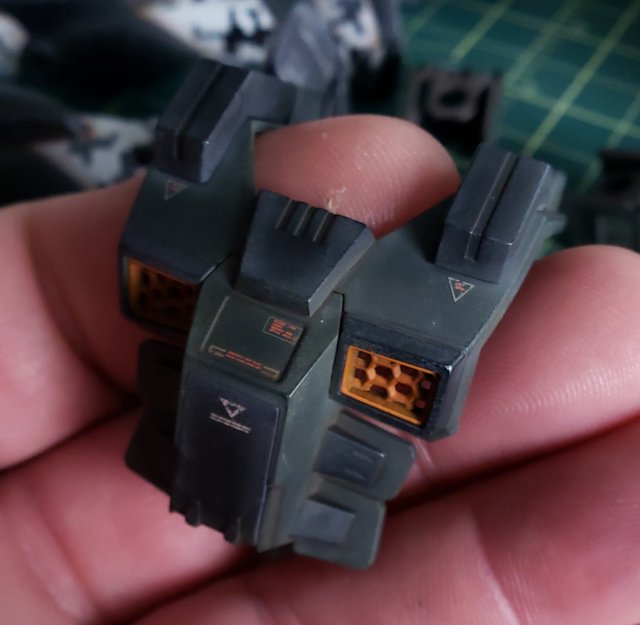 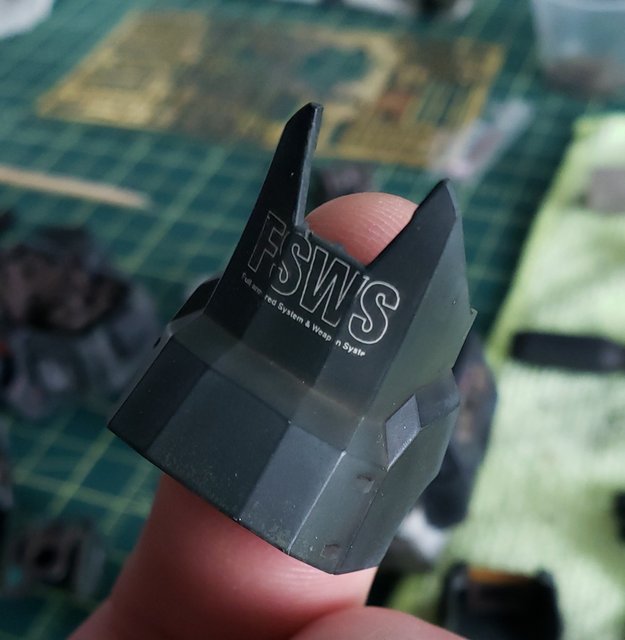 Getting closer. I want to finish up, my panther for the group build will be here soon and I need the room to start that. |
|
|
|
Post by chromdome35 on Jun 4, 2023 6:57:07 GMT -5
Looking good! I really like the way the bottom of the foot looks. Very realistic!
|
|
|
|
Post by deafpanzer on Jun 4, 2023 12:31:30 GMT -5
That was a great update... it is starting to look very realistic now.
|
|
ogrejohn
Full Member
   Oct '23 Showcased Model Awarded
Member since: June 2012
Go away or I shall taunt you a second time!
Posts: 1,302
Jun 1, 2012 17:33:59 GMT -5
Jun 1, 2012 17:33:59 GMT -5
|
Post by ogrejohn on Jun 4, 2023 16:17:06 GMT -5
Very nice weathering process you have there. Looks great!
|
|
mz3
Full Member
  
Member since: October 2012
Posts: 649
Oct 14, 2012 21:09:43 GMT -5
Oct 14, 2012 21:09:43 GMT -5
|
Post by mz3 on Jun 11, 2023 19:31:49 GMT -5
So progress on this one has been slow also. I've been working on the smallest, most eye killing parts. I get some pics up later. I did decide to add a few things. Namely a shield. 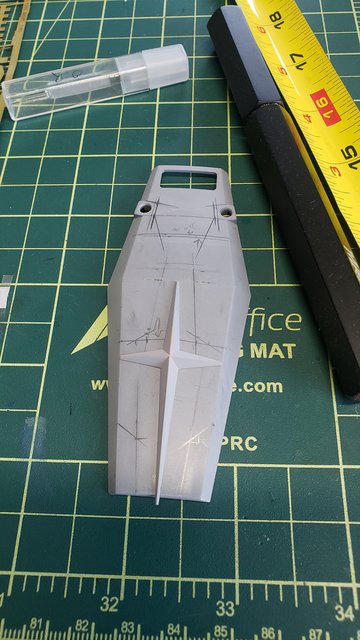 A couple of night ago I saw something while searching for pics of this kit and I had to do it. I started scribing panel lines onto the front piece. Messed up on one bad because math hard apparently. I'm also adding a boozuka and a shotgun. Pics in a few... |
|
mz3
Full Member
  
Member since: October 2012
Posts: 649
Oct 14, 2012 21:09:43 GMT -5
Oct 14, 2012 21:09:43 GMT -5
|
Post by mz3 on Jun 12, 2023 11:04:15 GMT -5
|
|
mz3
Full Member
  
Member since: October 2012
Posts: 649
Oct 14, 2012 21:09:43 GMT -5
Oct 14, 2012 21:09:43 GMT -5
|
Post by mz3 on Jun 12, 2023 11:15:59 GMT -5
|
|
|
|
Post by deafpanzer on Jun 12, 2023 22:53:07 GMT -5
Shotgun without the stock? If so, I think it looks cooler!
|
|
Real G
Full Member
  
Member since: April 2023
Posts: 880 
|
Post by Real G on Jun 13, 2023 13:07:44 GMT -5
Hey, won't Misha notice one of the Kampfer's shotguns is missing?  Those dang Feddies! The chrome silver on the Gundam's feet are so old school yet super effective. I have wondered how grippy giant metal feet would be on a metal ship deck... |
|
|
|
Post by Medicman71 on Jun 13, 2023 13:23:48 GMT -5
That's strange about the decals. I did the Bandai Master Grade Gundam Wing Zero Endless Waltz and I didn't have any problem with the decals. I even but them on unpainted plastic.
|
|
|
|
Post by dupes on Jun 13, 2023 14:23:30 GMT -5
Mmmmmm...starting to turn into a well-used battle machine!
|
|
mz3
Full Member
  
Member since: October 2012
Posts: 649
Oct 14, 2012 21:09:43 GMT -5
Oct 14, 2012 21:09:43 GMT -5
|
Post by mz3 on Jun 13, 2023 20:17:54 GMT -5
Nonstock has a problem. The hand can't hold it without the stock. I might try ro modify the grip. I've got 2 of them so if I screw up it's not a big deal.
In the past I've always had problems with the feet on these kits. Not knowing how to paint/weather them. I always think back to what someone said many years ago, saying painting silver on gundams make them look like diecast toys. That's been stuck in my head ever since. This time I figured just do it and wash the crap out of them like tank tracks. Good enough.
Decals😠
|
|
Real G
Full Member
  
Member since: April 2023
Posts: 880 
|
Post by Real G on Jun 14, 2023 18:09:54 GMT -5
The feet turned out not “good enough”, but great! The shotgun grip requires the hand to hold it at an angle, with the fingers repositioned to fit. Even the stock Kampfer hands don’t hold the grip well. The OOP HDM resin hands addressed the problem, but yeah, OOP.
|
|
mz3
Full Member
  
Member since: October 2012
Posts: 649
Oct 14, 2012 21:09:43 GMT -5
Oct 14, 2012 21:09:43 GMT -5
|
Post by mz3 on Jun 19, 2023 9:38:41 GMT -5
The hands have the index finger separate from the other 3. The other 3 fingers are connected at the joint. Cut the joint and fingers are free. They can "grip" items better. 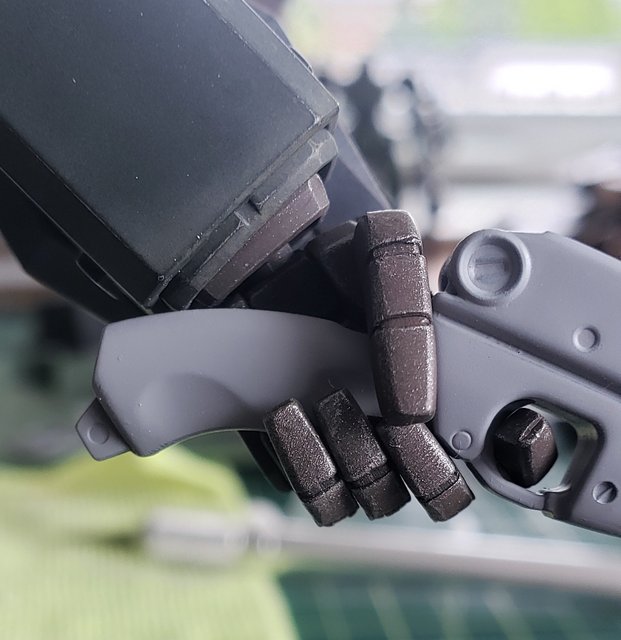 But they don't actually grip anything. Bend the fingers around an item and hope it stays in. With the stock on, the thumb kinda holds the gun in place. I didn't take a pic of that, still working on the stock. At this point only the weapons and shield I'm adding are left. I really want to move on to my panther for the group build. I didn't plan on this kit taking this long or doing everything I did to it. But, when it's all armed up, it looks really good! Pics coming... |
|