garydavis-Rest In Peace
Full Member
  
Member since: March 2023
RIP- September 2023
Posts: 440 
|
Post by garydavis-Rest In Peace on Mar 10, 2023 1:39:53 GMT -5
The original idea for headers was the use of solder, but.....I found a set in a parts Petty kit I thought I might try first....After extending each tube and mocking it up...I really didn't like how they looked....Soooo...I went back to the original idea of using solder. This is solid solder so I don't have to seal the ends off to keep Rosin from leaking out yrs down the road. The Curved out tube was a Plastic coat hanger turned down and then bent to shape (with heat applied) and then the ends drilled out. The collectors will be made with heat shrink tubing. THE FIRST SET... 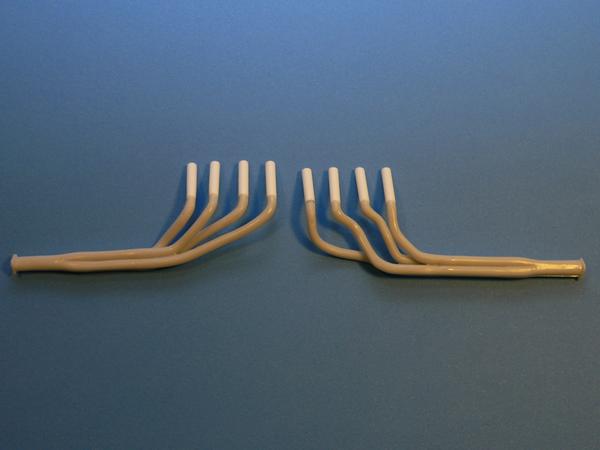 THE SOLDER SET..... 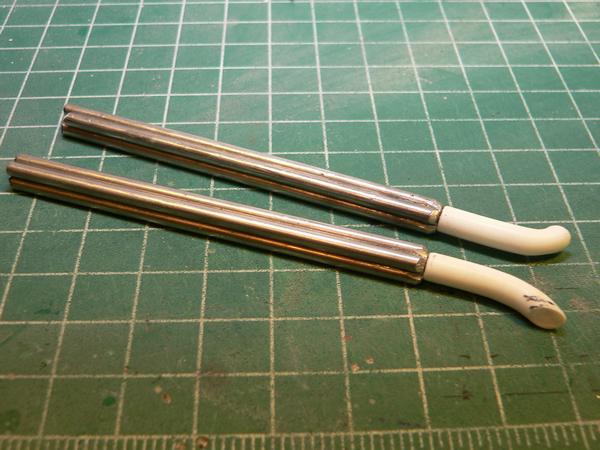 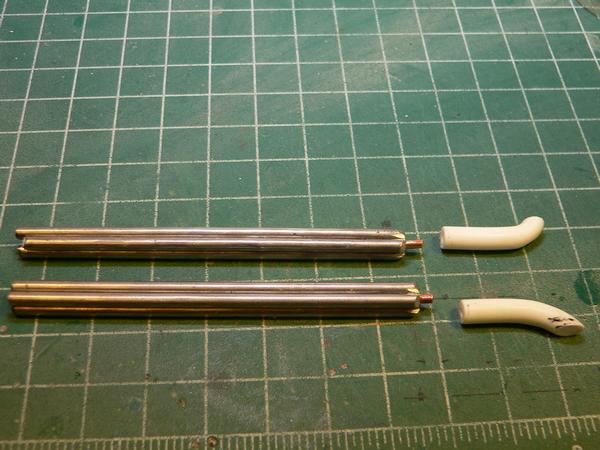 A jig will be made to bend the headers into the shapes that are needed to clear the body and be mounted parallel(as much as possible...) to the deck..... I made the bending jig for the headers out of a 2x2x6 and a 5/16 dowel. It worked real well for making that final bend. Here are a few pics of the progress... The bending jig... 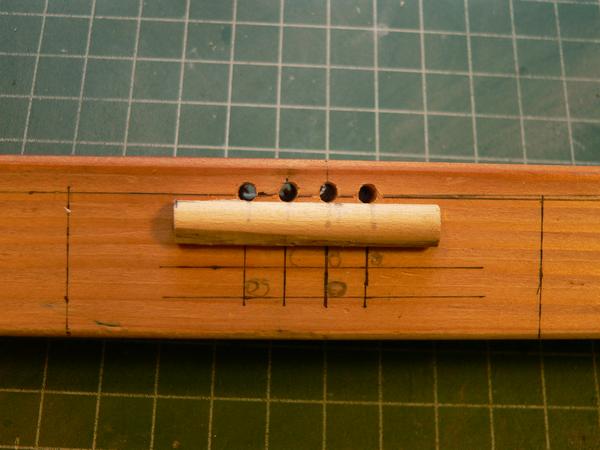 Headers after the first bend(a 1/4" rod was used for this)... 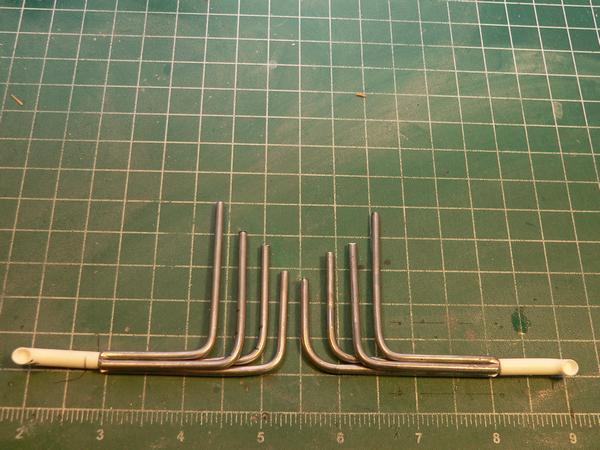 In the jig and after the second bend.... 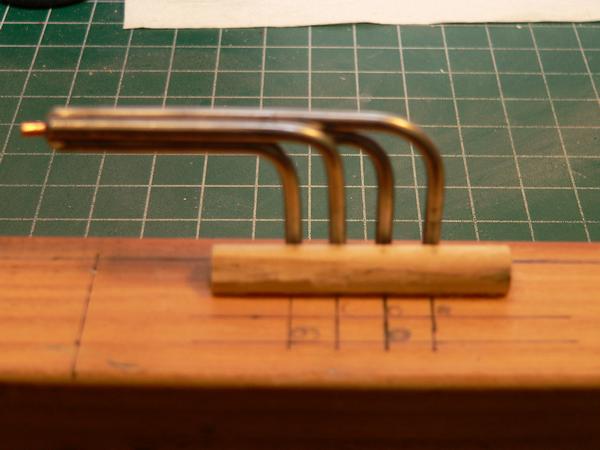 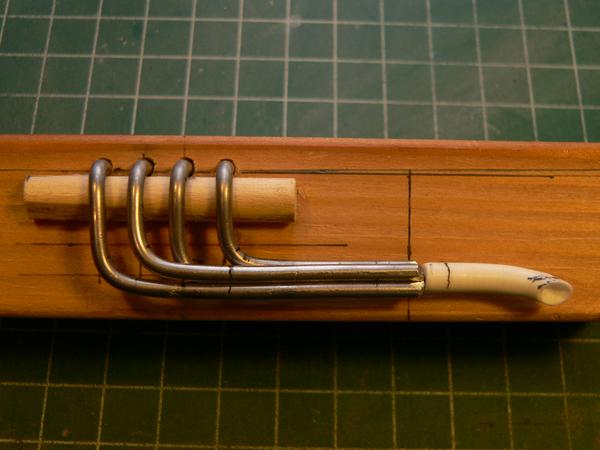 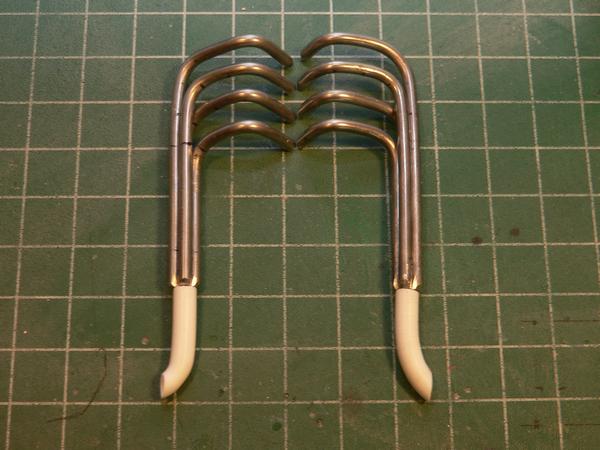 Mocked up on Engine.... 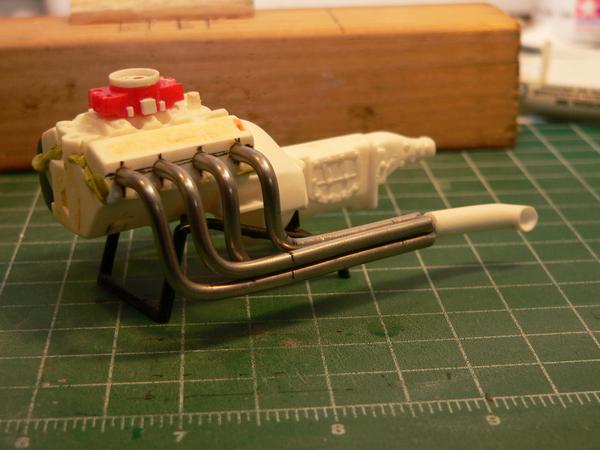 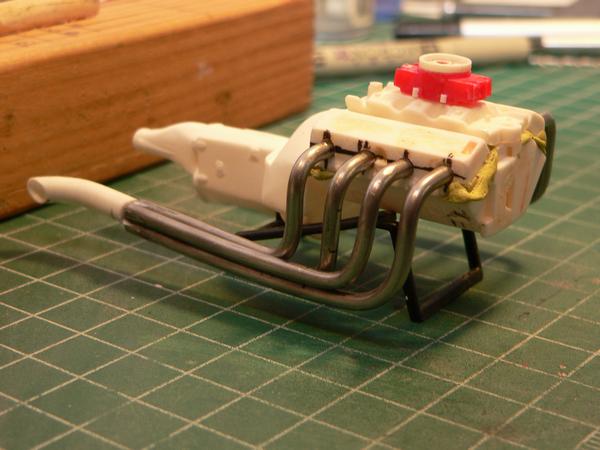 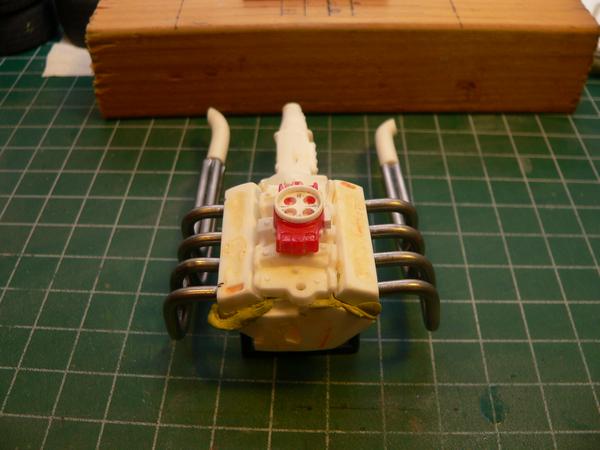 The good thing about using solder is that small adjustments can be made pretty easy. I still need to drill out the heads where each tube hits as that will give me more "bite" when they are glued. |
|
|
|
Post by mustang1989 on Mar 10, 2023 7:15:44 GMT -5
Man that looks so dang good Gary!! Looks like real header metal and the fact that you used solid solder is a definite plus. I made that mistake on my 56 Ford F-100 that I built around 7 years ago and the solder that I used still leaks out this crusty material at the ends.
|
|
garydavis-Rest In Peace
Full Member
  
Member since: March 2023
RIP- September 2023
Posts: 440 
|
Post by garydavis-Rest In Peace on Mar 10, 2023 10:35:17 GMT -5
I hear you Joe. That crusty stuff is Rosin. A person has to seal the solder ends with super glue in order for that not to happen. It's easy to work with though...at least for me.
|
|
garydavis-Rest In Peace
Full Member
  
Member since: March 2023
RIP- September 2023
Posts: 440 
|
Post by garydavis-Rest In Peace on Mar 10, 2023 10:48:07 GMT -5
|
|
|
|
Post by Tobi on Mar 10, 2023 11:00:06 GMT -5
This thread needs bookmarking, as there is so much to see and learn!
|
|
garydavis-Rest In Peace
Full Member
  
Member since: March 2023
RIP- September 2023
Posts: 440 
|
Post by garydavis-Rest In Peace on Mar 10, 2023 17:17:58 GMT -5
How does one BOOKMARK something on this Forum?
|
|
|
|
Post by mustang1989 on Mar 10, 2023 17:46:01 GMT -5
How does one BOOKMARK something on this Forum? Go to the top of your thread and you'll find a block that's got ACTIONS in it. From the drop down box you'll see Bookmark in the list. Click on that and you're done Gary.  |
|
garydavis-Rest In Peace
Full Member
  
Member since: March 2023
RIP- September 2023
Posts: 440 
|
Post by garydavis-Rest In Peace on Mar 10, 2023 18:28:58 GMT -5
OKaaay...got it Joe...Thanks. Now...what does the bookmark do for the post? Is it the same as PINNING?
|
|
|
|
Post by mustang1989 on Mar 10, 2023 19:12:31 GMT -5
OKaaay...got it Joe...Thanks. Now...what does the bookmark do for the post? Is it the same as PINNING? More or less Gary. You'll get an email notification and as well as a profile notification when someone posts to any given thread that you've got bookmarked. |
|
garydavis-Rest In Peace
Full Member
  
Member since: March 2023
RIP- September 2023
Posts: 440 
|
Post by garydavis-Rest In Peace on Mar 10, 2023 19:14:00 GMT -5
Alright then...got it. Thanks.
|
|
|
|
Post by Tobi on Mar 11, 2023 4:30:11 GMT -5
And you'll have an easier time finding your own threads again later.
|
|
|
|
Post by mustang1989 on Mar 11, 2023 7:41:23 GMT -5
And you'll have an easier time finding your own threads again later. Right on. Looking under your profile and going to your "most recent threads" helps with that as well. |
|
|
|
Post by Leon on Mar 11, 2023 7:52:12 GMT -5
Those are some great mods Gary!
|
|
garydavis-Rest In Peace
Full Member
  
Member since: March 2023
RIP- September 2023
Posts: 440 
|
Post by garydavis-Rest In Peace on Mar 11, 2023 11:44:19 GMT -5
Thank you Leon.
|
|
garydavis-Rest In Peace
Full Member
  
Member since: March 2023
RIP- September 2023
Posts: 440 
|
Post by garydavis-Rest In Peace on Mar 11, 2023 17:25:54 GMT -5
The radiator was sourced from a 65 Mustang parts kit. I didn't like the gaping hole on the back side so I trimmed down another radiator and slid it into that whole. Much better... 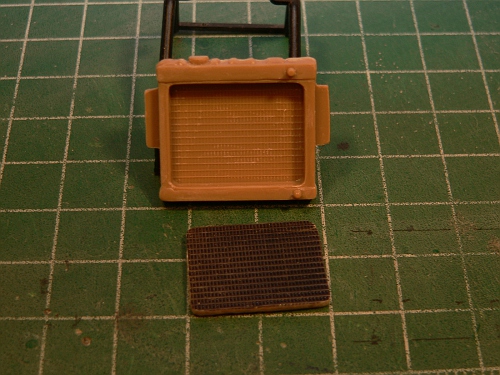 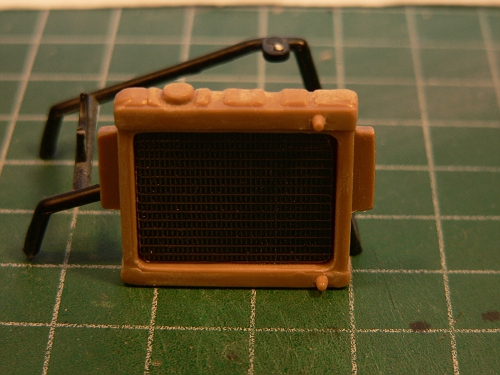 The Distributor was also sanded and cut to give it a cap. Wires will be added with boots. The wire in this pic was a test shot... 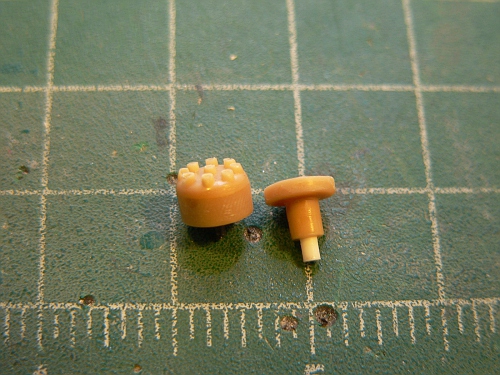 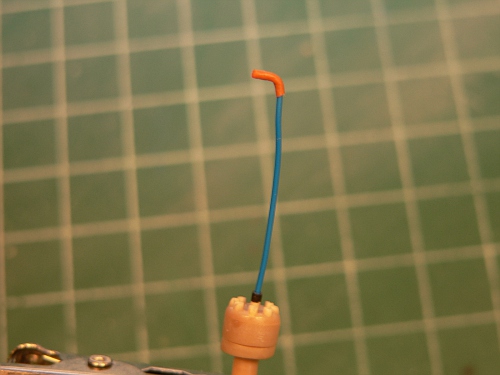 On the chassis... 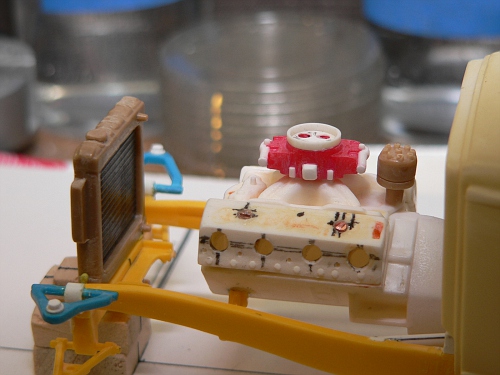 The front Grill was also worked on. It is in mock up and needs to be dropped down at least another inch..maybe 1 1/2 (scale). The hood will either be Vacuum formed (over a buck) which will give longer sides or...I can fab one from sheet and hand bend it to fit on the top only..Like the paper mock up is in the pic. The collectors on the headers were also put on.... 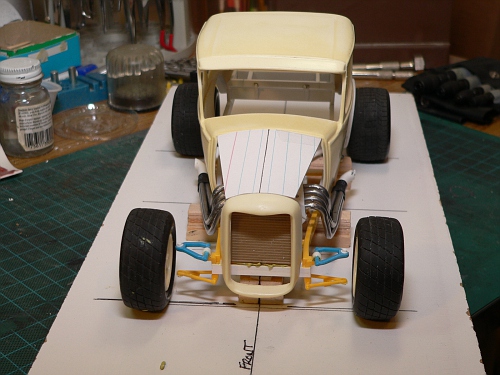 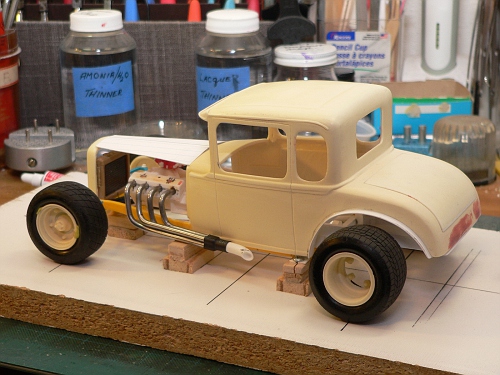 At this angle...you can see what I mean about dropping the grill down more.... 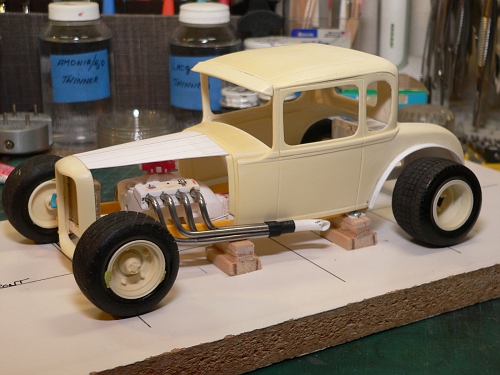 Thanks for looking in and commenting folks.... |
|
garydavis-Rest In Peace
Full Member
  
Member since: March 2023
RIP- September 2023
Posts: 440 
|
Post by garydavis-Rest In Peace on Mar 12, 2023 13:56:25 GMT -5
I did take a few scale inches out of the Grill surround. It sets higher and just in line with the front bars. The grill area.... 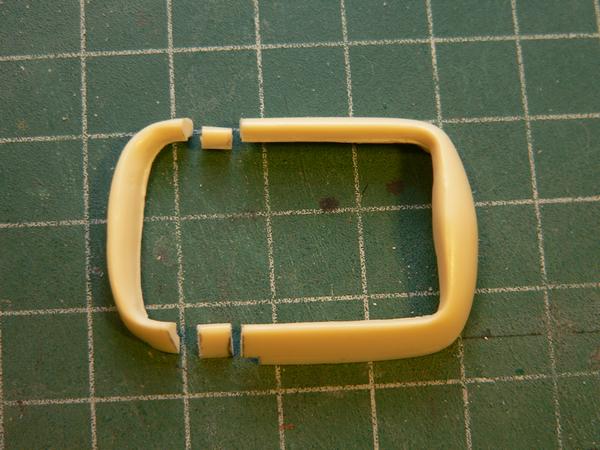 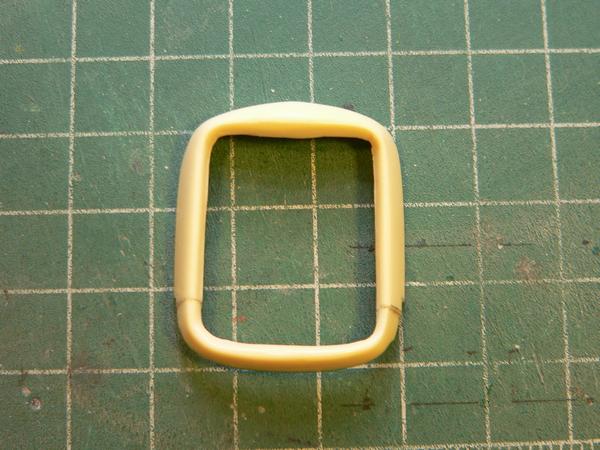 The front push bars,cowcatcher,chrome horn or what ever it's called in your area :-D ...was fabbed and is in mockup...It's pinned so it can be removed for painting and then re-attached afterwords.... 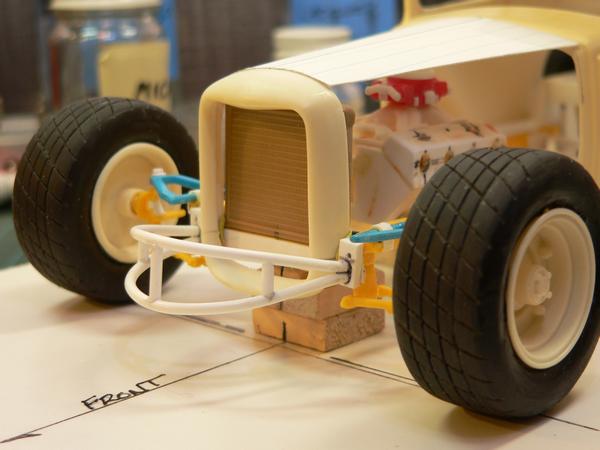 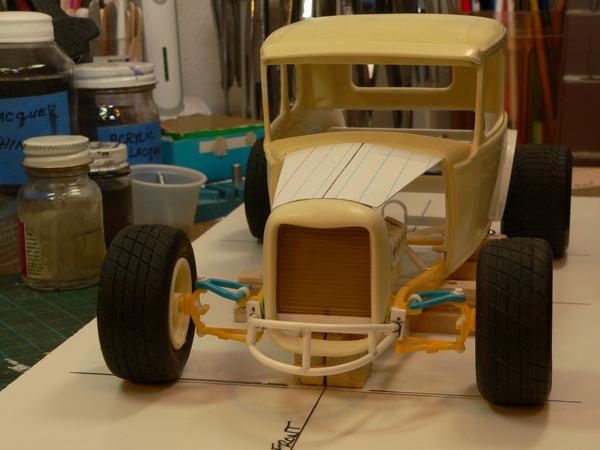 The rear bars were also fabbed and are in mockup the same way(pinned)... 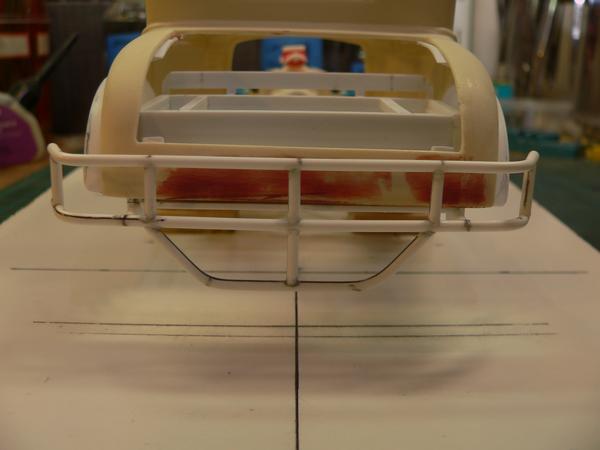 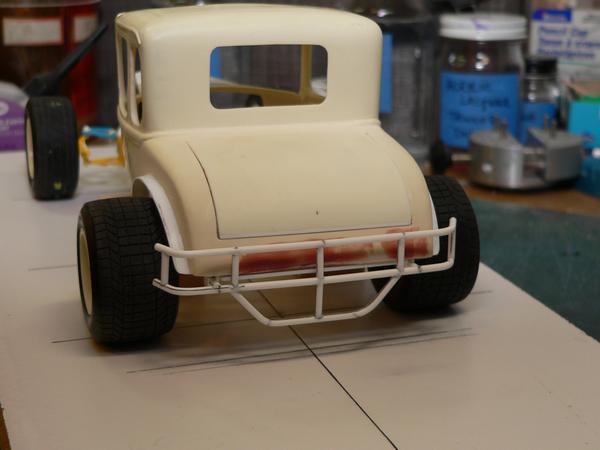 With that work completed...I can NOW concentrate on the interior floor and bar work...Thanks for stop'in by and look'in around... |
|
garydavis-Rest In Peace
Full Member
  
Member since: March 2023
RIP- September 2023
Posts: 440 
|
Post by garydavis-Rest In Peace on Mar 13, 2023 15:04:39 GMT -5
|
|
garydavis-Rest In Peace
Full Member
  
Member since: March 2023
RIP- September 2023
Posts: 440 
|
Post by garydavis-Rest In Peace on Mar 14, 2023 12:49:45 GMT -5
|
|
|
|
Post by `Boots` on Mar 14, 2023 15:31:26 GMT -5
Speechless!!  I`ve modified a couple of the 32 5 window but nothing like this.........fantastic work  |
|
garydavis-Rest In Peace
Full Member
  
Member since: March 2023
RIP- September 2023
Posts: 440 
|
Post by garydavis-Rest In Peace on Mar 15, 2023 14:28:08 GMT -5
Thanks boots, for stopping in and commenting. The dash and Gauges have been fabbed. Still need to do the three toggle switches. The front shock mounts have also been fabbed and are in the basic shapes in the pics. I will let them set for a day or so and then file them to shape. The seat is also in it's position along with the shifter. Here are a few pics...Thanks for looking in... 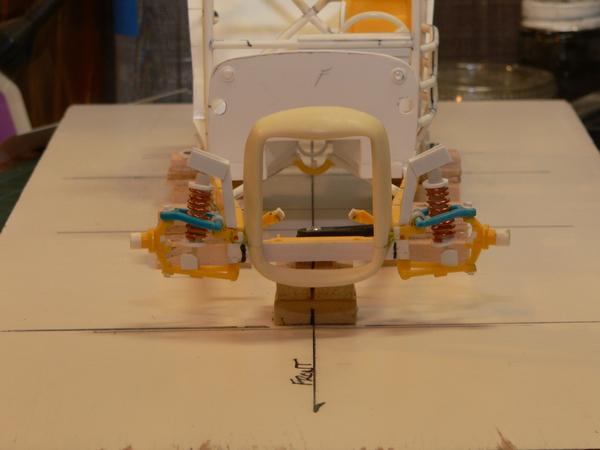 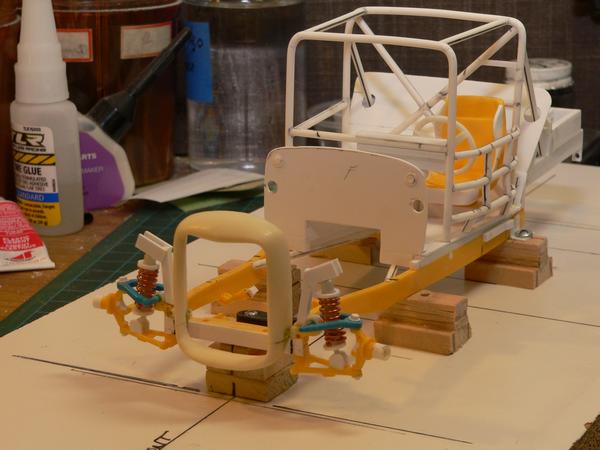 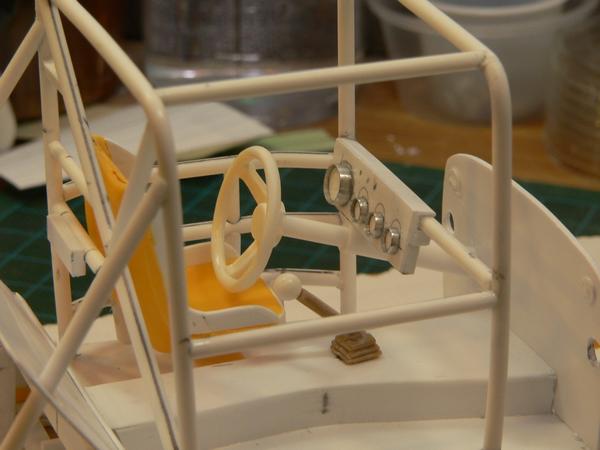 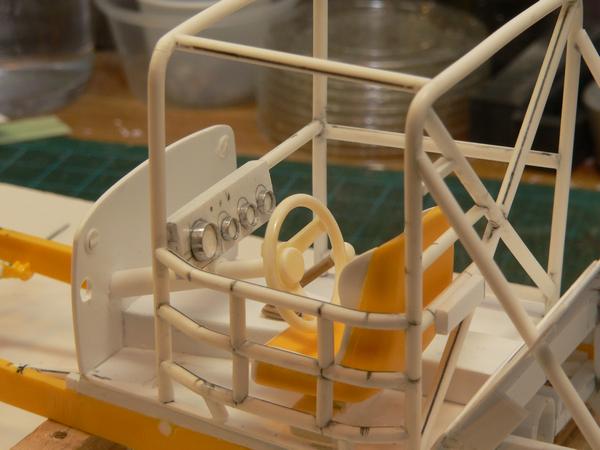 Here's some of the small stuff that takes time to figure out and build. A battery Box was fabbed along with padding and rib bolsters on the seat. The seat will be covered in a black fabric so it won't be so shinny. A fire extinguisher was sourced from a parts box but, it had to be modified to a hand held type. The brake master cylinder was also sourced from the 34 ford kit and the fluid reservoir had to be fabbed...here are a few pics to look at...thanks for looking in folks.... The battery box... 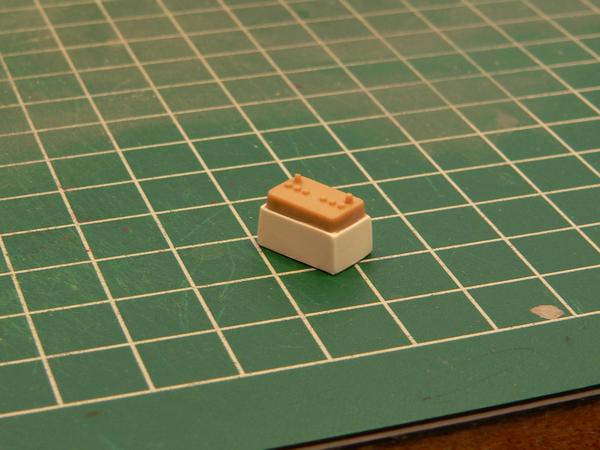 New seat padding... 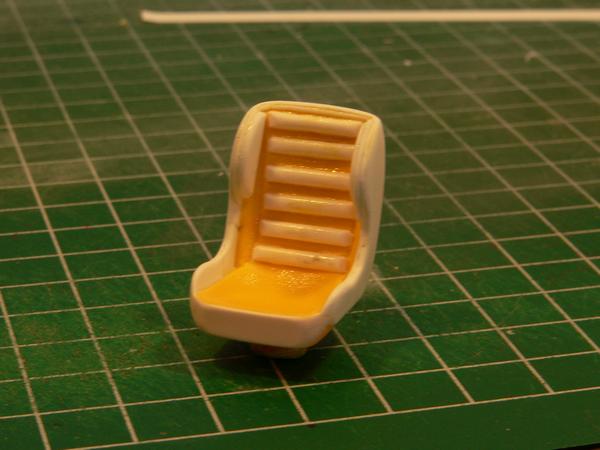 The master cylinder.. 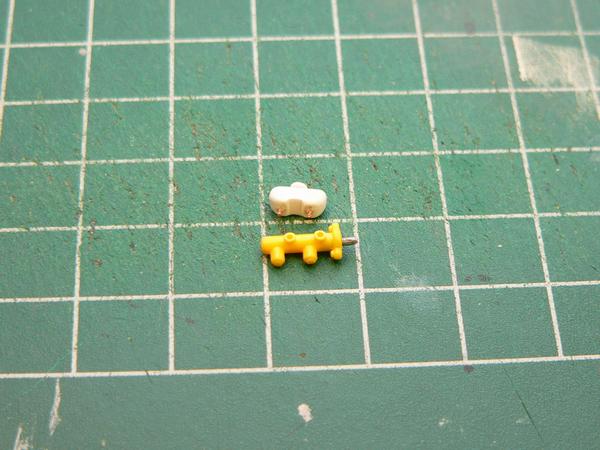 On the firewall.. 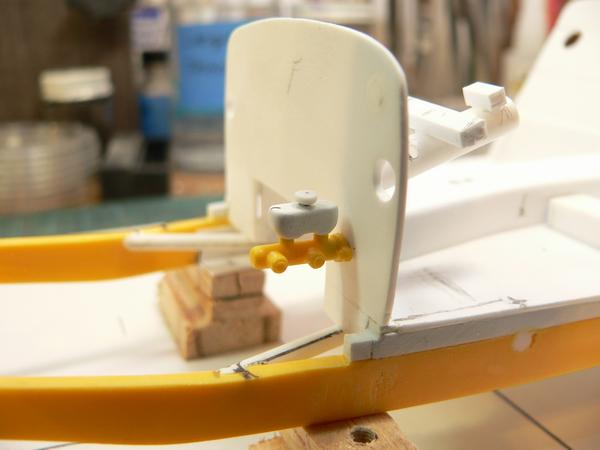 Fire extinguisher.... 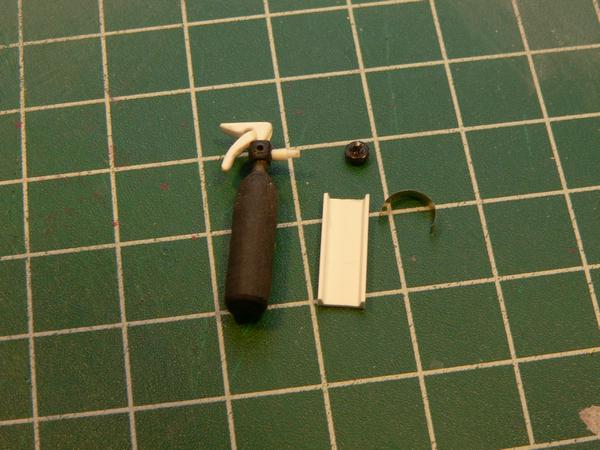 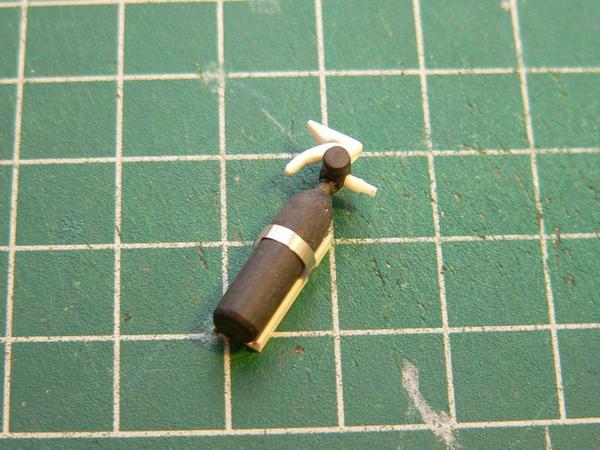 Thanks for looking in and commenting folks.... |
|
reserve
Senior Member
   
Member since: July 2012
Si vis pacem para bellum
Posts: 2,372
Jul 11, 2012 9:11:45 GMT -5
Jul 11, 2012 9:11:45 GMT -5
|
Post by reserve on Mar 15, 2023 19:05:08 GMT -5
Masterfull!
|
|
Joe Rix
Forum Moderator     
Member since: January 2023
Posts: 1,534  Member is Online
MSC Staff
|
Post by Joe Rix on Mar 15, 2023 23:07:43 GMT -5
Man oh man Gary, you are slamming that out of the park. Your fabrication skills are simply admirable. Fantastic work.
|
|
|
|
Post by mustang1989 on Mar 16, 2023 9:39:51 GMT -5
Good LORD Gary. The amount of fabrication that's going on in this thread is amazing!! The headers, radiator support mod, engine mods.....hell everything! What did you build the carburetor from? I see the main body is one color and then the float bowls, air horn and linkage mounts are another.
|
|
|
|
Post by mrt51 on Mar 16, 2023 9:52:31 GMT -5
Wow that's really cool!
|
|
|
|
Post by Tobi on Mar 16, 2023 11:08:36 GMT -5
Awesome!
|
|
|
|
Post by Steve Zuleski on Mar 16, 2023 11:44:11 GMT -5
This is some pretty intense scratch work, wow! Awesome work, Gary.
|
|
garydavis-Rest In Peace
Full Member
  
Member since: March 2023
RIP- September 2023
Posts: 440 
|
Post by garydavis-Rest In Peace on Mar 16, 2023 14:09:26 GMT -5
Good LORD Gary. The amount of fabrication that's going on in this thread is amazing!! The headers, radiator support mod, engine mods.....hell everything! What did you build the carburetor from? I see the main body is one color and then the float bowls, air horn and linkage mounts are another. Joe...Thanks for the GREAT comps bud! That carb came from a 1/16th parts box I bought at a show about 15yrs or so ago. I think the red body of that carb came from the amt mustang kit...not really sure. All the white parts I fabbed from sheet plastic and rod. All most everything in white, is usually from rod or sheet.
Thank you...... Steve, Tobi, mrt51, joerix and reserve. Stopping in and commenting means a lot.
|
|
garydavis-Rest In Peace
Full Member
  
Member since: March 2023
RIP- September 2023
Posts: 440 
|
Post by garydavis-Rest In Peace on Mar 16, 2023 14:12:10 GMT -5
|
|
|
|
Post by mustang1989 on Mar 16, 2023 18:18:21 GMT -5
And the brilliance continues. Very good work on the interior items and the front suspension Gary. This sucker is coming together VERY nicely!!!
|
|
garydavis-Rest In Peace
Full Member
  
Member since: March 2023
RIP- September 2023
Posts: 440 
|
Post by garydavis-Rest In Peace on Mar 16, 2023 19:25:23 GMT -5
Hey Joe...thanks for the compliment....
|
|