Post by tcoat on Mar 17, 2023 9:31:32 GMT -5
Well since I plan to finish this weekend it is time to post this one up here. Sorry to all the guys that have come from other forums and are probably sick of seeing this build by now! I started it back in early January so some of my tenses during the narration may be a bit odd.
While shopping the Jimmie Flintstone site for a 58 Chevy body I stumbled across the '61-'65 Econoline panel body. I was over joyed to find it as it is a major vehicle in the Cars I used to Own series of builds.


The Flintstone site does not ship to Canada and anybody that sells the body here charges WAY more I had a buddy in Vancouver Washington order it and he then shipped it to me. It has traveled so much it probably has more miles on it than the real thing did.
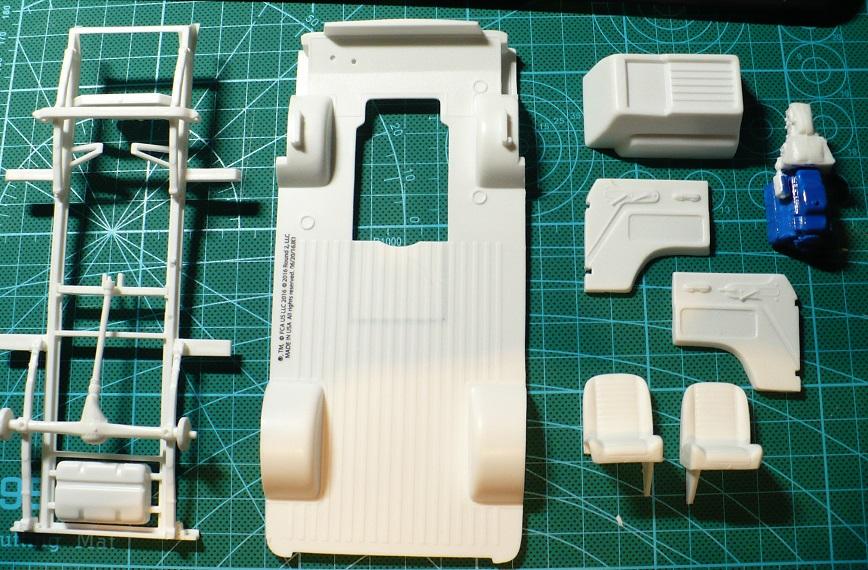
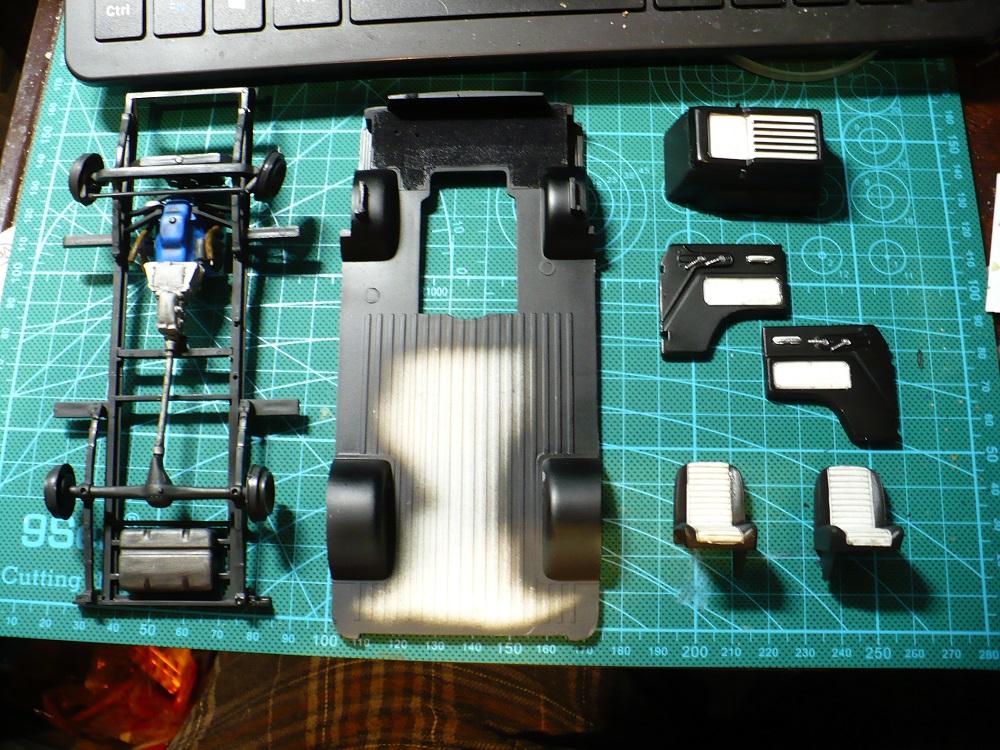
Since the first generation Econoline's have never been kitted the body is designed to go with he chassis and interior from the Lindberg Lil Red Wagon/Dodge fever Dodge A100 pickup kit. As these have not been released for several years I was beginning to think I would have to sell a kidney to complete this project! After a long search for one of these available for a price that did not require a second mortgage on the house I managed to score one from a reasonably close toy store/hobby shop at a normal retail price.

Although it is a Dodge interior the basics are close enough for anybody but the most diehard early sixties van fanatic. In fact Dodge it looks like didn't even try to hide that they were copying the Econoline.
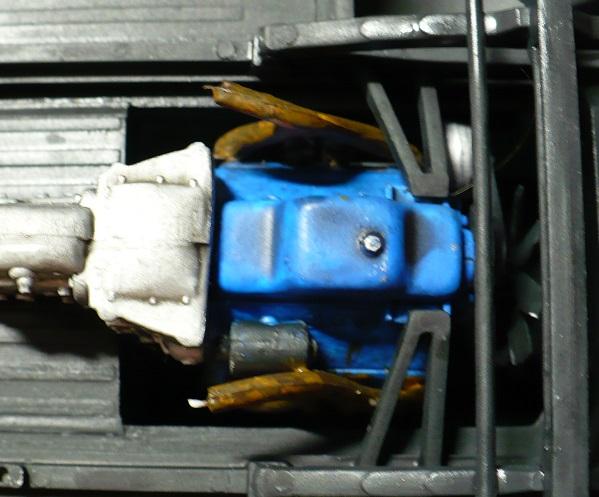
The knowledgeable amongst you are probably saying "But Tcoat the Econoline only came with a six cylinder engine and that is clearly a V8". Well that is actually convenient for me as my '64 had a 351W and C6 tranny from a 96 Fairlane crammed into that doghouse between the seats. So with some blue paint and a bit of squinting the kit318(?) now becomes a 351. It isn't like you are going to see much beyond the very bottom anyway.
I bought the van already built in late 78 and it had already been done up in pretty much standard early trend vantasic style. There was a bench in the rear that folded down to a bed, a cabinet from an early sixties RV with an 8 track player in it, an ugly (by todays standards) carpet and some early '70s house speakers mounted up in the rear corners The two pieces of foam for the bench/bed were hard to "sleep" on as they always pulled apart so I screwed the base down and threw a cheap RV sized mattress on it. I also wanted a chair so borrowed (forever) an old mid sixties bar stool from my parents and screwed it to the plywood floor. It of course would have meant instant death for anybody riding on it in the event of a crash by those were the invincible days.
So I had to make a bunch of stuff up
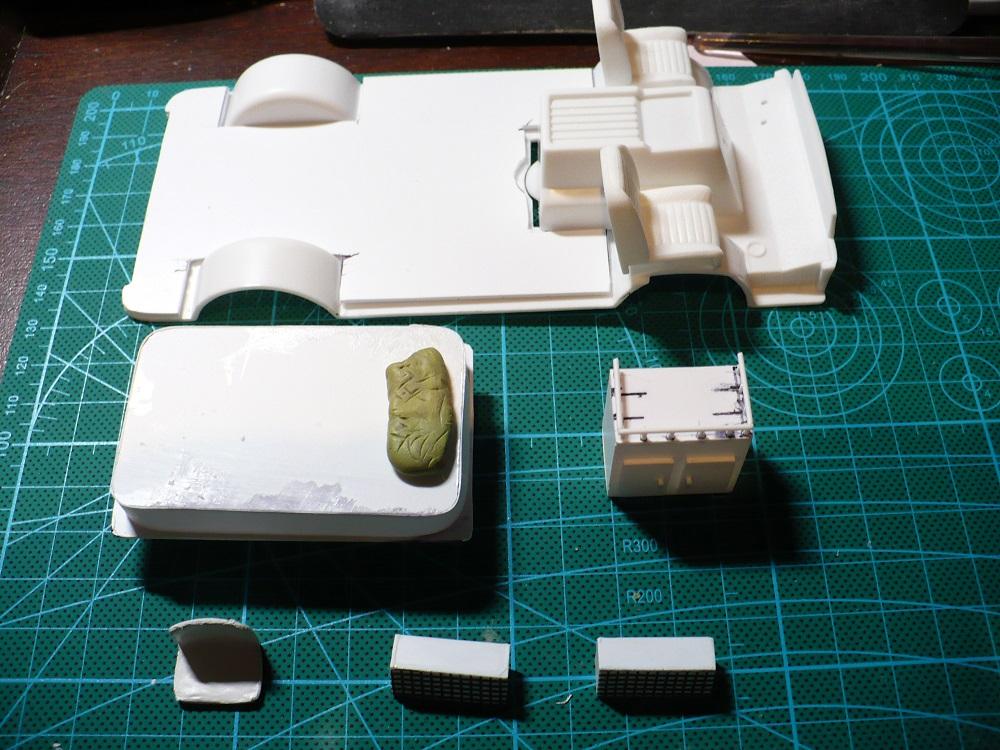
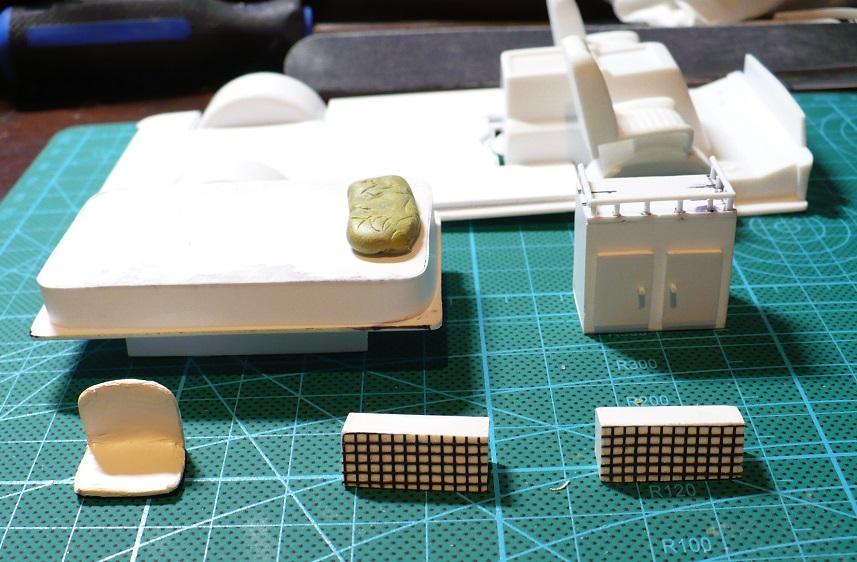
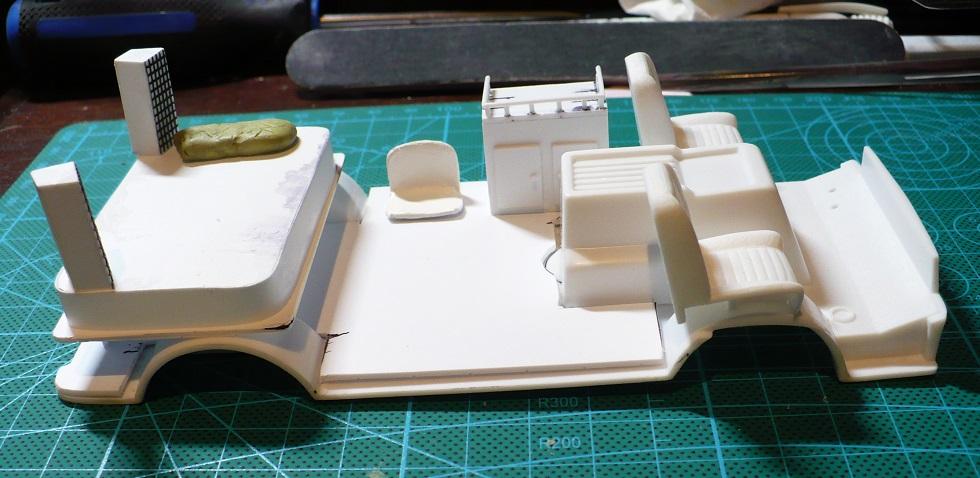
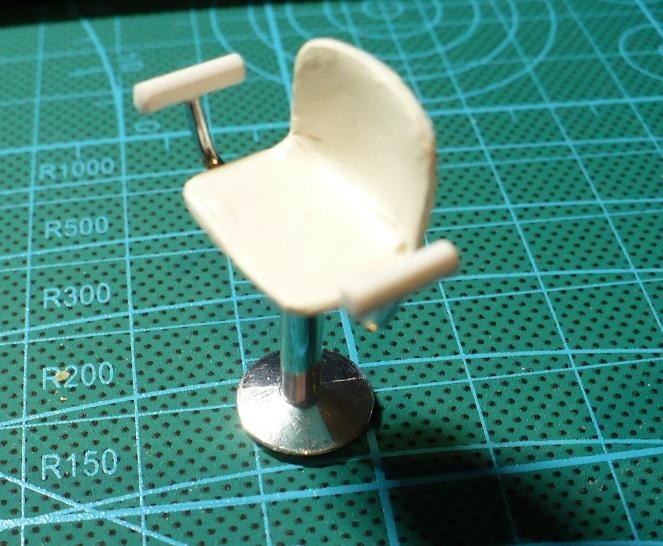
Paint starts to bring things to life. The top of the cabinet was that sort of psychedelic woodgrain pattern that anybody over about 55 years of age will recognize. The carpet, although not shag was a heavier pile than you get using embossing powder so it is short turf fibers used in model railroads. I think I missed a narrow black line between the bigger sections of the carpet but once body is on won't see much of it anyway.
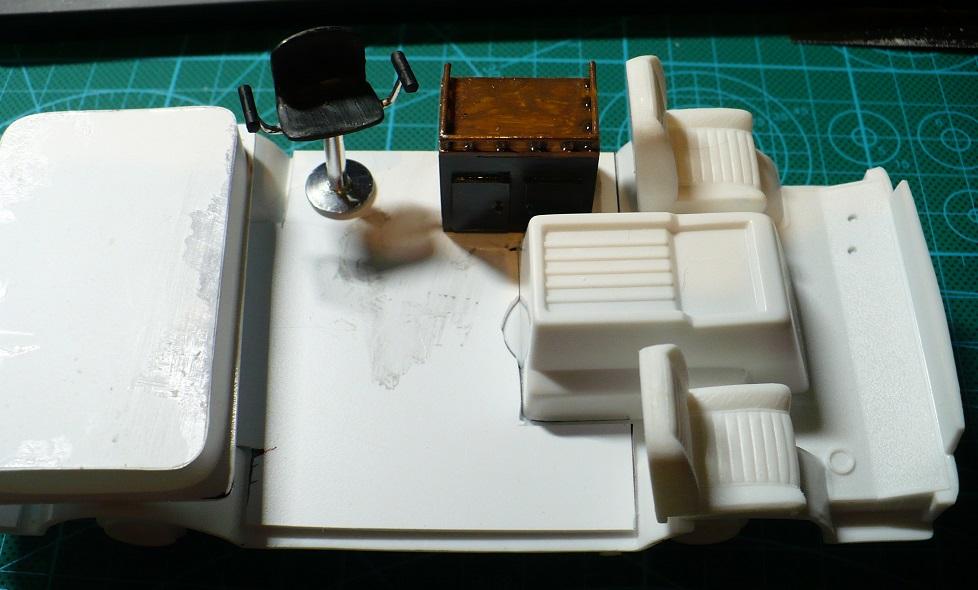
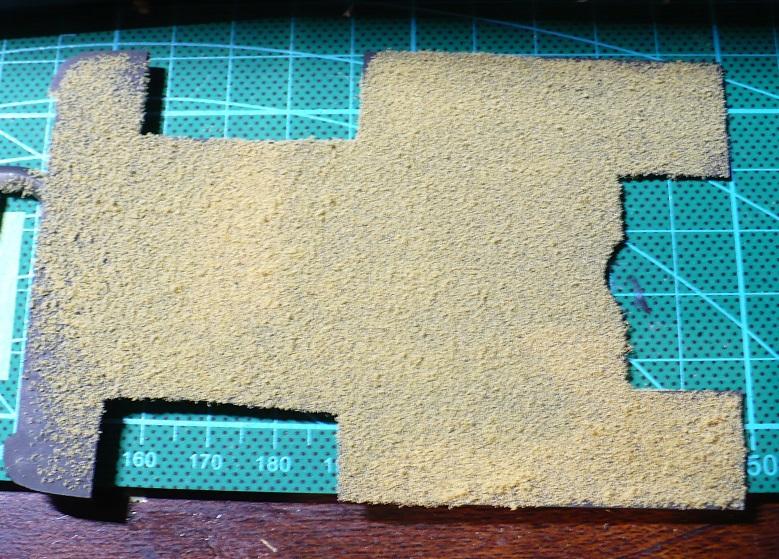
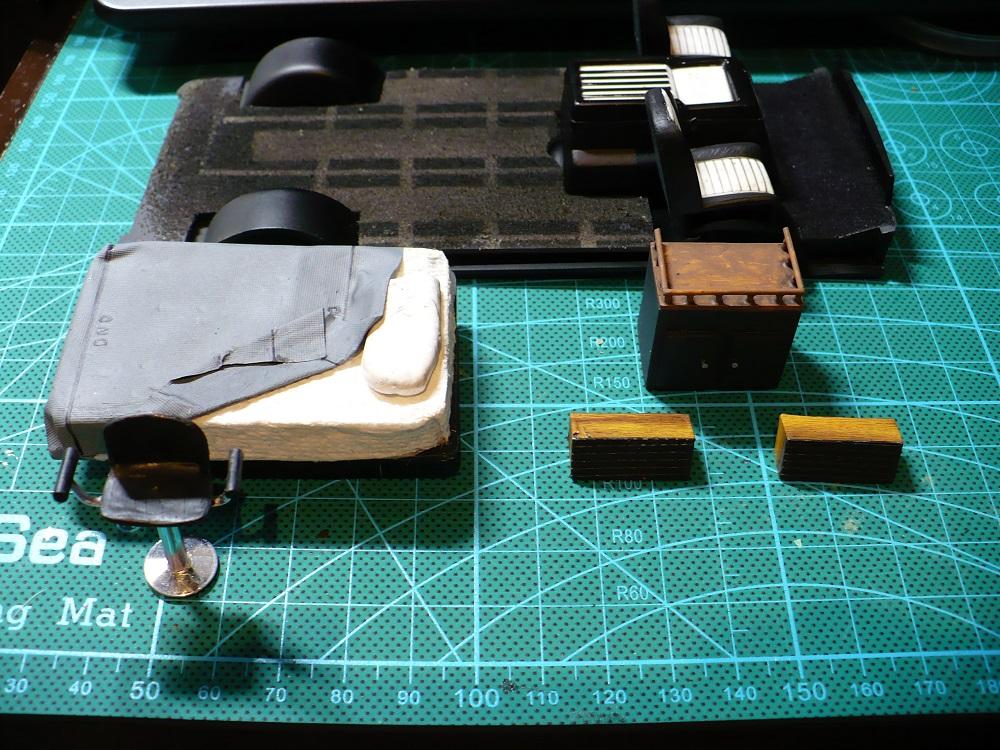
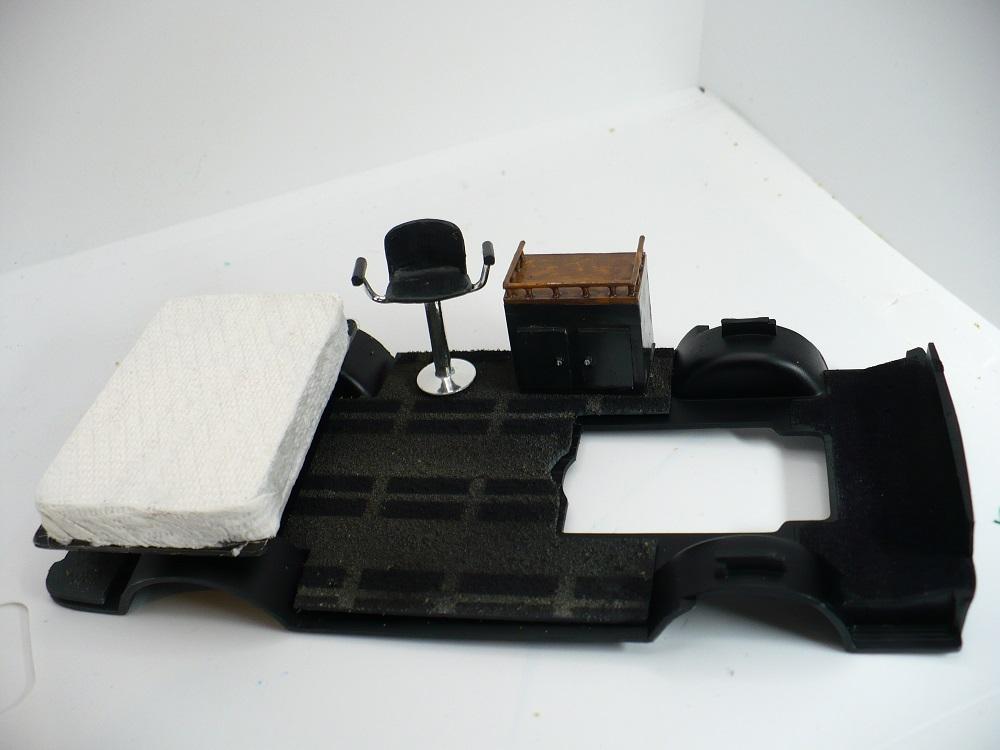
And all painted up. The dash is coming with the Flintstone body and will have white panels like the doors, seats and doghouse have. The blanket will be familiar to pretty much anybody with military, police or firefighting experience anyplace in the world. You can probably feel the itching kicking in already. Still need to make an 8 track player for the cabinet but have to did up a chrome radio I know I have someplace for that. Nothing but the front seat are glued on yet since I need to have the body to ensure spacing is correct.
.jpg.0c3eb234a1f404ae7168f37e322a968b.jpg)
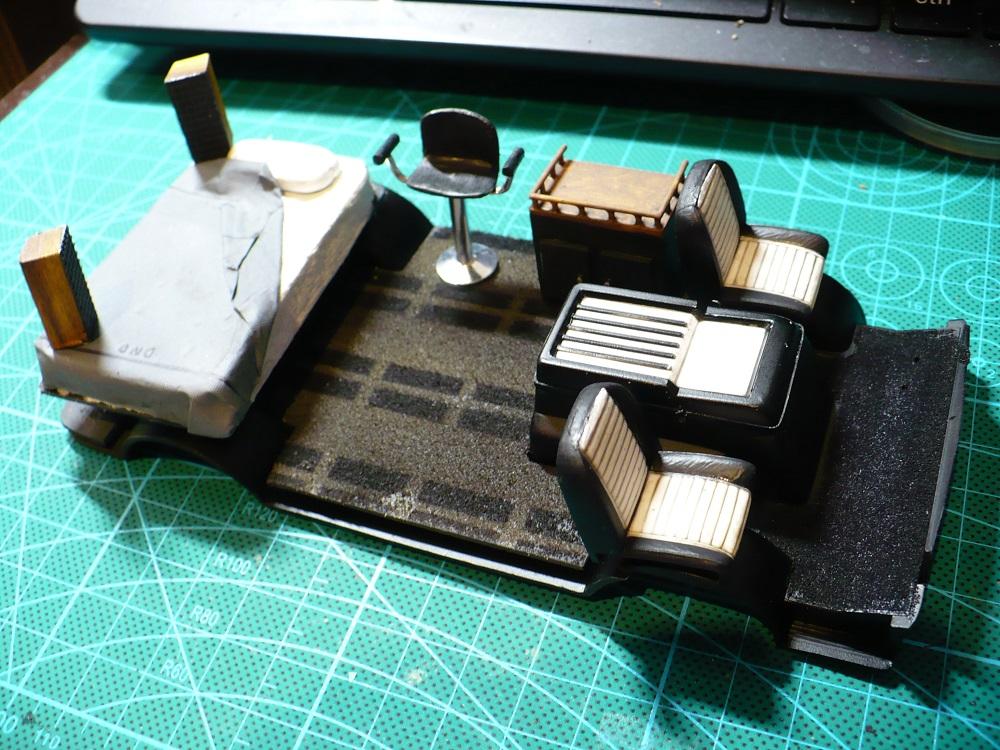
As far as I know there are no existing pictures of the real thing but most of the details are etched in my brain even after al this time so it is very accurate at least in my head.
That's it for now (January 14th) since...
I ain't got no body
Quick mockup using the Dodge body. Looks like I am going to need to trim a hair off the barstool height but the cabinet is bang on. There is no way the front seats will fit in using the locators. They don't even clear the kit body so need to move closer together. I raised the rear about 3 scale inches when I built the suspension so the rake looks about right.
.jpg.5f0f876b594e4192edef7a85182cc0ba.jpg)
January 17:
I have a body!
.jpg.672a61bdd8a682a4200c342ddaab8015.jpg)
.jpg.d57be952171c79cc4e2602e7165fdf7c.jpg)
I need to find some slightly smaller tires. These just look like balloons. The chassis needed some considerable rework as the body is about 3/8 inch shorter than the Lindberg kit.
Opened up and padding from dash removed. Resin isn't so hard to work with and my trepidation at the task was misplaced.
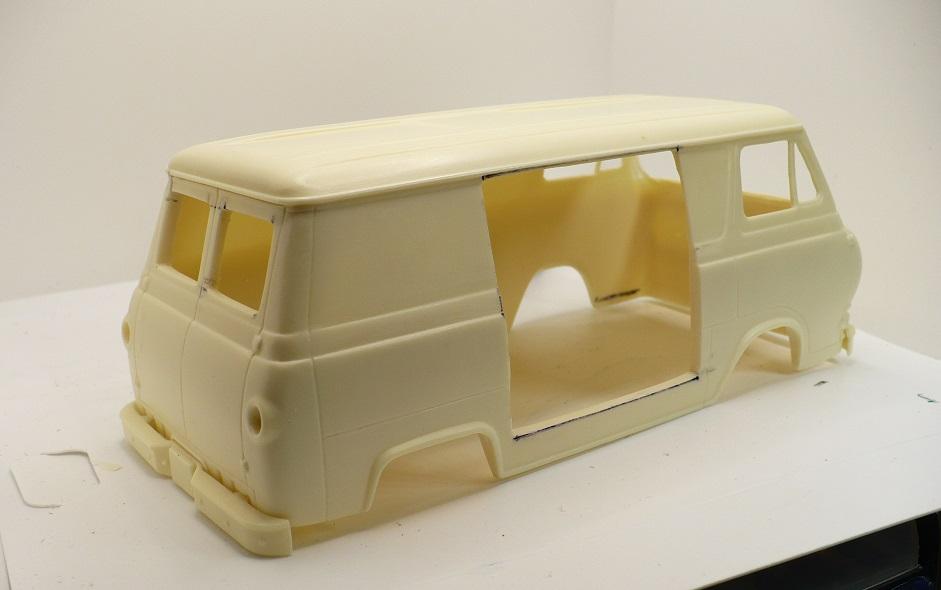
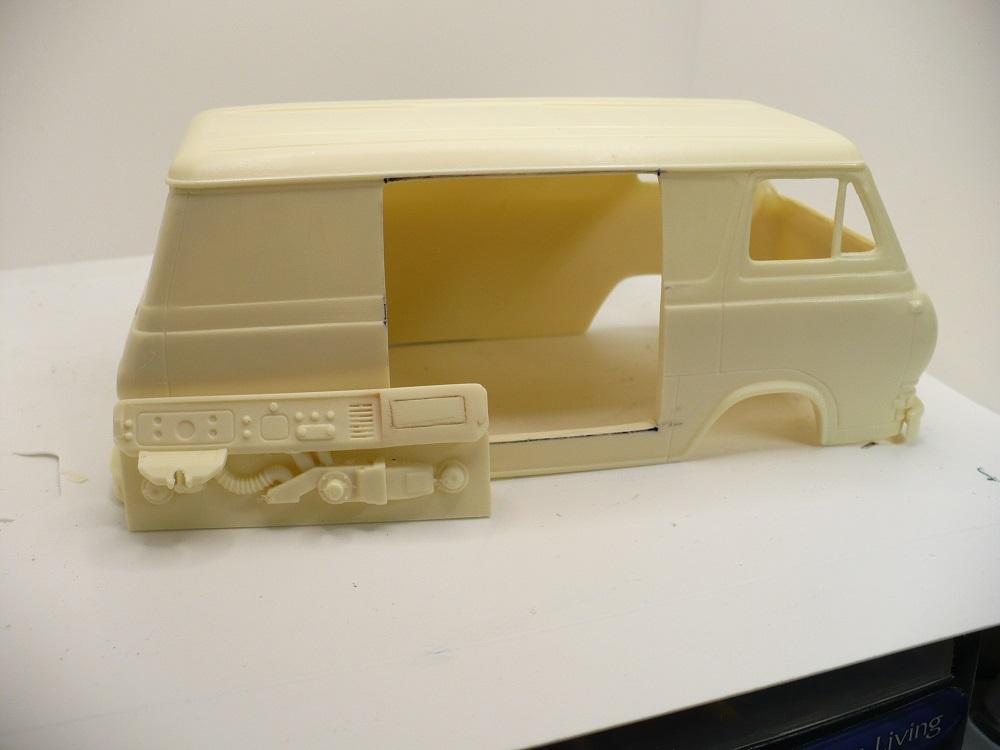
Quick mockup to make sure everything fits. About a 1/4 inch taken off the bar stool height so nobody bumps their head!
.jpg.09a8e768aab46cffb1d6d3a1fde85a09.jpg)
.jpg.e67d9fdef19cc53f9dd267d4a1b38af3.jpg)
.jpg.0fd1a747bc4bd1c587dbd661864dc820.jpg)
![]() Paneling, and decorations ready. Some will be paper and some decals. This will be my first venture into printing my own decals.
Paneling, and decorations ready. Some will be paper and some decals. This will be my first venture into printing my own decals.
The posters are all accurate to what I had except the Cooper one. I had a promo poster for his Vancouver 1975 concert but there do not seem to be any pictures of it and I had to go with close enough. The small ones will be 8-track tape labels. The only concession I made to accuracy is the inclusion of the two model magazine covers as neither existed back then and I wasn't building models at that point in my life. Besides, I don't think I could post the real magazines I had back then here anyway!

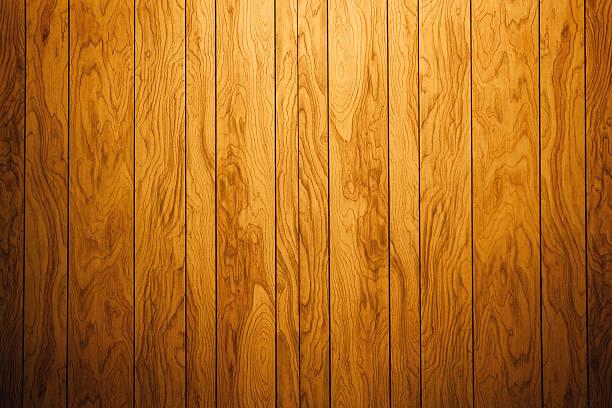
Yes it truly was a child of the seventies. Just look at that paneling!
Front end dropped a tad more so stance is finally right. By today's standards it looks extreme but was pretty normal back then.
.jpg.821fdce0c0d928f115ebaa336abaaef5.jpg)
January 22:
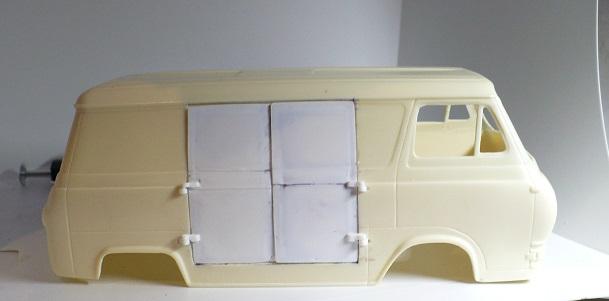
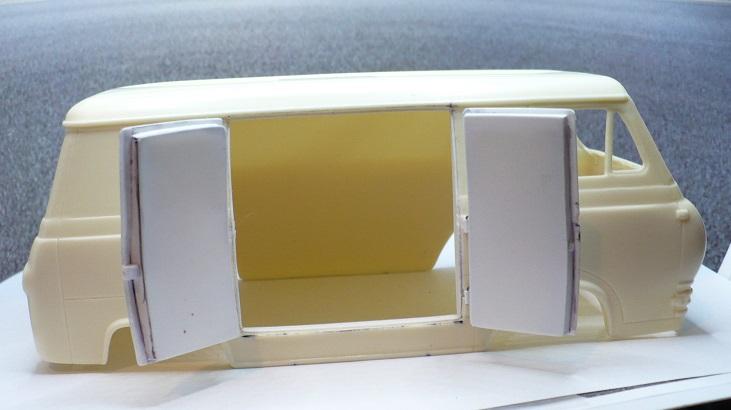
![]() I have doors. The hinges are a tad overscale but they are more to hang the doors on in the open position so it isn't too obvious. The closing part of the deal is just a bonus. Once all black you will hardly see then anyway.
I have doors. The hinges are a tad overscale but they are more to hang the doors on in the open position so it isn't too obvious. The closing part of the deal is just a bonus. Once all black you will hardly see then anyway.
The doors were made by skinning over the cut out resin parts with very thin styrene and the hinges are the Lindbergh kit parts for the front doors of the Dodge.
They fit better than the pictures make them look and will need some tweaking after paint anyway. The doors are not wrinkled like they look here that is a trick of the smudged marker ink and the resin showing through the styrene.
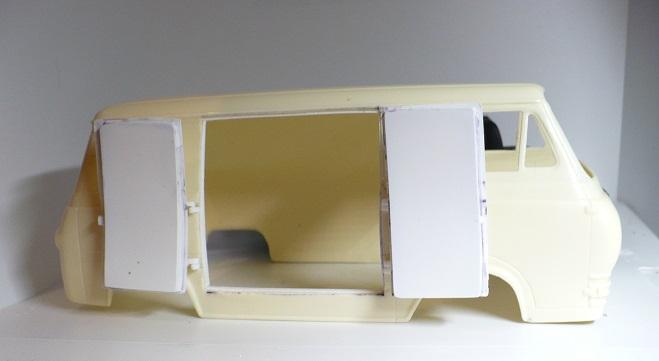
This is how it will be displayed. The inside of these doors was really easy to model since the structure was covered with paneling and the latch mech is all hidden. The outer lips are all scale thickness.
January 25:
Ummmm...
About those doors...
While sanding in prep for primer I managed to snap not one, but two of those little receiver rings off. I barely touched them and BING gone. The Lindberg plastic is apparently far more brittle than I realized.
So
Everything has come off (pictures eventually) and I am starting all over with folded over thin styrene sheet as the receiver and fine wire as the post. On the plus side this method results in a much more scale and accurate depiction of the hinges. The bad part remains to be confirmed but I suspect they will not stand up to repeated opening and closing very well so it may end up with permanently open doors. That wouldn't be horrible since it can still be seen closed on the drivers side and the interior is really the star of the show for the passenger side anyway.
I also need to get some coats of buildable primer on it to make sure I can get the slight curves of the transitions in the body creases correct. By using such thin material I sort of restricted myself to how much shaping I can do. If the primer fails I will try a very thin skim of filler putty for shaping. If that fails then I will build the doors all over again but with styrene of the next thickness up. If that doesn't cut it that will be the final nail in the coffin for closing doors since when open you cant see the outer skin anyway
February 2:
Well after a brief intermission it is back to work on this.
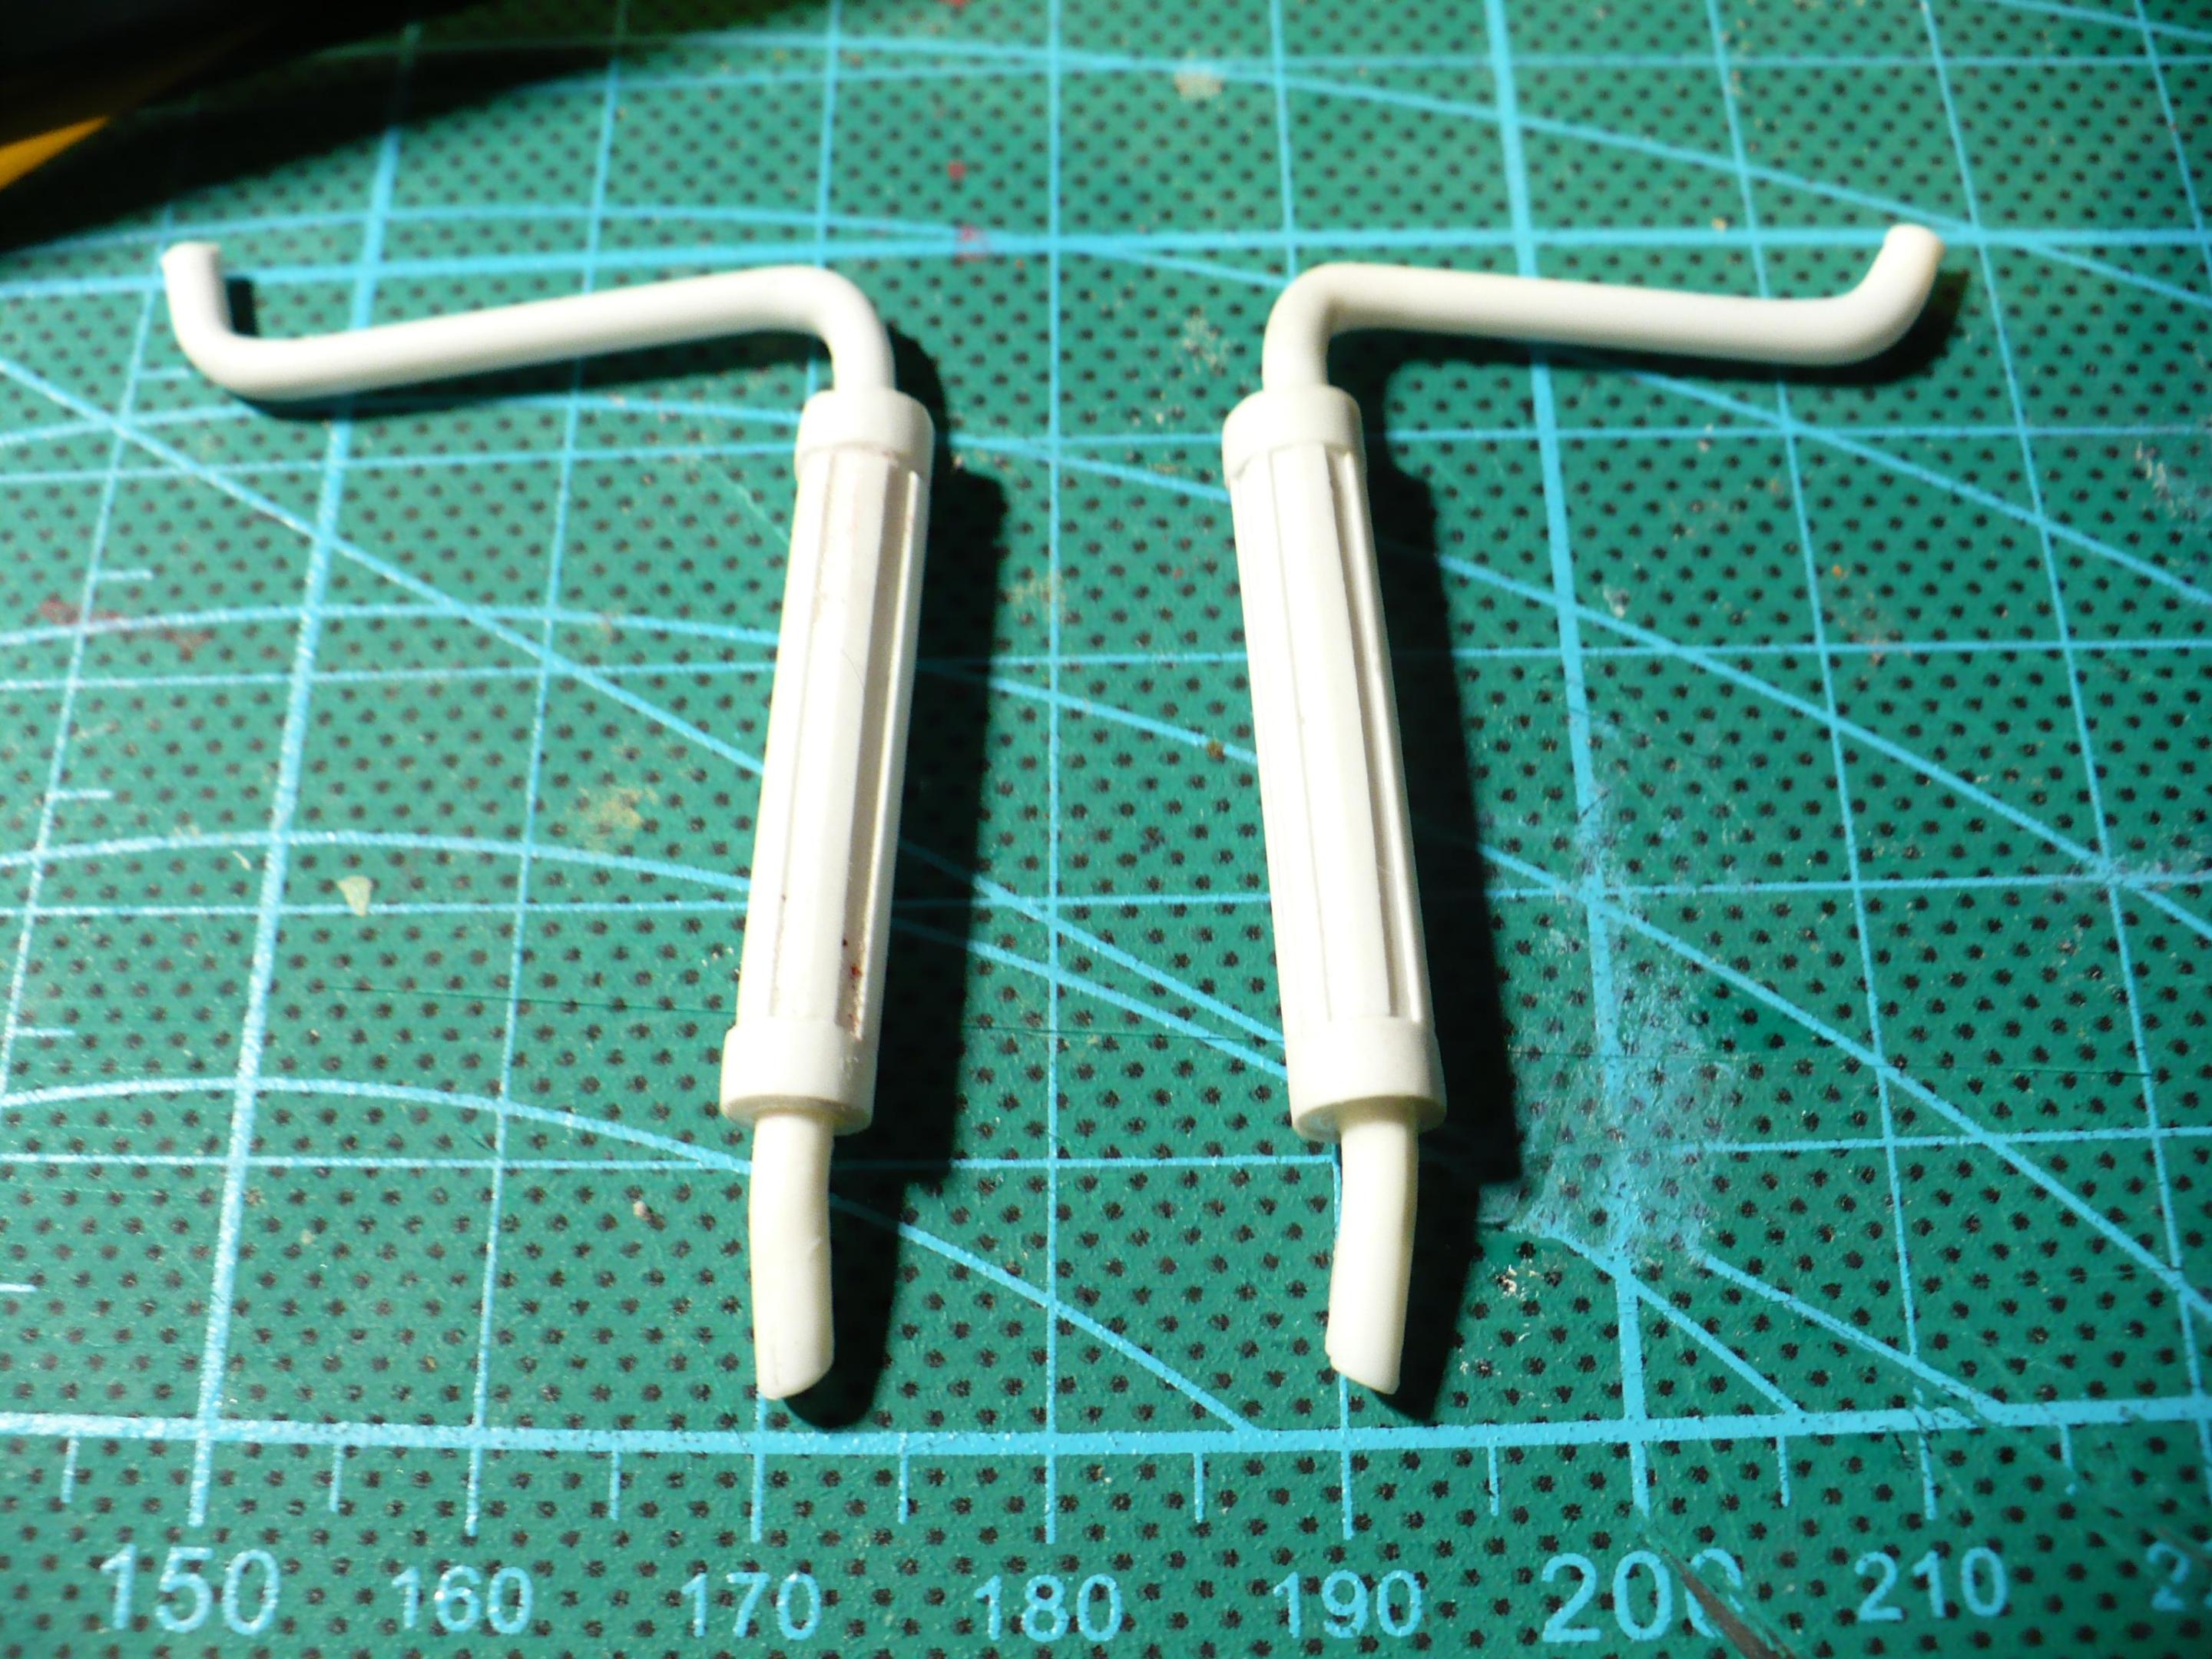
Nice pair of late 60s/early 70s, cheap, made in Japan (when made in Japan still meant cheap) resonated side pipes and the whole three scale feet of exhaust pipe that hooks directly to the headers. No mufflers were harmed in the manufacturing of the exhaust system on the real thing nor model.
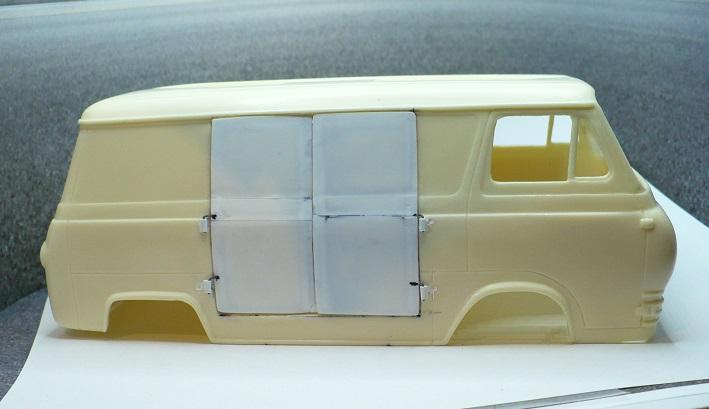
Reworked door hinges. Work great and hinges are very close to scale size. They will need some tweaking for size and shape once I get all the layers of paint on but that will be relatively easy.
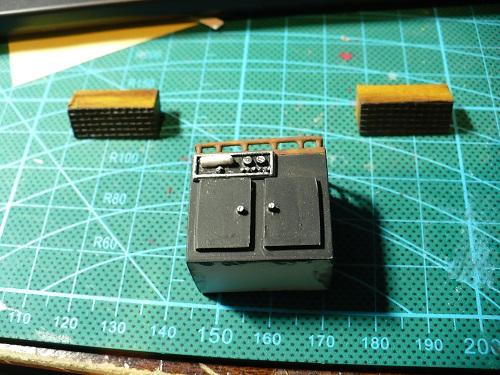
8 track player with 5 band equalizer and appropriate era home cabinet speakers ready to blow doors back off!
In primer
.jpg.42f93bfd497c587da6ecff7f8ef885b1.jpg)
First gloss coat
February 10:
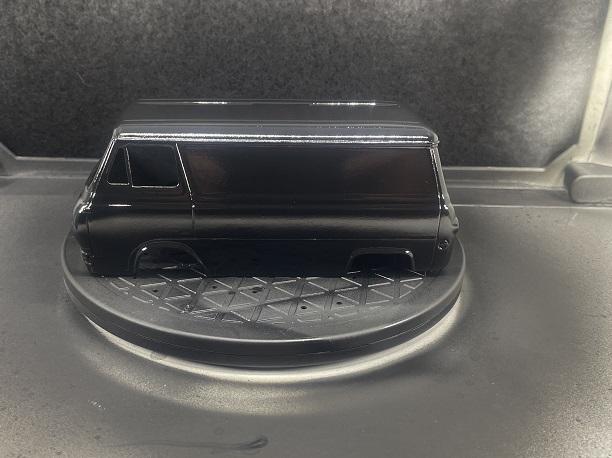
OK, so I spent hours and hour spraying two coats of super gloss black lacquer, then clear coating and polishing to Concours level shine, took the body back up to the bench took one long look at it and went back to the spray booth.
It was a beautiful shiny black van but it was not MY black van. My van had a 6 year old enamel paint job, never saw wax at any point while I owned it and was washed with a brush at a U-Wash booth when it go washed at all. It needed to have a fully intact but bit scruffy and mottled shiny finish.
I sprayed a coat of Tamiya semi gloss black over it but that was not shiny enough and far, far to smooth and even. Next step was to spray a light coat of Future over the whole thing. This brought the gloss way back up again so I used some Windex to remove much of it leaving it more uneven with some areas less glossy than others. Then I took an 800 grit sanding stick and added (GASP)swirl marks and light scrapes.
It is now perfect and looks like the real thing I had and not a garage queen show van!
.jpg.1800b4f86b5a0c18ed27f2b37f14828a.jpg)
.jpg.2e16c05b1aec117c2f651fbcc3af5afc.jpg)
.jpg.dfa36eba8e7ef5caeced49fb7f52381c.jpg)
.jpg.e27d4ae30c7f30a1ea7dcf345aa0a60e.jpg)
Scoured the internet for just the right paneling pattern. Speakers mounted.
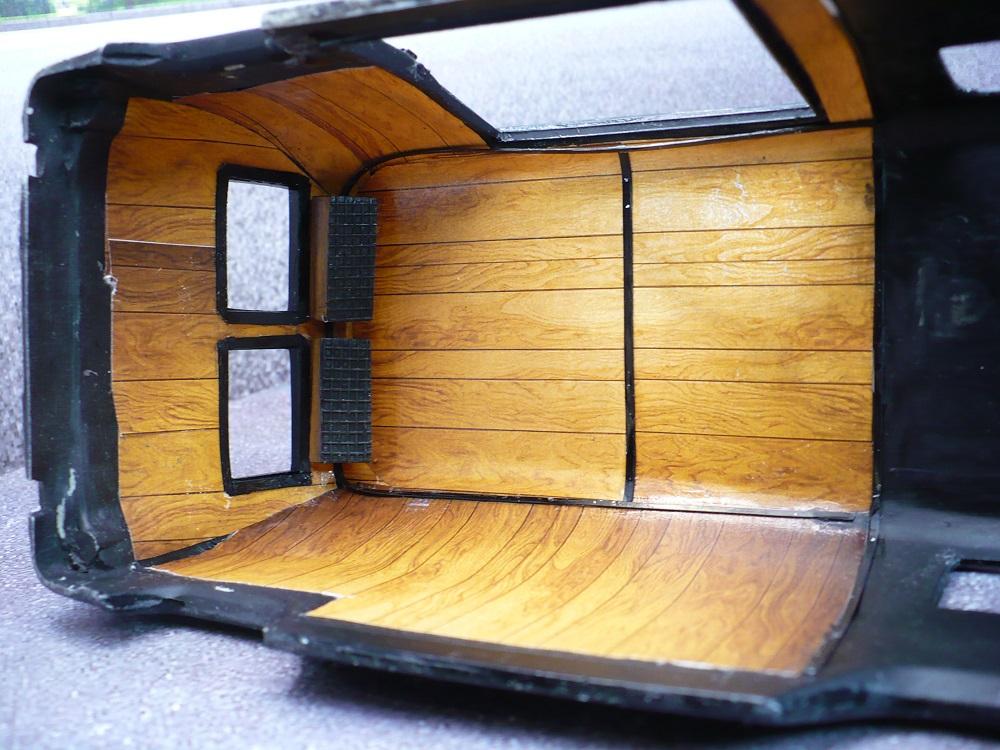
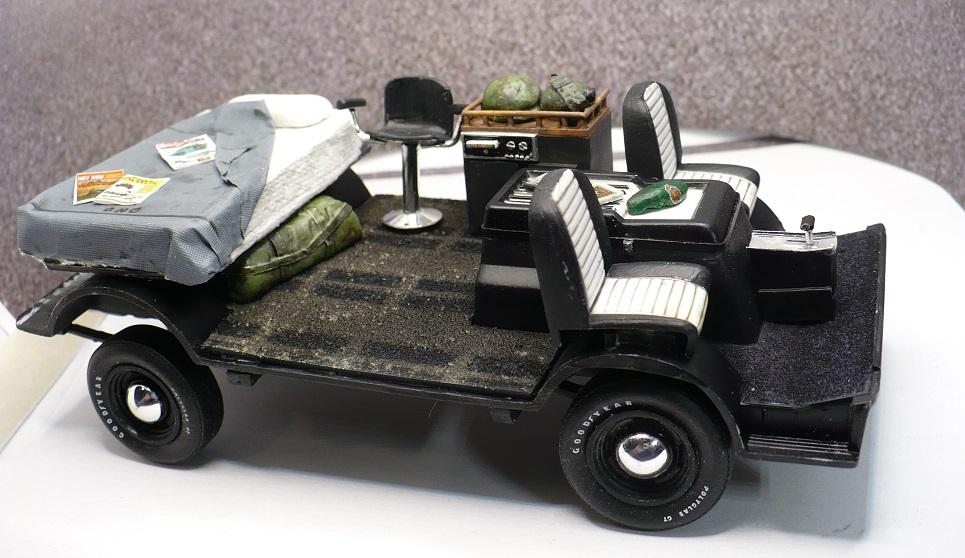
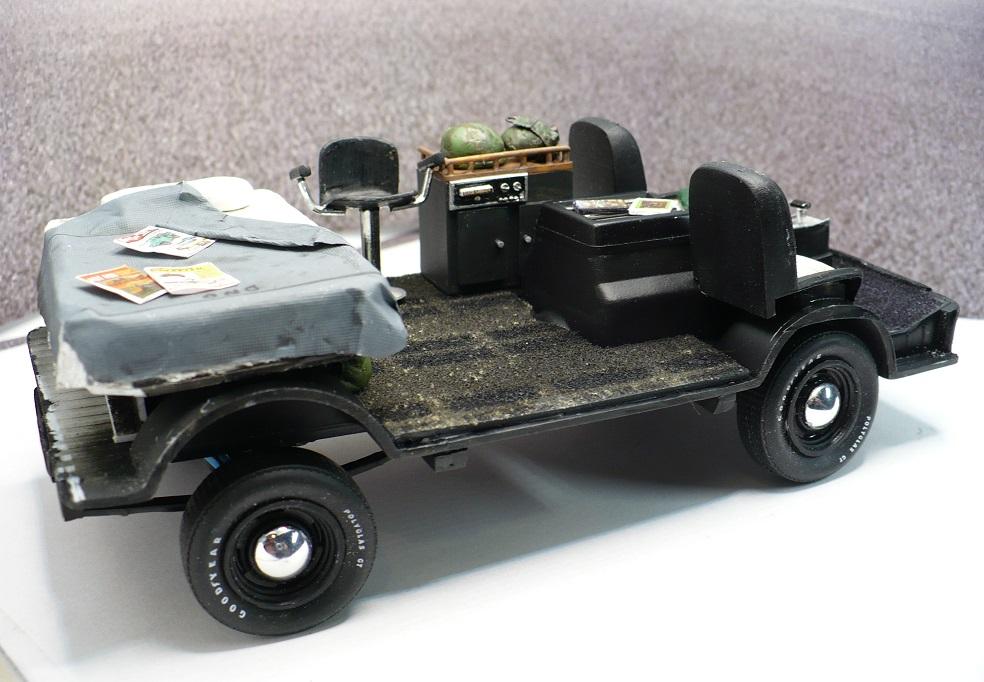
Added some clutter and decorating to give some colour and interest. Posters are 100% accurate to what was there and the 8-track tapes on the doghouse as well. I did make some concessions to history with the magazines since I was not building models nor reading model magazines at age 19.
Army helmet (no it is not a watermelon as the picture seems to indicate)and duffle bag made out of epoxy putty and textured foil from chip dip lids. Added some mud and dirt made from sawdust to the carpet because I usually tracked a bunch in and the maid only came by twice a week.
.jpg.693d7dfebb8c01d9e7e40cda0315e4bf.jpg)
.jpg.538ad0869369f5780b0058d8222b2728.jpg)
.jpg.eec7478d7b495b3995db5dae7cf46167.jpg)
.jpg.77024867b222cc80cb522e50fd159bd5.jpg)
.jpg.2abbf19852074182658fe6f137017a1e.jpg)
.jpg.8328efebf063ce4da2f5117c4deb96af.jpg)
Rest of my army gear that I hauled around is done.
Helmet, web belt with canteen and first aid packet, duffle bag and rolled up beret with cap badge.
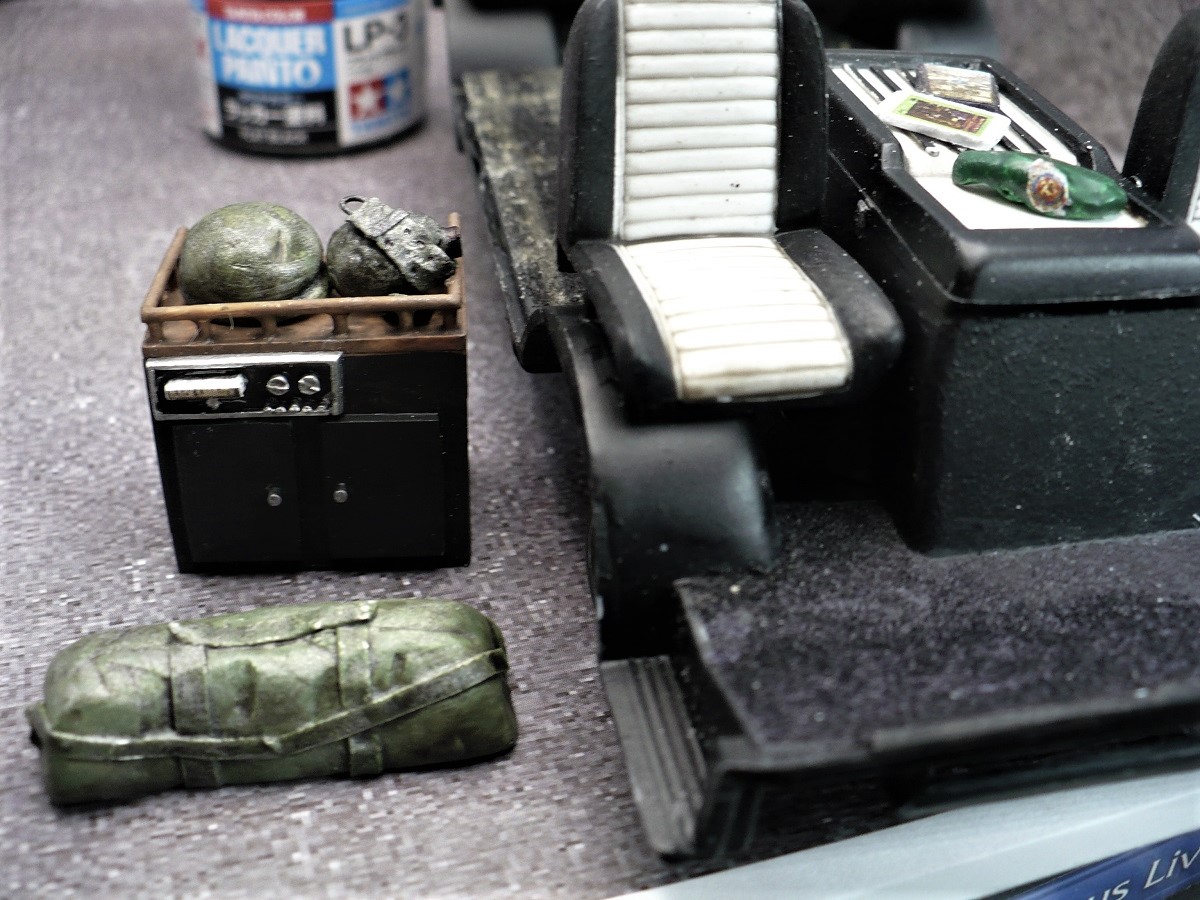
And I almost forgot a vital piece of equipment!
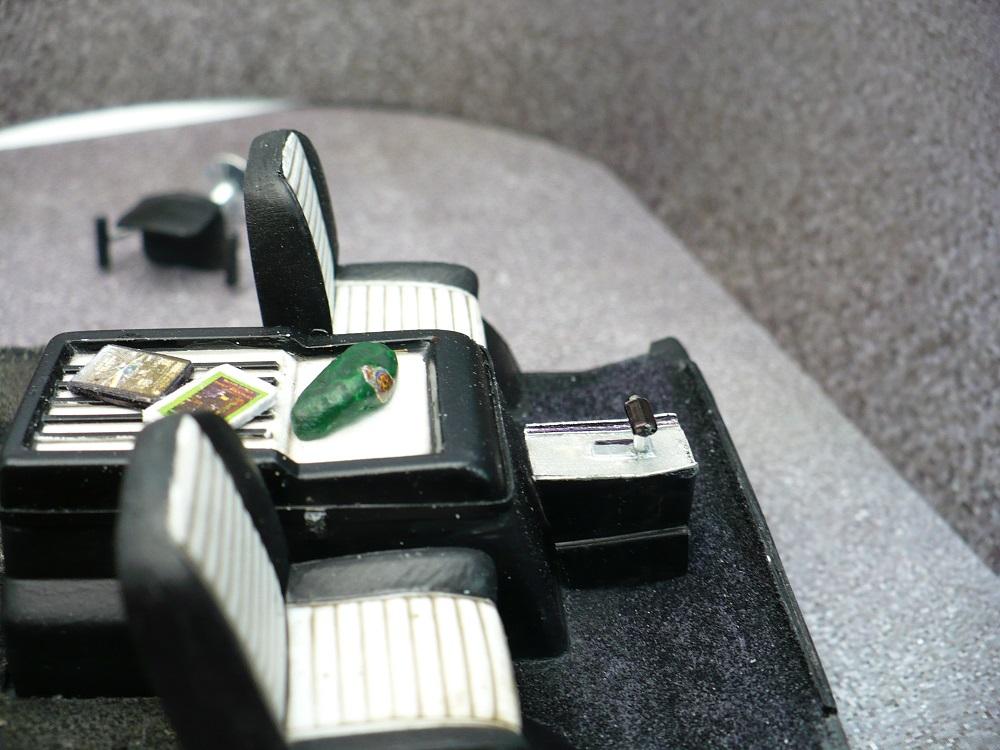
Section of 69 Fairlane console with shifter for the transplanted C6 tranny scratch built. The real section of console was literally cut out of the car, placed on extenders and raised up. Was a bit awkward to reach and the linkage was home made and wonky but it did get the job done.
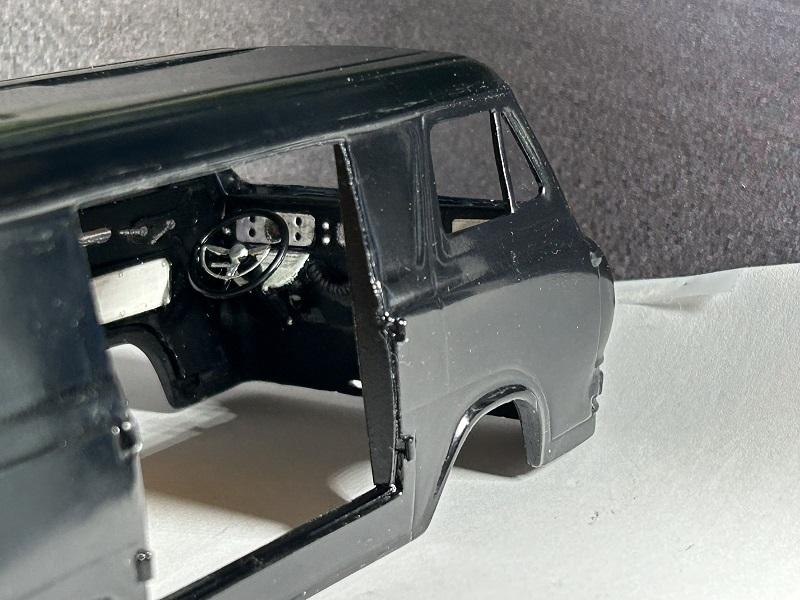
Almost ready to close up.
It's curtains for you
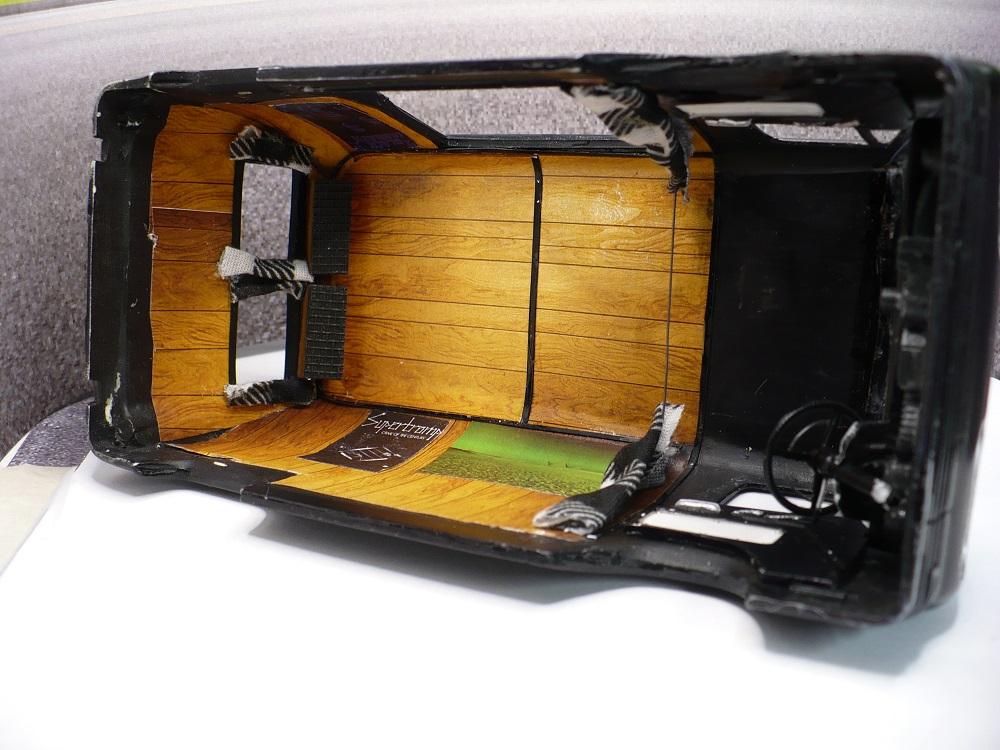
And interior is complete. Next up is the exterior. Not much to that though.
OK last look before it is all done!
.jpg.76f816fc606239cfe3386c8e8aa4a7a2.jpg)
.jpg.248b5af86921d8138dd030a2696f6c54.jpg)
While shopping the Jimmie Flintstone site for a 58 Chevy body I stumbled across the '61-'65 Econoline panel body. I was over joyed to find it as it is a major vehicle in the Cars I used to Own series of builds.


The Flintstone site does not ship to Canada and anybody that sells the body here charges WAY more I had a buddy in Vancouver Washington order it and he then shipped it to me. It has traveled so much it probably has more miles on it than the real thing did.
Since the first generation Econoline's have never been kitted the body is designed to go with he chassis and interior from the Lindberg Lil Red Wagon/Dodge fever Dodge A100 pickup kit. As these have not been released for several years I was beginning to think I would have to sell a kidney to complete this project! After a long search for one of these available for a price that did not require a second mortgage on the house I managed to score one from a reasonably close toy store/hobby shop at a normal retail price.

Although it is a Dodge interior the basics are close enough for anybody but the most diehard early sixties van fanatic. In fact Dodge it looks like didn't even try to hide that they were copying the Econoline.

The knowledgeable amongst you are probably saying "But Tcoat the Econoline only came with a six cylinder engine and that is clearly a V8". Well that is actually convenient for me as my '64 had a 351W and C6 tranny from a 96 Fairlane crammed into that doghouse between the seats. So with some blue paint and a bit of squinting the kit318(?) now becomes a 351. It isn't like you are going to see much beyond the very bottom anyway.

I bought the van already built in late 78 and it had already been done up in pretty much standard early trend vantasic style. There was a bench in the rear that folded down to a bed, a cabinet from an early sixties RV with an 8 track player in it, an ugly (by todays standards) carpet and some early '70s house speakers mounted up in the rear corners The two pieces of foam for the bench/bed were hard to "sleep" on as they always pulled apart so I screwed the base down and threw a cheap RV sized mattress on it. I also wanted a chair so borrowed (forever) an old mid sixties bar stool from my parents and screwed it to the plywood floor. It of course would have meant instant death for anybody riding on it in the event of a crash by those were the invincible days.
So I had to make a bunch of stuff up


Paint starts to bring things to life. The top of the cabinet was that sort of psychedelic woodgrain pattern that anybody over about 55 years of age will recognize. The carpet, although not shag was a heavier pile than you get using embossing powder so it is short turf fibers used in model railroads. I think I missed a narrow black line between the bigger sections of the carpet but once body is on won't see much of it anyway.


And all painted up. The dash is coming with the Flintstone body and will have white panels like the doors, seats and doghouse have. The blanket will be familiar to pretty much anybody with military, police or firefighting experience anyplace in the world. You can probably feel the itching kicking in already. Still need to make an 8 track player for the cabinet but have to did up a chrome radio I know I have someplace for that. Nothing but the front seat are glued on yet since I need to have the body to ensure spacing is correct.
.jpg.0c3eb234a1f404ae7168f37e322a968b.jpg)

As far as I know there are no existing pictures of the real thing but most of the details are etched in my brain even after al this time so it is very accurate at least in my head.
That's it for now (January 14th) since...
I ain't got no body

Quick mockup using the Dodge body. Looks like I am going to need to trim a hair off the barstool height but the cabinet is bang on. There is no way the front seats will fit in using the locators. They don't even clear the kit body so need to move closer together. I raised the rear about 3 scale inches when I built the suspension so the rake looks about right.
.jpg.5f0f876b594e4192edef7a85182cc0ba.jpg)
January 17:
I have a body!
.jpg.672a61bdd8a682a4200c342ddaab8015.jpg)
.jpg.d57be952171c79cc4e2602e7165fdf7c.jpg)
I need to find some slightly smaller tires. These just look like balloons. The chassis needed some considerable rework as the body is about 3/8 inch shorter than the Lindberg kit.
Opened up and padding from dash removed. Resin isn't so hard to work with and my trepidation at the task was misplaced.


Quick mockup to make sure everything fits. About a 1/4 inch taken off the bar stool height so nobody bumps their head!
.jpg.09a8e768aab46cffb1d6d3a1fde85a09.jpg)
.jpg.e67d9fdef19cc53f9dd267d4a1b38af3.jpg)
.jpg.0fd1a747bc4bd1c587dbd661864dc820.jpg)
The posters are all accurate to what I had except the Cooper one. I had a promo poster for his Vancouver 1975 concert but there do not seem to be any pictures of it and I had to go with close enough. The small ones will be 8-track tape labels. The only concession I made to accuracy is the inclusion of the two model magazine covers as neither existed back then and I wasn't building models at that point in my life. Besides, I don't think I could post the real magazines I had back then here anyway!
Yes it truly was a child of the seventies. Just look at that paneling!

Front end dropped a tad more so stance is finally right. By today's standards it looks extreme but was pretty normal back then.
.jpg.821fdce0c0d928f115ebaa336abaaef5.jpg)
January 22:
The doors were made by skinning over the cut out resin parts with very thin styrene and the hinges are the Lindbergh kit parts for the front doors of the Dodge.
They fit better than the pictures make them look and will need some tweaking after paint anyway. The doors are not wrinkled like they look here that is a trick of the smudged marker ink and the resin showing through the styrene.

This is how it will be displayed. The inside of these doors was really easy to model since the structure was covered with paneling and the latch mech is all hidden. The outer lips are all scale thickness.

January 25:
Ummmm...
About those doors...
While sanding in prep for primer I managed to snap not one, but two of those little receiver rings off. I barely touched them and BING gone. The Lindberg plastic is apparently far more brittle than I realized.
So
Everything has come off (pictures eventually) and I am starting all over with folded over thin styrene sheet as the receiver and fine wire as the post. On the plus side this method results in a much more scale and accurate depiction of the hinges. The bad part remains to be confirmed but I suspect they will not stand up to repeated opening and closing very well so it may end up with permanently open doors. That wouldn't be horrible since it can still be seen closed on the drivers side and the interior is really the star of the show for the passenger side anyway.
I also need to get some coats of buildable primer on it to make sure I can get the slight curves of the transitions in the body creases correct. By using such thin material I sort of restricted myself to how much shaping I can do. If the primer fails I will try a very thin skim of filler putty for shaping. If that fails then I will build the doors all over again but with styrene of the next thickness up. If that doesn't cut it that will be the final nail in the coffin for closing doors since when open you cant see the outer skin anyway
February 2:
Well after a brief intermission it is back to work on this.
Nice pair of late 60s/early 70s, cheap, made in Japan (when made in Japan still meant cheap) resonated side pipes and the whole three scale feet of exhaust pipe that hooks directly to the headers. No mufflers were harmed in the manufacturing of the exhaust system on the real thing nor model.
Reworked door hinges. Work great and hinges are very close to scale size. They will need some tweaking for size and shape once I get all the layers of paint on but that will be relatively easy.


8 track player with 5 band equalizer and appropriate era home cabinet speakers ready to blow doors back off!

In primer
.jpg.42f93bfd497c587da6ecff7f8ef885b1.jpg)
First gloss coat

February 10:
OK, so I spent hours and hour spraying two coats of super gloss black lacquer, then clear coating and polishing to Concours level shine, took the body back up to the bench took one long look at it and went back to the spray booth.
It was a beautiful shiny black van but it was not MY black van. My van had a 6 year old enamel paint job, never saw wax at any point while I owned it and was washed with a brush at a U-Wash booth when it go washed at all. It needed to have a fully intact but bit scruffy and mottled shiny finish.
I sprayed a coat of Tamiya semi gloss black over it but that was not shiny enough and far, far to smooth and even. Next step was to spray a light coat of Future over the whole thing. This brought the gloss way back up again so I used some Windex to remove much of it leaving it more uneven with some areas less glossy than others. Then I took an 800 grit sanding stick and added (GASP)swirl marks and light scrapes.
It is now perfect and looks like the real thing I had and not a garage queen show van!
.jpg.1800b4f86b5a0c18ed27f2b37f14828a.jpg)
.jpg.2e16c05b1aec117c2f651fbcc3af5afc.jpg)
.jpg.dfa36eba8e7ef5caeced49fb7f52381c.jpg)
.jpg.e27d4ae30c7f30a1ea7dcf345aa0a60e.jpg)
Scoured the internet for just the right paneling pattern. Speakers mounted.

Added some clutter and decorating to give some colour and interest. Posters are 100% accurate to what was there and the 8-track tapes on the doghouse as well. I did make some concessions to history with the magazines since I was not building models nor reading model magazines at age 19.
Army helmet (no it is not a watermelon as the picture seems to indicate)and duffle bag made out of epoxy putty and textured foil from chip dip lids. Added some mud and dirt made from sawdust to the carpet because I usually tracked a bunch in and the maid only came by twice a week.
.jpg.693d7dfebb8c01d9e7e40cda0315e4bf.jpg)
.jpg.538ad0869369f5780b0058d8222b2728.jpg)
.jpg.eec7478d7b495b3995db5dae7cf46167.jpg)
.jpg.77024867b222cc80cb522e50fd159bd5.jpg)
.jpg.2abbf19852074182658fe6f137017a1e.jpg)
.jpg.8328efebf063ce4da2f5117c4deb96af.jpg)
Rest of my army gear that I hauled around is done.
Helmet, web belt with canteen and first aid packet, duffle bag and rolled up beret with cap badge.
And I almost forgot a vital piece of equipment!
Section of 69 Fairlane console with shifter for the transplanted C6 tranny scratch built. The real section of console was literally cut out of the car, placed on extenders and raised up. Was a bit awkward to reach and the linkage was home made and wonky but it did get the job done.

Almost ready to close up.

It's curtains for you

And interior is complete. Next up is the exterior. Not much to that though.


OK last look before it is all done!
.jpg.76f816fc606239cfe3386c8e8aa4a7a2.jpg)
.jpg.248b5af86921d8138dd030a2696f6c54.jpg)


.jpg.85d8c2a72c6745359cd868ca0f09b1cb.jpg)


.jpg.43fc796e4cbb8a47e3af7f54ece90eaf.jpg)
.jpg.3a036b8b5ba490e32ca94e2c30d74b76.jpg)
.jpg.2558135e4f4eb08d45e60e6fa751f91f.jpg)
.jpg.1ad7d0b08e0c7cec8b800d1a6a608947.jpg)
.jpg.4e8fa9ad8ad572f8eee6d0b58b373bf1.jpg)
.jpg.faf7acc823a2b949d908f699e498238c.jpg)
.jpg.fe14ad06ddfaadc1632135ec533bd558.jpg)
.jpg.fe188acc3b1b47852d04a000317cf17b.jpg)
.jpg.e2450117934ab275d889b82e65b8c2c0.jpg)
.jpg.d7fed1259ab0194302115c3f7d846ffe.jpg)
.jpg.ea1cc89d68412147e6b4ad459b9947f6.jpg)
.jpg.7b10e6f76d5e9940707ce942b392b032.jpg)


