stikpusher
Forum Moderator      May '23 Showcased Model Awarded
Member since: April 2023
Living The Dream
Posts: 4,147 
MSC Staff
|
Post by stikpusher on Mar 4, 2024 17:57:48 GMT -5
A new month, a new week, and a new project. I’m starting my long planned Otaki/Arii Ki-43 II, with a set of Aeromaster Decals, Yahu instrument Panel, and possibly some PE bits from this generic Japanese PE detailing set. 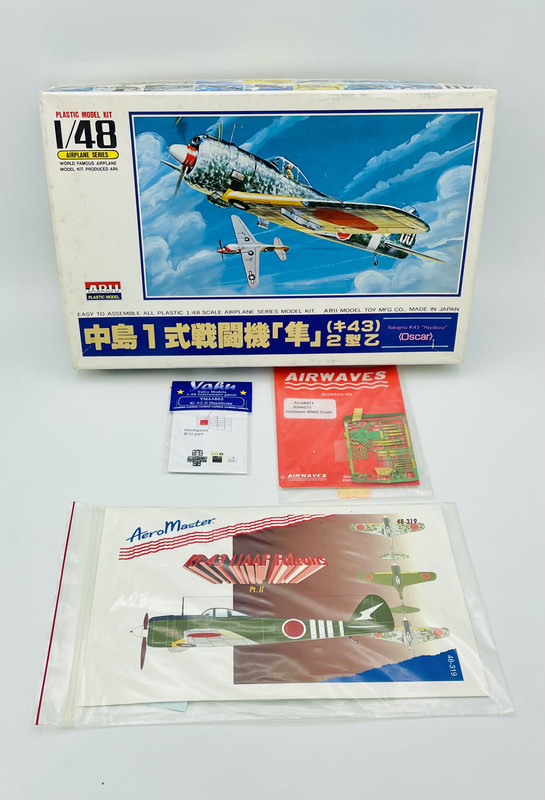 this is what comes in the box 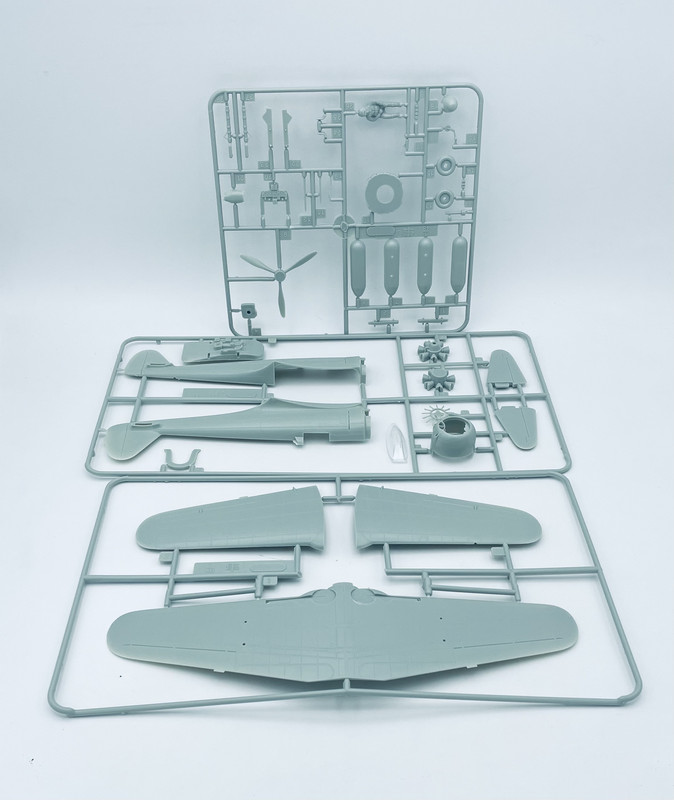 Externally, as a typical Otaki/Arii kit, the detailing and shape is nice, but the cockpit needs help, and the wheel wells are barely there 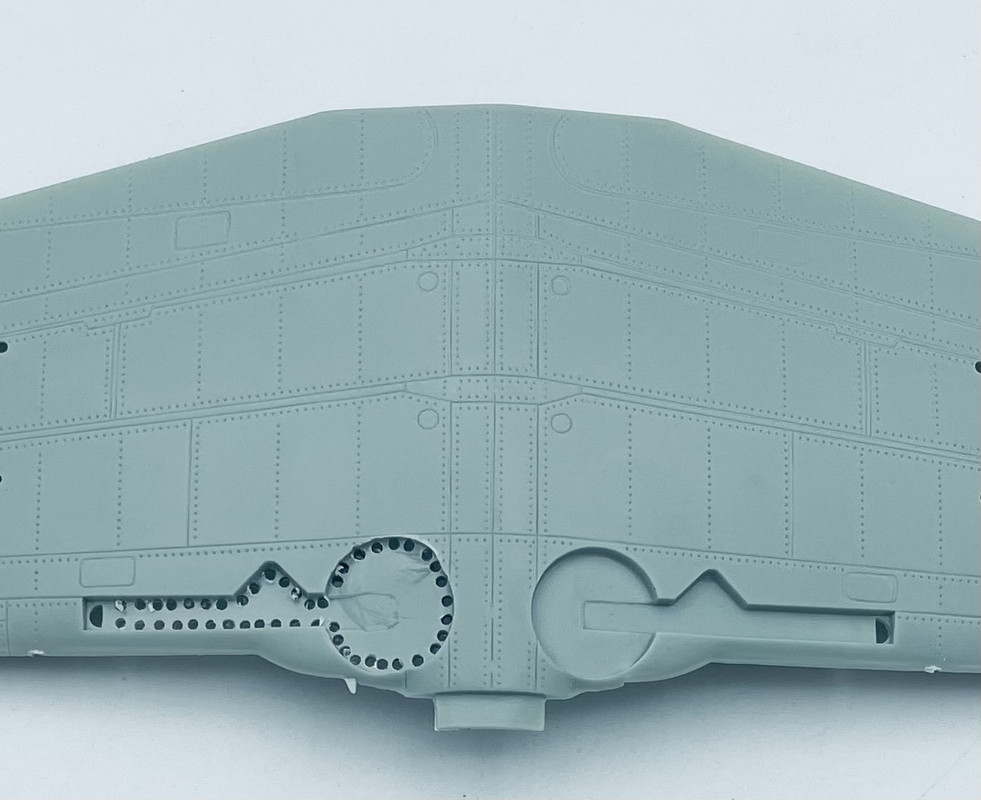 So I started by drilling, grinding, and removing the too shallow wheel well ceilings… I’ll build new ones of a more appropriate depth  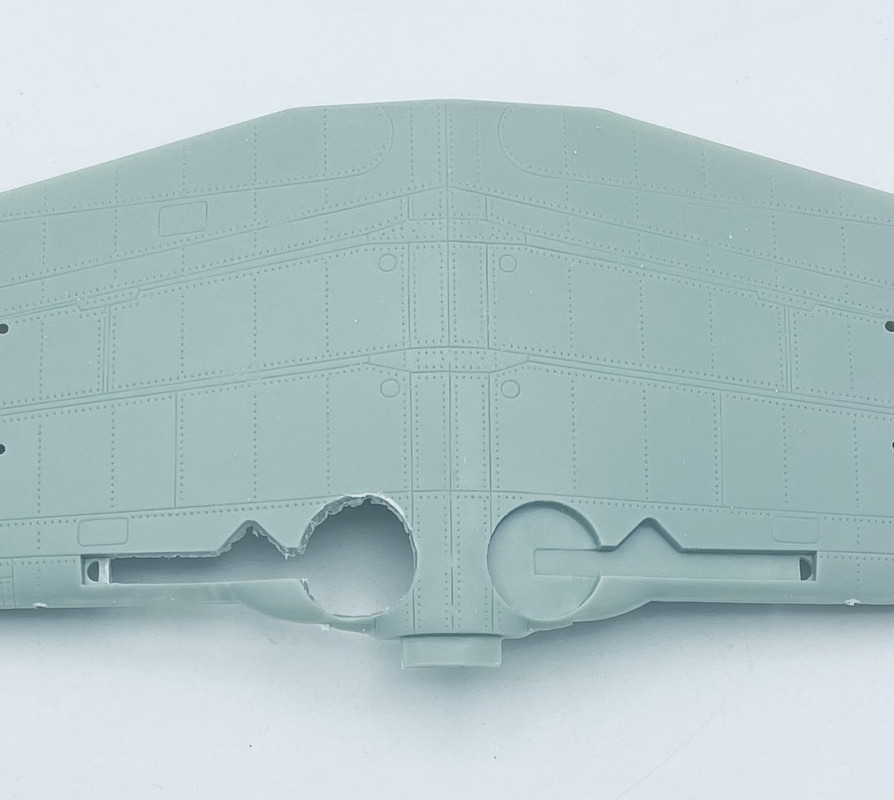 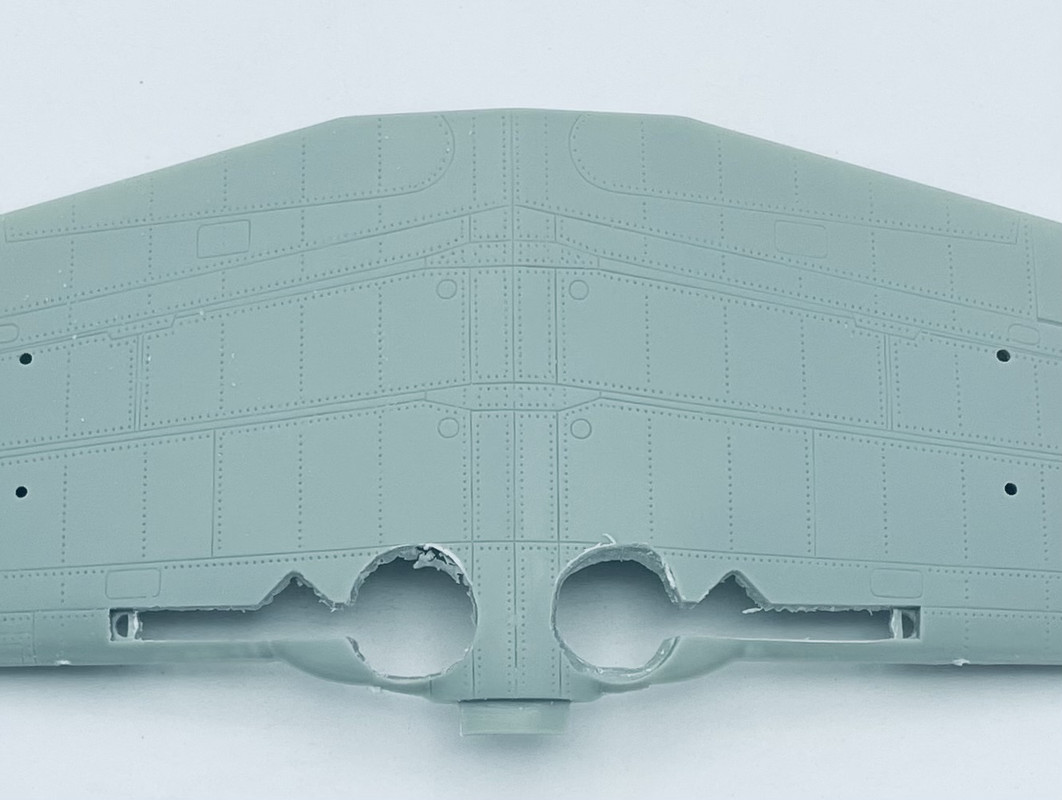 Then I addressed the pilot seat which has a block looking like a stack of phone books in the seat pan. Since the kit pilot figure is terrible, I won’t be using him, and I began cleaning up the seat, removing the block and drill8ng some lightening holes in the seat back. 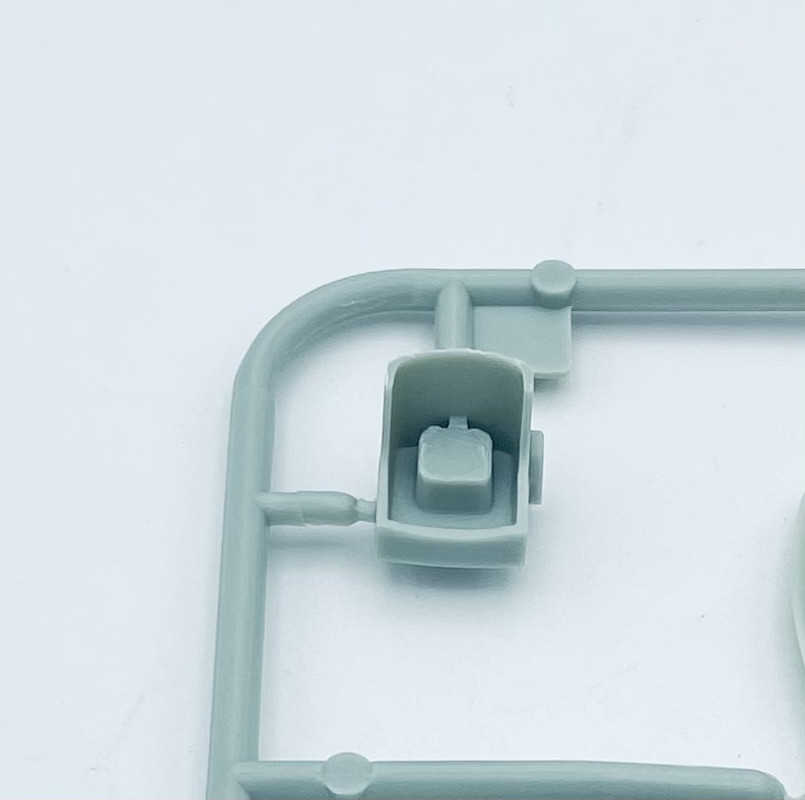 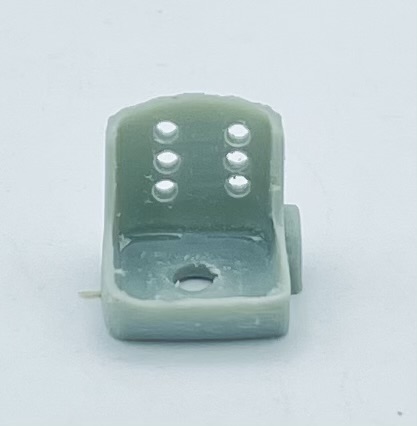 I’ll address the hole in the seat bottom, then add a bit more detailing to the seat. There is a resin replacement seat available, but it’s’ cost and shipping is more than I paid for this kit, so no thanks… More to come in a few days… |
|
|
|
Post by kyledehart5 on Mar 4, 2024 18:15:40 GMT -5
Needed the stack of phone books to see over the cowling. lol. Looking forward to this.
|
|
stikpusher
Forum Moderator      May '23 Showcased Model Awarded
Member since: April 2023
Living The Dream
Posts: 4,147 
MSC Staff
|
Post by stikpusher on Mar 5, 2024 16:37:20 GMT -5
Thanks Kyle. I hope that you like what will be going on with this one. Last night I finished up the seat, sanding off the seat pan bottom and replacing that with some sheet styrene, plus adding a low back support beam 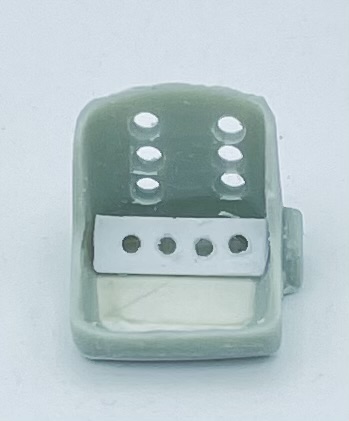 then I glued that in place on the cockpit floor 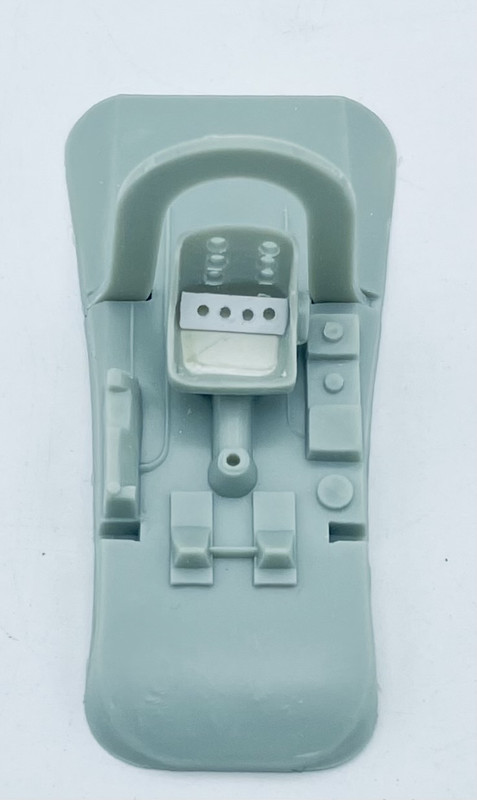 and this morning I've been working on adding the tops of the now depend wheel wells 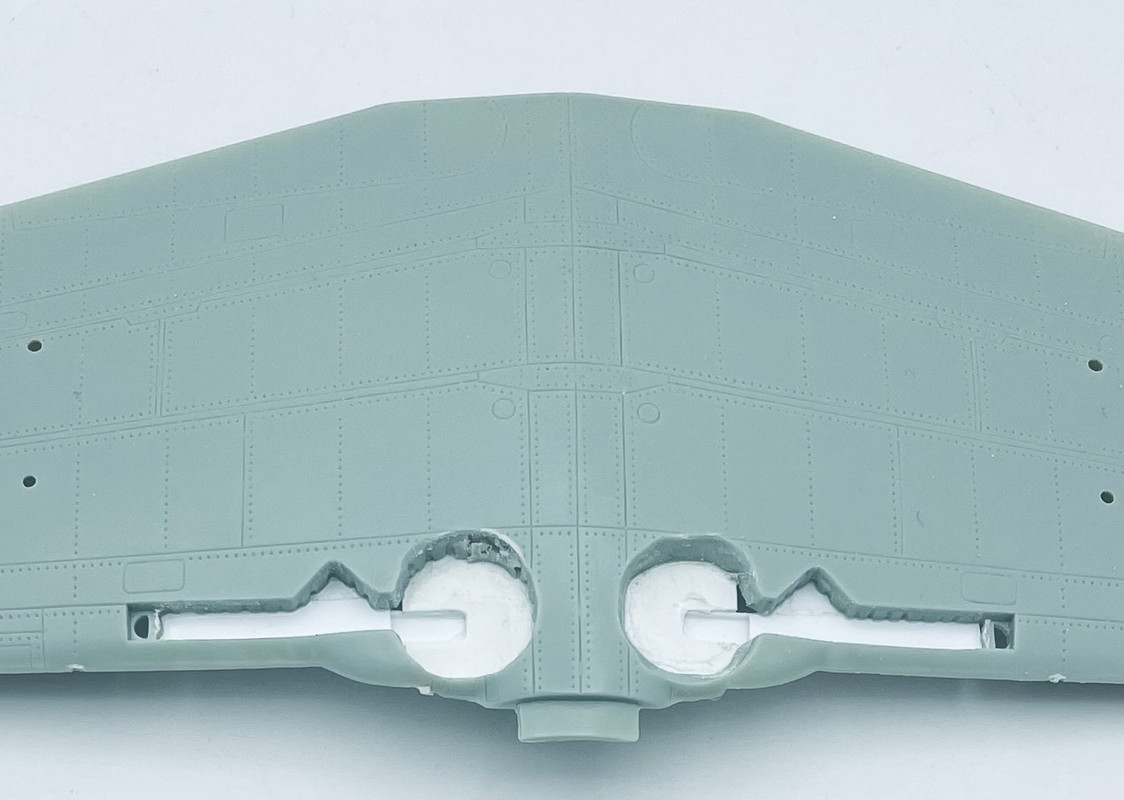 My next step is modifying fuselage areas at the forward portion of the wing roots affected by the deepened wheel wells. And I'll be able to start painting the cockpit soon too. |
|
|
|
Post by kyledehart5 on Mar 5, 2024 16:56:23 GMT -5
Impressive work! You are really taking this kit up a notch.
|
|
stikpusher
Forum Moderator      May '23 Showcased Model Awarded
Member since: April 2023
Living The Dream
Posts: 4,147 
MSC Staff
|
Post by stikpusher on Mar 5, 2024 17:36:17 GMT -5
Impressive work! You are really taking this kit up a notch. Thank you. I'm not planning on entering any contests or whatnot with this one, so just some simple improvements, not a deep dive rework. |
|
handiabled
Administrator      Apr '23 Showcased Build Awarded
Member since: February 2023
Posts: 4,458 
MSC Staff
|
Post by handiabled on Mar 6, 2024 2:23:22 GMT -5
Following this one. Looks like the office will build up nicely with the scratchwork and the extras you have for it.
|
|
floki
Full Member
  
Member since: September 2023
Posts: 310
Sept 16, 2023 0:58:27 GMT -5
Sept 16, 2023 0:58:27 GMT -5
|
Post by floki on Mar 6, 2024 4:22:17 GMT -5
Seat looks a lot better! Looking foward to more updates
|
|
jmarc
Senior Member
   
Member since: October 2023
Posts: 2,191
Oct 18, 2023 16:09:42 GMT -5
Oct 18, 2023 16:09:42 GMT -5
|
Post by jmarc on Mar 10, 2024 5:05:29 GMT -5
NNNNNNNNNeat start !
|
|
|
|
Post by deafpanzer on Mar 10, 2024 14:09:58 GMT -5
You are off to a good start! You have my respect for building it because I would have got rid of the old kit and get new tooled kit.
|
|
stikpusher
Forum Moderator      May '23 Showcased Model Awarded
Member since: April 2023
Living The Dream
Posts: 4,147 
MSC Staff
|
Post by stikpusher on Mar 10, 2024 15:35:35 GMT -5
Thanks guys! I'm gonna dress up the cockpit a bit, but not do a deep dive revamp... just make it presentable...
Clint that seat was horrid as molded. At least now it looks something like an actual seat...
Andy, I have couple more better Hayabusas in my stash, Hasegawa & Fine Molds. But this was my first, and I do have a soft spot for these Otaki/Arii kits... The Hasegawa kit looks best of the three, the Fine Molds kit being a bit simplified in the cockpit and engine.
|
|
stikpusher
Forum Moderator      May '23 Showcased Model Awarded
Member since: April 2023
Living The Dream
Posts: 4,147 
MSC Staff
|
Post by stikpusher on Mar 20, 2024 20:27:17 GMT -5
Well I finally have some updates worth posting... painting has begun... at least for the interior Basic parts ready for paint...  then last night I laid down a base of Tamiya Lacquer Flat Aluminum on all the interior areas, plus Tamiya Lacquer Light Gun Metal on the engine  I let that dry overnight, then this morning I airbrushed on a coat of Gunze Aqueous Aotake over the Aluminum areas 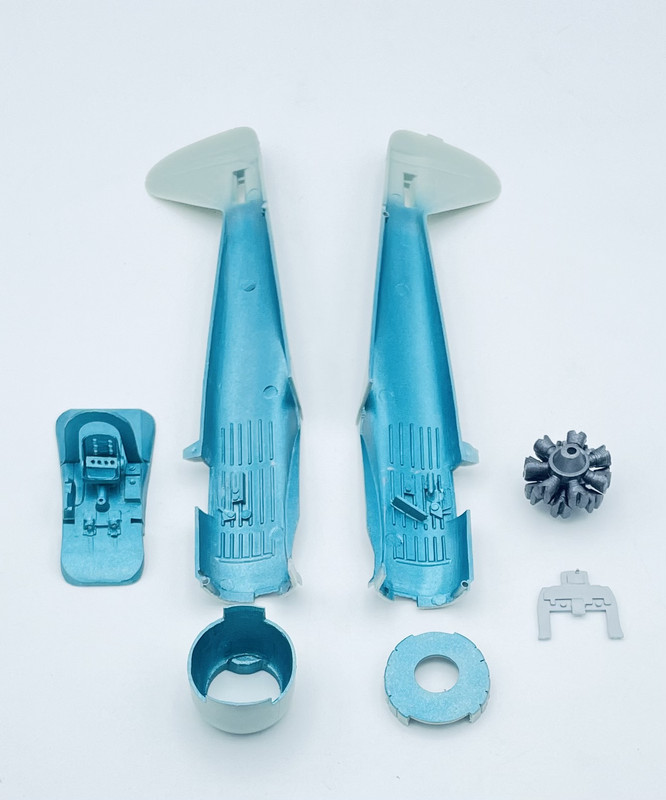 after I let that dry I masked off the cockpit areas for the next color, and also added a PE seat belt 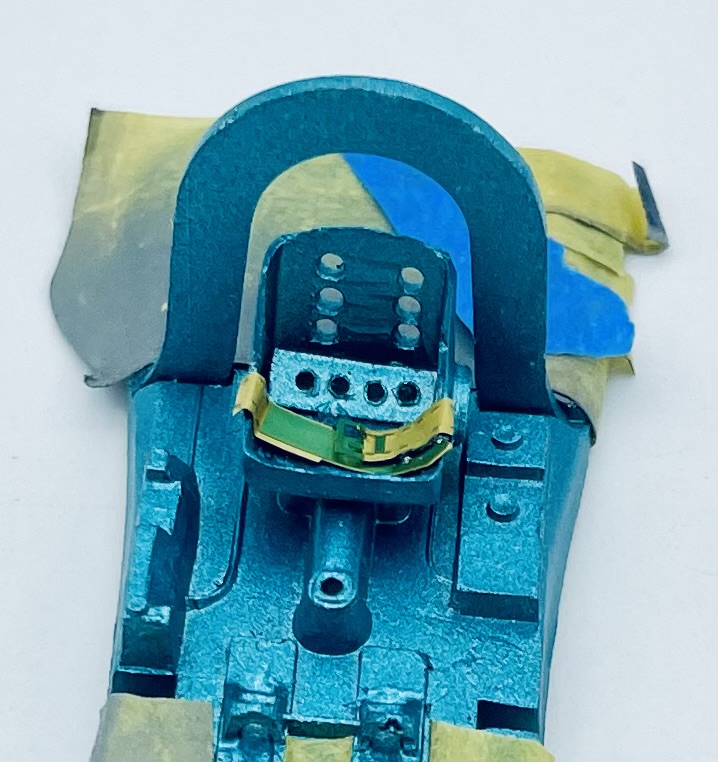 Then a short while ago I airbrushed a coat of Tamiya Cockpit Green in the cockpit area. I also painted the engine crankcase in Vallejo Game Color Cool Gray, and painted up a pair of machine guns from my spare bin that I will be adding, as their butts should be visible to the sides of the instrument panel top, like on a P-40B/C, or Zero. 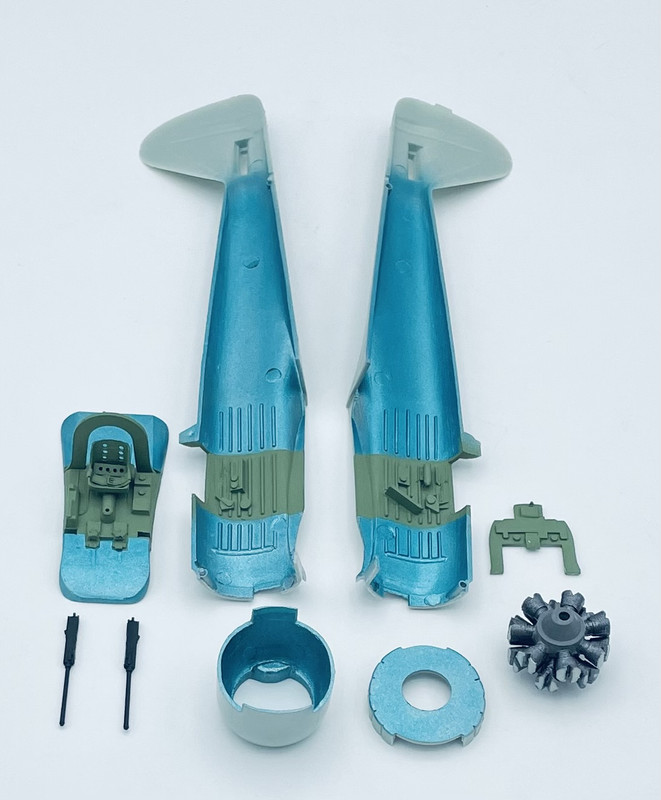 more to come in a day or two... |
|
|
|
Post by keavdog on Mar 20, 2024 20:33:27 GMT -5
Love that aotake blue. Be fun to do a whatif plane in all aotake. Looks like you're close to butting her up.
|
|
stikpusher
Forum Moderator      May '23 Showcased Model Awarded
Member since: April 2023
Living The Dream
Posts: 4,147 
MSC Staff
|
Post by stikpusher on Mar 20, 2024 21:30:43 GMT -5
Love that aotake blue. Be fun to do a whatif plane in all aotake. Looks like you're close to butting her up. Yeah, it is a neat color. I may add a hint of green to it on my next Japanese aircraft... That would be an eye catching aircraft in an Aotake exterior. I know that pre war IJN Claudes had an amber clear coat over the NMF to give a golden look... I have hand brushed detail painting to do tomorrow... some weathering in there... add the Yahu IP, figure a way to mount those guns to the IP, then I figure by Friday I can have the fuselage closed up... |
|
buddho
Forum Moderator     
Member since: February 2019
Posts: 1,287 
MSC Staff
|
Post by buddho on Mar 20, 2024 21:43:15 GMT -5
Awesome start ..looking forward to the next set of pics.
|
|
stikpusher
Forum Moderator      May '23 Showcased Model Awarded
Member since: April 2023
Living The Dream
Posts: 4,147 
MSC Staff
|
Post by stikpusher on Mar 20, 2024 22:17:17 GMT -5
Thanks Buddho. All I can say is that what I’ve worked on so far is where the kit needs the most help…. I’m surprised that Tamiya hasn’t made a 1/48 Ki-43 yet…
|
|
TJ
Senior Member
    June '23 Showcased Model Awarded
Member since: May 2023
Posts: 2,182
May 14, 2023 18:18:36 GMT -5
May 14, 2023 18:18:36 GMT -5
|
Post by TJ on Mar 21, 2024 4:15:02 GMT -5
Love that aotake blue. Be fun to do a whatif plane in all aotake. Looks like you're close to butting her up. That would be a cool color for a custom car model |
|
TJ
Senior Member
    June '23 Showcased Model Awarded
Member since: May 2023
Posts: 2,182
May 14, 2023 18:18:36 GMT -5
May 14, 2023 18:18:36 GMT -5
|
Post by TJ on Mar 21, 2024 4:15:56 GMT -5
Thanks Buddho. All I can say is that what I’ve worked on so far is where the kit needs the most help…. I’m surprised that Tamiya hasn’t made a 1/48 Ki-43 yet… The Hasegawa one is supposed to be real nice. Great work on this classic kit |
|
handiabled
Administrator      Apr '23 Showcased Build Awarded
Member since: February 2023
Posts: 4,458 
MSC Staff
|
Post by handiabled on Mar 21, 2024 9:20:42 GMT -5
Great progress Carlos. The aotake blue does look fantastic, what paint did you use for it?
|
|
lyle
Forum Moderator     
Member since: May 2013
On the sunny side of the dirt
Posts: 1,655 
MSC Staff
|
Post by lyle on Mar 21, 2024 9:31:29 GMT -5
Very nice, Carlos.
|
|
|
|
Post by tcoat on Mar 21, 2024 9:34:00 GMT -5
Is the blue sort of translucent? Have seen loads of different attempts at that primer/sealer but that one is by far the best looking.
|
|
stikpusher
Forum Moderator      May '23 Showcased Model Awarded
Member since: April 2023
Living The Dream
Posts: 4,147 
MSC Staff
|
Post by stikpusher on Mar 21, 2024 9:49:12 GMT -5
Thanks guys! TJ, Yeah that Aotake would look great on some cars. Kinda reminds of the metallic blue on some Mustangs I used to see as a youngster… I have a Hasegawa and Fine Molds Oscars in my stash, different versions, Both are better than this kit, but the Hasegawa kit is more detailed than the Fine Molds kit. Bit still, I’d love to see what Tamiya could do with the Ki-43 family in 1/48. Brent, I used an old bottle of Gunze Aqueous Aotake here. They actually label it as Metallic Blue, with “for interior of Japanese Aircraft” in fine print off to the side. Aotake is easier to type out  TC, I thinned the Aotake down a good bit for spraying over the Flat Aluminum base coat to get that effect. I have read of how that look was often seen on Japanese aircraft during examination. Normal thinning of this paint gives a pretty opaque color |
|
|
|
Post by tcoat on Mar 21, 2024 10:16:04 GMT -5
Thanks guys! TJ, Yeah that Aotake would look great on some cars. Kinda reminds of the metallic blue on some Mustangs I used to see as a youngster… I have a Hasegawa and Fine Molds Oscars in my stash, different versions, Both are better than this kit, but the Hasegawa kit is more detailed than the Fine Molds kit. Bit still, I’d love to see what Tamiya could do with the Ki-43 family in 1/48. Brent, I used an old bottle of Gunze Aqueous Aotake here. They actually label it as Metallic Blue, with “for interior of Japanese Aircraft” in fine print off to the side. Aotake is easier to type out  TC, I thinned the Aotake down a good bit for spraying over the Flat Aluminum base coat to get that effect. I have read of how that look was often seen on Japanese aircraft during examination. Normal thinning of this paint gives a pretty opaque color Well it worked! The primer was more of a tinted varnish than an actual paint so many of the opaque model paints just don't have the right look.. The sheen of the metal should show through just like you have. Have to get me some of that I guess.  |
|
|
|
Post by kyledehart5 on Mar 21, 2024 15:12:43 GMT -5
Yeah. I’d say you nailed that Aotake. Great update. Looking forward to more.
|
|
tucohoward
Junior Member
 
Member since: June 2023
Posts: 98
Jun 3, 2023 17:08:10 GMT -5
Jun 3, 2023 17:08:10 GMT -5
|
Post by tucohoward on Mar 21, 2024 18:46:31 GMT -5
Looking really good, Carlos! Love the older stuff. I still have a lot of Aero Master decals but don’t think I have any Airwaves PE left but wouldn’t surprise me if I found some in the stash haha.
Jay
|
|
stikpusher
Forum Moderator      May '23 Showcased Model Awarded
Member since: April 2023
Living The Dream
Posts: 4,147 
MSC Staff
|
Post by stikpusher on Mar 22, 2024 16:05:34 GMT -5
Thanks Jay! Yeah I picked up quite a few Airwaves set over the years. I really like the “generic” sets like these, so several kits can be improved by just a single set. Good for you on the Aeromaster decal sets. I have a few and really like the ones that I’ve used so far. Lots of photos on todays update, and a major milestone in construction… Yesterday I got the cockpit base colors detail painting finished and the machine guns installed on the forward side of the IP. 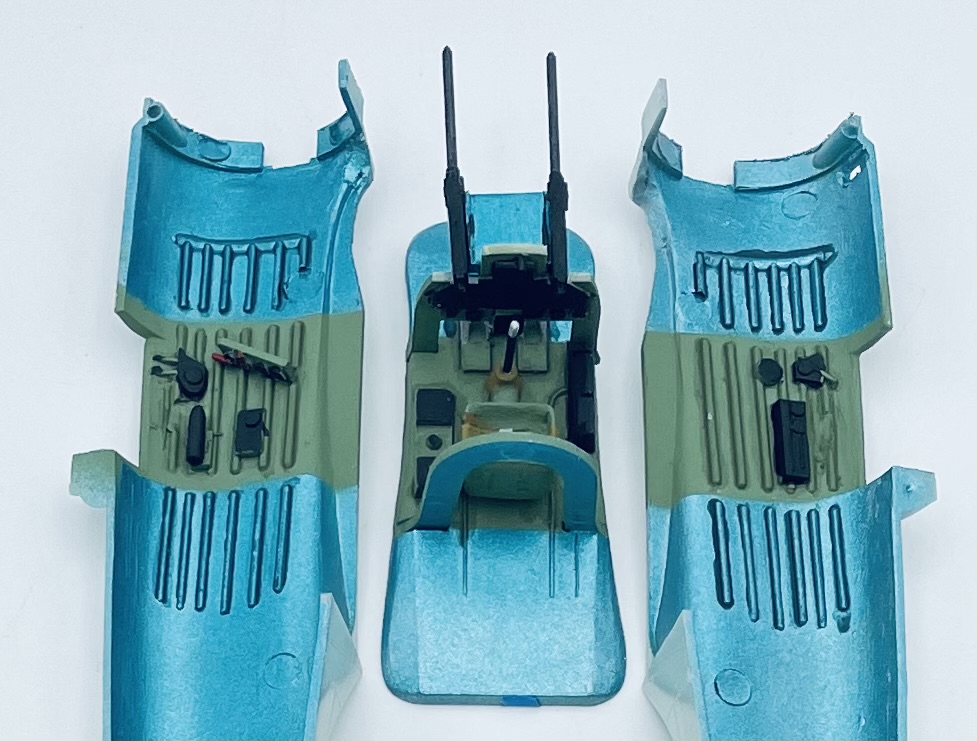 This morning I did some final light weathering, and installed the Yahu IP items 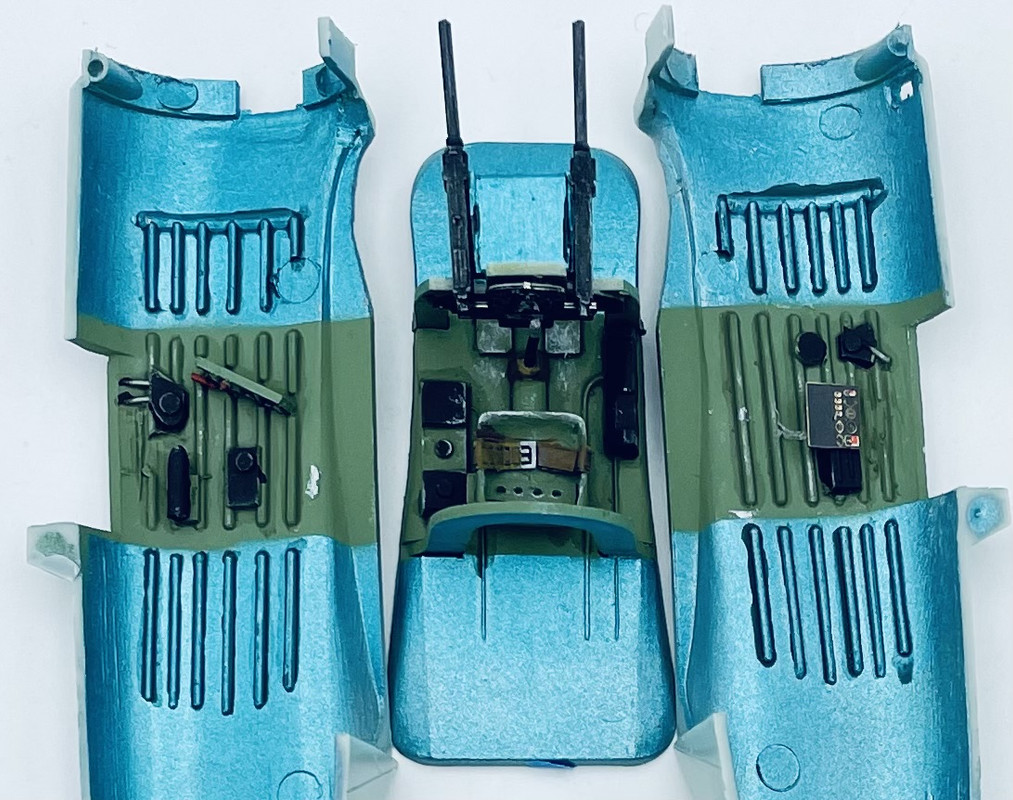 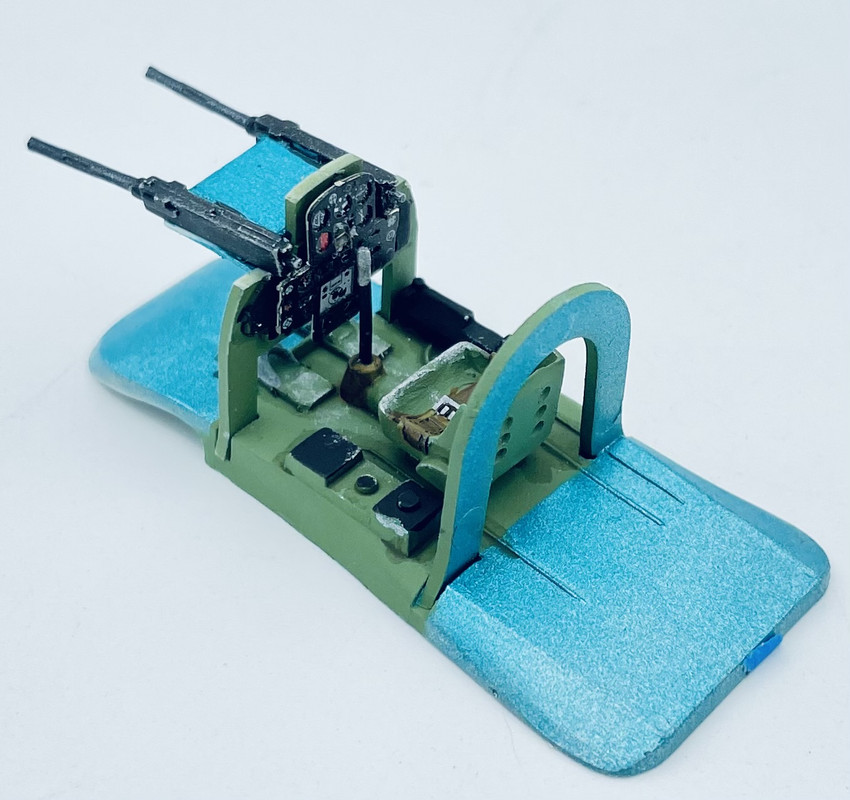 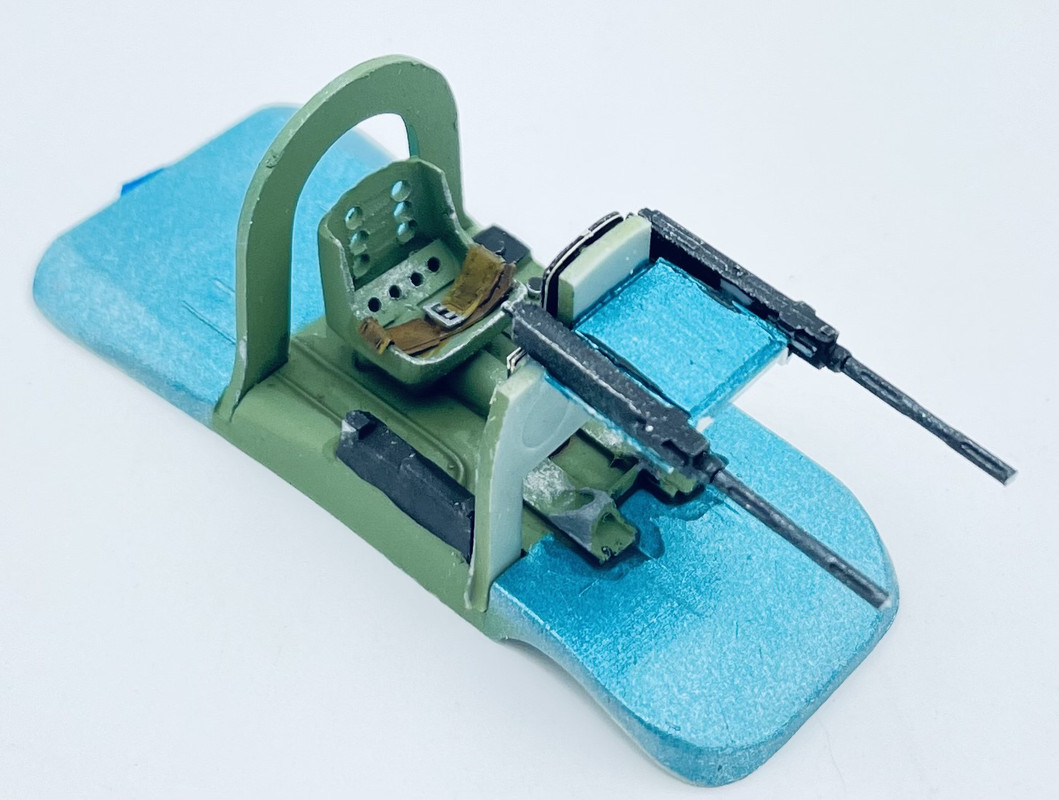 Then I glued the fuselage halves together and let them dry… after an hour or so, I sanded the seam there smooth  That’s all for this week…. have a busy weekend ahead here, more updates to come next week…. |
|
|
|
Post by kyledehart5 on Mar 22, 2024 16:56:14 GMT -5
An excellent update!! That looks awesome.
|
|
stikpusher
Forum Moderator      May '23 Showcased Model Awarded
Member since: April 2023
Living The Dream
Posts: 4,147 
MSC Staff
|
Post by stikpusher on Mar 23, 2024 13:32:57 GMT -5
Well, yesterday after my last update, I had a little free time left in the afternoon, so I glued the wings on to the fuselage 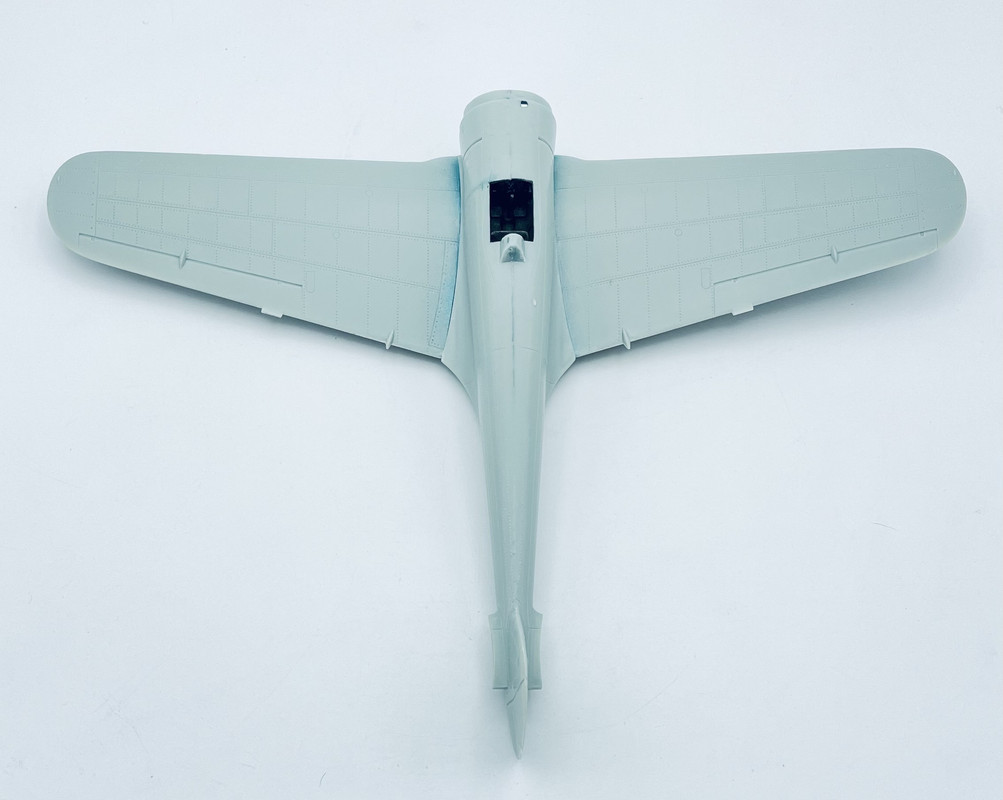 Not too bad a fit, but on the bottom there is a pronounced step and gap 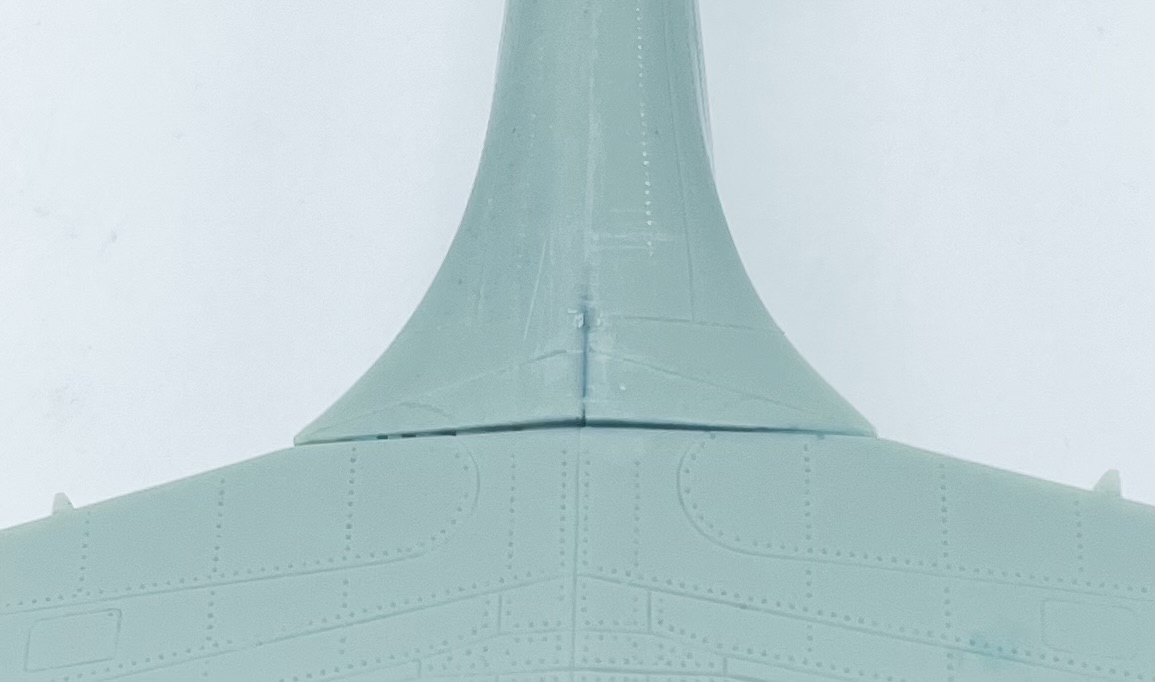 I will have to deal with the step & gap next week when I resume work on this next week... |
|
|
|
Post by keavdog on Mar 23, 2024 14:02:29 GMT -5
Yikes - that's a monster step.
|
|
jeaton01
Full Member
   Sept '23 Showcased Model Awarded
Member since: October 2013
Posts: 1,297 
|
Post by jeaton01 on Mar 23, 2024 16:34:29 GMT -5
And the butterfly flaps cross it!!
|
|
dodgy
Full Member
  
Member since: January 2024
Posts: 505
Jan 1, 2024 16:23:41 GMT -5
Jan 1, 2024 16:23:41 GMT -5
|
Post by dodgy on Mar 23, 2024 17:31:02 GMT -5
Hey Stik, I've got this bookmarked. I built the Otaki Mk IX. Spit a couple of years ago. It was both good and bad. Came out ok in the end, but no competition build. You're doing great work with this one.
|
|