mz3
Full Member
  
Member since: October 2012
Posts: 649
Oct 14, 2012 21:09:43 GMT -5
Oct 14, 2012 21:09:43 GMT -5
|
Post by mz3 on Jun 21, 2024 8:17:56 GMT -5
Well that was awesome... 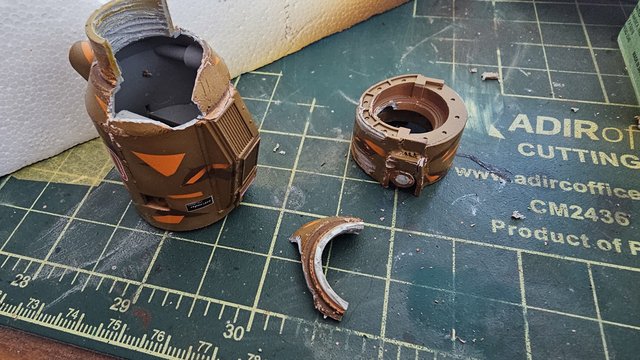 I went ahead and knocked the landing gear off my Zero as well. Good times |
|
handiabled
Administrator      Apr '23 Showcased Build Awarded
Member since: February 2023
Posts: 4,387 
MSC Staff
|
Post by handiabled on Jun 21, 2024 8:45:55 GMT -5
Oh man! What happened???
|
|
|
|
Post by 406 Silverado on Jun 21, 2024 8:49:37 GMT -5
Nooooooooo!!!! I know that was a tough blow but if there’s anyone that can recover from something like this it’s you.
|
|
mz3
Full Member
  
Member since: October 2012
Posts: 649
Oct 14, 2012 21:09:43 GMT -5
Oct 14, 2012 21:09:43 GMT -5
|
Post by mz3 on Jun 21, 2024 10:58:08 GMT -5
The part on the right slips down on to the top of the part on the left. I put them together and they got stuck. I painted the top part of the right piece and thought it would be ok. Obviously wrong! The top part started to go on fine and then just stopped. By the time I realized what was happening it was too late. I tried to pry them apart with a file, tried to pull them apart while holding them with a towel, tried to twist them apart. Nothing worked. I eventually had to use pliers to separate them. I tried to be careful, but at that point I knew I was going to break something.
Set the whole thing aside, started working on the Zero and knocked off the landing gear just to extra piss myself off.
I think I can fix the riesen panzer, I already started. The landing gear is probably a blessing in disguise. Pinning them in will strengthen them.
|
|
|
|
Post by keavdog on Jun 21, 2024 11:49:23 GMT -5
We all have those days...
|
|
mz3
Full Member
  
Member since: October 2012
Posts: 649
Oct 14, 2012 21:09:43 GMT -5
Oct 14, 2012 21:09:43 GMT -5
|
Post by mz3 on Jun 21, 2024 14:41:40 GMT -5
It was coming together pretty nicely... 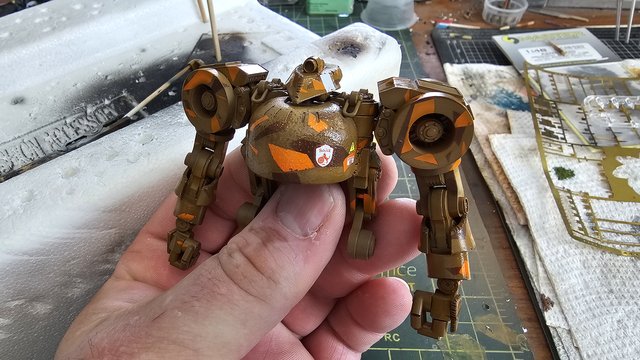 |
|
mz3
Full Member
  
Member since: October 2012
Posts: 649
Oct 14, 2012 21:09:43 GMT -5
Oct 14, 2012 21:09:43 GMT -5
|
Post by mz3 on Jun 21, 2024 17:47:52 GMT -5
Repair...   Thin cement and ca. Sanded. Paint in a bit. |
|
|
|
Post by kyledehart5 on Jun 22, 2024 0:56:43 GMT -5
Man that’s a real bummer of a day! We surely all have them. Looks like you’ve already got the repair work well in hand.
|
|
mz3
Full Member
  
Member since: October 2012
Posts: 649
Oct 14, 2012 21:09:43 GMT -5
Oct 14, 2012 21:09:43 GMT -5
|
Post by mz3 on Jun 22, 2024 21:03:42 GMT -5
Atleast I can save this one. I hate weeks like this...   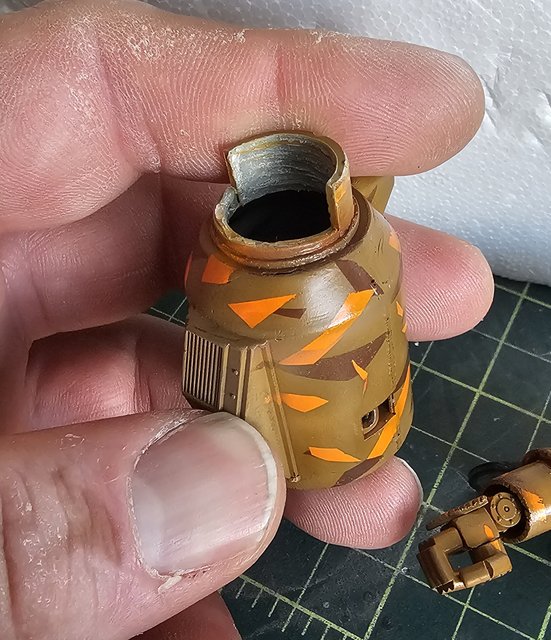 There's still some damage visible. I'm just going to work it into the weathering. 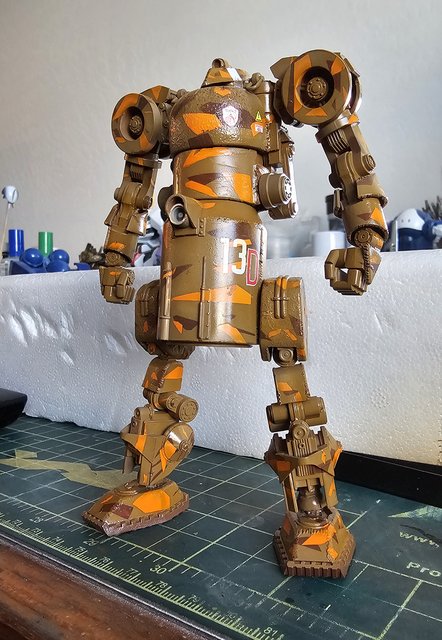 No more break!!! |
|
handiabled
Administrator      Apr '23 Showcased Build Awarded
Member since: February 2023
Posts: 4,387 
MSC Staff
|
Post by handiabled on Jun 23, 2024 4:23:11 GMT -5
Fantastic repairs! Looks like your back on track again
|
|
mz3
Full Member
  
Member since: October 2012
Posts: 649
Oct 14, 2012 21:09:43 GMT -5
Oct 14, 2012 21:09:43 GMT -5
|
Post by mz3 on Jun 26, 2024 19:38:19 GMT -5
Boring update...   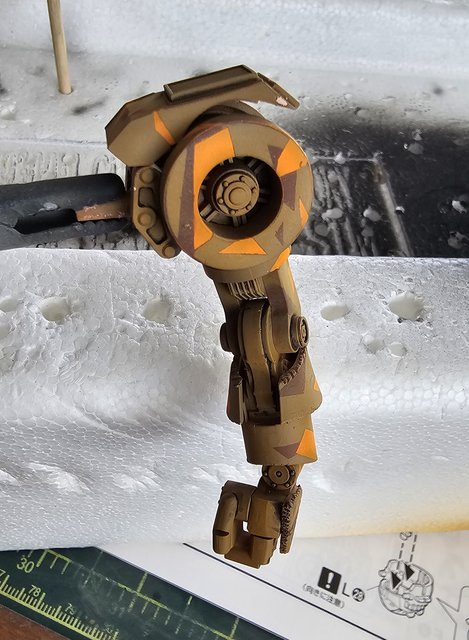 Pin wash and flat coat. I think oils next, I don't know. I want to finish this before I start the new Zero kit. |
|
|
|
Post by kyledehart5 on Jun 27, 2024 5:48:44 GMT -5
I don't know about boring. That is looking awesome!
|
|
handiabled
Administrator      Apr '23 Showcased Build Awarded
Member since: February 2023
Posts: 4,387 
MSC Staff
|
Post by handiabled on Jun 27, 2024 7:52:53 GMT -5
That's a pretty sweet looking update!
|
|
mz3
Full Member
  
Member since: October 2012
Posts: 649
Oct 14, 2012 21:09:43 GMT -5
Oct 14, 2012 21:09:43 GMT -5
|
Post by mz3 on Jun 27, 2024 17:44:02 GMT -5
Oils....  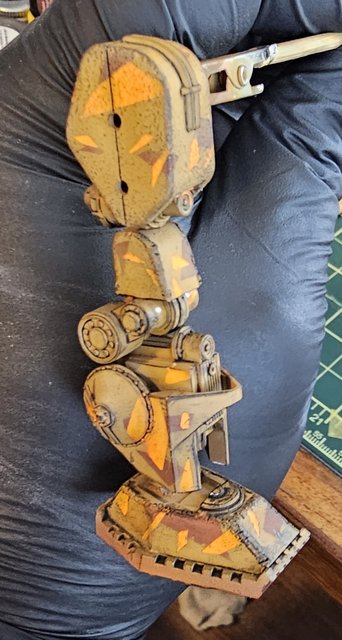 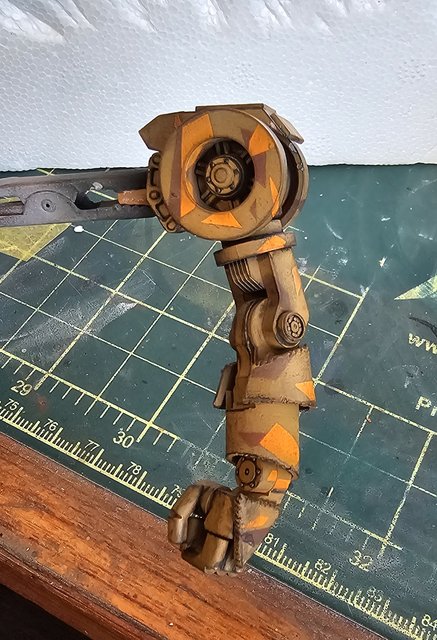 Black oil for dirtiness and starting oily streaks. I found another crack on the right side mechanisms. I don't know if it's from the damage before or if the wash crazed the plastic. I think I'm jusy going to paint some damage there and call it good. |
|
mz3
Full Member
  
Member since: October 2012
Posts: 649
Oct 14, 2012 21:09:43 GMT -5
Oct 14, 2012 21:09:43 GMT -5
|
Post by mz3 on Jun 28, 2024 13:35:34 GMT -5
Dirty...   Black, raw umber and buff oils. |
|
mz3
Full Member
  
Member since: October 2012
Posts: 649
Oct 14, 2012 21:09:43 GMT -5
Oct 14, 2012 21:09:43 GMT -5
|
Post by mz3 on Jun 28, 2024 15:06:08 GMT -5
More...  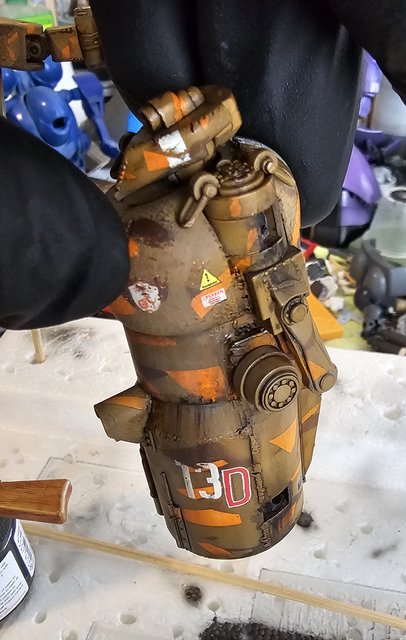 I applied another pin wash with oil paint. The premade junk I used is very old and I don't think it's good anymore. I made the pinwash with raw umber, a few drops on straight linseed oil and odorless turpenoid. I think the plastic is crazing a bit, I found more cracks here and there. The rifle is brush painted. Tamiya dark iron xf-84, the stock is light brown xf-93 with burnt sienna oils brushed on, then most of it removed with a brush and a cotton swab. Both paints were mixed with tamiya retarder in the 10 to 1 ratio the instructions suggest. I still need to drybrush the dark iron with a steel or shiny color. |
|
|
|
Post by kyledehart5 on Jun 28, 2024 17:40:25 GMT -5
I just love your weathering on this. Such a cool look. Love the idea for some damage to cover the damage too. That’ll fit right in
|
|
handiabled
Administrator      Apr '23 Showcased Build Awarded
Member since: February 2023
Posts: 4,387 
MSC Staff
|
Post by handiabled on Jun 29, 2024 3:16:03 GMT -5
Your weathering is always outstanding and this is no exception.
|
|
mz3
Full Member
  
Member since: October 2012
Posts: 649
Oct 14, 2012 21:09:43 GMT -5
Oct 14, 2012 21:09:43 GMT -5
|
Post by mz3 on Jun 29, 2024 18:06:23 GMT -5
Chips and salsa...   Chips are xf-93 light brown again. In a while I'll hit some of them with some iron paint. Rifle is drybrushed with testors steal. I reall like how it turned out. The simple ways are usually the best. |
|
|
|
Post by deafpanzer on Jun 29, 2024 20:30:45 GMT -5
Now you have made me hungry for those! Excellent work creating actual look of wood stock!
|
|
mz3
Full Member
  
Member since: October 2012
Posts: 649
Oct 14, 2012 21:09:43 GMT -5
Oct 14, 2012 21:09:43 GMT -5
|
Post by mz3 on Jul 4, 2024 10:15:30 GMT -5
I always liked doing wood. It's so simple to get good results.   I kind of went out of order, started dirtying up areas with oils. I just didn't do metal chips, wasn't thinking. So I stopped that to let the oils dry. Once they are dry I'll do the chips. I wasn't sure what to do with the light on the head. So I just made it red. Looks ok. First layer is tamiya chrome silver, then a shot of future, then clear red, then a few more shots of future, letting each layer dry overnight. I also "figured out" the ankles...   I accidentally painted the inside of the cups of the joint. Again wasn't thinking. When I assembled them, the left ankle cup cracked. It started working just fine. So I used a exacto blade and sliced the right side. Viola! Everything works fine now. I lined them up so it kinda looks like it supposed to be like that. |
|
|
|
Post by kyledehart5 on Jul 4, 2024 13:55:24 GMT -5
Sweet!! More incredibly nice weathering work. Nice job getting those joints figured out too. Sometimes those little accidents really are happy after all!!
|
|
mz3
Full Member
  
Member since: October 2012
Posts: 649
Oct 14, 2012 21:09:43 GMT -5
Oct 14, 2012 21:09:43 GMT -5
|
Post by mz3 on Jul 4, 2024 19:56:51 GMT -5
It's about time for one of those accidents to be happy,lol. Update...  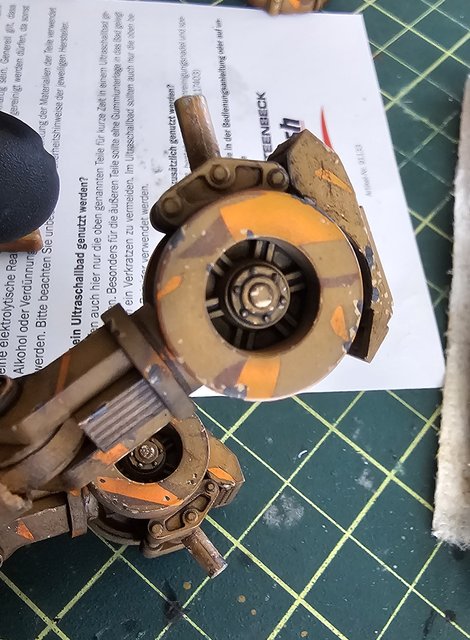 Metal chips done. Just used tamiya dark iron for this. They look blotchy in the pics, but they blend in pretty good. 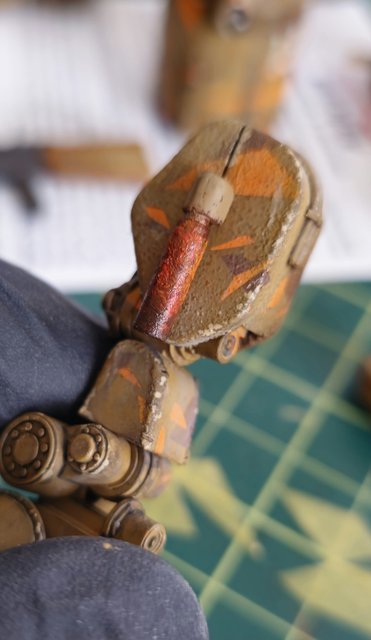 I'm not sure if these are supposed to be exhaust pipes, but they are on this one. I'm not even sure if rusting exhaust pipes would be a thing on mars, but it looks cool so it stays.  Then I remade the light onnthe waist. Melted clear sprue to size then sanded to get it shiny. It's a little too shiny, so I'll weather it a bit later. |
|
handiabled
Administrator      Apr '23 Showcased Build Awarded
Member since: February 2023
Posts: 4,387 
MSC Staff
|
Post by handiabled on Jul 5, 2024 1:42:02 GMT -5
Once again you've outdone yourself in the weathering department. I like your approach to weathering in "layers" so to speak. It has a realism to it that is wonderful!
|
|
|
|
Post by kyledehart5 on Jul 5, 2024 5:21:32 GMT -5
Yes indeed. Your weathering process is always top notch. Looking better and better.
|
|
|
|
Post by 406 Silverado on Jul 5, 2024 9:27:27 GMT -5
This is just incredible work MZ. A blend of good techniques that are all adding up into a very good end product. I really like how you melted that clear sprue for the light. NICE!!
|
|
mz3
Full Member
  
Member since: October 2012
Posts: 649
Oct 14, 2012 21:09:43 GMT -5
Oct 14, 2012 21:09:43 GMT -5
|
Post by mz3 on Jul 5, 2024 10:53:23 GMT -5
I learn how to do that from a youtube video just a few weeks ago. It never occurred to me to do this. It took 5 tries to get it. I kept setting the plastic on fire.
|
|
mz3
Full Member
  
Member since: October 2012
Posts: 649
Oct 14, 2012 21:09:43 GMT -5
Oct 14, 2012 21:09:43 GMT -5
|
Post by mz3 on Jul 6, 2024 13:52:24 GMT -5
Nasty...  Exhaust with black and raw umber oil paint. I let the paint sit on a piece of cardboard overnight to get as much ofthe oil out as possible before the paint hardened. I think that's the secret to doing exhaust with oils. 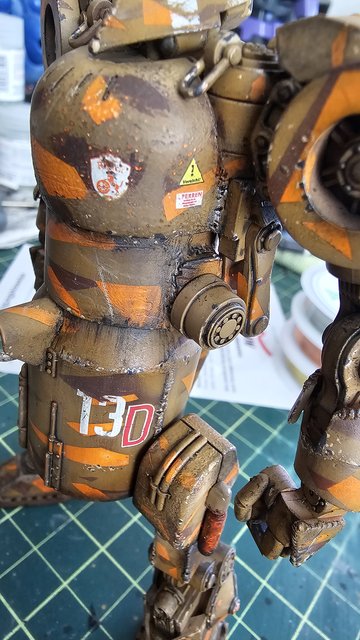 I used a silver graphite pencil and went over all the weld beads I added. Then used a rubber tipped brush to work the color in. It kinda pops in the picture, but irl it's very subtle. 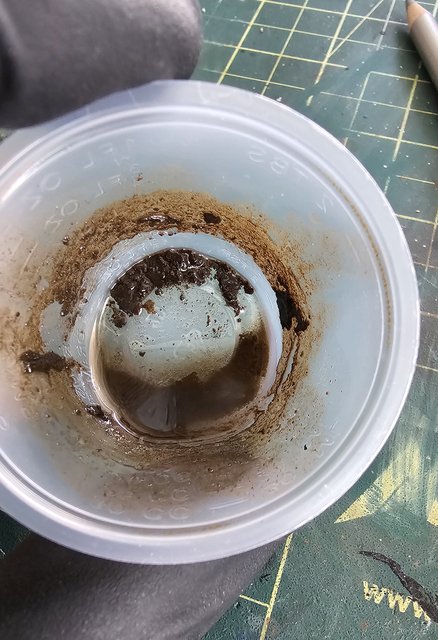  Then I "cooked" some raw umber oil and been adding that to various parts of the kit. Mostly feet/ankles and hands. Then a random, light drybrushing of black oil where ever I thought it needed a bit of dirtiness. I still need to figure out a orange/rusty/martian layer. I'll probably use some pigments. I have some AK ground stuff coming in for a base. Once that gets here I'll start the work on that. It was supposed to be delivered yesterday, but lazy people are lazy people. I will fix the orange paint showing through the upper layers on the chest at some point. |
|
|
|
Post by kyledehart5 on Jul 7, 2024 0:37:15 GMT -5
I believe I could look through your weathering updates all day. So good.
|
|
handiabled
Administrator      Apr '23 Showcased Build Awarded
Member since: February 2023
Posts: 4,387 
MSC Staff
|
Post by handiabled on Jul 7, 2024 1:57:43 GMT -5
Great looking additions to the weathered look. I'm looking forward seeing what kind of base you come up with for this
|
|