jkim
Full Member
  
Member since: October 2023
Posts: 116
Oct 19, 2023 12:36:27 GMT -5
Oct 19, 2023 12:36:27 GMT -5
|
Post by jkim on Sept 9, 2024 17:26:40 GMT -5
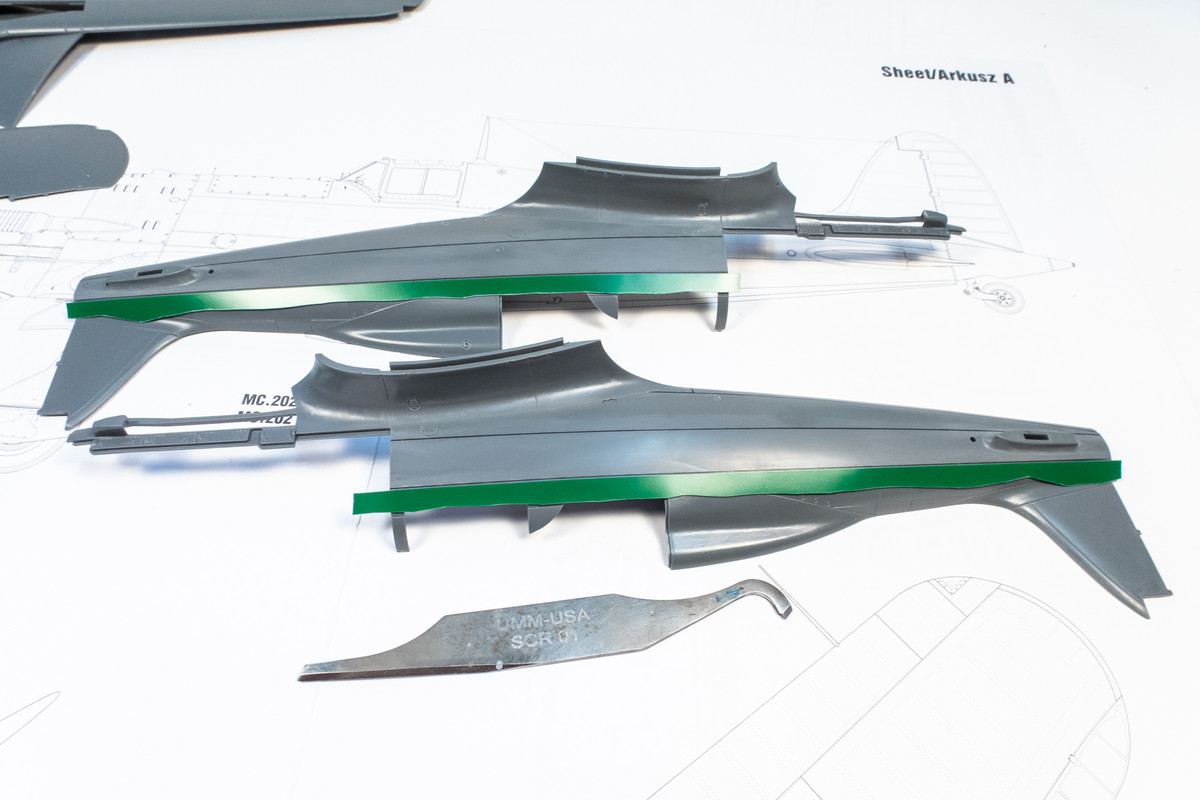
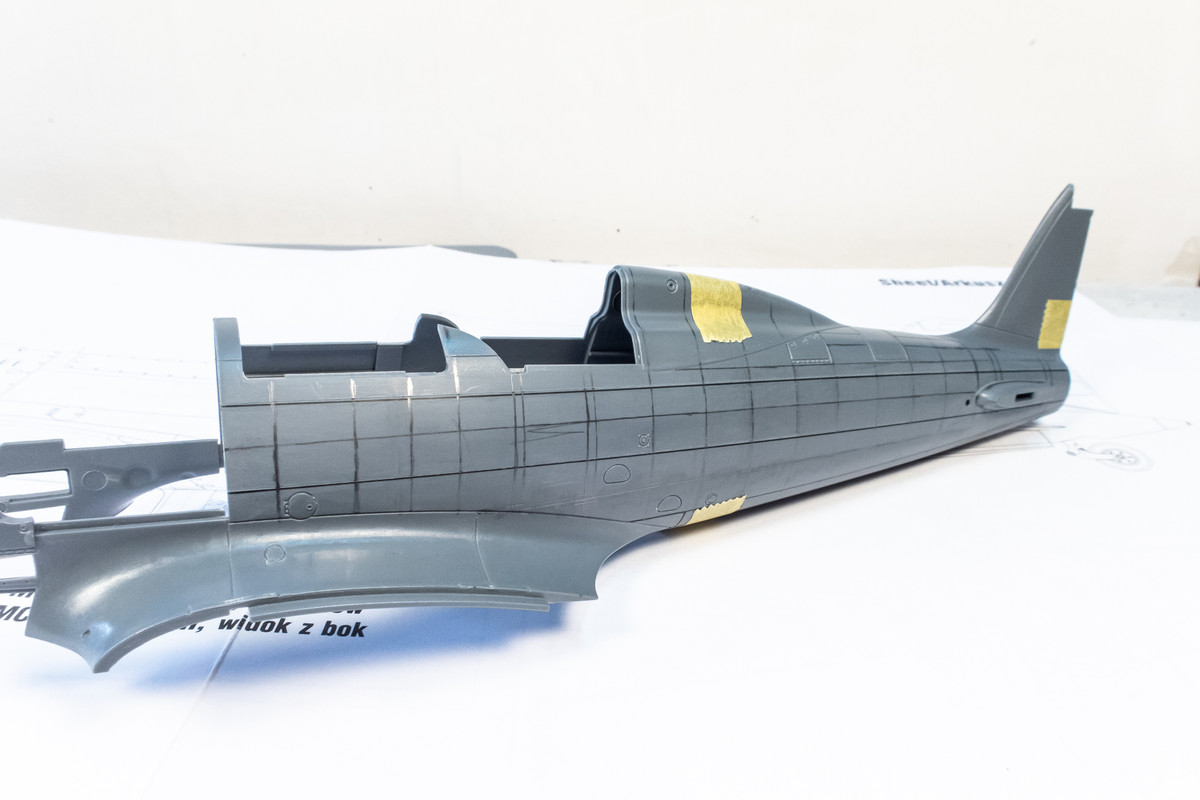
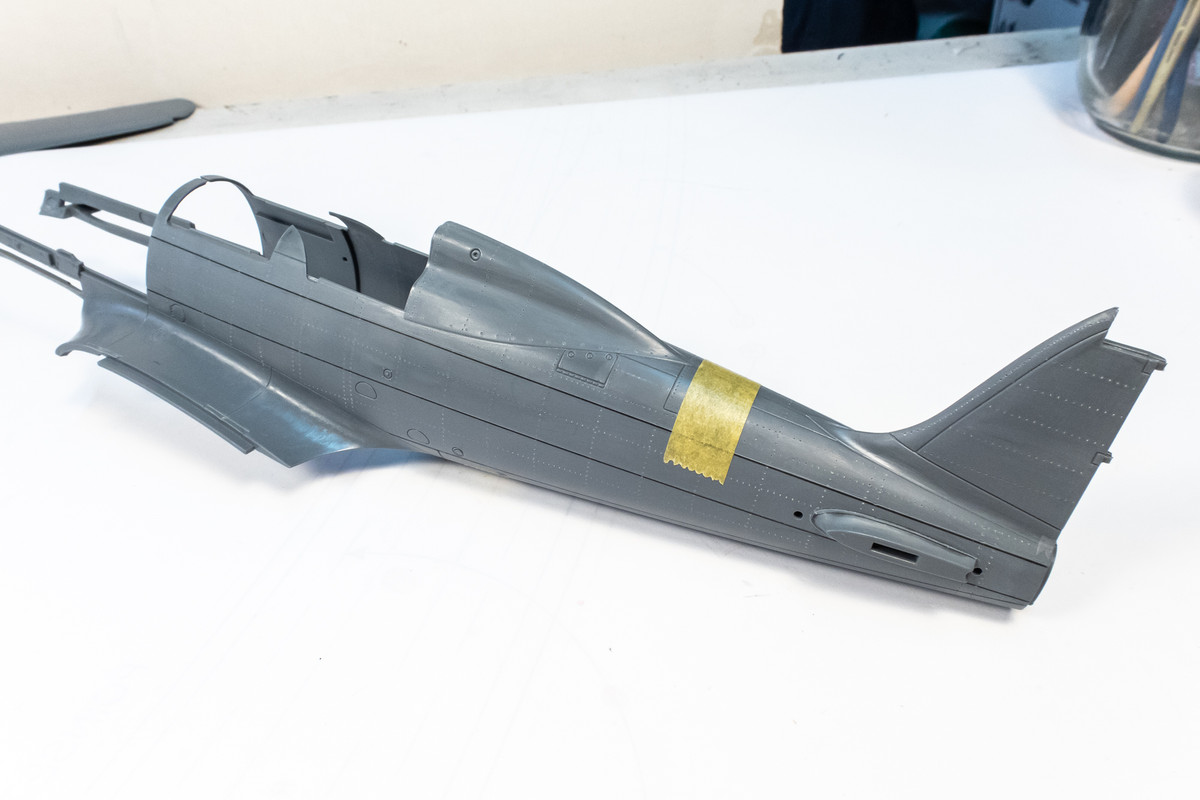
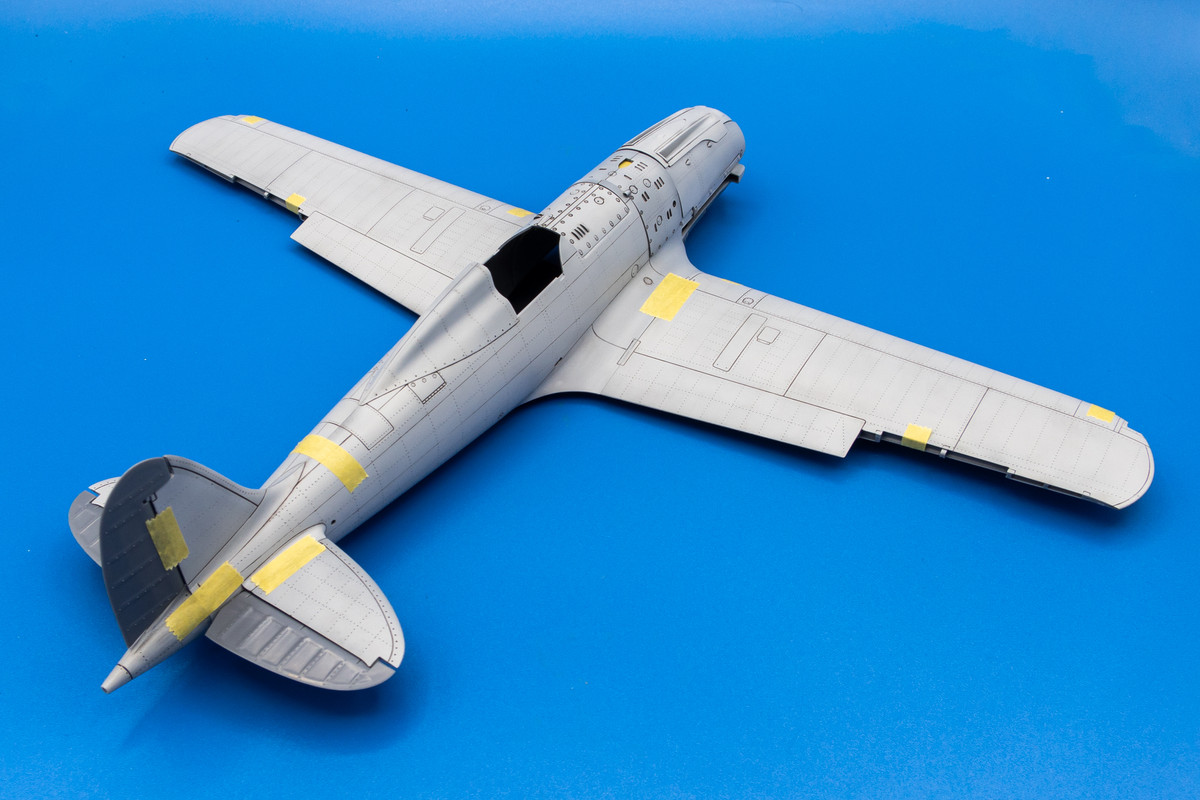
Hello! Since I just finished my Tomcat build, I thought it would be good to start another build thread. Had to figure out where this one would go (way too many sub-boards here!). I started this one quite a while ago but stopped soon after starting so I haven't done too much yet and I won't have too much to bring the MSC community up to speed. I've always been a fan of the Folgore and jumped at the chance to buy this new-tool large scale representation of the Folgore. Given that it is an iconic Italian fighter plane and that Italeri is an Italian company, I probably had unrealistically high expectations of this release. And the thing is, this ain't cheap either. The US MSRP of $180 puts it on the Tamiya level, in terms of cost. But sadly, high cost is probably the only thing that this Italeri release has with Tamiya. But if you want a large scale Folgore, which I definitely do, this is the only game in town (not counting the out-of-production Pacific Coast kits). Anyways... on to the kit iself. Box is nice and big with a nice painting of the Folgore in that characteristic "smoke ring" camo scheme (which I'm going to attempt to replicate). 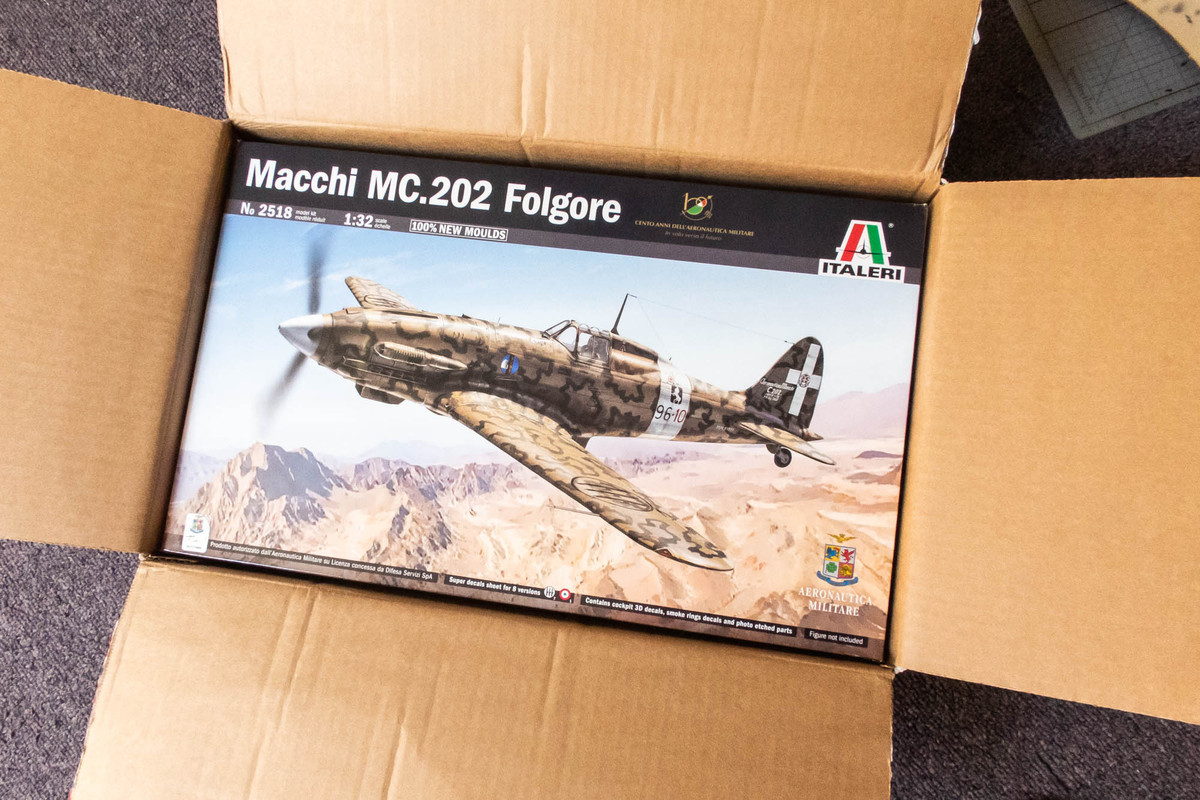 Lifting the lid off the box reveals a bit of misdirection by Italeri as you discover that the box is largely empty. Lots of air and only 4.5 sprues of dark gray plastic. And since the box is so empty, the sprues can bang against each other in the box. I had 5-6 loose pieces floating around in the bags and some other parts partially detached from their sprues. 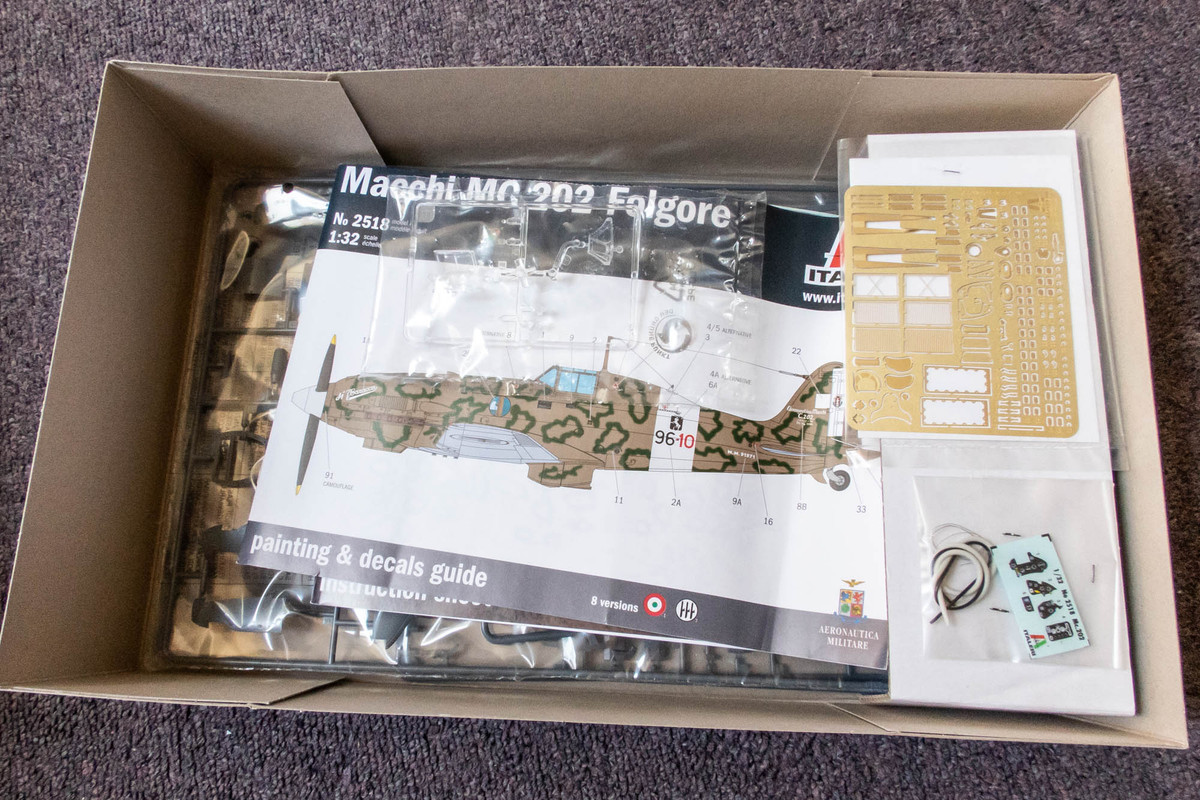 Inspection of the box contents has some positive moments. The molded detail of many of the parts looks nice and crisp. 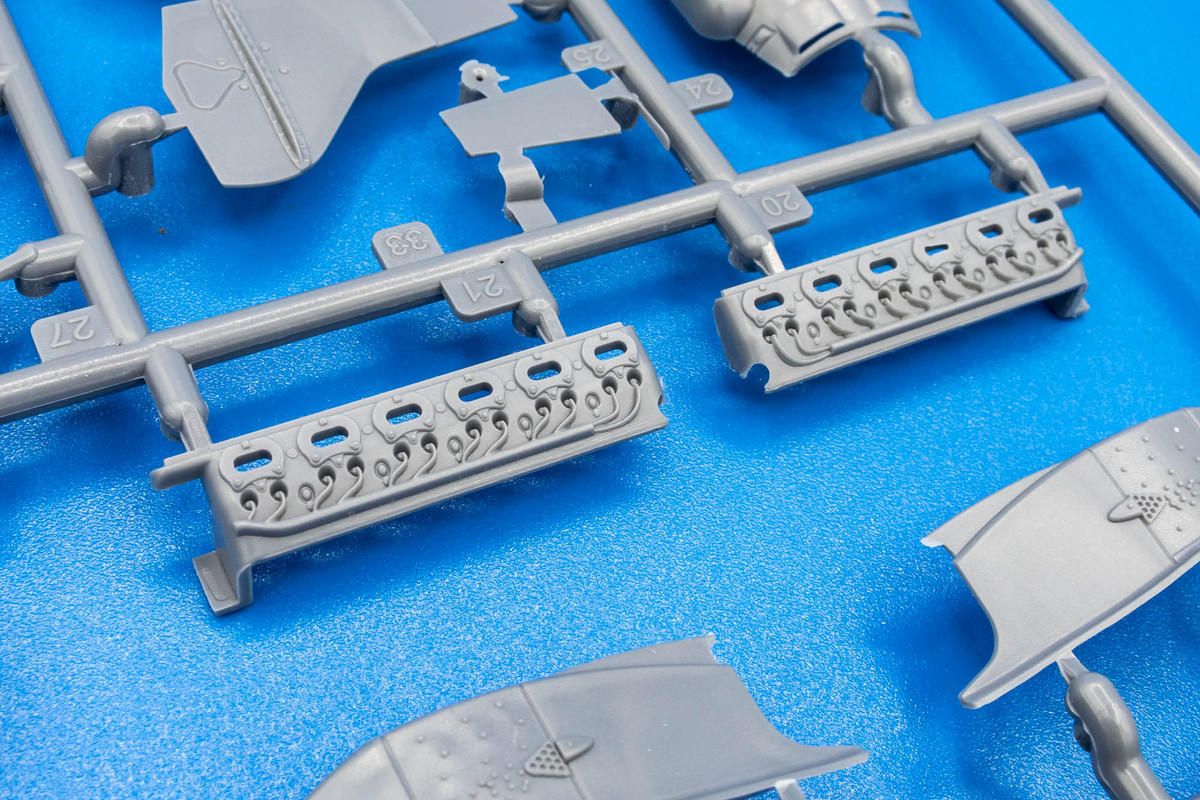 The exhaust stubs have hollowed ends. 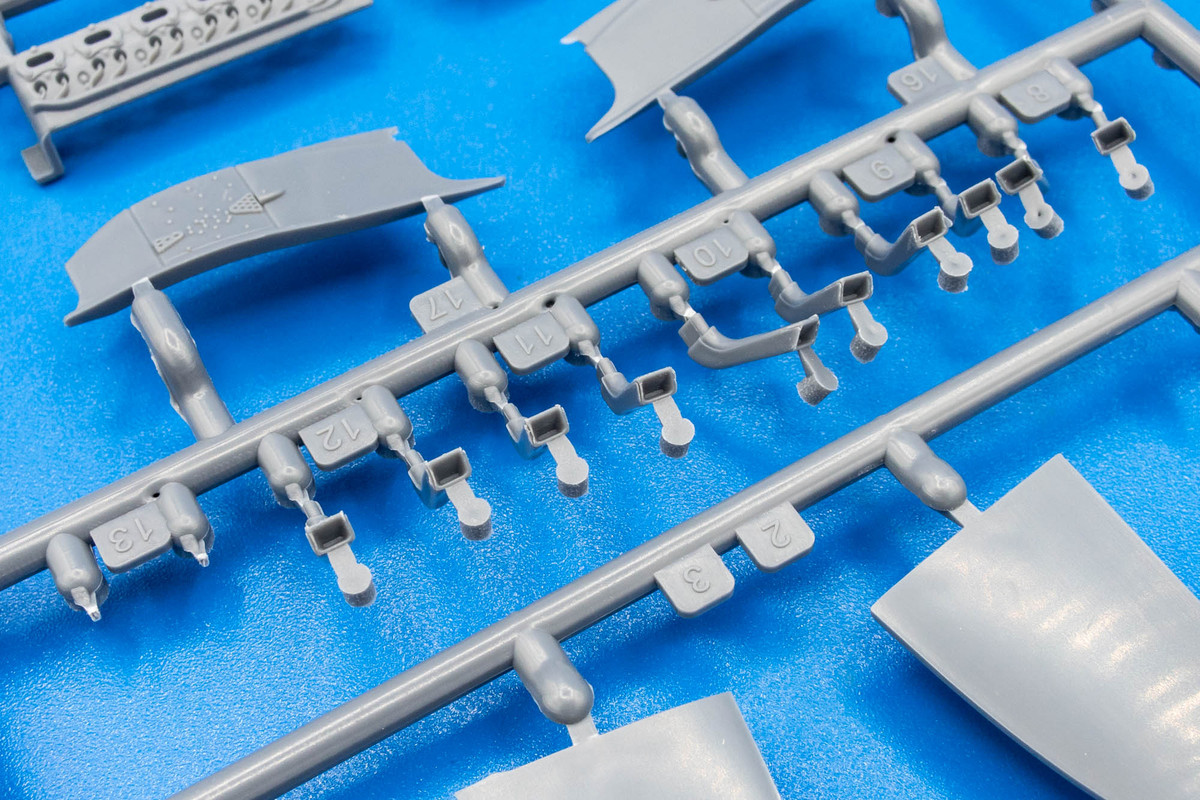 A fairly extensive fret of brass photo etch is provided for additional detail. 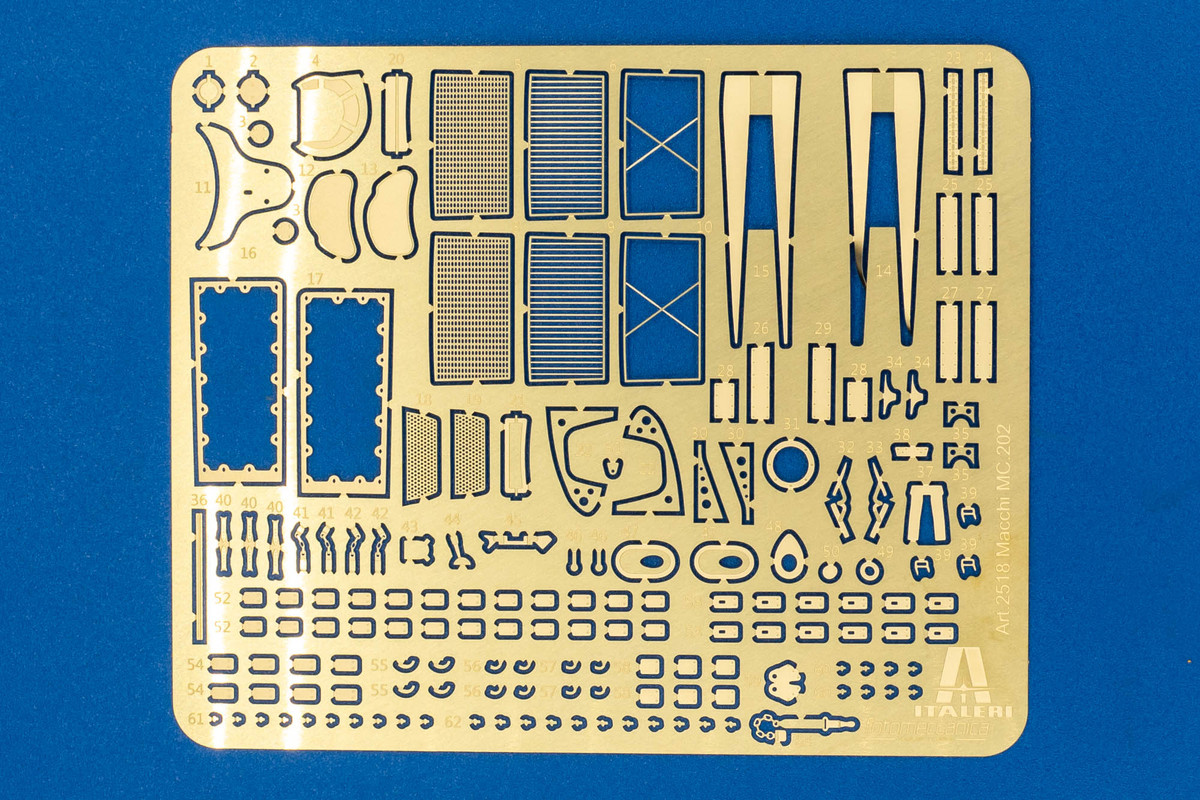 I really like the multi-page markings guide in full color depicting the seven markings options. And decals by Cartograf!  The bad? Some of parts display a combination of vague detail and pesky ejection marks in visible areas.  A very interesting take on the "weighted" tire effect.  The ugly? I think I'm most disappointed in the cavernous panel line details. Very heavy and deep and miles away from the state of the art. The fuselage is the worst offender. And note the snapped part right above the fuselage. Sigh.  |
|
jkim
Full Member
  
Member since: October 2023
Posts: 116
Oct 19, 2023 12:36:27 GMT -5
Oct 19, 2023 12:36:27 GMT -5
|
Post by jkim on Sept 9, 2024 17:49:42 GMT -5
|
|
|
|
Post by keavdog on Sept 9, 2024 18:26:02 GMT -5
Excellent! Glad to see you back on this one John. Interested to see how you do the camo - my 1/48 kit came with smoke ring decals (cheated there). BTW MRP make the Italian colors - mrpaint.sk/Italian |
|
TJ
Senior Member
    June '23 Showcased Model Awarded
Member since: May 2023
Posts: 2,182
May 14, 2023 18:18:36 GMT -5
May 14, 2023 18:18:36 GMT -5
|
Post by TJ on Sept 9, 2024 18:50:46 GMT -5
Definitely going to be watching your take on this one
|
|
|
|
Post by Steve Zuleski on Sept 9, 2024 21:22:17 GMT -5
Panel definition is awesome, John!
|
|
jkim
Full Member
  
Member since: October 2023
Posts: 116
Oct 19, 2023 12:36:27 GMT -5
Oct 19, 2023 12:36:27 GMT -5
|
Post by jkim on Sept 9, 2024 23:33:49 GMT -5
Thanks guys! Before I get back to the build, I'll go over the aftermarket stuff that I purchased for the build. I have a pretty generous attitude when it comes to aftermarket products. Compared to my other hobbies, I consider scale modeling affordable and I'll pick up stuff that I think is interesting or possibly worthwhile, examine it and maybe decide not to use it. Sometimes I get different versions of the same part to compare and choose what I like the best. You only live once right? The most interesting of the aftermarket haul is a collection of 3D-printed parts from a company called Aircraft in Pixels. AiP appears to be a one-man shop cranking out specialty parts for mostly WW1 aircraft. But he must have a soft spot for Italian aircraft because he's produced an assortment of enhancements for the Italeri Folgore kit. 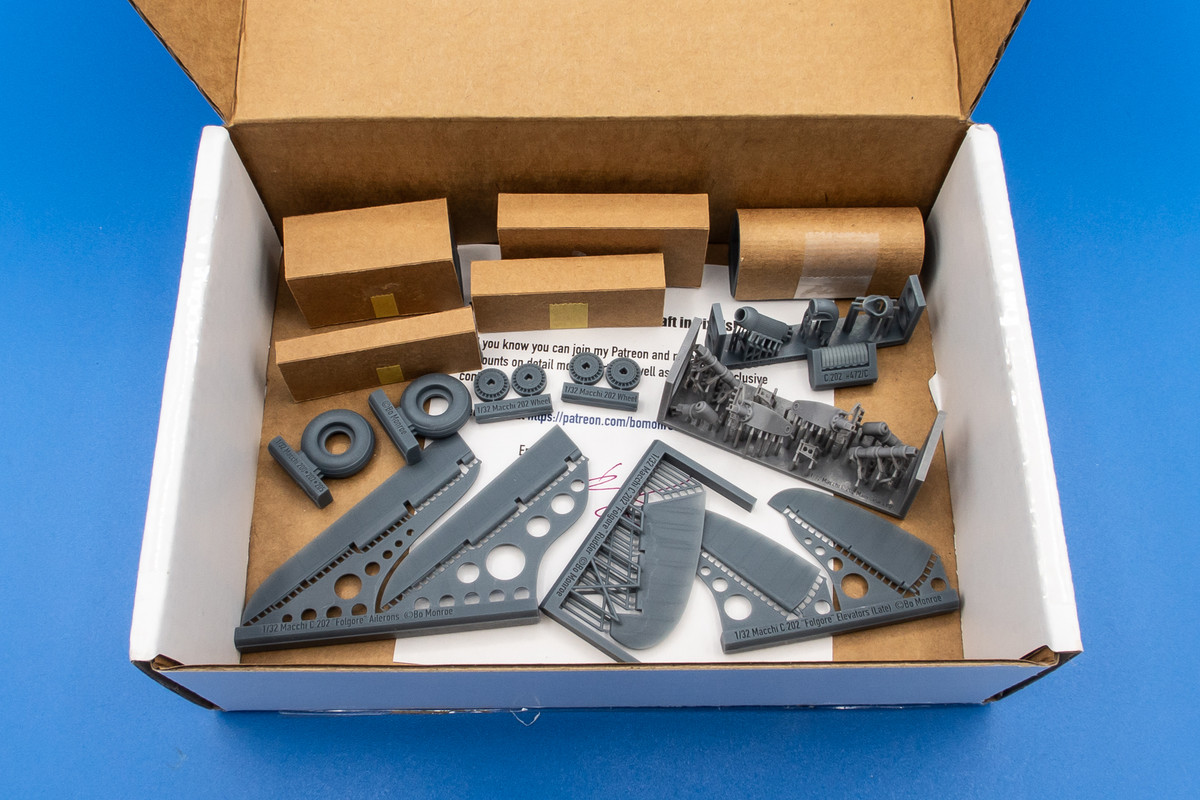 I bought a lot but not everything that he offers for this kit. He bundled most of the stuff I was interested into an Essentials bundle, which includes the spinner/backplate, the fabric-covered control surfaces, wheels and the desert air filter. There has been some discussion about the kit spinner being inaccurate. I'm not sure myself but the AiP spinner is noticeably different, being much stubbier and have a smaller hole at the tip. I personally don't think the kit spinner looks that bad so I'll have to some research to see which way I'll proceed. 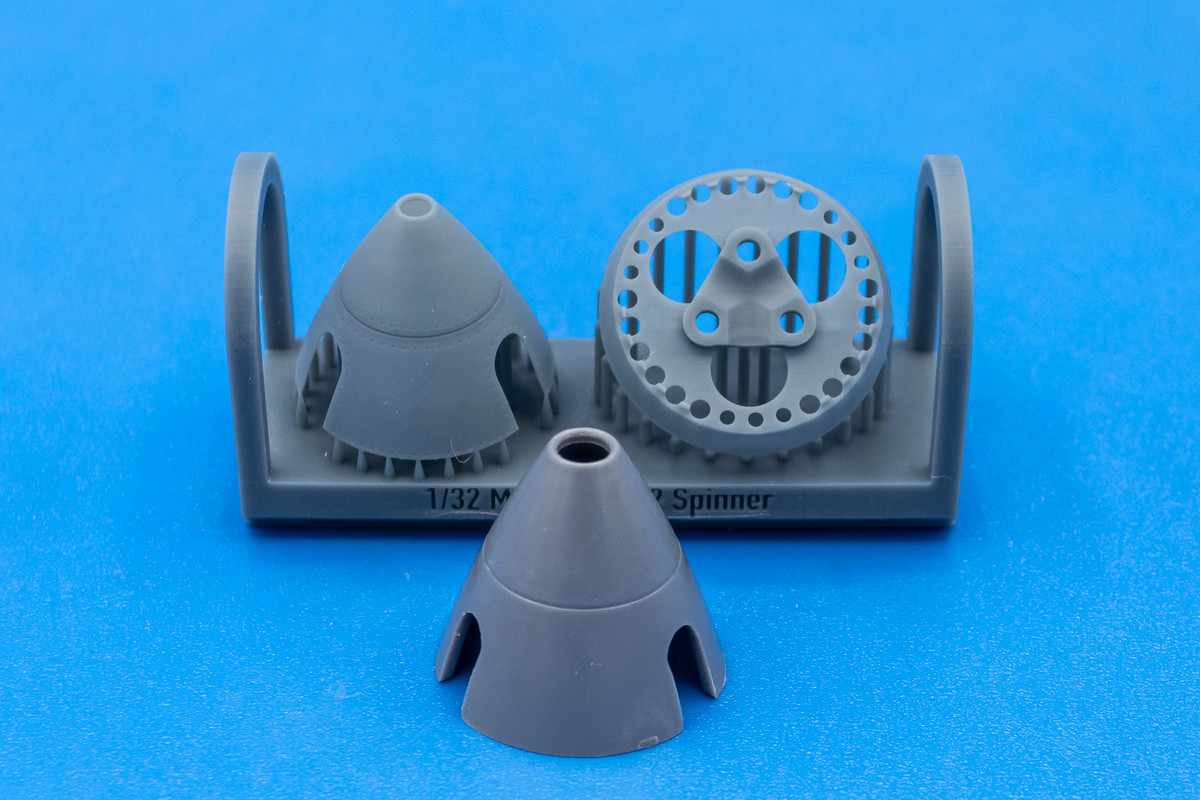 The kit control surfaces feature some exaggerated stitching and sagging fabric effect but an even more glaring error is the wrong number of ribs on the rudder and horizontal tail planes. The AiP versions correct this and look better to boot. 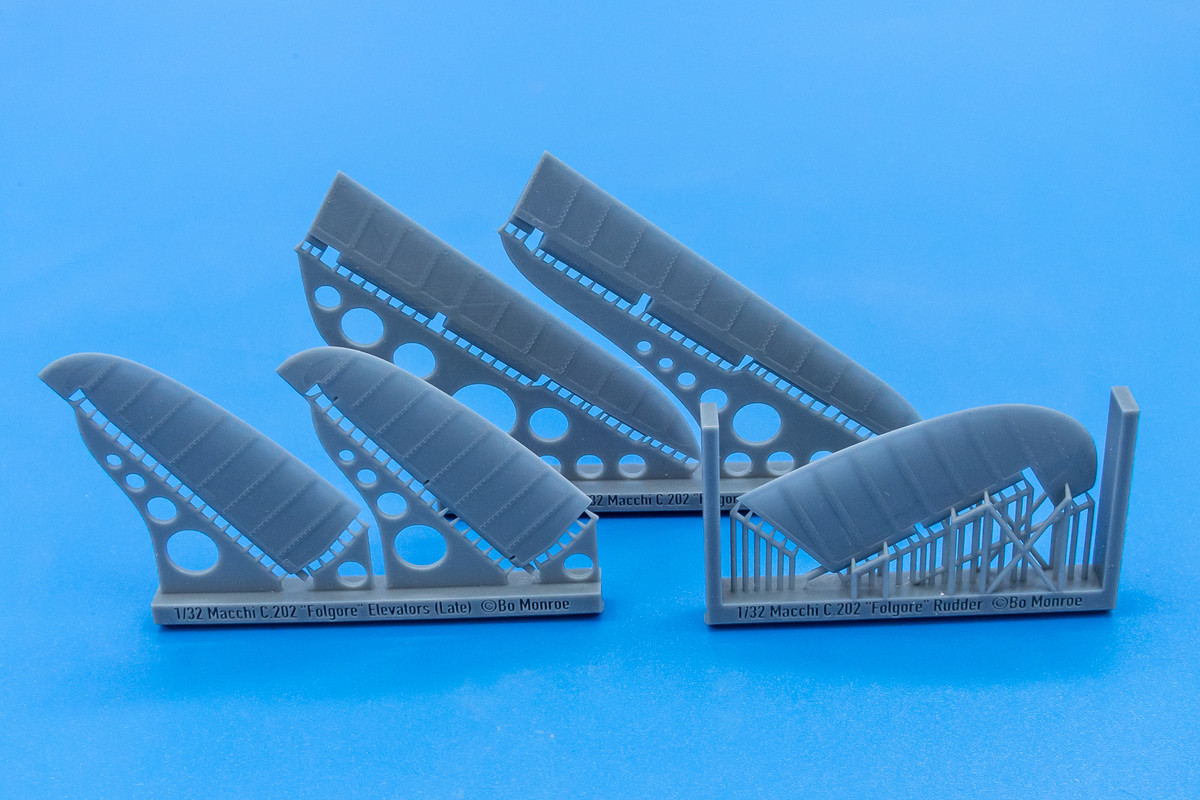 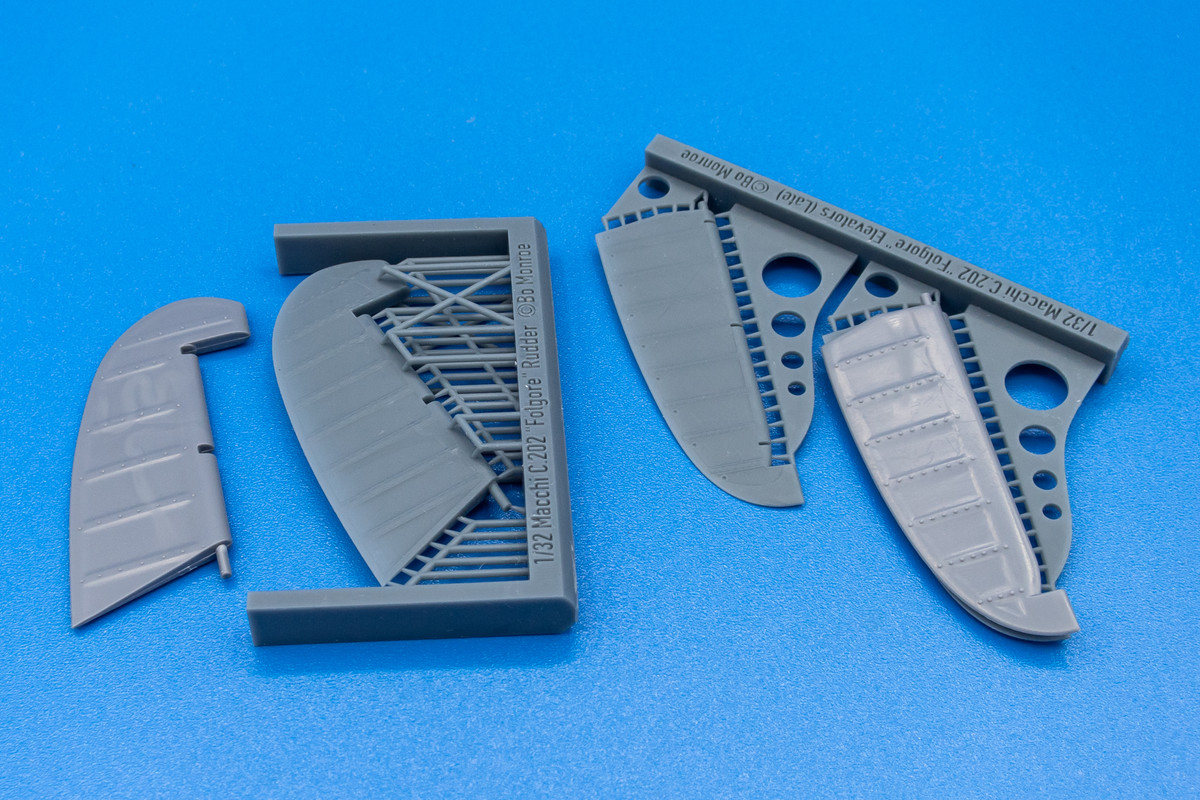 The tires have a more subtle weighted effect and cool Pirelli logos. 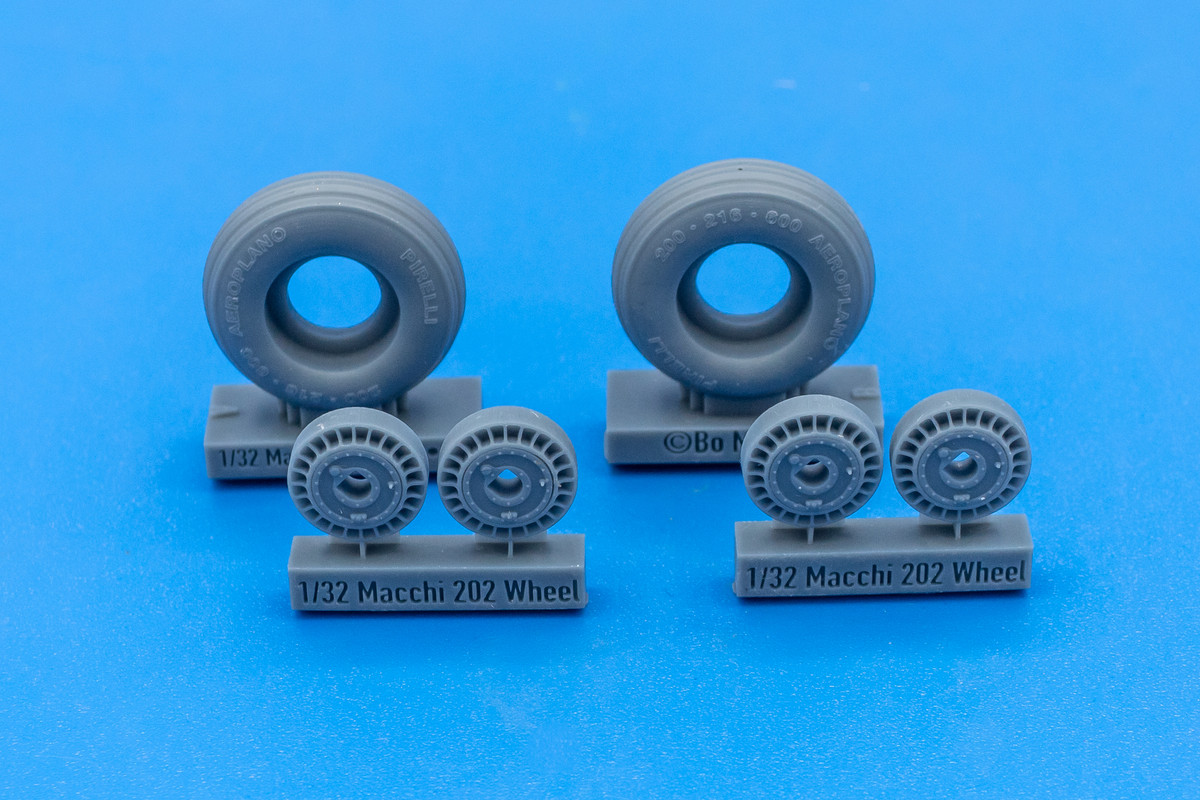 The air filter is surprisingly complex, comprised of four separate parts, not including the kit PE mesh grill. 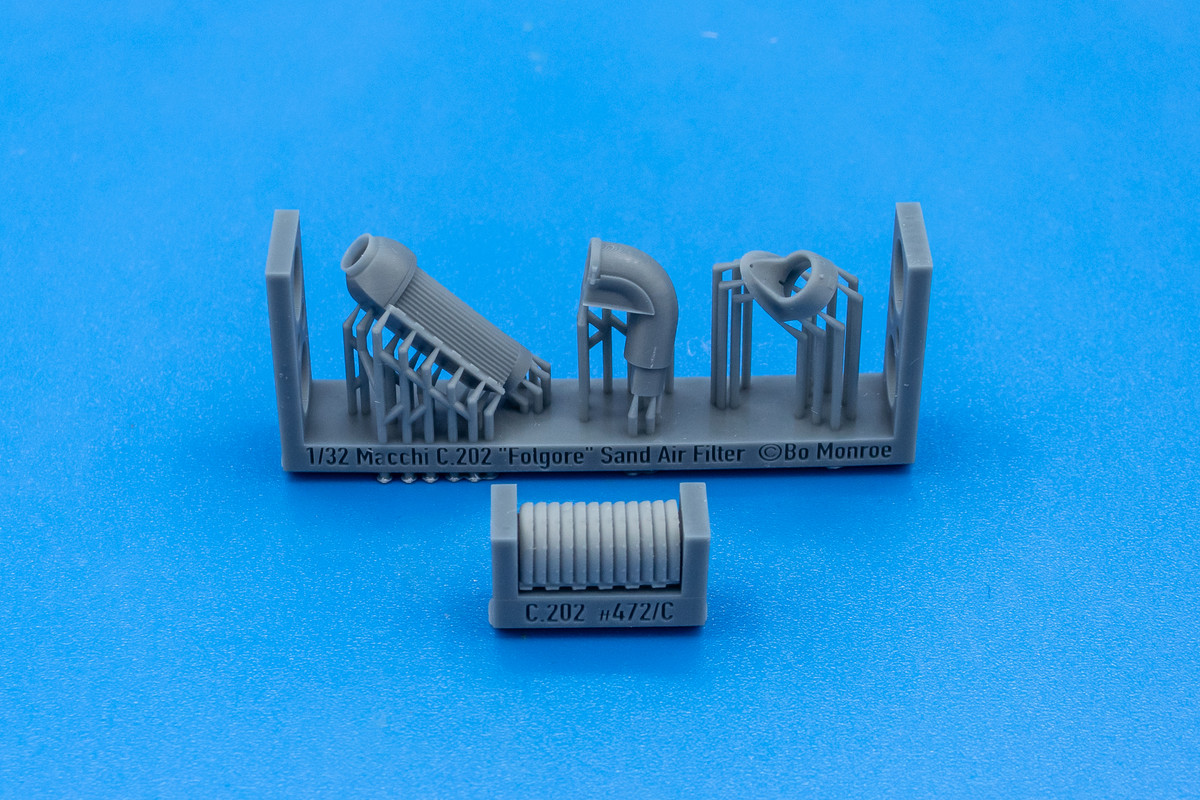 I also picked up a couple of detail sets. Little bits, some external and some for the engine. Just to let you know, I plan on buttoning up ALL of the panels on this build, even though Italeri features a full engine. I prefer my aircraft builds with closed panels and ready to fly, especially when it comes to such an elegant airframe as the Macchi Folgore. So why even bother with engine enhancements? The Folgore wheel well was often open to the rear engine, similar to the Focke-Wulf 190D-9. I want that view to be sufficiently busy looking, if not completely accurate, and I think some of these enhanced engine parts will be visible from the wheel well. 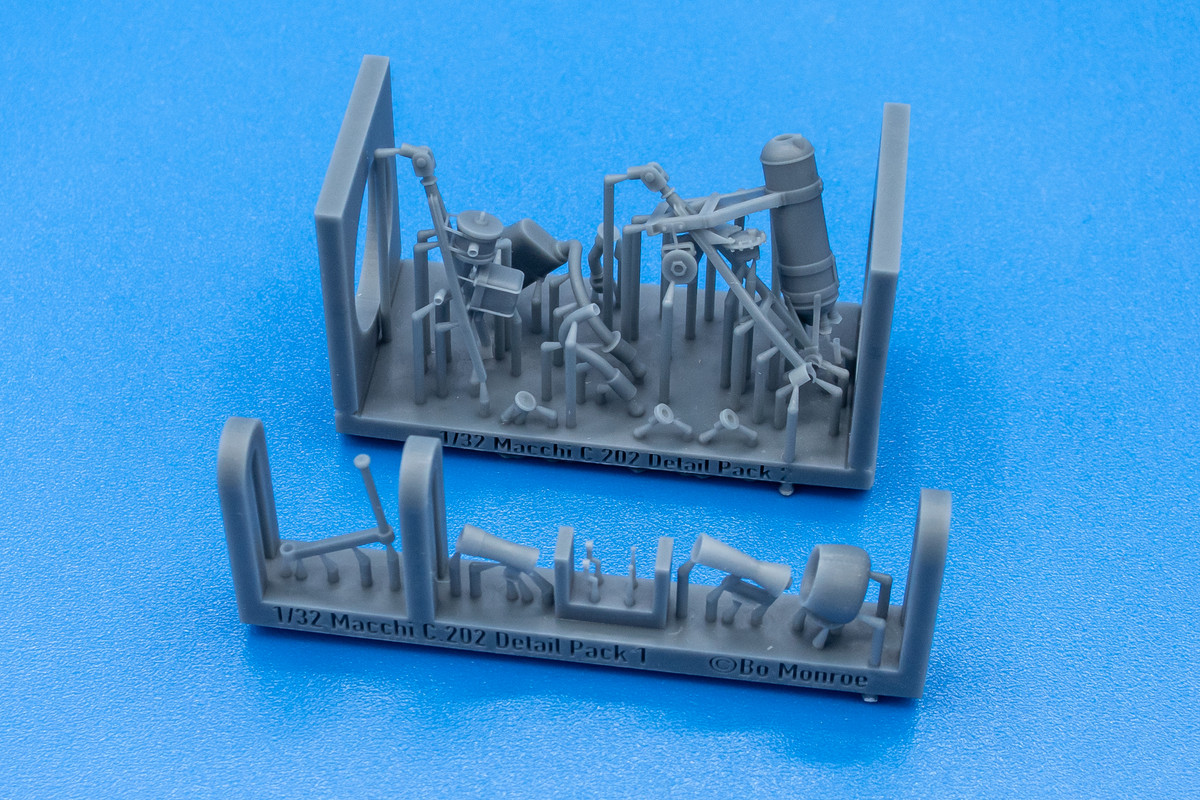 The most recent Folgore product that is offered by AiP is the landing gear. The kit would have you install the landing gear legs very early in the build process and the AiP gear circumvents this issue by separating the mounts from the legs themselves. Check out the delicate brake lines! This 3D-printed technology has the ability to produce some insanely fine details but it can also be very delicate and even impractical. I'm dubious that I'll be able separate those brake lines from the supports without snapping them. 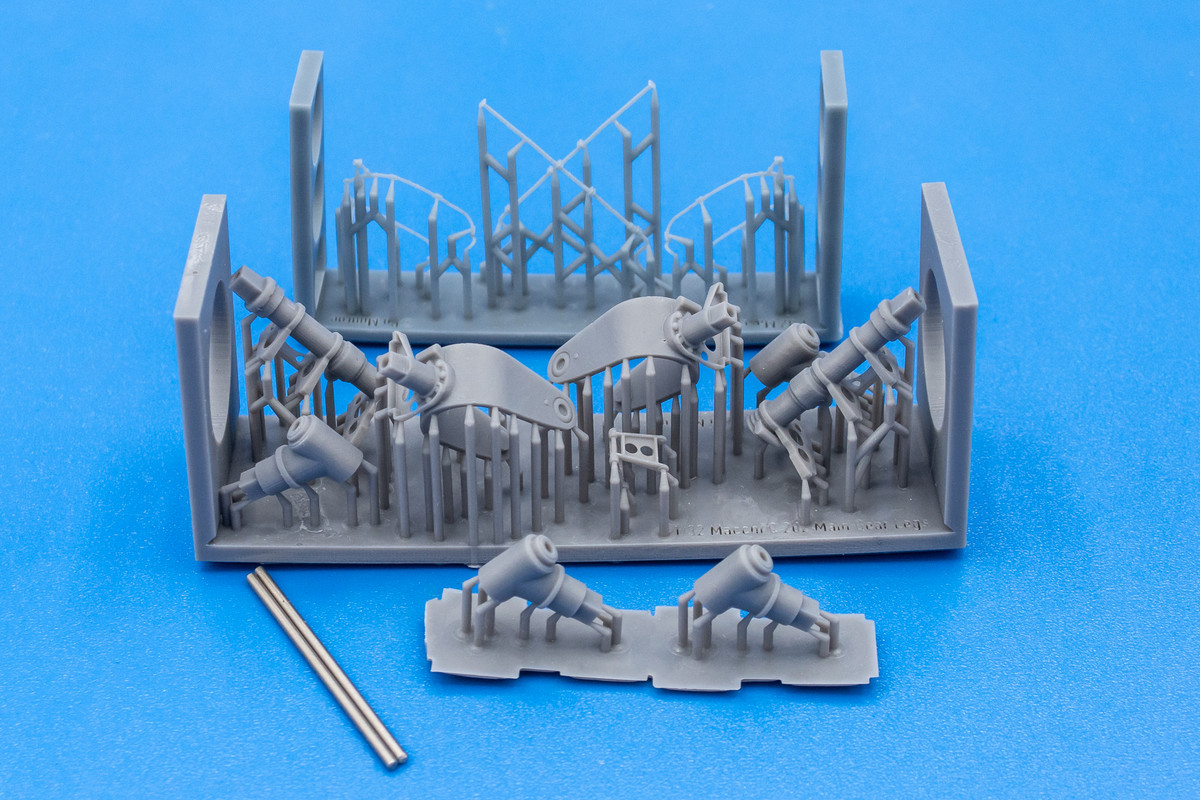 And finally, I picked up a set of exhausts. Not absolutely necessary since the kit exhausts have hollowed out ends. This was more of a "why not" purchase. 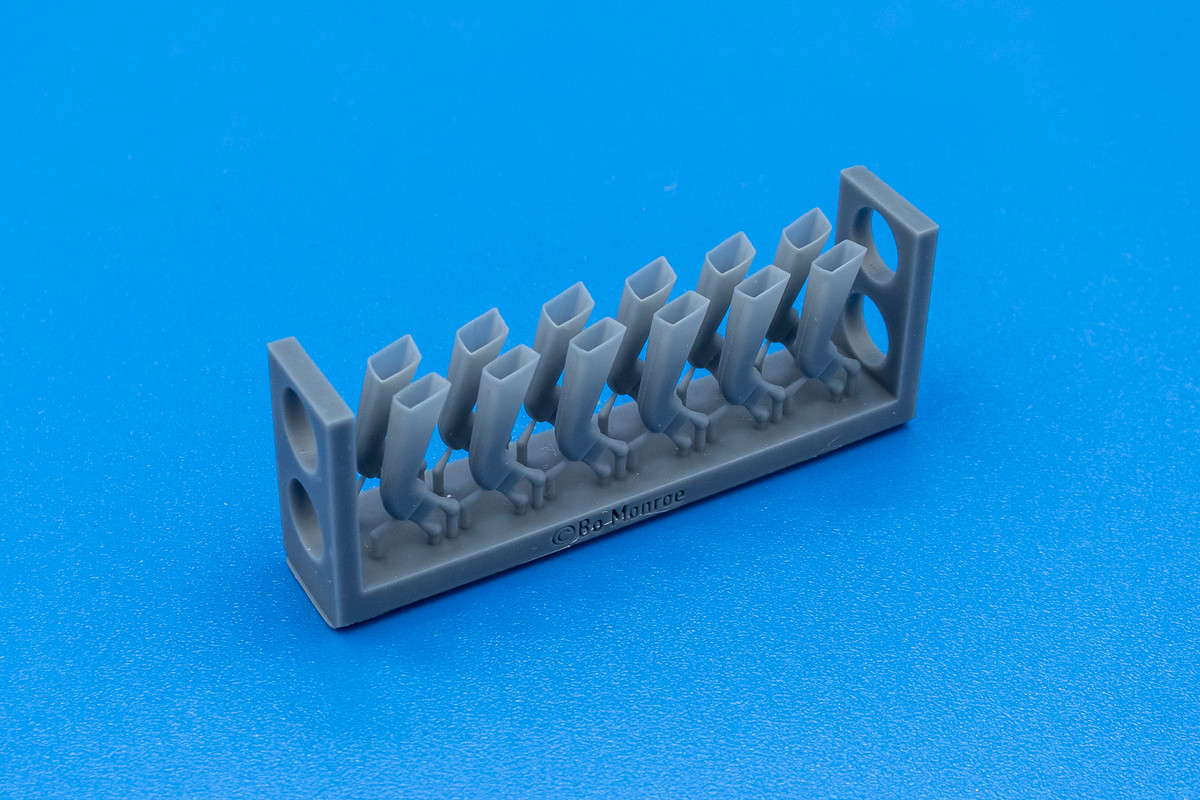 |
|
jkim
Full Member
  
Member since: October 2023
Posts: 116
Oct 19, 2023 12:36:27 GMT -5
Oct 19, 2023 12:36:27 GMT -5
|
Post by jkim on Sept 10, 2024 0:07:57 GMT -5
Continuing on with the aftermarket products. This is the Big Ed collection from Eduard. I specifically wanted the canopy masks and an alternative to the kit seat harnesses but the set also includes brass flaps and an instrument panel along with some other PE details. I like the look of Eduard's brass flaps but don't like the thinning of the wing surfaces that needs to be performed in order to accommodate the flaps so it all depends on how I feel. 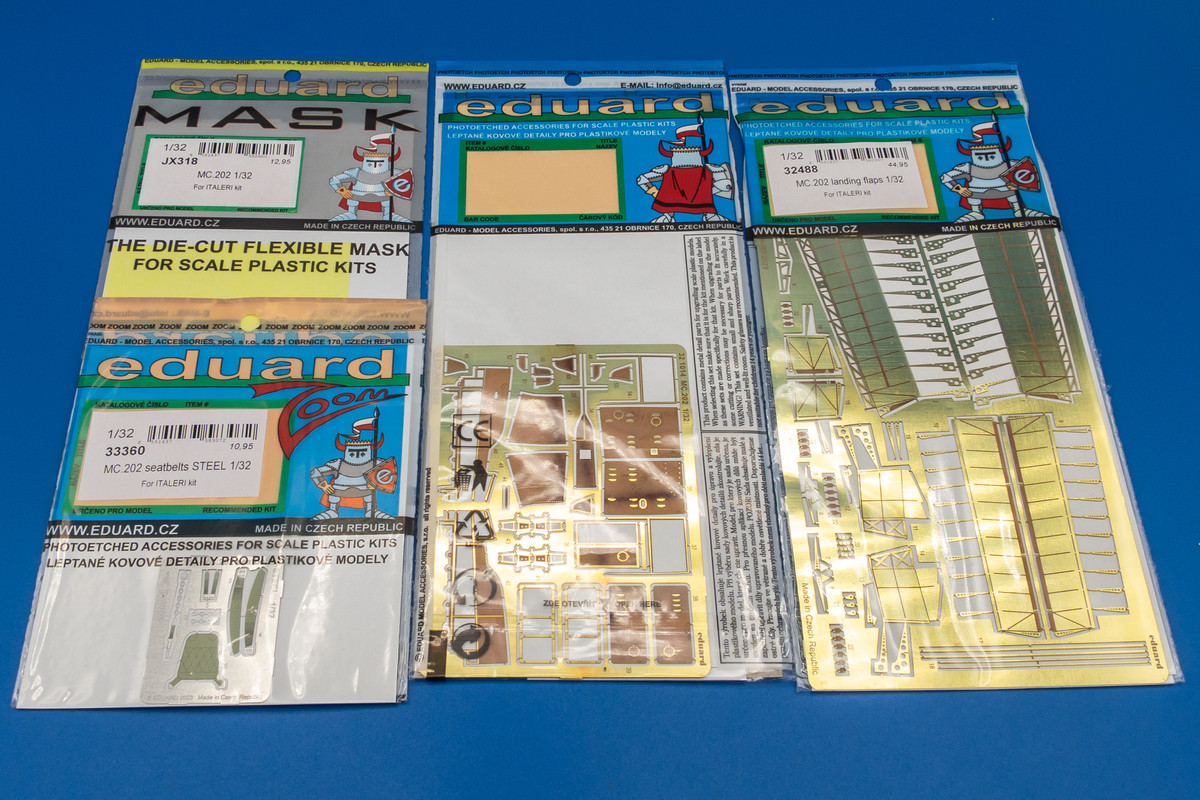 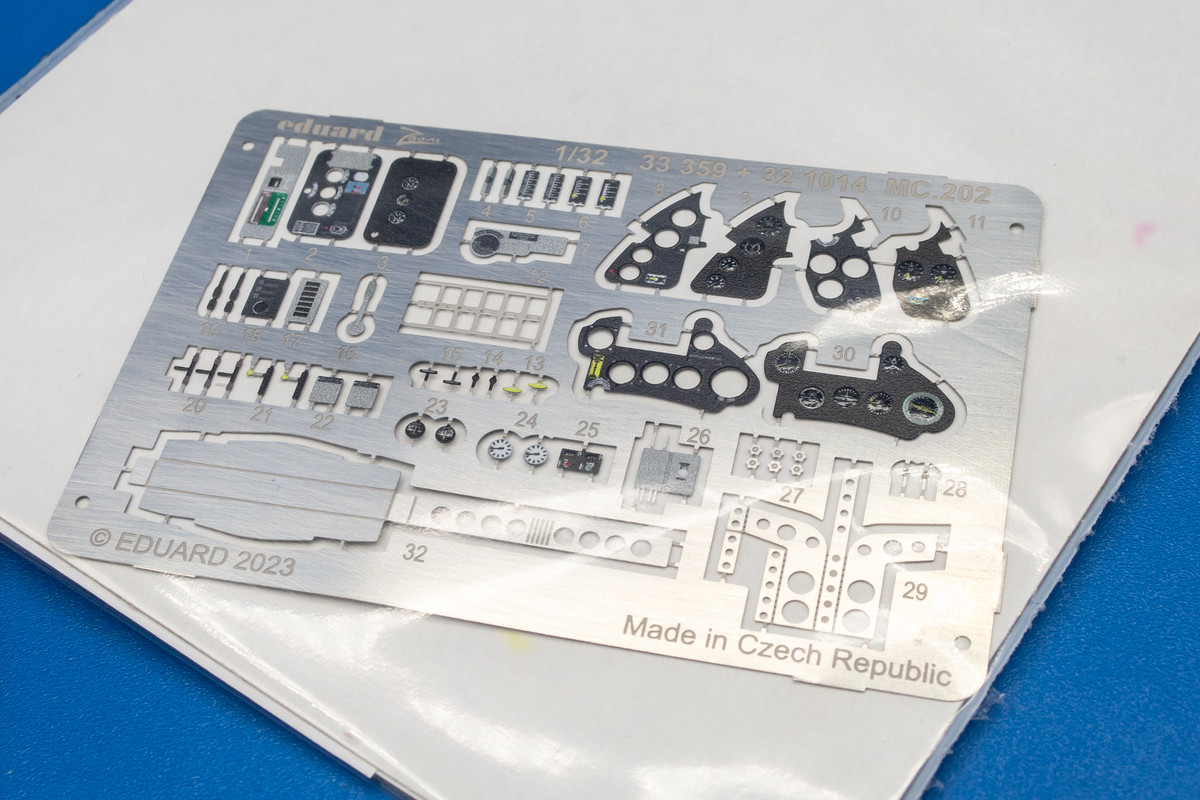 I think I'm infatuated with instrument panels. In addition to the Eduard PE instrument panel in the Big Ed set, I picked up a Yahu instrument panel. I'm not a big fan of the Quinta/Red Fox 3D decals because of their puffy look. If they are the only enhancement available, I will use them but I prefer a resin or plastic instrument panel with raised details and using decals to populate the instruments. This option is not available for this kit so I'm looking at alternatives, of which I now have three. 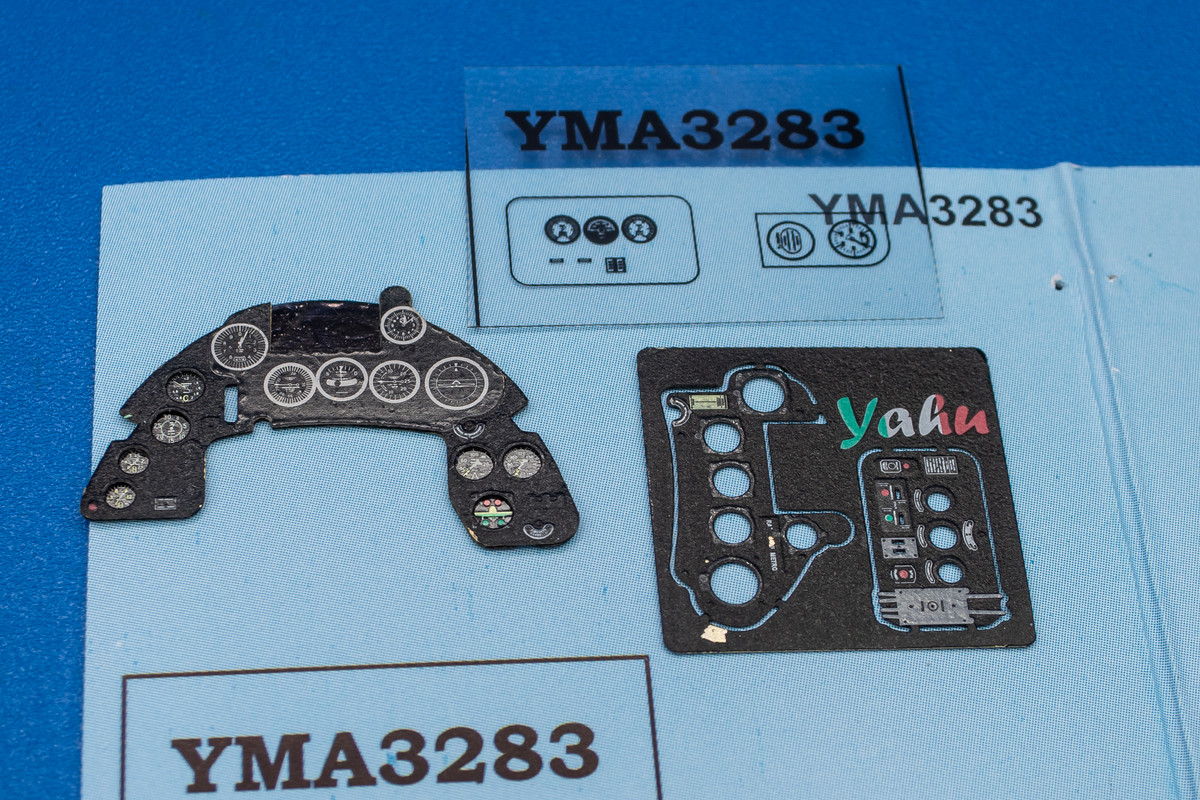 I forgot to mention that Italeri, to their credit, includes 3D decals for the instrument panel. 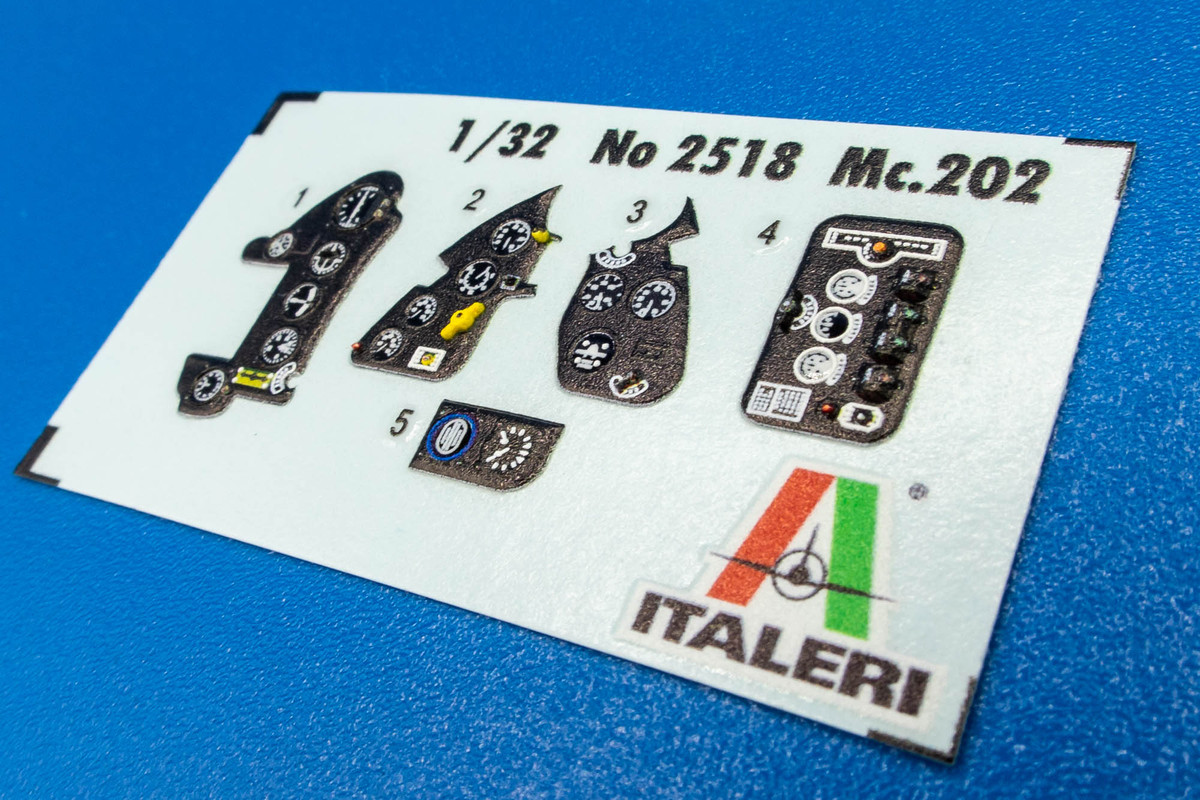 Being taken aback at how short and stubby the AiP spinner was, I ordered a Quickboost spinner to see what their take is. Based on my initial comparisons, it looks almost identical to the kit spinner but I'll take a closer look later.  So that's it for the aftermarket list... for now! One of things that occupied my mind while the kit was temporarily shelved was how to the paint the smoke rings. The kit supplies the smoke rings as a decal sheet and I've seen builds where they are used and they look pretty good. But I want to do them myself. Knowing my limitations, I didn't think I would be able to pull off trying to spray the rings with my airbrush on the fly. I need some sort of pattern to guide my airbrush strokes. So here is the idea... use the kit decals to cut a set of custom masks using my Silhouette Portrait cutter. The masks would be used to create the mottle shapes on the model and I would fill them in myself with the airbrush. To test this idea, I cut a small portion of the smoke rings as masks and applied them to my paint mule. Straight onto the plastic. 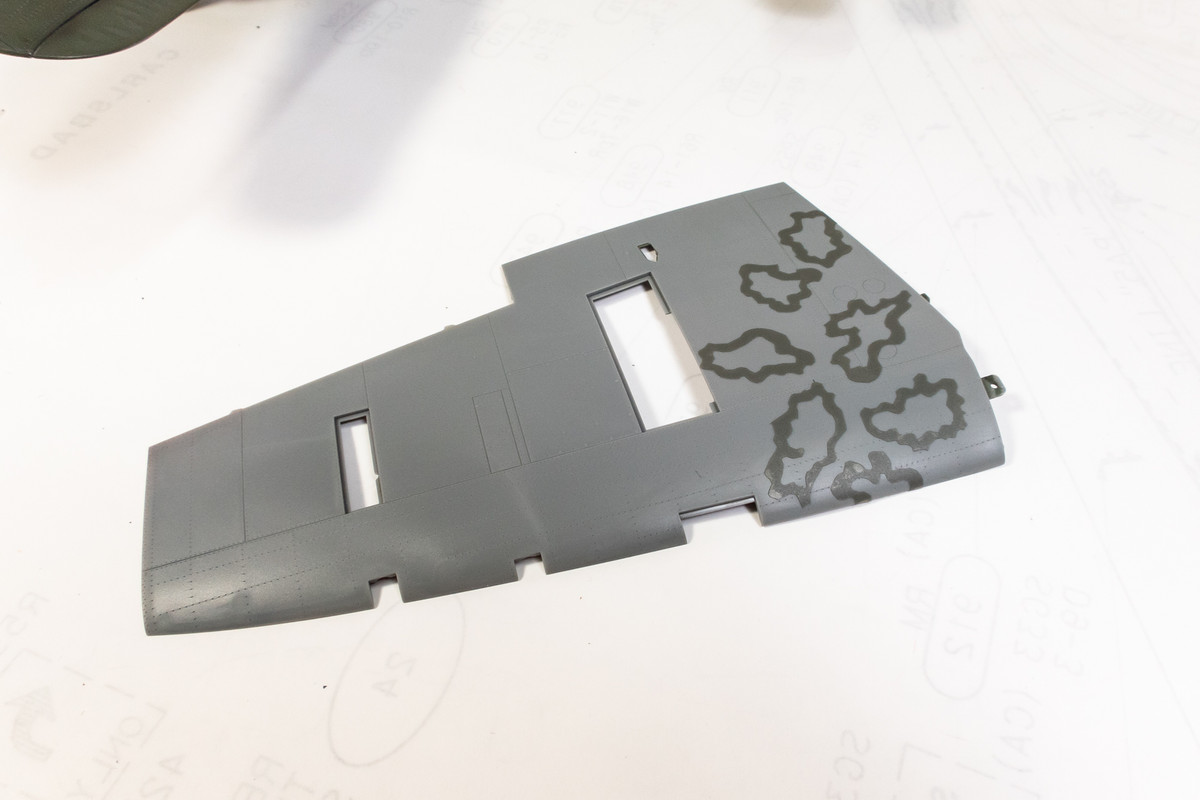 I then sprayed Mr Hobby Aqueous US Brown FS30219 (H-310), which is my leading candidate fo the Nocciola Chiaro 4 color. 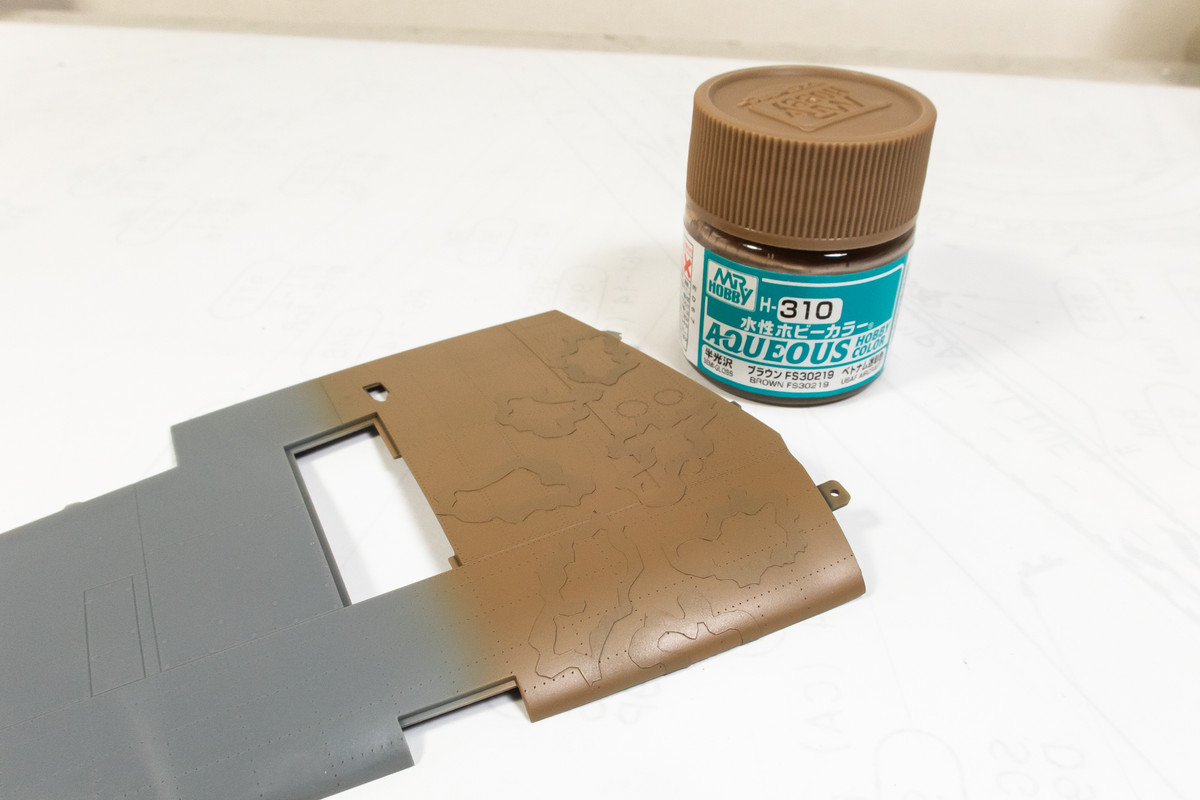 The masks are then removed, leaving the smoke ring patterns outlined, which I can fill in the with green color. At this stage, I should have lightly sanded all of the smoke rings to get rid of the raised paint edges but I didn't notice them until later. 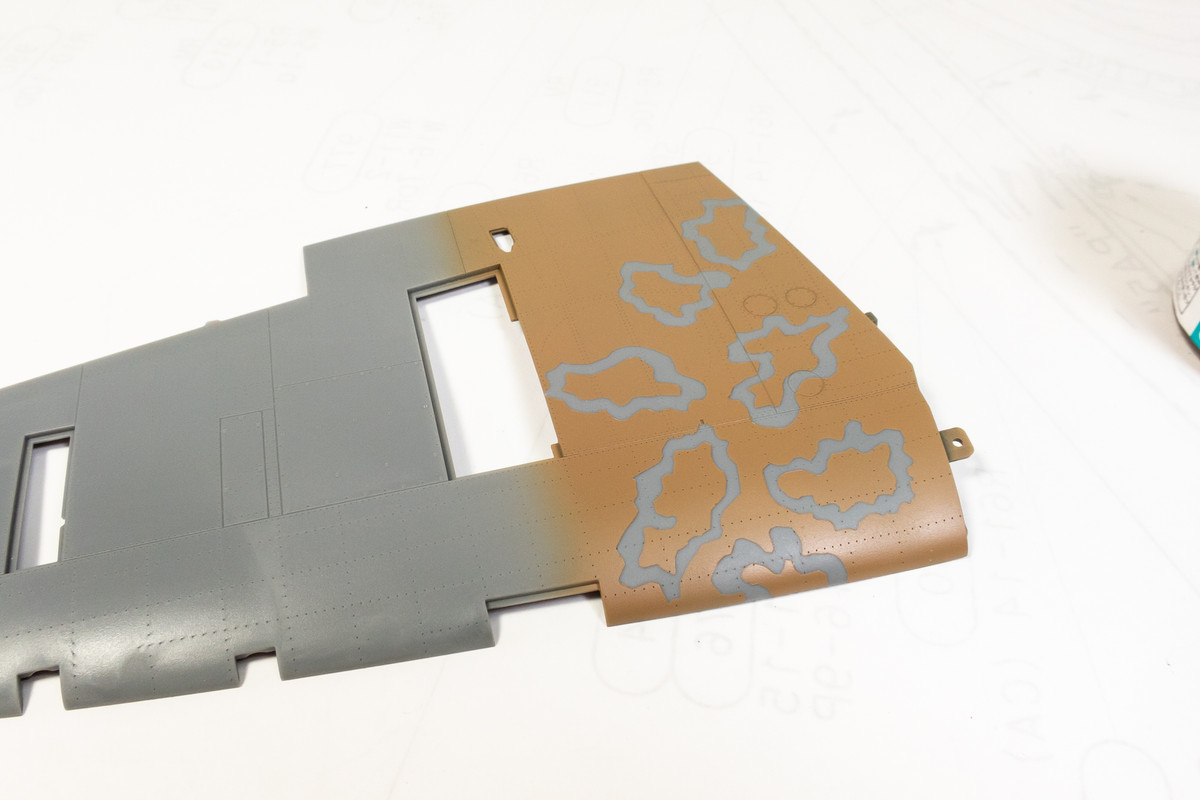 The green is then carefully filled in with the airbrush. These relatively tight patterns are much easier to do as a trace rather than free-handing them. I used Mr Hobby Aqueous RLM 71 Dark Green (H-64). 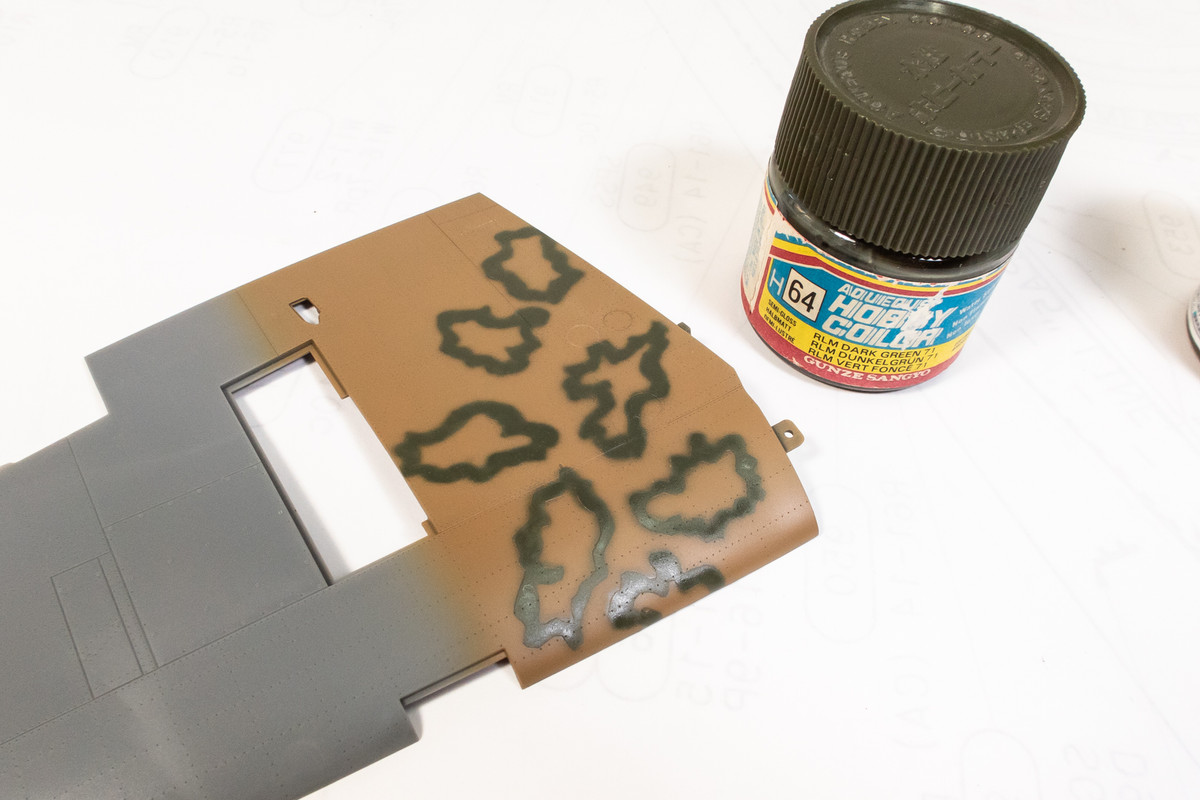 Ignoring the artifacts from the raised paint edges, I think this technique will work for me. 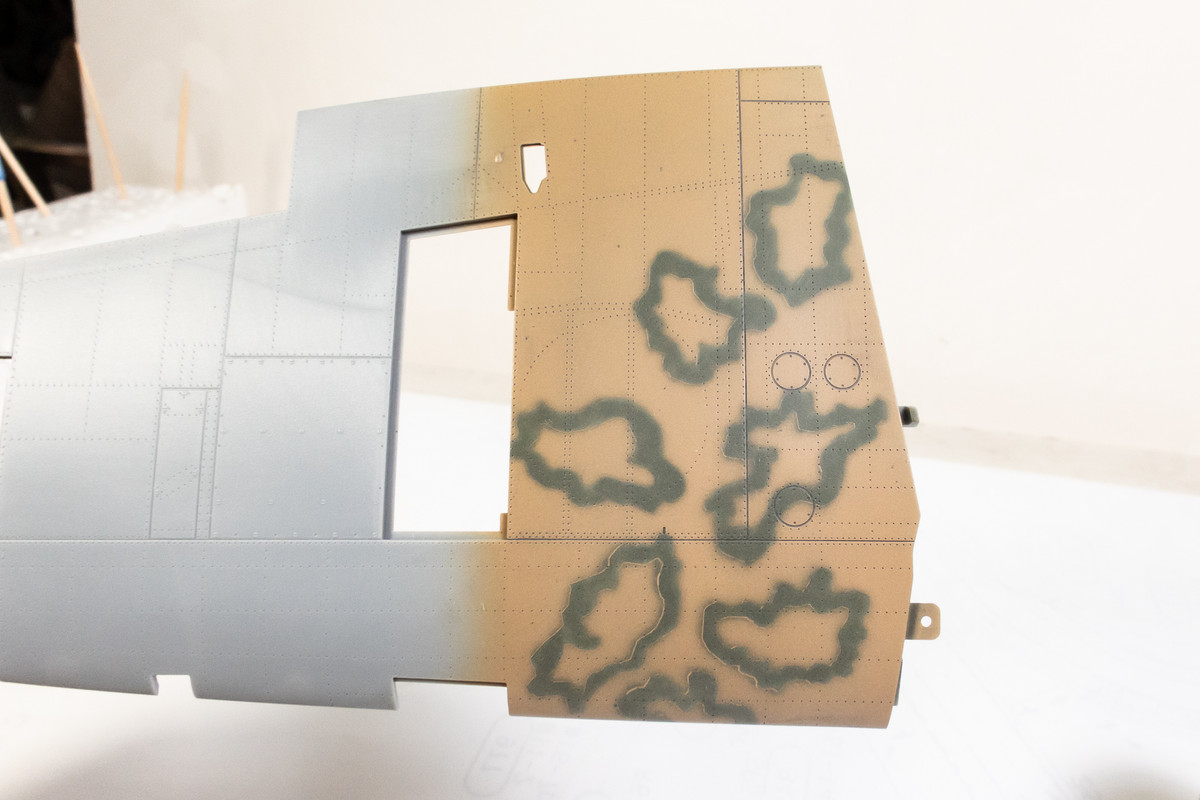 |
|
|
|
Post by keavdog on Sept 10, 2024 0:16:27 GMT -5
Smoke rings look great John. Not an easy camo. WWII Italian birds have some challenging paint schemes.
|
|
handiabled
Administrator      Apr '23 Showcased Build Awarded
Member since: February 2023
Posts: 4,458 
MSC Staff
|
Post by handiabled on Sept 10, 2024 3:40:18 GMT -5
Following this one! Excellent panel line correction and addition of rivets! Your builds always contain wonderfully explained tutorials of your process!
|
|
|
|
Post by 406 Silverado on Sept 10, 2024 4:29:08 GMT -5
Jeez.......a TON of aftermarket parts lined up for this build. It really gets me sometimes at how manufacturers can put such a high price on a kit only to have it suffer from not only basic inaccuracies but also to have things like injector pin marks in all the wrong places and that's not to mention a box that is only half full. Regardless of kit quality and overpricing, I already know that you'll be doing this bird the justice that it deserves after seeing the panel line filling and recribing as well as the riveting and smoke ring application process.
I'm in on this build all the way John.
|
|
TJ
Senior Member
    June '23 Showcased Model Awarded
Member since: May 2023
Posts: 2,182
May 14, 2023 18:18:36 GMT -5
May 14, 2023 18:18:36 GMT -5
|
Post by TJ on Sept 10, 2024 5:19:25 GMT -5
I like how you describe what your thought process is in regards to why you purchased each aftermarket set.
|
|
|
|
Post by kyledehart5 on Sept 10, 2024 14:39:12 GMT -5
Oh very nice. I’m in to watch this!! Beautiful work on the rescribe and rivets. And what a great haul of options you’ve given yourself.
|
|
spook
Full Member
  
Member since: June 2024
Posts: 189 
|
Post by spook on Sept 10, 2024 14:48:48 GMT -5
A work of art !
|
|
jkim
Full Member
  
Member since: October 2023
Posts: 116
Oct 19, 2023 12:36:27 GMT -5
Oct 19, 2023 12:36:27 GMT -5
|
Post by jkim on Sept 11, 2024 13:00:27 GMT -5
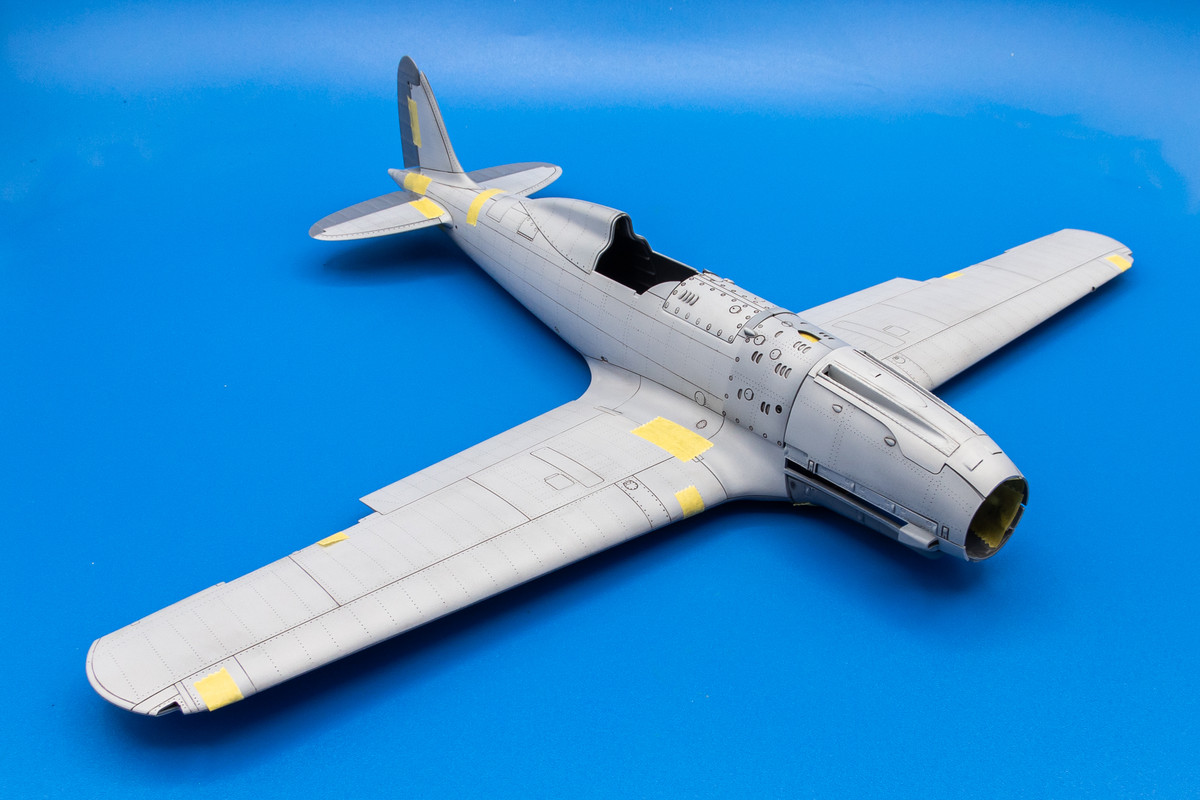
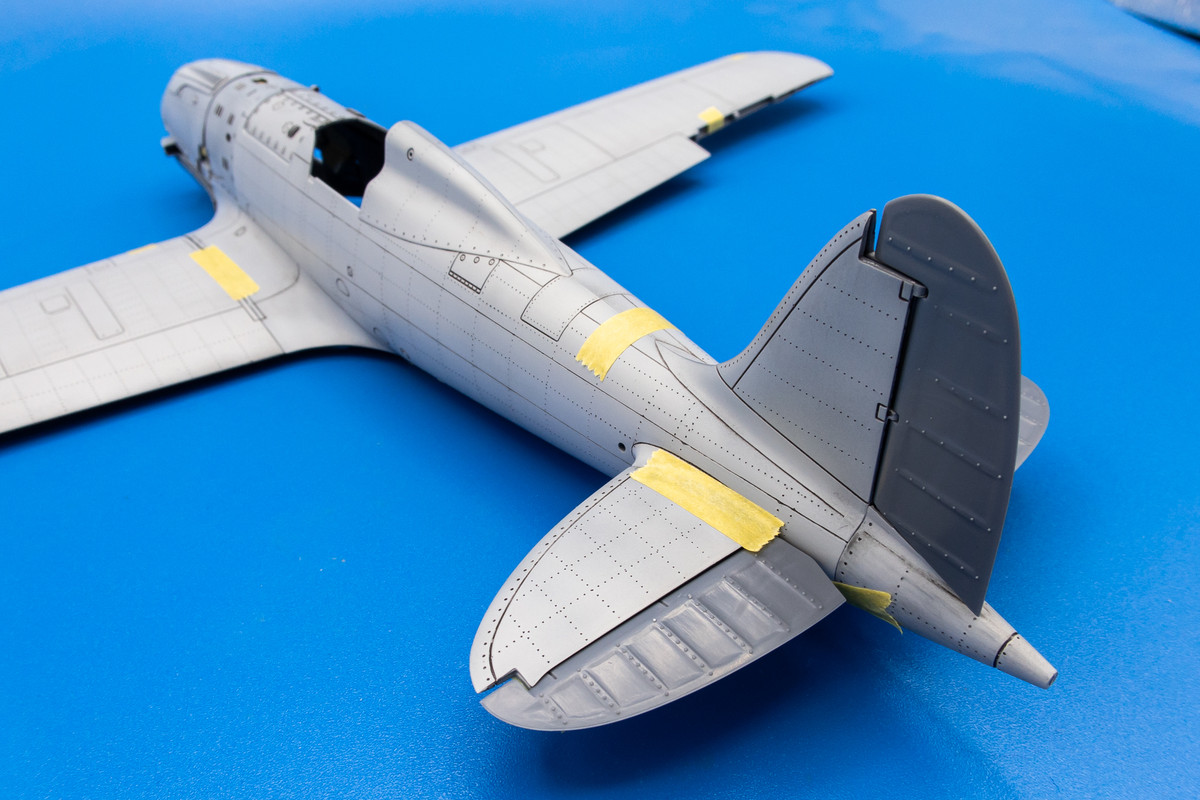
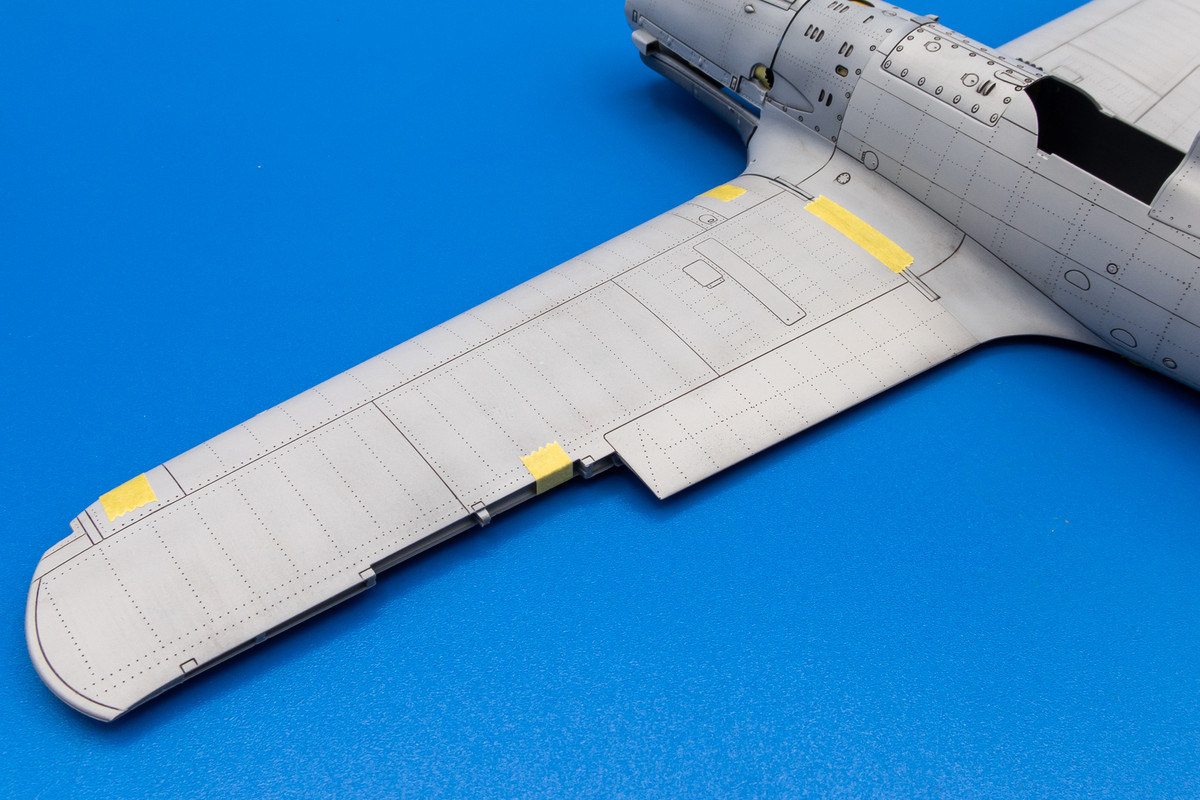
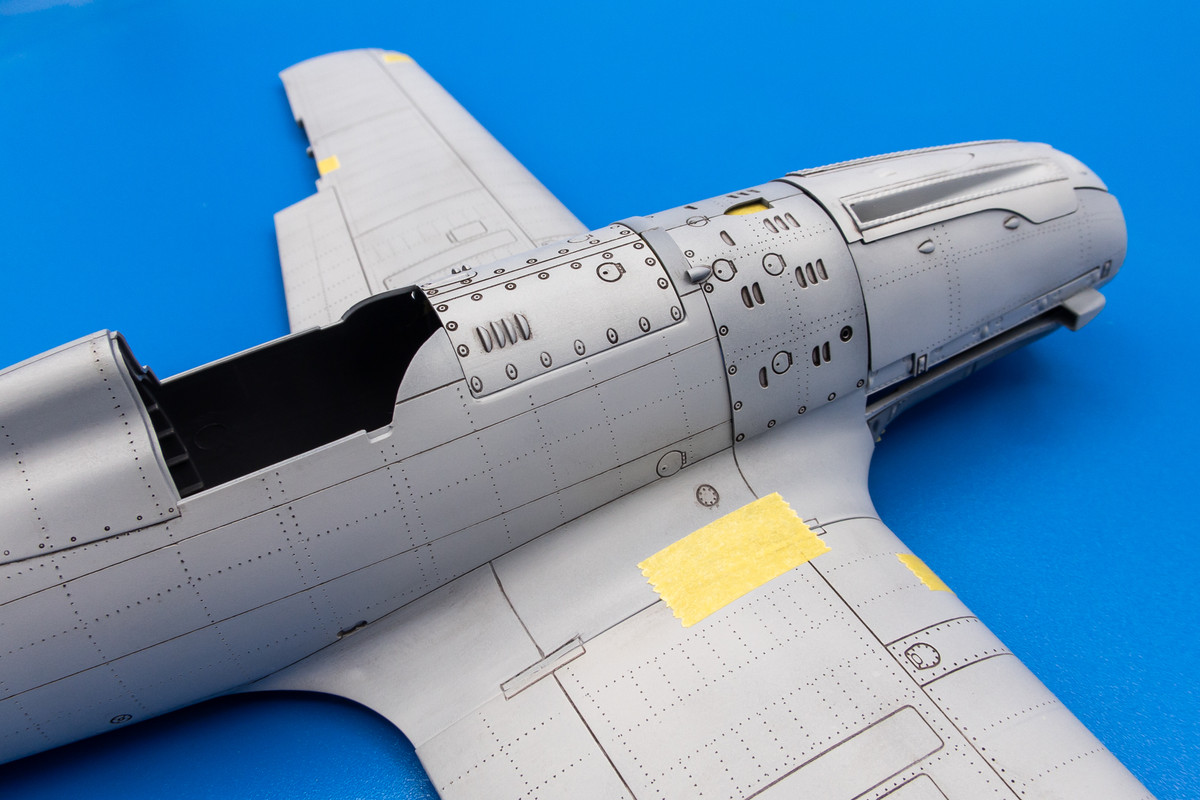
Smoke rings look great John. Not an easy camo. WWII Italian birds have some challenging paint schemes. Thanks John! Using the masks this way gives me an easy target to hit with the airbrush and gives me the option of adding my own touches so it won't be EXACTLY the same as everyone else, which is why I wanted to avoid using the decals. Following this one! Excellent panel line correction and addition of rivets! Your builds always contain wonderfully explained tutorials of your process! Thank you very much! I'm glad you find the tutorial style helpful. I also reference my own builds so it's useful for me too! Jeez.......a TON of aftermarket parts lined up for this build. It really gets me sometimes at how manufacturers can put such a high price on a kit only to have it suffer from not only basic inaccuracies but also to have things like injector pin marks in all the wrong places and that's not to mention a box that is only half full. Regardless of kit quality and overpricing, I already know that you'll be doing this bird the justice that it deserves after seeing the panel line filling and recribing as well as the riveting and smoke ring application process. I'm in on this build all the way John. I'm pretty disappointed in Italeri for their apparent lack of effort in designing this kit and then charging top-dollar price for it. But I really like the Macchi Folgore so I'm excited to build it and will put my best effort on it. I like how you describe what your thought process is in regards to why you purchased each aftermarket set. Thanks Johnny! Admittedly an aftermarket junkie! This secondary industry fascinates me. A lot of these "companies" are just one-man shops... people who are just passionate about models. So when I buy aftermarket parts, it feels so much more personal than, say buying a camera or a computer. Sometimes these companies will ask me if they can use pics of my builds or they may send a part for me to test and comment on. A highlight for me was when the late Jerry Crandall (Eagle Editions) made a positive comment on my Fw 190D-13 Conversion. This is coming from the author who discovered the D-13 in someone's backyard and helped restore it, whose book I am using as a reference! Dude! Oh very nice. I’m in to watch this!! Beautiful work on the rescribe and rivets. And what a great haul of options you’ve given yourself. Thanks Kyle! Options... that's a good way of putting it. I DO like to have options! Thank you sir! I've gone ahead and riveted the wing bottoms. Like the wing tops, I've decided not to re-scribe the panel lines. 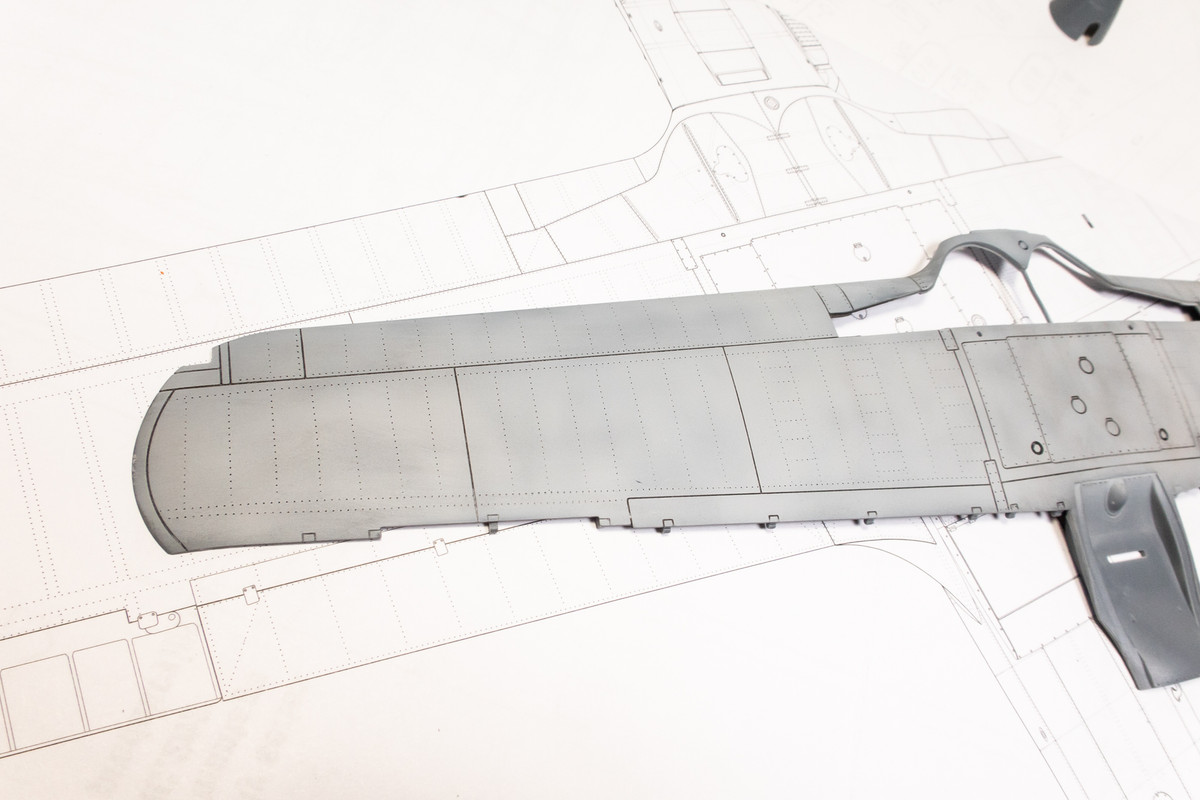 I've started to cobble together the engine and decided to stop at this point. I think it might be easier to paint the engine if I keep certain sub-assemblies separate. There's a lot still to factor that I'm not showing like the firewall that the engine mounts are connected to, various tubes and hoses and also the AiP detail parts. I'm also going to start looking at the cockpit since I've got a lot of options lined up there as well. 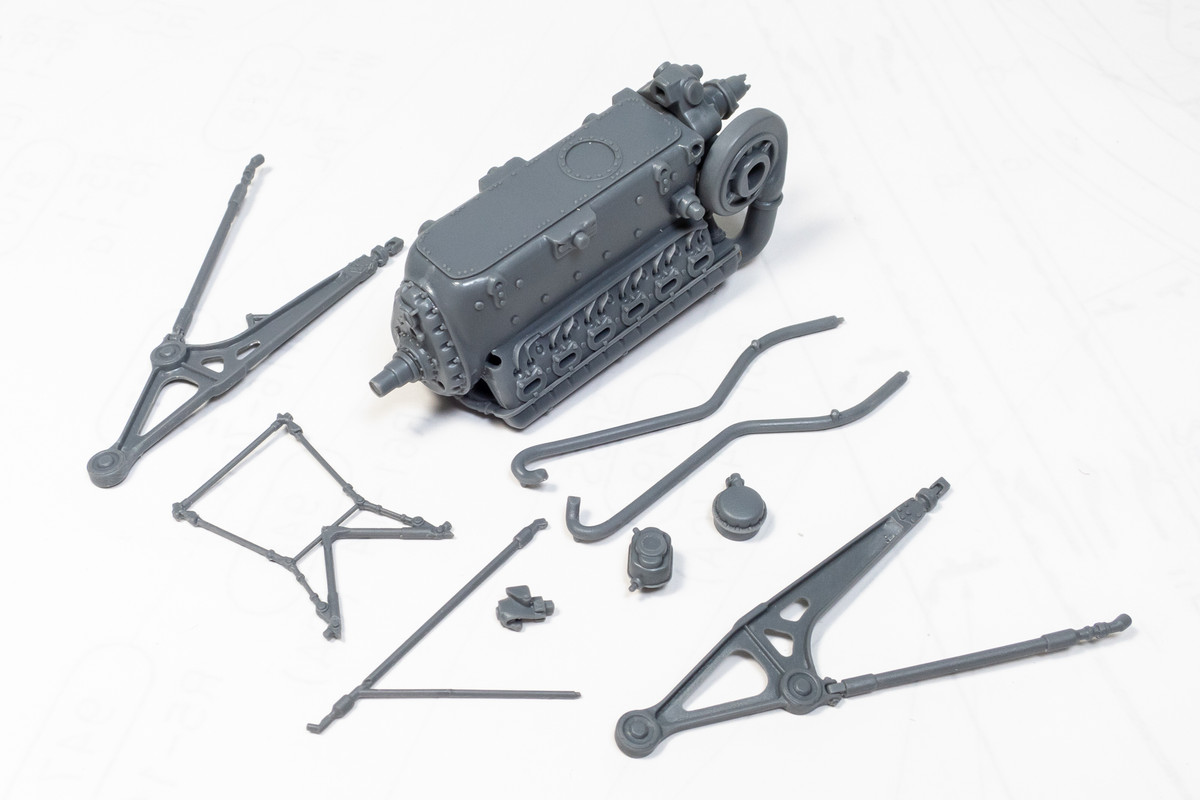 |
|
jkim
Full Member
  
Member since: October 2023
Posts: 116
Oct 19, 2023 12:36:27 GMT -5
Oct 19, 2023 12:36:27 GMT -5
|
Post by jkim on Sept 11, 2024 15:09:42 GMT -5
Taking a look at my options for the instrument panel. On the left is the kit-supplied 3D decals. They look decent but if used, I'd want to knock back that glossy finish so it would require some tedious masking of the instruments. In the middle is the Eduard PE. Each component is a 2-piece affair that is sandwiched together. As with all Eduard pre-painted part, I sprayed the outer parts with a clear flat to knock back the print texture, which can be distracting. On the right is the Yahu instrument panel. Comparable to Eduard when it comes to texture and fidelity of the instruments. One concern is that the top middle square is integral to the backing part and it would get in the way of the compass and gunsight assemblies. Yes, it can probably be cut away but I'm surprised at this mistake by Yahu not to keep that square space open like the Italeri and Eduard panels. 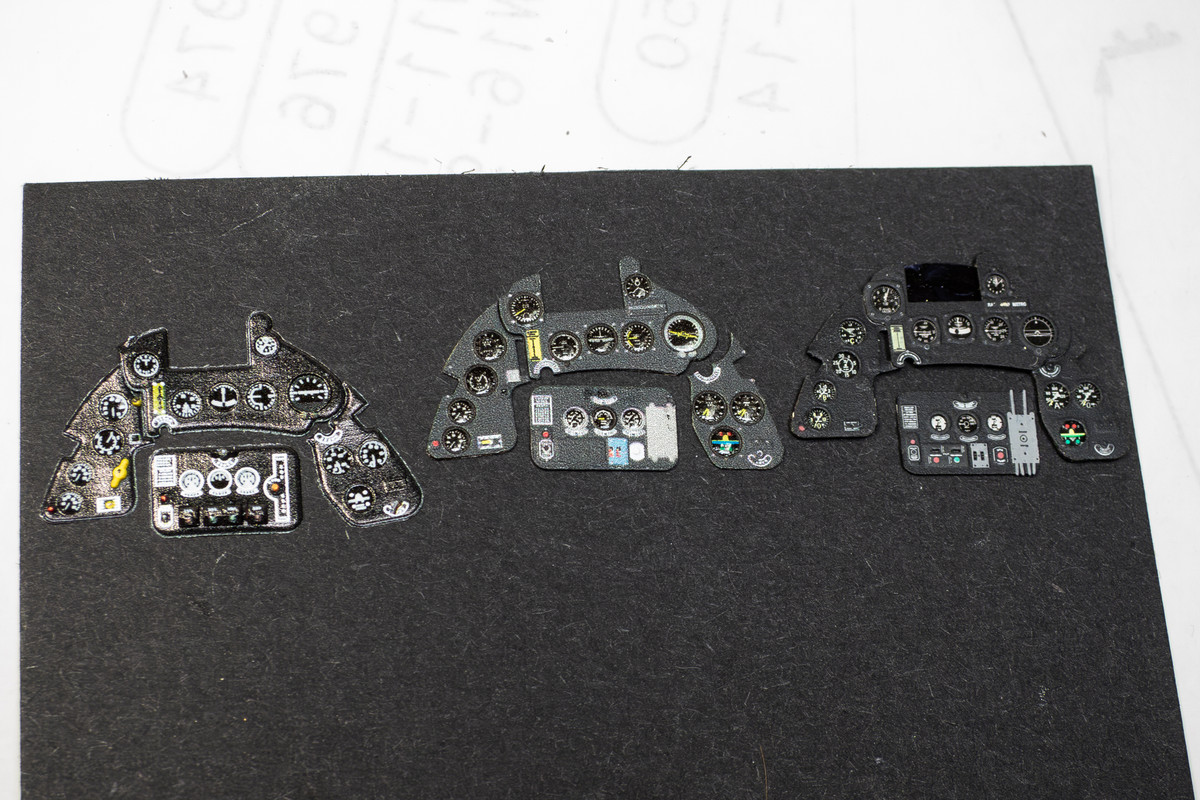 I've decided to go with Eduard for the main instrument panels and using the Yahu part for the rectangular panel beneath the IP. The Eduard parts have been attached to the instrument panel backing piece using PVA glue. 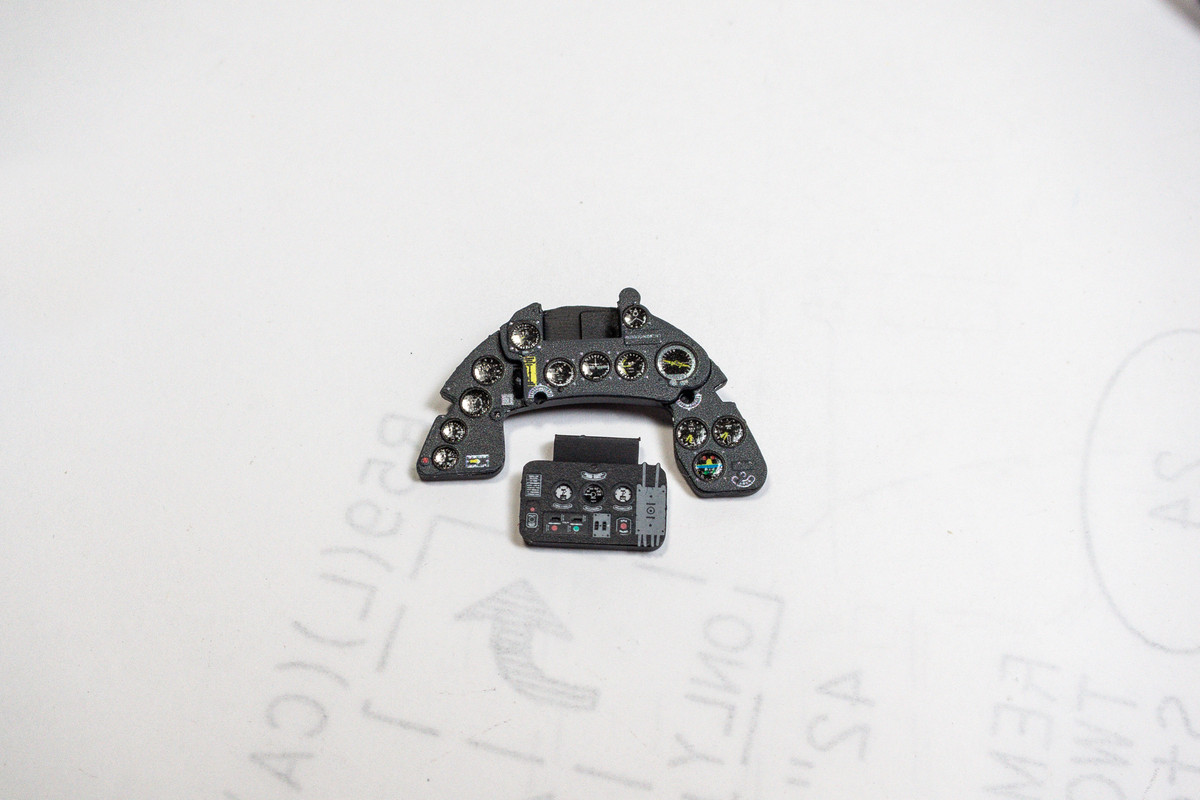 |
|
|
|
Post by 406 Silverado on Sept 11, 2024 17:26:33 GMT -5
Your thought process behind the IP selection was right on point John. These builds of yours are very enjoyable to watch and this one most certainly is no exception. Your detailing is at a surplus on this thing.
|
|
handiabled
Administrator      Apr '23 Showcased Build Awarded
Member since: February 2023
Posts: 4,458 
MSC Staff
|
Post by handiabled on Sept 12, 2024 1:48:58 GMT -5
Nice selection with the IP John. Did you by chance use pva or Future on the dial faces? They appear to have a nice glass finish to them.
|
|
jkim
Full Member
  
Member since: October 2023
Posts: 116
Oct 19, 2023 12:36:27 GMT -5
Oct 19, 2023 12:36:27 GMT -5
|
Post by jkim on Sept 12, 2024 16:57:13 GMT -5
Your thought process behind the IP selection was right on point John. These builds of yours are very enjoyable to watch and this one most certainly is no exception. Your detailing is at a surplus on this thing. Thank you sir! Selection is usually quality first but I'll consider ease of use if quality is roughly equal. I'm still trying to get my head around the construction order on this thing. Unlike 99.99% of other aircraft kits, this one starts with the engine, NOT the cockpit. And the engine gets mounted onto the wing bottom, instead of the fuselage, which you'd expect.  So right now, I'm looking at references and thinking about trying to add a little bit of detail to both the engine and the cockpit. I'm not a good scratchbuilder so it won't be anything extensive but I want to add a personal touch to the build. Nice selection with the IP John. Did you by chance use pva or Future on the dial faces? They appear to have a nice glass finish to them. Thanks! Both the Yahu and Eduard instrument panels have glossy instrument faces so you don't need to add any gloss. However, I attached the outer faces using Future as an adhesive so they may have gotten a little shinier! |
|
jkim
Full Member
  
Member since: October 2023
Posts: 116
Oct 19, 2023 12:36:27 GMT -5
Oct 19, 2023 12:36:27 GMT -5
|
Post by jkim on Sept 13, 2024 12:45:55 GMT -5
I'm working on a couple of fronts right now: the engine and the cockpit. There are some parts of the upper wing that will be visible from the wheel well and there are some mold marks there that need to be cleaned up. 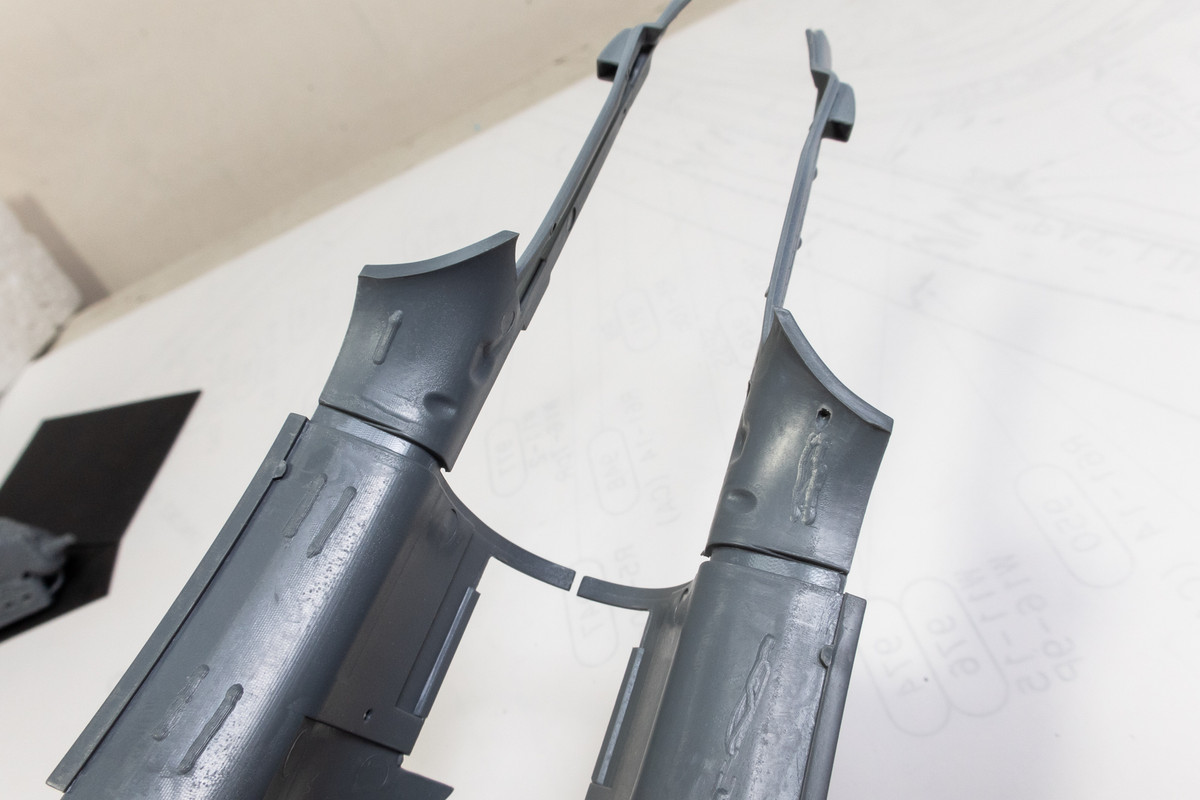 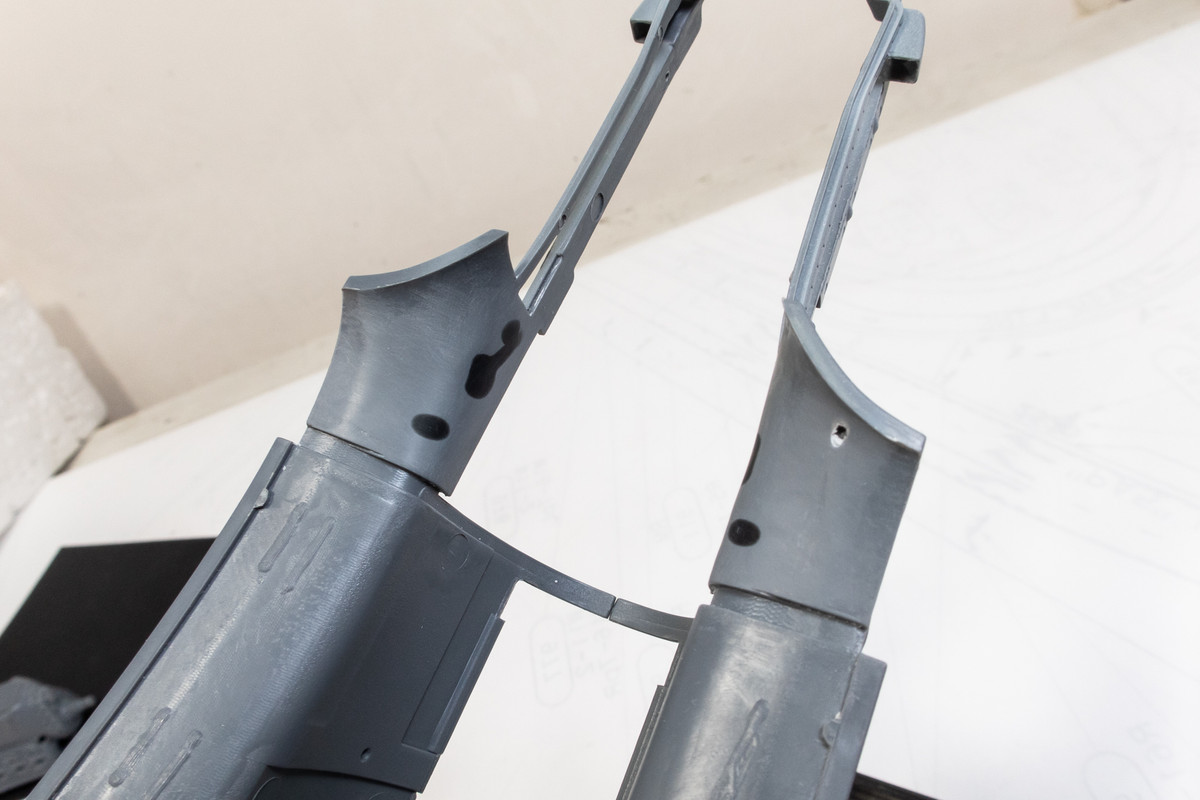 Jumping over to the cockpit, I've decided to use the later Type C gun sight instead of the oft-recommended older Type B, which is also included in the kit. The Type C gun sight has better detail and a nice PE frame for the reflector glass. The Type C in the Folgore does seem plausible according to my reference. 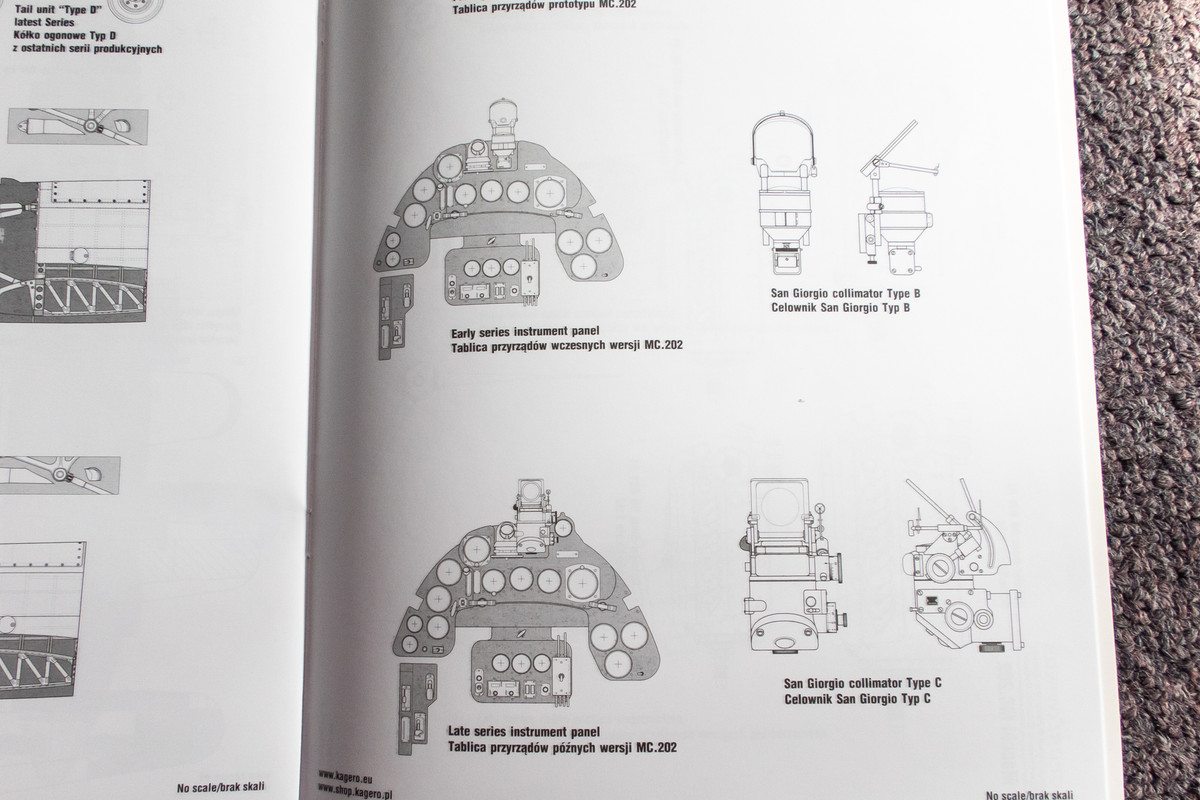 So here is the instrument panel with the Type C gunsight. I've added a small switchbox to the retangular auxilliary panel beneath the main panel, according to my reference photos. I've put primer over it but it is not yet painted. 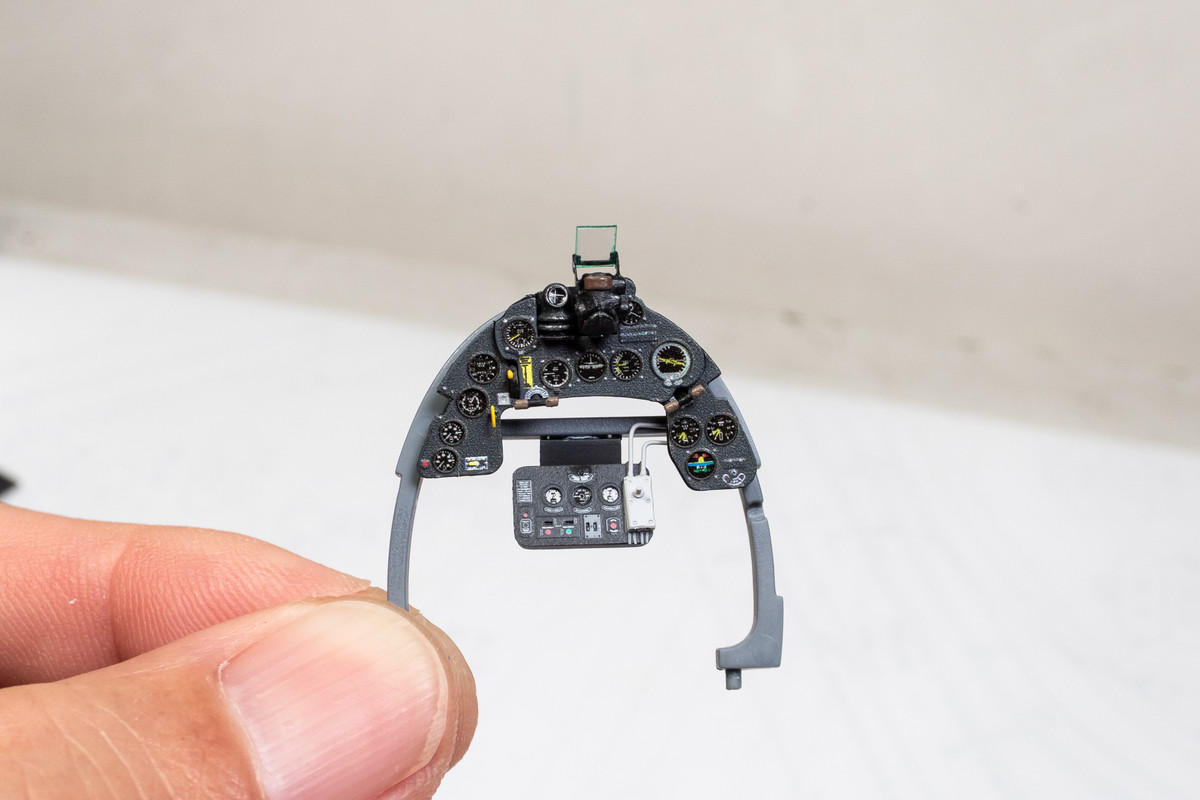 I've taken a look at the Eduard PE shoulder harnesses. I tried to add stitch detail which is not a good idea for pre-painted PE parts since it adversely affects flexibility, which is already pretty bad. So I decided to craft my own shoulder harnesses using foil. 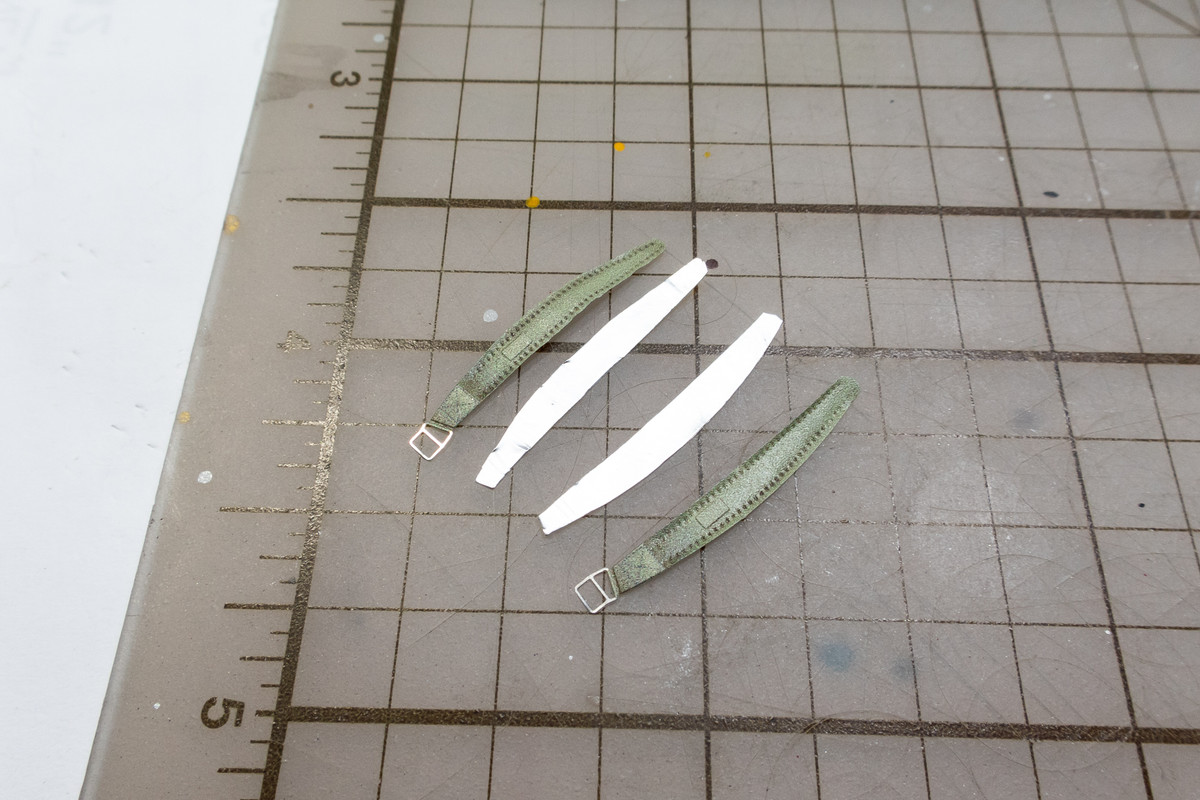 Stitch detail is added. 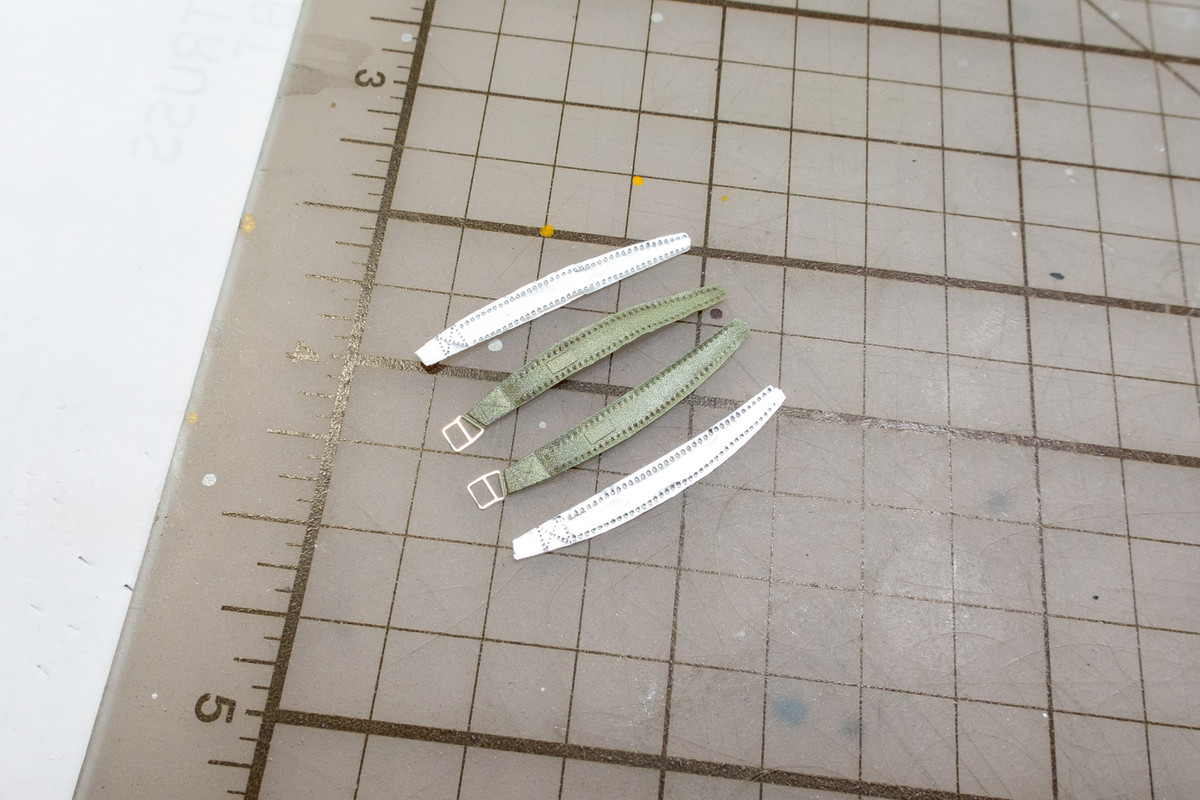 And then I transferred the buckles from the PE part to the new foil harnesses. 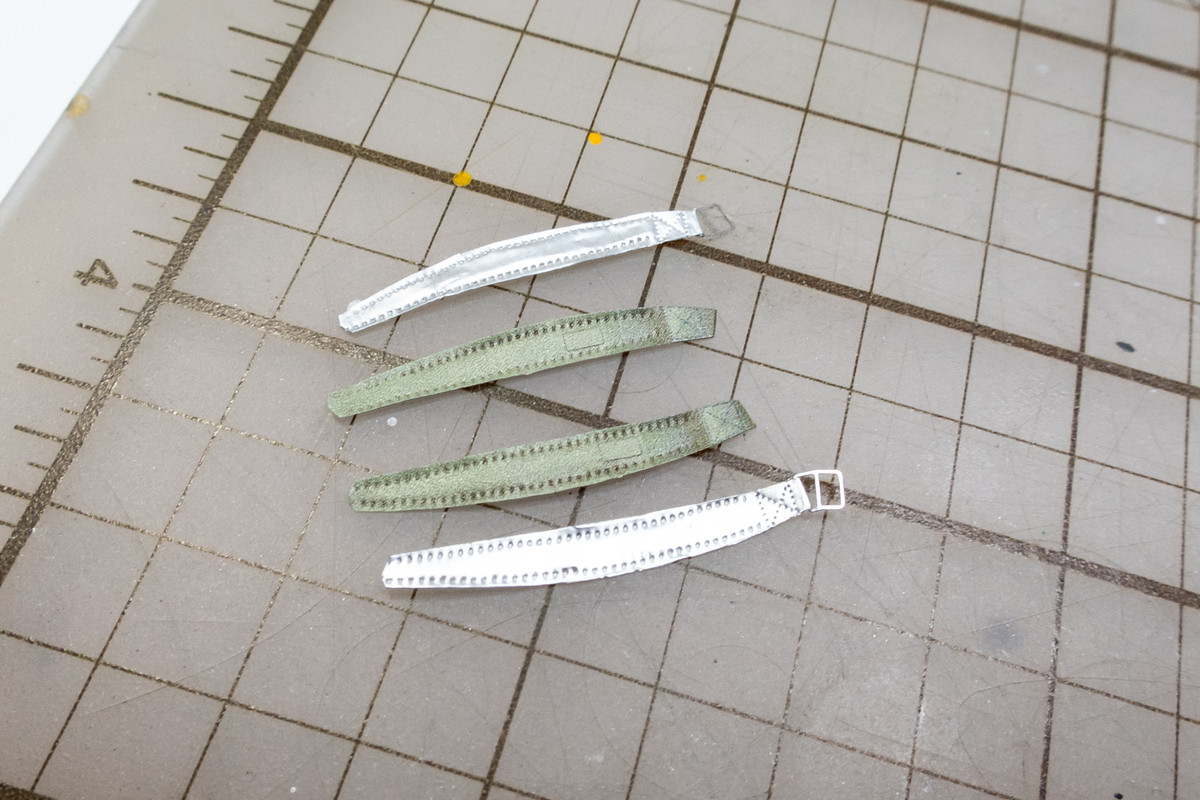 The foil is much more pliable than the PE so it'll be easier to pose them with more realistic folds. For comparison is the plastic kit part. 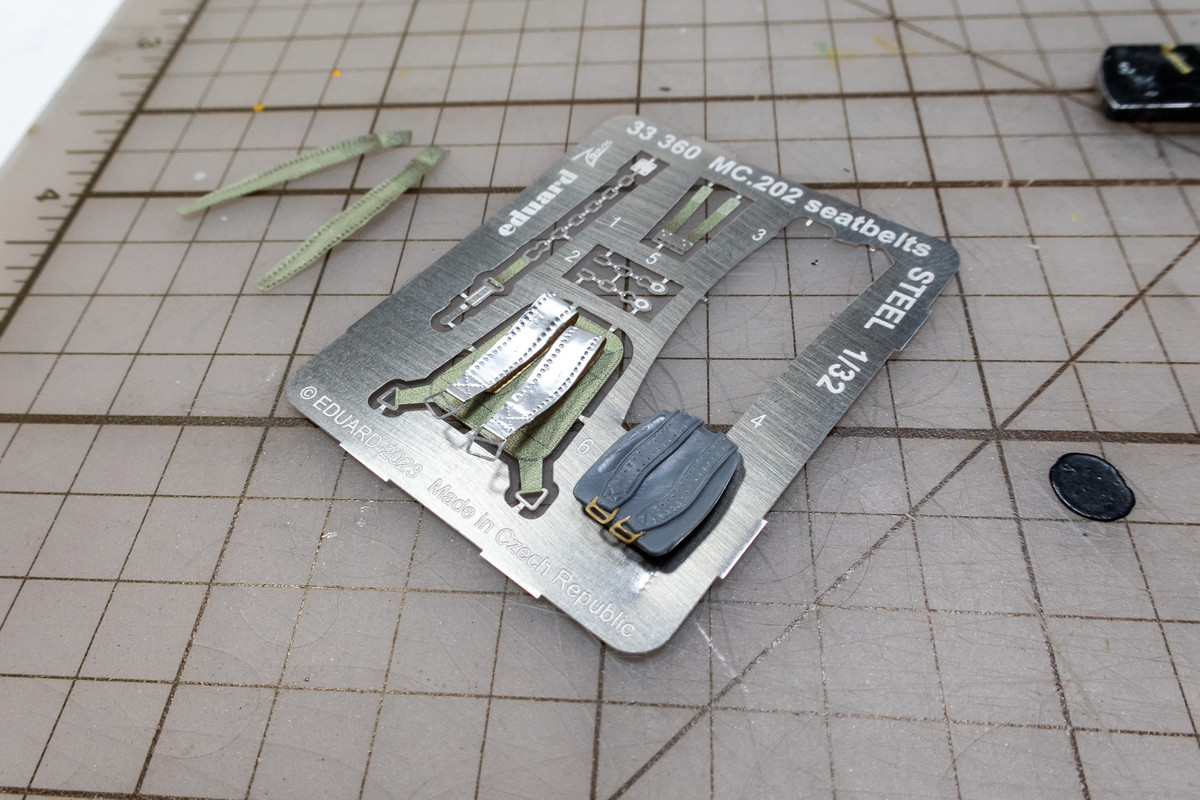 |
|
|
|
Post by kyledehart5 on Sept 13, 2024 23:48:32 GMT -5
Wow!! Great idea and great work on the harnesses. IP looks awesome as well
|
|
handiabled
Administrator      Apr '23 Showcased Build Awarded
Member since: February 2023
Posts: 4,458 
MSC Staff
|
Post by handiabled on Sept 14, 2024 3:06:35 GMT -5
Wonderful scratch work John! I like your glass tint on the gun sight!
|
|
TJ
Senior Member
    June '23 Showcased Model Awarded
Member since: May 2023
Posts: 2,182
May 14, 2023 18:18:36 GMT -5
May 14, 2023 18:18:36 GMT -5
|
Post by TJ on Sept 14, 2024 3:29:55 GMT -5
As always your attention to detail. The panels and the belts look fantastic
|
|
spook
Full Member
  
Member since: June 2024
Posts: 189 
|
Post by spook on Sept 14, 2024 13:13:18 GMT -5
Thinking outside the box ! IP looks great and the Harnesses as well .
|
|
jkim
Full Member
  
Member since: October 2023
Posts: 116
Oct 19, 2023 12:36:27 GMT -5
Oct 19, 2023 12:36:27 GMT -5
|
Post by jkim on Sept 15, 2024 0:24:31 GMT -5
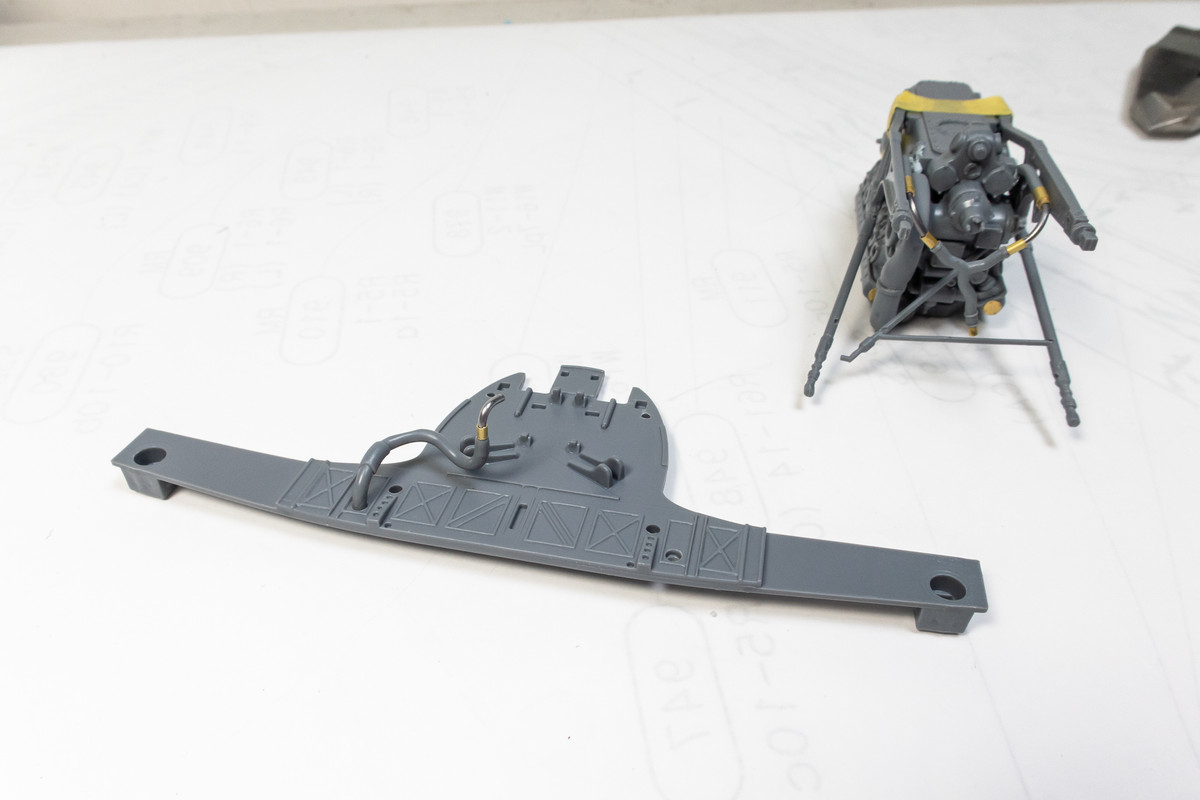
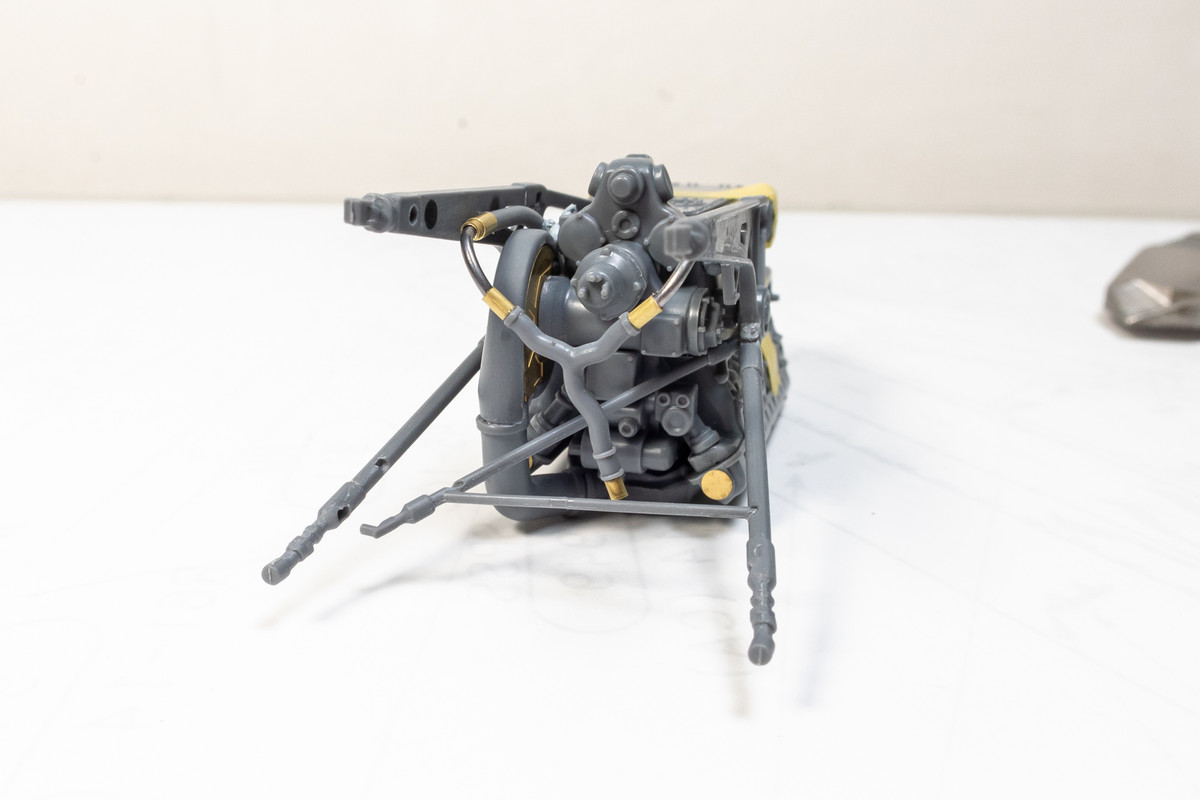
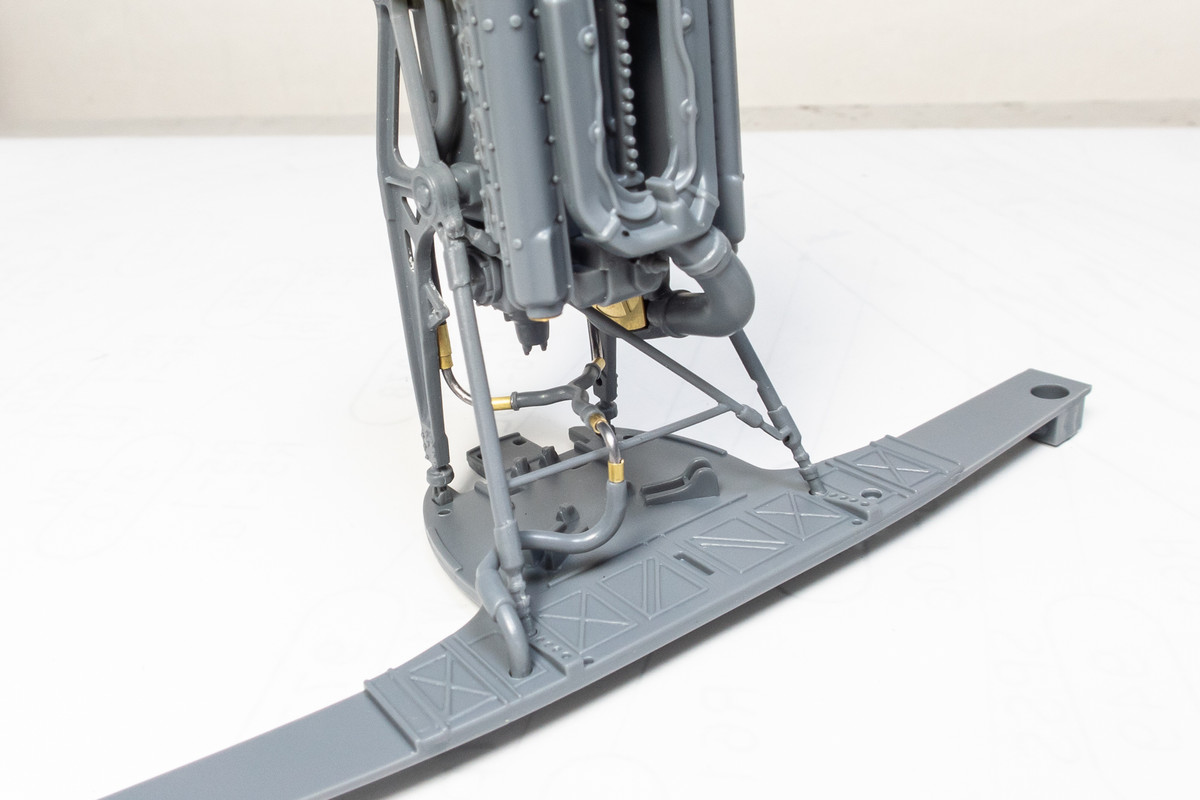
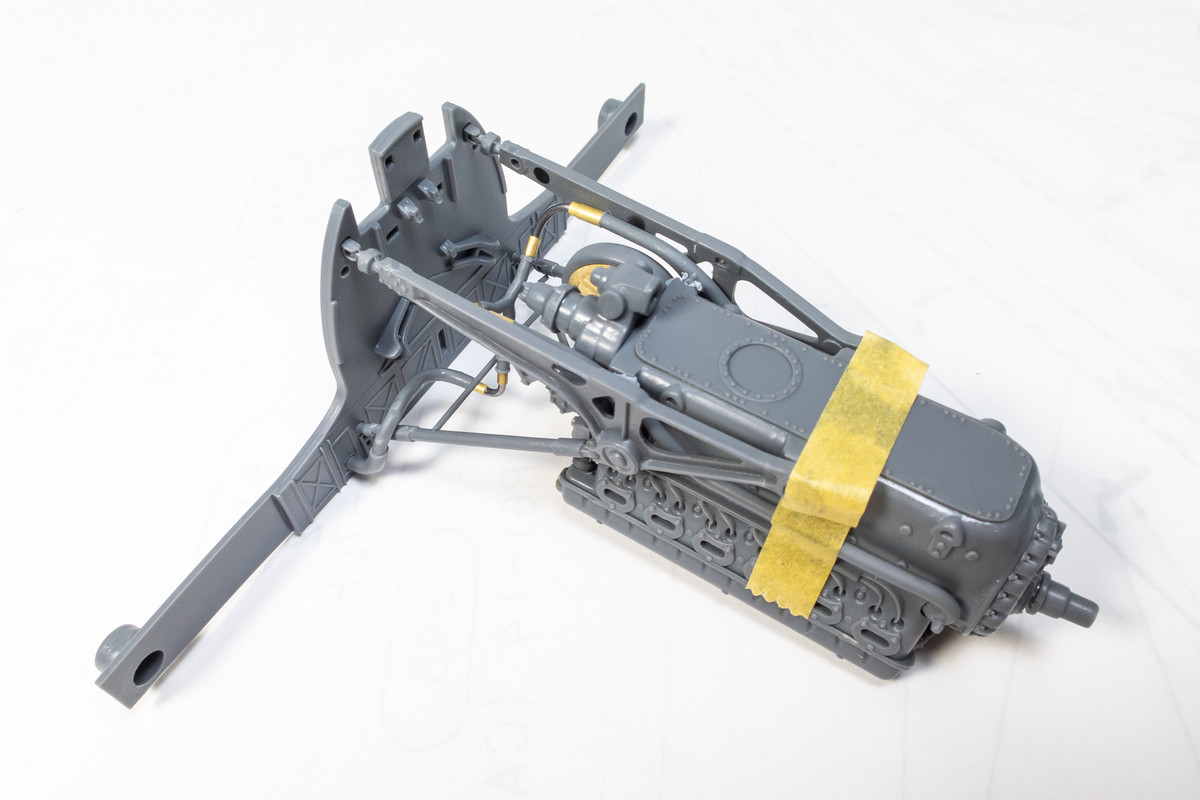
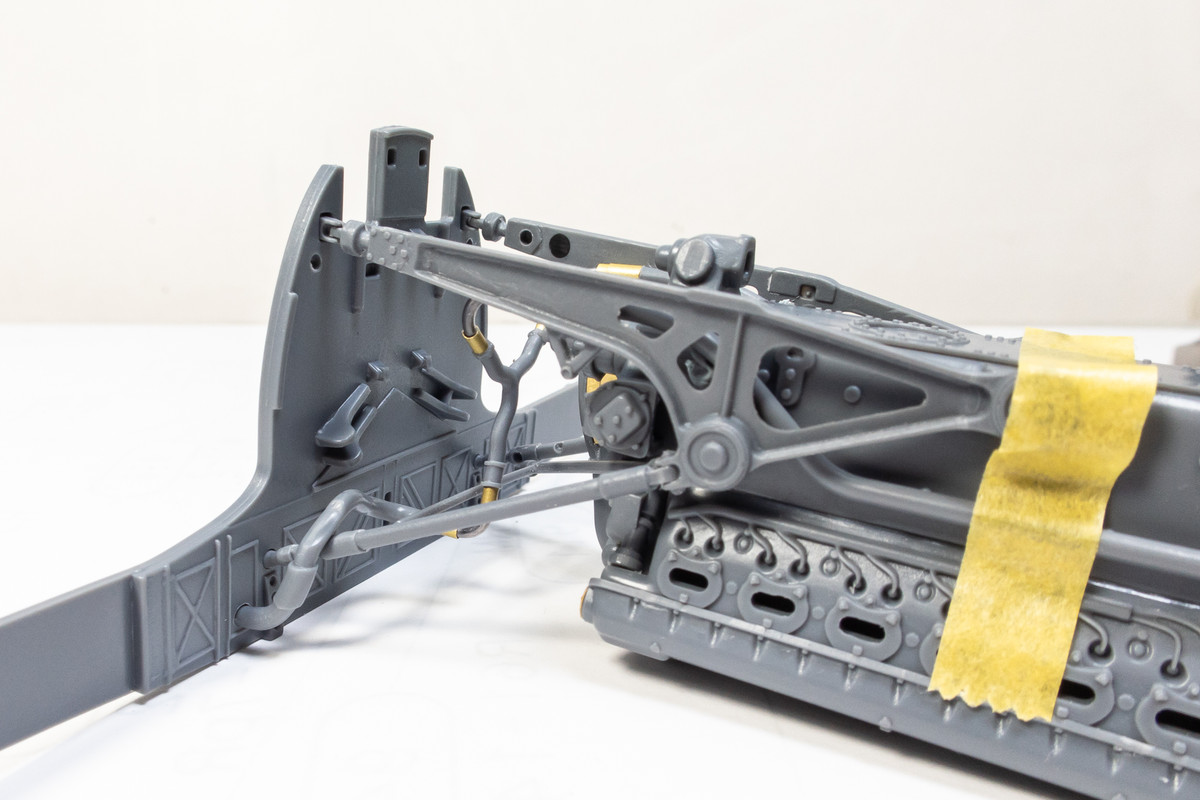
Thanks guys! Appreciate the look-in as always. More on the harnesses a little later but first let's go back to engine. I've assembled the main body of the engine and stopped so that I can figure out a few things. One of them is the piping that Italeri included as vinyl tubes. Not sure what they were thinking but really? Cmon, Italeri... this model deserves better. That white tubing is twice as thick as the pipe that it is supposed to be connected to and there is no way that it will hold any type of scale-appropriate bends. 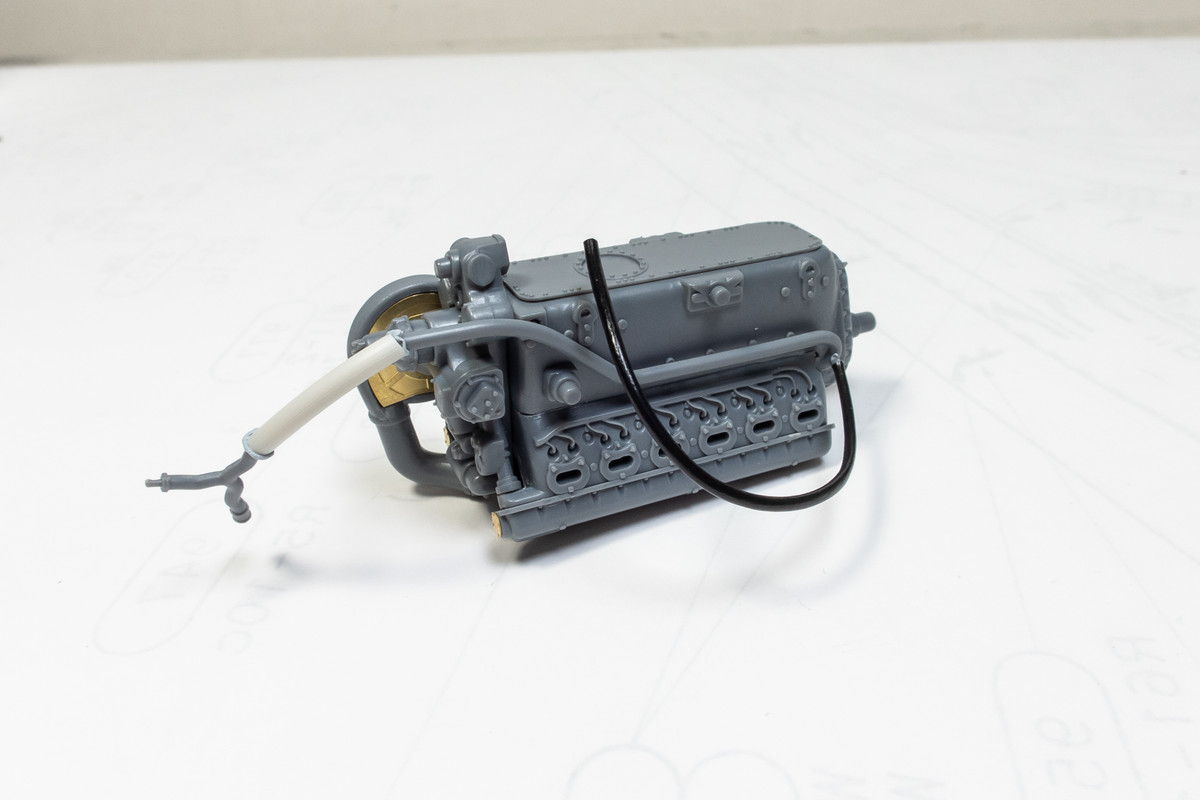 The vinyl tubing is getting tossed in the bin and I'm planning replacing it with lead wire. By dry-fitting the engine onto the firewall, I can start to figure out where each pipe goes and start planning the connections. I'm concentrating on the view from the bottom because this will only be seen from the wheel well openings. 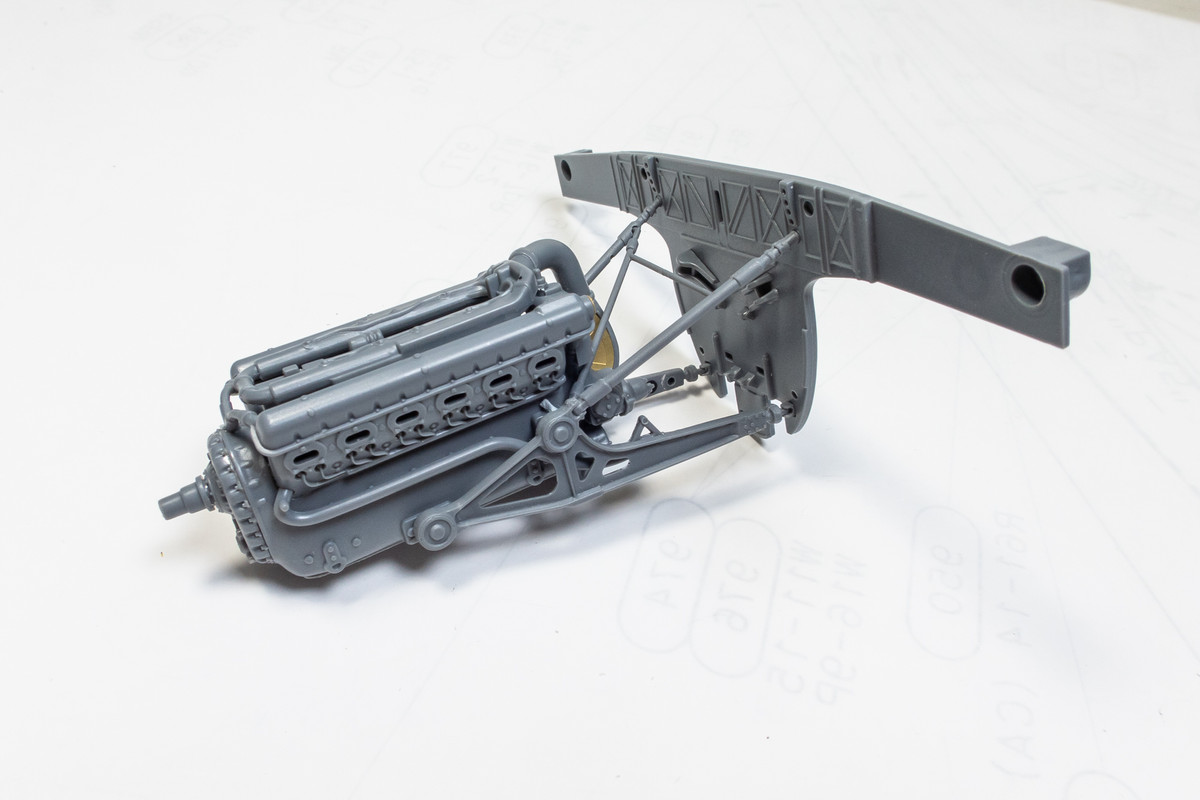 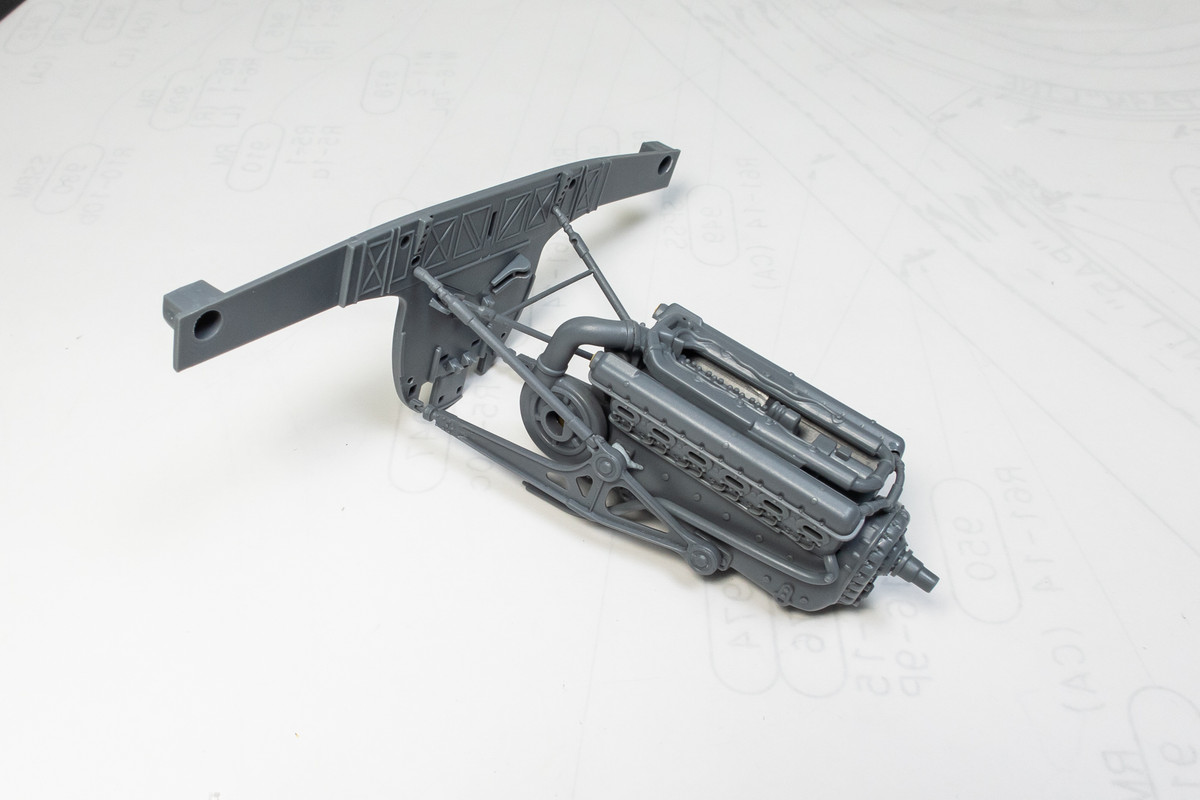 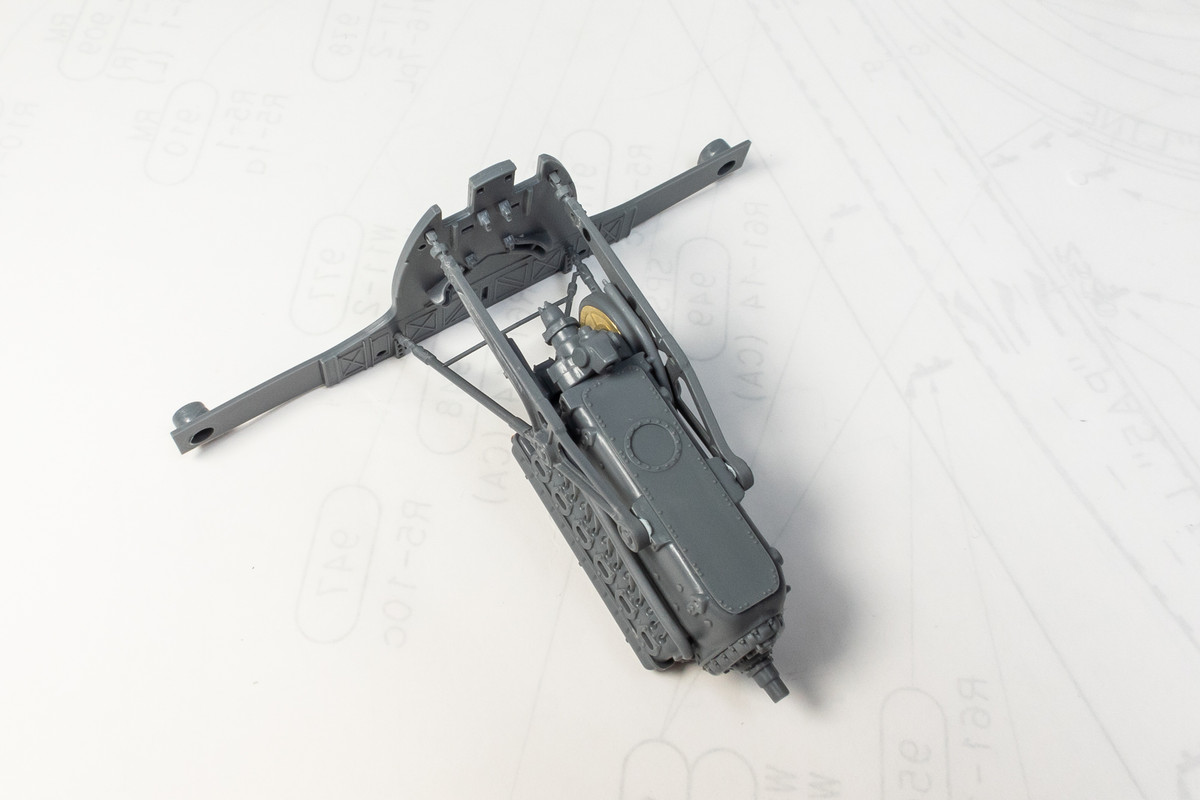 I've added some ribbing onto the visible area wing root interior just to break up that big plain space. 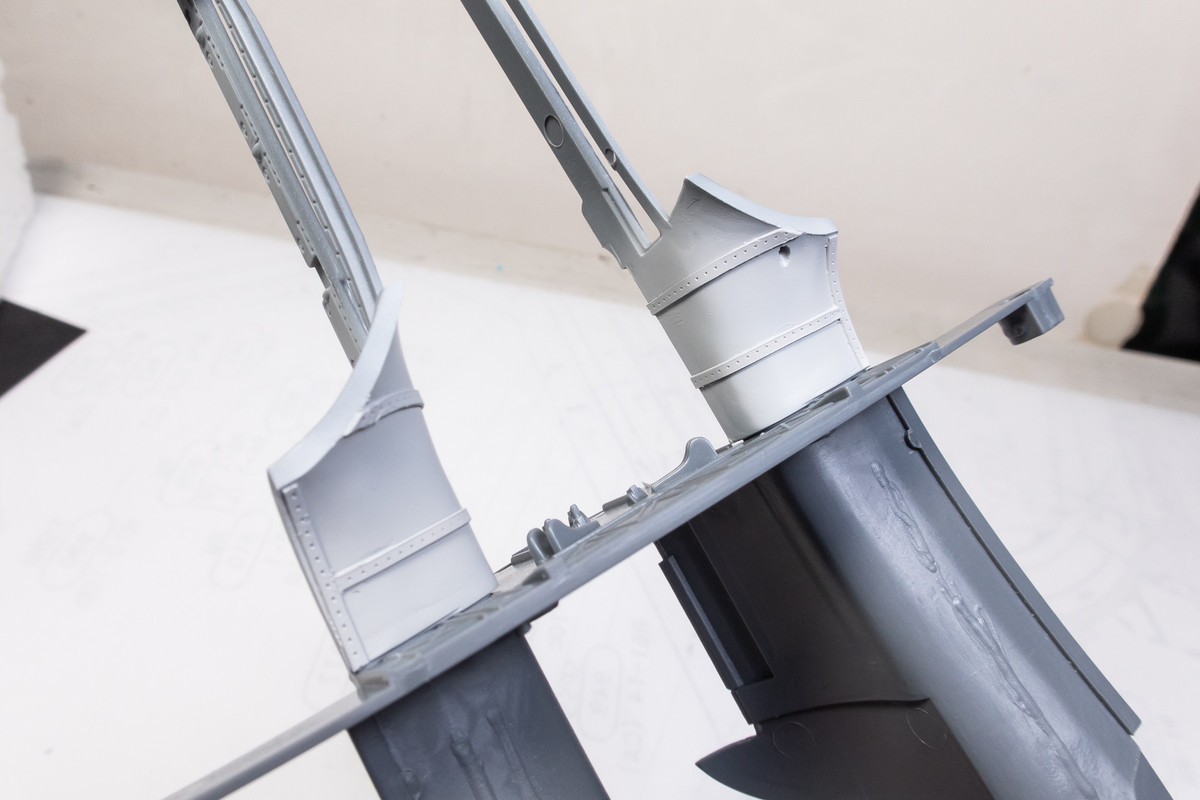 Back to the cockpit for another Cmon Italeri moment. Honking Big ejector marks on the cockpit side panels. They are within constrained spaces so making them a pain to fix. I decided to use punched discs of sheet styrene. 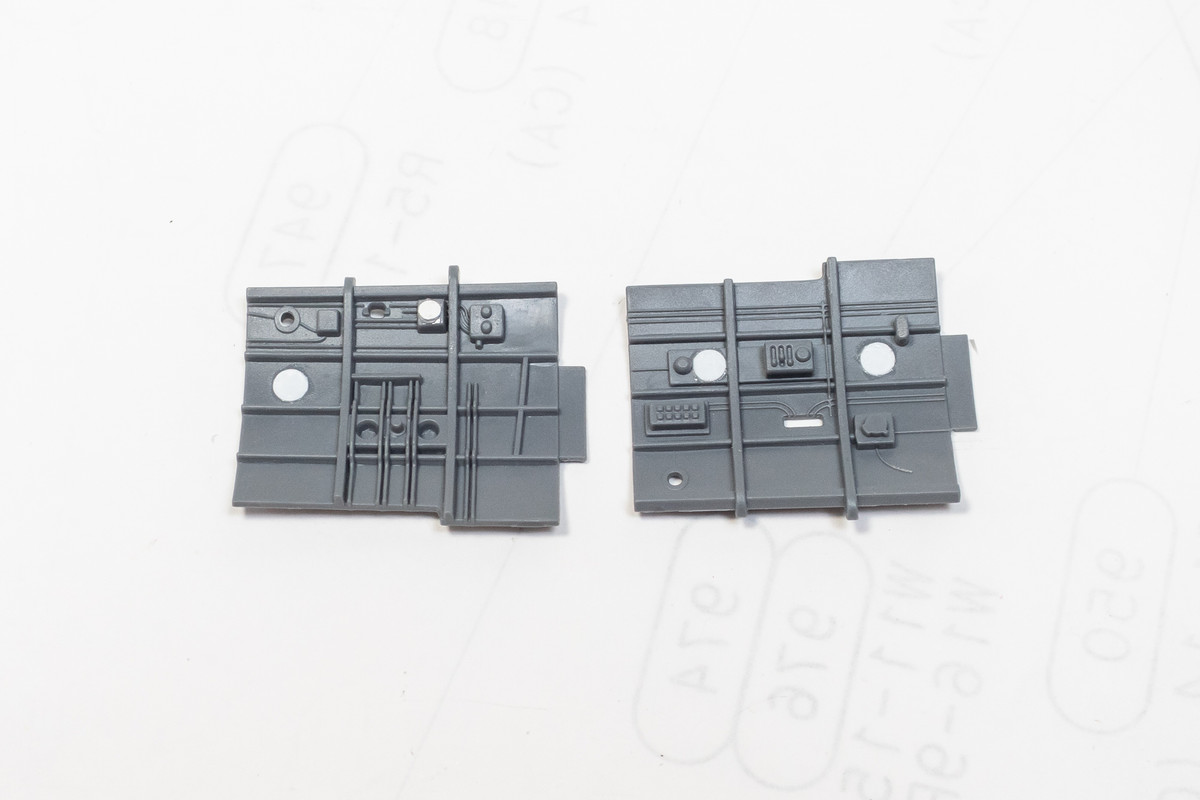 The cockpit lights are not usually included in models so I'm thankful Italeri included these. I've hollowed out the ends with a drill bit to accept a blob of clear UV epoxy after painting to simulate the lens. 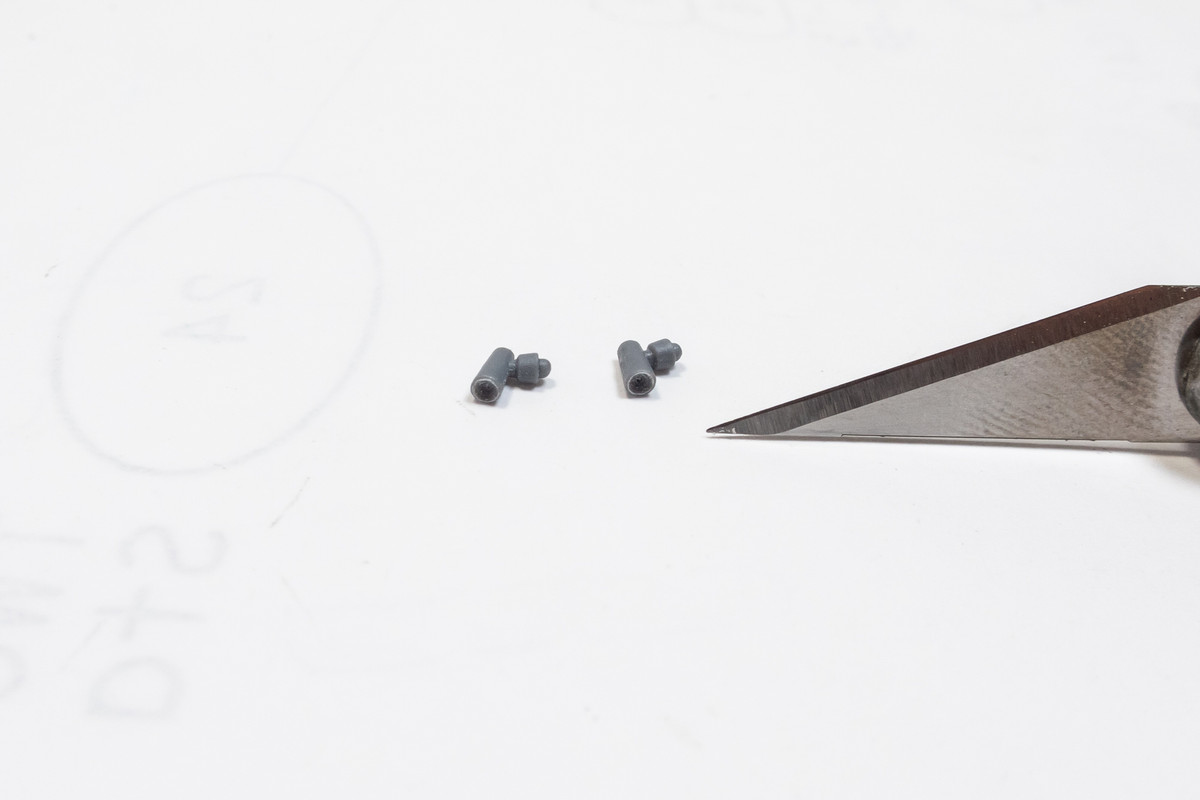 I've painted the kit-supplied back rest which has the shouler harnesses molded in. Compare that with the Eduard part with the foil harnesses. 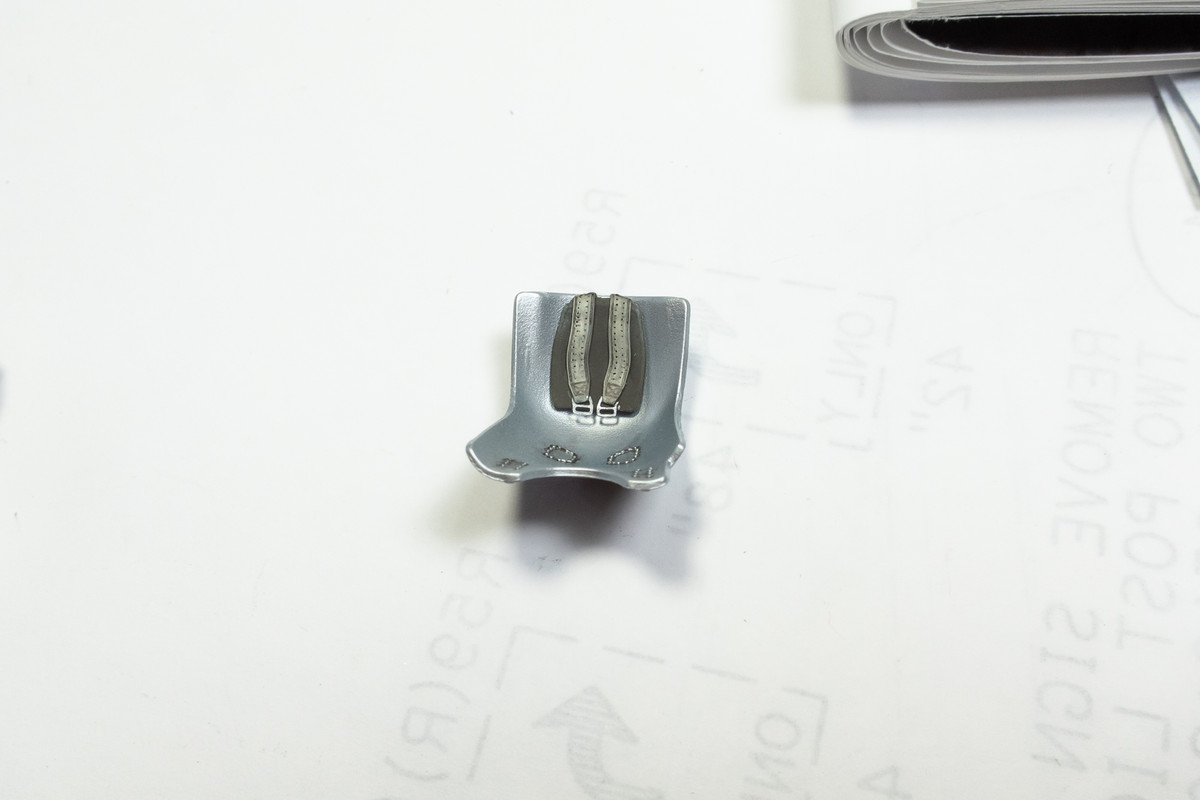 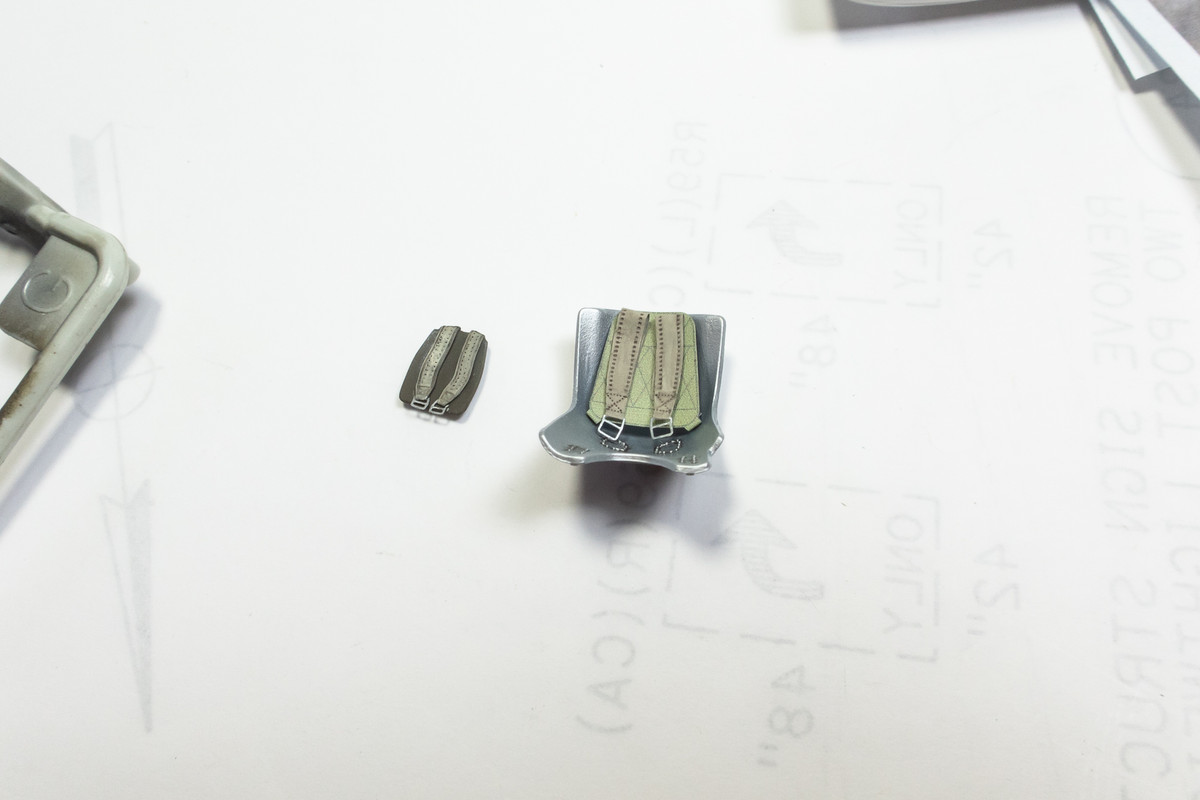 And finally, another look at the instrument panel after I've painted the little scratchbuilt switchbox. 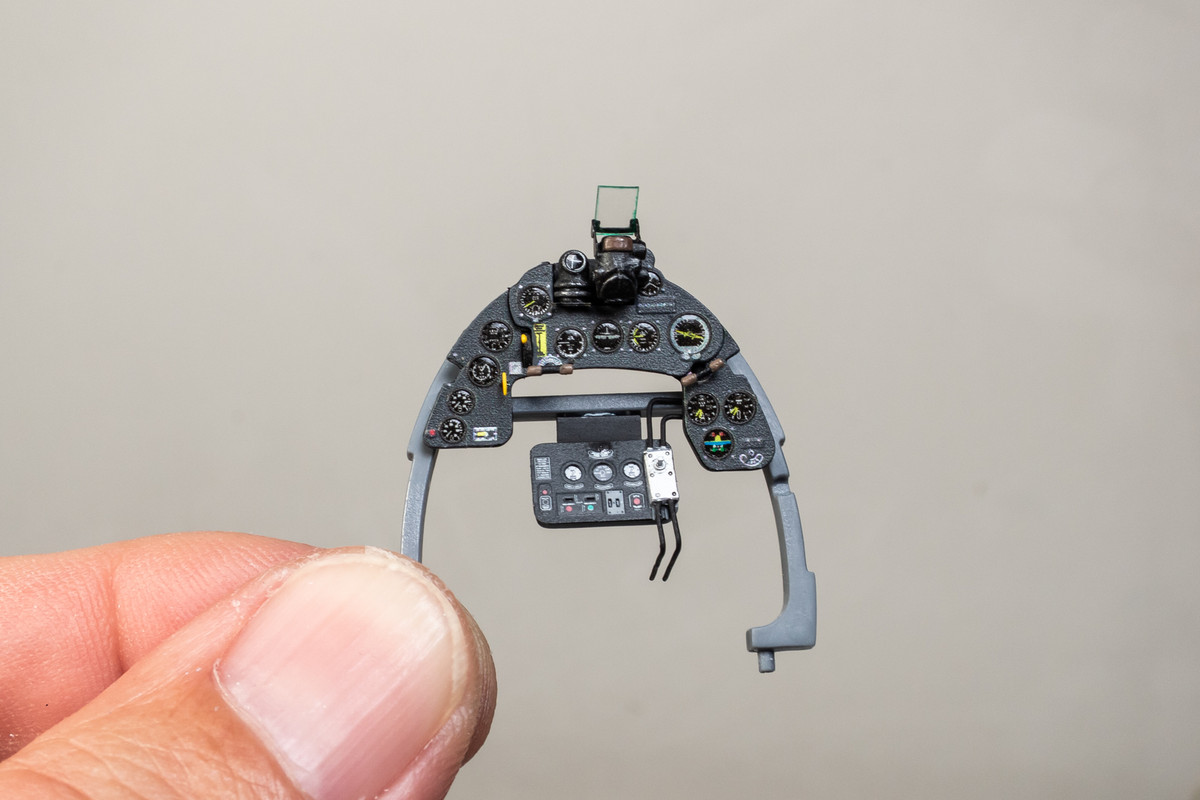 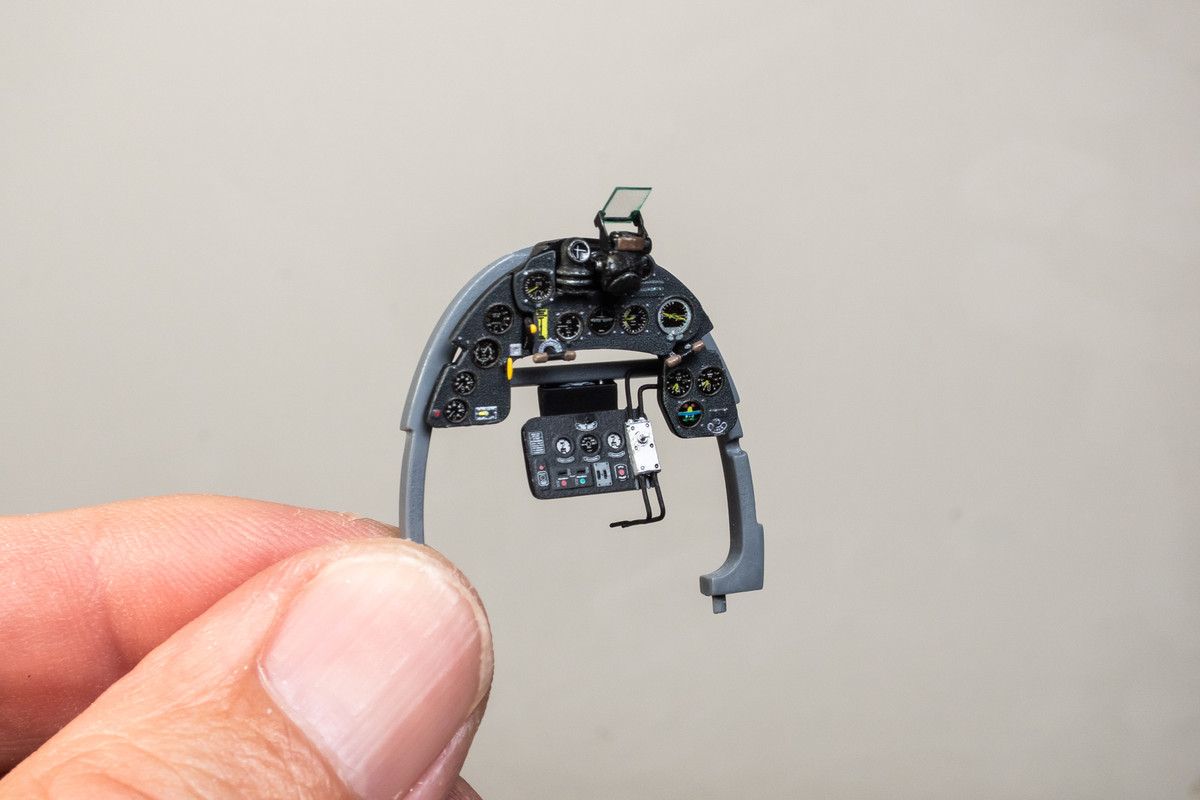 |
|
handiabled
Administrator      Apr '23 Showcased Build Awarded
Member since: February 2023
Posts: 4,458 
MSC Staff
|
Post by handiabled on Sept 15, 2024 3:48:42 GMT -5
Almost unbelievable the side panels had pin marks like that. Some more great looking scratch work you've done!
|
|
|
|
Post by kyledehart5 on Sept 15, 2024 5:06:39 GMT -5
Incredible nice work. And you’re doing a magnificent job surmounting Italeris best attempts at sabotage.
|
|
jkim
Full Member
  
Member since: October 2023
Posts: 116
Oct 19, 2023 12:36:27 GMT -5
Oct 19, 2023 12:36:27 GMT -5
|
Post by jkim on Sept 16, 2024 0:54:18 GMT -5
|
|
handiabled
Administrator      Apr '23 Showcased Build Awarded
Member since: February 2023
Posts: 4,458 
MSC Staff
|
Post by handiabled on Sept 16, 2024 4:01:53 GMT -5
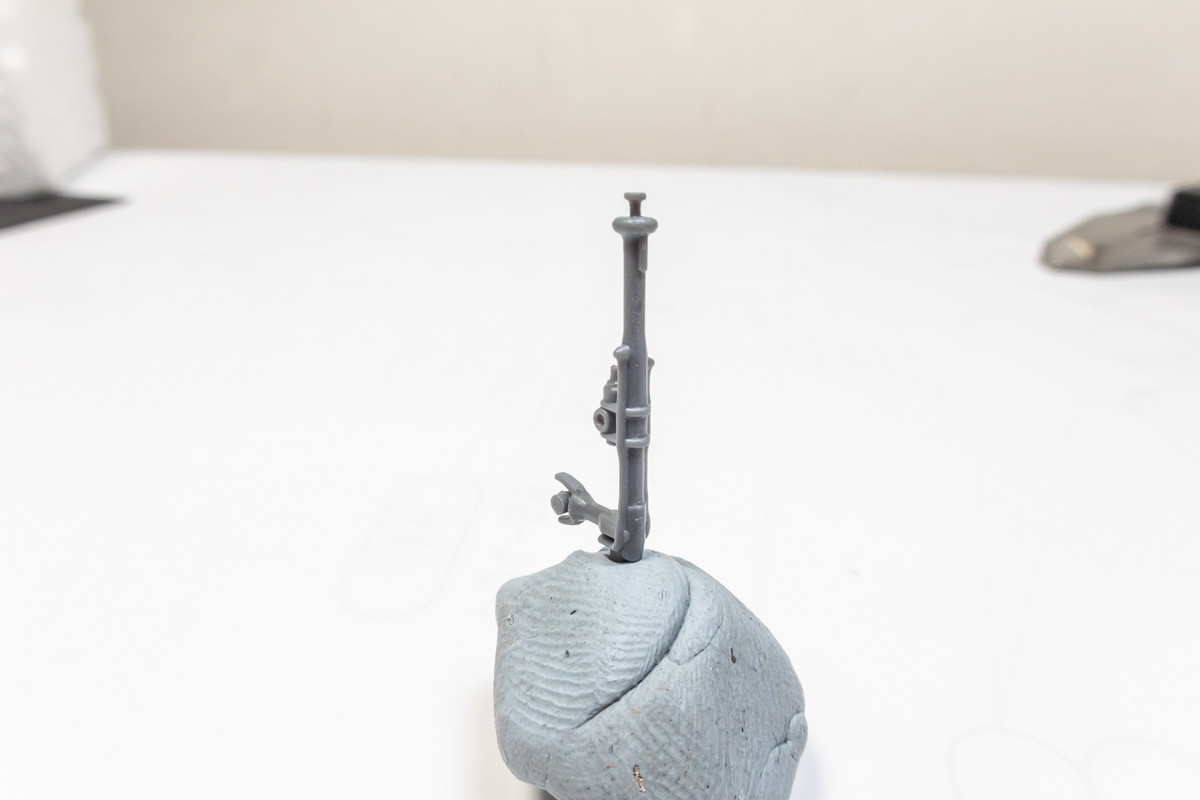
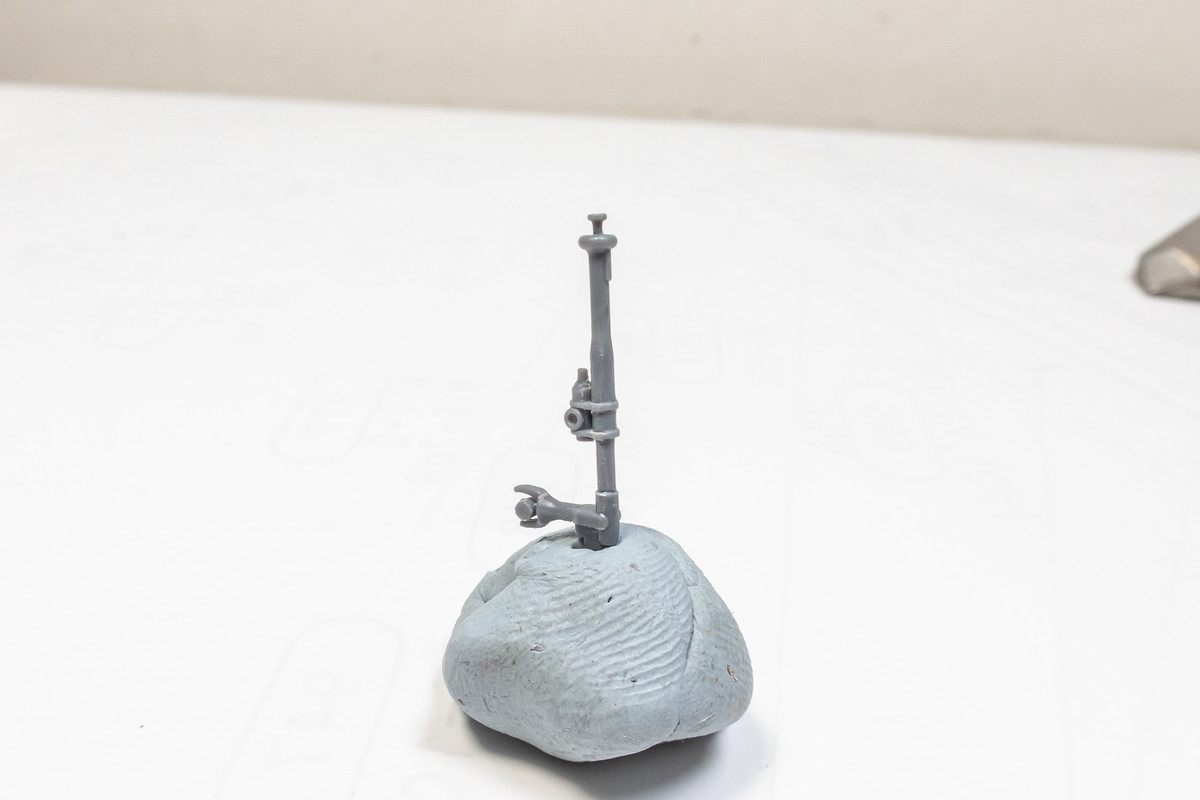
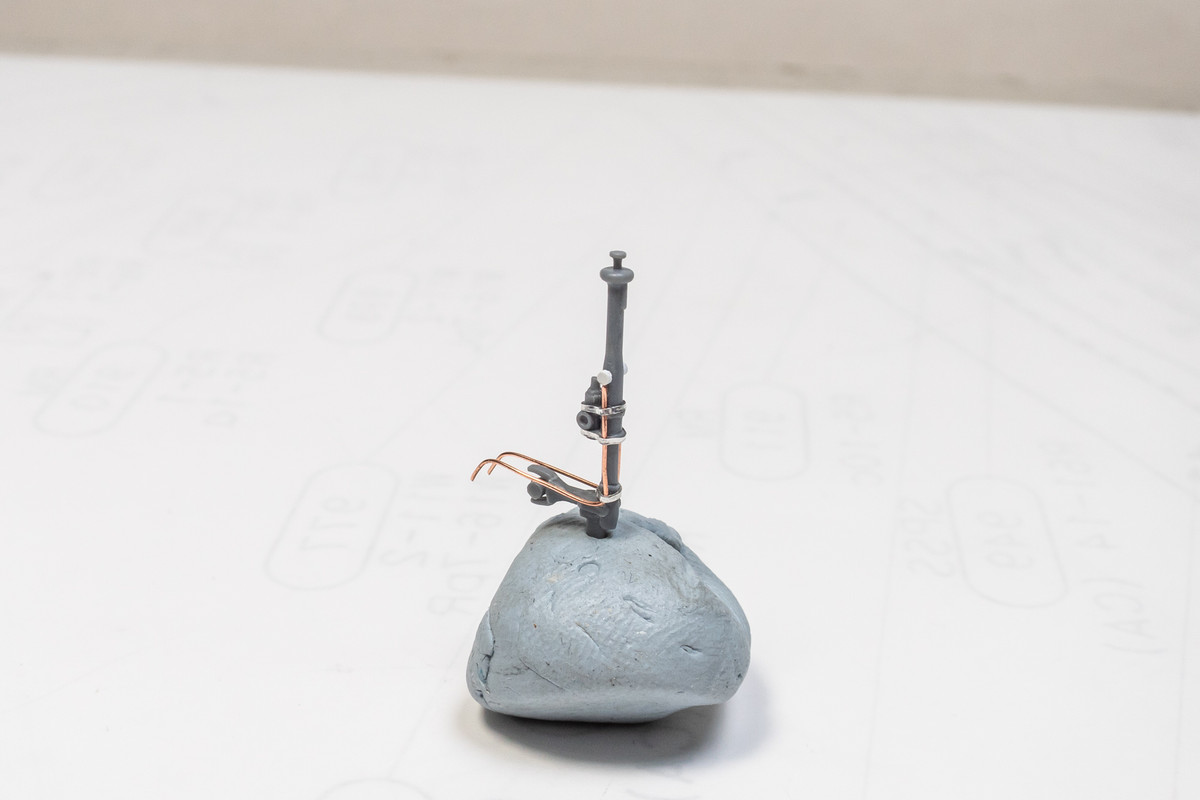
One you get the plumbing squared away it's going to show fantastic through the wheel bays. Really nice surgery on the control stick!
|
|
|
|
Post by kyledehart5 on Sept 16, 2024 4:14:55 GMT -5
Oh my again. More exceptional work. I particularly like your control stick upgrade. So nice!!
|
|
|
|
Post by deafpanzer on Sept 16, 2024 7:27:56 GMT -5
Impressive work!!!
|
|


