jkim
Full Member
  
Member since: October 2023
Posts: 116
Oct 19, 2023 12:36:27 GMT -5
Oct 19, 2023 12:36:27 GMT -5
|
Post by jkim on Sept 17, 2024 18:20:19 GMT -5
Thanks guys! I'm still waiting for the solder wire to arrive so just doing little odds and ends. Here is the Aircraft in Pixels replacement for the horizontal stabs.  In addition to the more realistically subtle fabric and sag effects, the AiP stabilizers have the correct number of stringers. Eight not seven. Very lazy of you, Italeri!  The control surfaces are glued into place in the neutral position with CA glue. For the upper side, I've cut the kit PE parts in half and mounted them on the movable part only. This is per the suggestion of a very helpful modeler's guide to the Italeri MC.202 kit by Maurizio di Terlizzi.  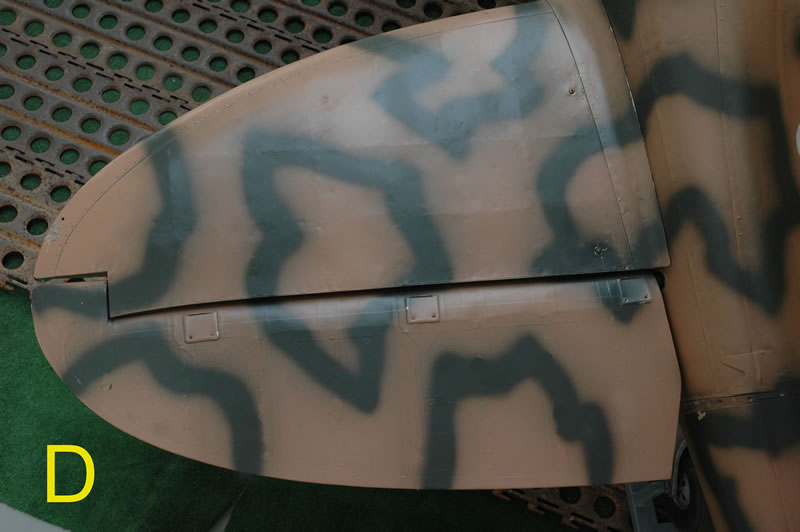 The undersides received some very small PE parts at the hinges courtesy of the kit PE fret.  This is the AiP vertical tail surface. Again, another lazy error by Italeri by only putting six stringers, not the correct eight. 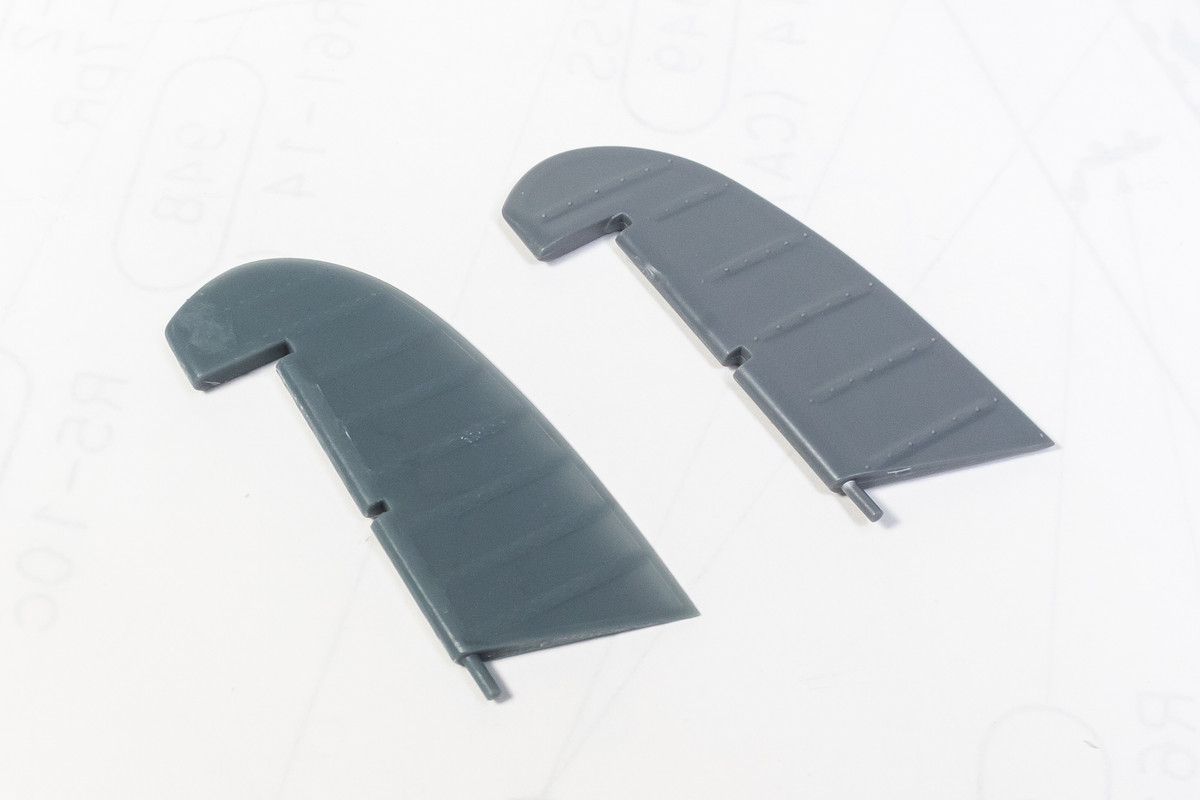 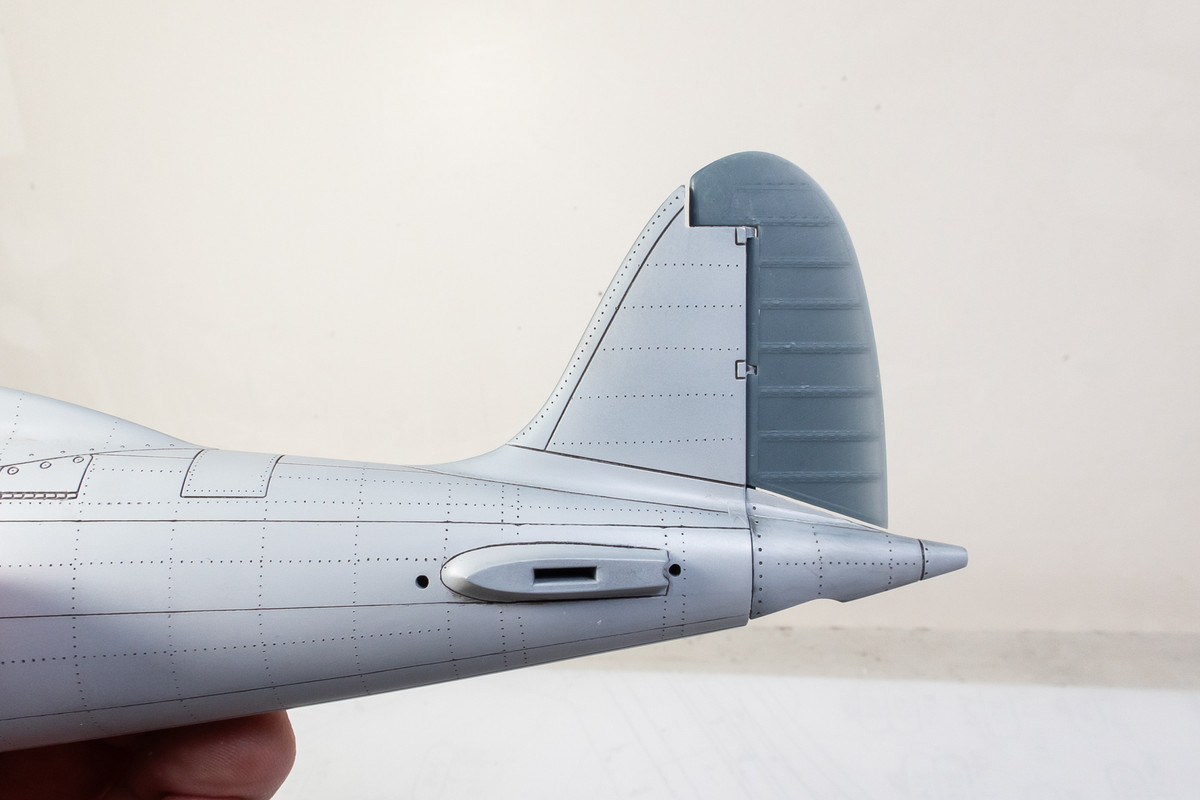 I took a look at AiP's Detail Set #2 next. The AiP stuff is incredibly well rendered but they come with absolutely ZERO instructions. On some parts like the control surfaces, it's no big deal but on these engine parts, some sort of instructions would be helpful. As it is, you have to play detective, looking at the photos on the AiP website as well as photos of the real Folgore engine.  I'm much more comfortable removing 3D-printed parts from their support trees. Typically, it is best to work from the outside towards the middle, cutting the thin attachment point with the FLAT side of cutters and then cutting at the base of the tree to remove the support completely and get it out of the way. 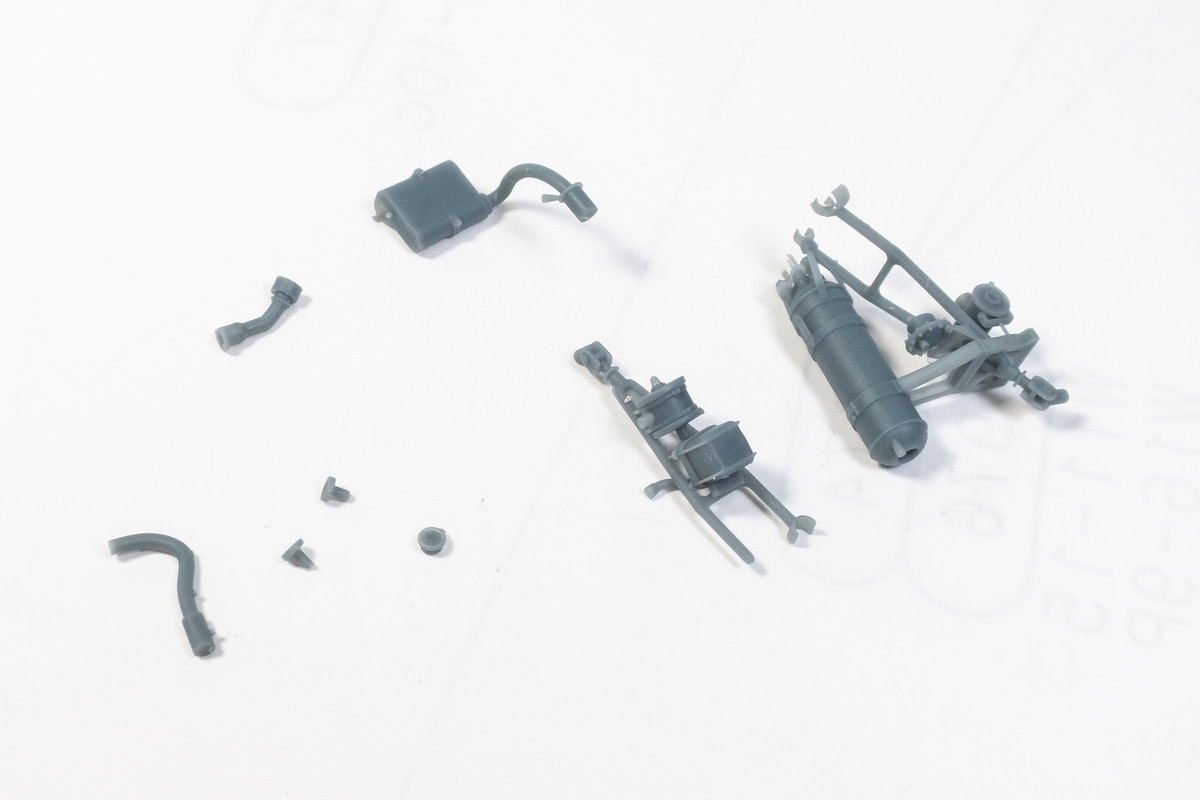 The two bigger AiP parts are mounted on the firewall. These are definitely visible from the wheel wells so I consider them a good upgrade.  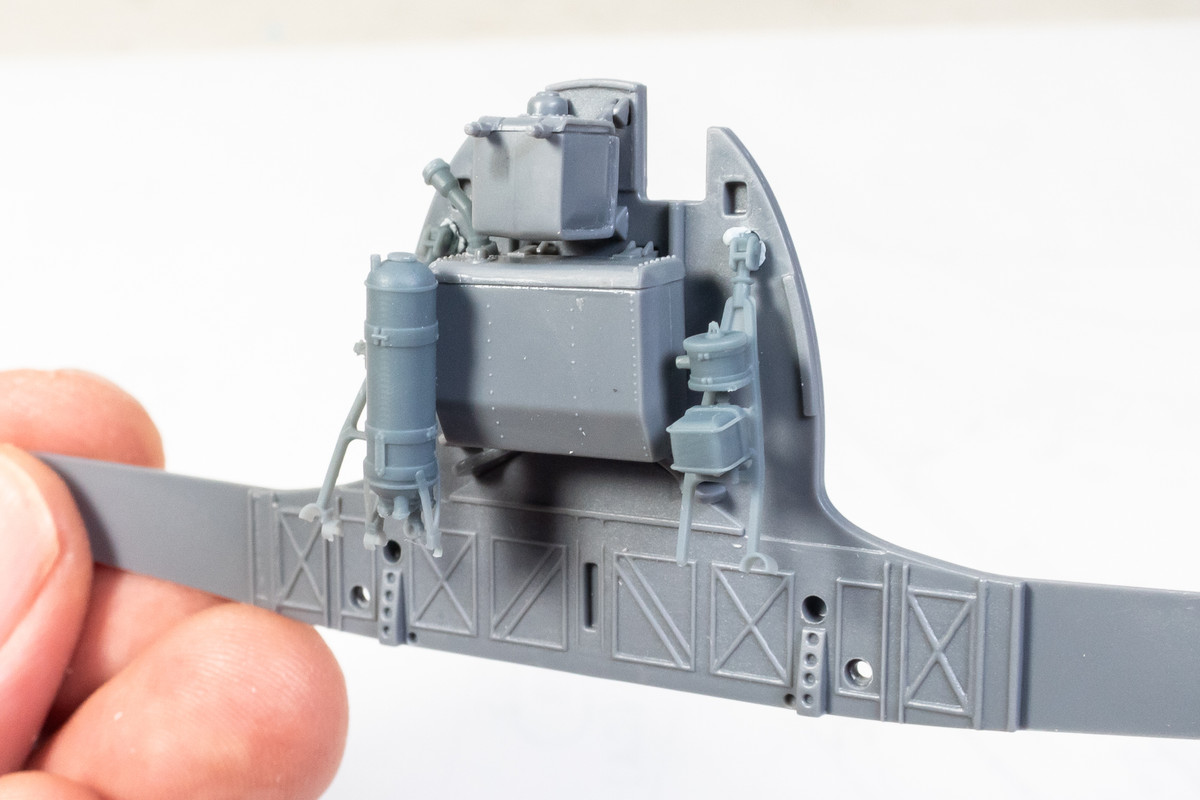 The third major part is the vapor oil tank and is mounted on the upper right side of the engine. This one will probably not be visible from the wheel well but I'll add it anyway.  Finally, I decided to replace the balls of the canopy release levers with slightly smaller balls to be more in-scale. These came from the filter elements of a Brita water filter.   |
|
handiabled
Administrator      Apr '23 Showcased Build Awarded
Member since: February 2023
Posts: 4,458 
MSC Staff
|
Post by handiabled on Sept 18, 2024 3:22:44 GMT -5
The bulkhead detail looks awesome! No doubt the view from the undercarriage will be fantastic! I like your substitution of the canopy release handles.
|
|
|
|
Post by kyledehart5 on Sept 18, 2024 4:52:50 GMT -5
The remarkable work continues!! I agree. That bulkhead is top notch!!
|
|
|
|
Post by 406 Silverado on Sept 18, 2024 5:05:51 GMT -5
It's really too bad that this kit sells for as much as it does and has these kinds of inaccuracies that you're talking about with the stringers. You're putting some good time and effort not only into the build but of the necessary research and "homework" to pull off as accurate of a build as possible. Your attention to detail is inspiring to say the least. One of these days, you're going to have to build two of an aircraft.....one all buttoned up like you are doing here and the other one all opened up and display them side by side. I, for one, would LOVE to see that.
Good progress on this John.
|
|
jkim
Full Member
  
Member since: October 2023
Posts: 116
Oct 19, 2023 12:36:27 GMT -5
Oct 19, 2023 12:36:27 GMT -5
|
Post by jkim on Sept 18, 2024 12:44:11 GMT -5
Thanks guys! Every once in a while, I'll violate my buttoned-up policy... 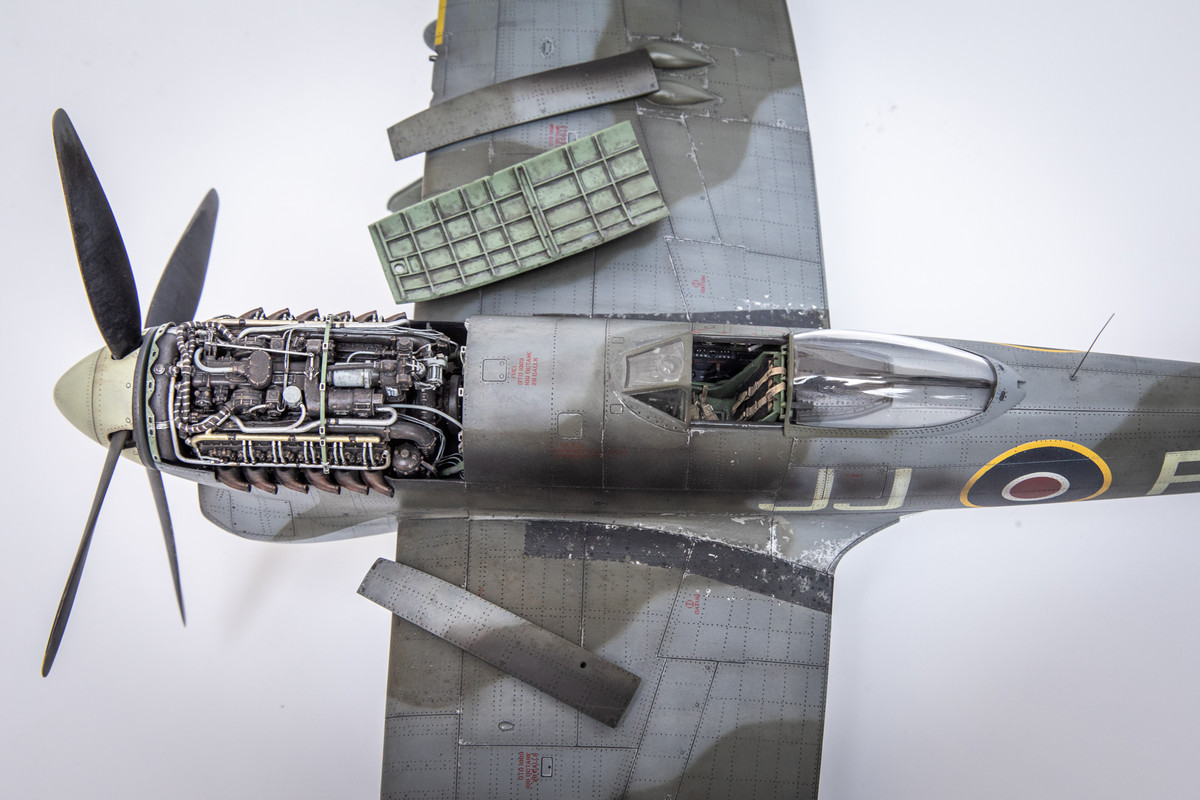 |
|
jkim
Full Member
  
Member since: October 2023
Posts: 116
Oct 19, 2023 12:36:27 GMT -5
Oct 19, 2023 12:36:27 GMT -5
|
Post by jkim on Sept 20, 2024 15:32:59 GMT -5
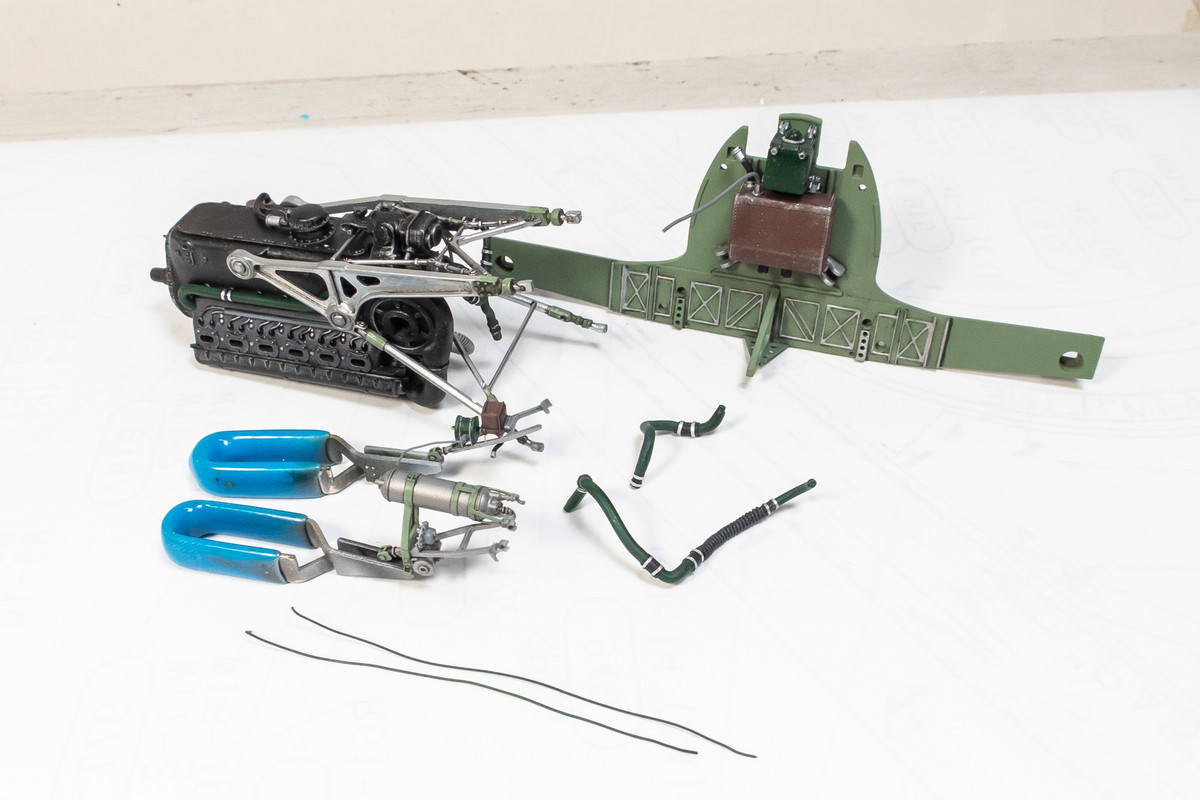
Hey guys! I have to admit that I've been spinning my wheels a bit on this build. This happens to me when I hit a mental roadblock. It's difficult for me to move forward in the presence of what I perceive to be too many variables and this feels like the case with the engine. Lots of unpainted loose parts and the dry-fitting process, via multiple skinny braces and tubes, is very shaky. I've managed to swap out the lead wire runs with thicker sections of solder wire and I think I have established, more or less, the kit-supplied engine plumbing.  The parts are being kept separate to make painting easier.  I think more needs to be added to the area visible from the wheel wells. The kit provides a few of the major tubular connections but the real area is much more complicated. So my aim is to be at least more visually plausible if not 100% complete. To that end, I am taking a look at my references to give me an idea of possible things to add.  I wanted to see how the exhausts fit so I took a look at the kit exhausts first. Which are not too shabby but visibly marred by the big sink mark depressions. C'mon Italeri!  The AiP exhausts are next level. But they look very fragile. For the price, AiP should include a few spares like Mathieu at Laminar Flow Designs does. Obviously, I want to use these so I'll have be very careful and maybe add them before the engine gets positioned into the fuselage.  Since I was already fishing things out of the AiP box, I thought I'd examine the landing gear legs. The kit legs are designed to plug into the firewall part very early in the build, which would be awkward. And note the keyed hole and peg for the wheel. This key ensures that the flat spot is in the right position when the model is up on its own legs.  The AiP legs are multi-part and hollow so that you can run a reinforcing metal rod through the legs for rigidity.  A comparison between the kit legs and AiP replacements. In addition to the increased detail, the AiP gives you the option of adding the gear legs later since the part that attaches to the wheel well is separate.  But looking at the AiP wheels, a problem arises. The holes in the hubs are keyed! Which makes no sense to me when the hubs are separate from the flattened tire. The key and flat portion of the tire need to be on the same part (like the kit wheels) for the pre-determined alignment to work. Having TWO hubs per wheel make it that much harder for everything to line up. The fit between the hubs and tire is super tight so rotation is impossible when the hubs are in place.  The final criticism of this setup by AiP is the idea of slipping the tire/wheel onto the landing gear and snapping onto the raised keyed pegs. Due to the repeated adjustments that would be necessary to get the flat spots correctly aligned, it's guaranteed that the paint is gonna get scratched off.  So I cut off the raised pegs and drilled out holes in the landing gear to accept brass tube axles. Resin is much more brittle than plastic and I paid the price by breaking parts off both legs. It took a few iterations of gluing the parts back on, drilling a little more, reattaching the broken part, drilling again, etc but I got it done.  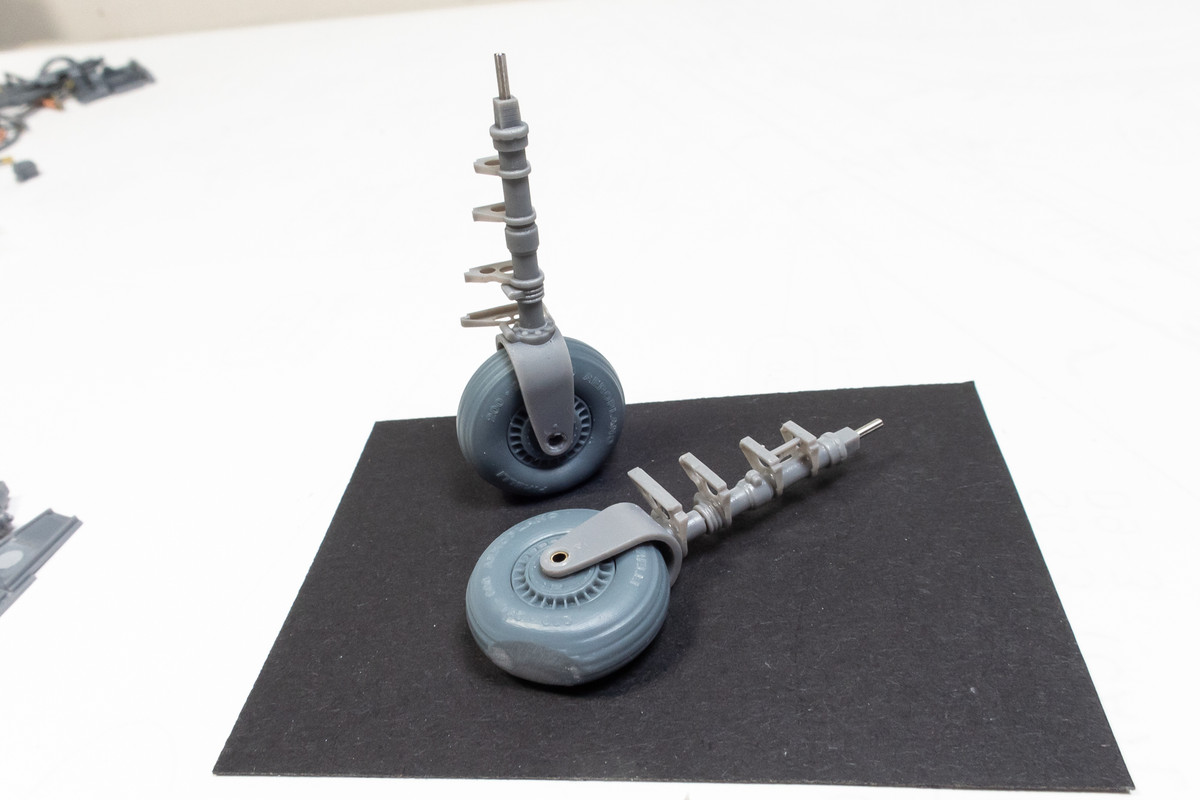 |
|
|
|
Post by kyledehart5 on Sept 20, 2024 16:21:18 GMT -5
Oh wow!! You’ve really had to put some work in!! Great job getting that landing gear worked out. I love the engine detail already. And those aftermarket exhausts do look really nice also.
|
|
spook
Full Member
  
Member since: June 2024
Posts: 189 
|
Post by spook on Sept 20, 2024 19:39:42 GMT -5
Forward progress is looking really good !
|
|
|
|
Post by keavdog on Sept 20, 2024 21:51:52 GMT -5
Great progress John. BTW - who is AiP? Looks like nice stuff.
|
|
handiabled
Administrator      Apr '23 Showcased Build Awarded
Member since: February 2023
Posts: 4,458 
MSC Staff
|
Post by handiabled on Sept 21, 2024 2:37:06 GMT -5
You covered a lot with this update John. I like your approach with adding detail to viewable areas and use the same process of adding the most obvious missing items vs everything that had been omitted. The aftermarket exhaust looks so much better than the Italeri! Your mods to the gear issues should make them very stout and easier to work with.
|
|
TJ
Senior Member
    June '23 Showcased Model Awarded
Member since: May 2023
Posts: 2,182
May 14, 2023 18:18:36 GMT -5
May 14, 2023 18:18:36 GMT -5
|
Post by TJ on Sept 21, 2024 4:13:09 GMT -5
Your typical detail upgrades are making this stand out. The plumbing and wiring are looking fantastic
|
|
|
|
Post by 406 Silverado on Sept 21, 2024 7:08:09 GMT -5
Talk about fine attention to the details on the landing gear!!  I really like what you're doing with this part of the build John. Landing gear is something that in the past I didn't pay as much attention to as the rest of the build but after seeing you build over the years I've started upping my game in that area of my builds. This is coming along very well indeed.  |
|
jkim
Full Member
  
Member since: October 2023
Posts: 116
Oct 19, 2023 12:36:27 GMT -5
Oct 19, 2023 12:36:27 GMT -5
|
Post by jkim on Sept 28, 2024 0:30:18 GMT -5
|
|
handiabled
Administrator      Apr '23 Showcased Build Awarded
Member since: February 2023
Posts: 4,458 
MSC Staff
|
Post by handiabled on Sept 28, 2024 3:02:28 GMT -5
Wonderfully painted detail work John!
|
|
|
|
Post by keavdog on Sept 28, 2024 10:13:12 GMT -5
Very nice John. Too bad it won't be seen once you button her up.
|
|
|
|
Post by keavdog on Sept 28, 2024 10:30:51 GMT -5
|
|
jkim
Full Member
  
Member since: October 2023
Posts: 116
Oct 19, 2023 12:36:27 GMT -5
Oct 19, 2023 12:36:27 GMT -5
|
Post by jkim on Sept 28, 2024 13:07:29 GMT -5
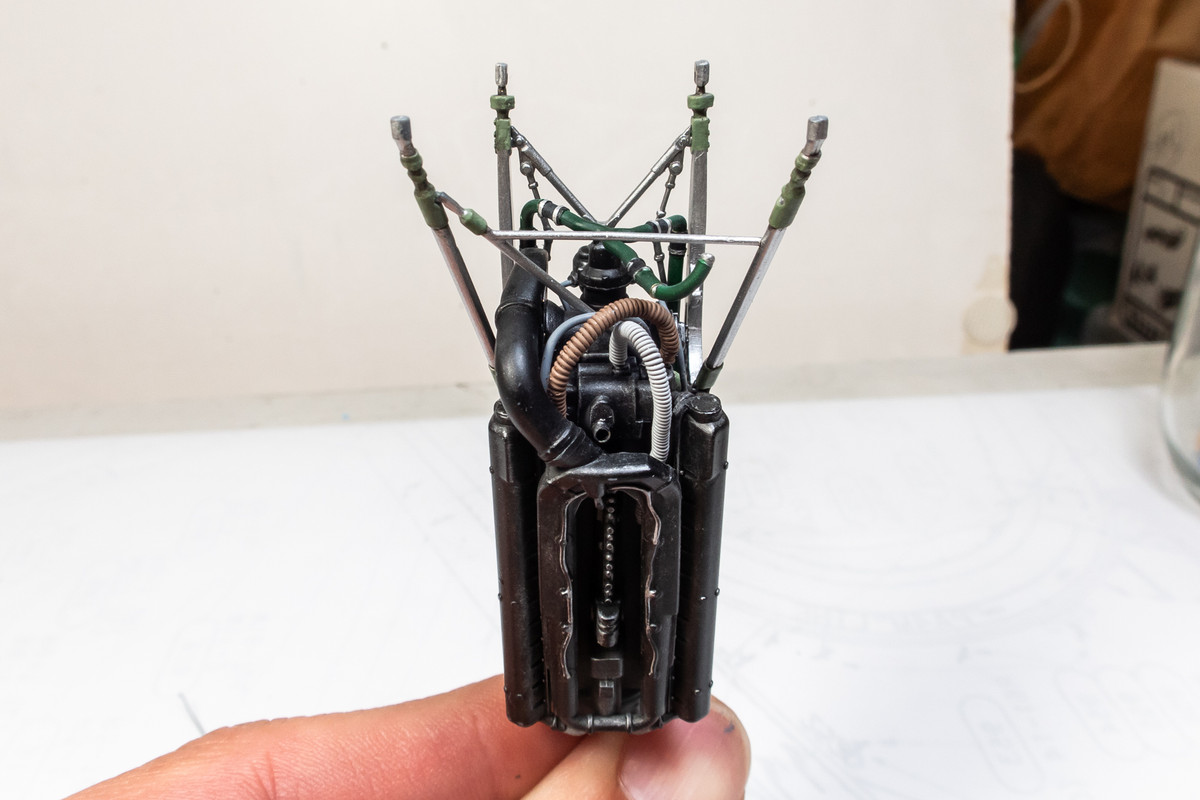
Wonderfully painted detail work John! Thank you! I was quite busy with other things this week and the time away from the bench led me to more thinking than doing and sometimes that's a good thing. Very nice John. Too bad it won't be seen once you button her up. Yeah but I'm ok with it. I just never liked the look of models with open panels... personal preference. And I have good quality photos of the build to document what's under the hood. The Veltro is coming but I'm not sure I'm going to pick one up. I needed to get at least ONE of Castoldi's creations built and this will check that box but I've been underwhelmed by this release by Italeri. Excitement pushed me to jump on the Folgore release but seeing the kit and building it leaves me lukewarm for the Veltro. Honestly, I don't think these Italeri kits are worth the money. One of the modifications that I made to the Folgore kit that I didn't mention was removing the corrugated pipe that was molded onto the triangular spar part and creating a new piece of corrugated pipe by wrapping copper wire around a piece of thicker lead wire. The molded pipe wasn't very convincing and I also get added flexibility in getting the pipe parts connected. 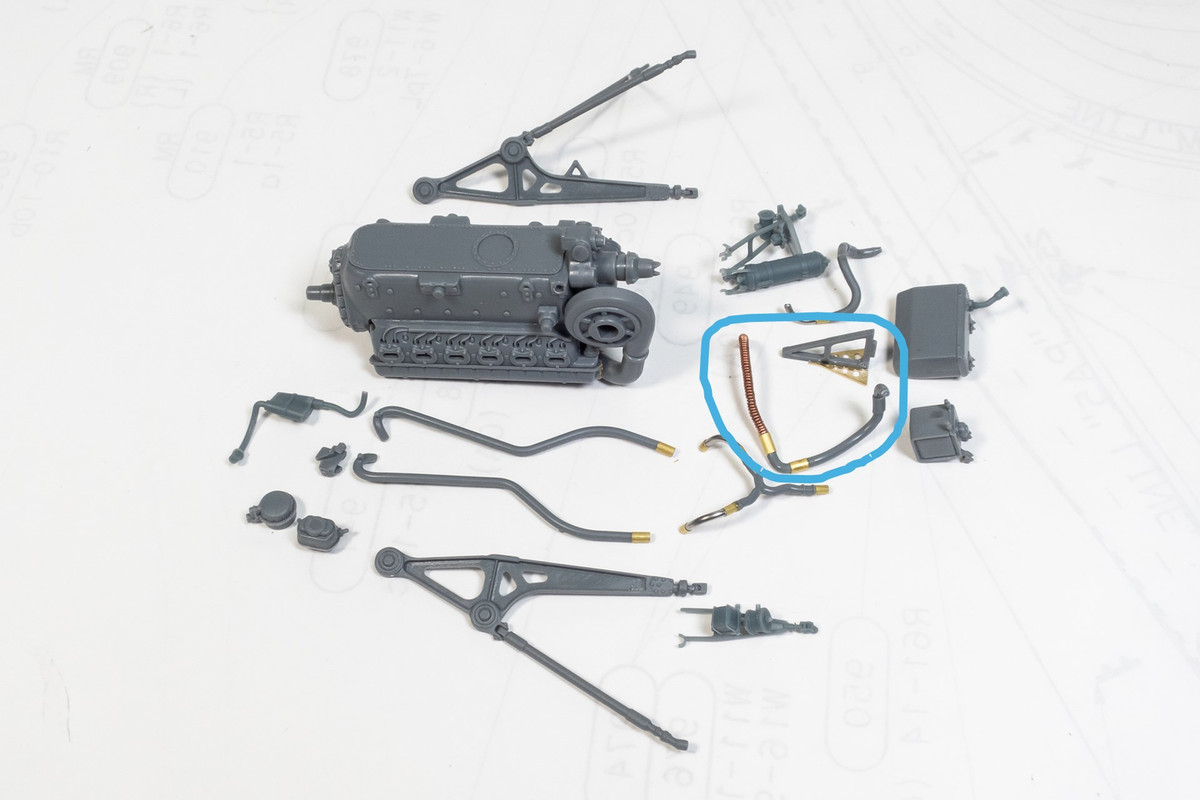 Previously, I drilled two holes in the bottom of the oil tank and added two brass tube sleeves to accept future plumbing. They are now difficult to access but I routed a section of lead wire capped with brass tubing to the hole in the leading edge of the port wing root. I also routed some wires from the AiP cylindrical oil tank. 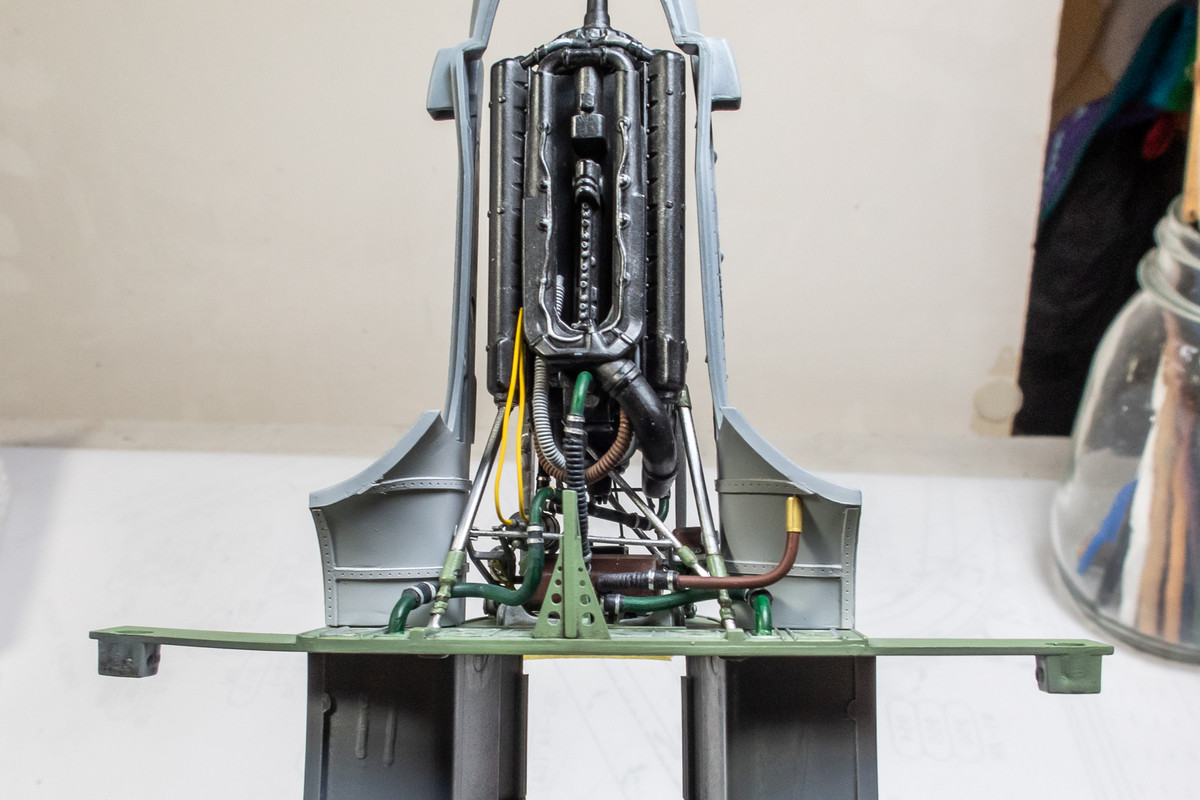 With the wing bottom and fuselage parts in place, we can see the possible view we'll have into the engine compartment. I don't think I've come close to the density and clutter of the real thing but the added stuff is at least filling up what would be empty space. 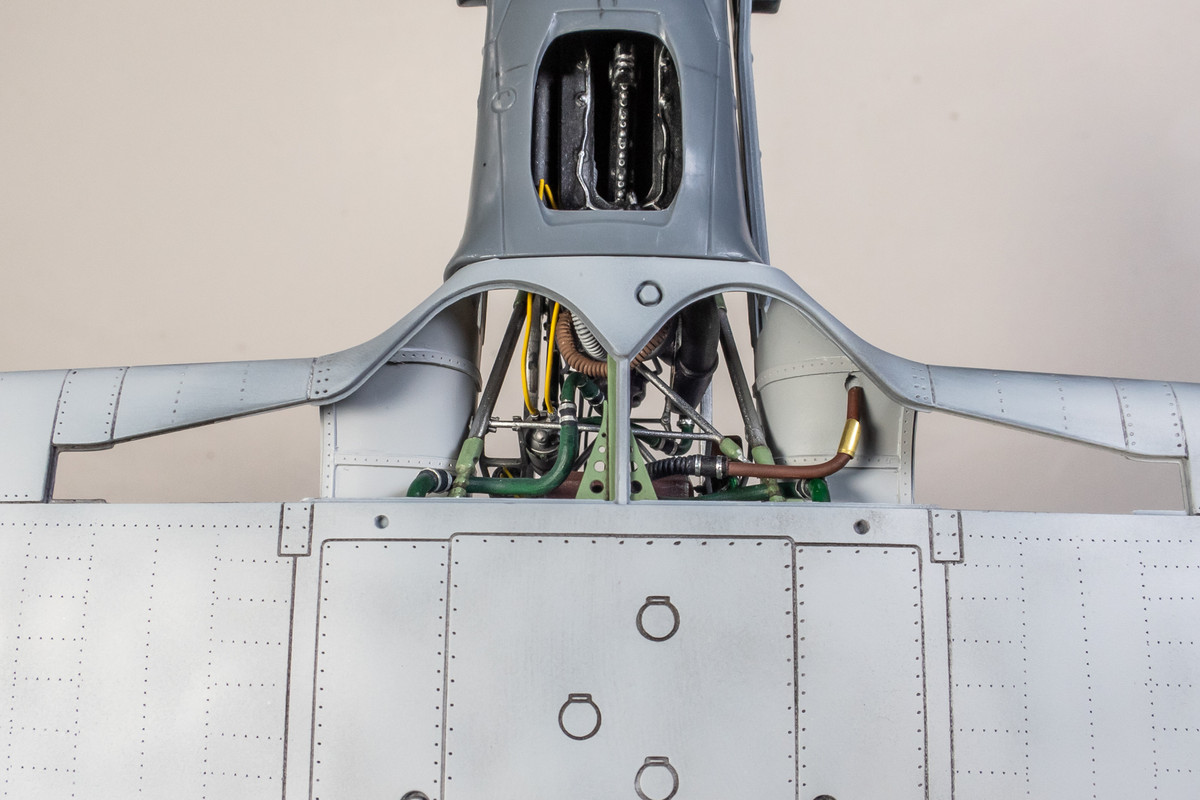 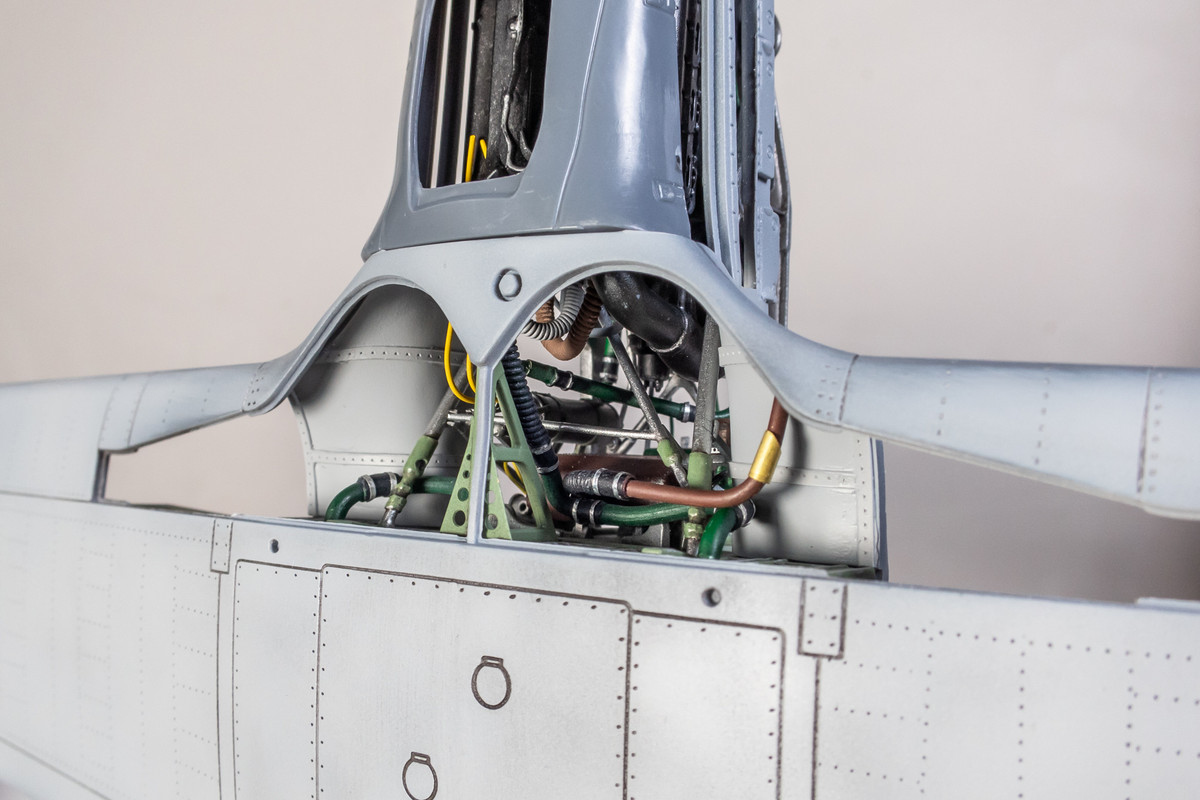 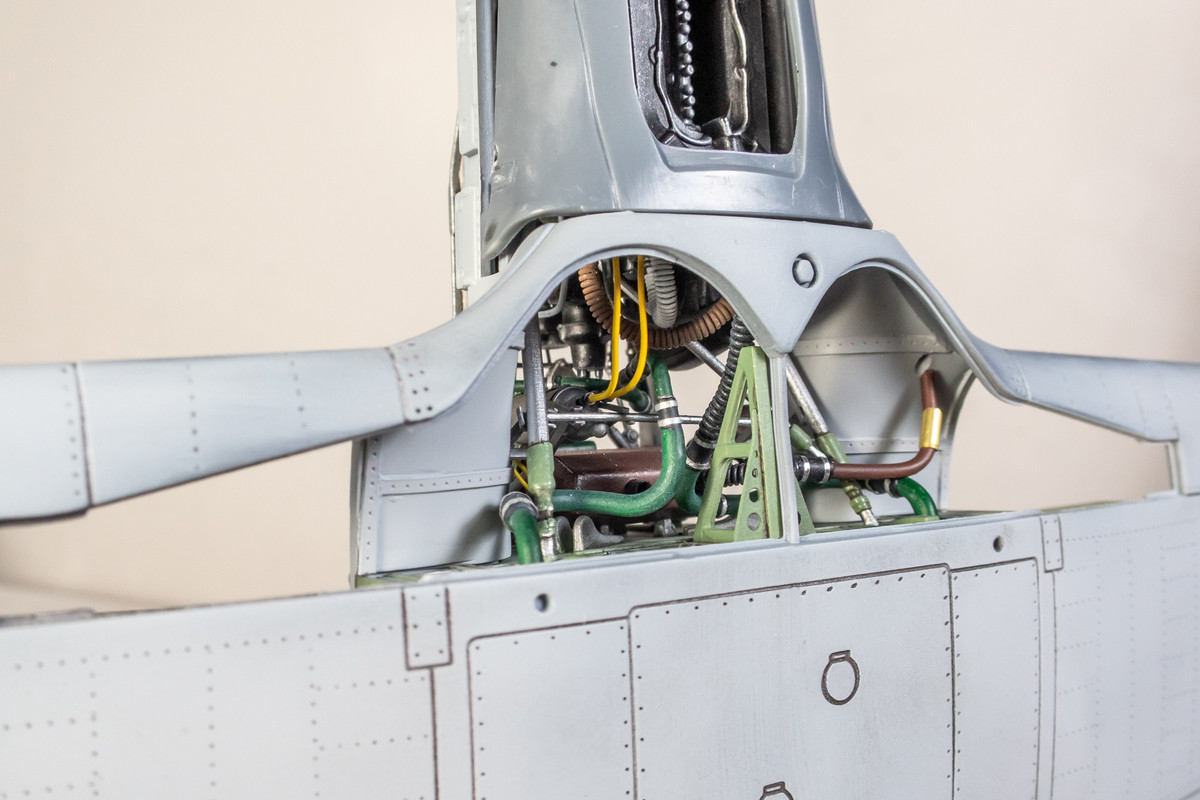 The Breda guns have been painted and temporarily mounted. No other enhancements were made here since you won't be able to see much from the wheel wells. 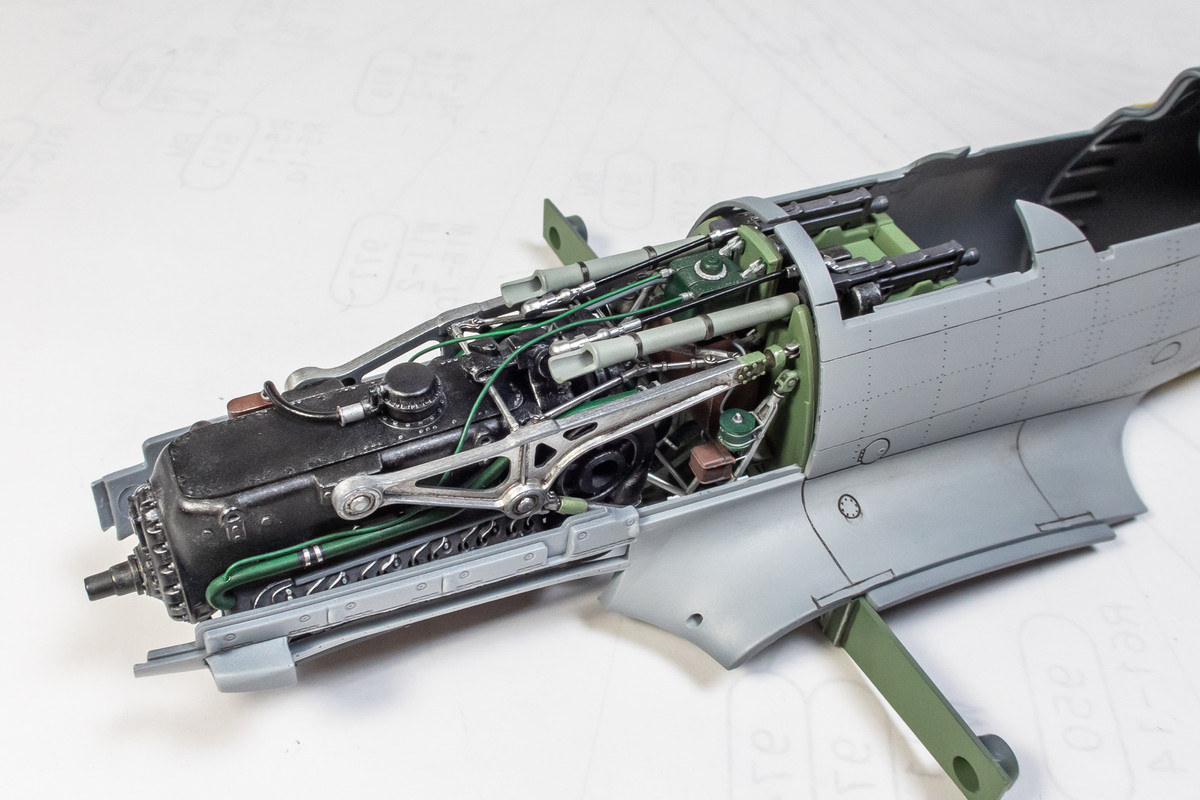 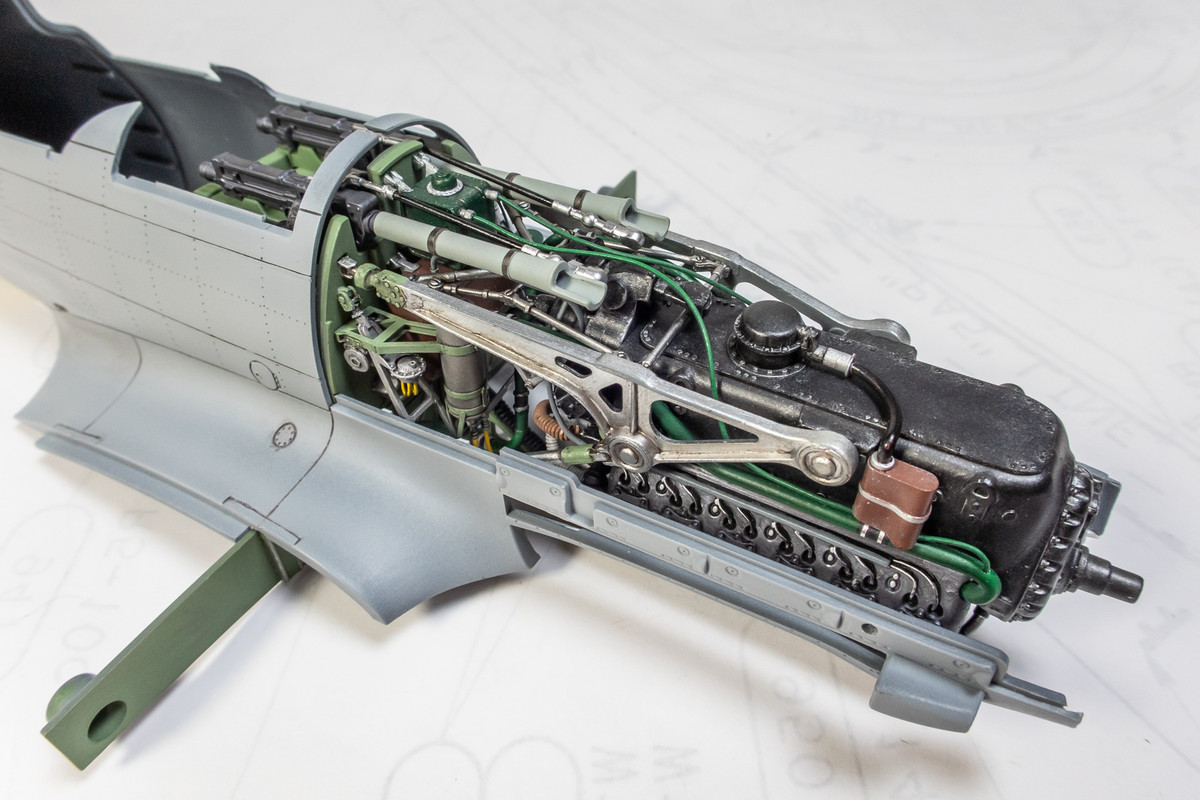 All of this adds to visual clutter, which is one of the goals. 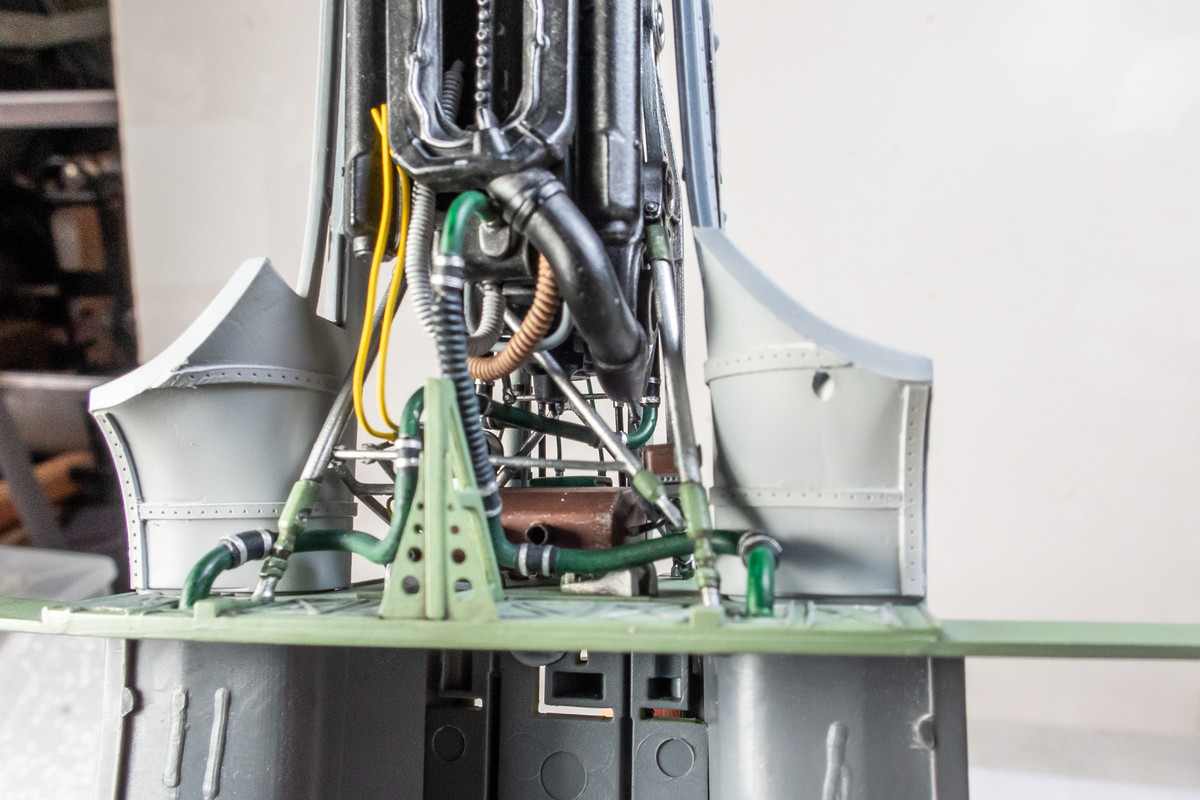 |
|
|
|
Post by 406 Silverado on Sept 28, 2024 15:18:09 GMT -5
This thing is just covered UP in details! Very good show with that engine and it's really too bad that it's all going to be covered up but can totally "get" keeping the lines of this beautiful bird intact with the panels all closed up. BTW......I'm with John ( keavdog ) in wondering if you're going to tackle that Veltro.  Edit: Looks like you posted your answer to that question and quite frankly, I don't blame you. |
|
|
|
Post by kyledehart5 on Sept 28, 2024 20:33:46 GMT -5
Oh my goodness! That is some fantastic paint and details there.
|
|
jkim
Full Member
  
Member since: October 2023
Posts: 116
Oct 19, 2023 12:36:27 GMT -5
Oct 19, 2023 12:36:27 GMT -5
|
Post by jkim on Sept 30, 2024 12:40:46 GMT -5
Now that the engine area is mostly complete, I can move on to other parts of the build. Taking a look at the Aircraft in Pixels replacement for the tropical filter, I was stumped on how to remove the outer filter element from this extremely tight casting block. AiP includes absolutely ZERO documentation or instructions so the modeler is left to figure things out on his own. 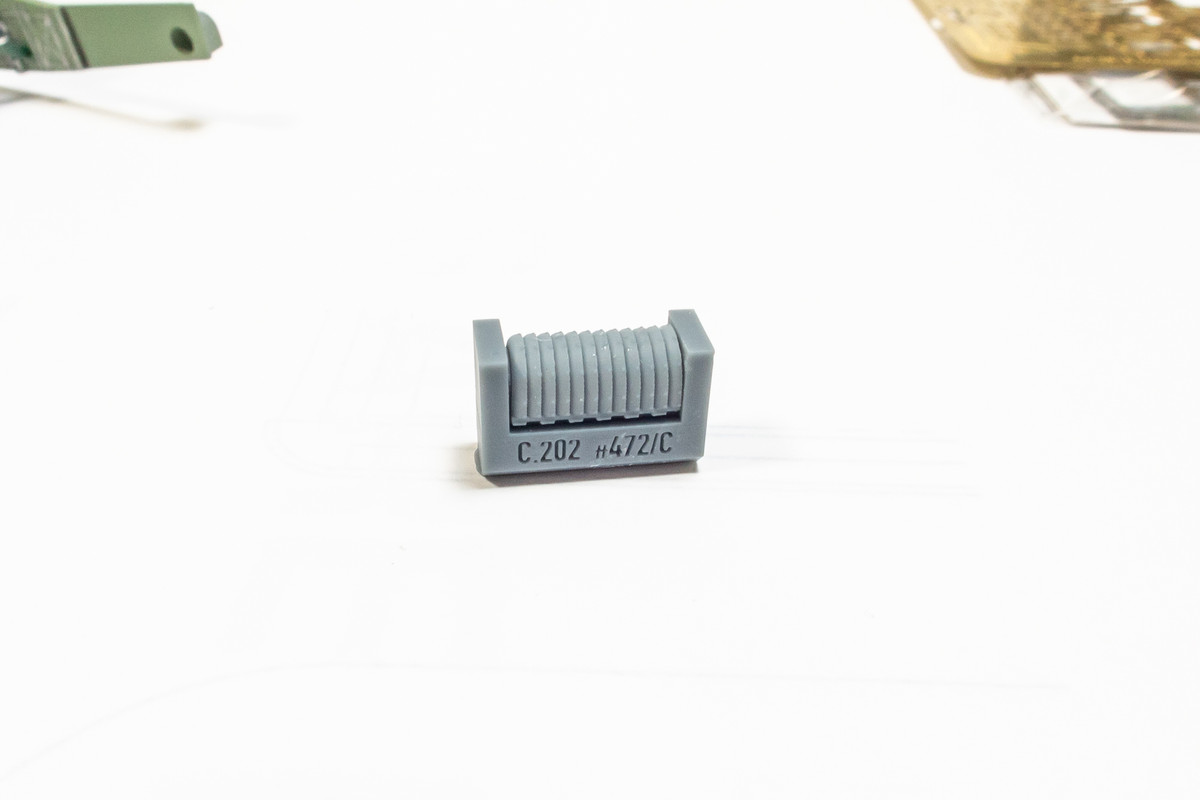 Not wanting to damage the delicate part, I went back to their website and found the answer... "the filter cover now ships clipped from supports on its own protective shoe". Ahhh... it simply slips off. This small set of four parts is not cheap ($21.50 US plus $10 shipping) so I find the lack of instructions especially appalling. The kit filter is no slouch either with three separate parts. 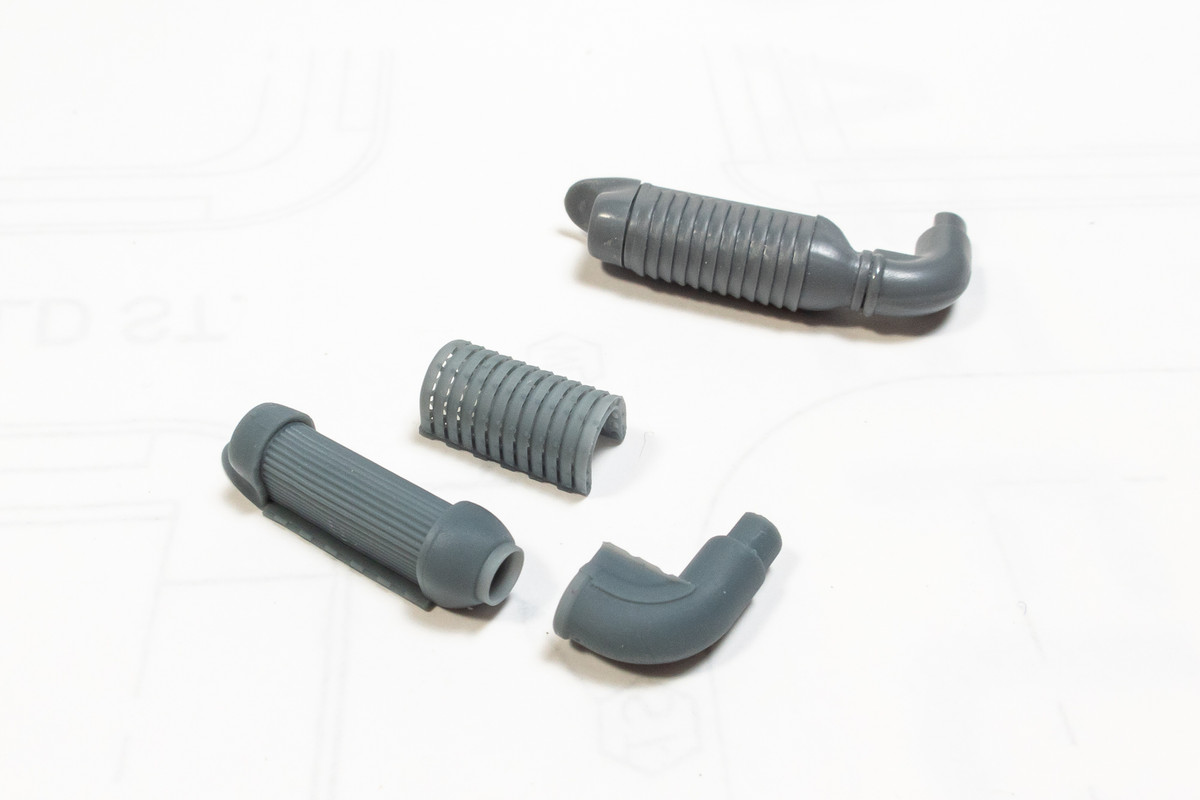 The main difference is that the ribbed filter section on the AiP version has physical slits that you can actually see through. But the slits are so small and the effect so subtle that I'd expect the vast majority of people would never notice the difference. 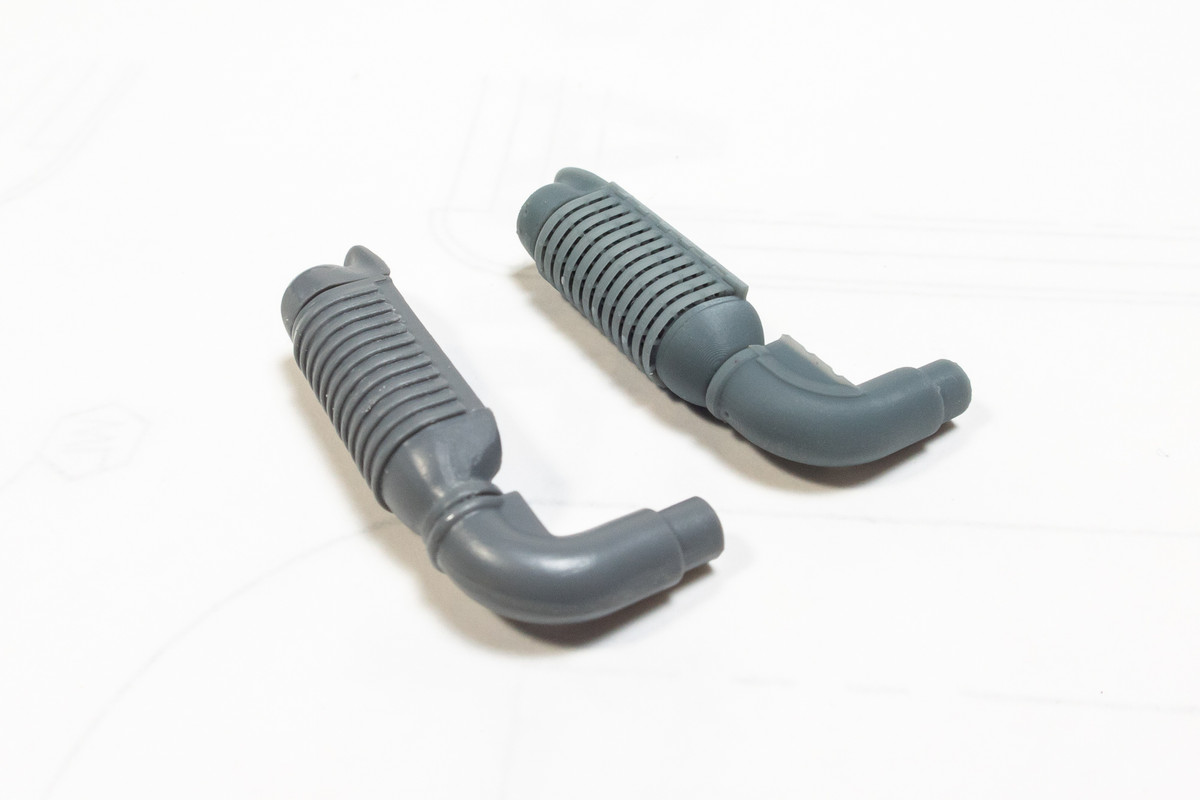 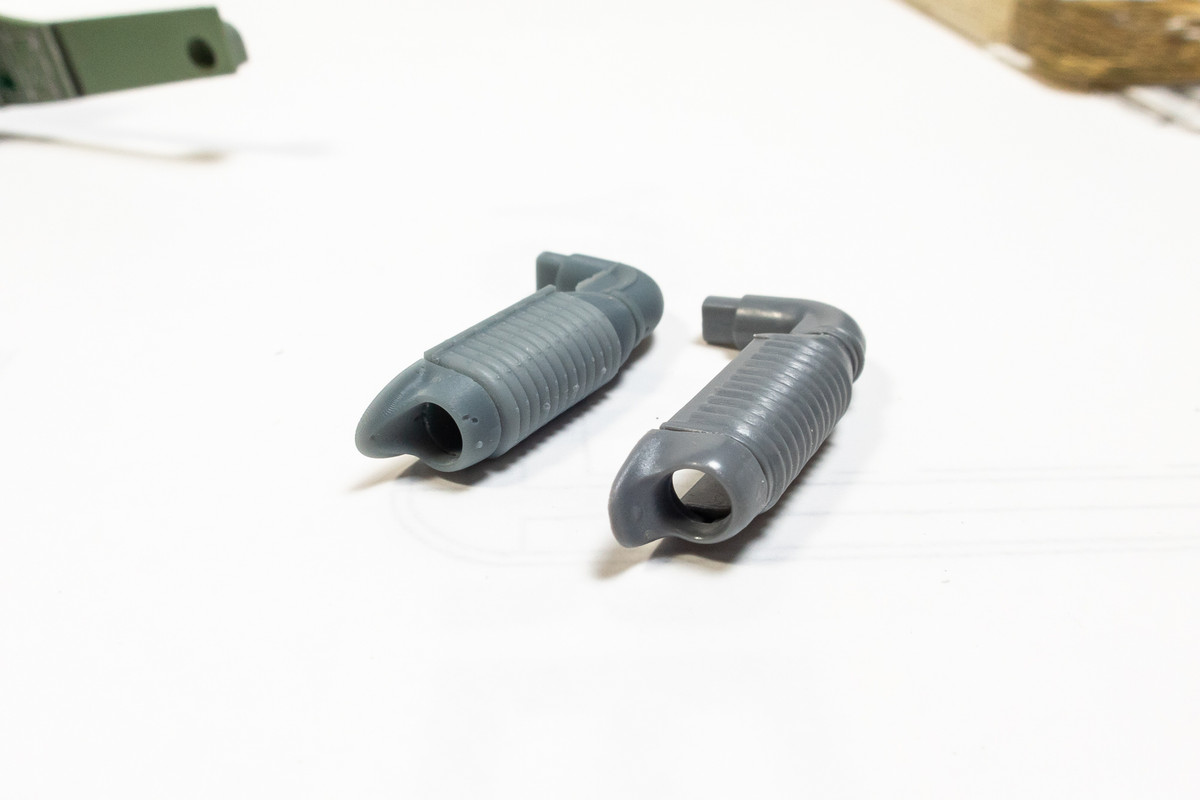 The rear fairing for the air filter highlights a very bad sprue attachment design. C'mon Italeri! 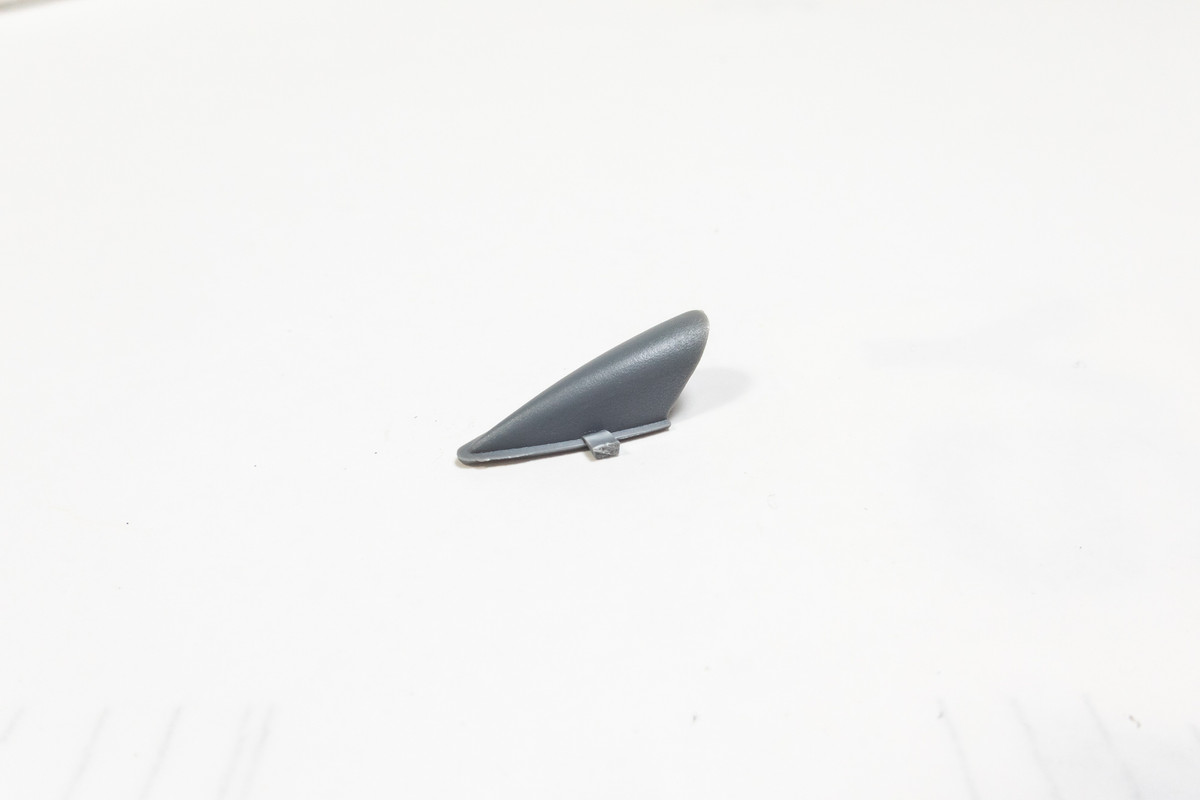 Moving on to the cockpit, I reviewed the Eduard PE set for any wortwhile cockpit additions. The frame for the hand lever beside the seat is cleverly folded with additional detail so I considered it a worthwhile upgrade. 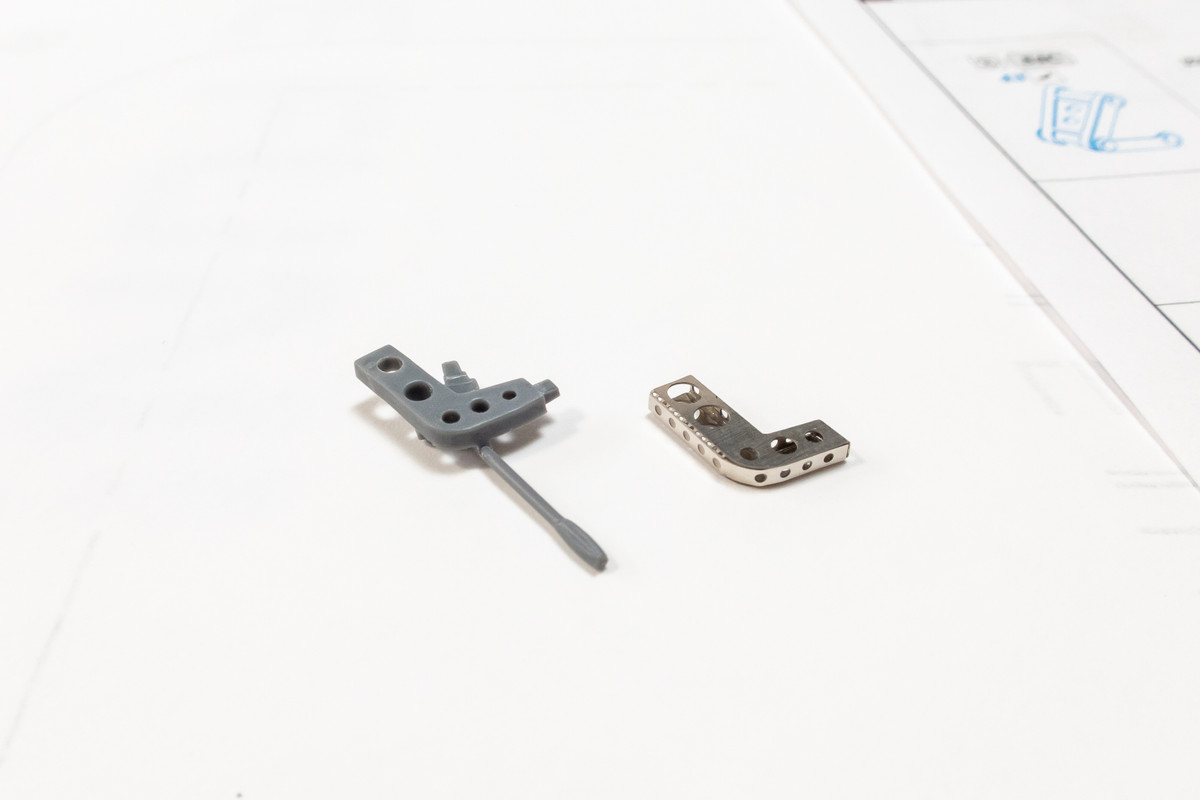 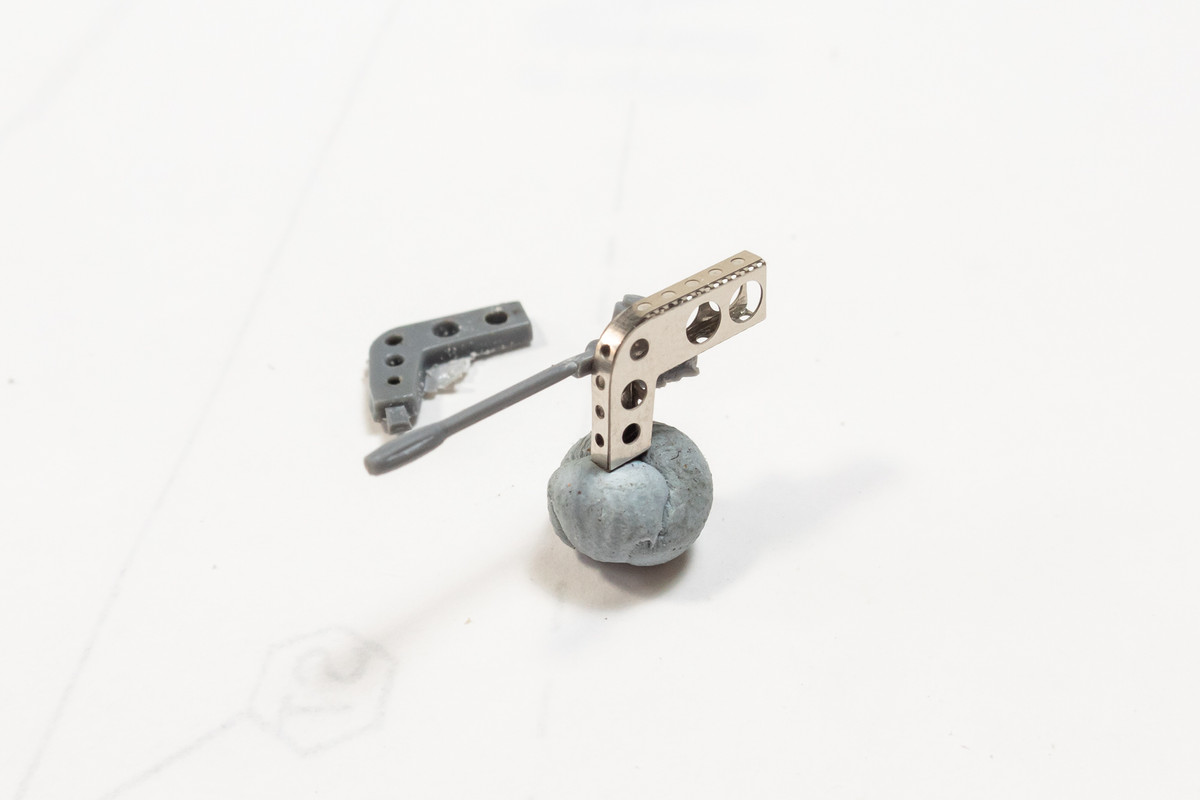 But this truss on the cockpit floor requires a lot of work without any benefit of added detail so I'm leaving this one off. I enlarged the existing holes with a micro drill bit. 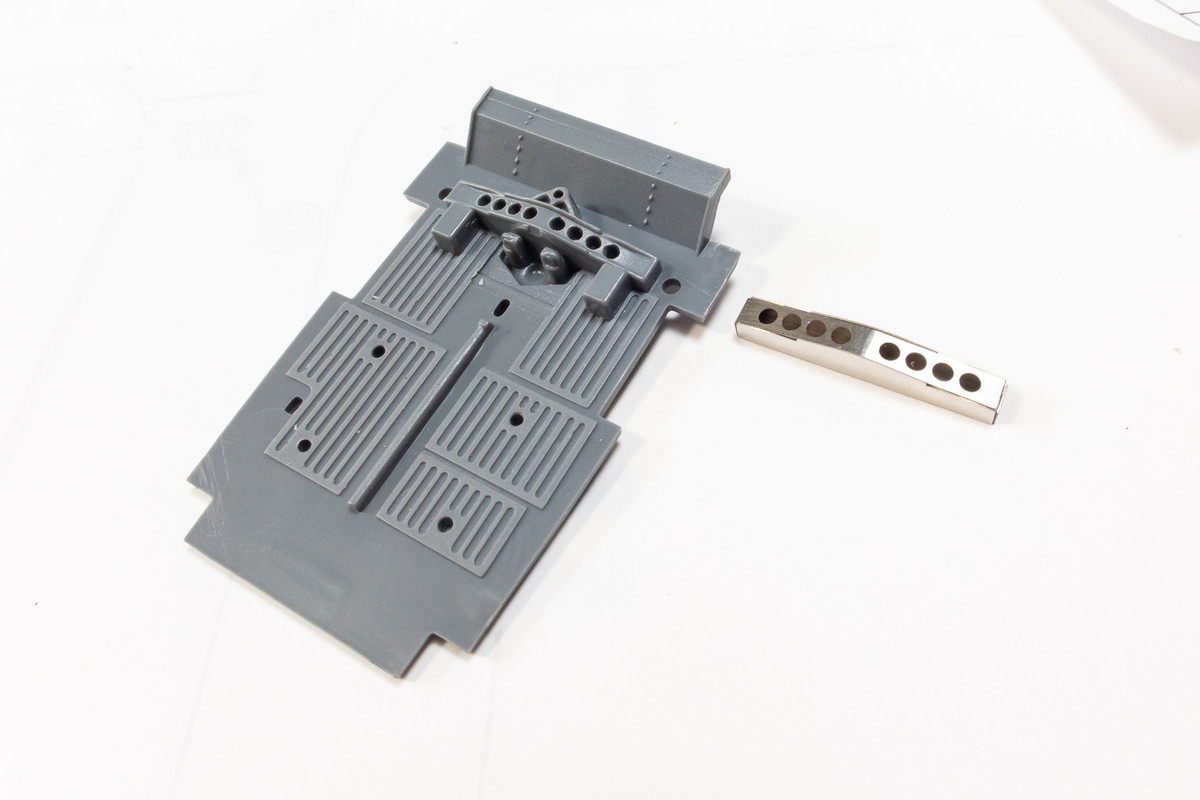 I've decided to replace the bottle-style oxygen regulator with the later German style, which is included in the kit. An oxygen hose was fabricated with copper wire and I fashioned a small panel to house the oxygen level and pressure gauges. The instrument bezels are from Airscale. 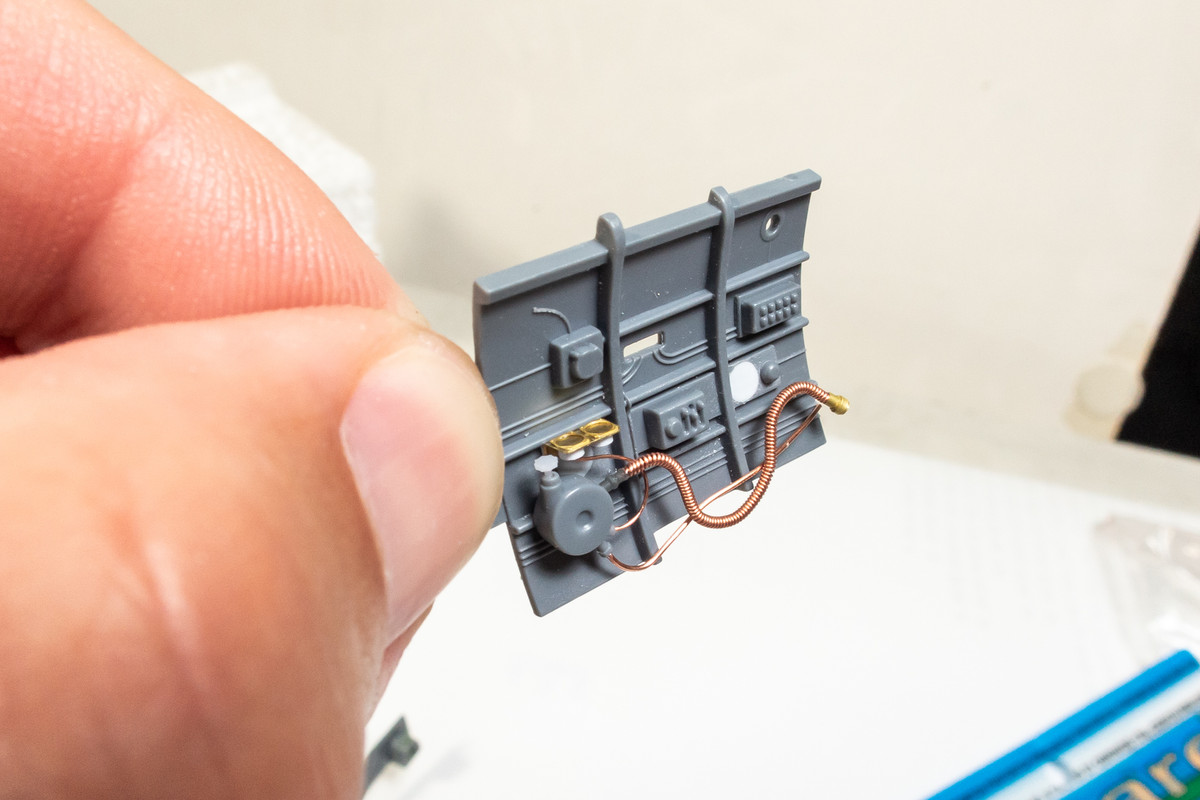 |
|
|
|
Post by kyledehart5 on Sept 30, 2024 15:40:00 GMT -5
Good grief man!! This is some awesome work. Love your little updates and how you weigh the pros and cons of each option you’ve given yourself. Really surprised that those guys wouldn’t give some sort of instruction on getting that air filter off. That stuff is so fragile you’d think they’d give guys a clue. I love that folded lever and the your work on the oxygen system.
|
|
jkim
Full Member
  
Member since: October 2023
Posts: 116
Oct 19, 2023 12:36:27 GMT -5
Oct 19, 2023 12:36:27 GMT -5
|
Post by jkim on Oct 1, 2024 14:48:14 GMT -5
Thank you Kyle! The lack of instructions for the AiP is a shame because the parts themselves are very well done. A lot of these 3D-printing companies are one-man shops and they seem to be driven by passion not profit. Which is a good thing. But maybe the lack of business focus leads to not considering basic business sense like providing instructions? In comparison, Laminar Flow Design produces similar products for Spitfires but Mathieu includes very comprehensive instructions for his enhancement kits. The XIVe conversion that I bought from him included a seven-page full color PDF. Back to the build... due to the wings entering the construction process relatively early, I thought it would be a good time to take a look at the Eduard brass flaps that came with the Big Ed set that I purchased for this build. Italeri includes flaps with internal details molded in which don't look too bad, with the exception of some pesky ejector pin depressions that would need to be filled. 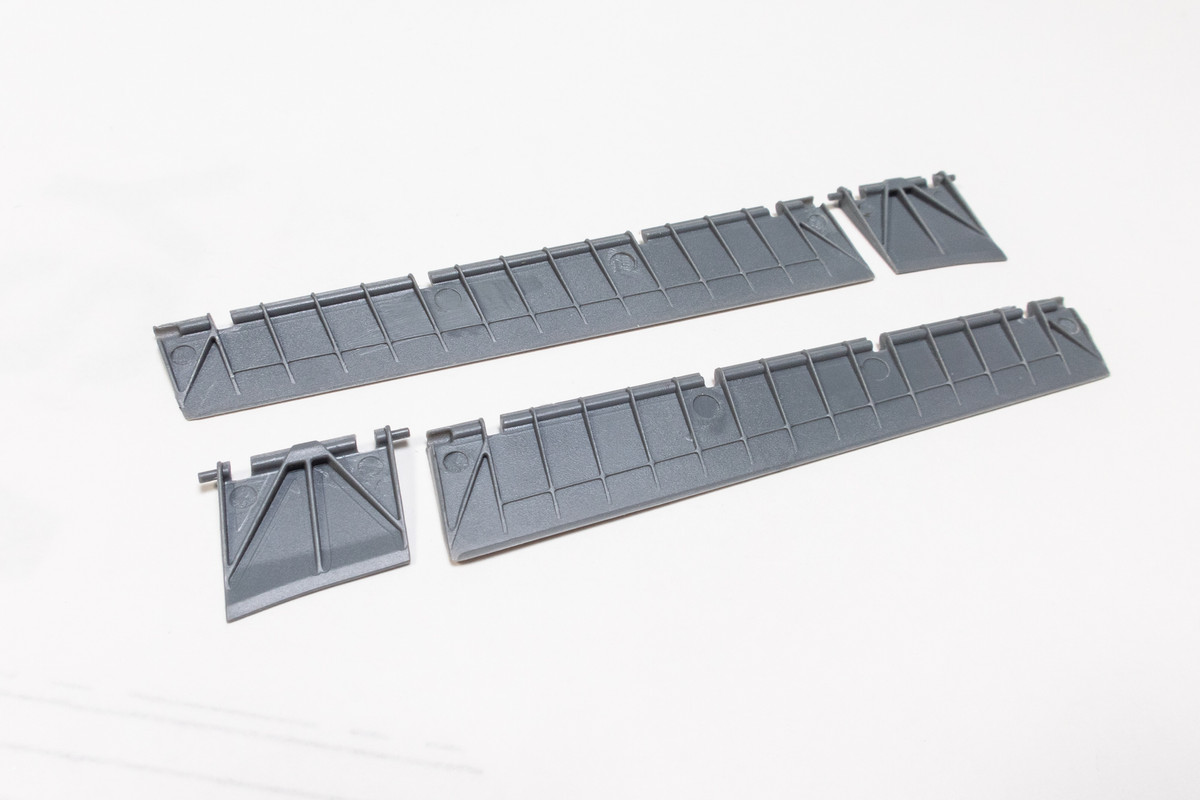 However, Italeri includes no detail for the flap bays so leaving the flaps down would offer a very incomplete representation. Eduard includes both the flap bays and the flaps themselves. 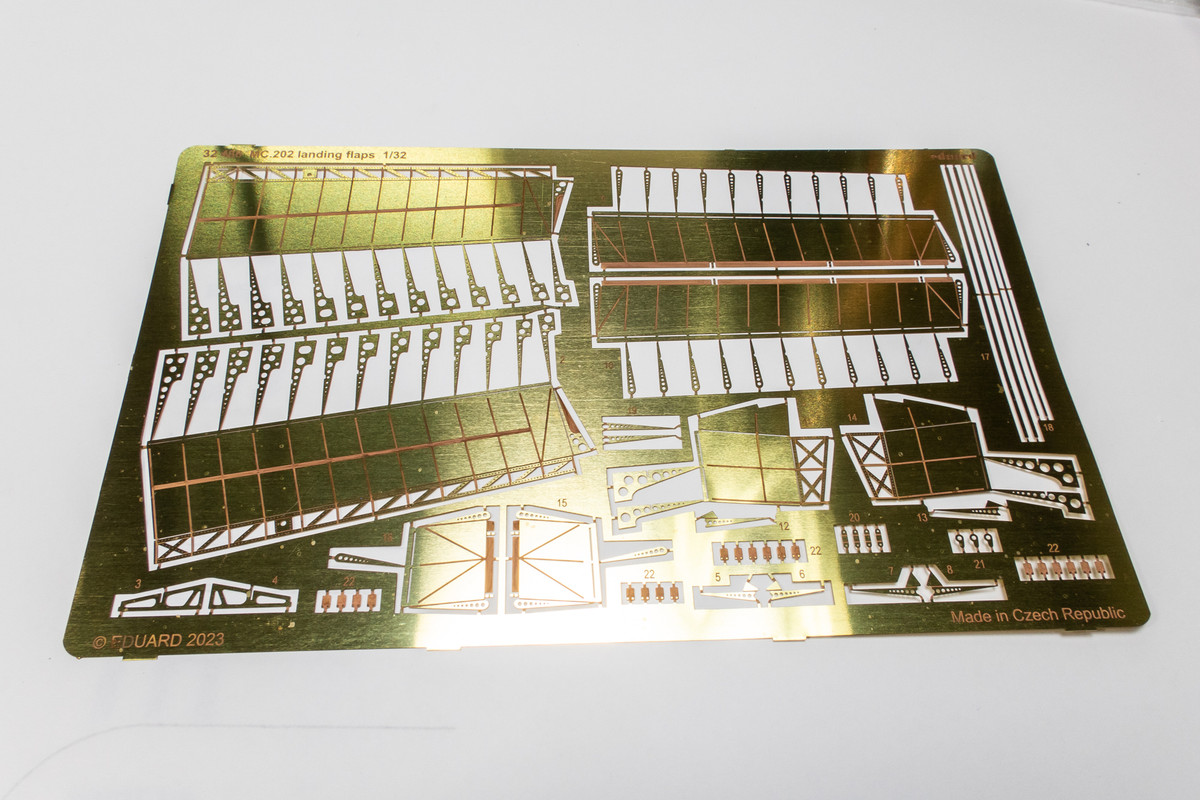 It looks pretty fiddly but in my experience, they usually fold up without an issue provided that you have some basic tools including a photoetch folding tool. 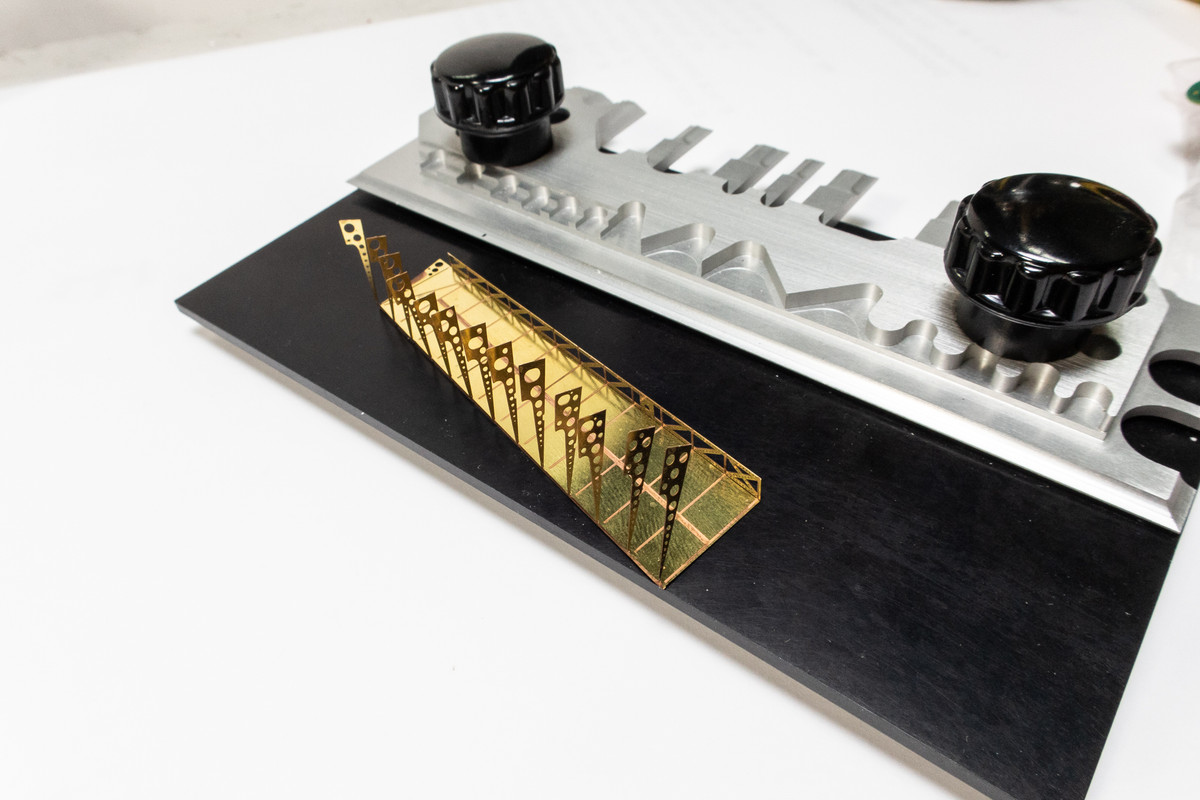 I started with the flap bays and you can see the difference that these would make compared to the blank space they occupy. Thin CA glue is used to secure all of the spars in place and CA debonder is used to clean up any excess CA. 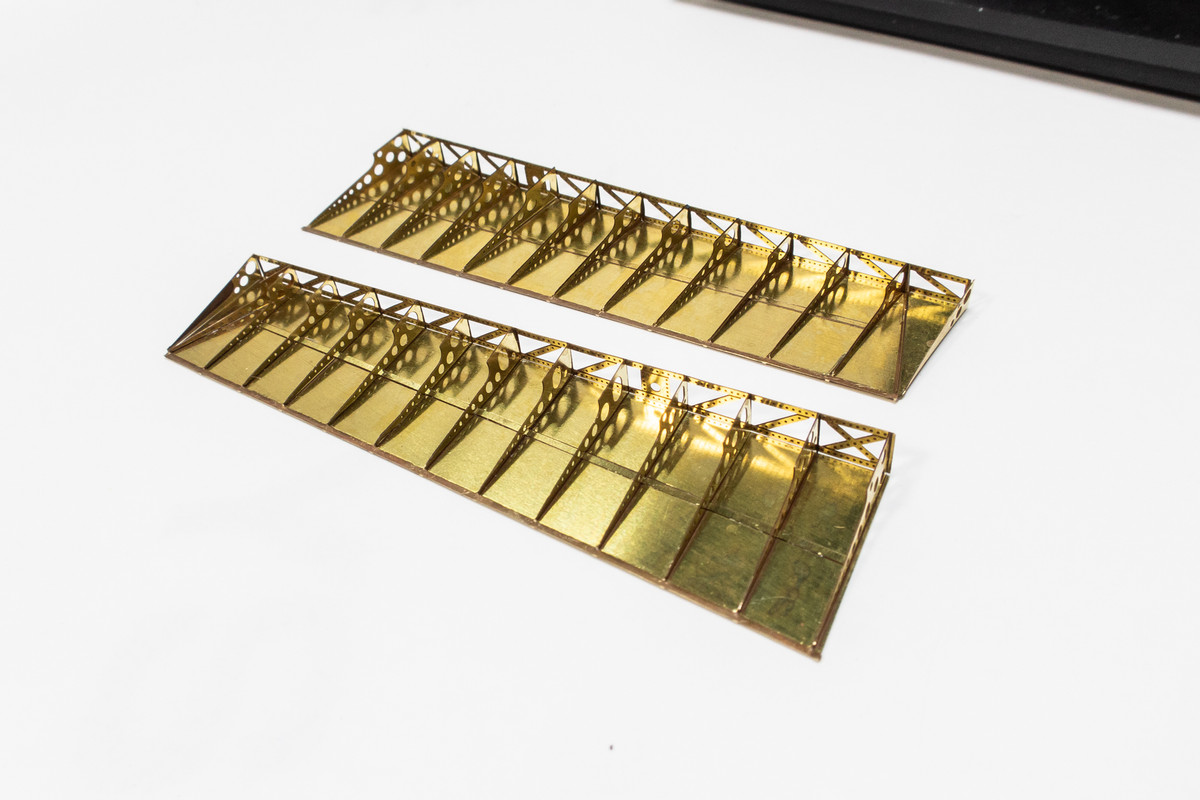 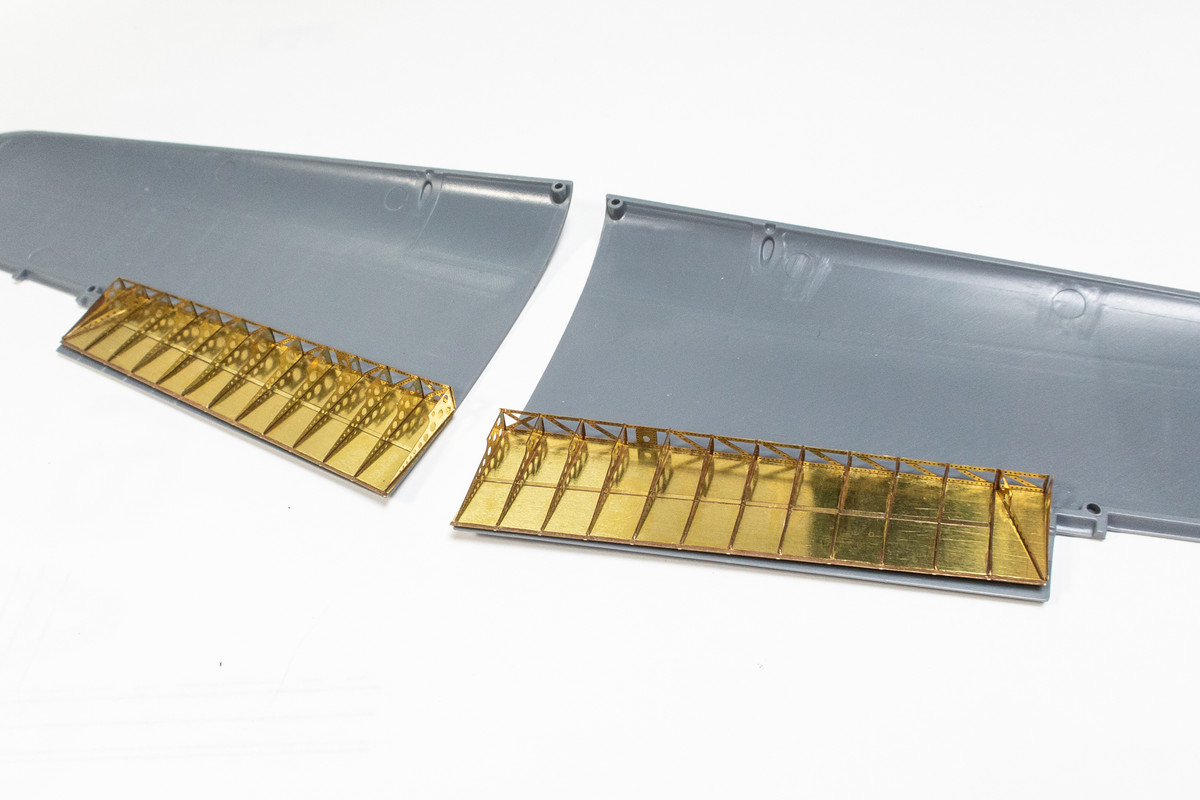 The small inboard flap bays are separate and are assembled next. 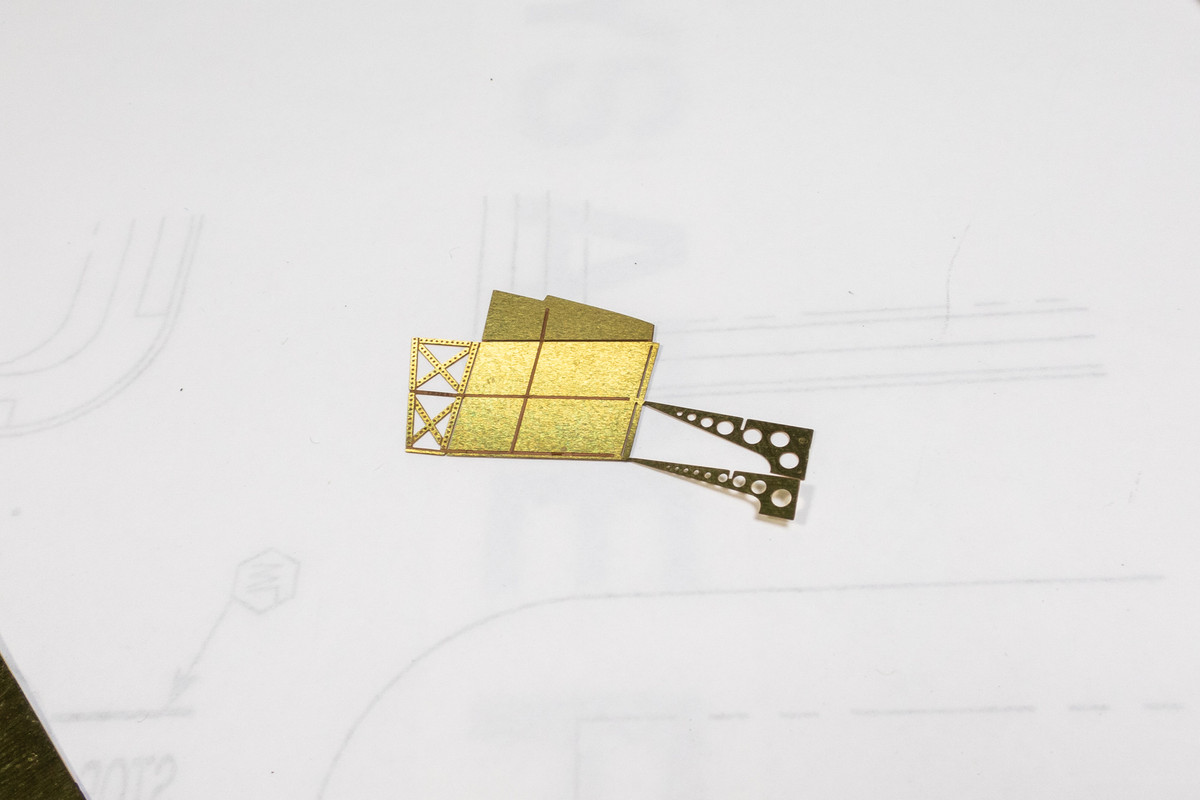 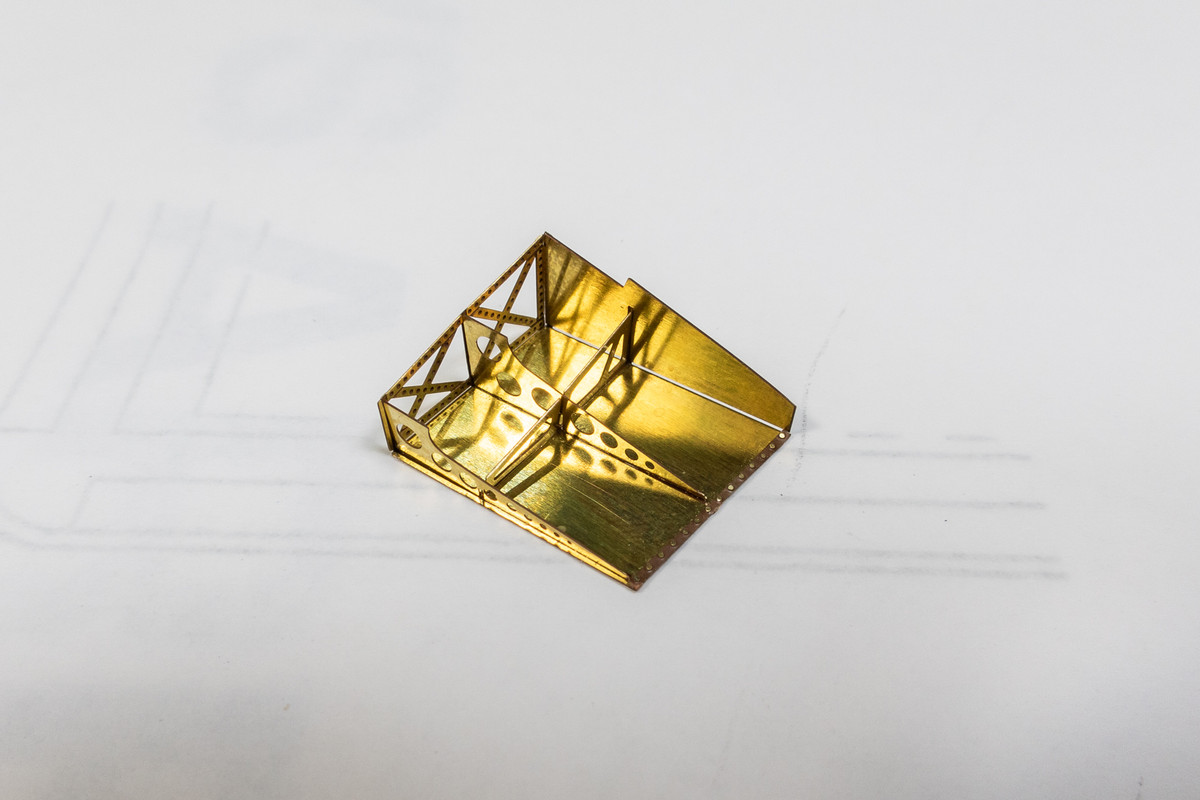 The flap bays are complete. Next I'll do the flaps themselves and investigate what kind of surgery is required to accommodate these brass parts. 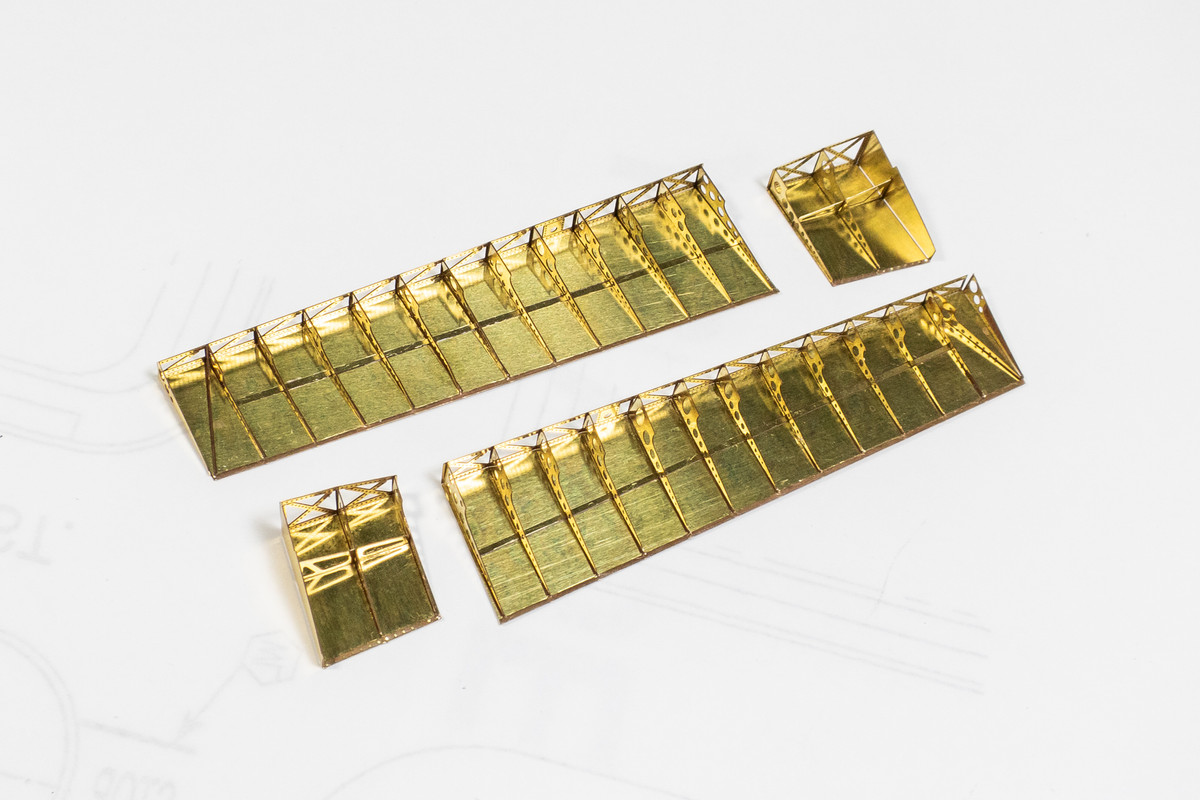 |
|
|
|
Post by keavdog on Oct 1, 2024 15:55:37 GMT -5
Wow those look great.
|
|
handiabled
Administrator      Apr '23 Showcased Build Awarded
Member since: February 2023
Posts: 4,458 
MSC Staff
|
Post by handiabled on Oct 2, 2024 2:20:12 GMT -5
I just caught up with this one again and your crafting another mind blowing aircraft John. Your attention to fine detail is absolutely fantastic!
|
|
TJ
Senior Member
    June '23 Showcased Model Awarded
Member since: May 2023
Posts: 2,182
May 14, 2023 18:18:36 GMT -5
May 14, 2023 18:18:36 GMT -5
|
Post by TJ on Oct 2, 2024 4:13:53 GMT -5
I just caught up with this one again and your crafting another mind blowing aircraft John. Your attention to fine detail is absolutely fantastic! +1 to this comment |
|
|
|
Post by 406 Silverado on Oct 2, 2024 4:49:26 GMT -5
That blew me away at the $31 for the air intake filter assembly John! It is a worthwhile investment, but I was expecting something like $15 or something of the like. The flaps..........the flaps.......  |
|
jkim
Full Member
  
Member since: October 2023
Posts: 116
Oct 19, 2023 12:36:27 GMT -5
Oct 19, 2023 12:36:27 GMT -5
|
Post by jkim on Oct 2, 2024 23:29:32 GMT -5
Thanks guys! I personally don't think $30 is worth the upgrade cost for the tropical filter but sometimes you don't know until you have it in hand. The PE flaps have been completed. Eduard makes some pretty cool stuff and I've always enjoyed putting their flaps together because they look so dang good. 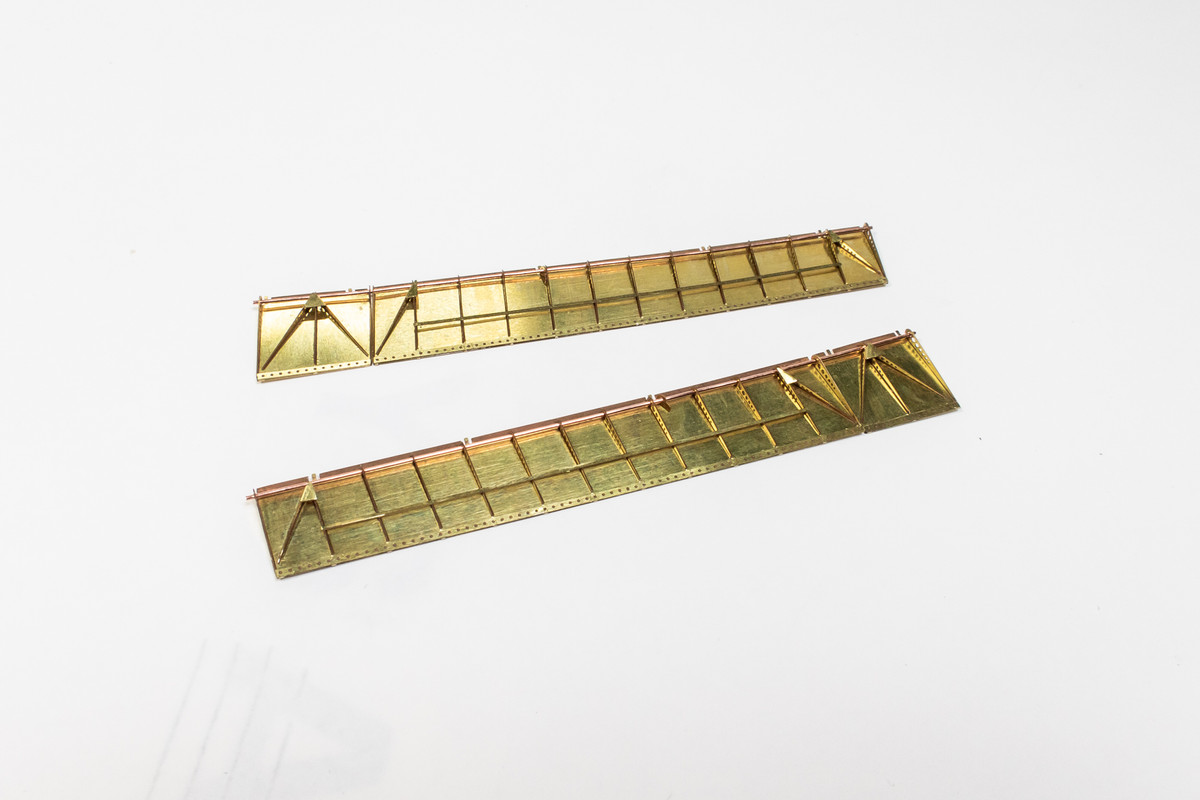 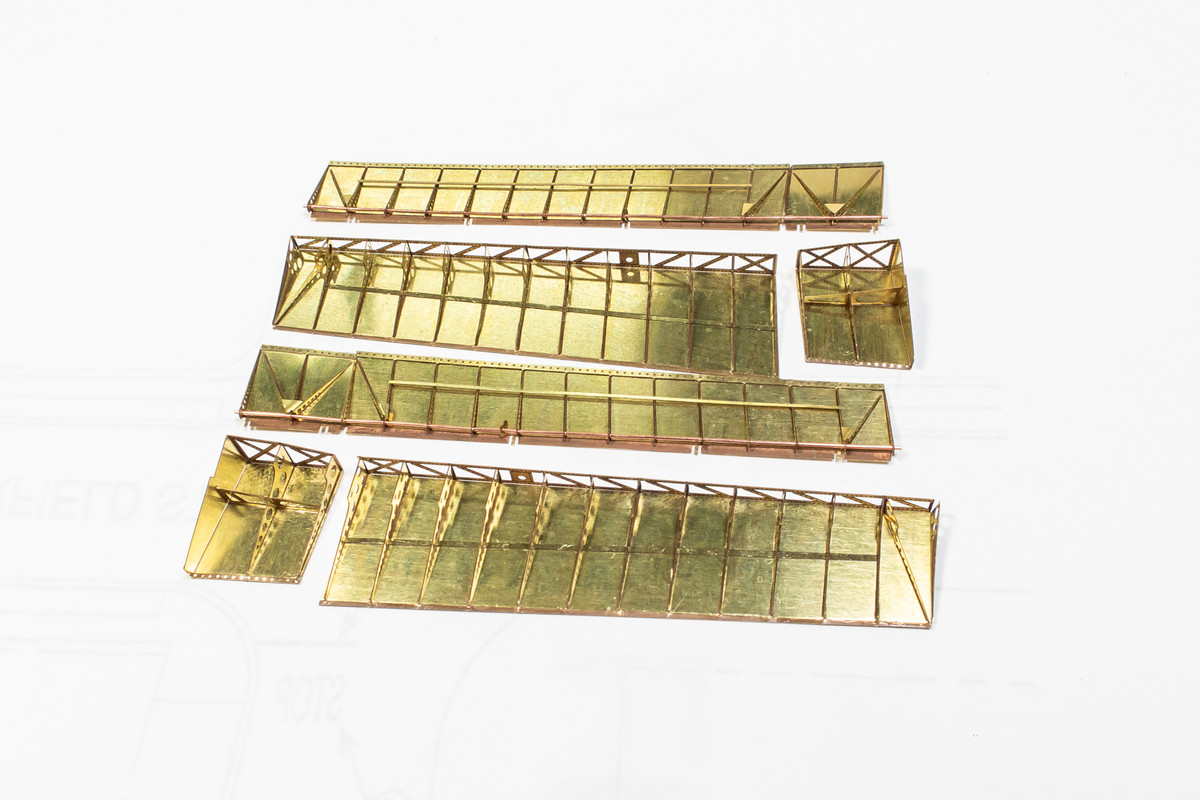 After the fun folding is done, you have to face the adjustment of the kit parts to make the brass fit. And this is one of my least favorite tasks... thinning large areas. It's tedious, somewhat vague and very time-consuming. 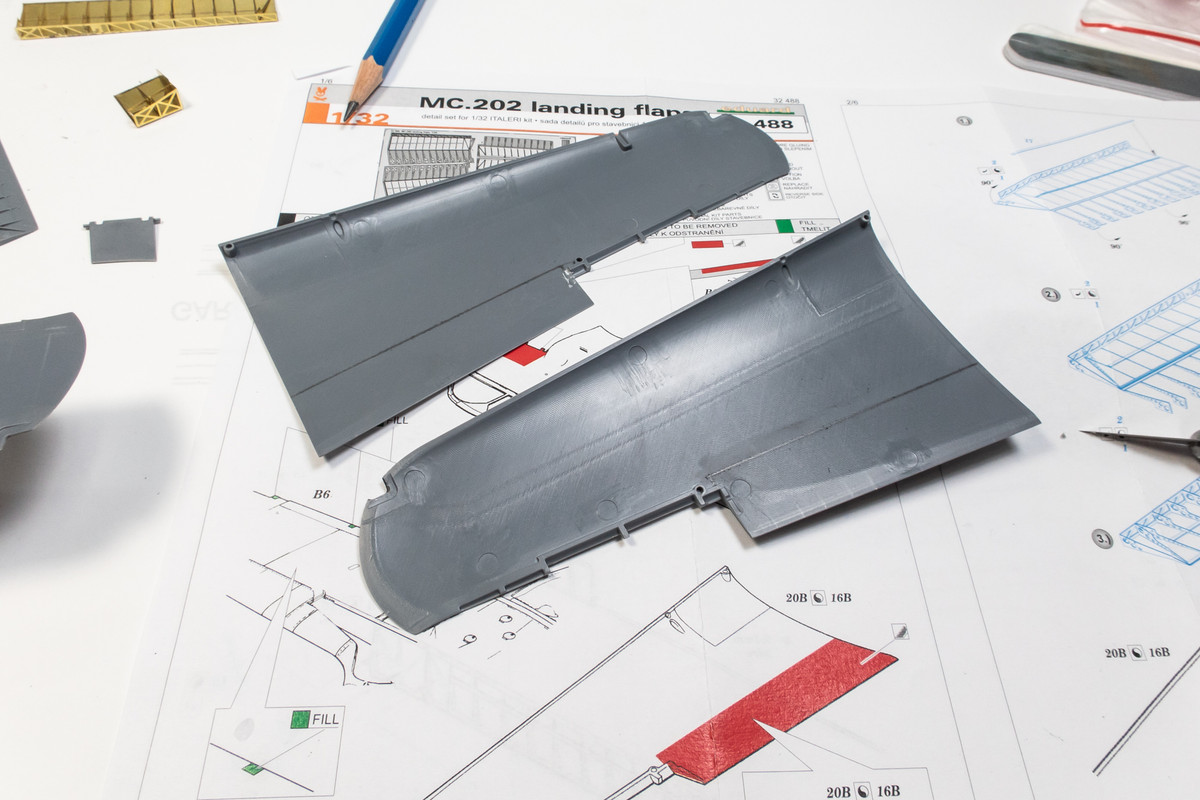 I have David Union lateral pen sander, which automates the process somewhat. But it's still very time consuming and plastic dust gets everywhere. I got tired of it after getting about halfway done on one upper wing. 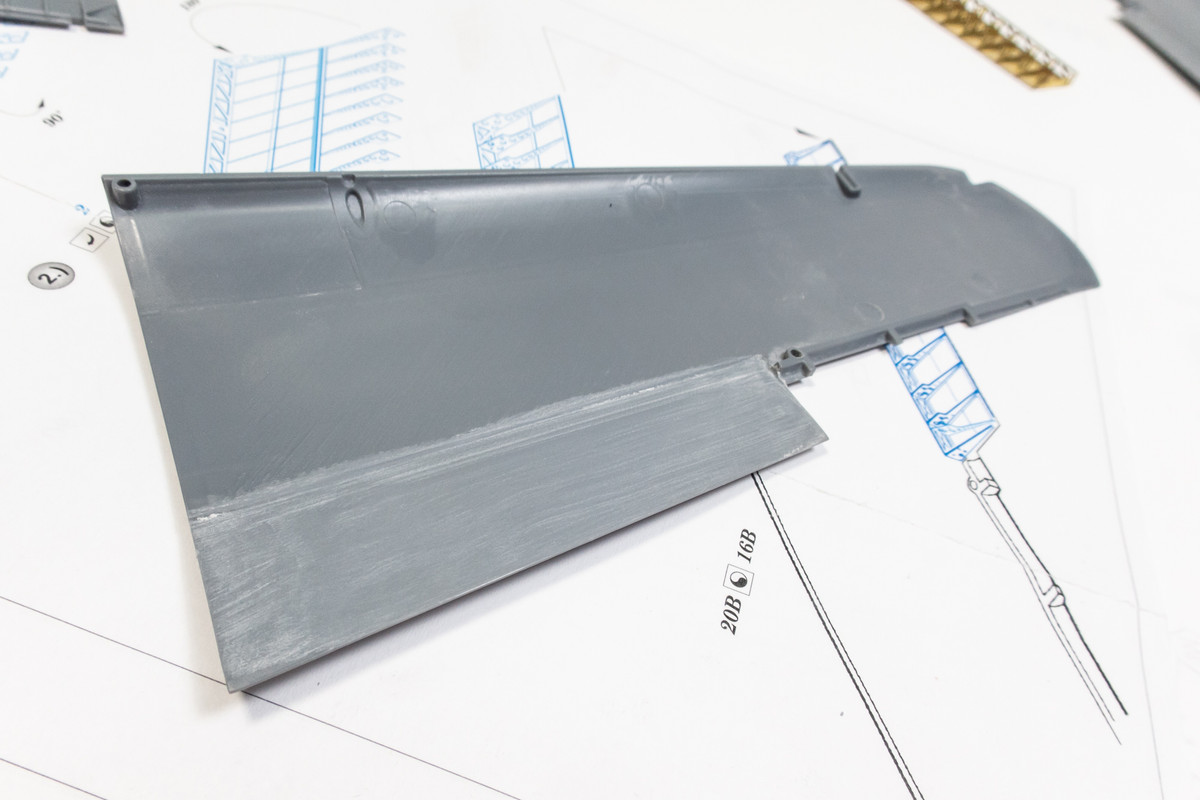 To take a break from the tedious sanding, I decided to add a little more detail to the instrument panel. 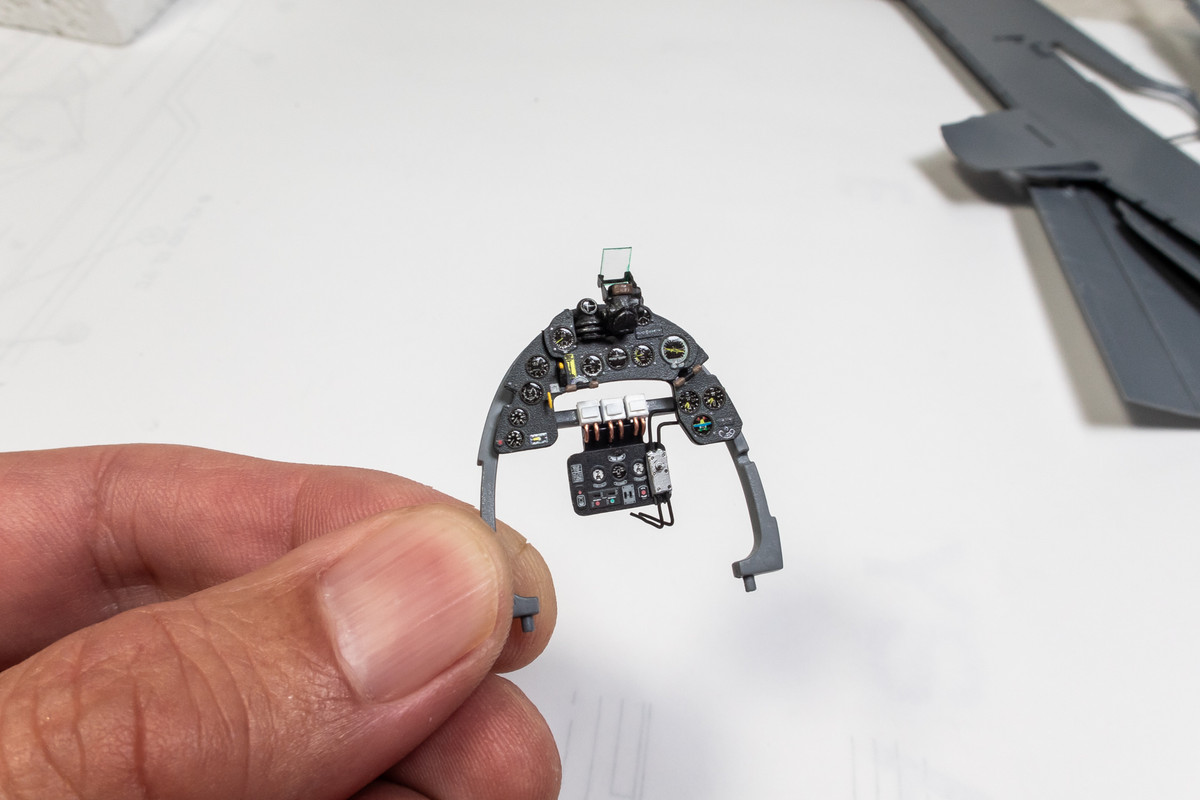 |
|
handiabled
Administrator      Apr '23 Showcased Build Awarded
Member since: February 2023
Posts: 4,458 
MSC Staff
|
Post by handiabled on Oct 3, 2024 1:58:27 GMT -5
I'm with you on making clearance for aftermarket parts. Very tedious. Your flaps look perfect and I really like the scratched detail on the IP!
|
|
|
|
Post by kyledehart5 on Oct 3, 2024 7:13:58 GMT -5
I really love the look of those aftermarket flaps. They just look soo dang cool. But I sure don’t think I’ll ever be using them myself. Can’t wait to see yours go in though. And that IP is truly l lovely.
|
|
jkim
Full Member
  
Member since: October 2023
Posts: 116
Oct 19, 2023 12:36:27 GMT -5
Oct 19, 2023 12:36:27 GMT -5
|
Post by jkim on Oct 8, 2024 11:53:06 GMT -5
|
|


 I really like what you're doing with this part of the build John. Landing gear is something that in the past I didn't pay as much attention to as the rest of the build but after seeing you build over the years I've started upping my game in that area of my builds.



 Edit: Looks like you posted your answer to that question and quite frankly, I don't blame you.


