|
|
Post by eastrock on Oct 20, 2012 12:10:23 GMT -5
Since the pressure is now off and the screening of the entries for the nationals is already done, we were given the go signal for our December contest (deadline XMAS Party) "Back to Basic" purely OOB no rescribing of the raise panel its how you present your skills without the use of aftermarket item, this will be challenge lots of sink mark most of them are exactly in the raise panel and rivets  lotsa visible gaps the plastic is already brittle and decals are yellowed (extra care is required) this is the disadvantage of the exchange gift got this bird last year) 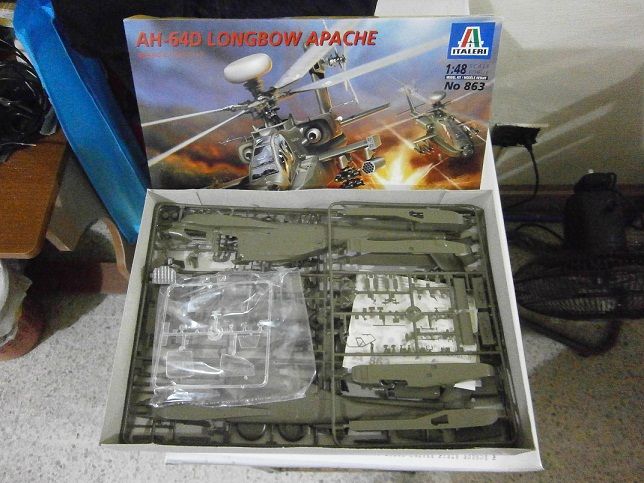 tight fitting and sub-assemblies if you see some white spots that would be the Mr. Dissolving putty much better than the Tamiya putty in this case. 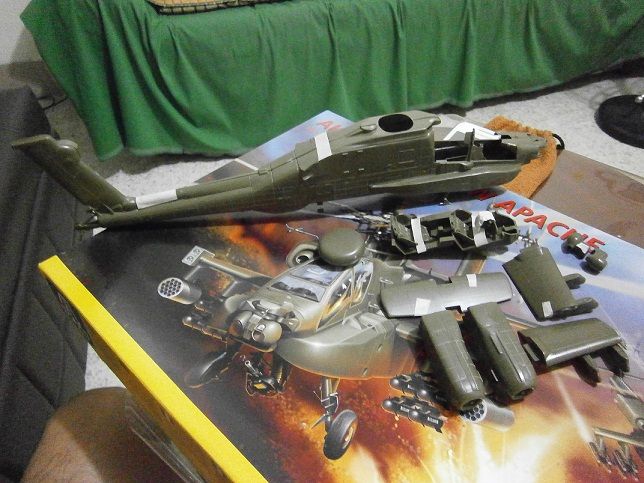 Thanks for viewing  |
|
venom1
Full Member
  
Member since: October 2012
Posts: 1,369
Oct 10, 2012 2:40:03 GMT -5
Oct 10, 2012 2:40:03 GMT -5
|
Post by venom1 on Oct 20, 2012 12:36:23 GMT -5
Ooo, a whirly bird! Me likey very much! ;D Will be watching this one with much interest.....  Cheers, Sam  |
|
|
|
Post by eastrock on Oct 20, 2012 20:40:59 GMT -5
Hey Sam, love your work also, thanks for checking in  Thanks Capt, I learn a lot from you guys! Cheers!! ER |
|
venom1
Full Member
  
Member since: October 2012
Posts: 1,369
Oct 10, 2012 2:40:03 GMT -5
Oct 10, 2012 2:40:03 GMT -5
|
Post by venom1 on Oct 20, 2012 23:34:40 GMT -5
Hey Dicky, thats sweet news! Braille scale helos are my thing at the moment, so I will be in like Flynn! ;D ER - Thanks mate, that means a lot! Hopefully I will have some more to show off soon! Look forward to your Longbow tho. As Dicky said, it's the OOB stuff that shows of REAL display of modelling talent! Cheers, Sam  |
|
|
|
Post by eastrock on Oct 29, 2012 7:24:54 GMT -5
Update: This is also riddled with sink marks specially in the detailed parts nothing to do with it since there's no mods allowed on the build, its not easy like in the armor modelling which you can hide the damage by weathering. 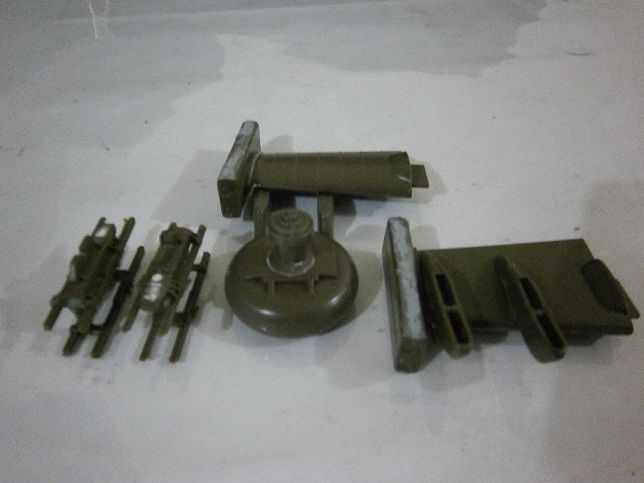 Thanks for checking! ER |
|
Deleted
Member since: January 1970
Posts: 0
Nov 25, 2024 11:32:31 GMT -5
Nov 25, 2024 11:32:31 GMT -5
|
Post by Deleted on Oct 29, 2012 10:32:59 GMT -5
This looks like fun, bookmarked for sure!
|
|
|
|
Post by eastrock on Oct 29, 2012 11:32:50 GMT -5
Thanks Mack but this one needs a lot of sanding also  |
|
|
|
Post by deafpanzer on Oct 29, 2012 12:45:05 GMT -5
So quick but looking real good. Sometimes I am tempted just to do OOB build... maybe my next build it will be. You have my attention now...
|
|
Deleted
Member since: January 1970
Posts: 0
Nov 25, 2024 11:32:31 GMT -5
Nov 25, 2024 11:32:31 GMT -5
|
Post by Deleted on Oct 29, 2012 15:13:21 GMT -5
must be the norm with italeri kits at the moment, loads of sanding and filling! nice work so far though
|
|
|
|
Post by eastrock on Nov 21, 2012 11:45:06 GMT -5
cockpit done, sprayed with german grey tinted with flat black and dry brushed with enamel silver sprayed. 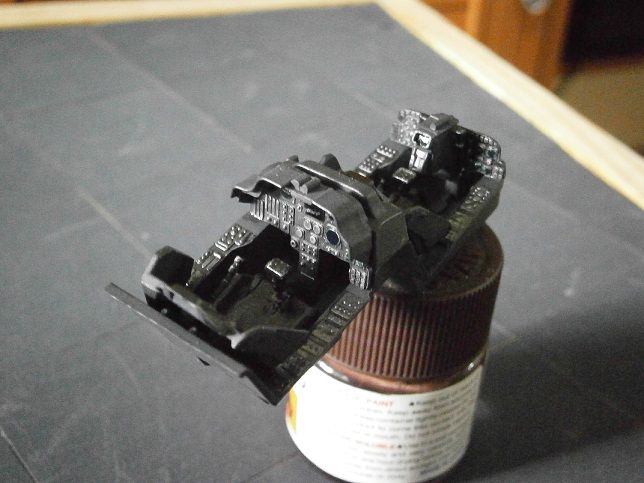 Thanks for checking in guys... Cheers! ER |
|
Deleted
Member since: January 1970
Posts: 0
Nov 25, 2024 11:32:31 GMT -5
Nov 25, 2024 11:32:31 GMT -5
|
Post by Deleted on Nov 21, 2012 14:00:25 GMT -5
Hey ER,great work in the 'office' mate....even if its not accurate!.....But you said it was 'Strictly' OOB,so again nice work fella!! ;D  Correction....It may be accurate for the US version,I have only seen pics of the British Apache cockpits,which have display screens in both pits |
|
|
|
Post by deafpanzer on Nov 21, 2012 14:08:18 GMT -5
Nice work on the office!!! Keep it coming buddy
|
|
|
|
Post by eastrock on Nov 21, 2012 21:56:54 GMT -5
Hi CB did you mean this one? Thought this one was a glass barrier or something (disadvantage of being an armor modeler ;D ) I haven't stick it yet, still need weather the cockpit a bit more... Thanks Nemo and Andy 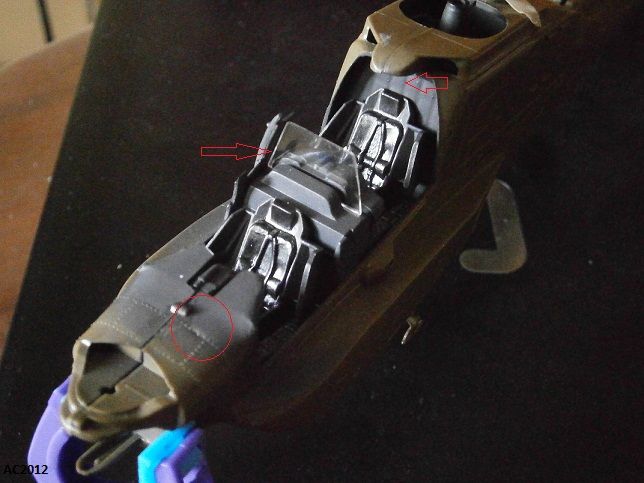 as you see in the picture lot of work need to be done, stubborn marks and a very nasty sink on the front, nothing to do about that I just have to leave it there. |
|
|
|
Post by bullardino on Nov 22, 2012 3:29:41 GMT -5
Good job on that nasty kit, ER  |
|
venom1
Full Member
  
Member since: October 2012
Posts: 1,369
Oct 10, 2012 2:40:03 GMT -5
Oct 10, 2012 2:40:03 GMT -5
|
Post by venom1 on Nov 22, 2012 7:27:38 GMT -5
Nice job so far on a not very nice kit! I can see the pigs ear slowly becoming a silk purse! ;D This kit is one of the reasons I don't really do 1/48 Italeri Kits anymore! Keep up the great work ER!  Cheers, Sam  |
|
|
|
Post by eastrock on Nov 22, 2012 10:41:27 GMT -5
Thanks Luigi, I'll have to buy more sheet of sand paper and putty  Sam, well I got the kit thru an exchange gift, and decided its worth a try, I can always put it back to the shelf  |
|
|
|
Post by eastrock on Nov 23, 2012 10:18:22 GMT -5
|
|
Deleted
Member since: January 1970
Posts: 0
Nov 25, 2024 11:32:31 GMT -5
Nov 25, 2024 11:32:31 GMT -5
|
Post by Deleted on Nov 23, 2012 12:52:41 GMT -5
ER....sorry for the late reply.The screen between the 2 'pits is correct.It's made from ballistic glass,so that even if one of the positions takes a hit,and is disabled,the other one can still fly the chopper!
I was actually talking about the vdu screens fitted in the instrument panels.Your version doesn't really show them up too well,but that's possibly the angle of the piccies.
|
|
Deleted
Member since: January 1970
Posts: 0
Nov 25, 2024 11:32:31 GMT -5
Nov 25, 2024 11:32:31 GMT -5
|
Post by Deleted on Nov 23, 2012 17:33:40 GMT -5
Ooo that fit looks nasty  I'm sure you'll pull her into shape though going by the excellent cockpit  |
|
|
|
Post by eastrock on Nov 23, 2012 21:49:39 GMT -5
Thanks CB, I think its only have one VDU on the front.
Steve, this would take longer than I thought even the exhaust has fit problems with a lot of cleaning.
Chris, Thanks for checking, would try my best here
Cheers!
|
|
Deleted
Member since: January 1970
Posts: 0
Nov 25, 2024 11:32:31 GMT -5
Nov 25, 2024 11:32:31 GMT -5
|
Post by Deleted on Nov 24, 2012 5:05:57 GMT -5
|
|
|
|
Post by eastrock on Nov 24, 2012 11:32:50 GMT -5
Thanks for pointing it, CB much appreciated ;D Still working with the bird... gaps after gaps 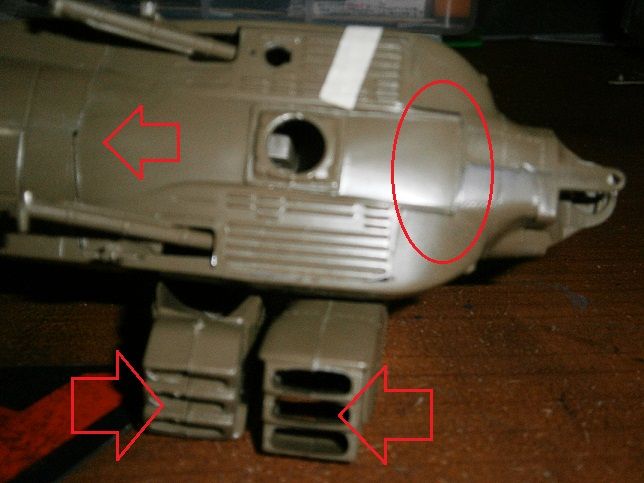 need to repair the exhaust and much of the gaps... cheers |
|
|
|
Post by eastrock on Nov 26, 2012 11:39:19 GMT -5
its much worse the ESCI LAV25 no wonder it was thrown in the box for the exchange gift last year... it really look like a head-on collision on the wall. 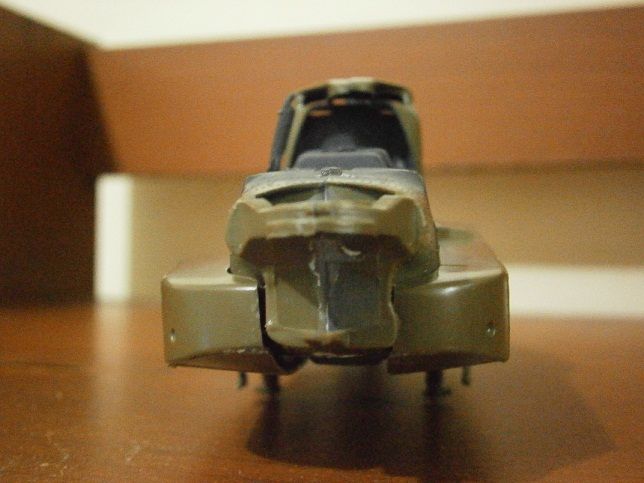 still a lot of work to do...  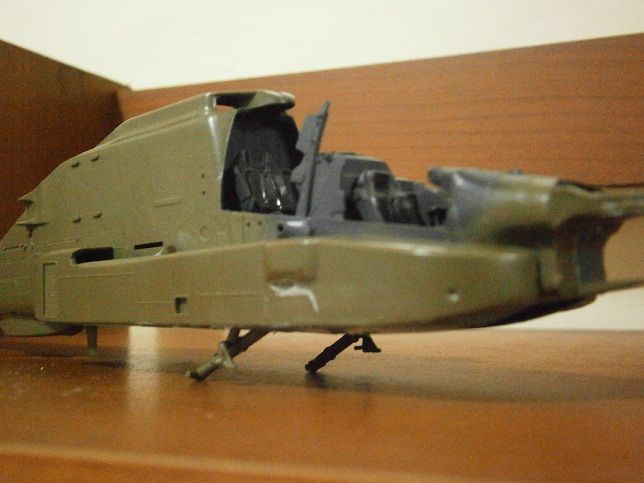 |
|
|
|
Post by deafpanzer on Nov 26, 2012 14:00:07 GMT -5
Like white elephant gift exchange thing? LOL Knowing you and your skill, you will turn it into a great build...
|
|
|
|
Post by eastrock on Nov 26, 2012 20:28:18 GMT -5
Chris I almost put this one back to the shelf, it has a lot of issues one after another...  Andy, yes just like that and next month I'll be also putting one also, it would be depend on the receiver if he will build it or not  lol |
|
|
|
Post by eastrock on Nov 27, 2012 21:49:56 GMT -5
Thanks, Nemo I had slap a combination of filler, liquid putty and tamiya putty on the bird.
|
|
|
|
Post by eastrock on Nov 27, 2012 23:15:16 GMT -5
Thanks Scott, if guys like CB and especially Dicky who loves abusing, you could tolerate this kind of punishment  LOL here she is now... back on the shelf in the meantime still need to slap a few more filler... (drying time) 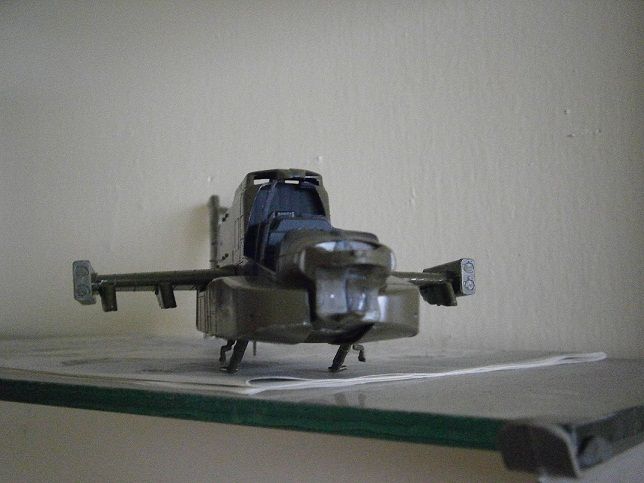 Cheers!! |
|
|
|
Post by bullardino on Nov 28, 2012 7:17:55 GMT -5
Go on, my friend, you're making it. It does already look something completely different from the original kit, great job  |
|
|
|
Post by eastrock on Nov 28, 2012 9:50:47 GMT -5
Thanks for the support, Luigi much appreciated would try improve the kit.  |
|
Deleted
Member since: January 1970
Posts: 0
Nov 25, 2024 11:32:31 GMT -5
Nov 25, 2024 11:32:31 GMT -5
|
Post by Deleted on Nov 28, 2012 14:43:08 GMT -5
Scot - has anyone else ever told yer you look very similar to our SteveM??  lol Dicky, ;D ;D he's like me only faster and a bit more misty...  Great work on this old gal, ER , I know how you feel.. I've an Airfix spit looking at me begging for more filler and time but unlike me, I think you'll finish this one nicely  |
|