|
|
Post by armorguy on Feb 29, 2012 2:07:04 GMT -5
You can build clean Tony, good to hear you go for the Friul tracks, the models will look great, they do look great already in fact !
|
|
|
|
Post by tonylee-Rest In Peace on Feb 29, 2012 18:12:05 GMT -5
Howdy The right side makes the job complete. The Thoma Schurzen will be the last thing to be installed so keep your shirts on. 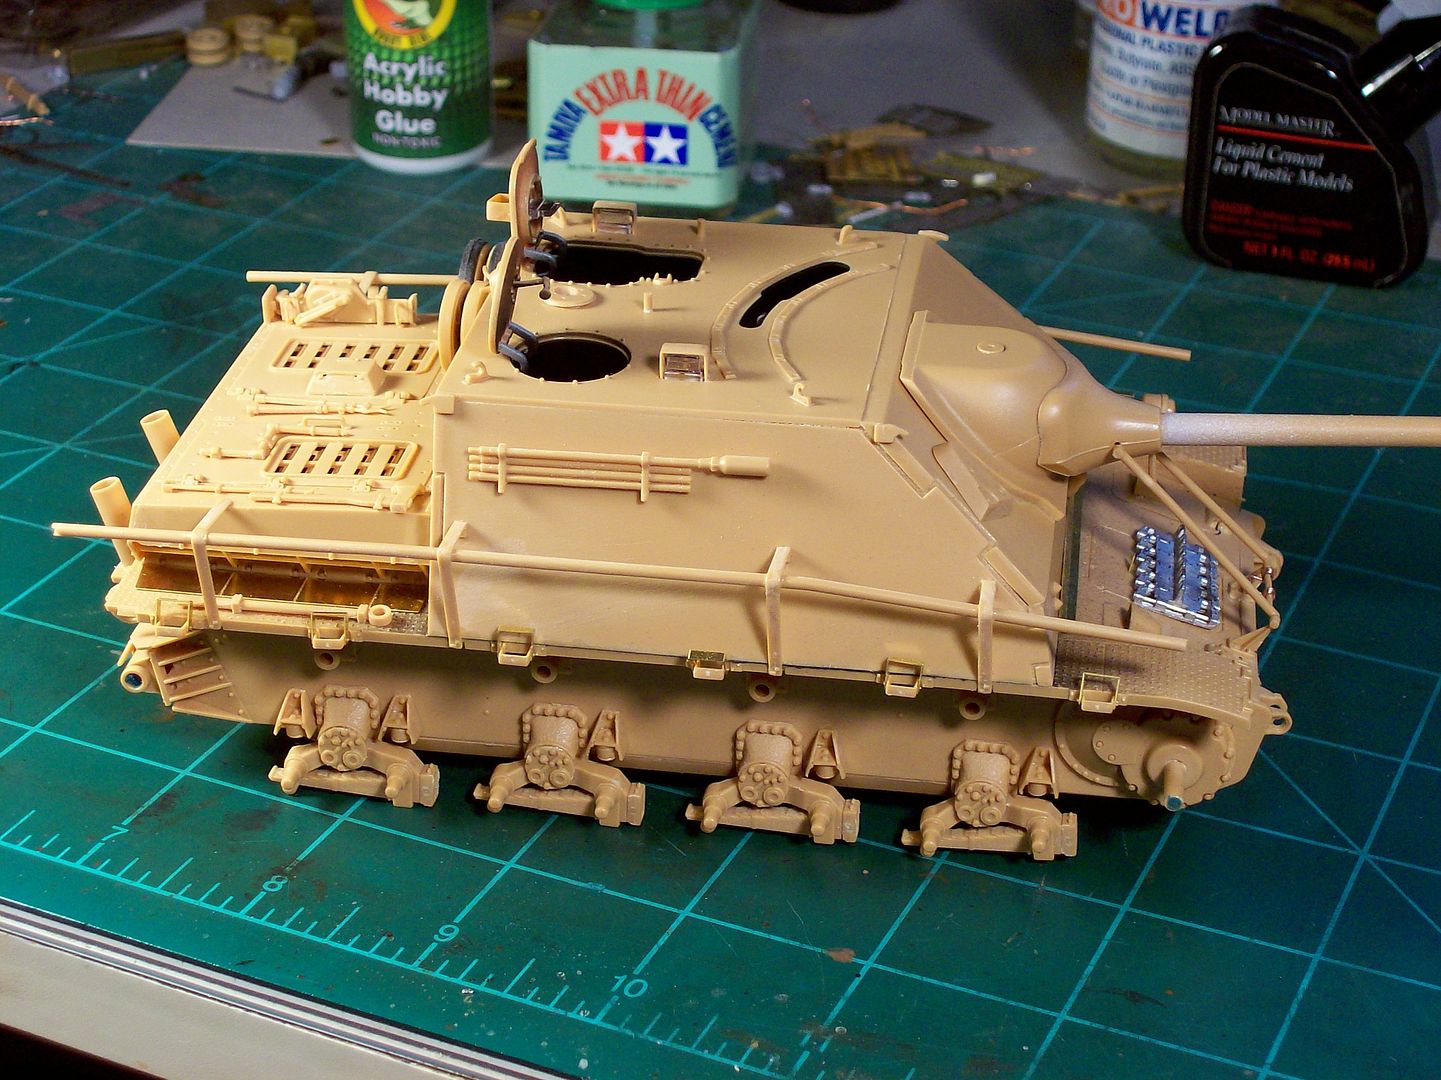 Stormy night but today has been wonderful  Tony |
|
|
|
Post by TRM on Feb 29, 2012 18:23:38 GMT -5
Getting exciting!!!! We are getting what you had last night my friend!!!! Snoooooooooooooooooooooow!!
|
|
bigjohn
Reviews member    
Member since: December 2011
John Hale
Posts: 3,438
Dec 21, 2011 2:17:45 GMT -5
Dec 21, 2011 2:17:45 GMT -5
|
Post by bigjohn on Feb 29, 2012 19:53:00 GMT -5
Looks sweet my Friend! What kind of cammo pattern you aiming for?
|
|
|
|
Post by 406 Silverado on Feb 29, 2012 21:53:11 GMT -5
Nice progress and thanks for the info Tony, I figured you'd be going with Fruils, just checking
|
|
|
|
Post by spud on Mar 1, 2012 7:48:37 GMT -5
looking really good tony.
|
|
|
|
Post by wouter on Mar 2, 2012 10:17:53 GMT -5
Nice to see some progress Uncle T, looks superduper!!!
Cheers
|
|
|
|
Post by tonylee-Rest In Peace on Mar 2, 2012 10:39:38 GMT -5
Hi Wout I was checking out the screen fit and realized there was nothing to hold the top of them to that rail bar. Checking the instructions to see if I missed something,Tristar wants you to just glue them to the bar,Naaaaaaa My Aber PE set has 18 of these hangers for the top and all I need to do is figure out how to hold these little guys while I solder in that center plate.  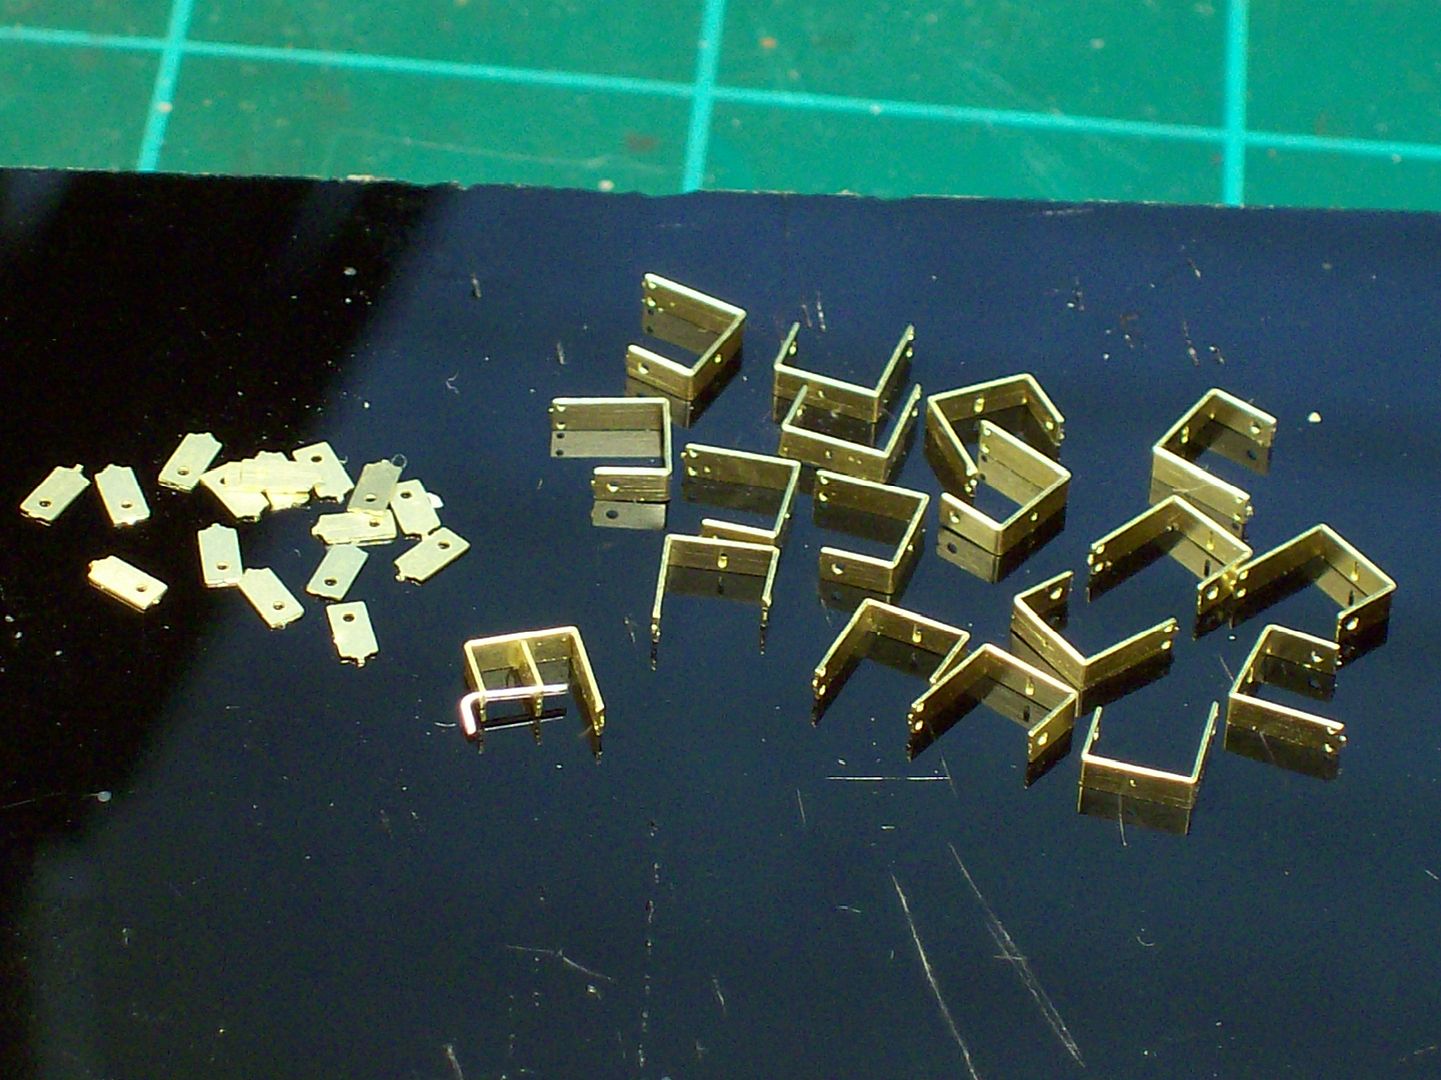 Tony |
|
|
|
Post by eastrock on Mar 2, 2012 12:11:33 GMT -5
Lets of stuff tony!!  |
|
|
|
Post by spud on Mar 2, 2012 13:42:40 GMT -5
Omg ..... You must have some serious goggles tony
|
|
|
|
Post by tonylee-Rest In Peace on Mar 2, 2012 14:19:33 GMT -5
;D I figured out a way to hold these with 2mm wide wooden square pegs glued to a steel V block. There's not enough surface area for glue to hold the little center plate so they had to be soldered.  Once I got the hang of it it didn't take very long to do all 18. 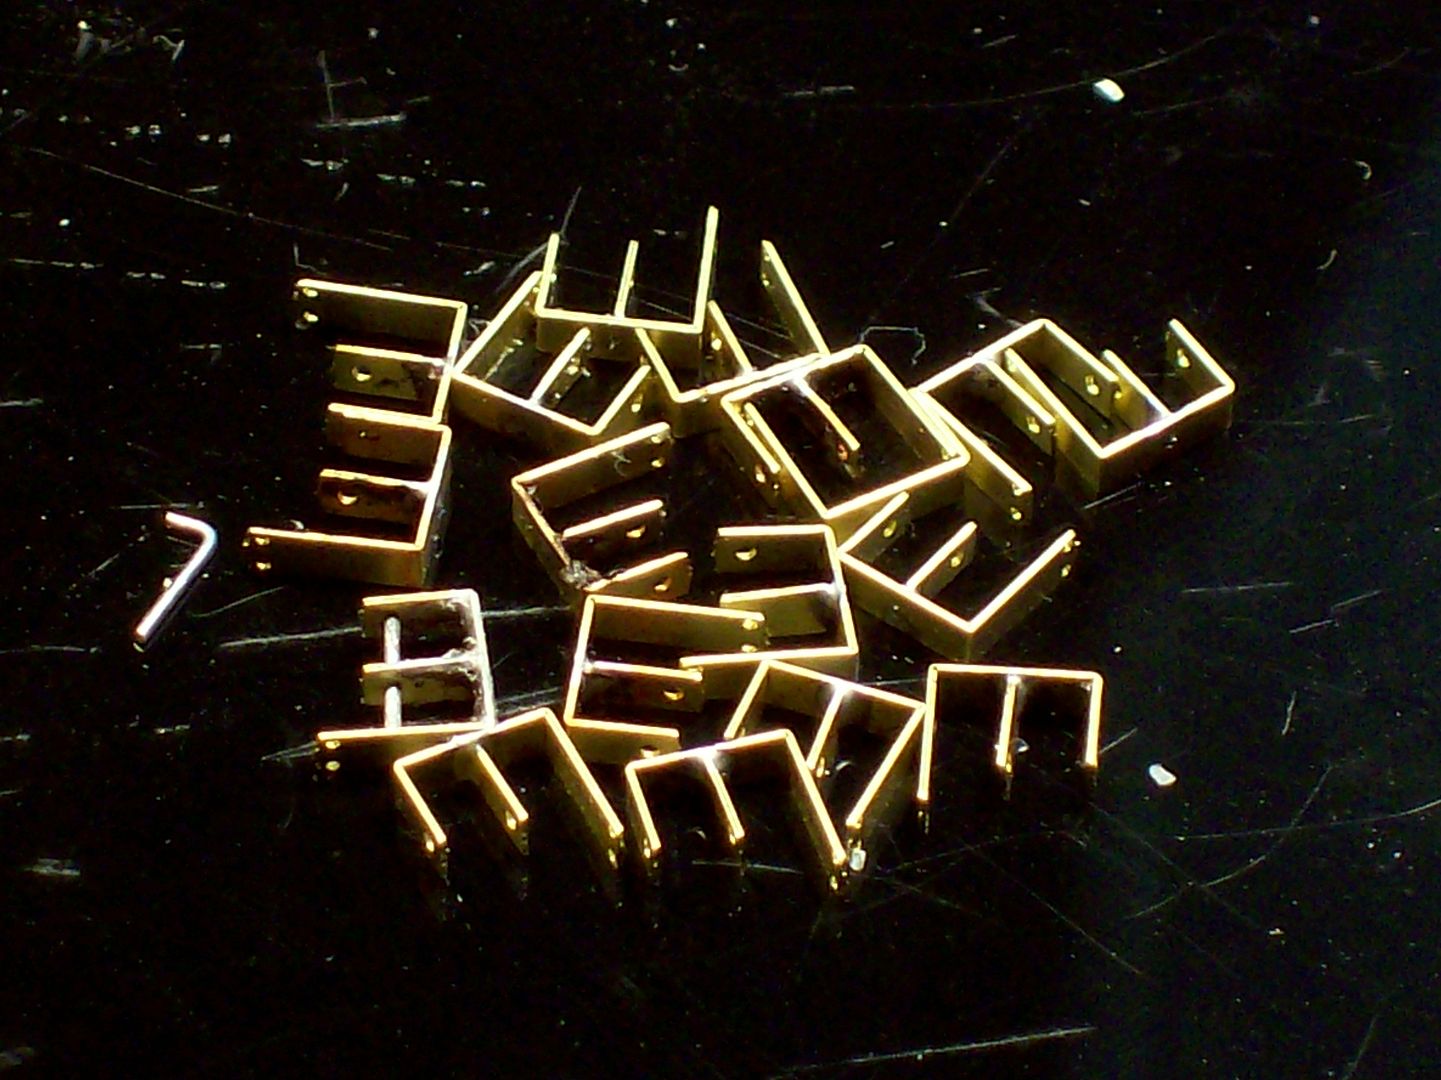 Need to bend some pins and that finishes that task. BTW 4mm wide 3mm high 1 1/2mm front to back Later Tony |
|
panzerman75.
Full Member
  
Member since: February 2012
Posts: 292
Feb 19, 2012 1:07:13 GMT -5
Feb 19, 2012 1:07:13 GMT -5
|
Post by panzerman75. on Mar 2, 2012 14:22:51 GMT -5
Looks great Tony you inspire me to do more p.e on my models looks great
Phil
|
|
|
|
Post by spud on Mar 2, 2012 15:28:57 GMT -5
wow fantastic tony, you really are an ace with the ol shinys
|
|
|
|
Post by tonylee-Rest In Peace on Mar 2, 2012 16:09:52 GMT -5
Thanks Some of the glue from the pegs melted to the brass and i'll have to clean that off but otherwise the solder flowed real nice. Humped over the bench is hard on the old back,it's aspirin time.  Tony |
|
bigjohn
Reviews member    
Member since: December 2011
John Hale
Posts: 3,438
Dec 21, 2011 2:17:45 GMT -5
Dec 21, 2011 2:17:45 GMT -5
|
Post by bigjohn on Mar 2, 2012 19:20:12 GMT -5
They don't call him the King of Bling for nothing. Nice work with the jig Tony.
|
|
|
|
Post by 406 Silverado on Mar 2, 2012 19:38:48 GMT -5
Now that's the Tony we know......Mr. PE.
Top work as usual buddy. Looking forward to the screens
|
|
|
|
Post by tonylee-Rest In Peace on Mar 2, 2012 20:58:22 GMT -5
You guys are full of it you know that? ;D
Tony
|
|
|
|
Post by TRM on Mar 2, 2012 21:03:06 GMT -5
Then I am full of it too Uncle T!!!! perfecto!!! that is just how you roll!!!  |
|
|
|
Post by eastrock on Mar 2, 2012 21:50:41 GMT -5
Tony's Brass works!!!
|
|
danb.
Reviews member     March 2013 MoM Winner
Member since: November 2011
Posts: 2,808
Nov 17, 2011 9:22:52 GMT -5
Nov 17, 2011 9:22:52 GMT -5
|
Post by danb. on Mar 3, 2012 5:34:27 GMT -5
WOW Tony thats an amazing effort keep it up.
Dan B
|
|
|
|
Post by 406 Silverado on Mar 3, 2012 10:03:49 GMT -5
;D ;D ;D ;D  |
|
|
|
Post by tonylee-Rest In Peace on Mar 3, 2012 13:23:02 GMT -5
I'm goin to my room and hide,you people are just too much.  Tony  |
|
|
|
Post by tonylee-Rest In Peace on Mar 3, 2012 14:52:27 GMT -5
Since you guys are all pumped up about these Thoma schurzens here's a little something to tide you over till Monday. ;D There are three panels per side and this is the center panel. The screen is sandwiched between those reinforcing strips top and bottom and of course the three upper hangers. 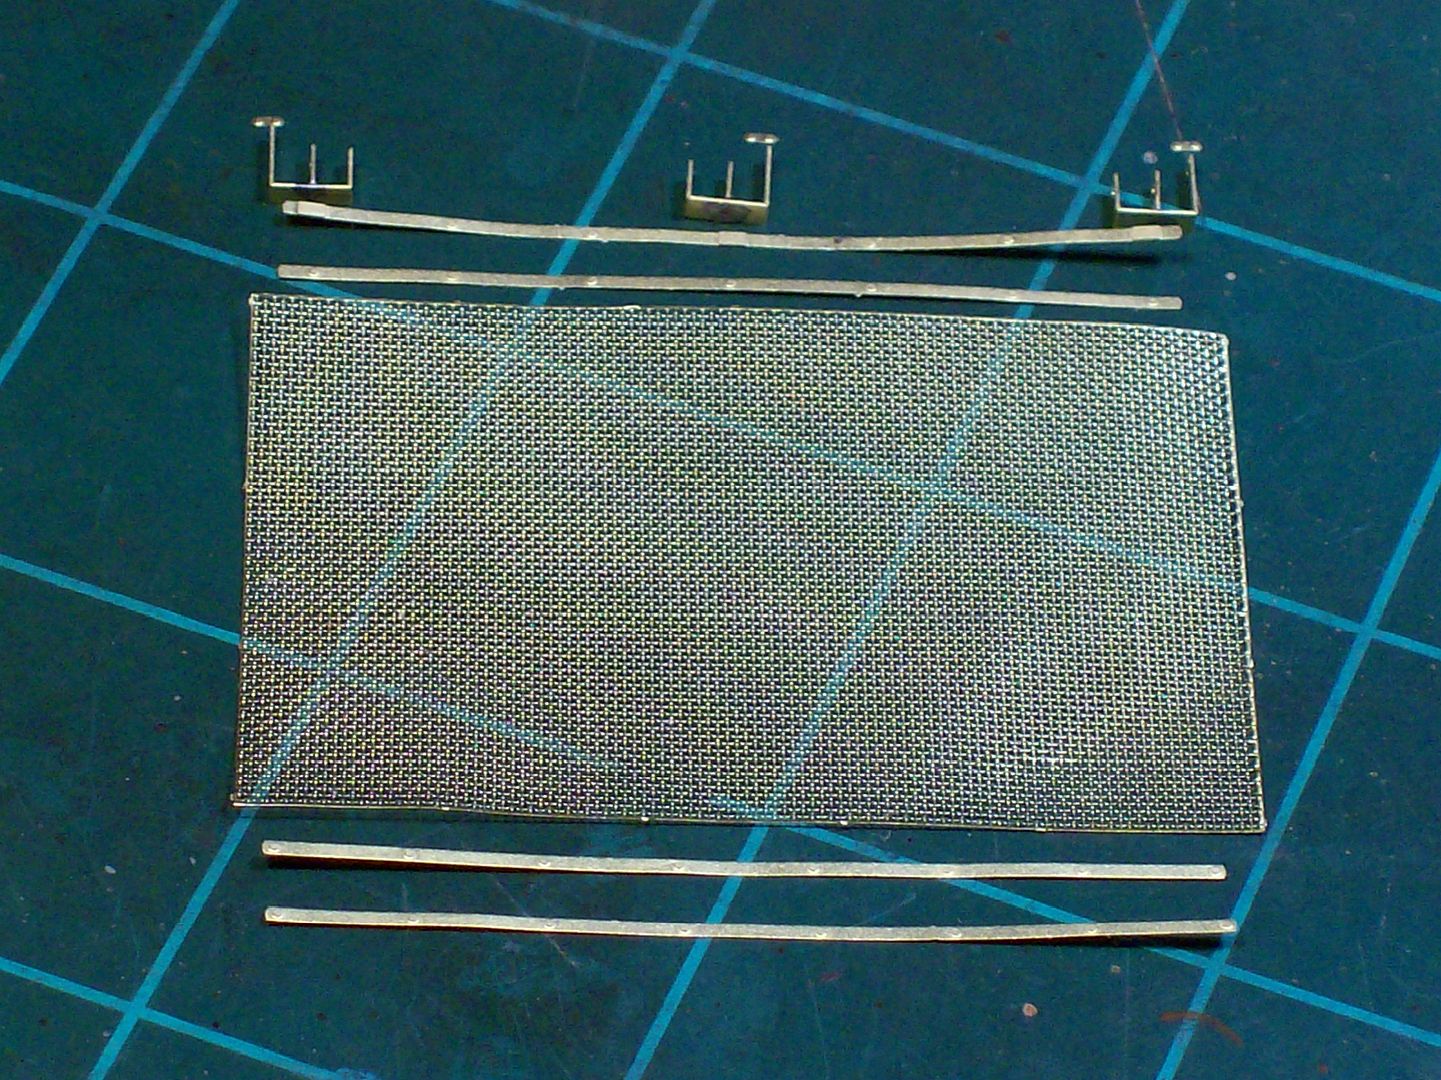 All soldered up 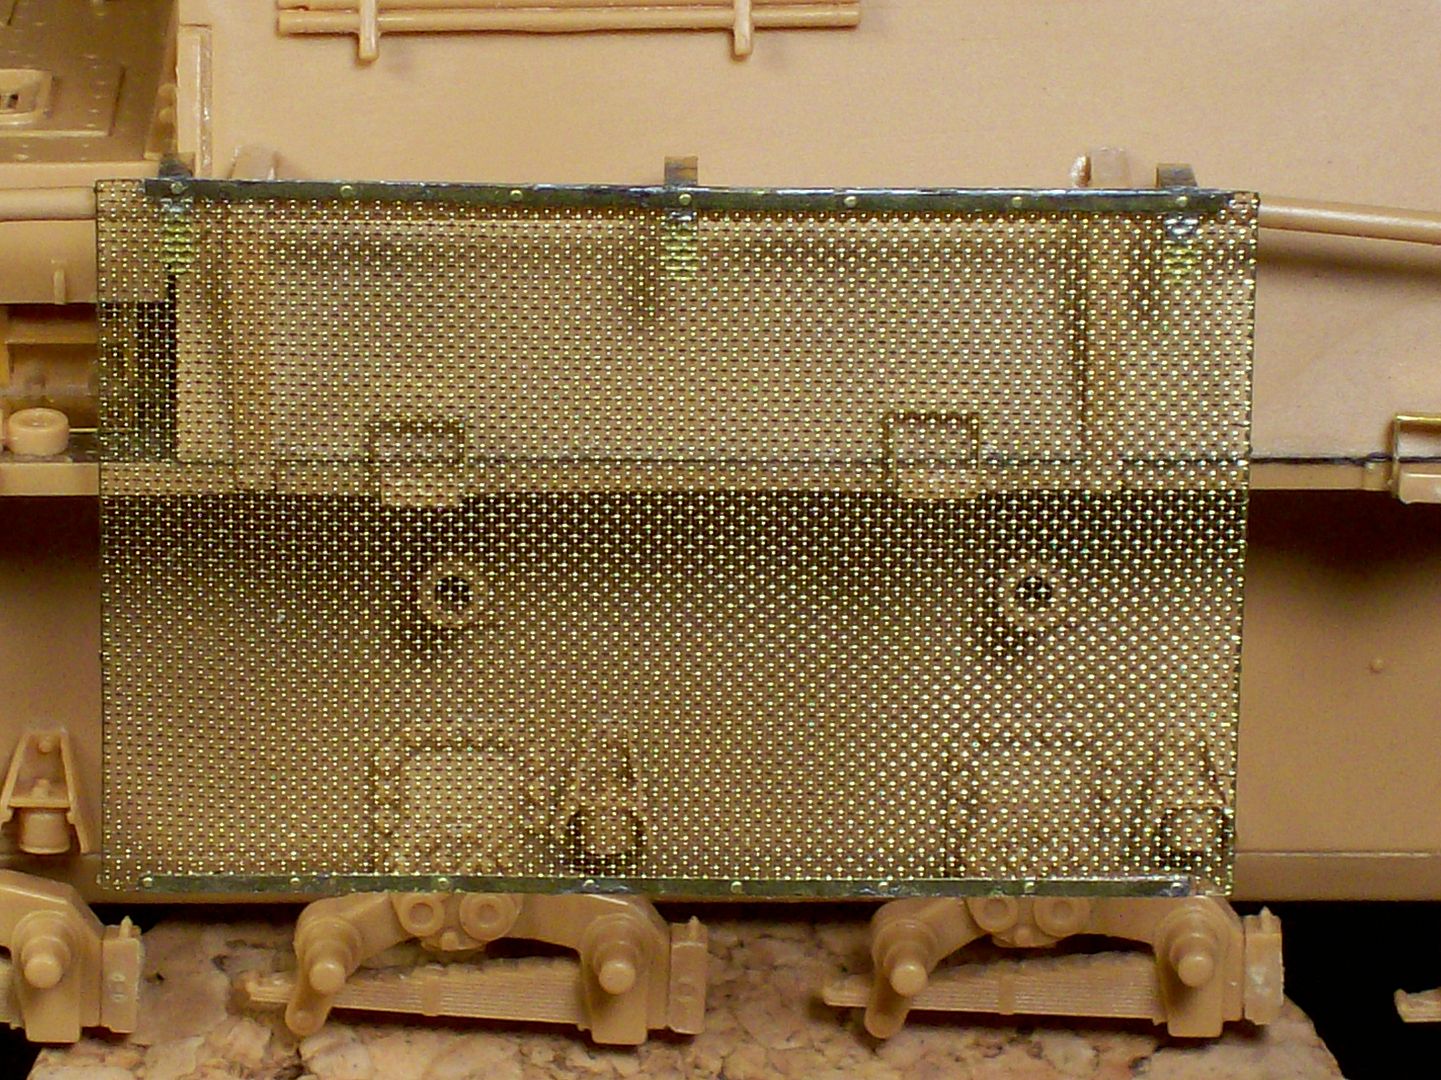 Time to rest my back so chill out you task masters  Tony |
|
panzerman75.
Full Member
  
Member since: February 2012
Posts: 292
Feb 19, 2012 1:07:13 GMT -5
Feb 19, 2012 1:07:13 GMT -5
|
Post by panzerman75. on Mar 3, 2012 14:57:59 GMT -5
Looks great tony keep up the great work
Phil
|
|
|
|
Post by spud on Mar 3, 2012 15:57:24 GMT -5
have you tried lowering your chair tony so your not humped over too much?
very clean and i preusme its soldered
|
|
|
|
Post by tonylee-Rest In Peace on Mar 3, 2012 16:25:16 GMT -5
Yep it's soldered Spud  I lean over the bench so if I drop a part it doesn't go to the floor,just a habit from my gun smithing days. Thanks Panzer Tony |
|
|
|
Post by spud on Mar 3, 2012 17:23:49 GMT -5
lol i should do that, i have a habit of sitting away from mine,
|
|
modelfreak72
Full Member
  
Member since: January 2012
Why worry, each of us is wearing an unlicensed nuclear accelerator on his back.
Posts: 1,479
Jan 28, 2012 23:21:46 GMT -5
Jan 28, 2012 23:21:46 GMT -5
|
Post by modelfreak72 on Mar 4, 2012 0:17:05 GMT -5
Hey tony, just getting caught up. Awesome work with the hangers and the mesh! The kit is looking great, looking forward to the next update!
|
|
|
|
Post by tonylee-Rest In Peace on Mar 5, 2012 19:14:42 GMT -5
Up-Date Time 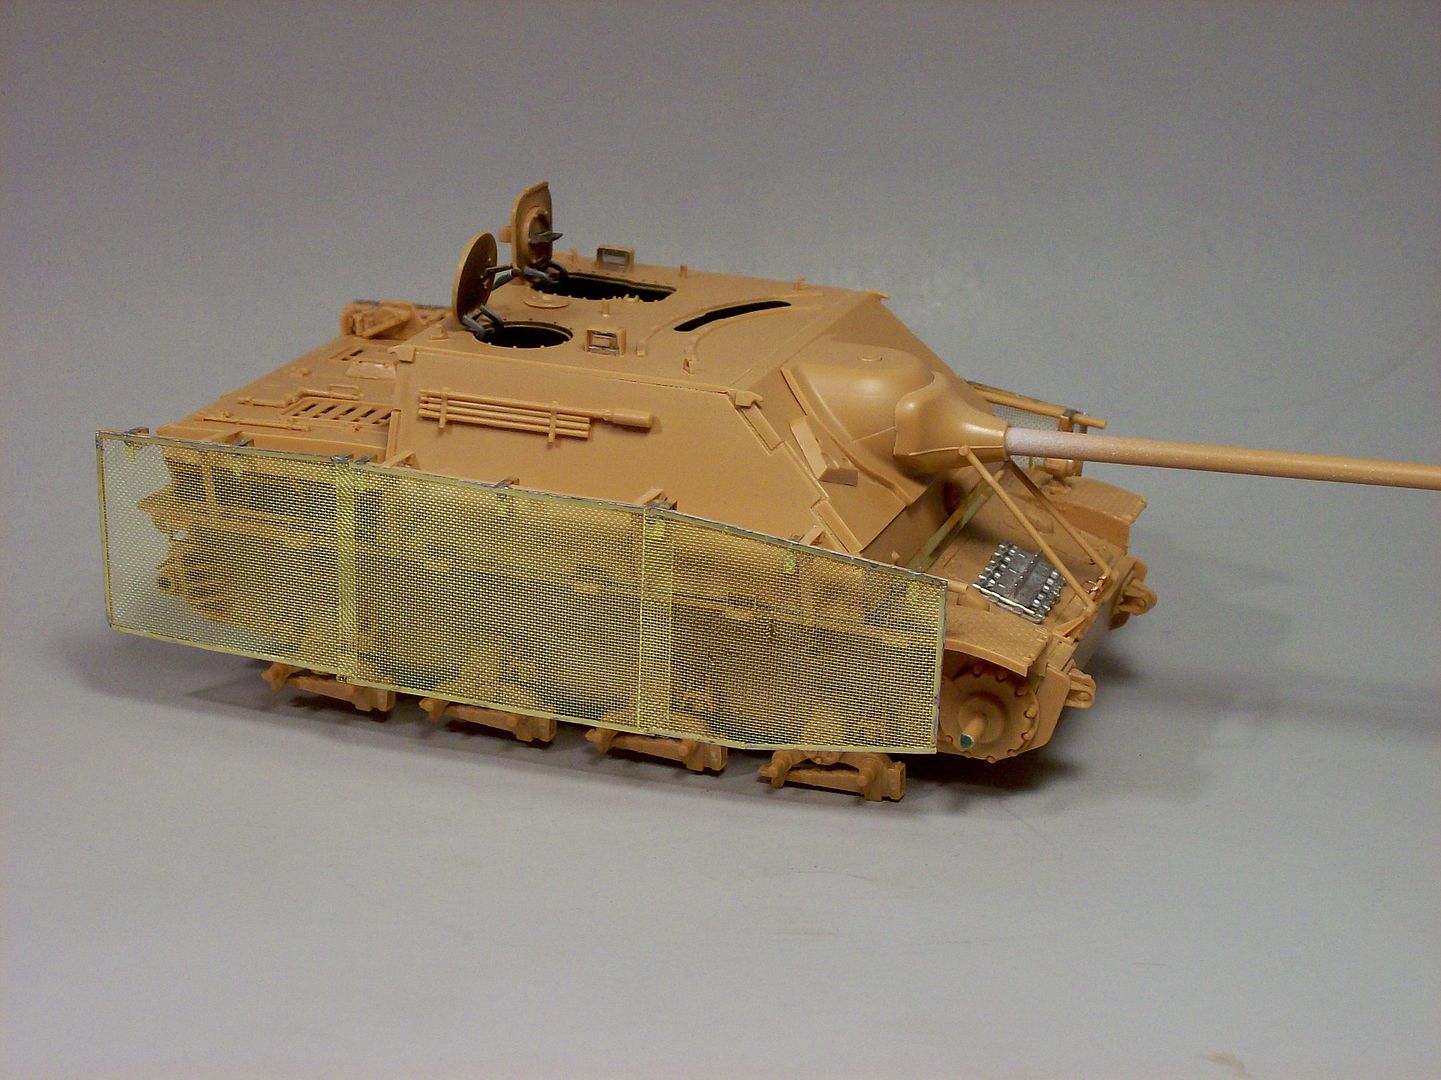 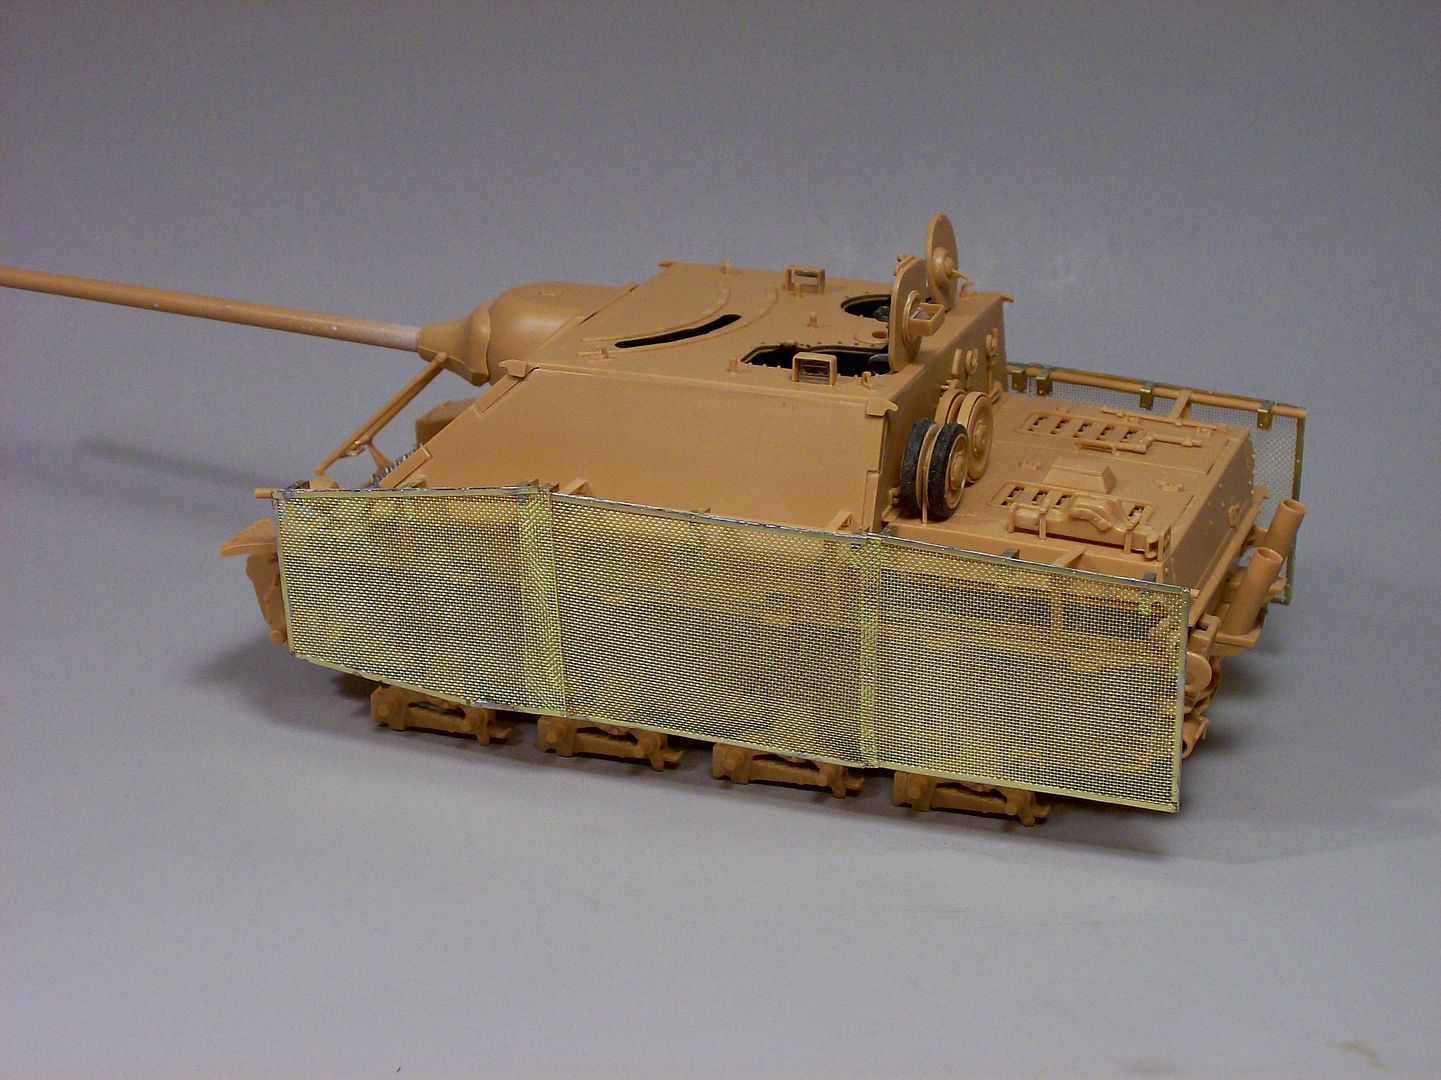 Attach the lower hangers and they'll be done. That step was super fun  Tony lee |
|
panzerman75.
Full Member
  
Member since: February 2012
Posts: 292
Feb 19, 2012 1:07:13 GMT -5
Feb 19, 2012 1:07:13 GMT -5
|
Post by panzerman75. on Mar 5, 2012 20:00:50 GMT -5
Looks sharp tony real sharp.
|
|