Deleted
Member since: January 1970
Posts: 0
Apr 23, 2024 5:34:32 GMT -5
Apr 23, 2024 5:34:32 GMT -5
|
Post by Deleted on Aug 11, 2012 9:14:10 GMT -5
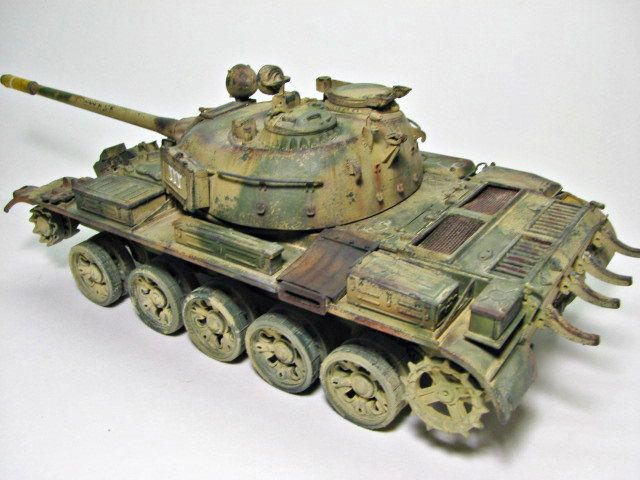
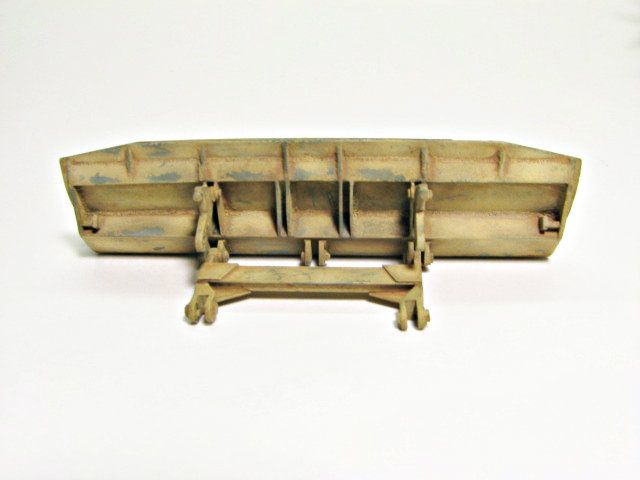
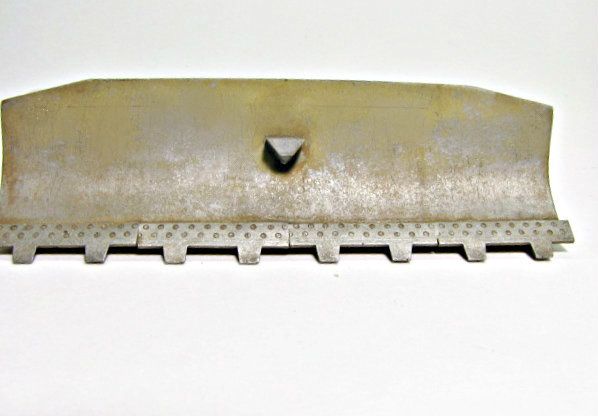
I picked this kit up for 10 bucks at an IPMS show last winter. It was a great deal and it was Russian so had to have it. The kit itself wasn't bad however there were a lot of parts on the sprues that were options that the instructions did not explain. I wanted to build a T-55 but cannot afford the Tamiya offering at this time so decided to convert it. The only real difference between T-54/T-55 variants I can see is just the biological protection port thing on the turret just forward the gunners mount. To me it looks like a T-55 and for now thats good enough. Using referance photo's I tried to scratch build some more detail into it's appearance using lead wire and styrene. I also added the BTU-55 Dozer attachment from CMK. For $17 from sprue brothers I had to have it. I also picked up an aluminium barrel from Barrel Depot via SB's as well. Not sure what to do with the track yet, I don't like the rubber ones that came with and can't afford fruil tracks so I may comprimise and get the workable ones from Trumpeter, they're only around 20 bucks. The DSHK machine gun was also the pits...so grabbed a brass one from JB Model. I'm glad the kit was only 10 bucks but at this point I could have gotten the Tamiya one  . Here's where I'm at: 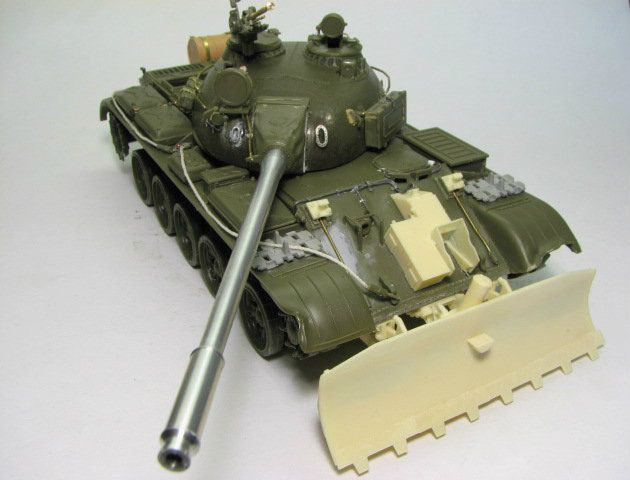 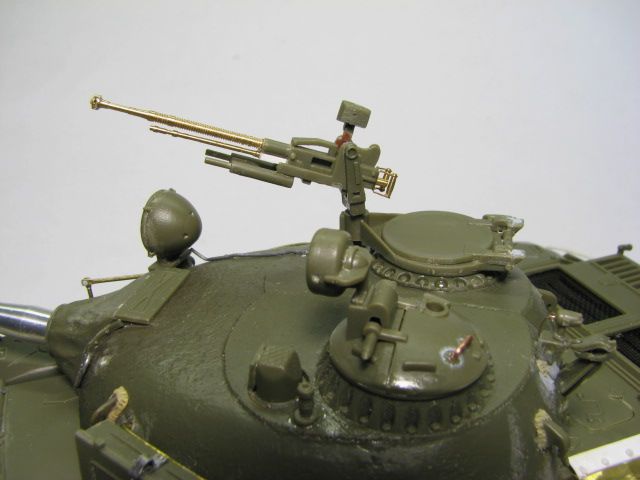 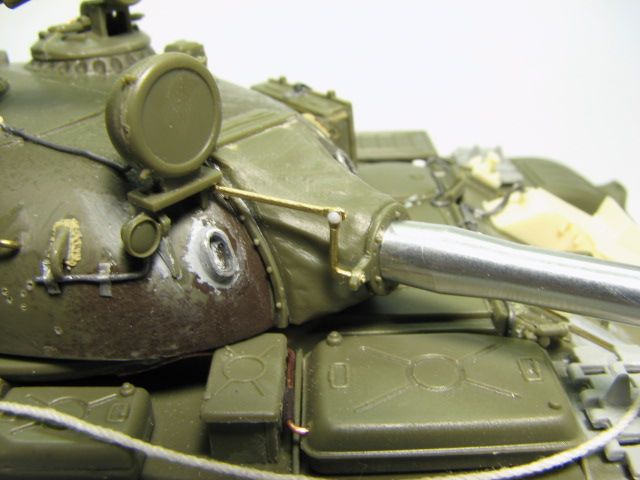 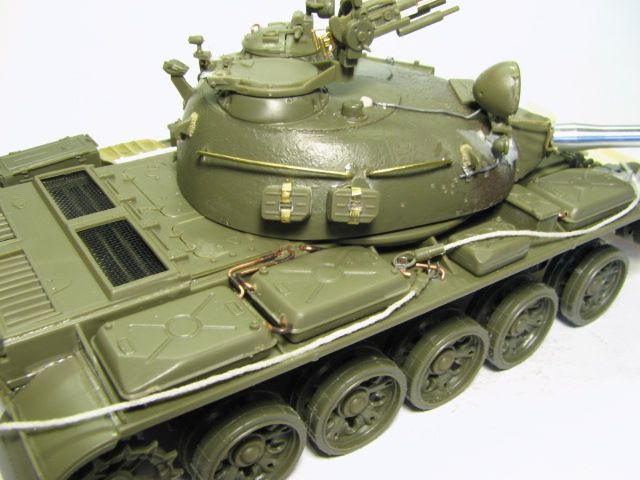 Rattle can satin green: 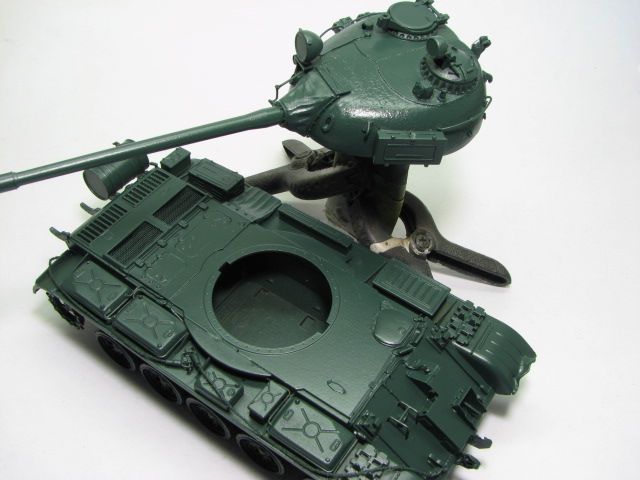 Here it is after a coat of hairspray and a mix of Tamiya buff and Flat yellow. I then added some white to the cup and tried to create some variation. 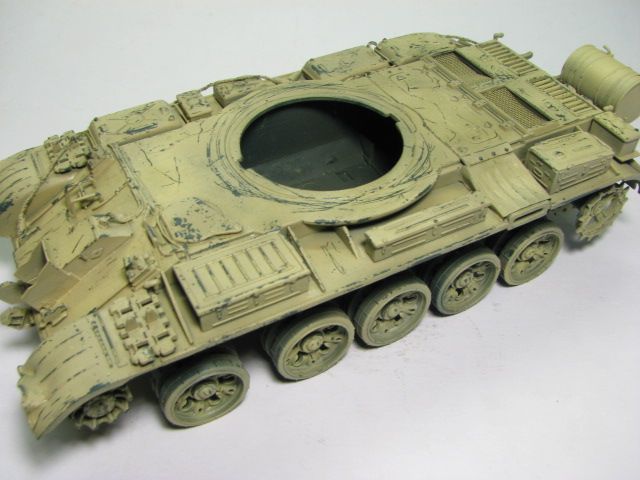 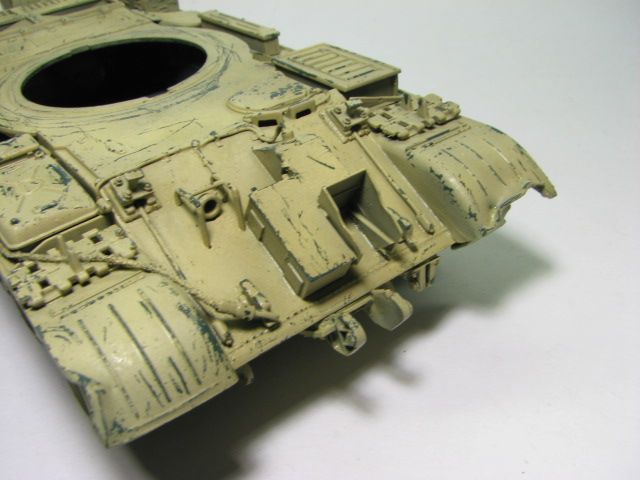 I then hit everything again with a coat of Humbrol Matt and another coat of hairspray. I then did my green camo pattern over that followed by some chipping effect with a sponge and a brush. 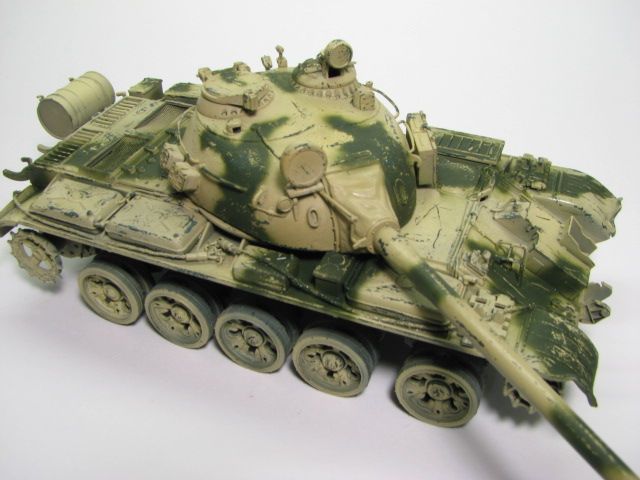 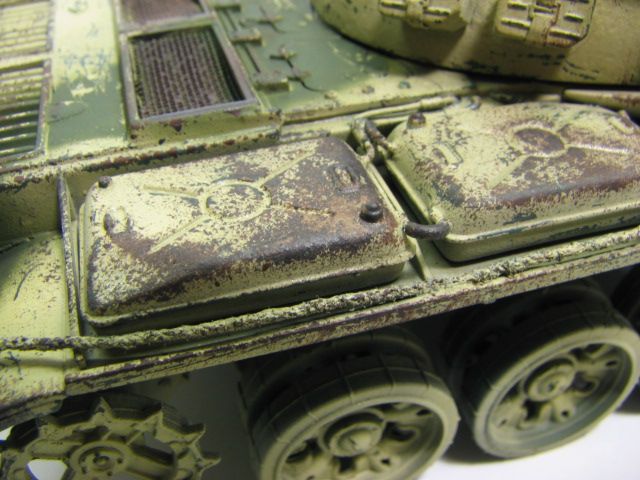 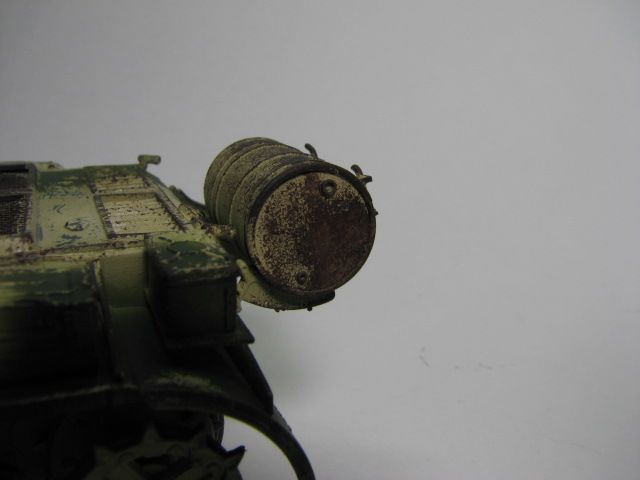 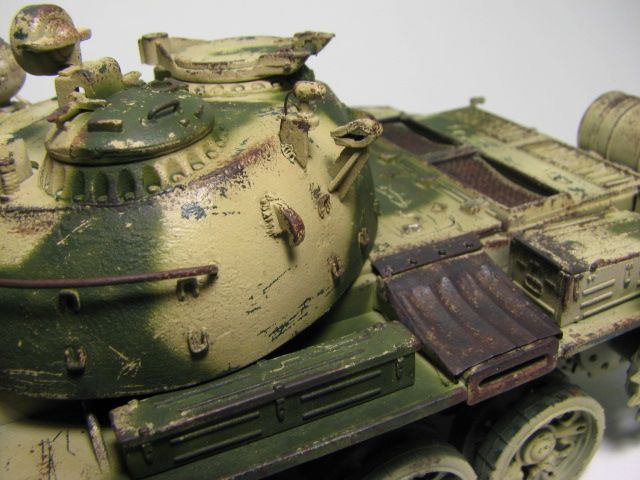 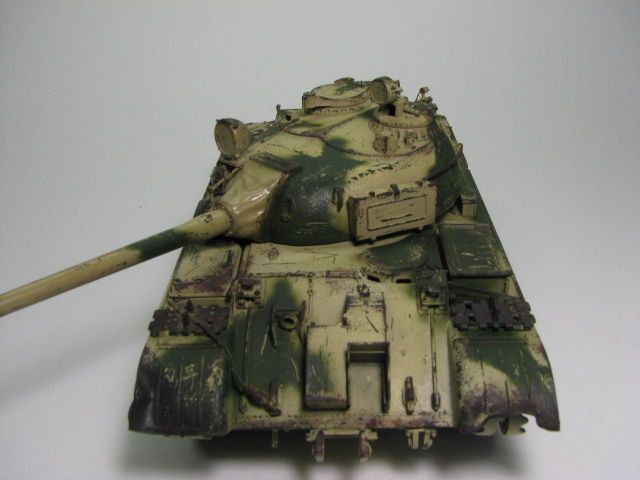 And now I have been hitting it with washes and pigments, I'll post those later.  |
|
|
|
Post by 406 Silverado on Aug 11, 2012 9:20:07 GMT -5
Don't knock those cheap 10 dollar kits, like the ESCI kits. You can still make a good model from it...like this one here. Very nice work on the one.
I've moved it to the armor category since it's still a WIP.
|
|
Deleted
Member since: January 1970
Posts: 0
Apr 23, 2024 5:34:32 GMT -5
Apr 23, 2024 5:34:32 GMT -5
|
Post by Deleted on Aug 11, 2012 9:30:35 GMT -5
Thanks, I'll try to put up better photo's too these ones are dark.
|
|
|
|
Post by spud on Aug 11, 2012 9:50:09 GMT -5
ialarmu the Rusting looks fantastic. as for teh tracks ild hold off and save the extra few quid but them im biased cos i love friuls |
|
bigjohn
Reviews member 
Member since: December 2011
John Hale
Posts: 3,438
Dec 21, 2011 2:17:45 GMT -5
Dec 21, 2011 2:17:45 GMT -5
|
Post by bigjohn on Aug 11, 2012 11:02:11 GMT -5
Wow, That paint job looks fantastic. Nice job with the bargin kit!
|
|
Deleted
Member since: January 1970
Posts: 0
Apr 23, 2024 5:34:32 GMT -5
Apr 23, 2024 5:34:32 GMT -5
|
Post by Deleted on Aug 11, 2012 11:17:21 GMT -5
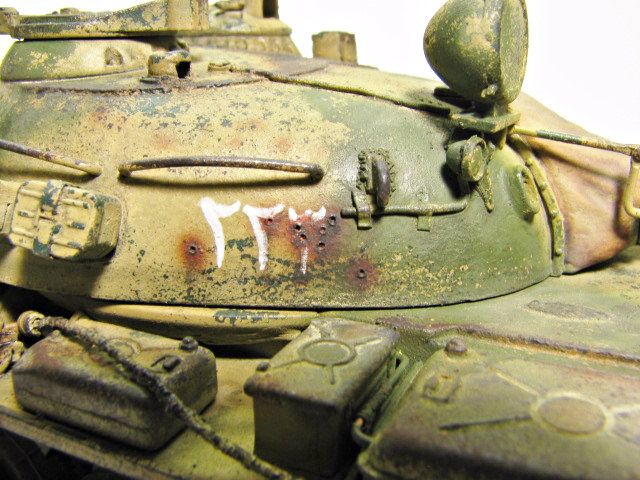
Ok, so I got some pics of where I am to date.. Last night I did a black oil wash followed by a yellow ochre mixed with white filter to give a washed out dusty look. I also carefully went around the model with some very thin rust colour from the airbrush just tightly over the rusty spots to stain the area. Then I finished off with a brush filled with black pigment to rub over those spots to give a worn look. 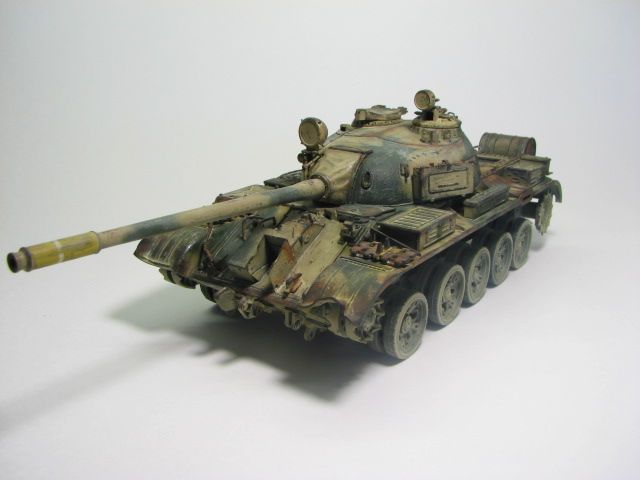 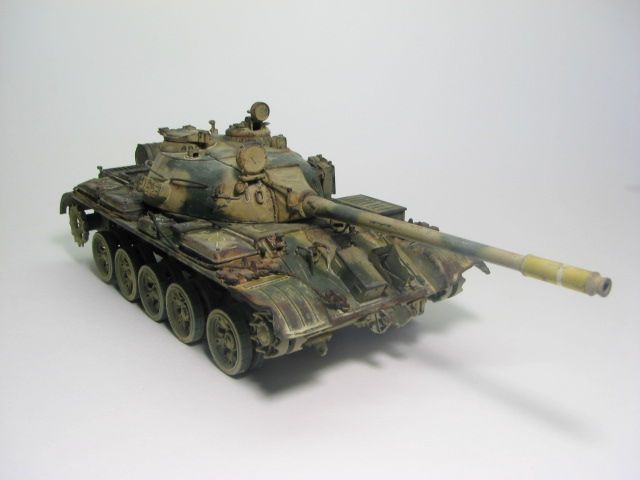 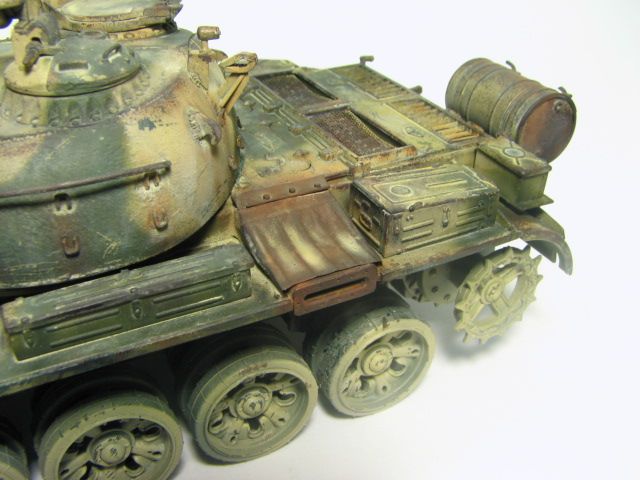 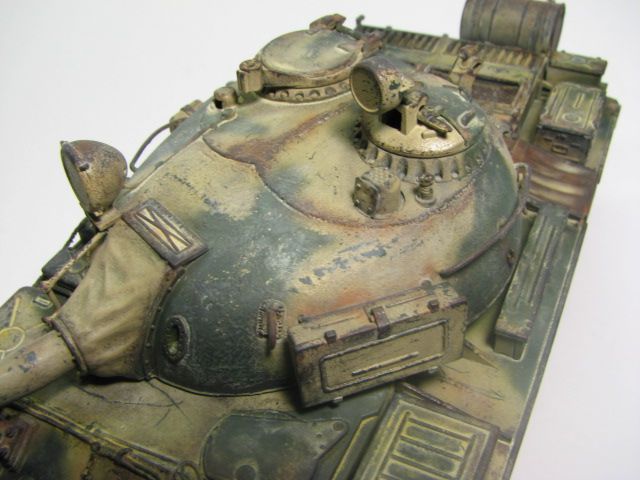 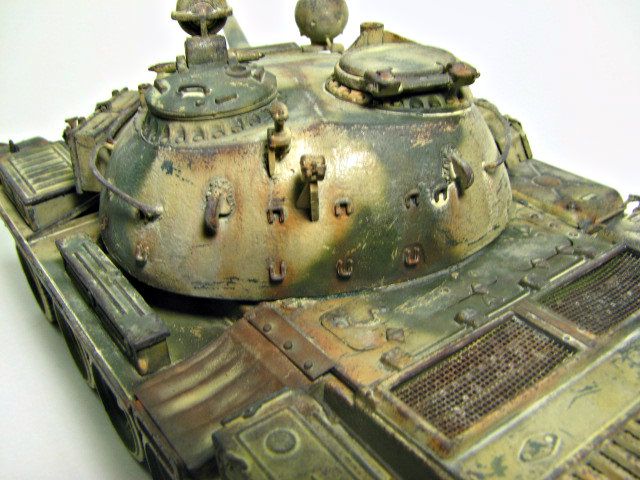 Tonight I'll start on the dozer blade, I also have to do the wheels but still undecided what to do, I've seen some fairly clean but worn wheels on Iraqi tanks and muddy ,very dirty ones as well  . |
|
|
|
Post by wbill76 on Aug 11, 2012 11:20:10 GMT -5
Very nice work on the older kit...weathering and wear give it the "hard miles" look. Either way with the wheels would work, are you planning to put it on a base? If so, that might make the decisio for you.
|
|
|
|
Post by bbd468 on Aug 11, 2012 14:47:53 GMT -5
WOW!!! That is a stunning job, front to back man. Luv it!  Gary |
|
paulh
Senior Member

Member since: November 2011
build, fail, learn, succeed - ENJOY
Posts: 2,389
Nov 15, 2011 15:54:51 GMT -5
Nov 15, 2011 15:54:51 GMT -5
|
Post by paulh on Aug 11, 2012 15:07:26 GMT -5
Lovely job!
Done a similar thing myself with a few cheap Trumpy kis bought as skill builders. Great fun geyying them too look half-decent.
A word of caution on the Trumpeter indy-links-: I bought the non-workable ones and found I had to take a slice out of the drive sprockets for them to fit- hopefully the workable ones will be better.
P
|
|
Deleted
Member since: January 1970
Posts: 0
Apr 23, 2024 5:34:32 GMT -5
Apr 23, 2024 5:34:32 GMT -5
|
Post by Deleted on Aug 11, 2012 15:14:09 GMT -5
Nice colour scheme on a great build  very nice |
|
rondriaan
Full Member

Member since: March 2012
Posts: 606
Mar 27, 2012 2:07:40 GMT -5
Mar 27, 2012 2:07:40 GMT -5
|
Post by rondriaan on Aug 12, 2012 16:10:21 GMT -5
Wow thats looks good
|
|
WigWag Workshop
Reviews member
Member since: May 2012
"Keep The Glue On The Styrene"
Posts: 720
May 22, 2012 7:25:45 GMT -5
May 22, 2012 7:25:45 GMT -5
|
Post by WigWag Workshop on Aug 12, 2012 16:19:29 GMT -5
WOW! Very nice build, weathering is top notch
-Steven
|
|
Deleted
Member since: January 1970
Posts: 0
Apr 23, 2024 5:34:32 GMT -5
Apr 23, 2024 5:34:32 GMT -5
|
Post by Deleted on Aug 12, 2012 23:34:26 GMT -5
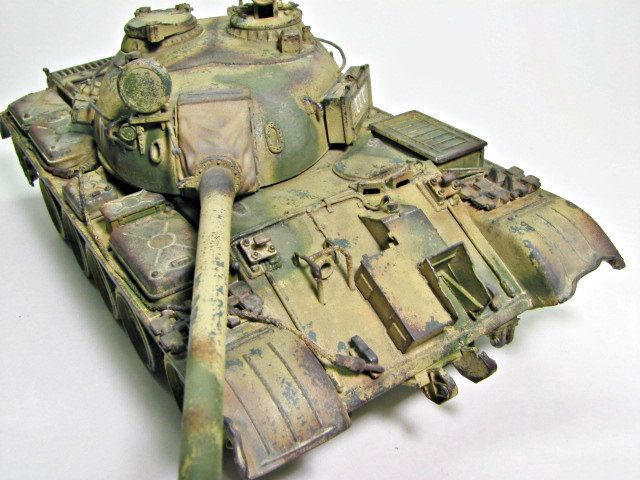
Well guys, last night I was contemplating this model. The weathering was bothering me a bit as it just looked a little bit muddy and not very defined, and maybe a bit overdone...... I was looking at some Iraqi tanks on the net and mine looked similar to the ones I saw in a tank graveyard. I'm going for a well worn "operational" look not a "knocked out rusting in the desert " look so I became bothered..............then came out a ziplok bag and a bottle of Windex. I stripped the whole thing down to the green enamel I had applied and started over, I'm still going for the chipped look but will reduce the rust and try to keep my details and rusting crisp and subtle. Heres where I'm at as of tonight. 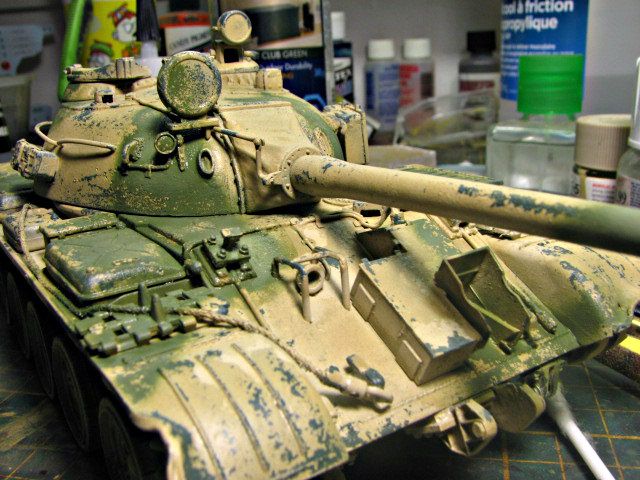 Tommorrow night I'll have some time to start some careful rusting. I want to take my time and do this right,I think overall I got a bit excited with the last attempt. I also changed my shade of green and browned up the tan colour, IMO it looks a bit better for the scale. Thanks for looking |
|
Deleted
Member since: January 1970
Posts: 0
Apr 23, 2024 5:34:32 GMT -5
Apr 23, 2024 5:34:32 GMT -5
|
Post by Deleted on Aug 13, 2012 12:39:27 GMT -5
Yeah I fugured that reaction was coming LOL! I tend to be a bit fussy about these things and I'm already happier with the chipping so far. Some times you can get carried away with washes and lose what you were aiming for.
I stripped a Churchill I did 4 times......Windex is awesome.
|
|
|
|
Post by wbill76 on Aug 13, 2012 13:04:02 GMT -5
The important thing is that you are happy with the end result since it will be sitting there on your shelf once completed...I know the feeling of having a not-quite-satisfactory build quietly mocking you every time you glance at it on the shelf...it can get very annoying! ;D Looking forward to round 2!
|
|
|
|
Post by wbill76 on Aug 13, 2012 17:51:08 GMT -5
Could be Dicky! Although somehow I doubt that's the real source of any discomfort for you judging by what your new cave is turning out these days. As a builder we get very close and personal with each project and know all the little flaws and such as a result that others don't...and if not careful can become our own worst critics. For myself, I'm generally happy with builds that cross the finish line...there's only be one occasion where I've declared one finished but then went back and tweaked things a bit to quiet the nagging voice in the back of my mind saying "you know it's not REALLY done unless you fix X". ;D |
|
Deleted
Member since: January 1970
Posts: 0
Apr 23, 2024 5:34:32 GMT -5
Apr 23, 2024 5:34:32 GMT -5
|
Post by Deleted on Aug 13, 2012 21:41:08 GMT -5
Well, for me it's about doing my best work possible,it's how I stretch myself. This is why I'm Chumming with you all now cuz the work around here rocks my socks A good lot here! Weathering is going well tonight, decided pull back on the reigns a tad and I'm liking the results. I'll tidy up the desk for some photos tomorrow after work. Thanks for the input guys! |
|
|
|
Post by bbd468 on Aug 14, 2012 12:59:56 GMT -5
Dude.... I thought you nailed it the first time. Looked pretty sweet to me. ;D Gary |
|
Deleted
Member since: January 1970
Posts: 0
Apr 23, 2024 5:34:32 GMT -5
Apr 23, 2024 5:34:32 GMT -5
|
Post by Deleted on Aug 14, 2012 22:03:15 GMT -5
|
|
|
|
Post by wbill76 on Aug 15, 2012 11:04:12 GMT -5
No worries man, it's your build and you need to be happy with the end result, after all it's your work and effort going into it. I'd say you achieved your desired look based on the description very nicely.
|
|
Deleted
Member since: January 1970
Posts: 0
Apr 23, 2024 5:34:32 GMT -5
Apr 23, 2024 5:34:32 GMT -5
|
Post by Deleted on Aug 15, 2012 18:01:41 GMT -5
Thanks guys!
|
|
bigjohn
Reviews member
Member since: December 2011
John Hale
Posts: 3,438
Dec 21, 2011 2:17:45 GMT -5
Dec 21, 2011 2:17:45 GMT -5
|
Post by bigjohn on Aug 15, 2012 19:48:54 GMT -5
If it makes you feel any better, I think your second attempt looks better than the first one. I really like what I see!
|
|
|
|
Post by bbd468 on Aug 15, 2012 20:13:39 GMT -5
Hey... What can i say but, you nailed it again!!! Looks awesome man! Well Done. Gary |
|
stevereid
Full Member
Member since: November 2011
Posts: 556
Nov 16, 2011 16:17:33 GMT -5
Nov 16, 2011 16:17:33 GMT -5
|
Post by stevereid on Aug 15, 2012 21:07:34 GMT -5
I love this! Not a great kit- but your work shows that someone with skill can make that irrelevant.
I have seen Rob (scratchmod) do this many times and it is great to see.
Steve
|
|
Deleted
Member since: January 1970
Posts: 0
Apr 23, 2024 5:34:32 GMT -5
Apr 23, 2024 5:34:32 GMT -5
|
Post by Deleted on Aug 16, 2012 19:27:05 GMT -5
Thanks fellers, appreciated!
|
|
noname
Full Member
March 2012 / April 2013 MoM Winner
Member since: January 2012
I like building models
Posts: 720
Jan 29, 2012 9:24:03 GMT -5
Jan 29, 2012 9:24:03 GMT -5
|
Post by noname on Aug 16, 2012 20:46:12 GMT -5
This is lookinjg great. I can tell your having fun. Your being fussy is paying off.
|
|
Deleted
Member since: January 1970
Posts: 0
Apr 23, 2024 5:34:32 GMT -5
Apr 23, 2024 5:34:32 GMT -5
|
Post by Deleted on Aug 24, 2012 19:28:18 GMT -5
Ordered some Trumpy tracks on evilbay today. 25 bucks with free shipping |
|
|
|
Post by wouter on Aug 25, 2012 8:27:49 GMT -5
wow, that's a very nice T-55...superb chipping and sublime weathering, looks great mate!
Cheers
|
|
Deleted
Member since: January 1970
Posts: 0
Apr 23, 2024 5:34:32 GMT -5
Apr 23, 2024 5:34:32 GMT -5
|
Post by Deleted on Sept 19, 2012 18:04:52 GMT -5
Hey guy's, I got the Trumpeter tracks in the mail the other day. WOW a lot of sprue cutting in my future as each link has 4 contact points to the tree.  Anyway, of course the first thing I wanted to check was if they fit flawlessly over the drive sprocket. 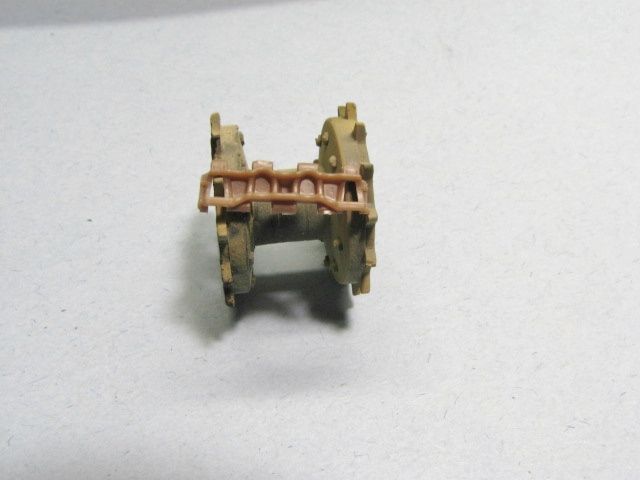 As you can see NO. No big deal, we're model builders right? So I simply removed the drive sprocket and cut it with my razor saw and test fitted until right.  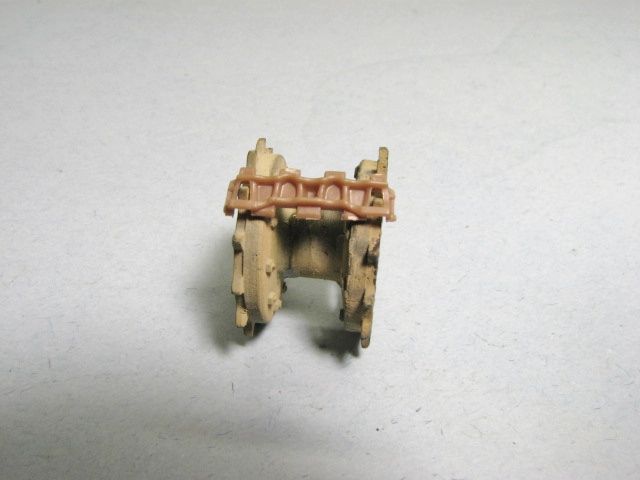 Now to settle in to the task of building track, I may need a spacer for that drive wheel so the track stays straight to the road wheels, we shall see. Crank the tunes it's gonna be a long night. ;D |
|
|
|
Post by wbill76 on Sept 19, 2012 19:23:04 GMT -5
Tracks are always tedious, but looks like you've got the sprocket hurdle cleared!
|
|
 .
.


 .
. 


 very nice


 .
.