|
|
Post by spud on May 2, 2012 13:01:18 GMT -5
very cool
|
|
snidervolley
Full Member

Member since: April 2012
Posts: 346
Apr 27, 2012 14:51:48 GMT -5
Apr 27, 2012 14:51:48 GMT -5
|
Post by snidervolley on May 2, 2012 16:50:07 GMT -5
|
|
|
|
Post by spud on May 2, 2012 17:06:23 GMT -5
wouldnt that have been a cream or off white on the insde? like teh glass holder?
|
|
snidervolley
Full Member
Member since: April 2012
Posts: 346
Apr 27, 2012 14:51:48 GMT -5
Apr 27, 2012 14:51:48 GMT -5
|
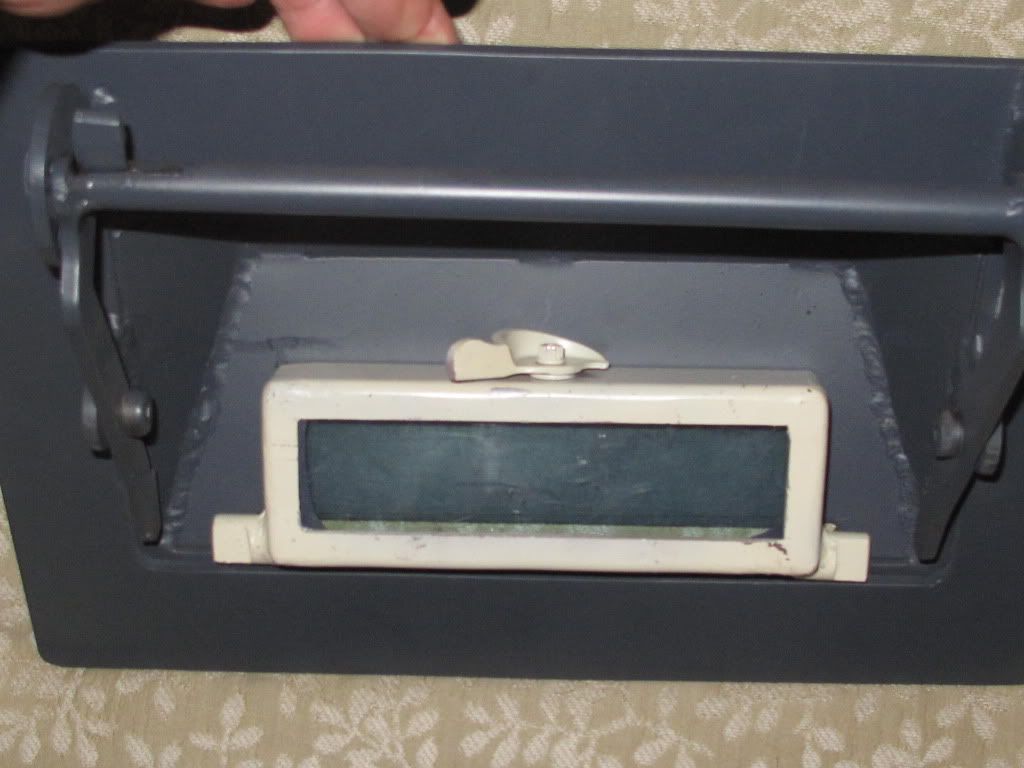
Post by snidervolley on May 3, 2012 8:52:55 GMT -5
yes absolutly, the paint i have on the visor is just to protect the test fixture while i figure out how to hold glass blocks within visor .the interior can be ivory or buff and i will go with buff .
|
|
snidervolley
Full Member
Member since: April 2012
Posts: 346
Apr 27, 2012 14:51:48 GMT -5
Apr 27, 2012 14:51:48 GMT -5
|
Post by snidervolley on May 7, 2012 9:12:53 GMT -5
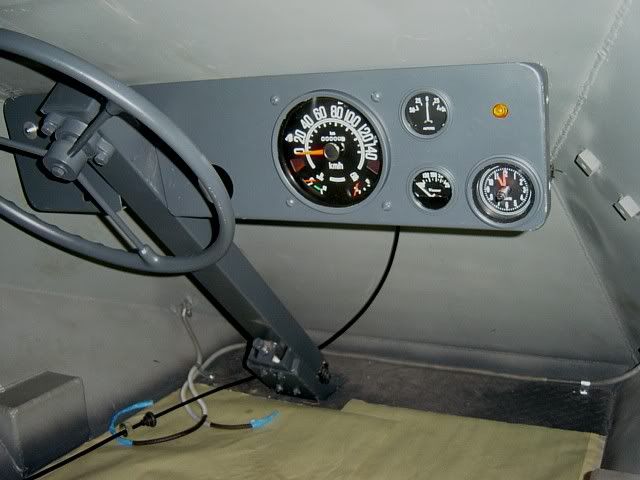 dash and stearing wheel at correct angle and location |
|
|
|
Post by spud on May 7, 2012 9:56:54 GMT -5
very cool,
|
|
stevereid
Full Member
Member since: November 2011
Posts: 556
Nov 16, 2011 16:17:33 GMT -5
Nov 16, 2011 16:17:33 GMT -5
|
Post by stevereid on May 7, 2012 17:58:55 GMT -5
Snider-
you have a great eye for detail- and your welding looks great as well.
I like models and old cars- so this is the ULTIMATE!
Steve
|
|
|
|
Post by TRM on May 7, 2012 19:06:10 GMT -5
Dash is looking the part!!! Great work there SV!!!
|
|
multicam
Senior Member

Member since: January 2012
Nate
Posts: 2,039
Jan 10, 2012 14:35:41 GMT -5
Jan 10, 2012 14:35:41 GMT -5
|
Post by multicam on May 7, 2012 21:23:53 GMT -5
Wow. So cool. BRILLIANT!!! Still watching... Gobsmacked. And I thought styrene was expensive!!! ;D  ;D |
|
snidervolley
Full Member
Member since: April 2012
Posts: 346
Apr 27, 2012 14:51:48 GMT -5
Apr 27, 2012 14:51:48 GMT -5
|
Post by snidervolley on May 8, 2012 8:39:19 GMT -5
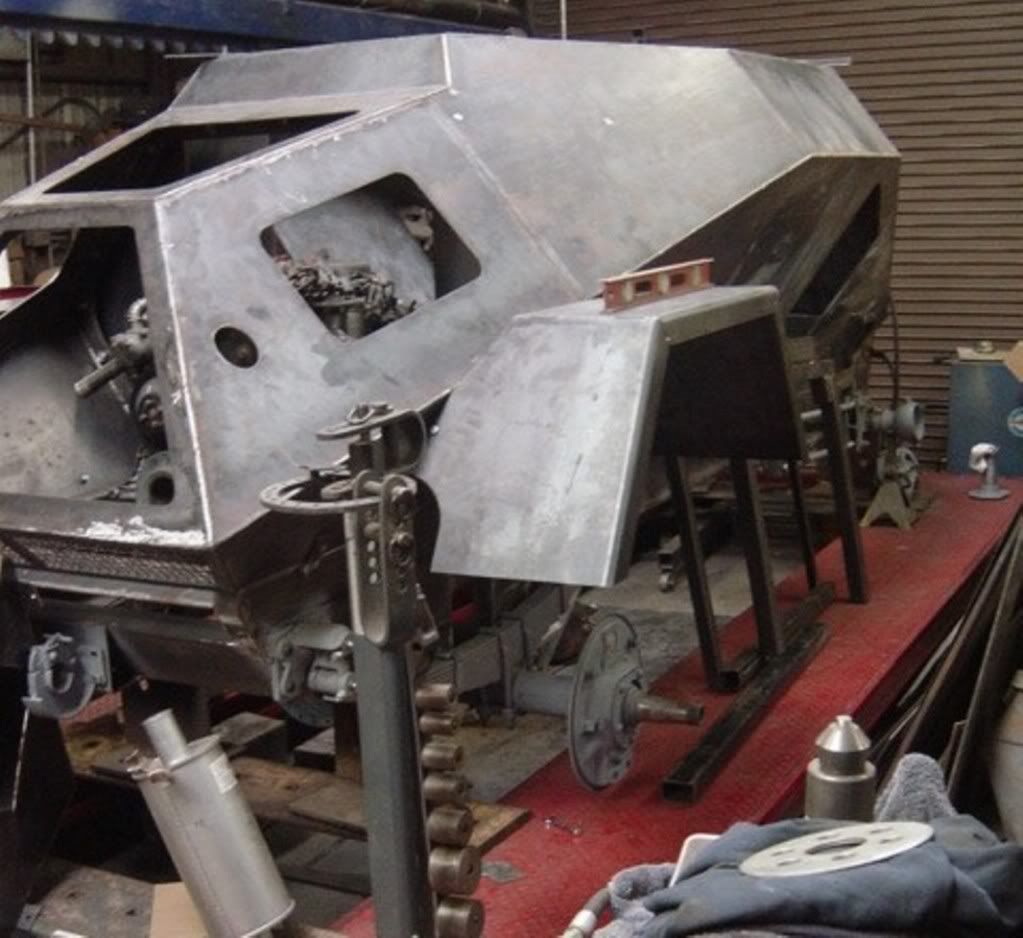 ass end view fender going on |
|
|
|
Post by spud on May 8, 2012 8:41:15 GMT -5
is this a restoration or a new build?
|
|
|
|
Post by tonylee on May 8, 2012 8:48:03 GMT -5
Why waste talent like that when you can start from scratch?  I'm not even believing this project. ;D Tony |
|
snidervolley
Full Member
Member since: April 2012
Posts: 346
Apr 27, 2012 14:51:48 GMT -5
Apr 27, 2012 14:51:48 GMT -5
|
Post by snidervolley on May 8, 2012 11:32:23 GMT -5
its a new build but i have included as many as possible of original items and pieces but these are extremly rare not many (i think two ) made it through the war
|
|
snidervolley
Full Member
Member since: April 2012
Posts: 346
Apr 27, 2012 14:51:48 GMT -5
Apr 27, 2012 14:51:48 GMT -5
|
Post by snidervolley on May 8, 2012 11:33:09 GMT -5
 original muzzle brake |
|
snidervolley
Full Member
Member since: April 2012
Posts: 346
Apr 27, 2012 14:51:48 GMT -5
Apr 27, 2012 14:51:48 GMT -5
|
Post by snidervolley on May 8, 2012 11:52:42 GMT -5
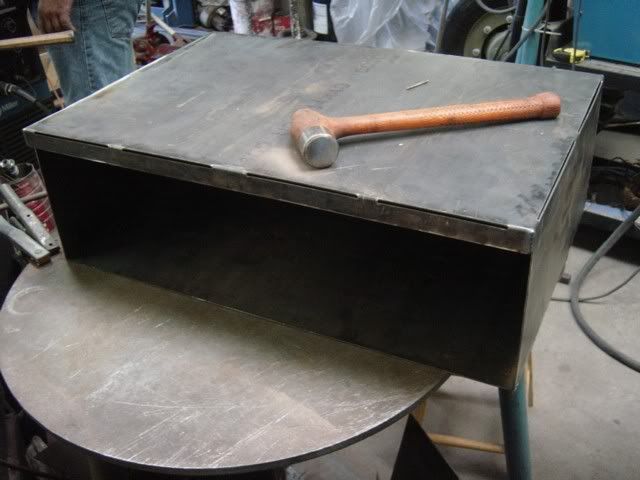 box for rear deck lid ( will be my test camo and aging platform |
|
|
|
Post by spud on May 8, 2012 11:59:28 GMT -5
oh that will be fun,
and you have some tallents with steel then if your making it mostly from scratch
|
|
snidervolley
Full Member
Member since: April 2012
Posts: 346
Apr 27, 2012 14:51:48 GMT -5
Apr 27, 2012 14:51:48 GMT -5
|
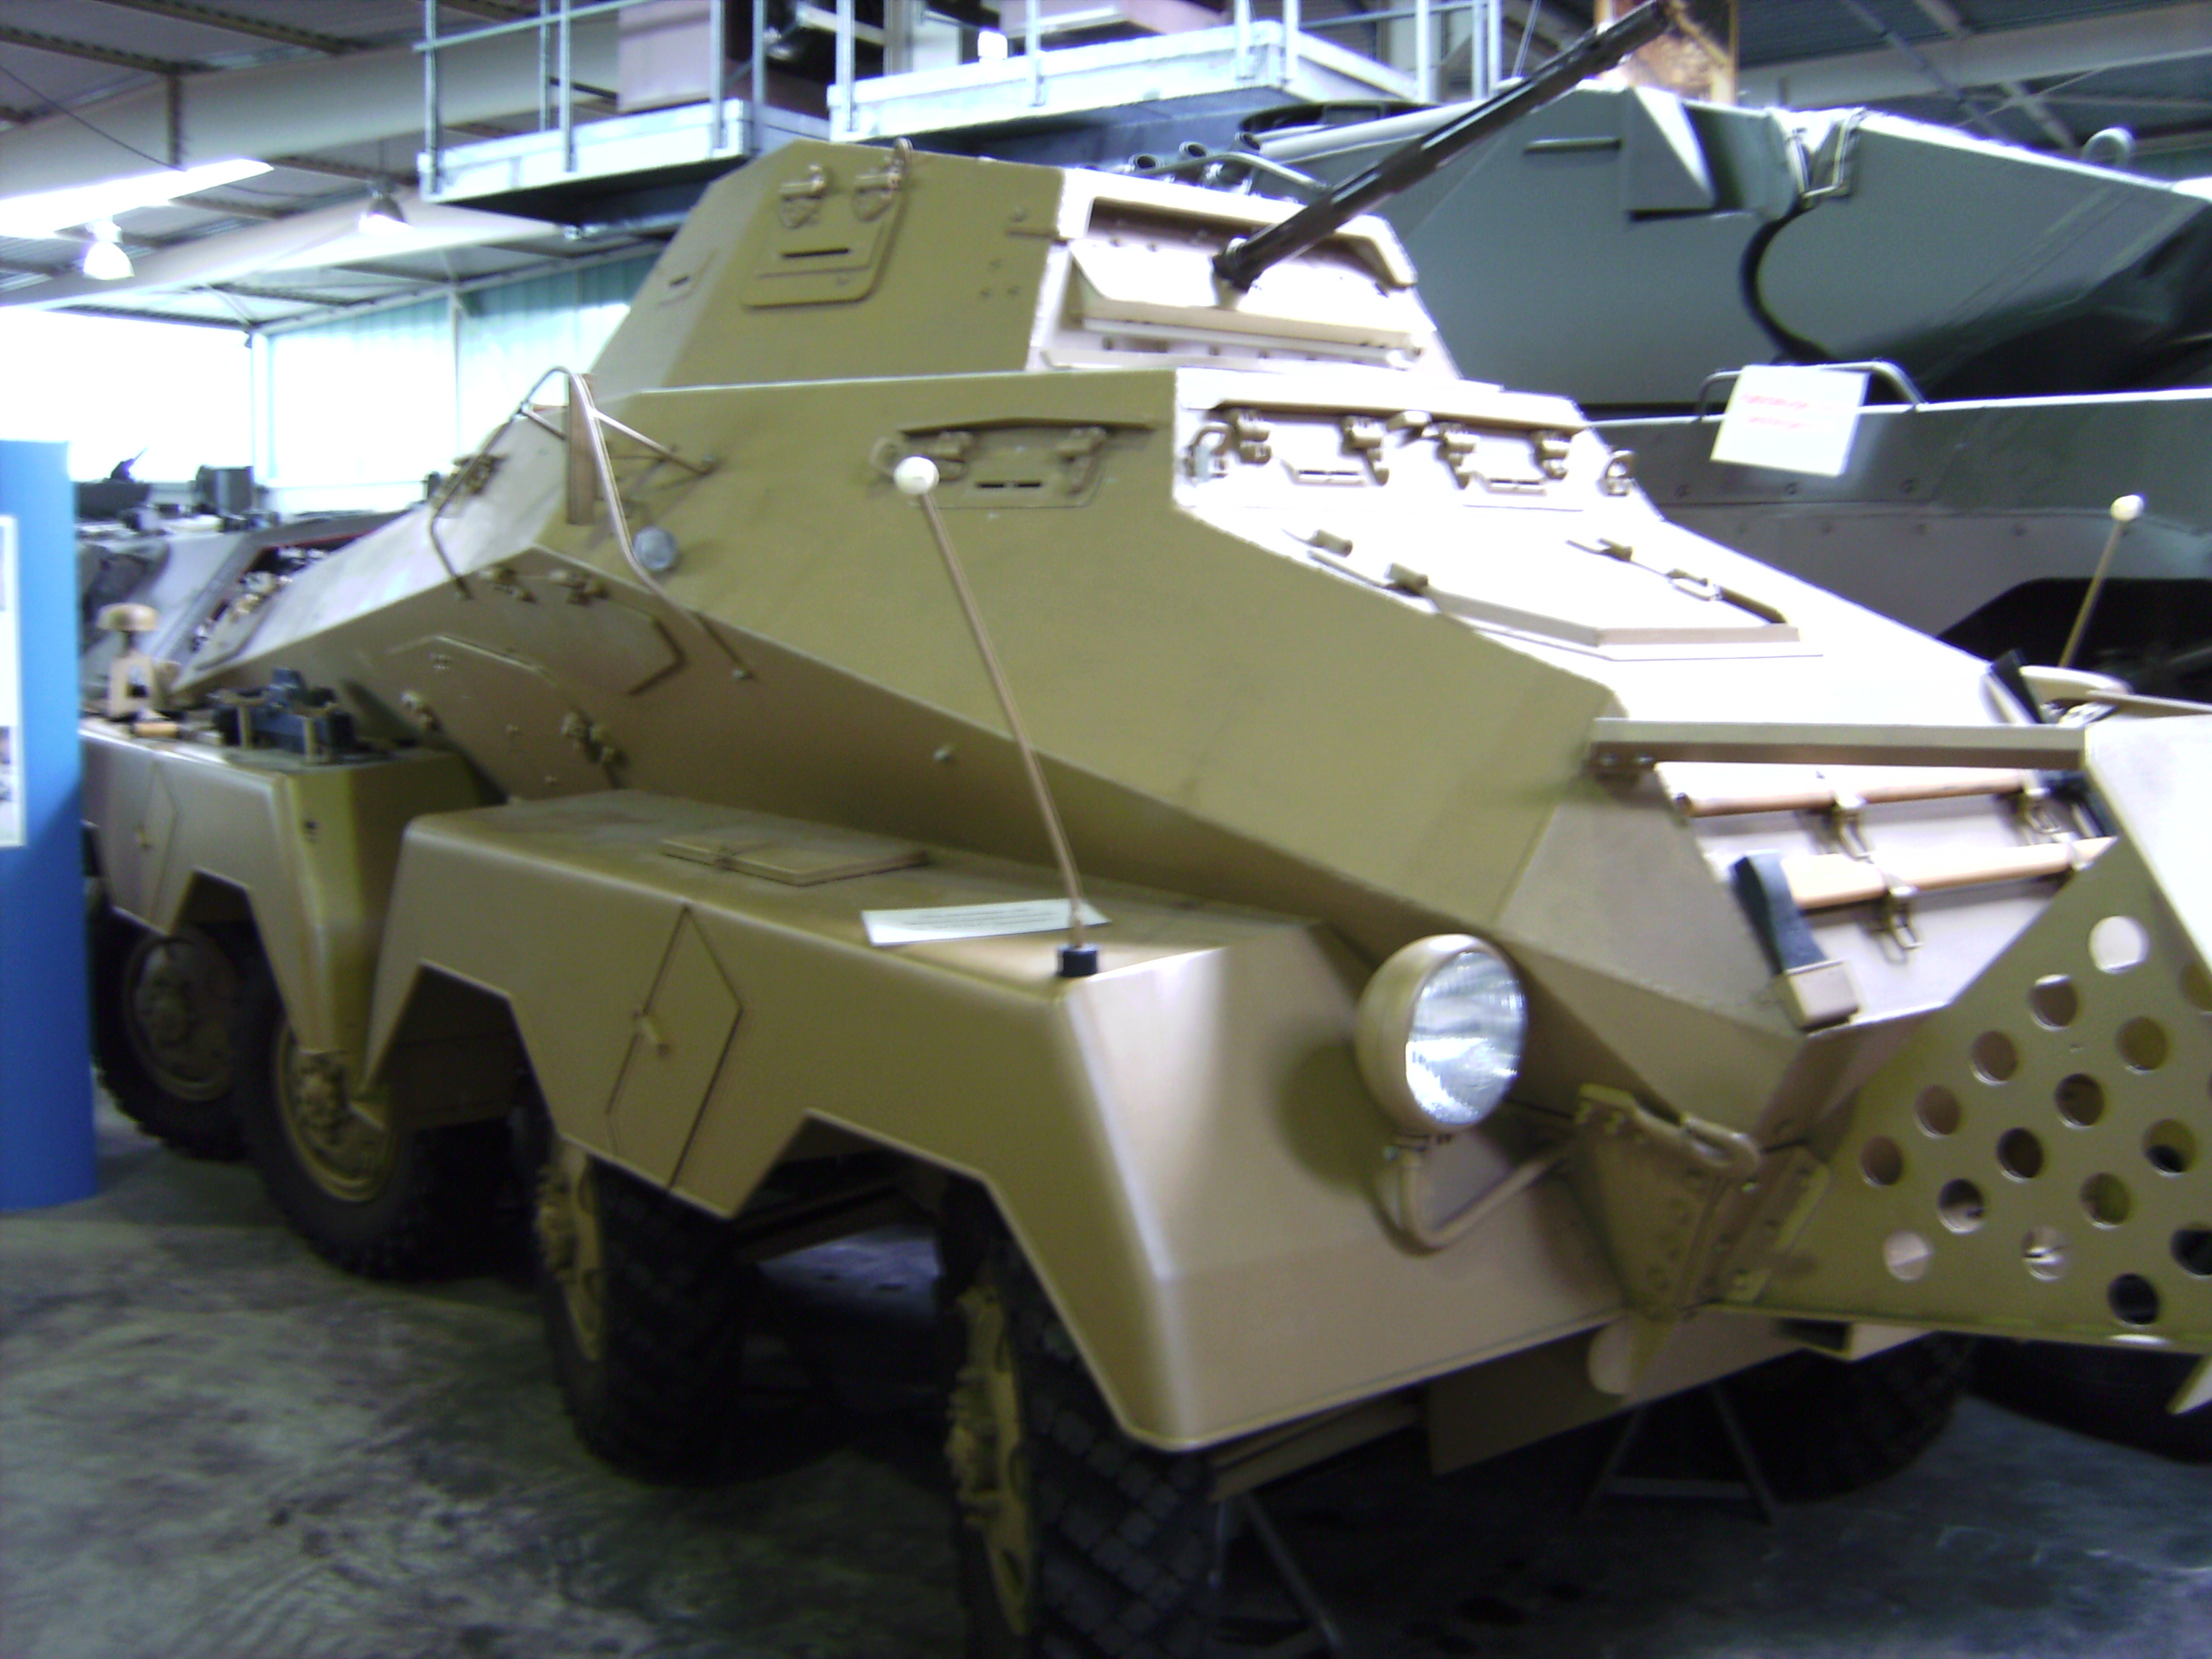
Post by snidervolley on May 8, 2012 19:44:14 GMT -5
 ss dasriech aufklarungs panzerjaegers |
|
snidervolley
Full Member
Member since: April 2012
Posts: 346
Apr 27, 2012 14:51:48 GMT -5
Apr 27, 2012 14:51:48 GMT -5
|
Post by snidervolley on May 8, 2012 19:49:12 GMT -5
mounts for visor glass block prototype made,aftermuch tweeking the glass block folds back and easily removes woo hoo for the small victories in life.............  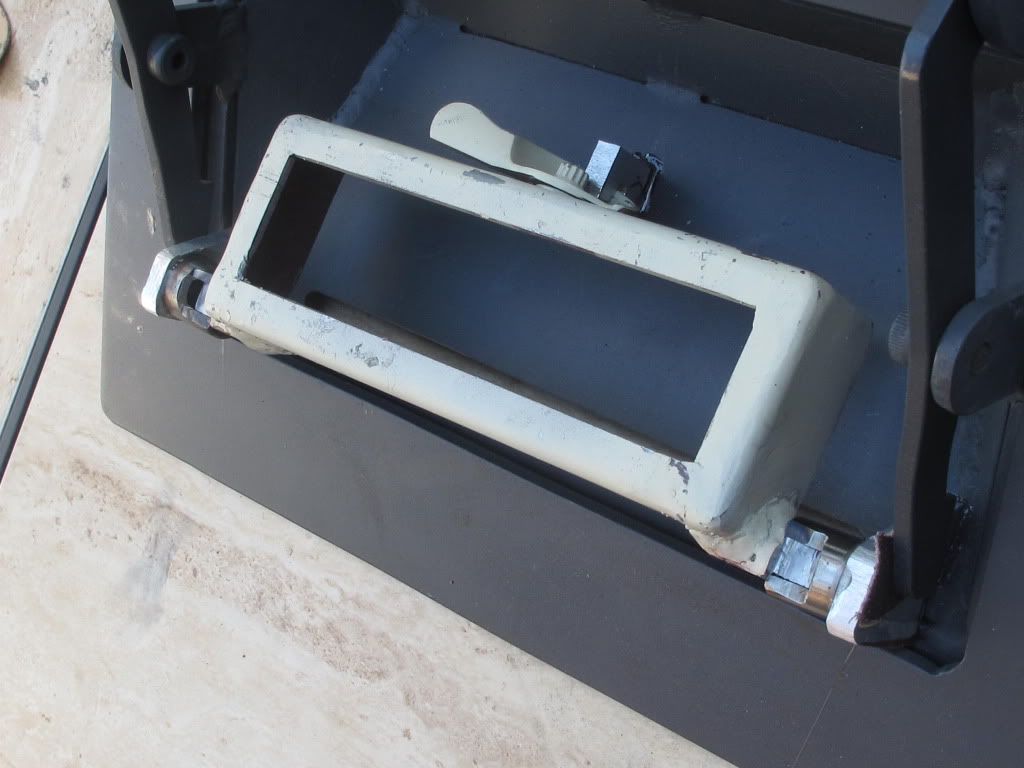 |
|
snidervolley
Full Member
Member since: April 2012
Posts: 346
Apr 27, 2012 14:51:48 GMT -5
Apr 27, 2012 14:51:48 GMT -5
|
Post by snidervolley on May 8, 2012 19:50:48 GMT -5
glass was contributed from bullet proof hummvee and cut by water jet cutter (i tried band saw and was an epic failure to be sure .
|
|
snidervolley
Full Member
Member since: April 2012
Posts: 346
Apr 27, 2012 14:51:48 GMT -5
Apr 27, 2012 14:51:48 GMT -5
|
Post by snidervolley on May 8, 2012 20:26:36 GMT -5
Ok guys advise please, i am going to try a modicum of rust and can,t use anything that will wear off easily? Im thinking sand and epoxy for rust roughness with base pigmiTation burnt siena?
|
|
|
|
Post by TRM on May 9, 2012 5:33:37 GMT -5
I cannot tell you what an incredible project this is! Not to mention how great everything looks so far!! With that said... I would first question the level of rusting you are looking for. There is worn, beat, dilapidated and "FUBAR"...LOL!!! Obviously if this were to look like it was still in use, there would and could be rust but definitely nothing like something abandoned and left to rot, like this. For Discussion purposes only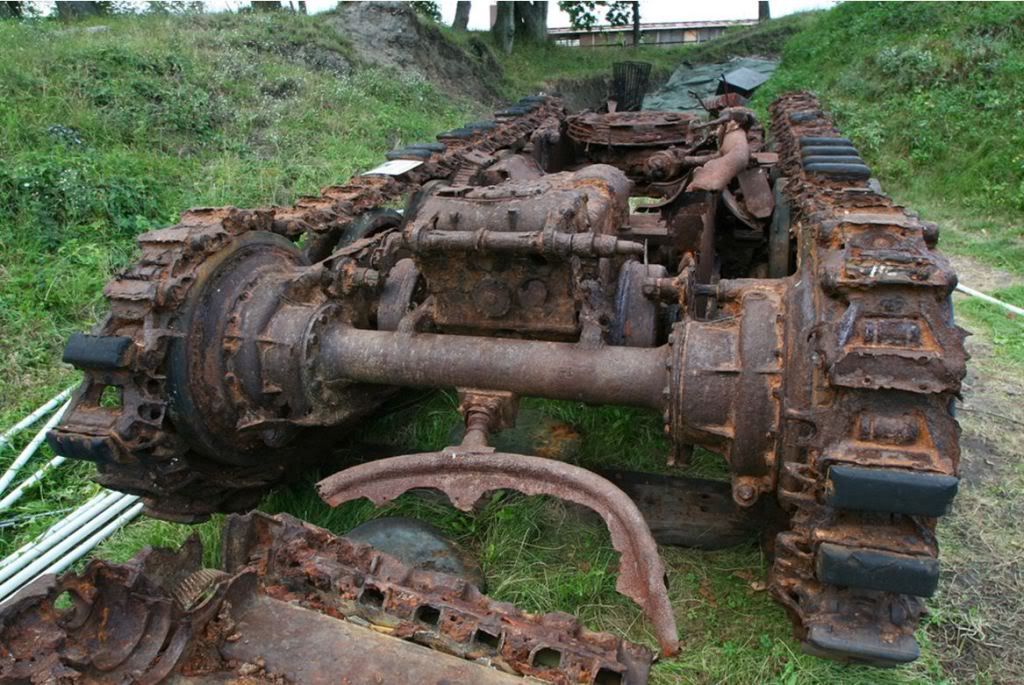 Just a bit too far ey? I am trying to remember if you are wanting to add light rusting, depicting this in a working capacity...correct? I know you shown this: For discussion purposes only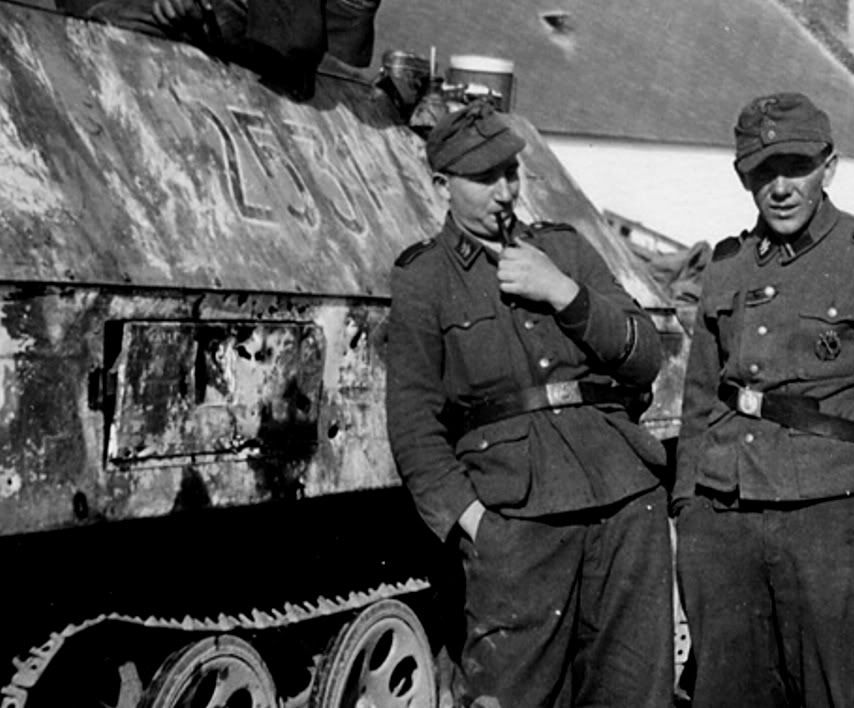 This looks like battle damage and not just aging. I would have to say for the sand use, little to none. I would think you would see more chipping and surface rusting, areas with Red Oxide primer showing and such. Outside corner and surface edges where foot traffic and hands would come in contact would be bare metal, raw steel from wear and tear. I would suggest for texture to the bare rusted parts maybe a light epoxy sponged on to give the raised texture and just under the chipped paint edge to give the appearance that the rust continued under the paint in that area. You may have to weather as you go. Often in modeling, the level of wear, damage and overall weathering is layered several times. This will give the depth that is desired but it allows you to stop when you think there is enough. If anything these are good reference shot for you. Here there is damage down the side from sideswiping something. Doesn't look like much paint is even removed. All this shows is that the possibilities are endless. For Discussion purposes only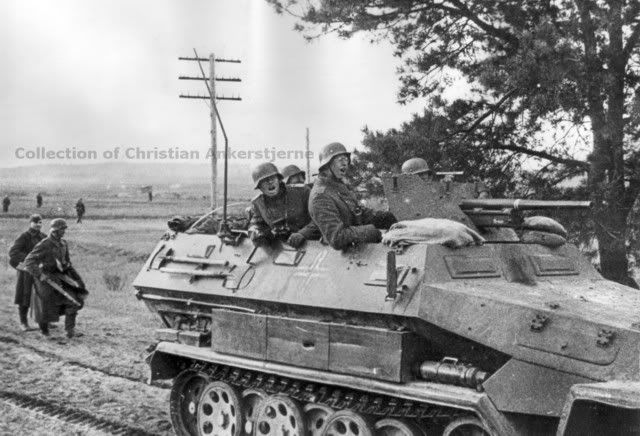 Sorry for the long windiness...just putting this out for discussion. I certainly hope to hear from the others on this. This is too interesting seeing you go into weathering something this big!! (2 cents)  Carry on Sir!! |
|
snidervolley
Full Member
Member since: April 2012
Posts: 346
Apr 27, 2012 14:51:48 GMT -5
Apr 27, 2012 14:51:48 GMT -5
|
Post by snidervolley on May 9, 2012 8:23:12 GMT -5
yes yes TRM i agree and want have just a bit of rust on the thinner metal boxs and alot of edge wear on the corners as you say with chipping of top coat camou paints as they would have been applied in field by crews with paint that was mixed and applied with what ever found ( sometimes air and sometimes rags and diesel to mix down . it came in cans of thick colours (pic)  |
|
snidervolley
Full Member
Member since: April 2012
Posts: 346
Apr 27, 2012 14:51:48 GMT -5
Apr 27, 2012 14:51:48 GMT -5
|
Post by snidervolley on May 9, 2012 8:23:37 GMT -5
as a paste 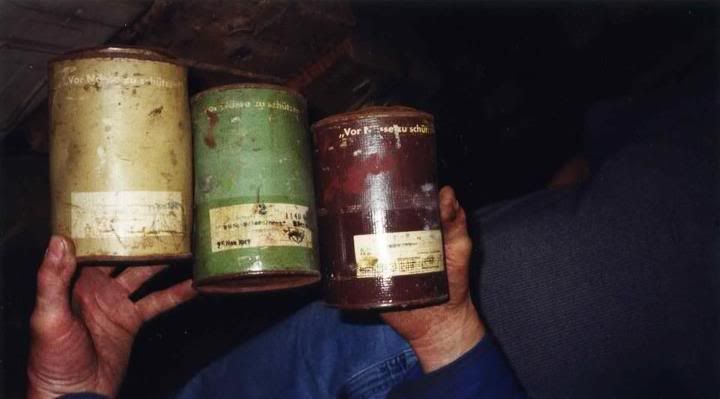 |
|
snidervolley
Full Member
Member since: April 2012
Posts: 346
Apr 27, 2012 14:51:48 GMT -5
Apr 27, 2012 14:51:48 GMT -5
|
Post by snidervolley on May 9, 2012 8:25:25 GMT -5
excellent thank you i will try the epoxy and sponge trick:)
|
|
406 Silverado
Global Administrator 
Member since: November 2011
Posts: 8,379
Member is Online
MSC Staff
|
Post by 406 Silverado on May 9, 2012 8:45:25 GMT -5
;D ;D ;D ;D That's my boy.
Very nice grasshopper, you learn fast. Theo we need to sit and take you to the next level bro.
ok T has gotten this rusting lark down pretty damn good. So the tips he's given are correct. If the damaged is not done in layers of painting and weathering it won't look right. Now, this 222 is not 1/35 so it has to be done carefully as with all larger scale models and painting.
Keep in mind also that the Germans not only used red oxide primer but also a very dark gray primer. Since this is a huge 'model' it might be best to do the damage after you have the correct primer and paint color on.....then do the damage. I am thinking that when you paint this, it will be a much thicker layer of paint than say on a 1/35 model. So this will mean that what chipping or damage you do will be much more realistic than just painting it on.
Take some of that scrap metal and do some testing to see how thick the paint will be and how to besst chip through the layers ie primer and paint. See if it will chip by striking it with a hard object, especially on the corners and edges. See if it chips to the primer or to the bare metal.
Love this project of yours.
|
|
snidervolley
Full Member
Member since: April 2012
Posts: 346
Apr 27, 2012 14:51:48 GMT -5
Apr 27, 2012 14:51:48 GMT -5
|
Post by snidervolley on May 9, 2012 9:11:52 GMT -5
thanks guys
i will try and walk the rice paper without tearing it........
i think this weathering will be the hardest part of the whole project if i want to get it right ( not over done or under done)
years back i painted a painting of square rigger in a squal , i spent most of the time at first on the ship thinking the sea was going to be a snap ( how can you make a mistake aye? ) well when i got to the easy part and ended up painting it over and over and over . it was way harder than the ship. WAY !! and im thinking this is going to be the same and this is why im here . so im brasing for the squal
|
|
snidervolley
Full Member
Member since: April 2012
Posts: 346
Apr 27, 2012 14:51:48 GMT -5
Apr 27, 2012 14:51:48 GMT -5
|
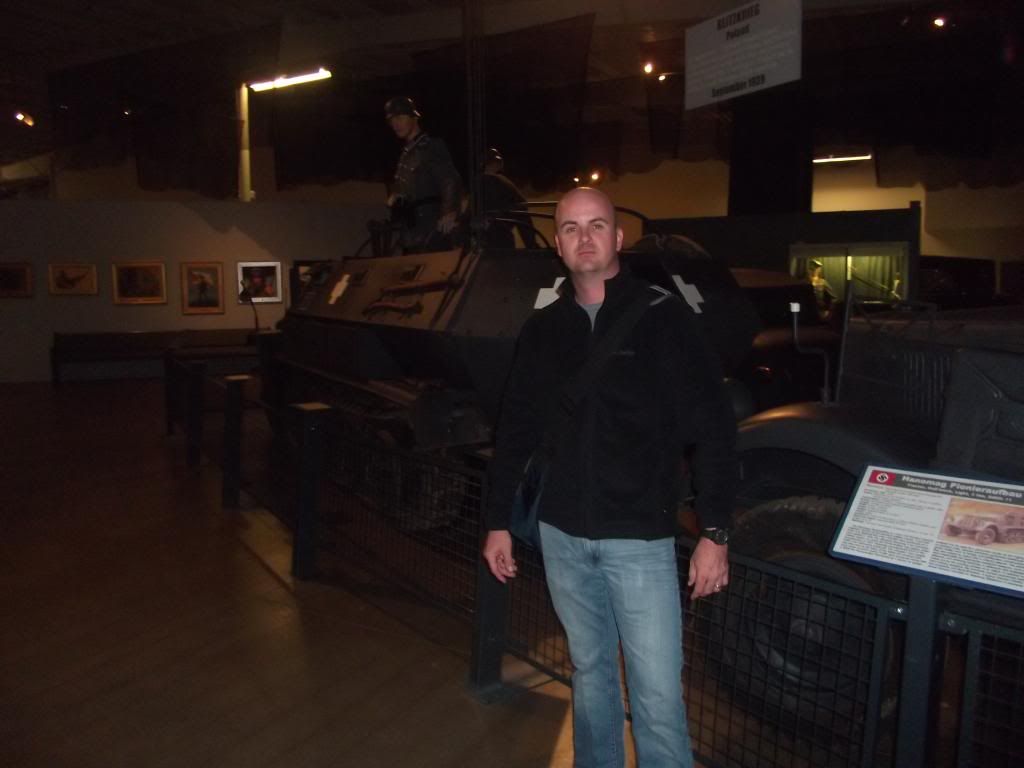
Post by snidervolley on May 9, 2012 9:12:31 GMT -5
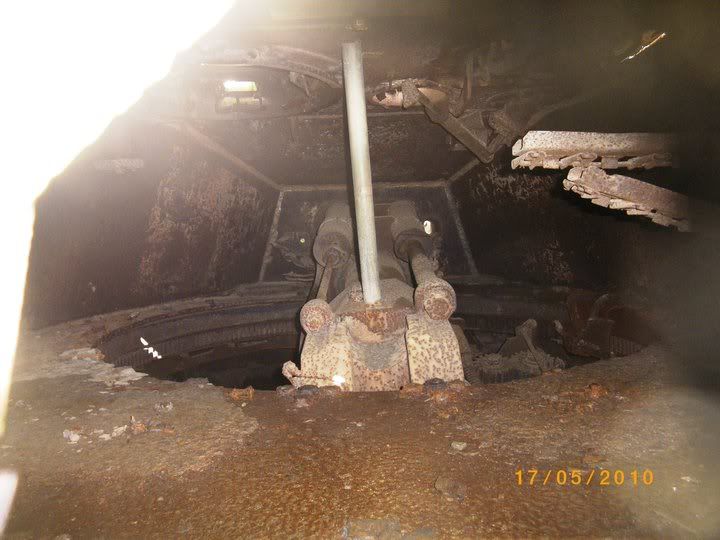 inside la gliese tiger 213 taken me ,until iwas told i couldnt be up there doh!! if icoulda climbed in i woulda until told but the damned hatches where rusted closed |
|
snidervolley
Full Member
Member since: April 2012
Posts: 346
Apr 27, 2012 14:51:48 GMT -5
Apr 27, 2012 14:51:48 GMT -5
|
Post by snidervolley on May 9, 2012 10:29:23 GMT -5
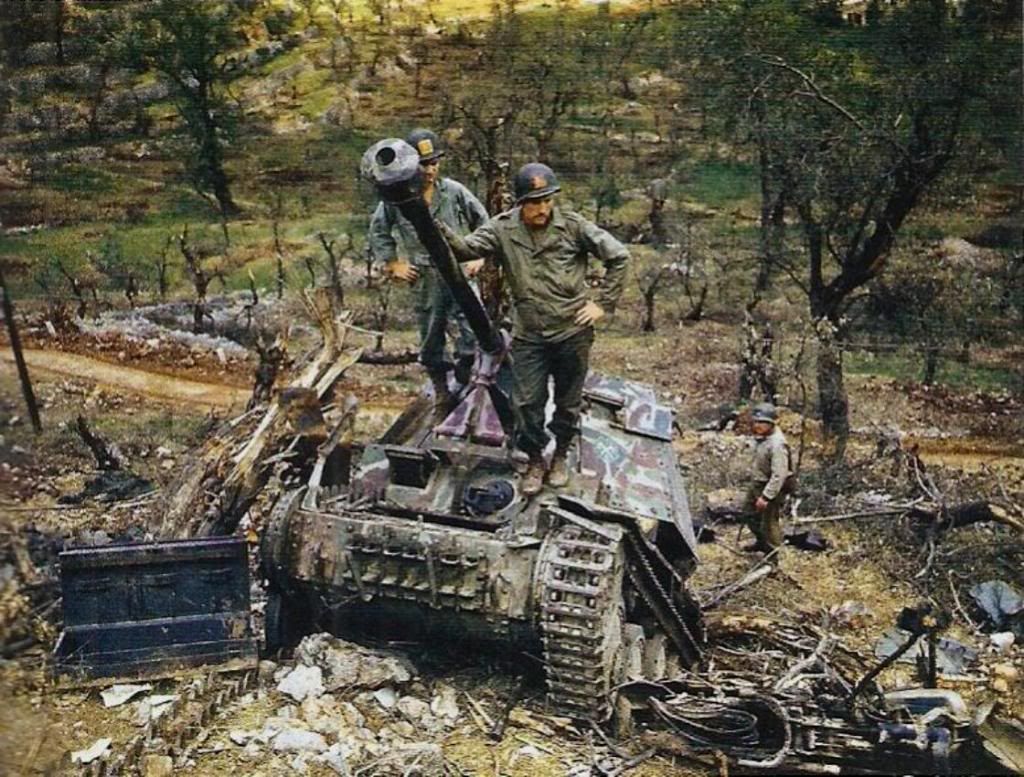 here the paint has been applied with a rag or rough broom pretty thick to create the dark contrasts |
|
snidervolley
Full Member
Member since: April 2012
Posts: 346
Apr 27, 2012 14:51:48 GMT -5
Apr 27, 2012 14:51:48 GMT -5
|
Post by snidervolley on May 9, 2012 10:48:14 GMT -5
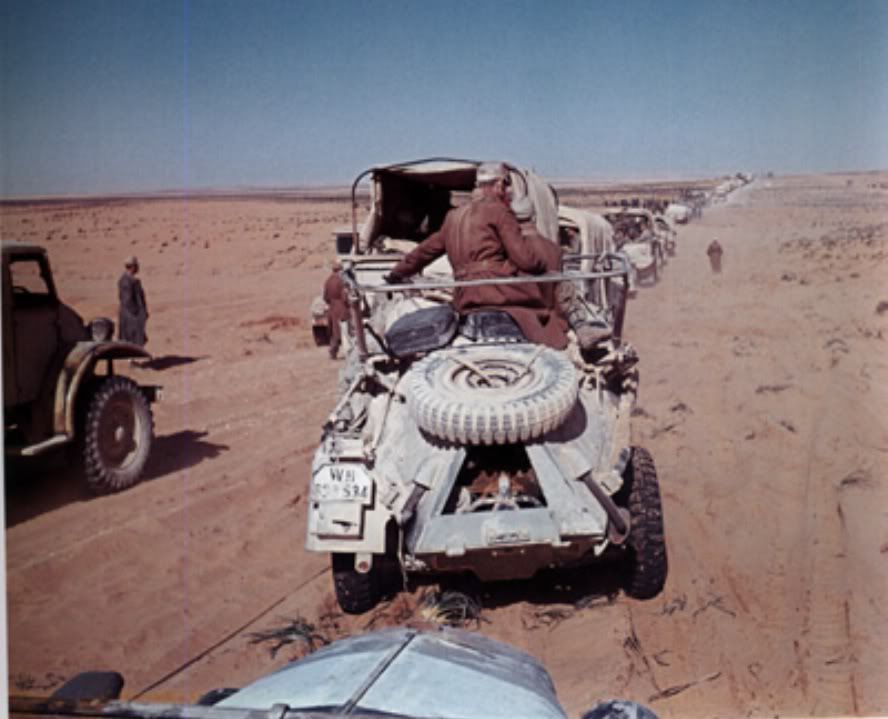 original color shot out of afrika without merryl streap |
|
snidervolley
Full Member
Member since: April 2012
Posts: 346
Apr 27, 2012 14:51:48 GMT -5
Apr 27, 2012 14:51:48 GMT -5
|
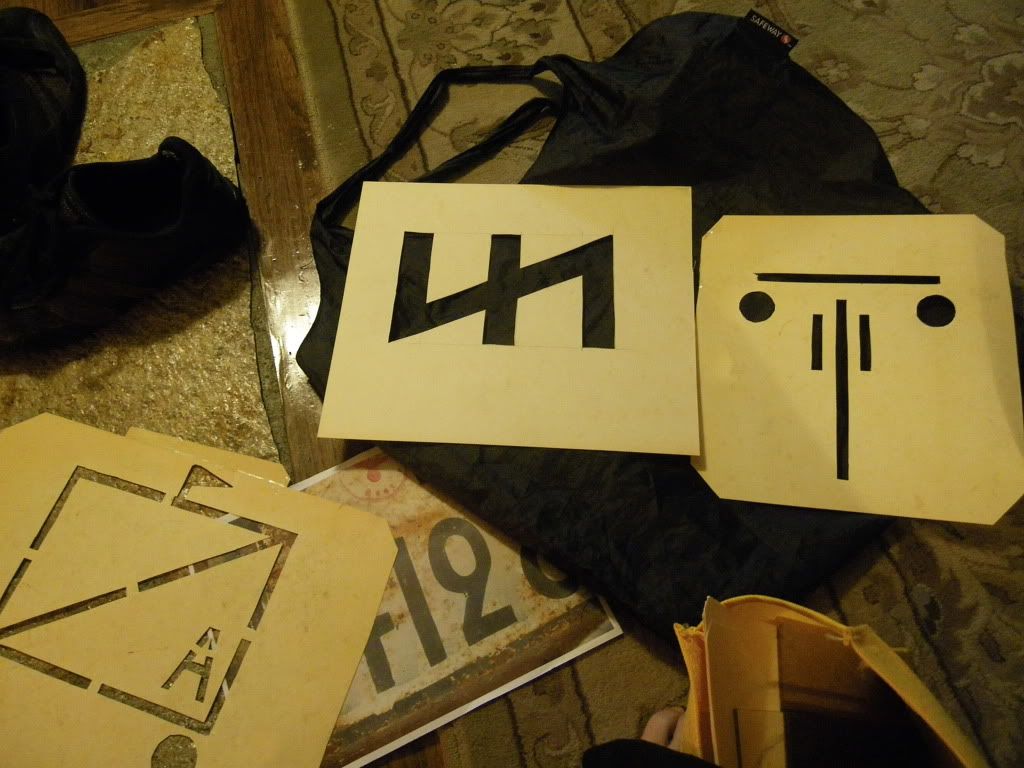
Post by snidervolley on May 9, 2012 12:05:03 GMT -5
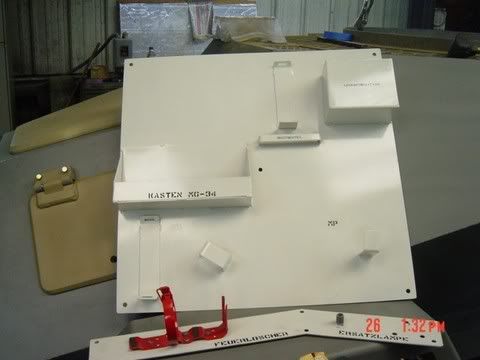 internal stowage plate |
|


 ;D
;D 


 Carry on Sir!!


