legend
Full Member

Member since: November 2011
Posts: 577
Nov 30, 2011 13:49:32 GMT -5
Nov 30, 2011 13:49:32 GMT -5
|
Post by legend on Jan 8, 2012 11:24:38 GMT -5
Hey Rob
Did you get anywhere replicating flaking paint?
I have tried all kinds of techniques and potions but cannot find a satisfactory method.
Bill
|
|
|
|
Post by 406 Silverado on Jan 8, 2012 11:40:04 GMT -5
LOL, Bill I'm still trying to find a way bro. I've tried the crackle but it becomes too fragile, especially if it's followed by weathering. Once I find a good technique I'll post it here. I'm trying something right now with the JT for cracked caked mud and dirt on burnt areas. We'll see how that turns out.
|
|
Deleted
Member since: January 1970
Posts: 0
Apr 24, 2024 18:35:44 GMT -5
Apr 24, 2024 18:35:44 GMT -5
|
Post by Deleted on Mar 12, 2012 3:47:17 GMT -5
Hi, This is my first post but I saw this thread and thought you all might be interested in this technique I found on another modelling forum for U-Boats This is from a poster who was doing a 1/72nd Revell U-Boat VIIC model. I havent tried this myself yet so I cant comment therefore if anybody does let us know the outcome. It involves enamel paints so it might not be for everybody taste but I believe the pics speak for themselves Heres his description on how to do it " First of all i paint the base with a matt finish, the color is not so important; i used grey. In the next step i mix rust pigments with water until it it has the thickness of... yoghurt... I completely cover the base with a thick layer of this mixture, because the base is painted with a matt finish the pigments will hold better on the `rough` surface. After drying, the pigments are very vulnerable, and because of that i make a mixture of burnt sienna oil paint and white spirit (about 20/80%), and carefully apply this mixture on the pigment surface with a pointed brush. Because of this, you will get nice dark and light rust color differences in the pigment, and after a day of drying the pigments are now much stronger for the next step. Then i take the final color (again grey enamel in my case) and completely cover the area with a fine brush, i don`t brush the paint on but i `tap` it on to avoid damaging the pigments. After 10 minutes when the paint is just dry i begin to peel the paint with a scalpel. Because the enamel paint doesn`t stick very well on the pigments, this is very easy to do and because the grey enamel paint is still fresh it will start to peel and come up. If you wait to long with this the paint is to hard and it doesn`t peel, so timing is important. In fact this is the base method i discovered, it is not easy but after some practise the results can be very good." 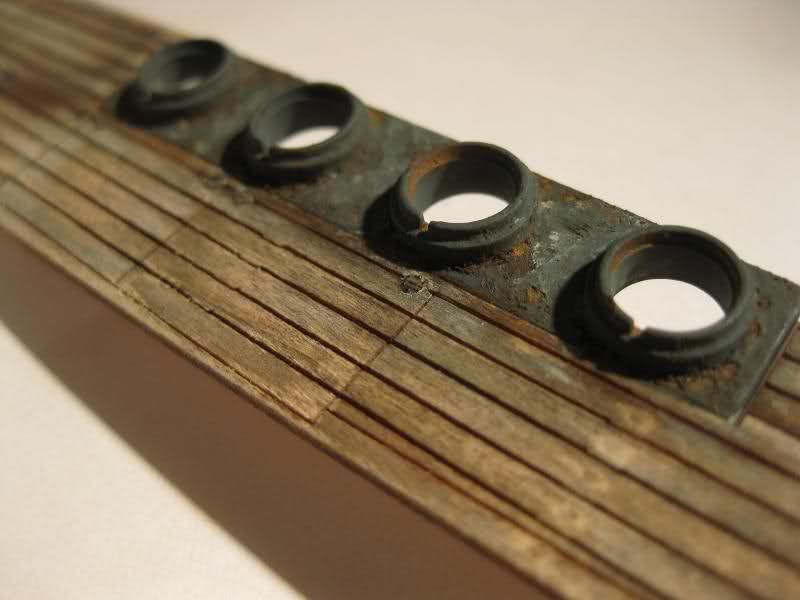 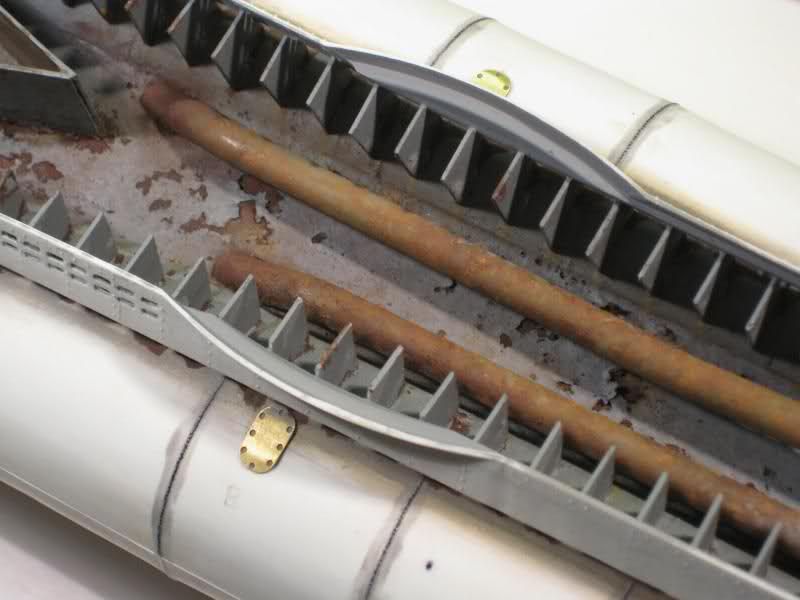 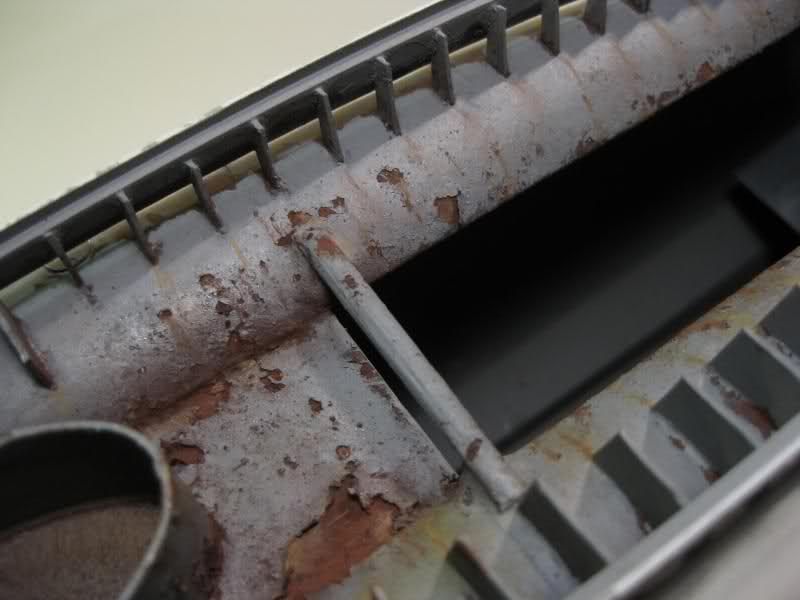 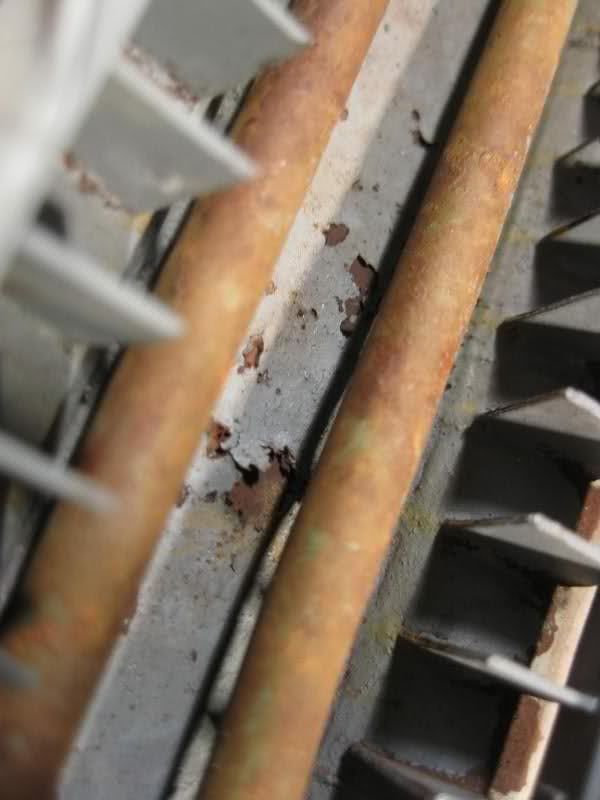 Heres a link to the thread its definitely worth a look as this guy has some very innovative techniques and a very accomplished modeler. I know this is mostly ship & U-Boats but I believe we can all learn from one anothers subject matter Hope this is useful to anyone Cheers models.rokket.biz/index.php?topic=443.0 |
|
|
|
Post by TRM on Mar 12, 2012 4:51:17 GMT -5
Thanks for posting Ohms....let me say welcome too!!!
His name is Karel! Exceptional builder! He has achive some great results on this one. AMP is an awesome site too, and yes originally gear mostly to the U-boat builder, they a lot of other interesting builds.
|
|
|
|
Post by 406 Silverado on Mar 12, 2012 7:29:45 GMT -5
Hiya Richard. Welcome to MSC. I just got your email but haven't gotten a chance to reply yet.
Some very nice chipping there buddy. The results look great. it's a similar technique to the one I posted a few threads below this one. The principal is basically the same in that the pigs create the flaking. The only problem with using pigs is that once you create the chipping flaked paint it is difficult to use any weathering products after the pigs are exposed. You can weather with pigs, but not filters, washes or streaking.
Will be cool to see this build of yours in the floaty category. Might even get T to finish his U boat.
Thanks for posting and have fun on the forum
|
|
edi
Full Member
Member since: November 2011
Posts: 303
Nov 17, 2011 17:21:45 GMT -5
Nov 17, 2011 17:21:45 GMT -5
|
Post by edi on Mar 12, 2012 14:45:05 GMT -5
i use the similar method
matt enamel like primer, pigments , acrylic varnish, hairspray and acrylic camouflage color on the top
with small amount of water it's normal chipping but when chipping with lot of water you can make flaking paint effect on camouflage color...because camo color starts to behave like chewing gum...
i get this effect with AK chipping fluid...and first it was strange to me, later i see its good but i wasnt experiment much
you can see some of this effect on my m36 kit
will make some images soon when i catch some free time
|
|
Deleted
Member since: January 1970
Posts: 0
Apr 24, 2024 18:35:44 GMT -5
Apr 24, 2024 18:35:44 GMT -5
|
Post by Deleted on Mar 12, 2012 19:10:01 GMT -5
Hi,
Thanks for the warm welcome!
Rob,
No problem take your time Im in no rush
With regard to my post above I have to say that even though the guy that did this build over on AMP is an exceptional builder I feel its all rather moot as if you have studied U-Boats and their history you will find that other than an obsolete rusting hulk in a disused shipyard somewhere at the end of the war, no actual U-boat would have been allowed to get in such a state of disrepair. Of course there will be paint chips and surface rust but not rust to the extent that is shown
U-boats were routinely serviced, refitted and painted after each patrol. On the odd occasion they might go straight back out but ultimatley they were done on their return.
More importantly you have to also bear in mind that Captains and their crews took great pride in their vessels as do all seamen, past and present, and would do what they could themselves to paint etc. After all their life depended on their vessel being fit for service. In fact U-47 that sunk HMS Royal Oak was touched up with paint by her crews on her way home from the mission, not only that they even took the time to design and paint the famous Bull of Scapa Flow emblem on her conning tower to boot. But that might have been an exception rather than the rule as Im sure Cpt Prien knew there would be quite a spectical on his return.
Rightly or wrong I feel that we as WW2 modellers for instance we have a certain responsibility in choosing our subject carefully, and in how we represent it and not get carried away with our own need to show off our skills to the viewing public etc to a point where instead of honoring the subject matter and the people who served on and in it, it does them an injustice instead.
Hope my comments arent too contraversial its just my opinion please feel free to comment either way
Thx
Richard
|
|
|
|
Post by TRM on Mar 12, 2012 22:06:29 GMT -5
Hello Richard! First I have to say that the first step in making a great build is doing the research. You are right there brotha'!! U-boats are actually a numbing ride of ups and downs in finding information and actually pulling of a great look. I know only in the sens of spending the better part of 2 years just doing research for a shelved queen the all might 1/72 VIIC from Revell. All the goodie too. Just waiting to go on...my poison, the U-69, that would be a story for another day...maybe sooner if we all keep talking about this, I will have no choice but to put her back on the docks! Back on track... Thinking, mind you, that you are just about there. The U-boat was a beast and an incredible workhorse. She, meaning just about all of them, were indeed painted before they left on patrol, which only lasted a few months. However, these months were spend predominantly in two climates...the Freezing A$$ North Atlantic and the warm waters of the Mediterranean and Caribbean/Gulf Coast of the US. With this, a couple things would happen....Chipping, and lots of it. Examples... U-69 coming back from her 3rd patrol...only a few months: 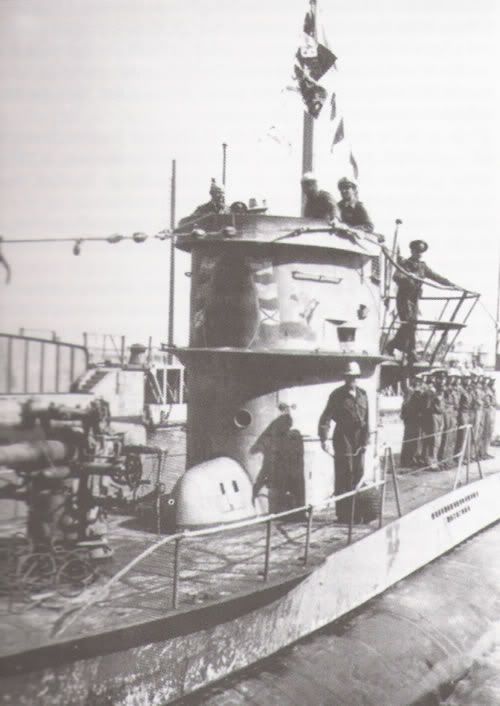 Picture for discussion purposes only U-552 returning: 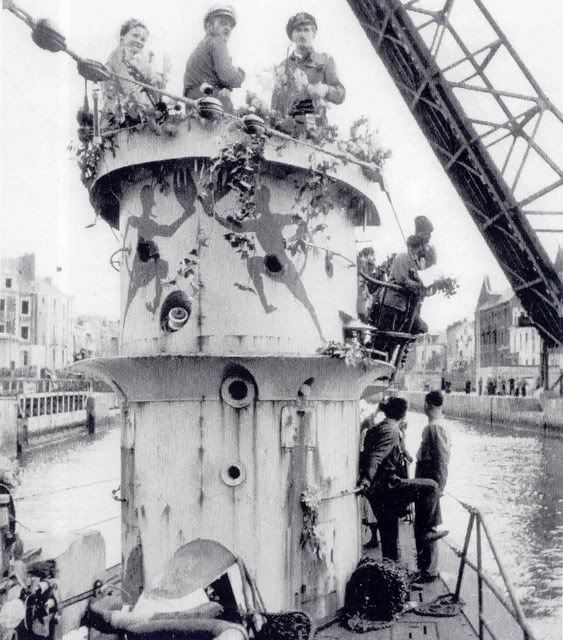 Picture for discussion purposes only U-204: 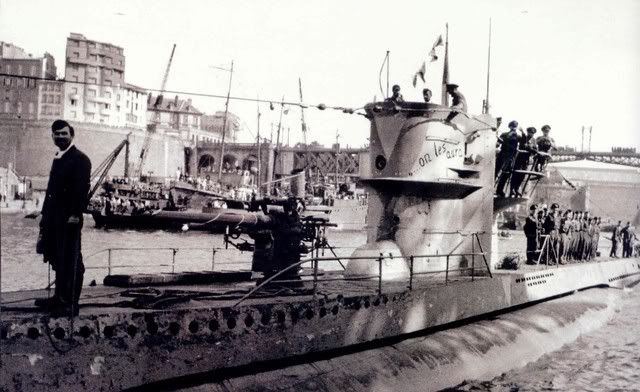 Picture for discussion purposes only U-177 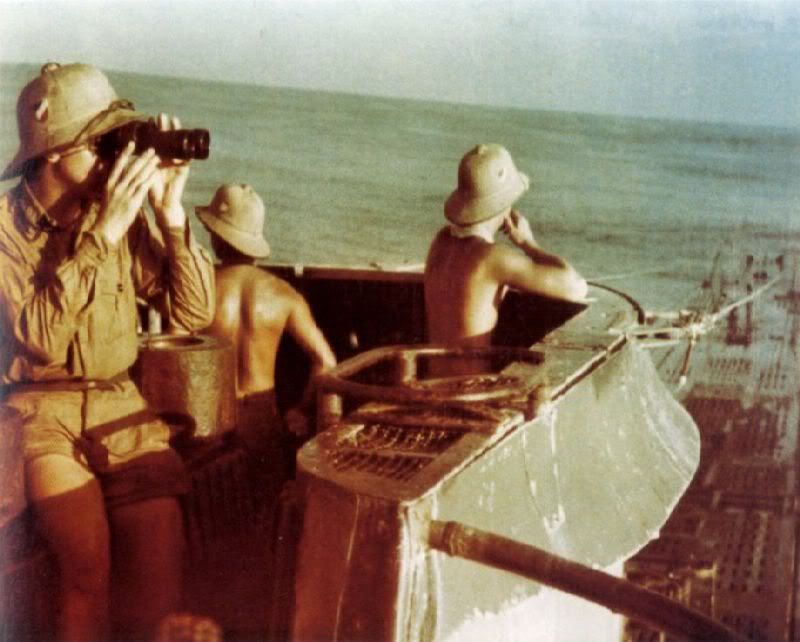 Picture for discussion purposes only This is just the tip of the ice berg...I unfortunately can keep going and going. The cold weather and water U's met with Ice and hard water conditions, the warm water met with normal sea conditions and algea and scum. Within hours of leaving the slew, a u-boat would already have paint falling off, with in days the entire top would fade out due to the sun beating down on her...cold or warm. These vessels spent the majority of their time on the surface. This is worse. The oxygen in the air would almost instantly oxidize the surface areas naked to the elements...even more so the wear and tear from the men on deck. This will bring me to the pressure hull. This is what you are seeing in the pictures from the U-995 Build from AMP. This space was ALMOST inaccessible most of the time. The men did open the hatched on the side of the saddle tanks to access various valves, connections and such, but it was not regularly. Since this space was not seen by anyone except the occasional mechanic, this are was not retreated with fresh paint. With that (yes everyone, I am just about done) Karel (builder of the above listed U-995, I think, nailed the look of the area on the pressure hull. Even more impressive is that he actually recreated the original 995. The one on display has been changed over the years, when it was adopted by another country's navy and then finally when it was made into a museum. Sorry for going on here...just a fun subject for me. Neat little anecdote Richard...you mentioned the "Bull" of Scapa Flow....After Prein's death the high command ordered the bull placed on the conning tower of all U's....the U-69 was out on patrol....embarrassed to ask what the bull looked like the came up with their own version. The copied a mascot from a French Cheese Company....... The Laughing cow! 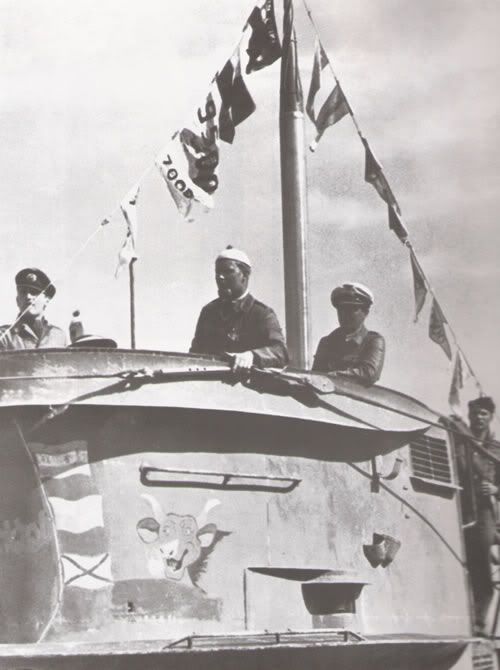 Not even close and they were made fun of throughout the Navy....but went on to be one of the highest tonnage sinking boats! Didn't mean to rant on here...I will get my coat now!!! Take care!!  |
|


