danb.
Reviews member     March 2013 MoM Winner
Member since: November 2011
Posts: 2,808
Nov 17, 2011 9:22:52 GMT -5
Nov 17, 2011 9:22:52 GMT -5
|
Post by danb. on Feb 6, 2012 14:19:38 GMT -5
Cheers boys thanks for the positive comments i have made a lot of progress on the cat over the weekend i will get some pics up soon, no paint as yet Rob as i have got carried with this scratch building lark its a bit addictive.
Dan B
|
|
danb.
Reviews member     March 2013 MoM Winner
Member since: November 2011
Posts: 2,808
Nov 17, 2011 9:22:52 GMT -5
Nov 17, 2011 9:22:52 GMT -5
|
Post by danb. on Feb 10, 2012 11:00:57 GMT -5
|
|
|
|
Post by 406 Silverado on Feb 10, 2012 11:09:41 GMT -5
wow Dan, this is gonna be great with paint on it. love the corkboard bricks.
|
|
danb.
Reviews member     March 2013 MoM Winner
Member since: November 2011
Posts: 2,808
Nov 17, 2011 9:22:52 GMT -5
Nov 17, 2011 9:22:52 GMT -5
|
Post by danb. on Feb 10, 2012 16:05:17 GMT -5
Thanks Rob hopefully this weekend i will get some paint tests done before i set upon the big cat i will post up an update soon.
Dan B
|
|
|
|
Post by TRM on Feb 10, 2012 16:46:16 GMT -5
Looking great Dan!!! Paint Paint Paint!!! Love to hear that!!!
|
|
|
|
Post by wouter on Feb 12, 2012 4:29:55 GMT -5
Nice update Dan: love those armour plates on the back of the hull, I've seen it on some other models and it never gets boring. Ideal for weathering and stuff. Lookin' forward to next update!
Cheers
|
|
bigjohn
Reviews member    
Member since: December 2011
John Hale
Posts: 3,438
Dec 21, 2011 2:17:45 GMT -5
Dec 21, 2011 2:17:45 GMT -5
|
Post by bigjohn on Feb 12, 2012 15:47:39 GMT -5
Nice Dan! I love the base, this is gonna look killer when you get it all done up!
|
|
danb.
Reviews member     March 2013 MoM Winner
Member since: November 2011
Posts: 2,808
Nov 17, 2011 9:22:52 GMT -5
Nov 17, 2011 9:22:52 GMT -5
|
Post by danb. on Feb 18, 2012 15:05:55 GMT -5
Hey all after a while off the Panther painting has started i have decided to go with a unpainted Panther as i have been itching to do a raw steel effect tank the turret will be painted witha hint of camo to represent the turret being finished before the hull this tank will be a bit of a marmite tank some of you will like and some of you will hate it!!! ;D The hull was primed with a black primer then the fiddly bits were finished off with Tamiya black and the airbrush. 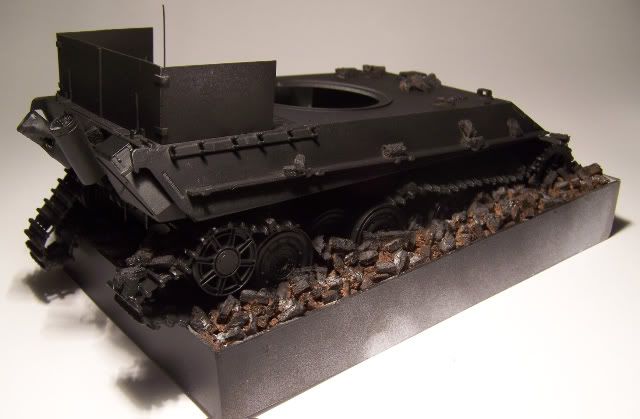 Then the rust stage began i used Revell enamels and white spirit as a thinner, first up was a dark brown i made this coat thin so the black primer could show through for shadows. Then i mixed light brown and orange and sprayed this as the lighter fresh rust. These 3 colours were then used with a sponge and randomly applied over the hull. 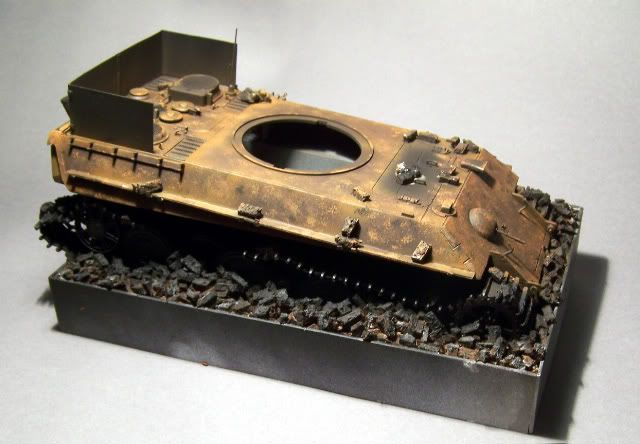 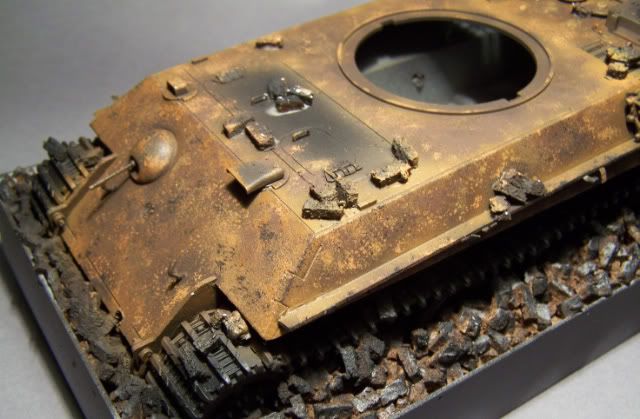 once this stage was dry i de canted some hairspray into my ab and applied 3 light coats i left this to dry for 1 hour then i mixed equal parts of Tamiya blue,neutral grey and white then sprayed 2 light coats this is to simulate the bluey grey mild steel colour this was then chipped off in random areas to uncover some rust. Then the hull was sealed with some matt coat ready for weathering and enamel rusting. 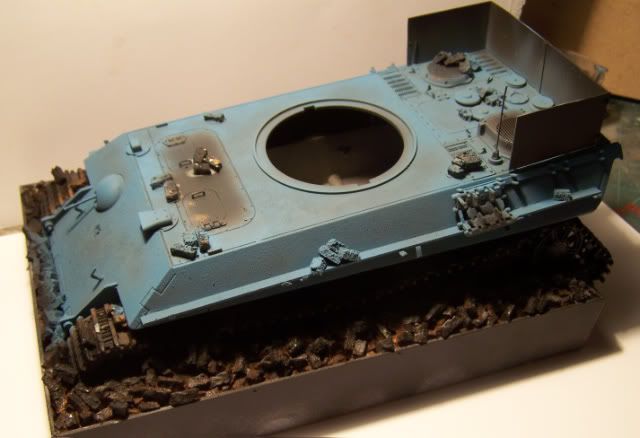 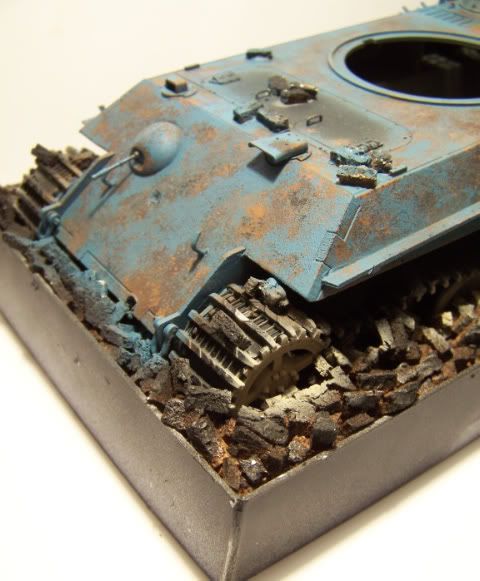 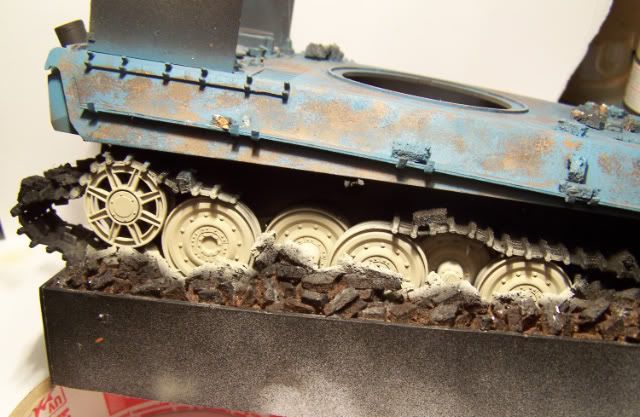 while the hull was drying i started the turret i wanted this to look simple and as if the germans only had a short time to get it ready for battle this was primed the same way as the hull then it received 2 light coats of Tamiya Buff then wite was added to the mix for colour modulation. The barrel was painted using Tamiya neutral grey then a thin coat of German grey to replicate a unpainted finish. For the camo this was Nato green the turret was sealed with gloss coat. 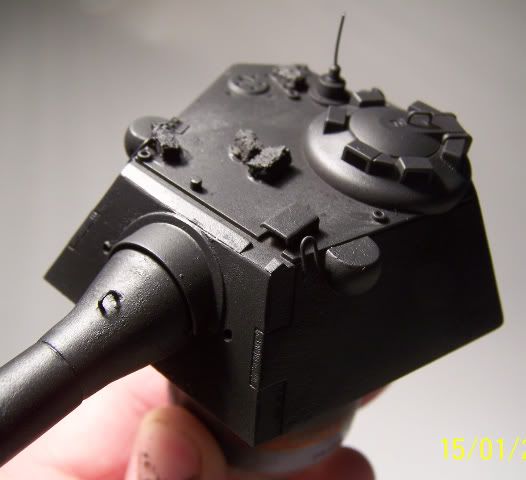 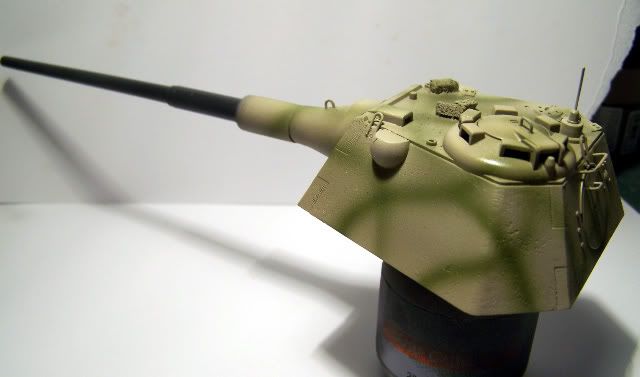 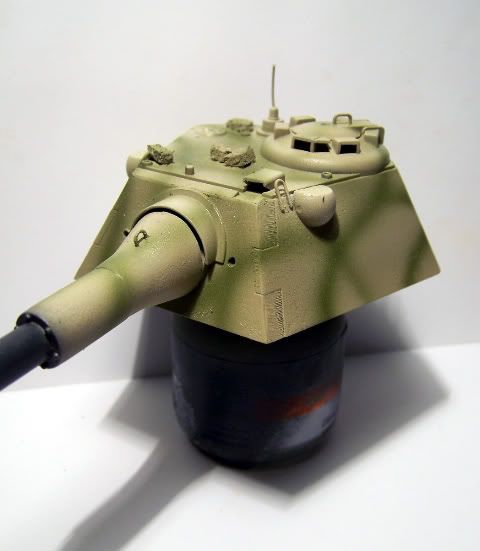 sorry for the long update Dan B |
|
AndyArgent.
Senior Member
    Aug 2013 MoM Winner
Member since: November 2011
Andy Bodge Argent - Aug 2013 MoM Winner
Posts: 1,746
Nov 17, 2011 17:09:43 GMT -5
Nov 17, 2011 17:09:43 GMT -5
|
Post by AndyArgent. on Feb 18, 2012 17:25:31 GMT -5
Hi Dan this is lookin something special mate, Just a quick note ,if you are going to put the spare tracks on the hull as you have demonstrated on it before paint you might want to sand of the injection pin marks of the inside face of the links. I missed it on a build once and those little beggers really stick out on a weathered track link.
|
|
|
|
Post by spud on Feb 18, 2012 21:45:41 GMT -5
Oh cool we have paint!!!!
|
|
|
|
Post by TRM on Feb 18, 2012 22:51:03 GMT -5
Looking good Dan...keep it going!!
|
|
multicam
Senior Member
   
Member since: January 2012
Nate
Posts: 2,039
Jan 10, 2012 14:35:41 GMT -5
Jan 10, 2012 14:35:41 GMT -5
|
Post by multicam on Feb 19, 2012 1:21:46 GMT -5
No worries man, we like long updates!  looking great! |
|
danb.
Reviews member     March 2013 MoM Winner
Member since: November 2011
Posts: 2,808
Nov 17, 2011 9:22:52 GMT -5
Nov 17, 2011 9:22:52 GMT -5
|
Post by danb. on Feb 19, 2012 3:45:51 GMT -5
cheers boys thanks for the positive comments thanks Bodge for the advice i have cleaned them up to the best of my abilities and i was very surprised with how clean they were on the sprue overall the kit has been very good.
Dan B
|
|
|
|
Post by 406 Silverado on Feb 19, 2012 9:10:12 GMT -5
Nice to see the paint going on this one Dan. Nice work on the chipping too.
|
|
bigjohn
Reviews member    
Member since: December 2011
John Hale
Posts: 3,438
Dec 21, 2011 2:17:45 GMT -5
Dec 21, 2011 2:17:45 GMT -5
|
Post by bigjohn on Feb 19, 2012 9:14:10 GMT -5
More pics please. ;D
|
|
|
|
Post by wouter on Feb 20, 2012 11:18:14 GMT -5
Nice start on the paintwork mate! Really love it so far!!!!
And I'm glad you chose some different colors than I had planned on my Panther F, otherwise I would have changed my plans ;D ;D ;D
Cheers
|
|
AndyArgent.
Senior Member
    Aug 2013 MoM Winner
Member since: November 2011
Andy Bodge Argent - Aug 2013 MoM Winner
Posts: 1,746
Nov 17, 2011 17:09:43 GMT -5
Nov 17, 2011 17:09:43 GMT -5
|
Post by AndyArgent. on Feb 20, 2012 15:14:55 GMT -5
Ive got one in the stash to do but i really like Wilders version and tempted to recreate that but then again i dont want to copy others.
|
|
|
|
Post by wouter on Feb 20, 2012 16:00:40 GMT -5
Bodge: I remember the Wilder one: I was thinking the same thing as you mate: in the end I decided to do something a bit different. But it's cool stuff indeed!
Cheers
|
|
danb.
Reviews member     March 2013 MoM Winner
Member since: November 2011
Posts: 2,808
Nov 17, 2011 9:22:52 GMT -5
Nov 17, 2011 9:22:52 GMT -5
|
Post by danb. on Feb 21, 2012 2:26:51 GMT -5
I had started the rusting stage at the weekend and found it was not really what i had in mind so i started again!!!!  Take Two: Due to the last blue being too dark i added more white to the mix this new mix was then sprayed on it was left to dry for a few minutes then 3 light coats of hairspray was applied. 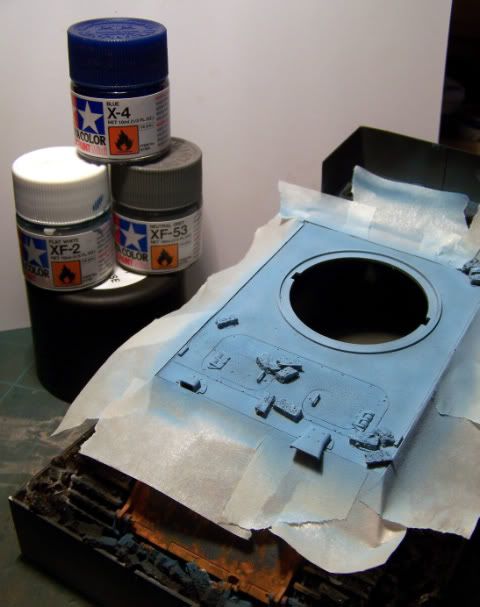 Once the HS had dried i then needed a darker blue or grey i decided on grey so i used Tamiya German Grey thinned 50% this was thinly sprayed on the hull. 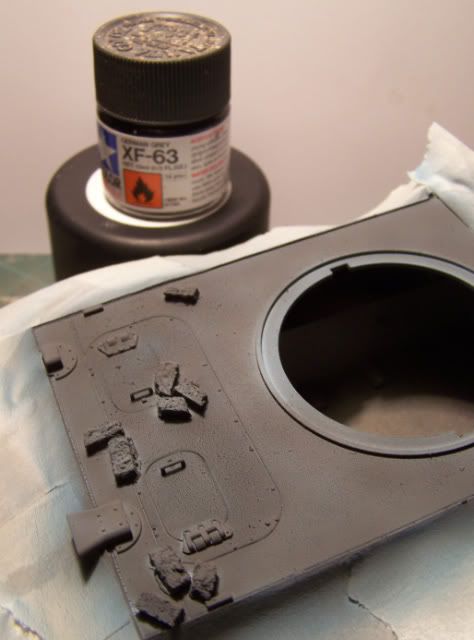 I then wanted a scratched effect on the hull to simulate stored sheet steel i studied my reference pics and used info from Adam Wilders techniques so i sprayed a film of water with my AB onto the hull to soften the German Grey then scratched the surface with a tooth pick. 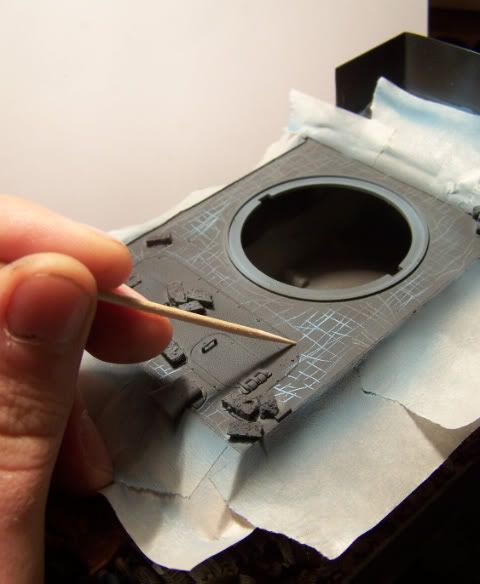 Then i revealed more of the lighter blue by using a stiff brush and chipping in random areas. 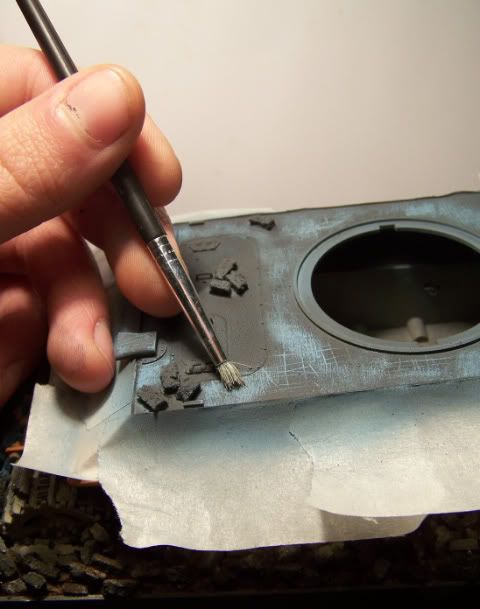 I then sealed this with some Tamiya clear ready for the enamel rust and weathering. Enamel orange was used thinned with white spirit and brushed on in random areas a stiff brush was used to feather the edges. 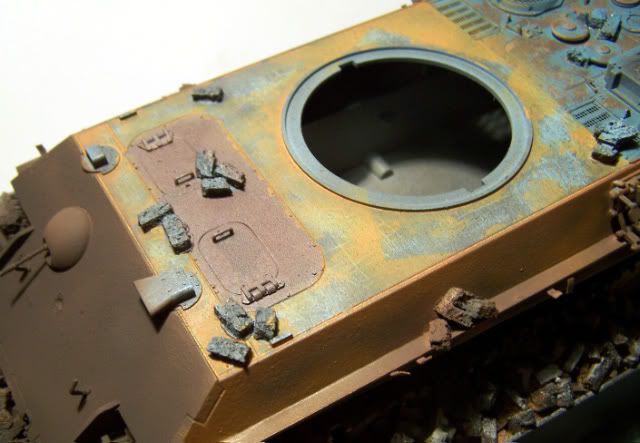 I am finally happy with the rust effect i have achieved what do you lot think all comments welcome. Dan B |
|
|
|
Post by 406 Silverado on Feb 21, 2012 8:47:34 GMT -5
Man that does look great Dan. The raw steel effect is right on target bro. I haven't had time to woork on my ammo rack but this is what I have in mind. just the inspiration I need to get back to it.
Keep it coming Dan, this is fantastic
|
|
multicam
Senior Member
   
Member since: January 2012
Nate
Posts: 2,039
Jan 10, 2012 14:35:41 GMT -5
Jan 10, 2012 14:35:41 GMT -5
|
Post by multicam on Feb 21, 2012 17:49:39 GMT -5
Looking good Dan. Love the way the light blue and orange contrast  |
|
Deleted
Member since: January 1970
Posts: 0
Nov 24, 2024 6:35:47 GMT -5
Nov 24, 2024 6:35:47 GMT -5
|
Post by Deleted on Feb 21, 2012 18:12:57 GMT -5
Dan,bring them along mate,It'll mean I won't have to put so much of my 'tat' on the table  ......Plus I might get away and spend some dosh! |
|
Deleted
Member since: January 1970
Posts: 0
Nov 24, 2024 6:35:47 GMT -5
Nov 24, 2024 6:35:47 GMT -5
|
Post by Deleted on Feb 21, 2012 18:49:56 GMT -5
I can do both.....and still come back with 2 kits!!!!! ;D ;D.....You know me!!
|
|
danb.
Reviews member     March 2013 MoM Winner
Member since: November 2011
Posts: 2,808
Nov 17, 2011 9:22:52 GMT -5
Nov 17, 2011 9:22:52 GMT -5
|
Post by danb. on Feb 23, 2012 2:29:31 GMT -5
I wont be able to make saturday boys due to lack of money and family issues life always gets in the way!!! hope its a good day for you boys another update on the panther will be soon as more rust has been done.
Dan B
|
|
danb.
Reviews member     March 2013 MoM Winner
Member since: November 2011
Posts: 2,808
Nov 17, 2011 9:22:52 GMT -5
Nov 17, 2011 9:22:52 GMT -5
|
Post by danb. on Feb 25, 2012 5:26:42 GMT -5
Hey all just a quick update on the Panther. Progress so far: for the rust i used orange Revell enamels thinned with white spirit also used MIG fresh rust pigments in the mix. The tracks have been given a dark rust basecoat. next to do is the weathering and dust. 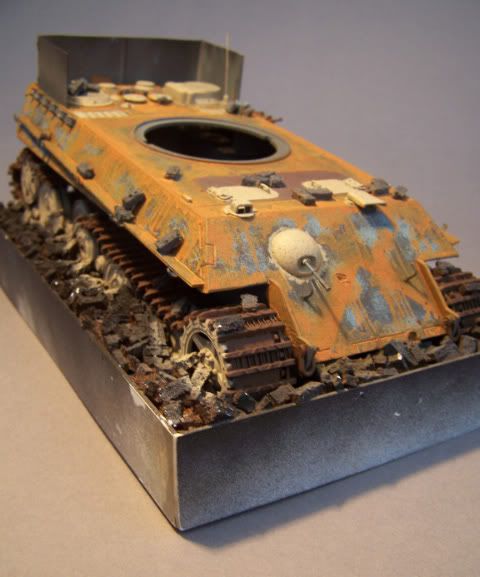 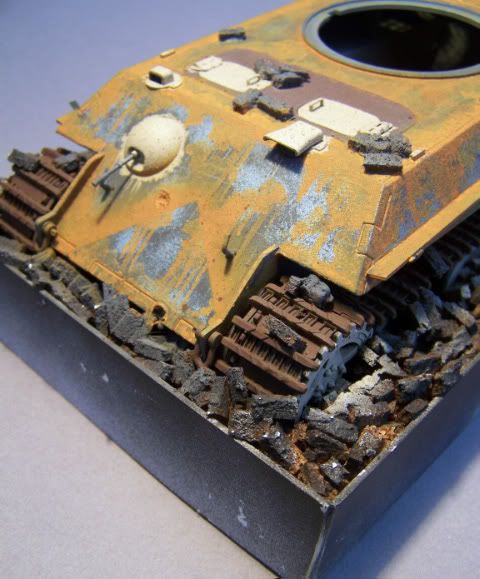 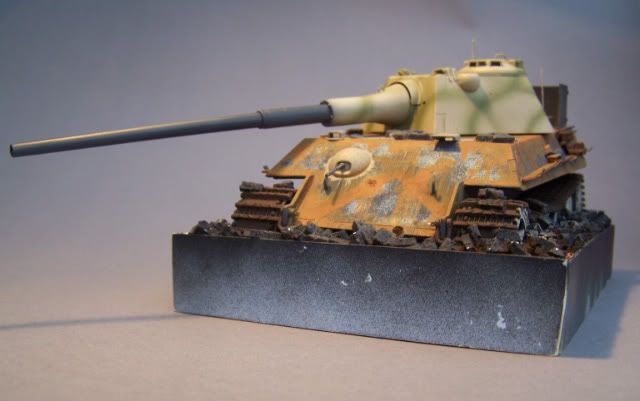 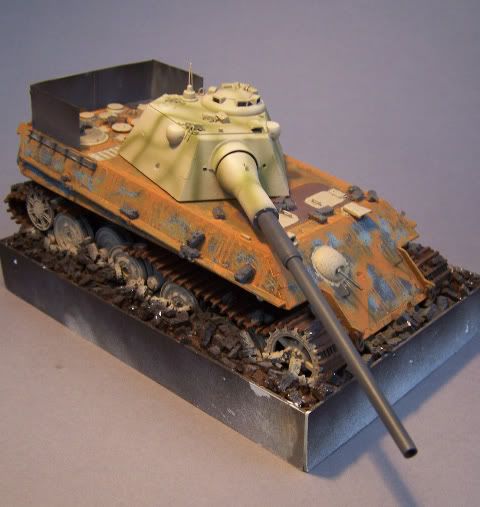 Dan B |
|
|
|
Post by wouter on Feb 25, 2012 5:46:43 GMT -5
Looks very cool mate, love the different layers of paint and rust. Very nice so far!
Cheers
|
|
|
|
Post by 406 Silverado on Feb 25, 2012 9:11:33 GMT -5
Looks a bit too heavy on the bright rust, but could be the lighting. I'm liking this one Dan. Staying tuned in for more.
|
|
danb.
Reviews member     March 2013 MoM Winner
Member since: November 2011
Posts: 2,808
Nov 17, 2011 9:22:52 GMT -5
Nov 17, 2011 9:22:52 GMT -5
|
Post by danb. on Feb 25, 2012 10:20:47 GMT -5
Cheers boys for the comments yes Rob it was bright under the light i have airbrushed a light layer of Buff over the top areas as dust from
the collapsed building it has toned it down a lot more pics soon
Dan B
|
|
danb.
Reviews member     March 2013 MoM Winner
Member since: November 2011
Posts: 2,808
Nov 17, 2011 9:22:52 GMT -5
Nov 17, 2011 9:22:52 GMT -5
|
Post by danb. on Feb 27, 2012 7:39:13 GMT -5
Here is a few more pics of the dusty rusty Panther as Rob has mentioned the rust was looking very bright so after a dusting of Buff in the AB i think it has dulled it down quite a bit might be a bit over done  i have also added some wear and tear to the turret and a pin wash of thinned black enamel nxt for the turret will be some rainmarks and dust. Also i have made a start on the brickwork to the base of the roof support beam. 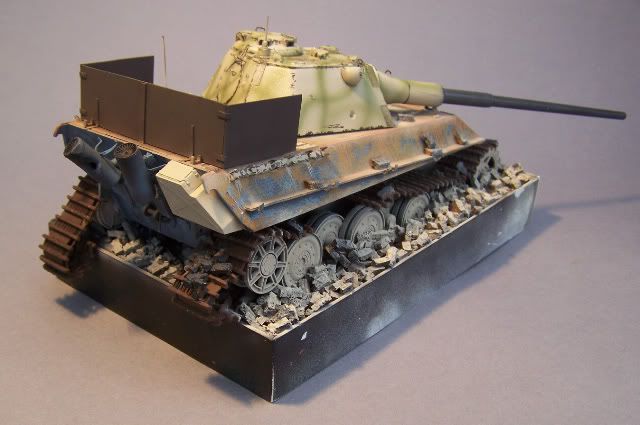 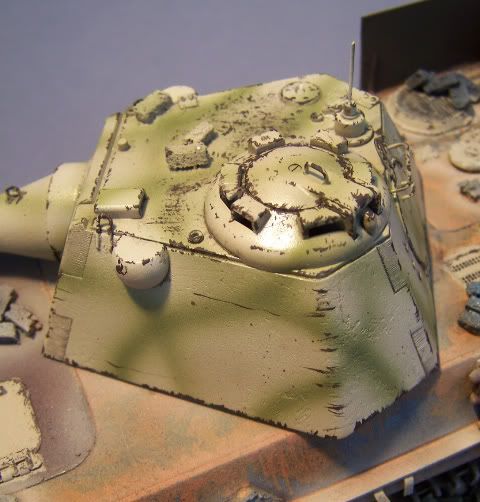 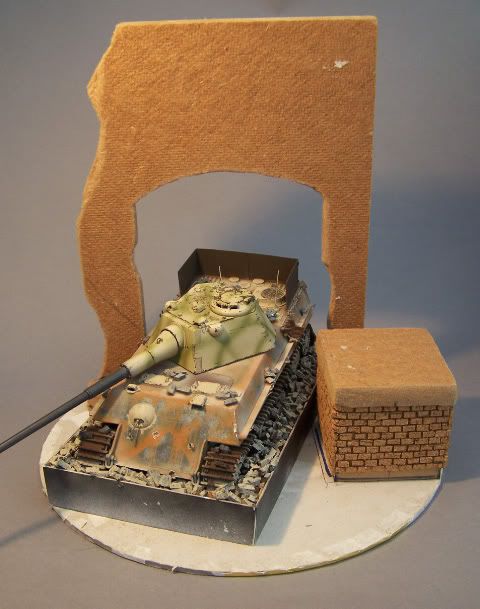 Also added a few figures which will eventually be added to the dio. 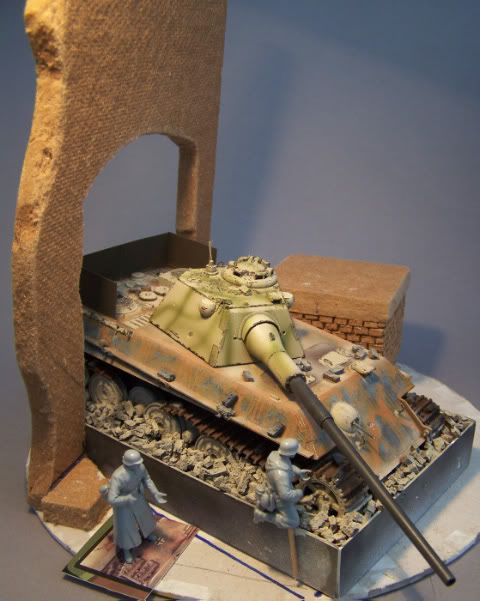 Dan B |
|
|
|
Post by 406 Silverado on Feb 27, 2012 11:58:42 GMT -5
That looks a lot better Dan. It's tricky when it comes to taking pics of rusty vehicles. The rust will be too bright or too dark. Lighting plays a big role. When I used to use real rust powder I could never get the rust to show right.
The dio set up looks fantastic. Love the rubble, very realistic.
|
|