|
|
Post by Teabone on May 12, 2013 14:57:50 GMT -5
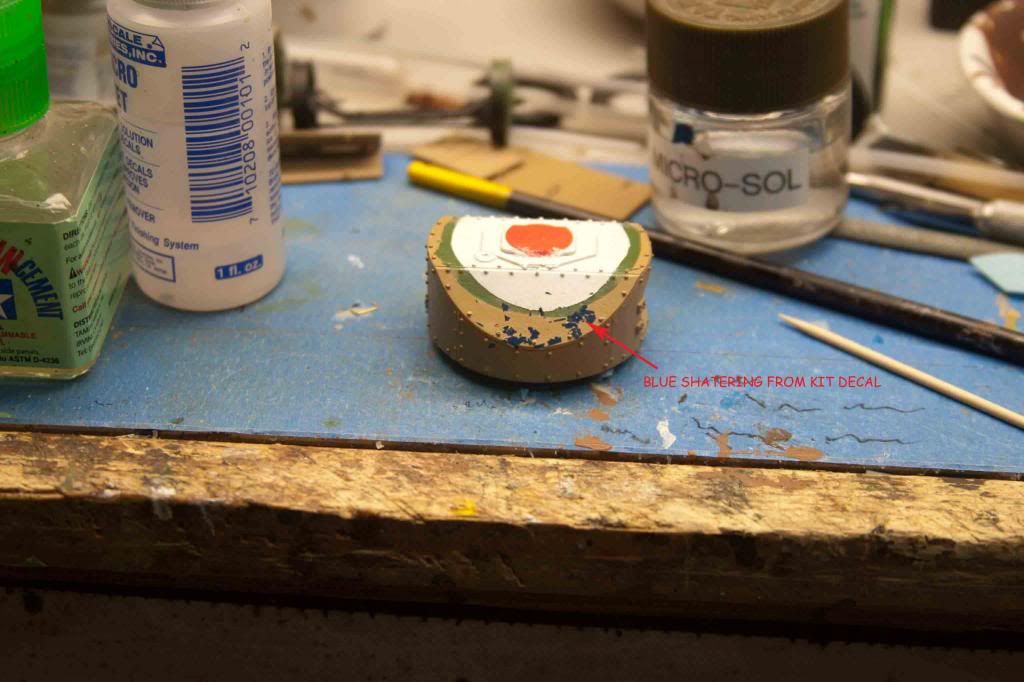
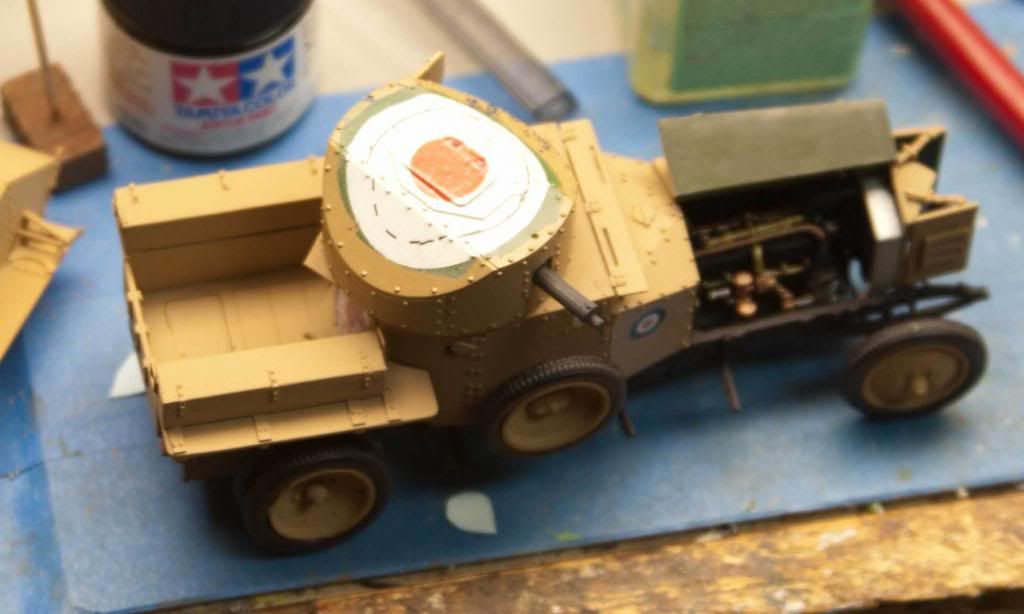
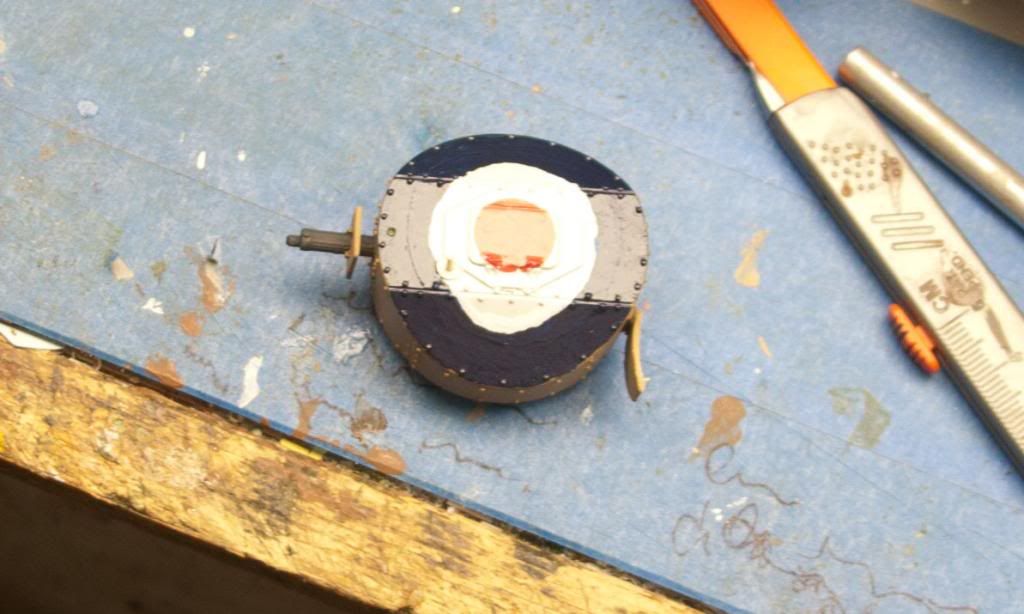
Here we have the identification mark started with the red center placed over the painted white part next would come the Royal Blue. The first rule of applying decals of unknown quality should be to give them a coat of Future, well I did not do that and when I went to apply the blue ring it shattered and you can see some protions stuck to the top. This required that I go to a back up plan of get some Royal Blue paint which will be reported on later.
Bones
|
|
|
|
Post by Teabone on May 12, 2013 15:09:05 GMT -5
This picture shows some interior detail. Rolls-Royce were minimalist when it came to instrument panel accouterments as I had to fake something within those limits. I used some archer gauges which when placed looked real nice, I then decided we needed some form of bezel to separate the gauge from the instrument panel. I chose some 28ga. brass wire I got from a beading shop and I thought they came out reasonably good. So then I was struck with the idea of finishing the glass covers of the gauges with some clear fingernail polish which I have done in the past and it work quiet well. Up jumped the devil and my gauges were dissolved under the nail-polish so in looking at them I could barely see the gauges to start with so now they were black and white blur I would just live with it.
Bones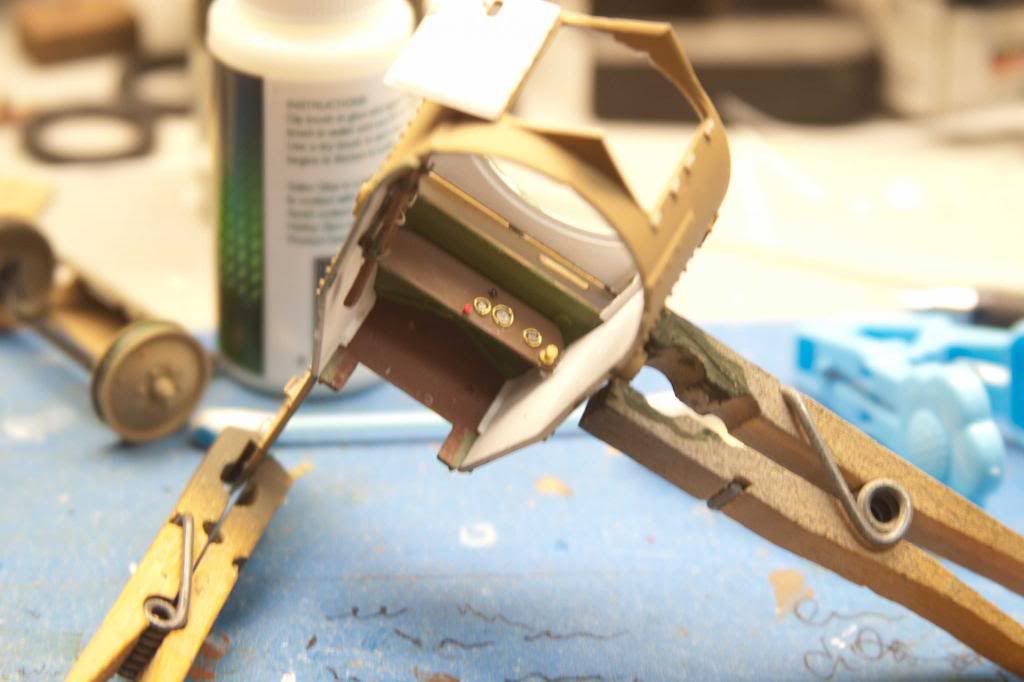
|
|
|
|
Post by Teabone on May 12, 2013 15:16:08 GMT -5
I was looking at the roundels at the show yesterday on a couple of examples of HMAC's and thought then it's definitely a painting job rather than using the kit decal. You've reinforced that plan Bones but I'm sure yours wll turn out fine the red and white look excellent 
Bones
|
|
|
|
Post by Teabone on May 12, 2013 15:17:56 GMT -5
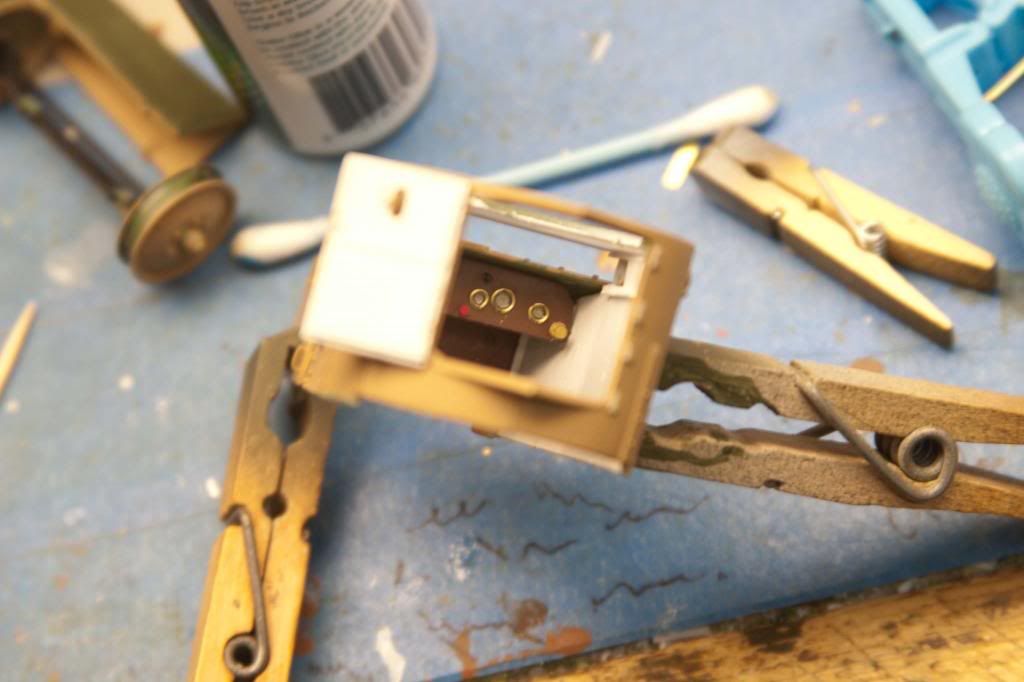
The hand pressure pump for the fuel I made for some styrene scraps.
Bones
|
|
|
|
Post by Teabone on May 12, 2013 15:23:19 GMT -5
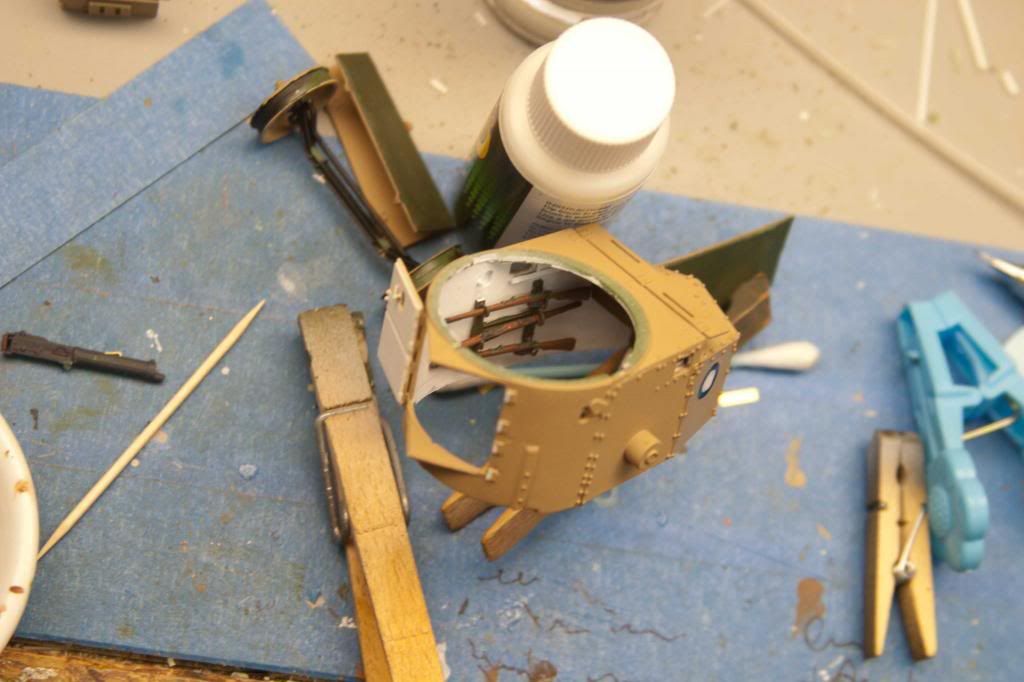
This picture shows a rack for the rifles on the left side of the crew compartment. This is another liberty on my part, the instructions show that you install them vertical on the right side. The problem with that is the rifles are so long the extend up into the turret which would not have worked. My reference shows a horizontal rack on the right side but due too the over scale size of the shifting levers there is not enough room so on the left side they went.
Bones
|
|
|
|
Post by Teabone on May 12, 2013 15:25:27 GMT -5
This picture was of the vehicle just kind of fit together without glue to see how things were fitting.
Bones.
|
|
|
|
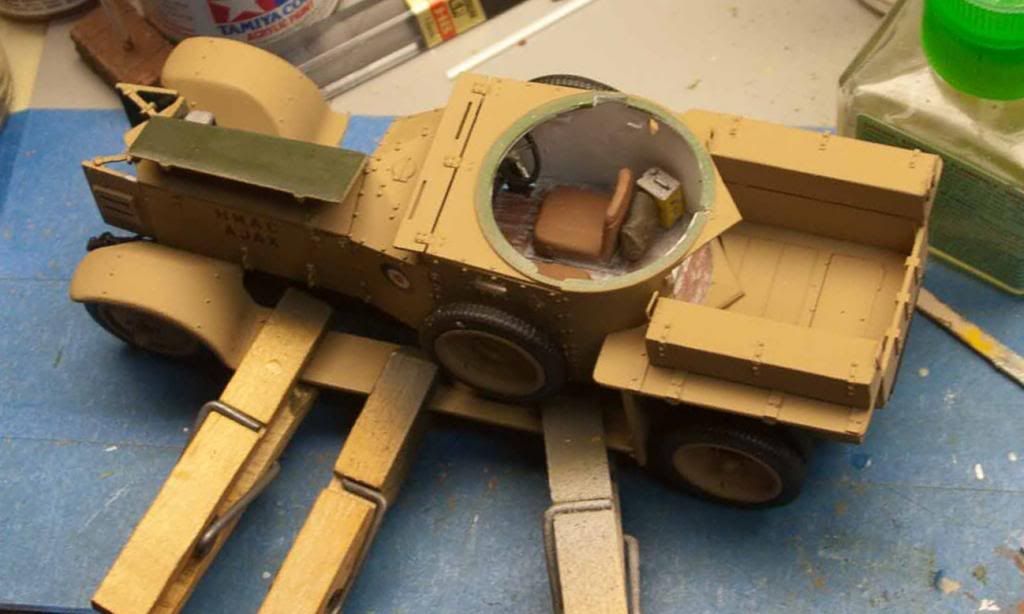
Post by Teabone on May 12, 2013 15:27:25 GMT -5
Here is the placement of the left running board.
Bones.
|
|
|
|
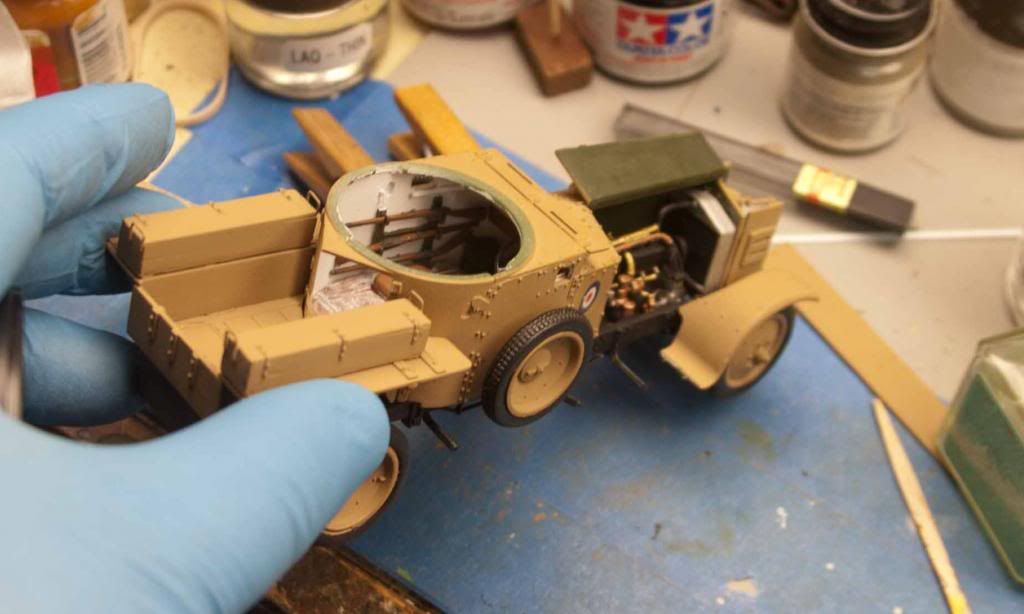
Post by Teabone on May 12, 2013 15:29:42 GMT -5
And here is where we will leave it for a few more days while I try to finish up.
Bones.
|
|
|
|
Post by Teabone on May 12, 2013 15:39:12 GMT -5
Really starting to come together now Bones yer making a great job of this one 
Bones
|
|
|
|
Post by bullardino on May 12, 2013 15:58:41 GMT -5
I really like it, Bones. As Dicky said, I'm sure you'll recover perfectly the blue decal.
|
|
|
|
Post by deafpanzer on May 12, 2013 21:31:03 GMT -5
WHOA! Almost missed this... GREAT update... GREAT process!!!
|
|
|
|
Post by Teabone on May 13, 2013 23:47:44 GMT -5
I sure am glad I have all you loyal boosters giving me good cheer from the sidelines. I had another hiccup yesterday when I discovered that the headlights will not fit when the shutters are open on the radiator so today the shutters came off while the headlights were attached which will govern the shutter position. The problem has to be a scale thing as the shutters were clearly intended to be open-able. Those old cars before the early 1930's did not have radiator shrouds and always tended to over heat until someone discovered the need for a shroud.
Bones
|
|
|
|
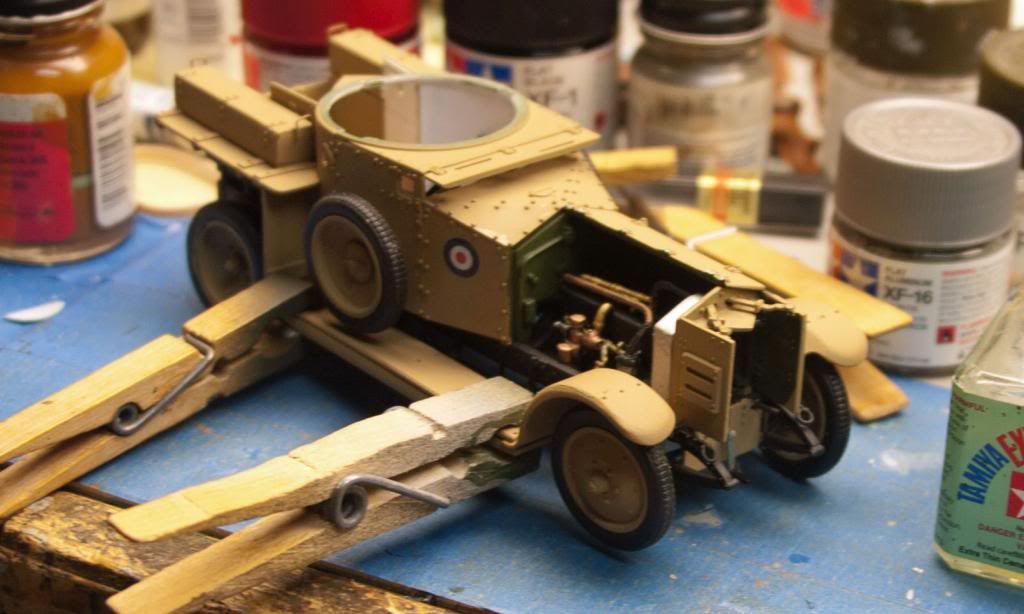
Post by Teabone on May 15, 2013 16:47:03 GMT -5
Who said I would never get this done, I'm almost there. The last of the running bboards and sand support boards.
Bones.
|
|
|
|
Post by Teabone on May 15, 2013 16:48:46 GMT -5
The top of the turret with the roundel done as its going to get.
Bones.
|
|
|
|
Post by Teabone on May 15, 2013 16:54:31 GMT -5
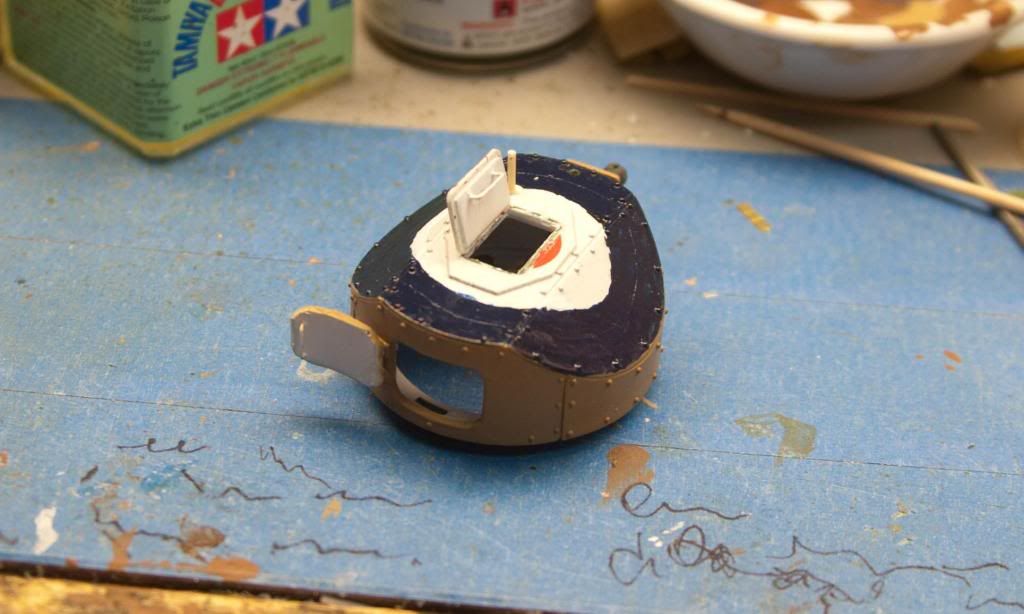
Turret with all doors open, those who are going to do their own Rolls might want to note that the seat inside the turret that appears to be suspended on chains was apparently done so in the event the turret had to turn fully where the seat went over the drivers seat because they conflict at that point. This is important here because if you turn the turret with the ridged kit seat it will be knocked off when turned in the wrong direction too far.
Bones.
|
|
|
|
Post by Teabone on May 15, 2013 16:55:53 GMT -5
Next will be the finished model once I can give it a couple of washes to define the rivets etc.
Bones
|
|
|
|
Post by deafpanzer on May 15, 2013 17:02:53 GMT -5
WOW! It is really looking GOOD!!!! Can't wait to see you bring it across the finish line...
|
|
|
|
Post by wbill76 on May 15, 2013 20:23:40 GMT -5
Glad you stuck with this one Bones! Looking forward to seeing it cross the finish line.
|
|
|
|
Post by Teabone on May 15, 2013 22:22:34 GMT -5
Yep nice work all round Bones and very informative too - it's been very helpful and will be a great reference for when I attempt mine 
DickyF
Another thing that you want to be aware of that I should have fixed, assuming you may do something with those radiator shutters, they are WAY too thick and really interfere with the headlight placement unless you build the near closed. They should only be about 0.015 thick and the air flow venting device has to be thinner also. I'm not sure what could be done with the headlight buckets but have my suspicions they also are over scale some. If you chose to use the 5 min epoxy lenses as I did be careful to the epoxy for them slowly to avoid the air bubbles I encountered. One builder I followed built his wheels with the tires on them, I chose to build the wheels first for reasons involving the paint and found that one has to be careful rolling the rubber tires onto the rims if you go for after assembly. The rim edges are not uniform and some are thin and can be damaged. If you hold the rubber tires in front of your hair drier for a few seconds to warm them a little it add flex for installing them.
Bones
|
|
|
|
Post by bullardino on May 17, 2013 0:44:19 GMT -5
Great progress, Bones  |
|
|
|
Post by Teabone on May 17, 2013 16:39:08 GMT -5
Luigi richardoram & DickF
Thanks for taking the time to look and the nice comments.
Luigi, next you get to see the finish.
richardoram, your assessment could be right depending on your frustration level. Mine is easy, if it don't go right I move on I'm just not of a temperament to spend 600 hours on any model, more power to those who can it just does not work for me. If you are a rivet counter or cant just move on when it goes bad this is not the build for you. I like Chuck Alshires take on it posted on one of my following posts.
DickyF
I suspected that you might be one of those steady hands that can paint after the complete build, I have a hard time when I can build in several moduals.
Bones.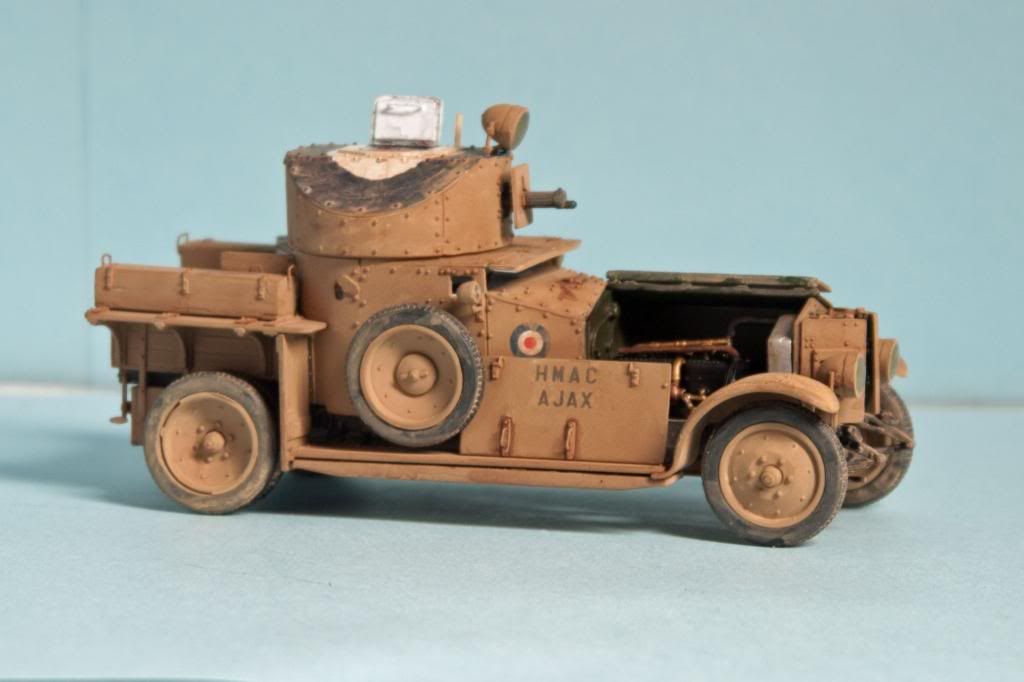
|
|
|
|
Post by Teabone on May 17, 2013 16:48:23 GMT -5
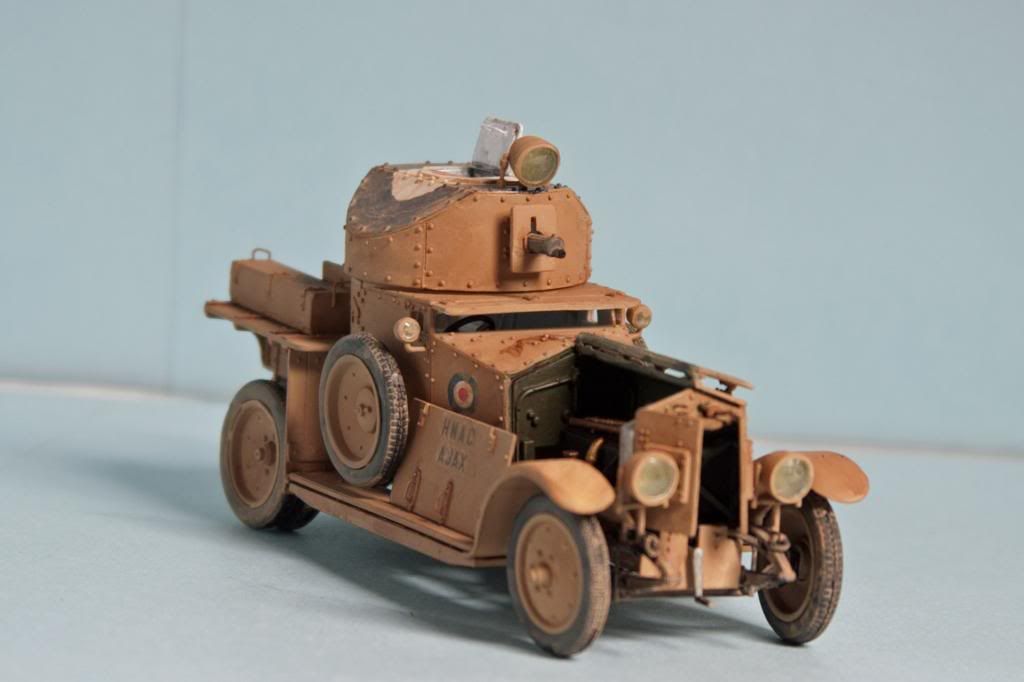
Another view with what Chuck Aleshire said when he reviewed the kit for AMPS.
"
Conclusions
As stated above, this kit in some very fundamental
ways doesn't quite meet today's higher standards. Maybe we modelers are
becoming spoiled. This kit costs as much as many of the kits coming out
of Asia, the ones with full interiors, photoetch, metal barrels, and so
on and so forth, and it just doesn't match up. I was slightly
disappointed with the flash, the sink marks, the oversize pin marks,
and the mounting pins/ holes that just did not mate up at all until the
part was reshaped. This kit felt much like a circa '70's kit in many
ways.
This kit absolutely screams for aftermarket resin
wheels, an interior set, and loads of photoetch. This kit can be the
basis for an amazing model. Hopefully, the folks that produce these
things are on the ball and already gearing up to capitalize on Roden's
effort.
I applaud Roden's efforts in producing this kit, and
hope they do even more in 1/35 armor. This is a solid start. I just
hope that they can build on this effort and take the steps needed
to meet the expectations of today's informed modeler.
Pros - Unique and interesting subject. The kit
builds into a nice looking model if you are up to a challenge. Despite
some of the extra effort expended in some areas, it was a fun build.
This is definitely not an "add glue and shake the box to build" kit.
Cons - parts quality varies as stated above, sometimes vague instructions, fairly pricey for a kit with no "bells and whistles".
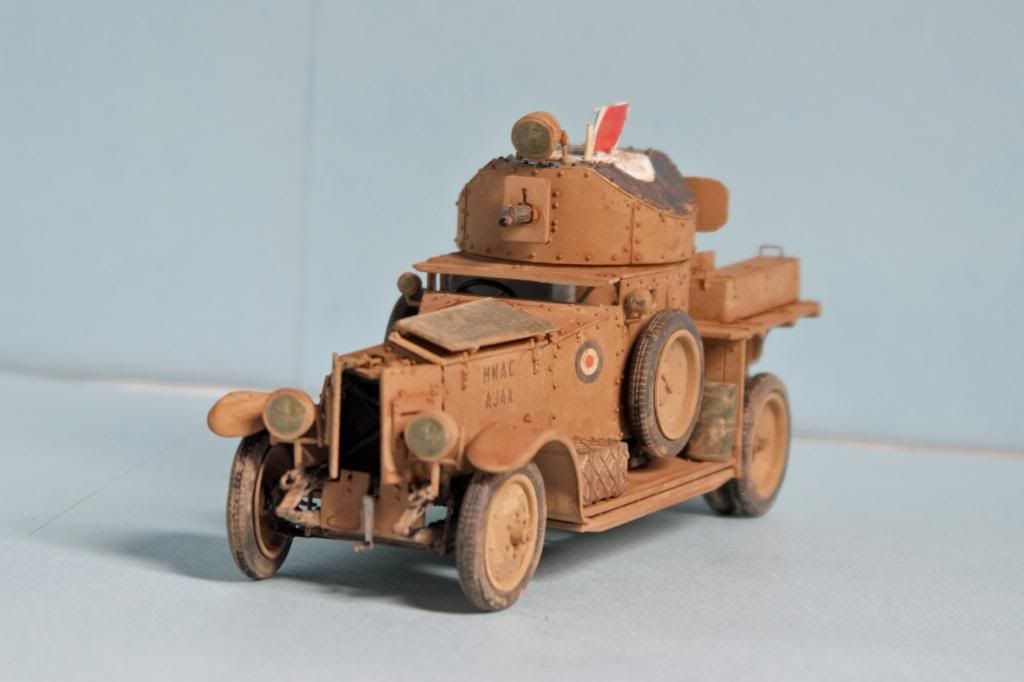

|
|
|
|
Post by Teabone on May 17, 2013 16:49:35 GMT -5
And

|
|
|
|
Post by Teabone on May 17, 2013 16:51:14 GMT -5
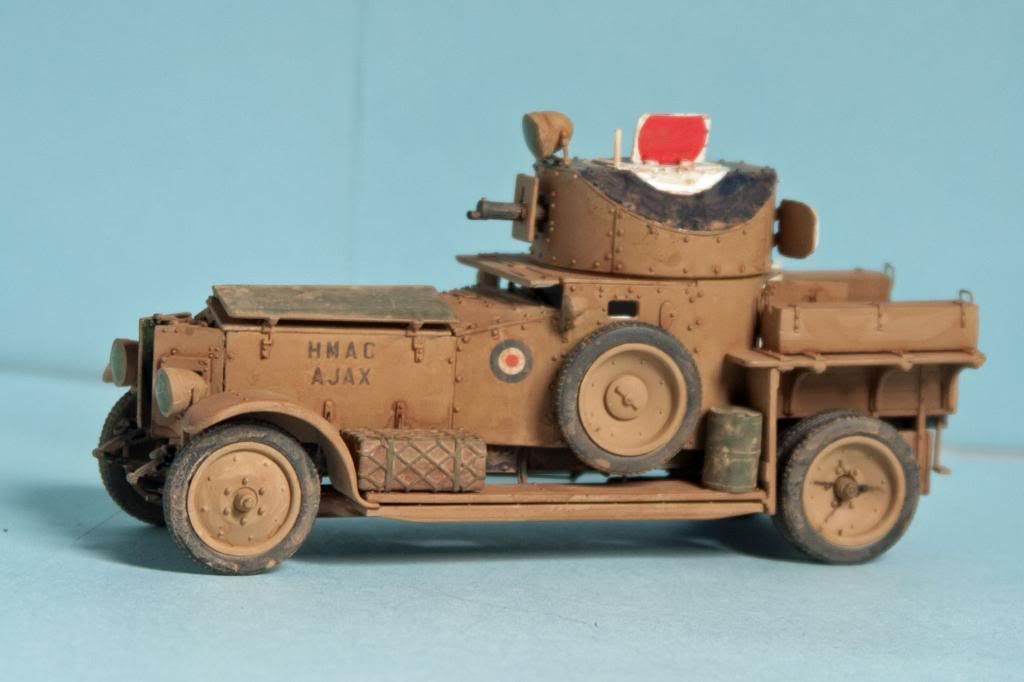
And they just keep on coming.
Bones
|
|
|
|
Post by Teabone on May 17, 2013 16:53:00 GMT -5
Like ancient water torture.
Bones
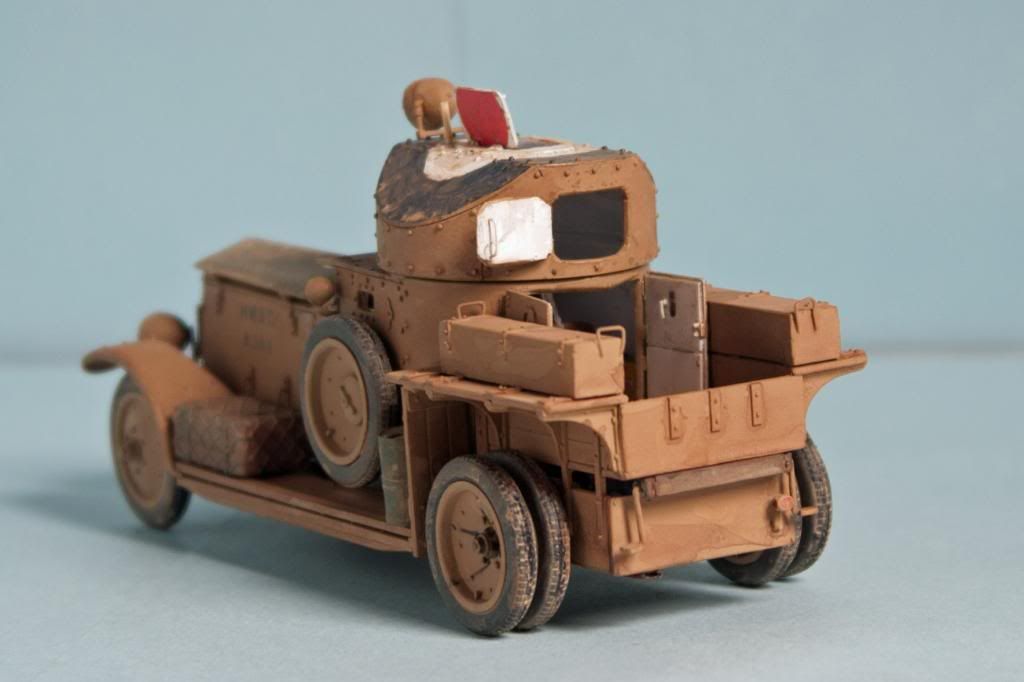
There is more.
|
|
|
|
Post by Teabone on May 17, 2013 16:54:41 GMT -5
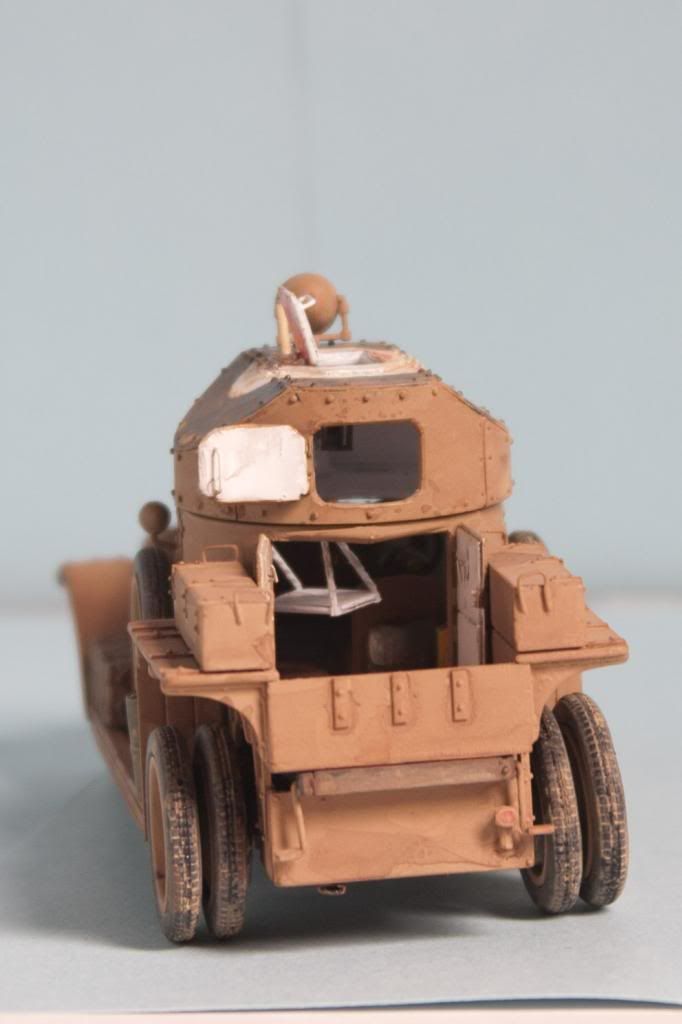
Cant stop now.

|
|
|
|
Post by Teabone on May 17, 2013 16:55:51 GMT -5
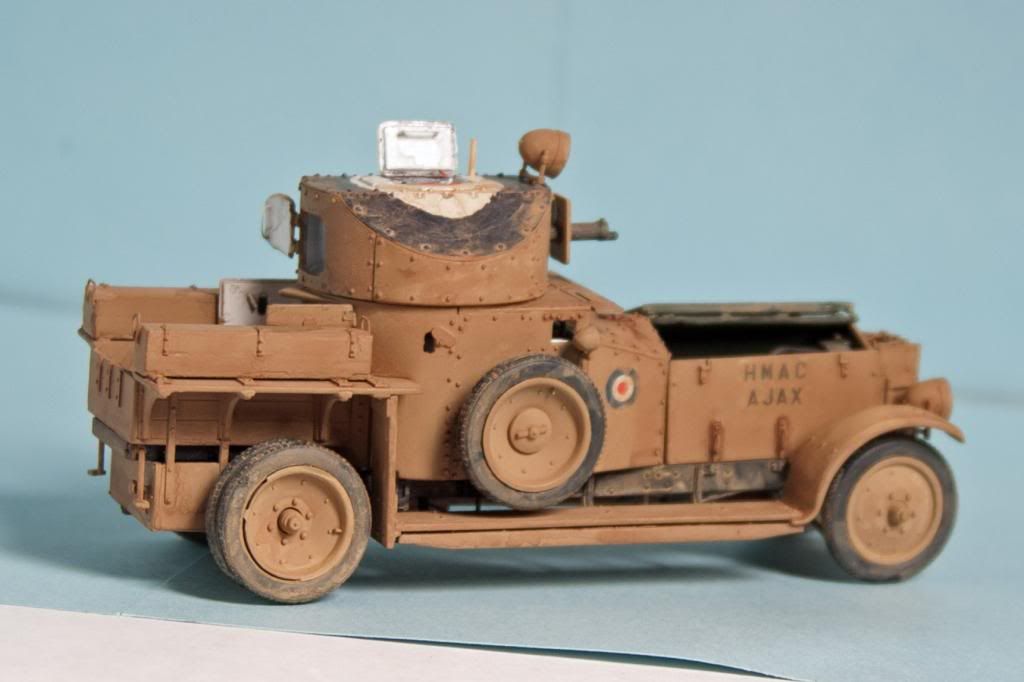
When your on a roll keep going.
|
|
|
|
Post by Teabone on May 17, 2013 16:57:56 GMT -5
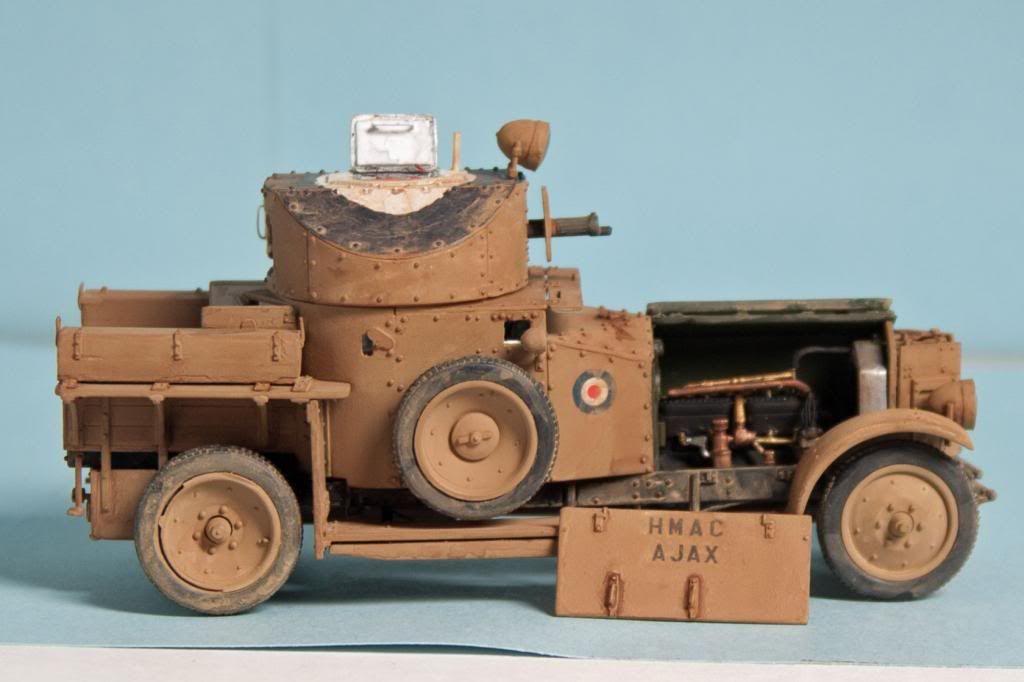
Just a few more I promise.
|
|
|
|
Post by Teabone on May 17, 2013 16:59:15 GMT -5
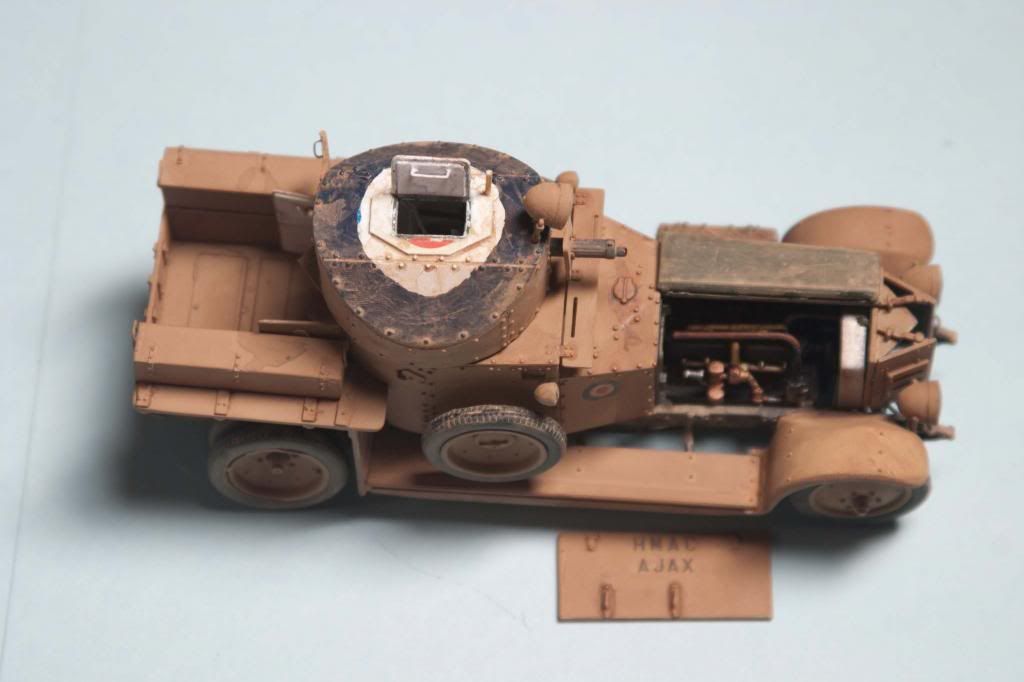
Your not going to believe it just one more after this.
|
|
|
|
Post by Teabone on May 17, 2013 17:03:53 GMT -5
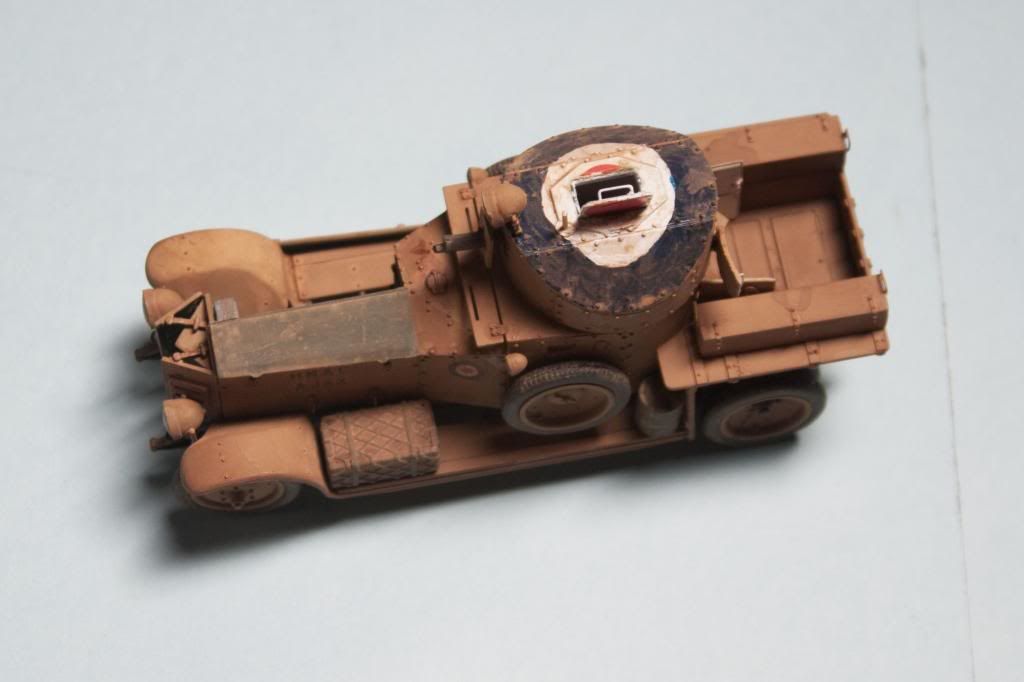
And without any fanfare this is it.

|
|