Rick
Full Member
  
Member since: March 2013
what to build, what to build . . . Ok THAT one!
Posts: 854 
|
Post by Rick on Sept 30, 2013 21:42:17 GMT -5
When Italeri released their big 1/35 scale PT boat, I jumped at it. I also jumped into construction to few reference sources. Construction was a breeze. Cruised through the sub assemblies with no problems and blindly followed the paint references to the letter. That's when the trouble began. I followed the painting guide to the letter. I was satisfied with the medium green camo. The flat back was ok but nato black would have been better. Pale green FS34227 was completely wrong. I don't know if the paint mix in the bottle is incorrect or if Italeri's researchers got it wrong. Pale green is way to bright. I should have stopped after the pale green base coat, but for reasons unknown to myself to this day, I kept at it hoping the camo would come to the rescue. Nope. Lousy masking on top of wrong paint only made it worse. The only good thing was the paint finish was nice and smooth. When I finished with painting, I took a look and decided to put it in dry dock until I could decide what to do with it. So, after a long hiatus, I've decided to give it another shot and fix it. If that fails, I found another on clearance at the hobby shop. If this works, then maybe a late war gunboat conversion with the other one. Before I get started, here's a couple of pics taken during the "what was I thinkin' phase". Back when I was giddy with construction and before paint. Sub assemblies are done and everything above the deck is dry fitted. 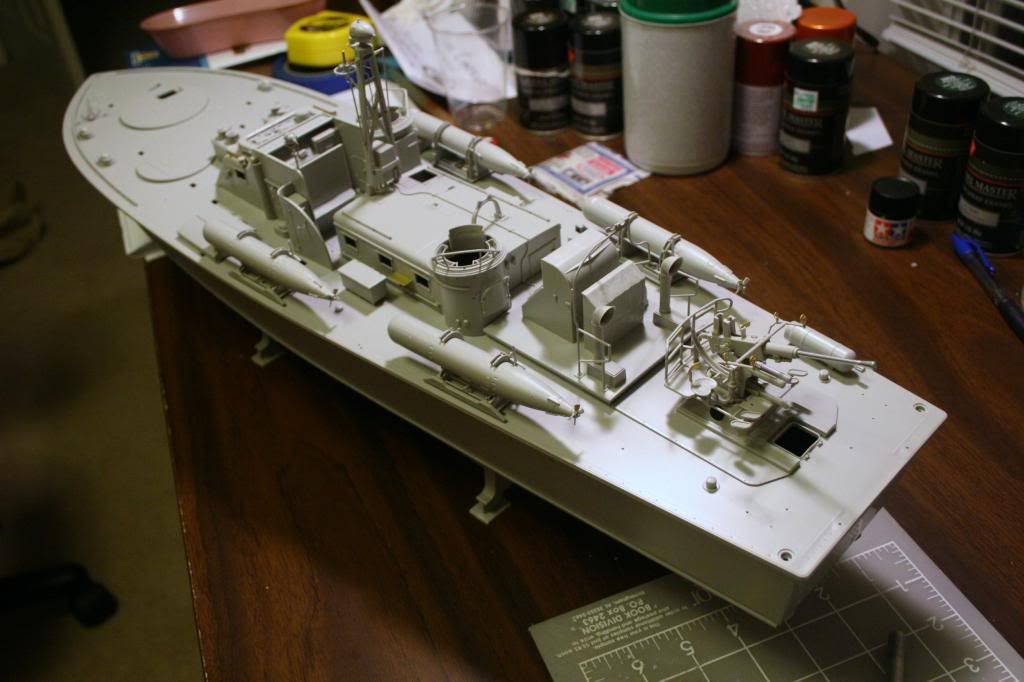 MM Pale green base coat. (Should be called putrid green) Sorry, Italeri really missed this one. At this point I was thinking, a wash would tone this down. 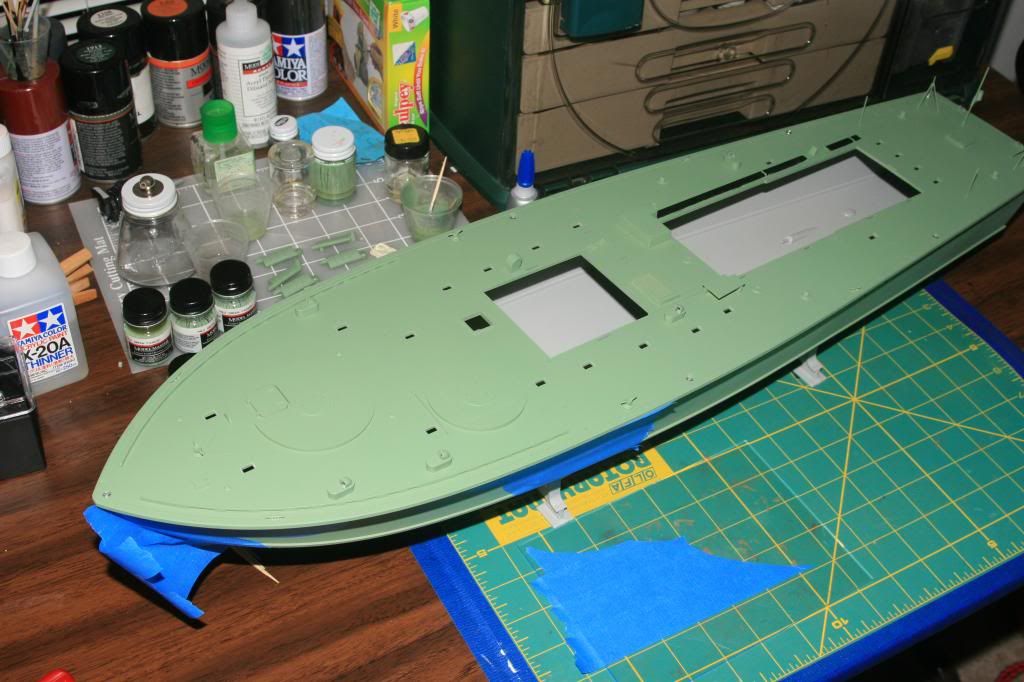 And after camo and deck accessories were painted. And, it's still way to bright. No way a wash is going to help tone this beacon down. 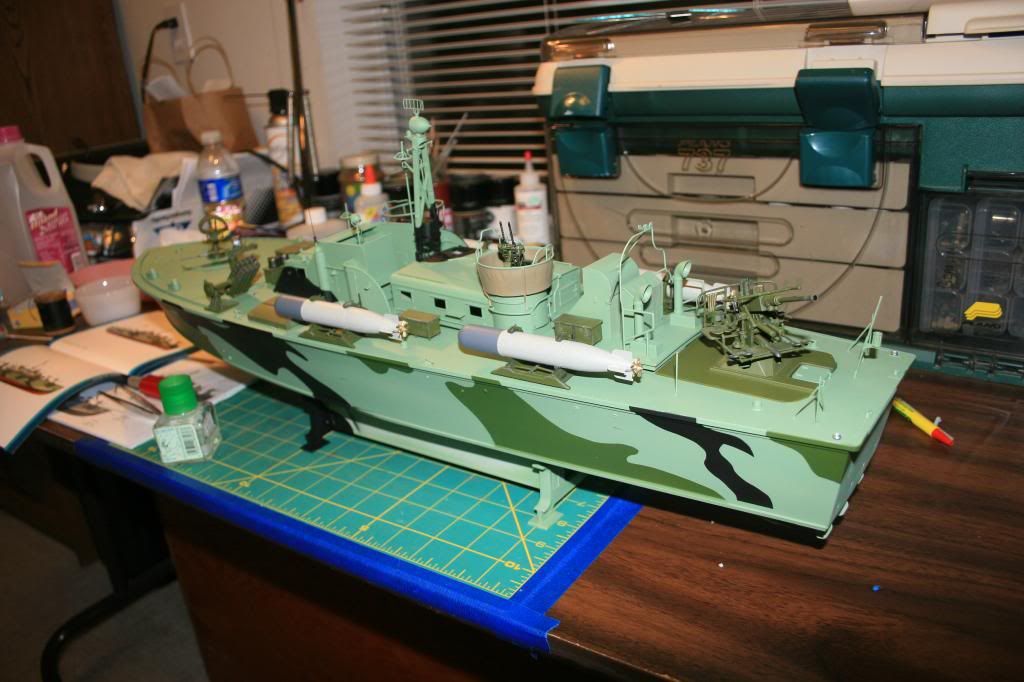 And that's where history ends and my attempt to rescue it from embarassing floater status and turn it into the weapon of war this kit deserves. Rick |
|
|
|
Post by fightnjoe on Sept 30, 2013 21:56:58 GMT -5
rick i will say in advance i know nothing....nothing of this subject................but.........that is one very bright green buddy.
joe
|
|
Rick
Full Member
  
Member since: March 2013
what to build, what to build . . . Ok THAT one!
Posts: 854 
|
Post by Rick on Sept 30, 2013 22:11:19 GMT -5
"Holy crap, what was I thinking?  ?" "You weren't you idiot!" I says to myself upon seeing what disaster I brought upon myself. All I could say was, "FUBAR!" |
|
|
|
Post by wbill76 on Oct 1, 2013 20:02:42 GMT -5
I've got every confidence that you will be able to rescue it Rick!  |
|
Rick
Full Member
  
Member since: March 2013
what to build, what to build . . . Ok THAT one!
Posts: 854 
|
Post by Rick on Oct 7, 2013 22:29:19 GMT -5
First set of salvage pics. The finish on the hull and deck was already pretty smooth. I was satisfied with the red bottom. There were some raised lines on the hull where the camo masks were applied. I sanded the hull with 6000 grit sanding mesh to smooth the transitions then masked the lower red part and primed with Mr Surfacer 1200. Over the primer, I pre-shaded with flat black and lots of squiggles to give some depth and aging to the hull when I repaint. 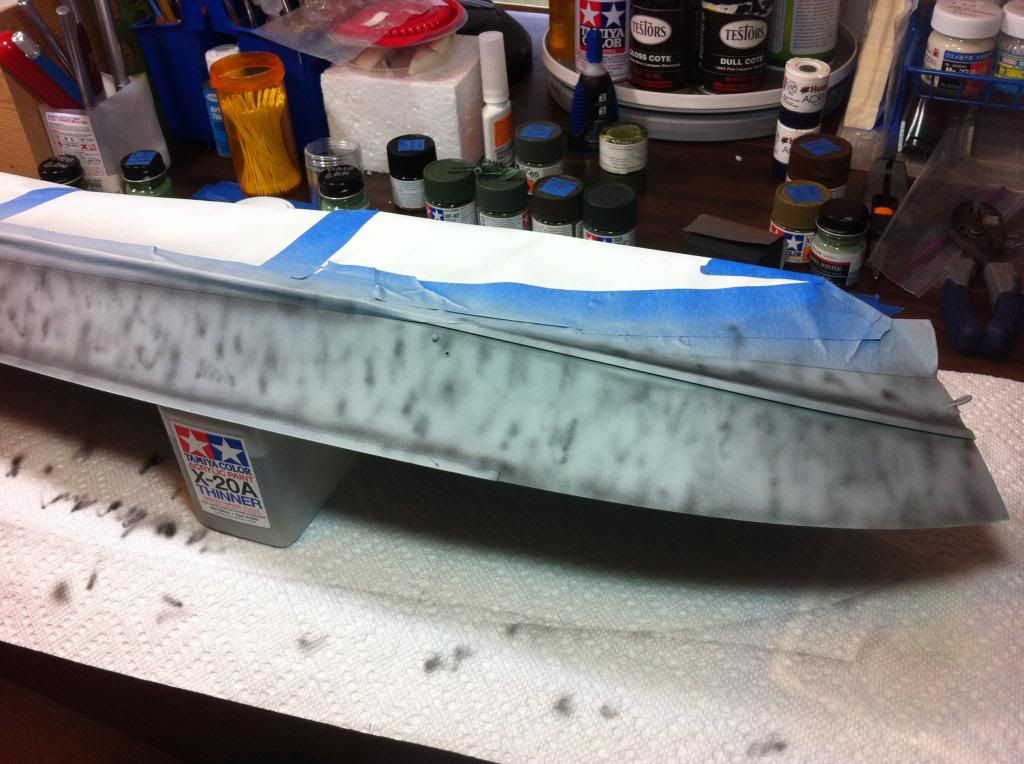 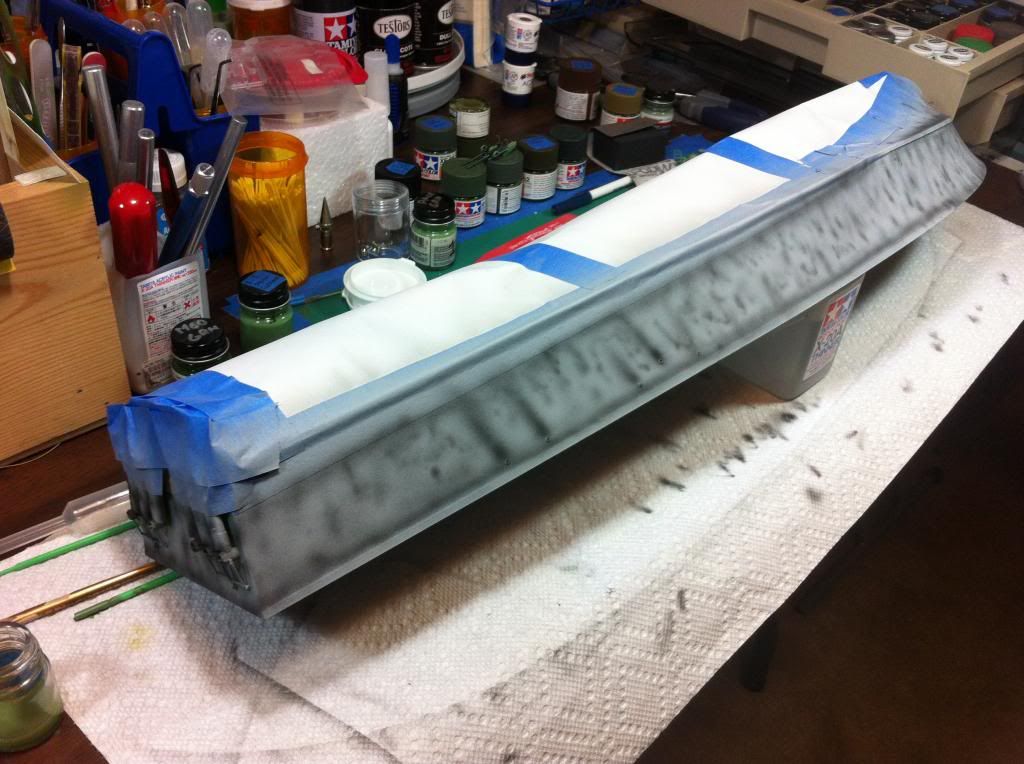 Next up, I decided to paint the deck as is but first, more pre-shading to bring out some variances in paint due aging under the south pacific sun. 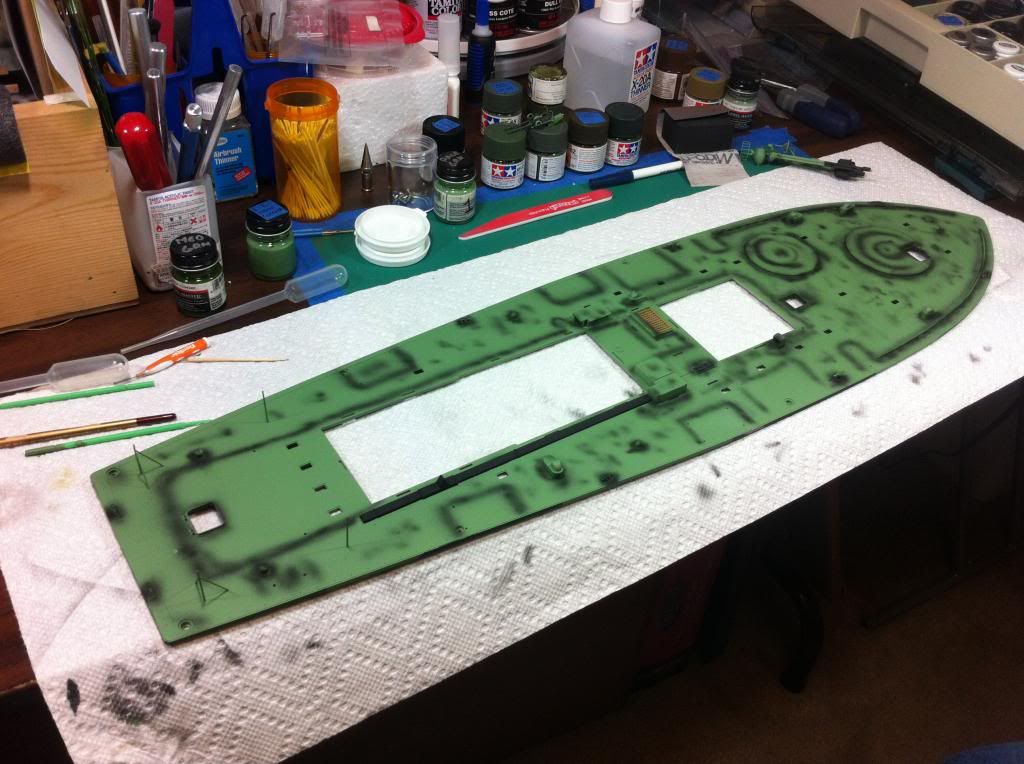 Before starting this salvage attempt,I did a bunch of research of every blog known to mankind and websites even remotely supporting PT boats to try to identify the correct colors and paints. Well, I found that virtually every website, the recommendations or stated colors, had a wide variance from each other. The consensus even stated on several sites concluded that there was a wide variance of colors applied to boats in the pacific. Heat and sun faded colors so very little was consistent. I mixed and tested for several hours. I ended up spiking the model master pale green with medium green to darken and increase the green color of the hull. Here is the result on the hull. After camo Nato black and medium green, some washes and grunge should darken the overall hull to a more realistic brightness level. 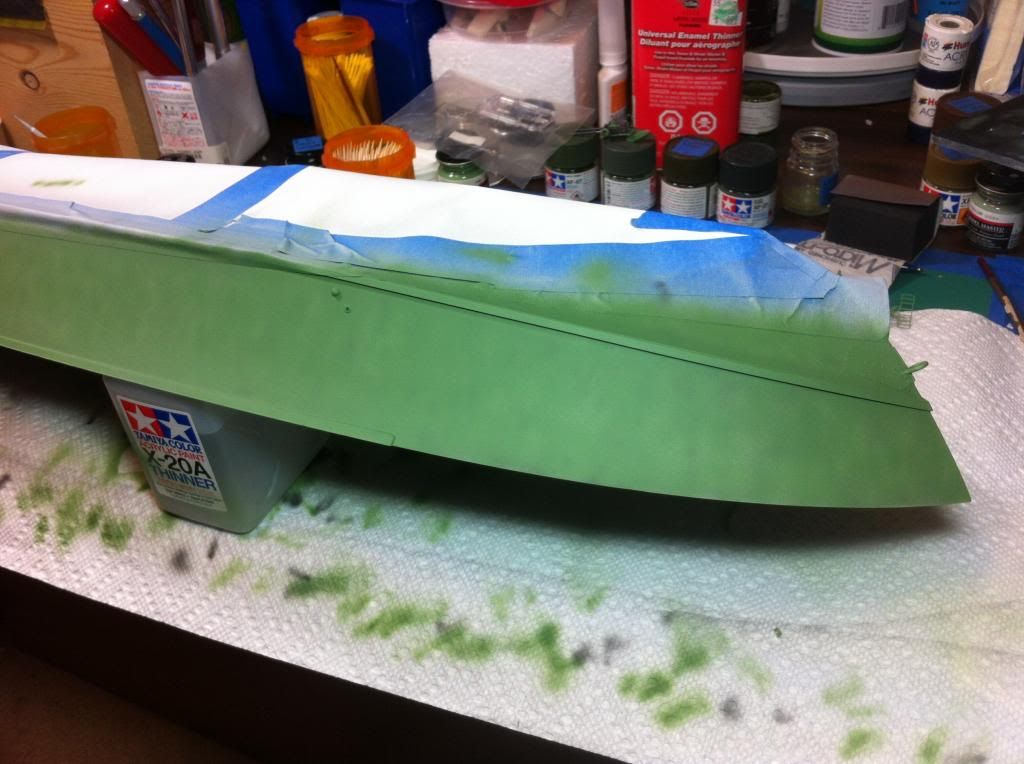 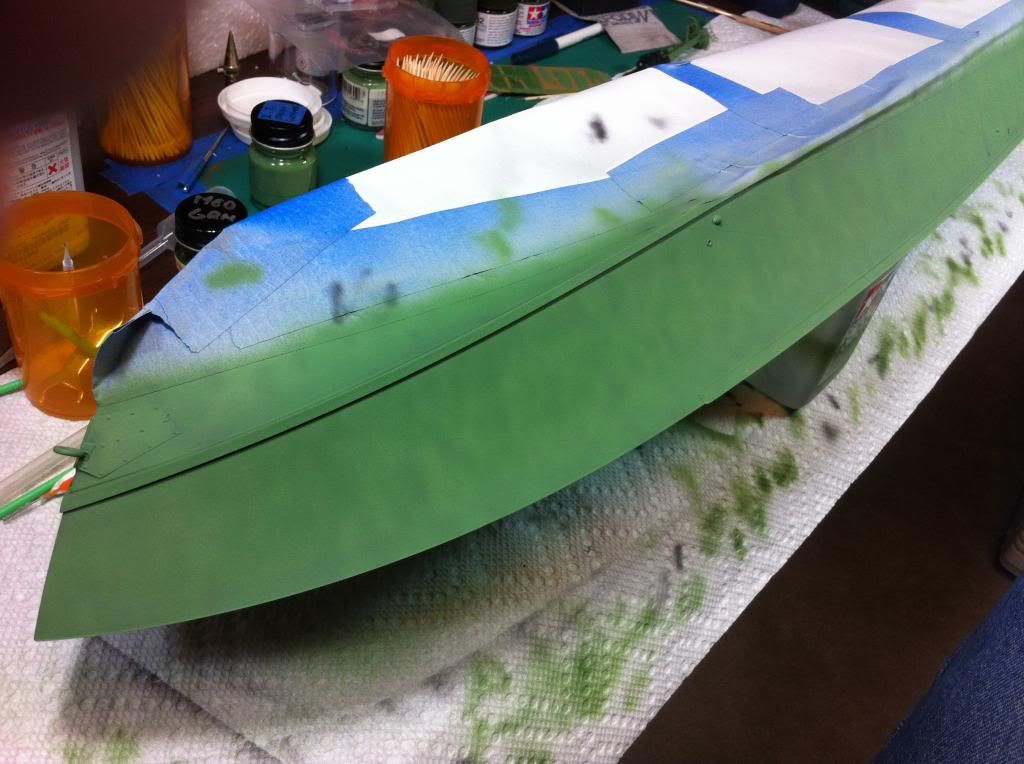 Same shade will be used on the superstructure too. The deck color is darker than the hull. I need to fabricate that mix and will post pics when finished with it as well as the superstructure. Still undecided if I want to try to rehab these parts or crack open my "spare" kit and re-build them in their entirety. I am going to try to get my base greens correct before taking on the camo. Got a feeling this one could drag on for a while. Thanks for looking in. As always comments and suggestions are welcome. Rick |
|
|
|
Post by wbill76 on Oct 8, 2013 19:53:59 GMT -5
Salvage work is looking good so far Rick, steady as she goes!
|
|
Rick
Full Member
  
Member since: March 2013
what to build, what to build . . . Ok THAT one!
Posts: 854 
|
Post by Rick on Dec 10, 2013 1:22:10 GMT -5
Sorry for the delays on this one. I still haven't felt good with the mixes I was coming up with, until now. The deck is supposed to be a darker green than the hull. In the Pacific, the sun and limited forward support took their toll on these boats. I ended up using RLM Licht Grun for the deck. No doubt some will debate the accuracy, which is fine but in my mind, this darker shade on the deck plus some eventual washes and weathering, will bring it in line with what my idea of the final color should be. For fading and wear purposes, I began spraying randomly over the pre-shaded deck which allowed some of the original Pale Green to lighten highlights. This effect doesn't show up to well in these pics and there is some glare as well but I hope it gets the idea across. 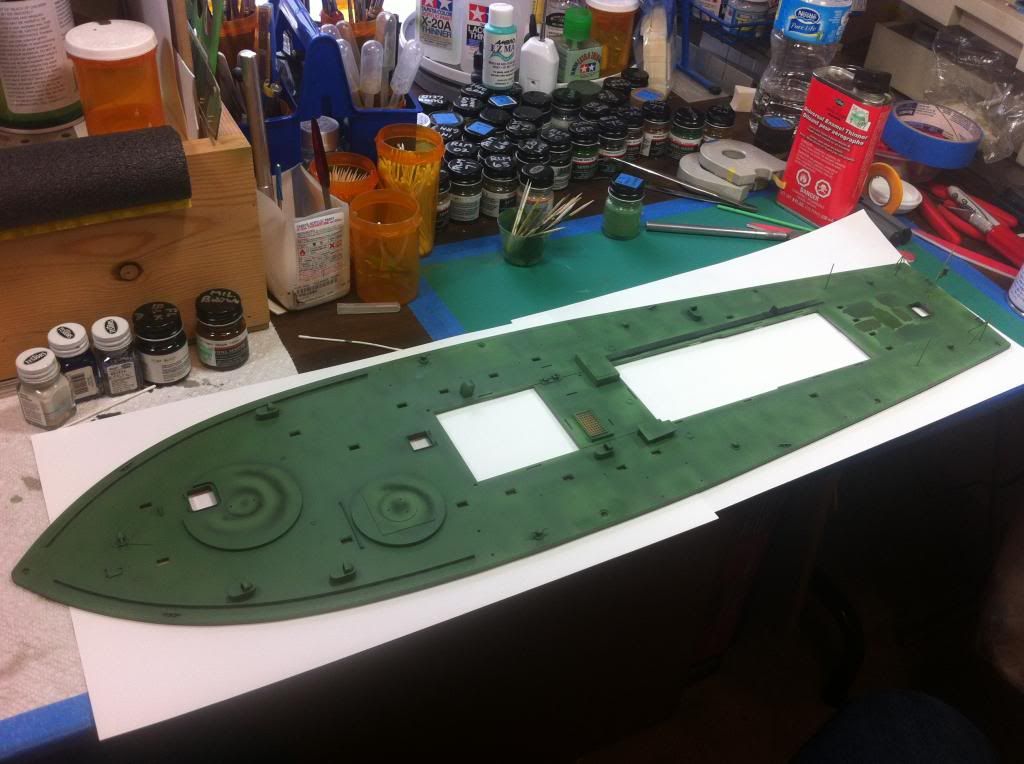 Note, the various paint patches behind the deck opening were test mixes against the original color. This area will be covered by the 40mm Bofors. 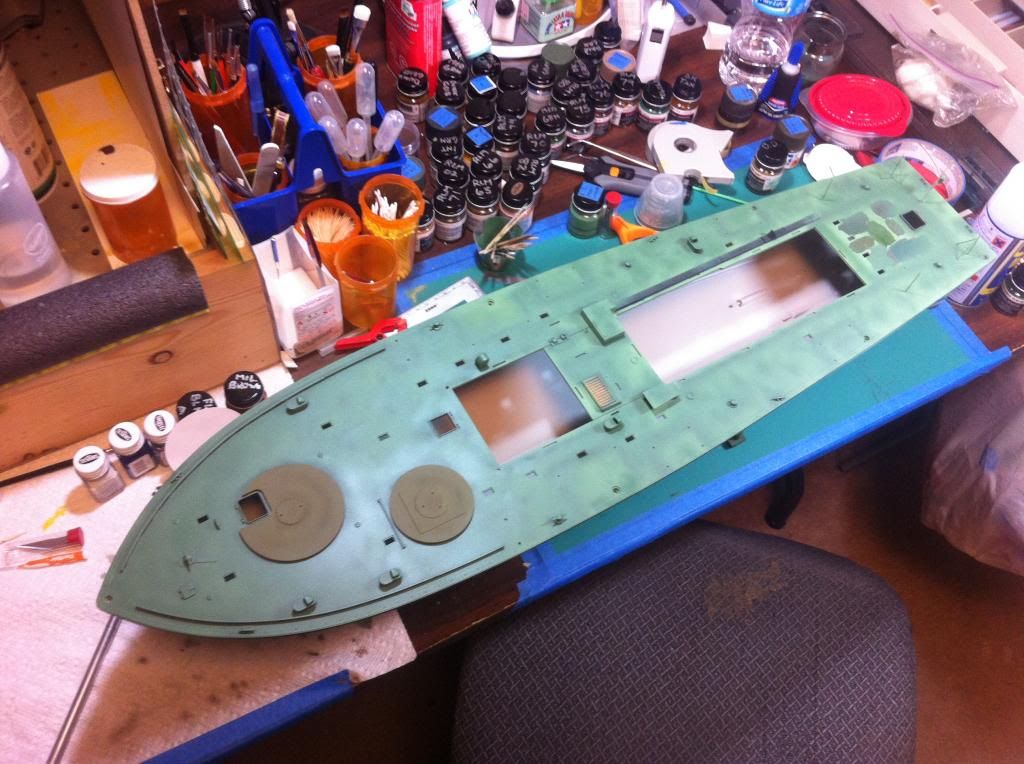 Next up is the day cabin. The base green matching the hull has been sprayed over some pre-shading to mottle the look. Still to come will be the dark green and black camo pattern re-application. I'll stick with the original dark green but change from flat black to Nato black. The three wires at the front are Radar cabling made from piano wire. They extend up into the mast. 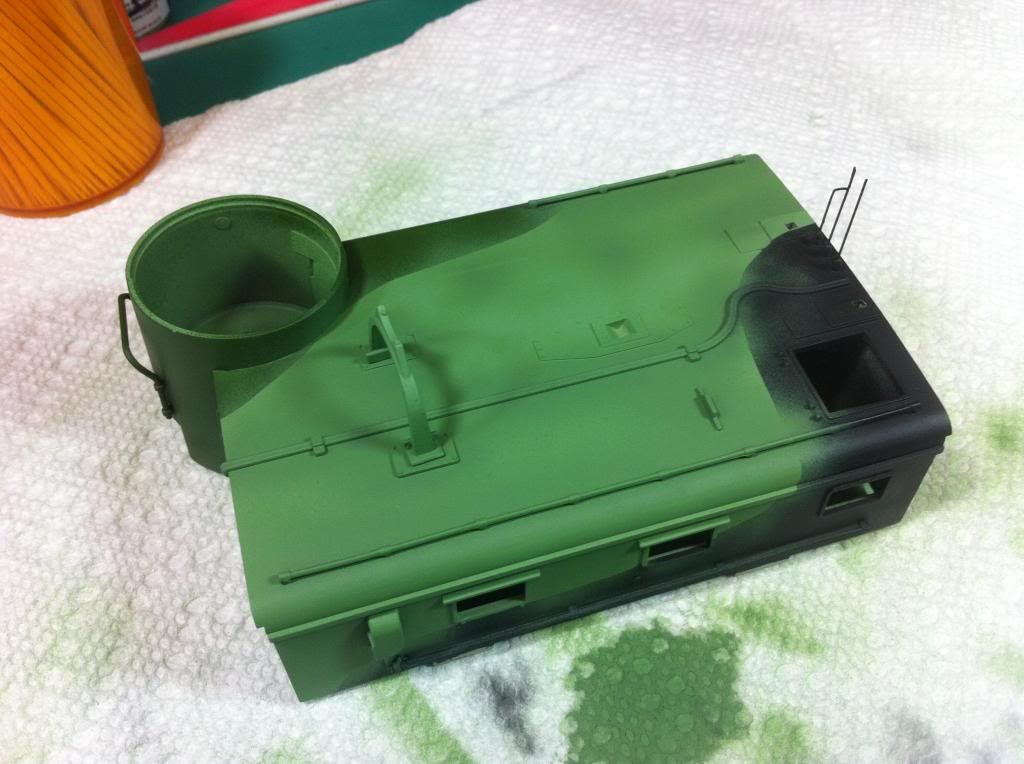 Last shot for today is of the deck superstructure dry fitted to gauge the contrast and brightness differences from the deck and hull. The hull structures have had their hull matching base coats applied, but not the camo. That will come next. 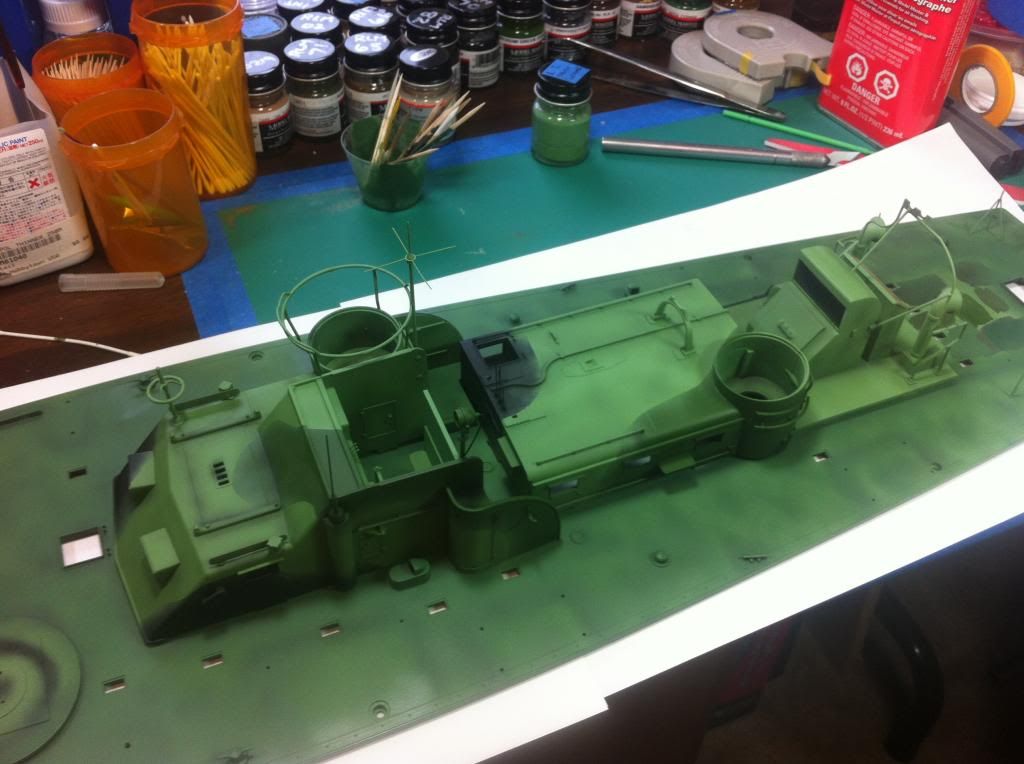 As always, comments, critiques, and suggestions are always welcome. |
|
|
|
Post by deafpanzer on Dec 10, 2013 13:41:41 GMT -5
SUPERB color modulation job!
|
|
Rick
Full Member
  
Member since: March 2013
what to build, what to build . . . Ok THAT one!
Posts: 854 
|
Post by Rick on Dec 10, 2013 20:47:21 GMT -5
Thanks Andy. Appreciate the comment. I really like the random pre-shade versus on in panel lines. Figured this trick out when building my big Mossie. I'm getting better at not covering it entirely with the new base coat. Going to try to carry it over into the camo as well. I like the subtle variation and when combined with panel washes, it should really help make the detail pop. Once everything has been assembled and mounted, I'll probably try some highlights in the walk areas as well.
Rick
|
|
|
|
Post by wbill76 on Dec 10, 2013 21:57:12 GMT -5
I think you're getting what you're aiming for Rick, the color variations looks well balanced and under some weathering will blend together just right IMHO.
|
|
|
|
Post by Leon on Dec 11, 2013 21:34:11 GMT -5
Rick,looks like you achieved the color you were after.Going to look great with the camo on.
|
|
captfue
Full Member
  
Member since: October 2012
Posts: 311
Oct 1, 2012 22:25:19 GMT -5
Oct 1, 2012 22:25:19 GMT -5
|
Post by captfue on Dec 12, 2013 17:55:02 GMT -5
Nice work
|
|
Rick
Full Member
  
Member since: March 2013
what to build, what to build . . . Ok THAT one!
Posts: 854 
|
Post by Rick on Dec 15, 2013 21:03:47 GMT -5
Progress today on the deck structures. Managed to get the dark green camo re-sprayed and changed the flat black to Nato black. Though the pics do not show it well, I definitely like the slightly grayer "color" of the Nato black. Sprayed it randomly also so a bit of the flat showed through to give some modulation. I wanted to give just a slight softness to the camo as apposed to the hard edge of just tape. I Used Blu-tac rolled then pressed onto the structures just beyond the previous camo edge. Tape under the Blu-tac prevented random overspray. 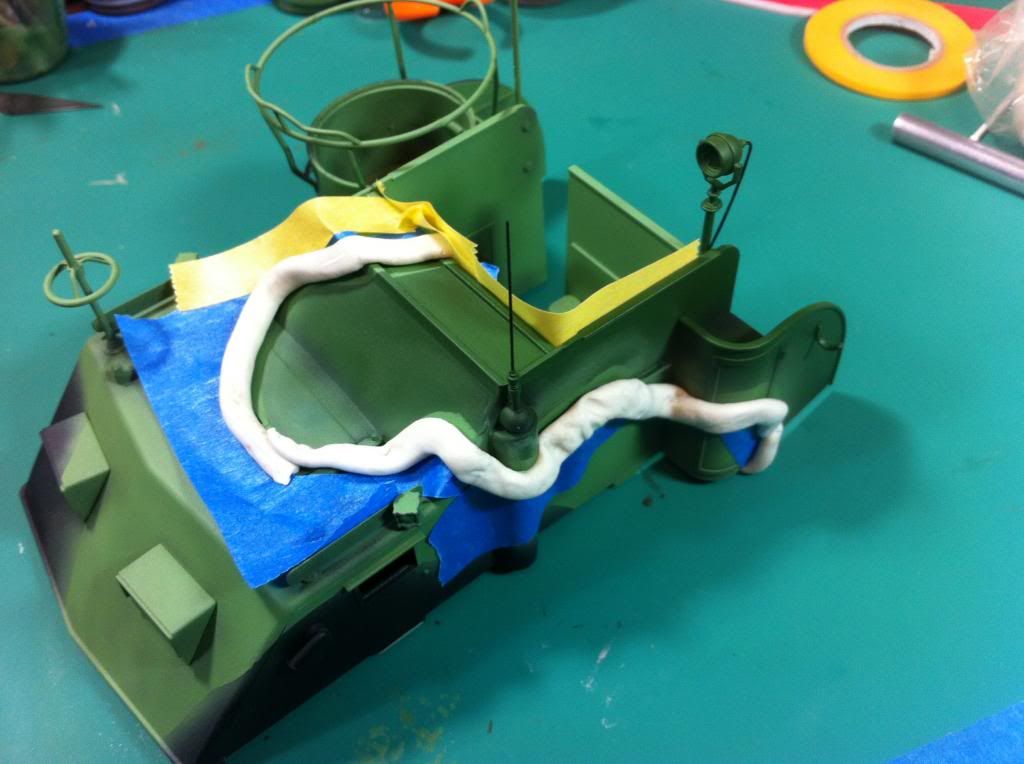 Had to repeat the same process for the black. Here's the result after the camo was applied. 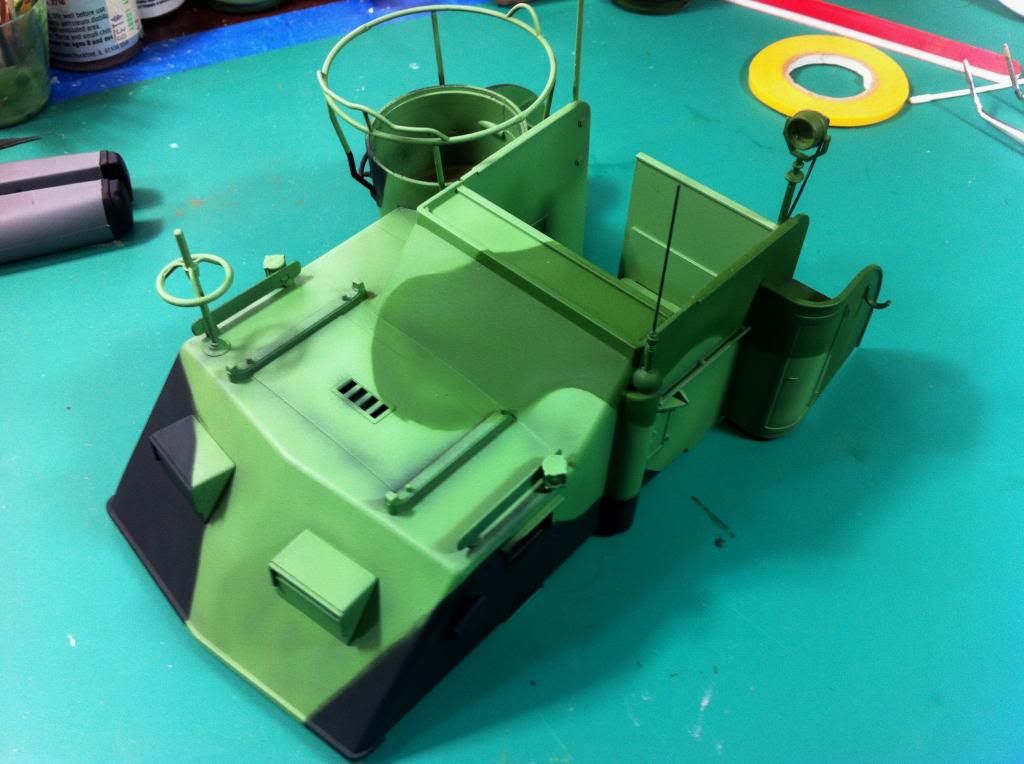 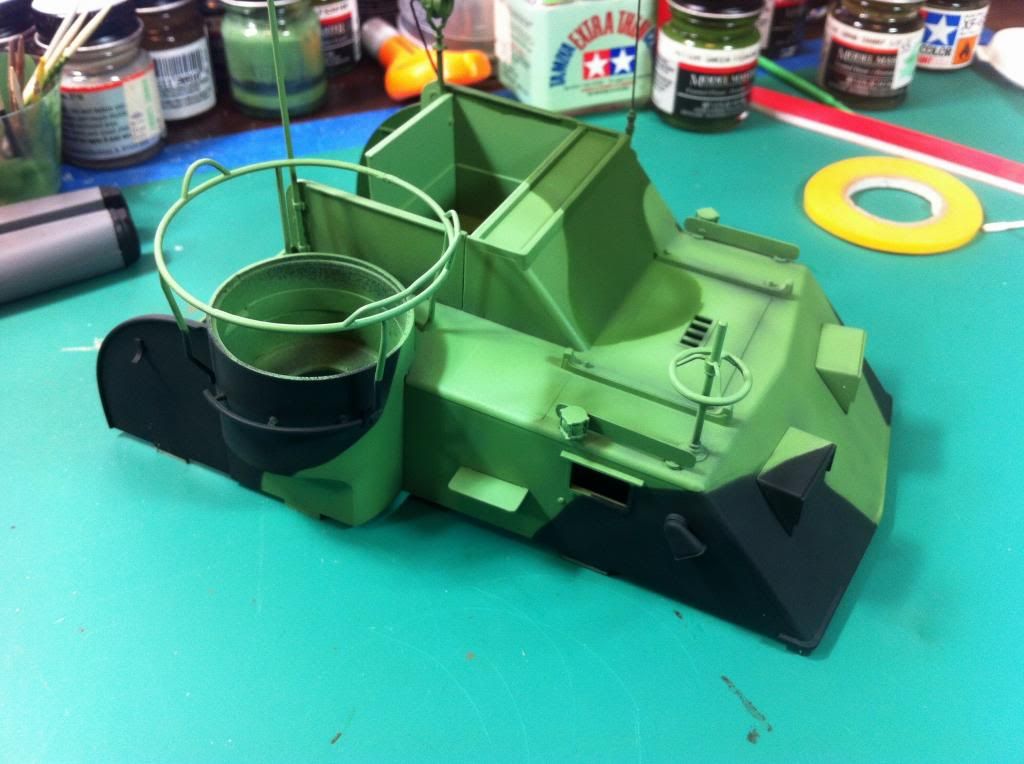 Next up, I dry fit the re-sprayed deck structures onto the previously re-sprayed deck. 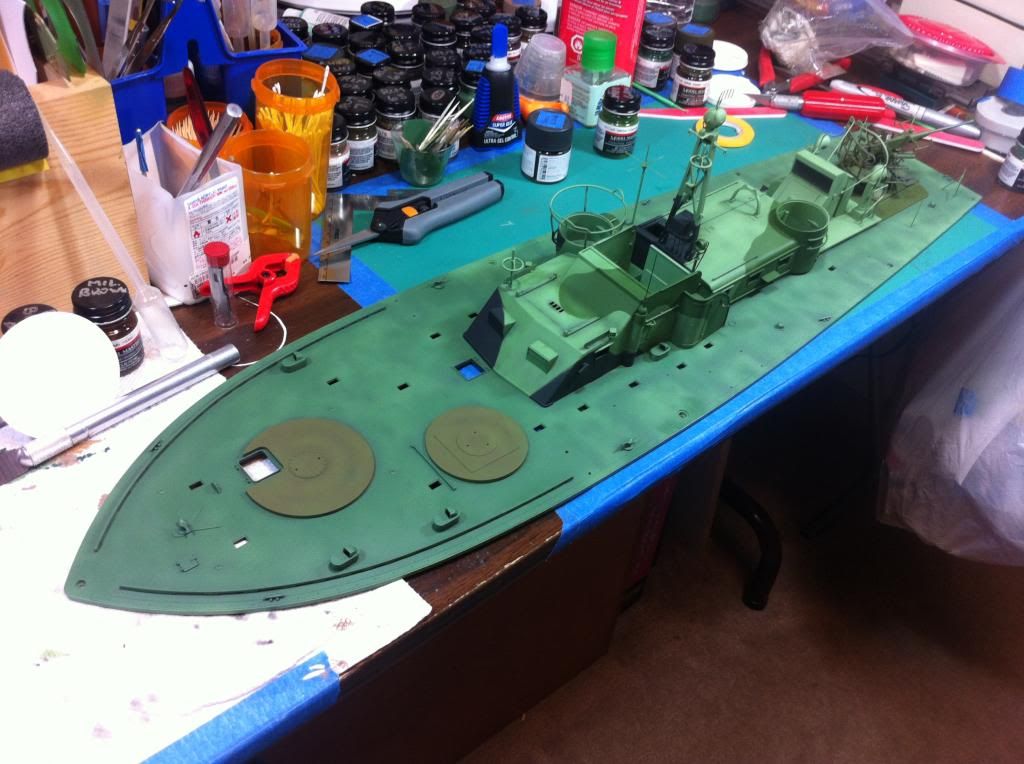 And then had to add a number of the weapons load just for visual. 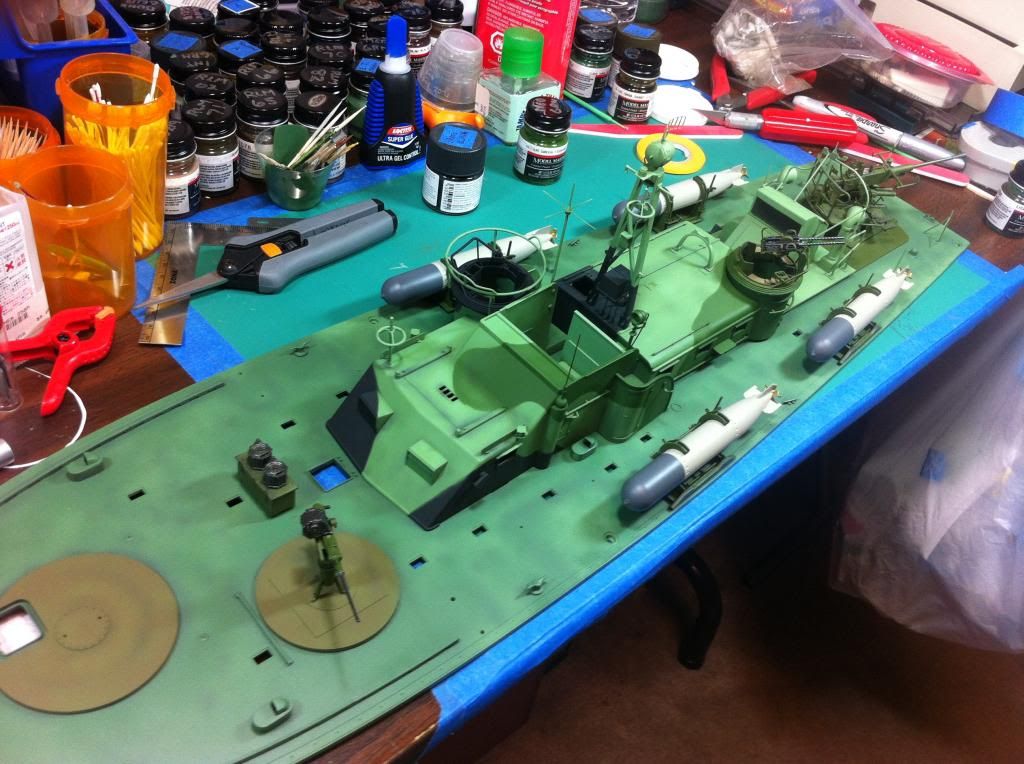 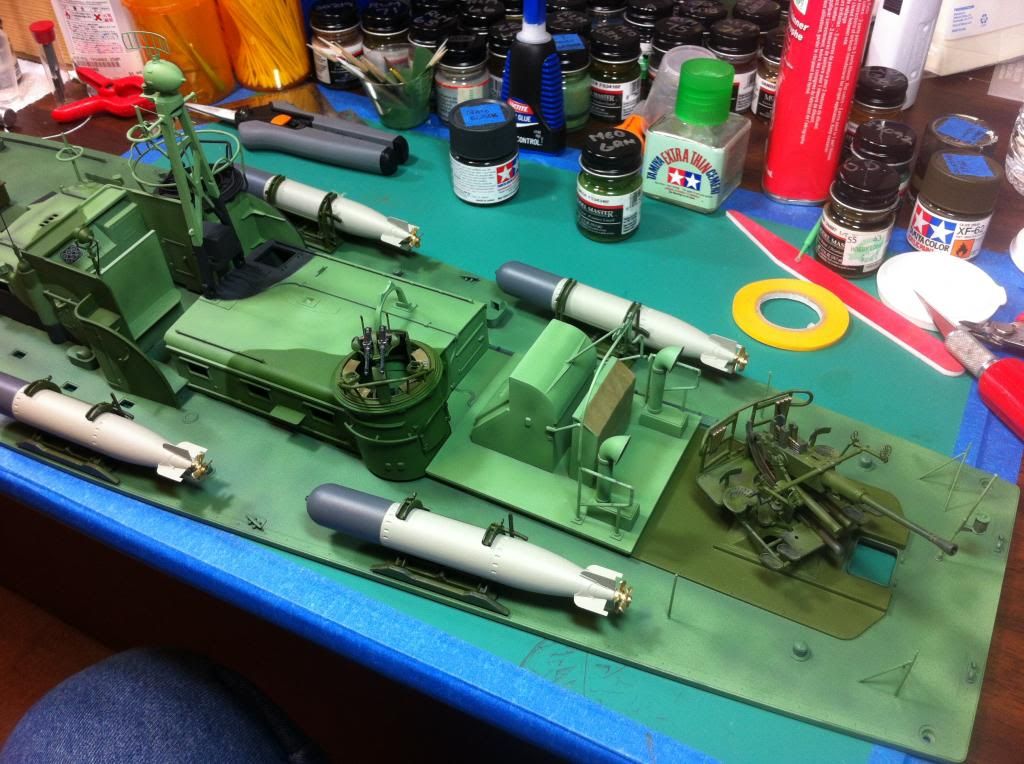 The port twin .50 cal turret. I made canvas magazine covers and used plastic strip to make the catch bucket for the empty shell casings. It's directly under the.50's. 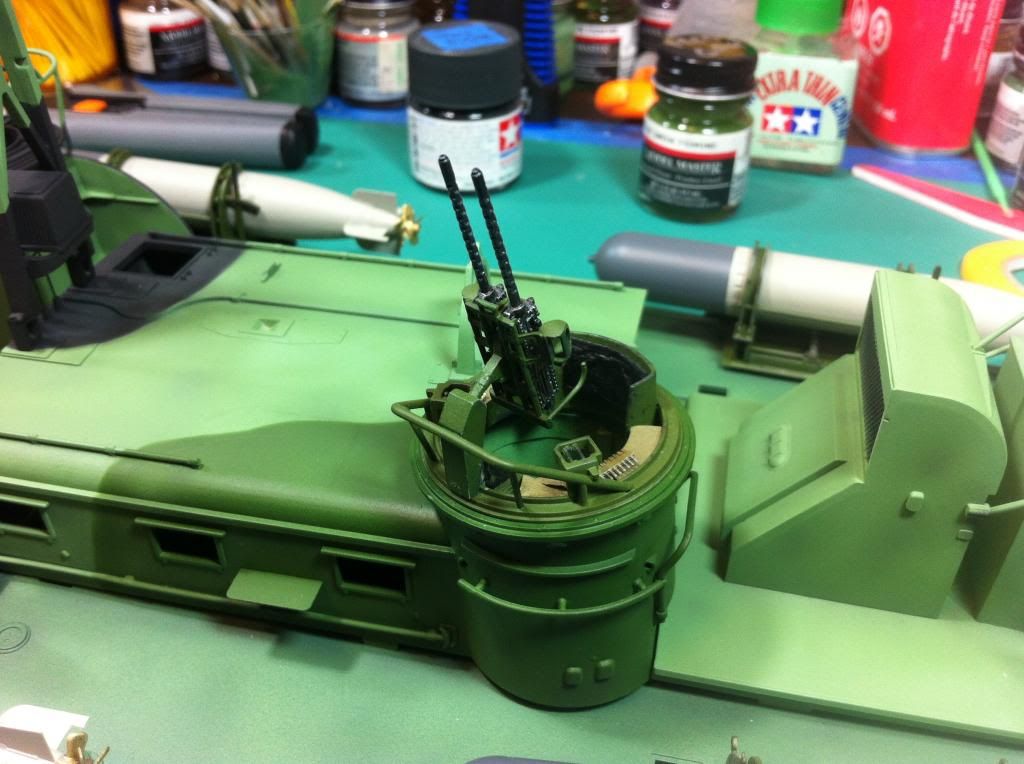 That's it for this installment. Next up I'll tackle the hull camo then plan to bring it all together so the washes can begin. Thanks for looking in. As always, any suggestions/recommendations are welcomed. Rick |
|
|
|
Post by deafpanzer on Dec 16, 2013 1:18:57 GMT -5
Looking better and better every time you post! Paint job look awesome!
|
|
|
|
Post by wbill76 on Dec 16, 2013 20:43:42 GMT -5
Now that camo gives it a mean look for sure Rick, very nice!
|
|
Rick
Full Member
  
Member since: March 2013
what to build, what to build . . . Ok THAT one!
Posts: 854 
|
Post by Rick on Dec 29, 2013 0:56:47 GMT -5
Been away a bit work and holidays. Spent some time this morning working on camo for the hull. Here's a few pics of the latest activity. Trying to get the hull camo done so I can get on with assembly and weathering. I masked the hull with blu-tac and started with the dark green. Here's the masking and result: 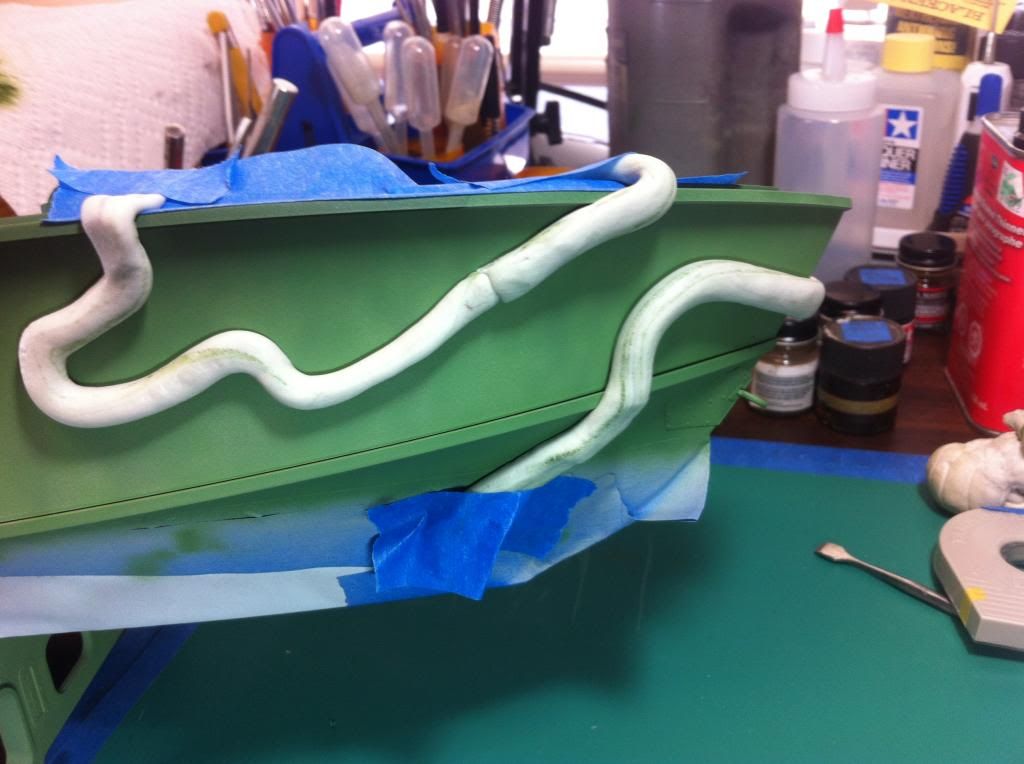 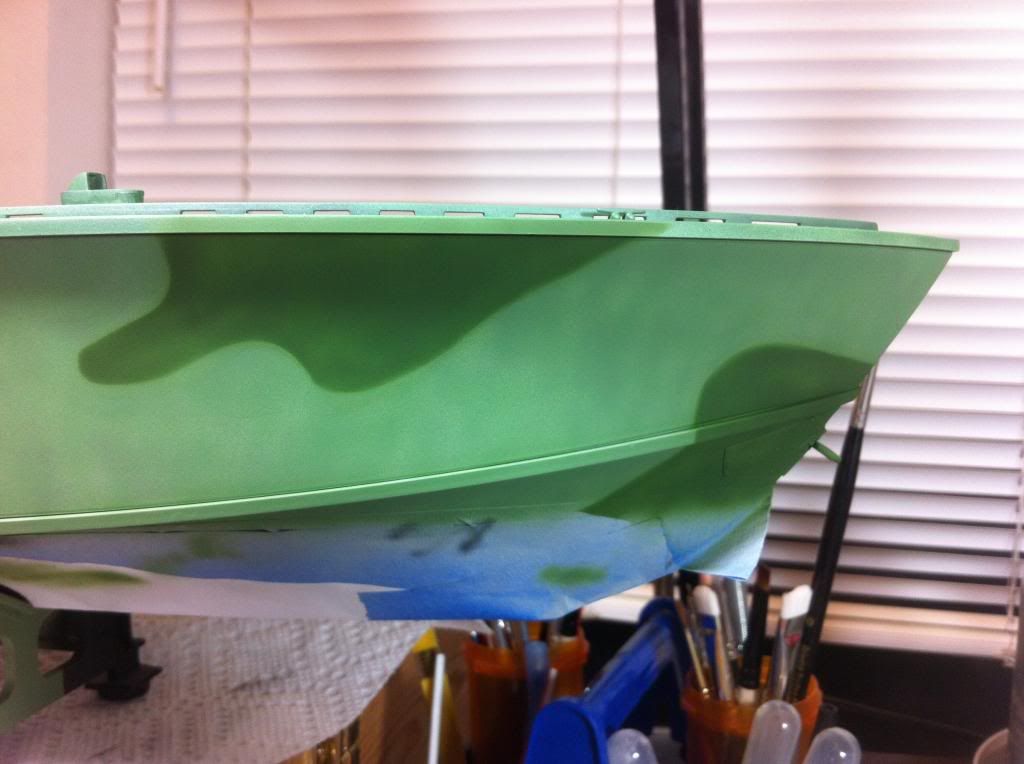 Here is the aft port side 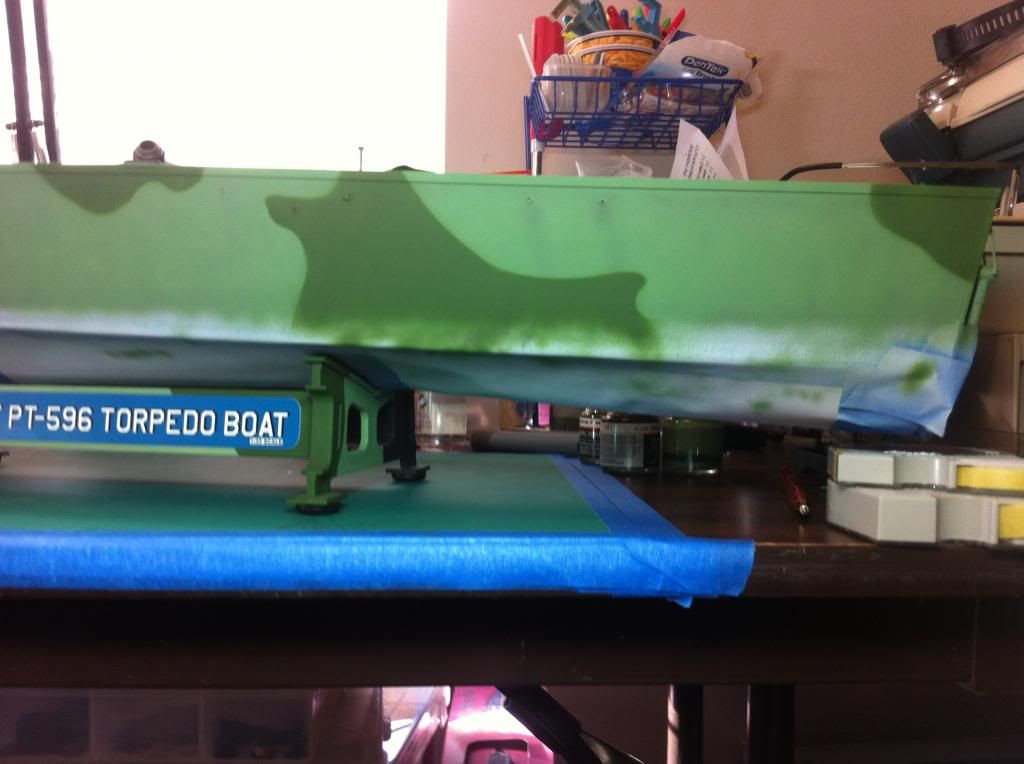 And the port side bow to stern 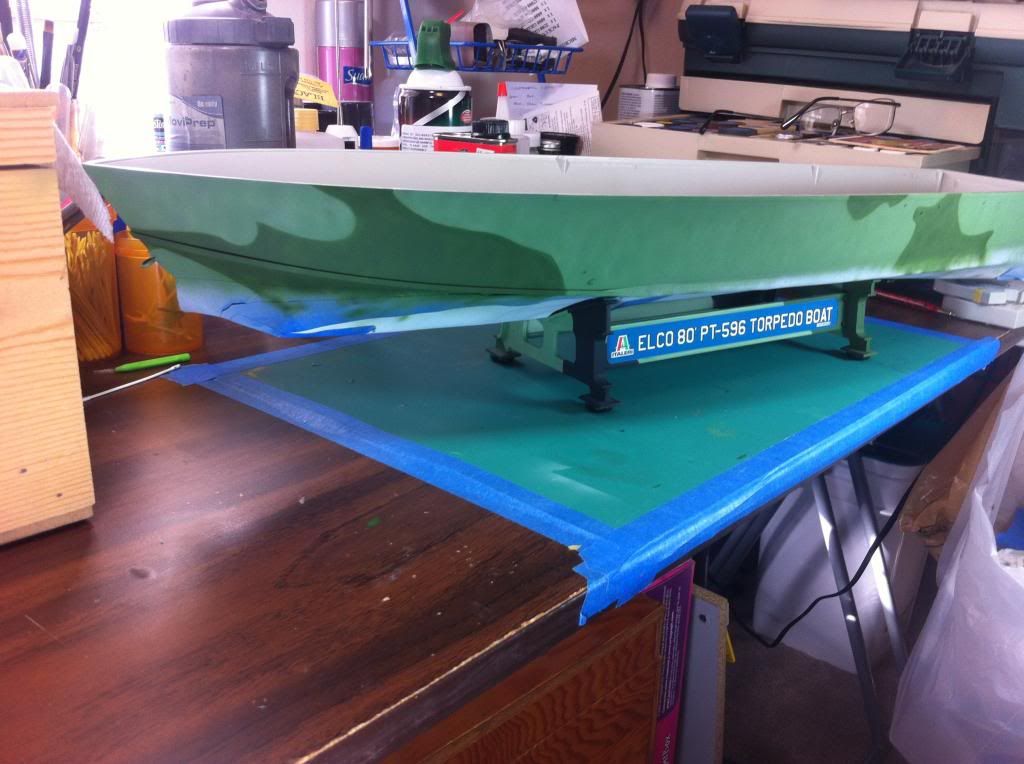 Moving to the starboard side, next was the Nato Black to give it some faded appearance rather than use the straight flat black 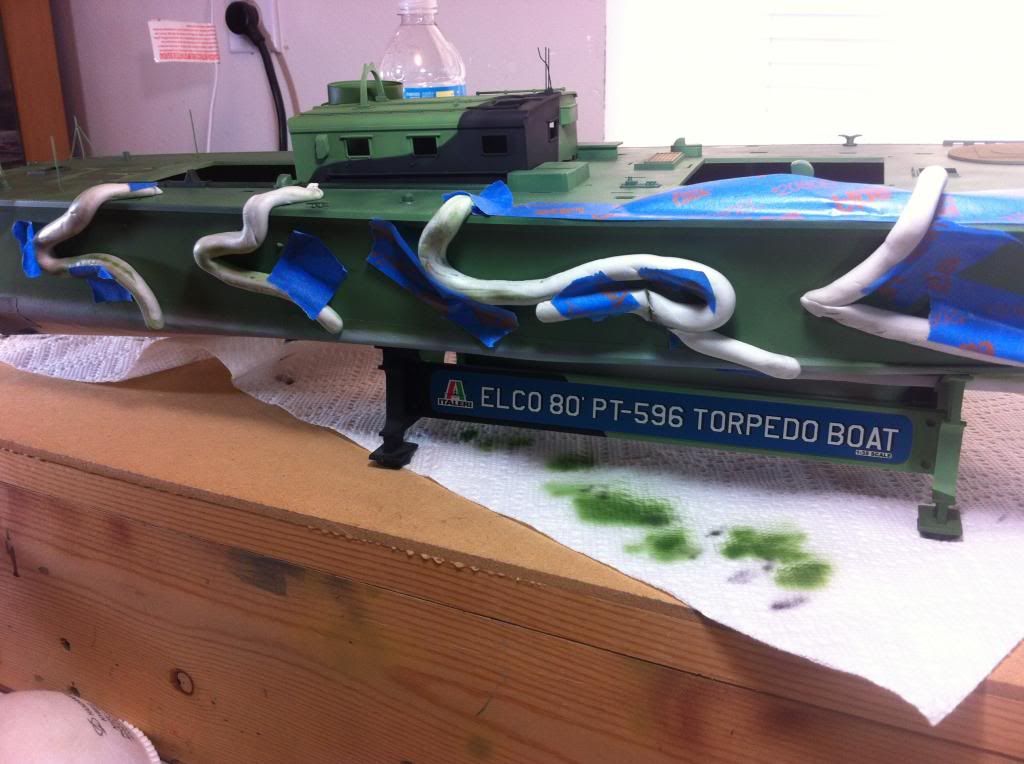 And here is the result 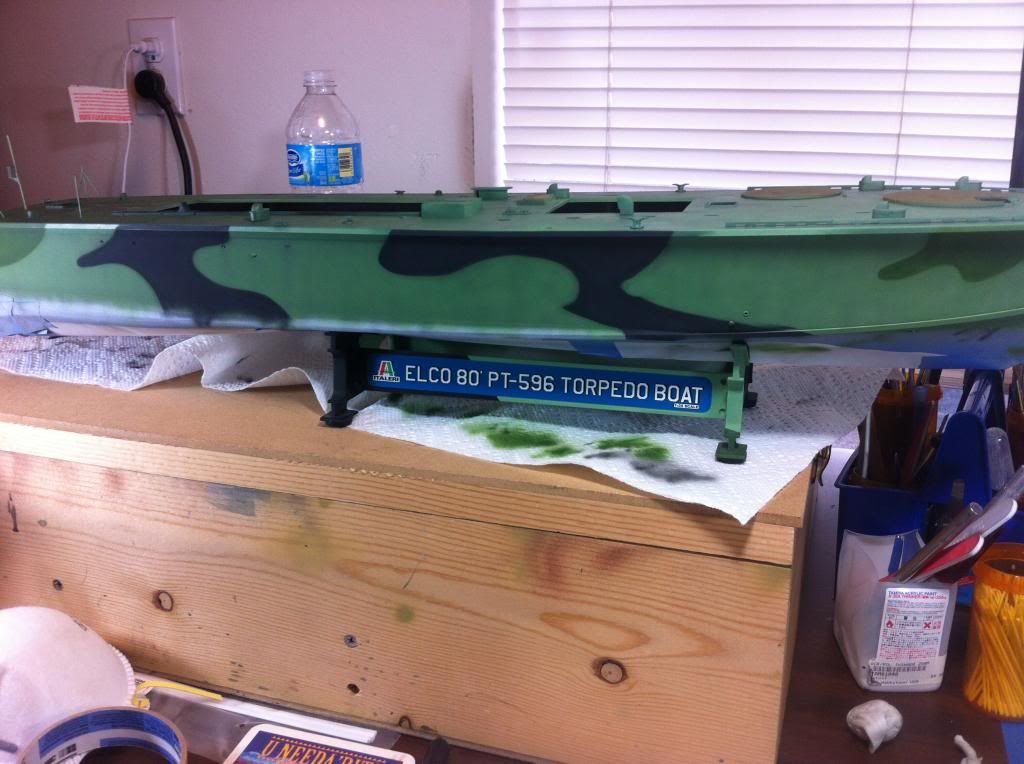 A bit of touch up tomorrow and then the black camo will be added to the port side. Feels good to get back to work on this one. It's been a shelf queen for several years now. Finally getting past the original incorrect paint has been a huge hurdle to get past. |
|
Rick
Full Member
  
Member since: March 2013
what to build, what to build . . . Ok THAT one!
Posts: 854 
|
Post by Rick on Dec 29, 2013 14:42:18 GMT -5
Finished the black camo on the port side and touched up a few areas. Not as happy with the masking as I would have hoped. I think it would have been best to strip the hull down completely but at the time, I was just wanting to move forward with it.
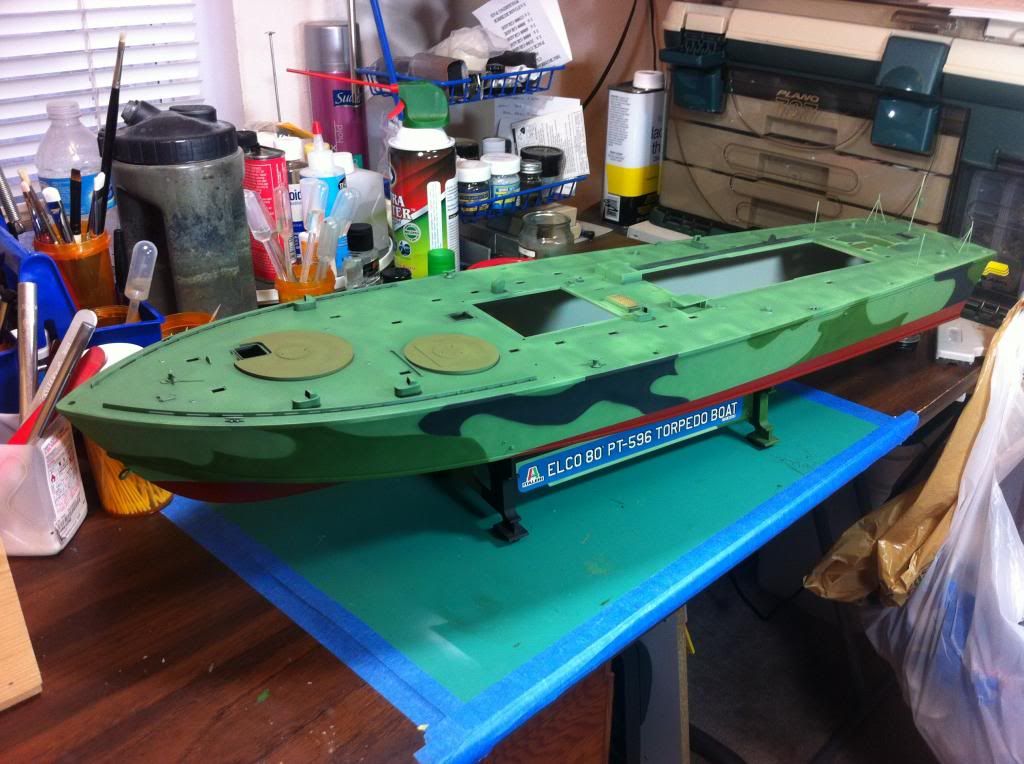
Dry fit the hull structures one last time before calling the camo done
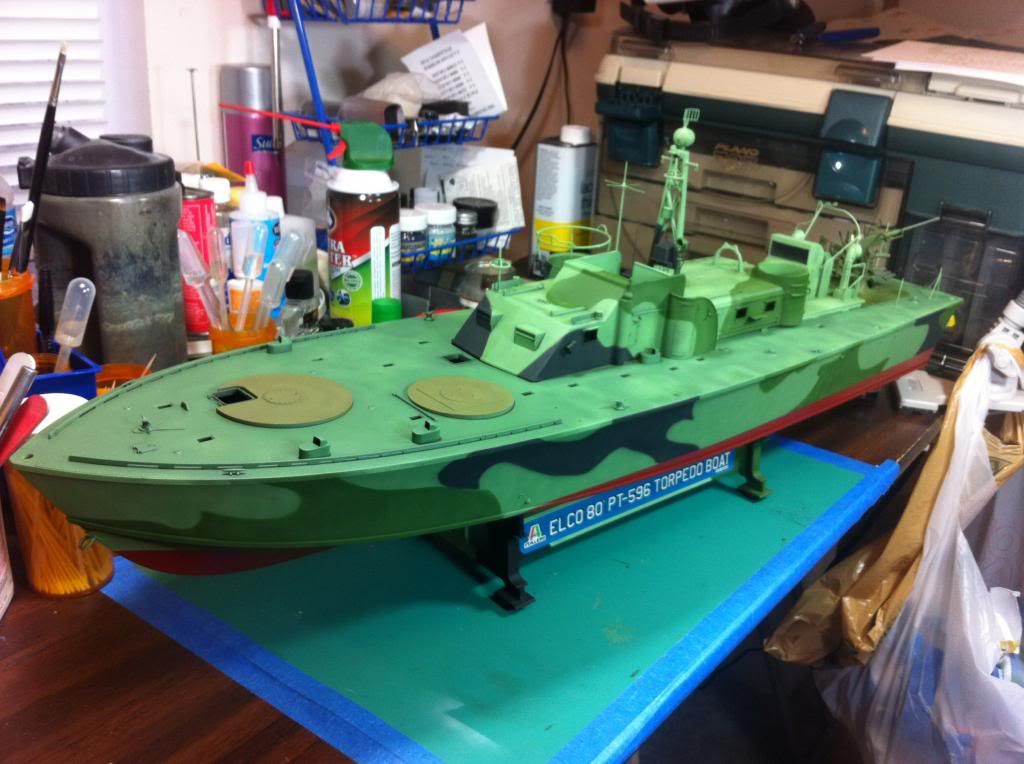
Next up will be applying some weathering to the hull and structures. Following that, I'll permanently attach the cabins then start final assembly with the weapons. Thanks for stopping by to check on progress. As always, any suggestions are appreciated.
Rick
|
|
|
|
Post by deafpanzer on Dec 30, 2013 1:30:03 GMT -5
Camo kept looking better and better!!!
|
|
|
|
Post by wbill76 on Jan 2, 2014 21:52:57 GMT -5
Looking good Rick, seeing all the camo applied with the cabins in place really gives you a good feel for how it's all coming together.
|
|
Rick
Full Member
  
Member since: March 2013
what to build, what to build . . . Ok THAT one!
Posts: 854 
|
Post by Rick on Mar 19, 2014 22:22:30 GMT -5
Back with another slow progress update. When I set the hull aside after re-doing the camo, I left the tape on the lower red surface thinking I would be back at it very soon. As things happen, life gets in the way and when I came back and removed the mask, there was tape residue that left some goo in places and hard residue in others. In the process of cleaning it up, paint came off in the process. So once again, I had to re-paint the red lower hull.
I wanted to modulate the red for a war weary look to go along with the upper hull so I randomly sprayed flat black followed by a thin mix of Tamiya red with a couple drops of nato black. It took many multiple coats of the thinned red to make a difference but finally, I got the look I was after.
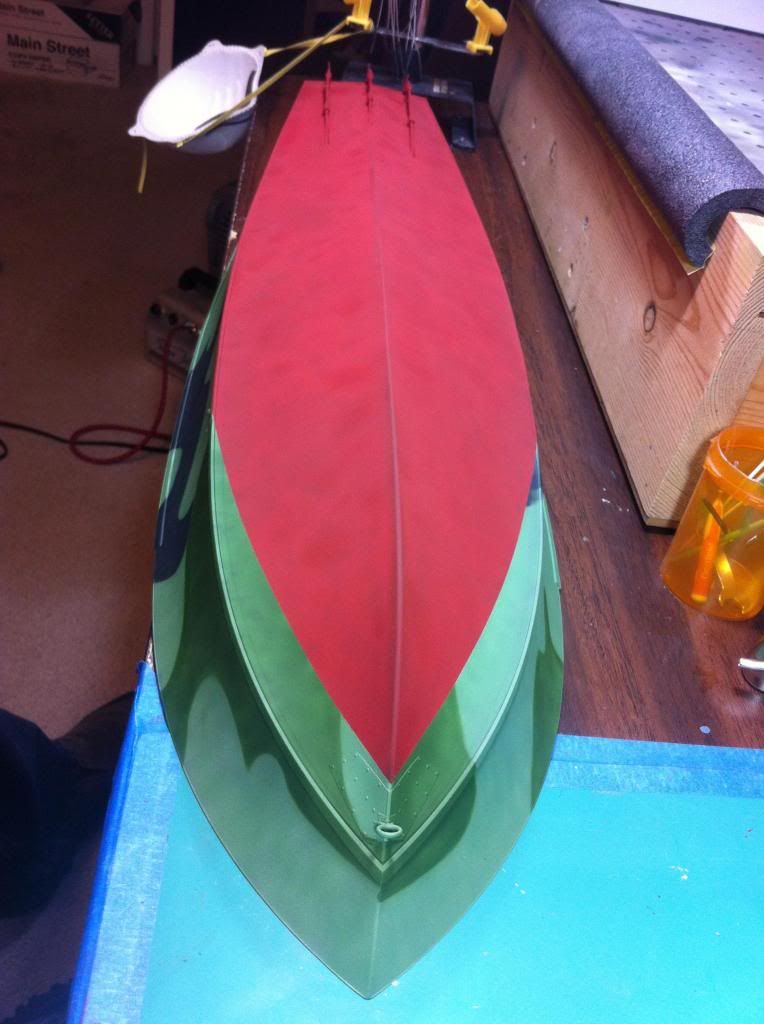
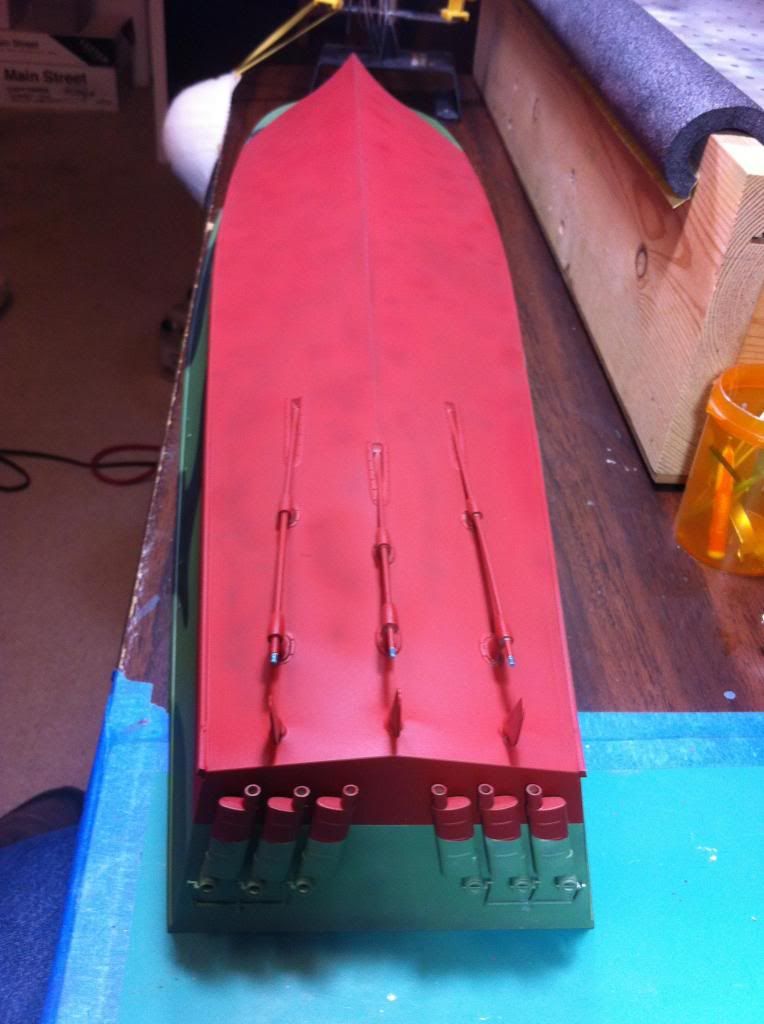
Here's a view of the finally finished hull with the deck
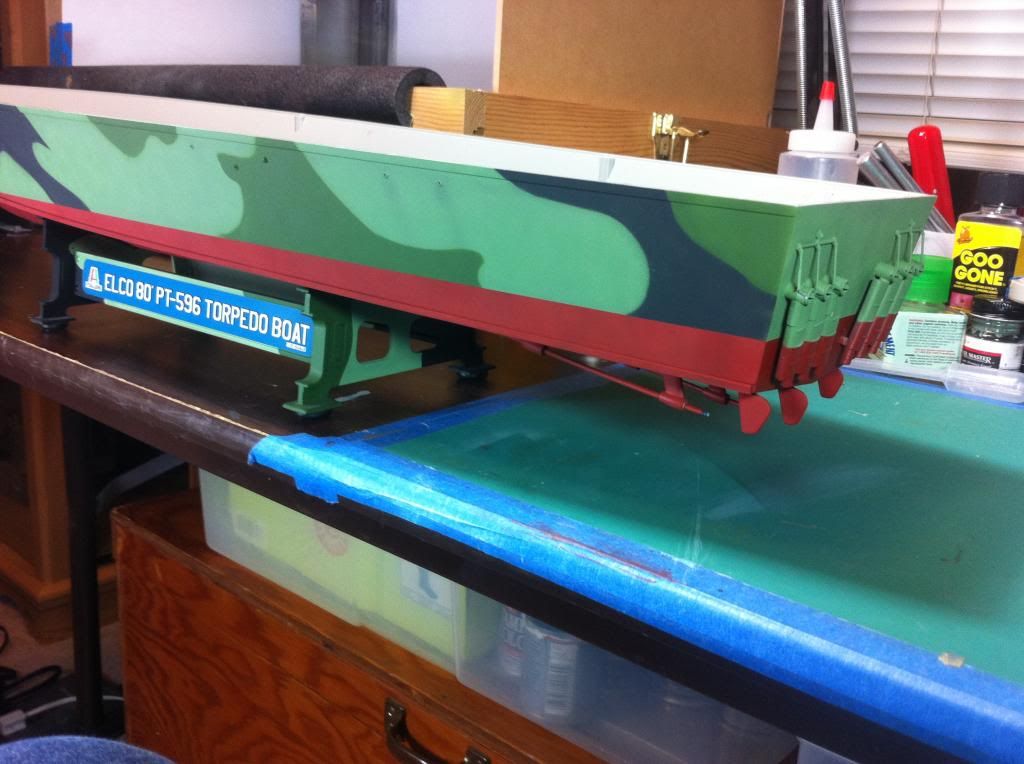
Decided to move forward with the hull structures. These are now mounted to the deck. WooHoo! Feels like progress finally.
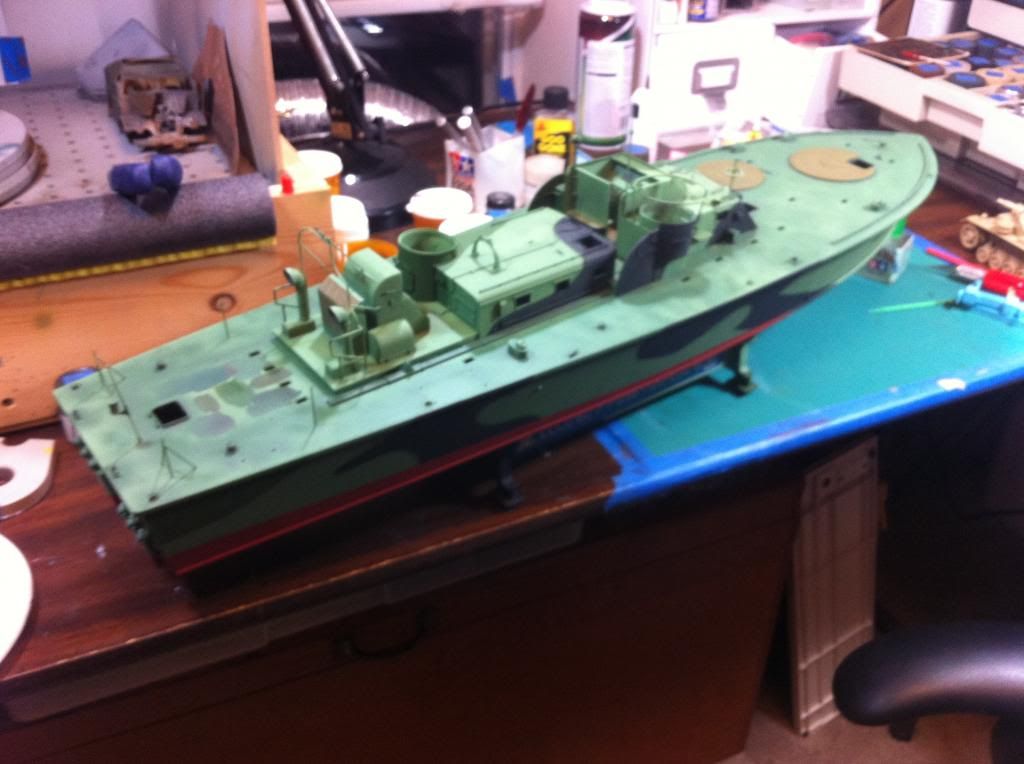
Next going to try to apply some weathering and streaking to the hull. Going to do a bit of practice with that on a beater before going for the hull.
Boats are not my specialty by no means so if there are any suggestions for applying the hull streaking, I would appreciate any input here on in messaging.
Rick
|
|
|
|
Post by deafpanzer on Mar 20, 2014 0:17:08 GMT -5
The weary red look fantastic!!! Glad you are still working on this...
|
|
|
|
Post by Leon on Mar 20, 2014 3:57:32 GMT -5
Rick look like your making really good progress buddy.The camo and hull modulation look fantastic.  |
|
Deleted
Member since: January 1970
Posts: 0
Nov 29, 2024 7:09:33 GMT -5
Nov 29, 2024 7:09:33 GMT -5
|
Post by Deleted on Mar 20, 2014 16:10:51 GMT -5
What a fantastic scheme, looks the business! and weathering is gonna be so much fun
|
|
|
|
Post by wbill76 on Mar 20, 2014 20:31:10 GMT -5
Looking good Rick! The 'tape-induced' re-do on the hull red looks very nice. As for streaking and weathering, I would imagine the same rules would apply here as they would for any other project. Go with what works!  |
|
Rick
Full Member
  
Member since: March 2013
what to build, what to build . . . Ok THAT one!
Posts: 854 
|
Post by Rick on Jul 19, 2014 7:52:26 GMT -5
Going to bring over the completed blog from MHI to bring this rebuild to a close. So, now that the past is almost current, since the last MSC update, I've been able to focus on more details trying to bring the 596 to life. Been working through weathering this beast and finally have been able to start connecting the parts via superglue. At last, it feels like progress is being made and the light at the end of the tunnel is approaching. My goal is to have her finished up in time for the May 17 IPMS region 6 contest in Wichita. One month to go! Damn the torpedo (mounts) and full speed ahead! As mentioned earlier, I ended up repainting the lower hull red. This time, again I pre-shaded with black and used about half a bottle of red trying to cover it up with more thin coats than I could count. Here are a couple pics of the lower hull. The first is just with the pre-shade only. 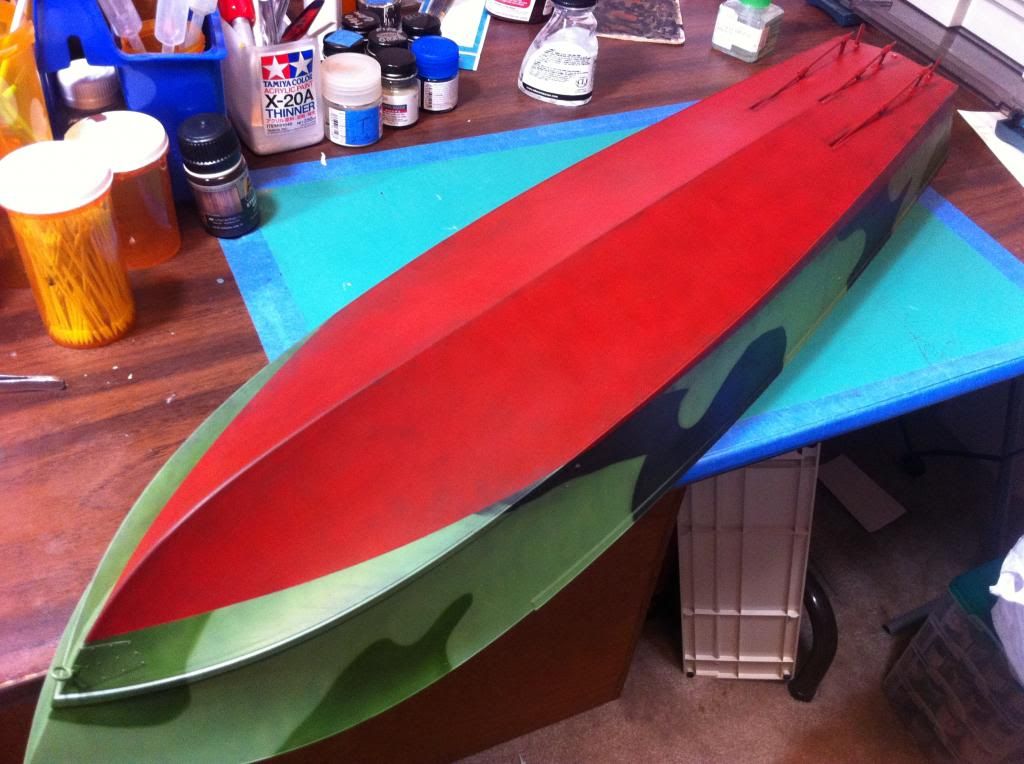 The next two show how I sponge on oils to add more grunge to the hull around the waterline. I apply some black and white artists oils in small dots then use cosmetic sponges torn into various shapes humid with mineral spirits to spread and blend the oils. I alter the edge or a side of the sponge to eliminate any patterns. 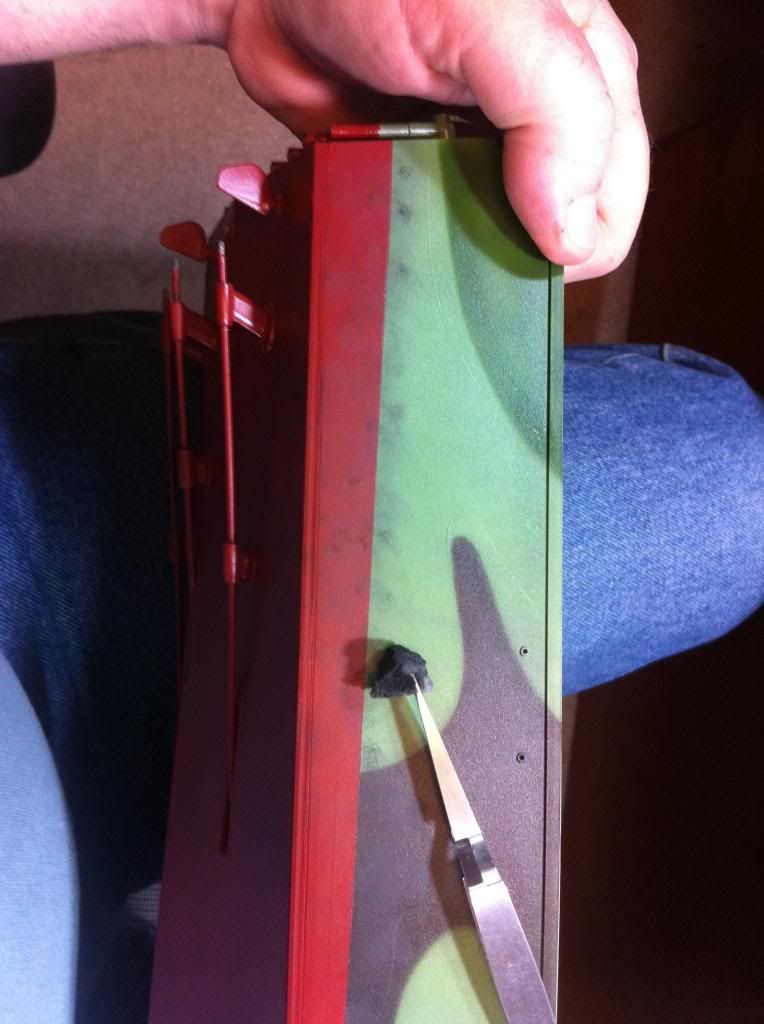 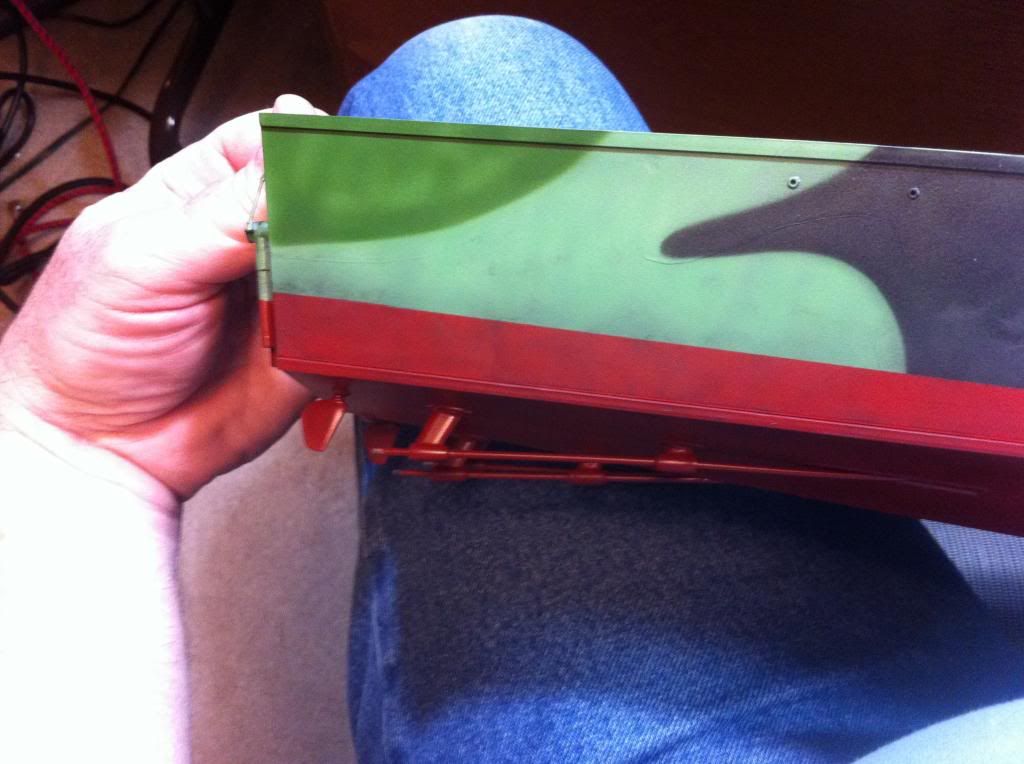 Moving on, finally, the glue starts flowing and time to begin fitting out the boat. The deck houses received their windows and are now attached to the deck. The deck has now been permanently joined to the hull. 16 skylights and their protective grates have been added to the deck. Next pics show various assemblies and weathering. Sorry, pics are not the best. I have three daylight lamps trying to illuminate this beast and I'm catching glare from one or the other. Also using my iPhone which isn't helping either: 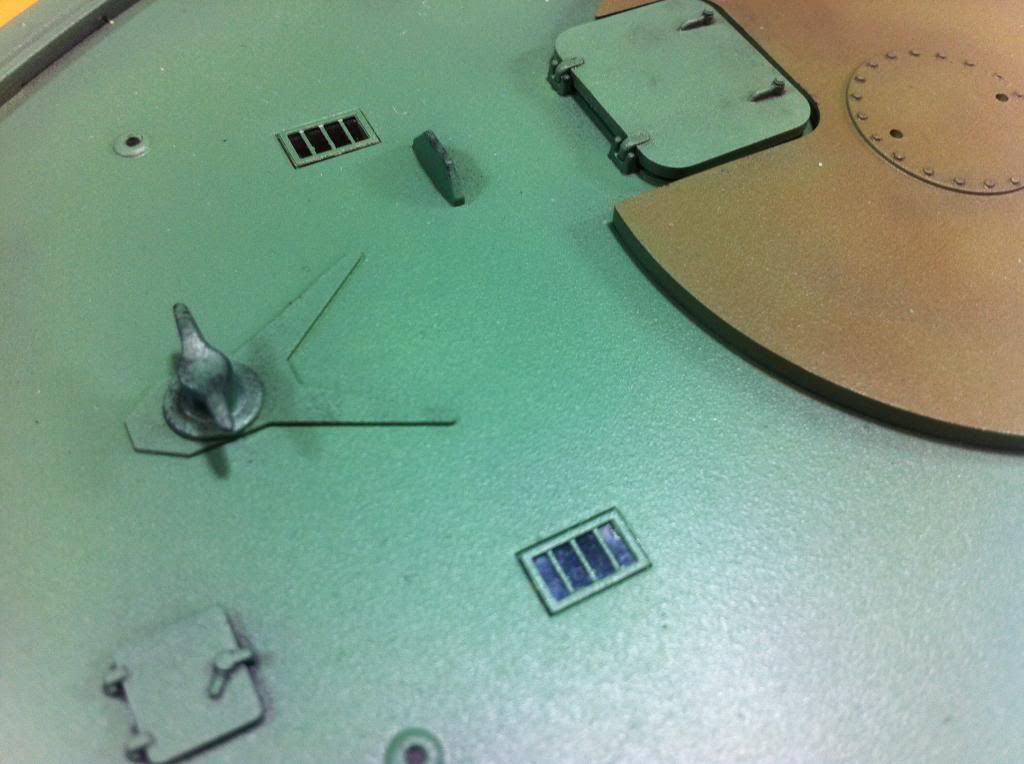 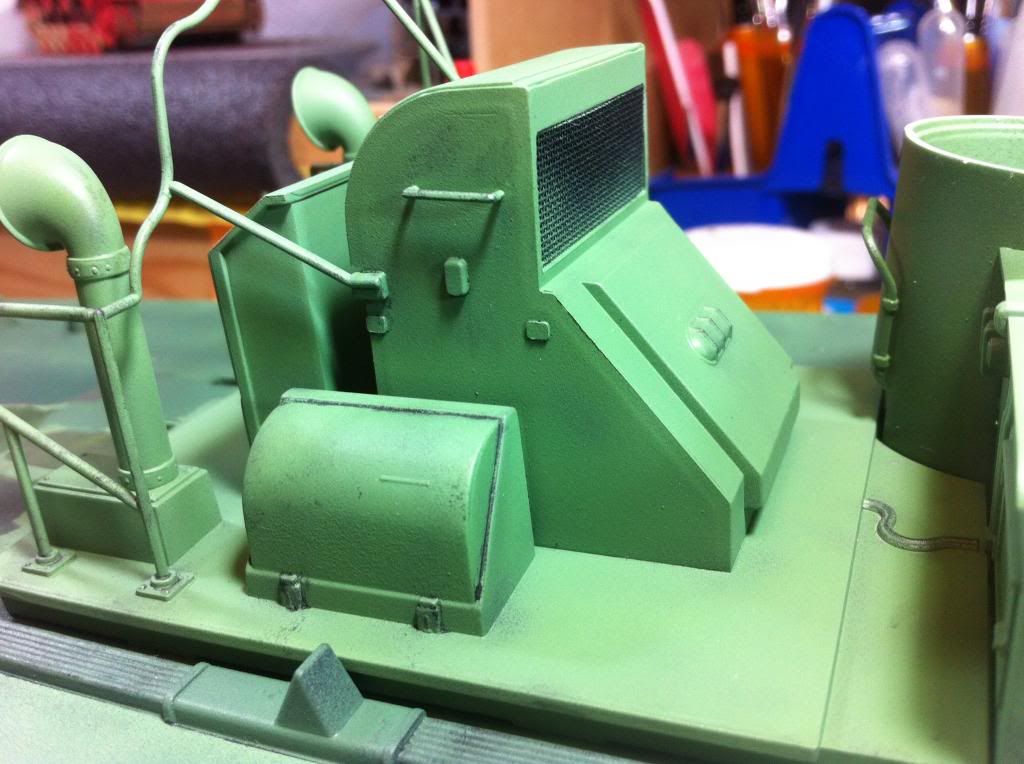 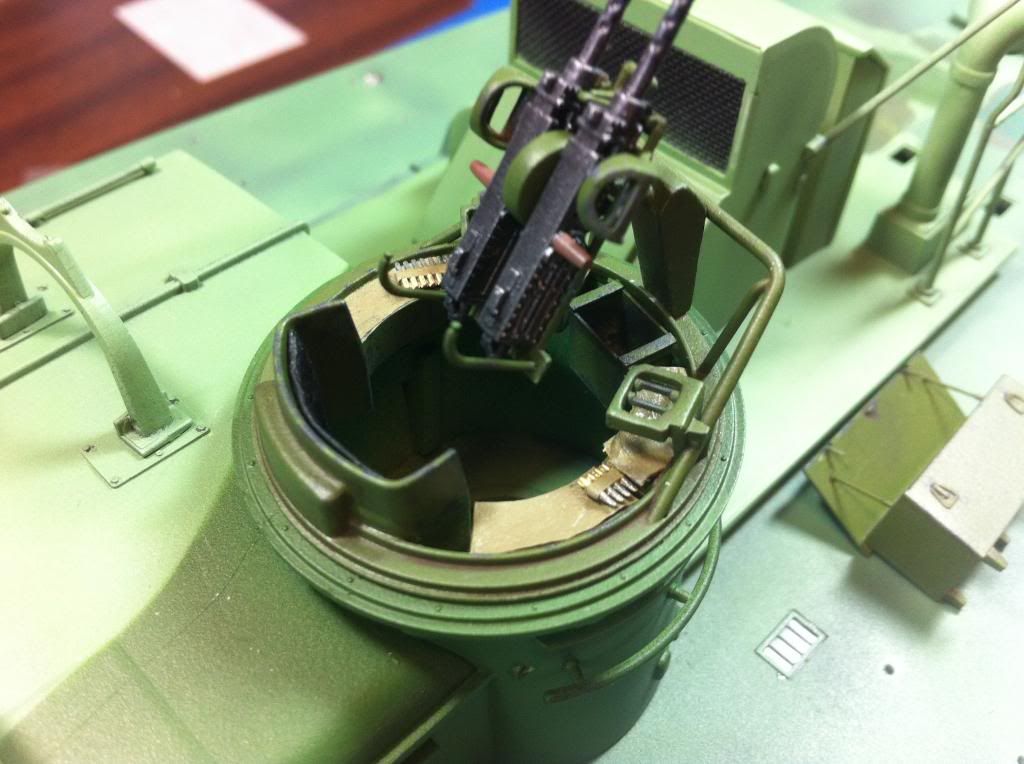 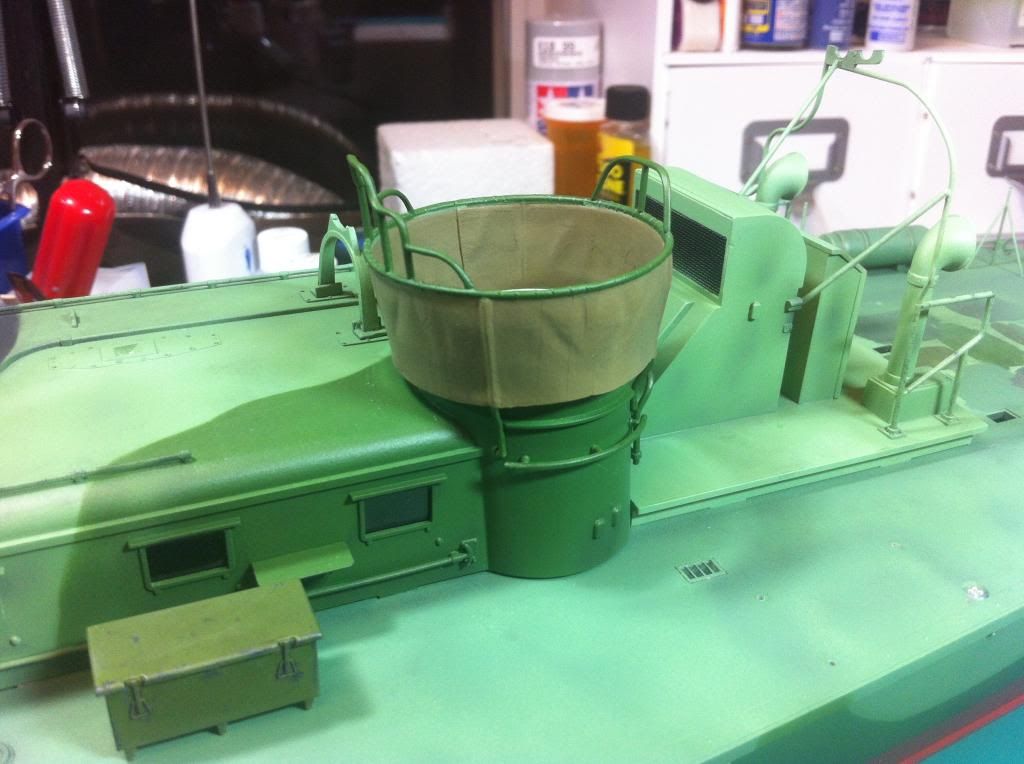 Had quite a number of deck lockers and ammo lockers to attach to the deck. Since all surfaces were painted, I found the best way to attach them was to dab the deck color on each glue point with a brush then carefully set the piece in it's proper location. After a few seconds, I removed the part and let the paint dot dry. Once dry, carefully scrape the paint down to the plastic then attache plastic to plastic with super glue gel. 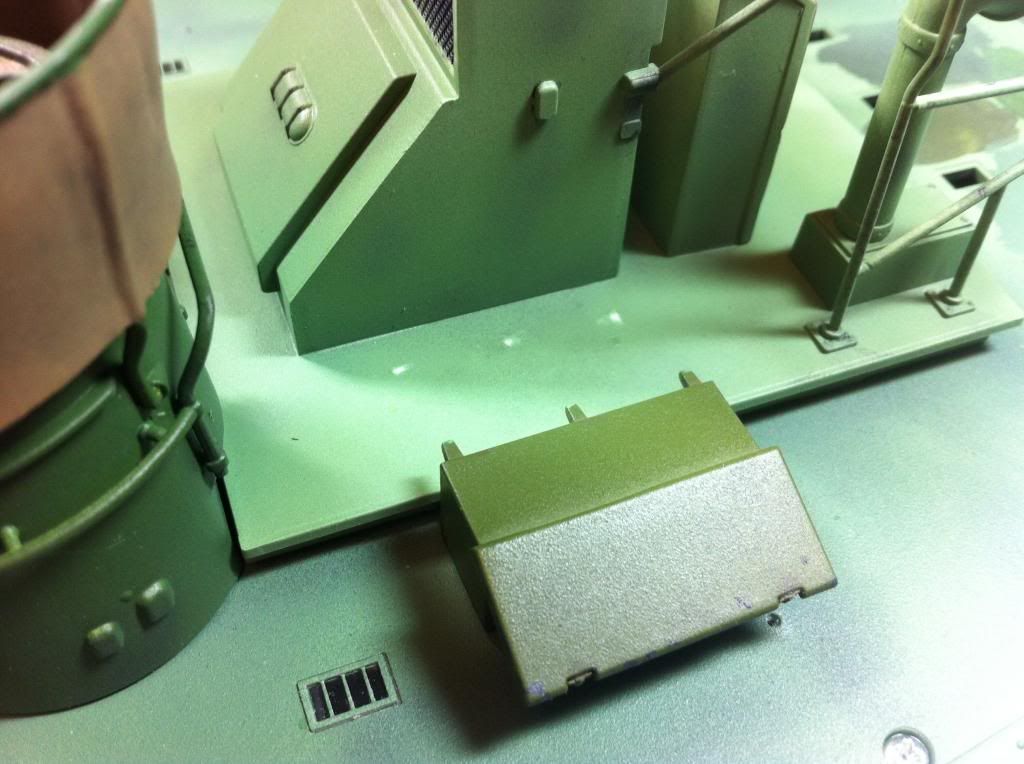 The rocket launchers are interesting devices. they attach at the beam and are stowed inboard over the deck. In action, they are rotated out and aimed so when fired, the rocket exhaust is directed downward into the water. I mounted one of mine in the stowed position and left the other movable so it could set up in either stowed or in the firing position. 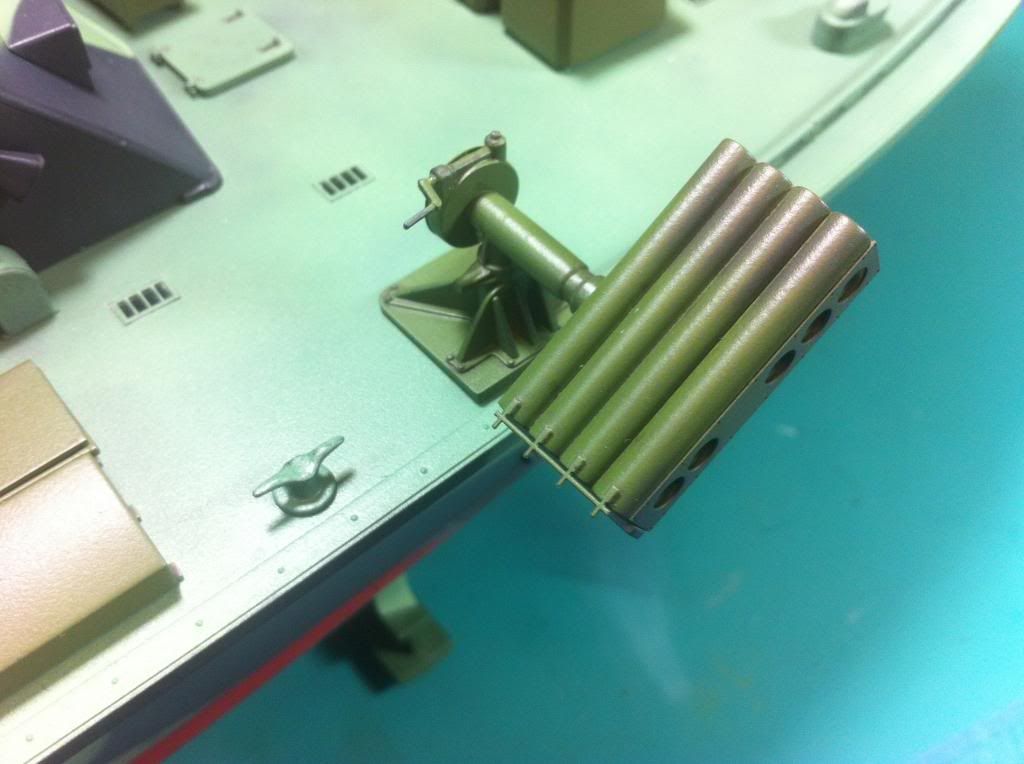 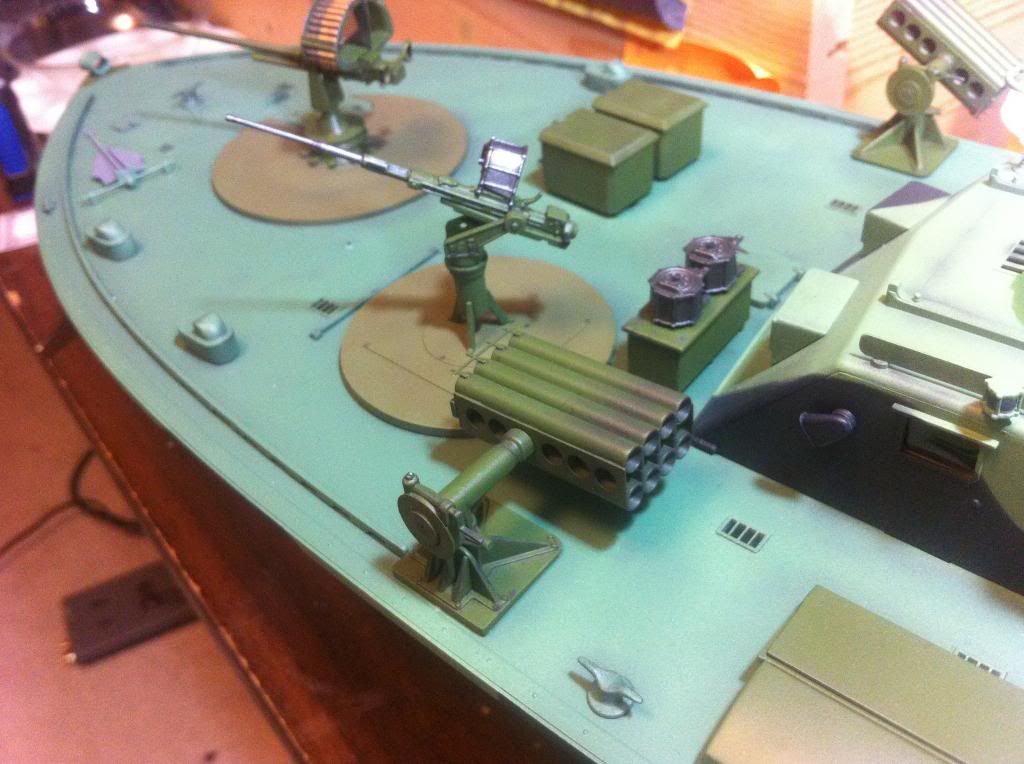 Torpedoes have been re-painted with brass warheads and received some weathering love. Still need to run cables around them before attaching the roll off racks to the deck. Probably will be one of the last steps. 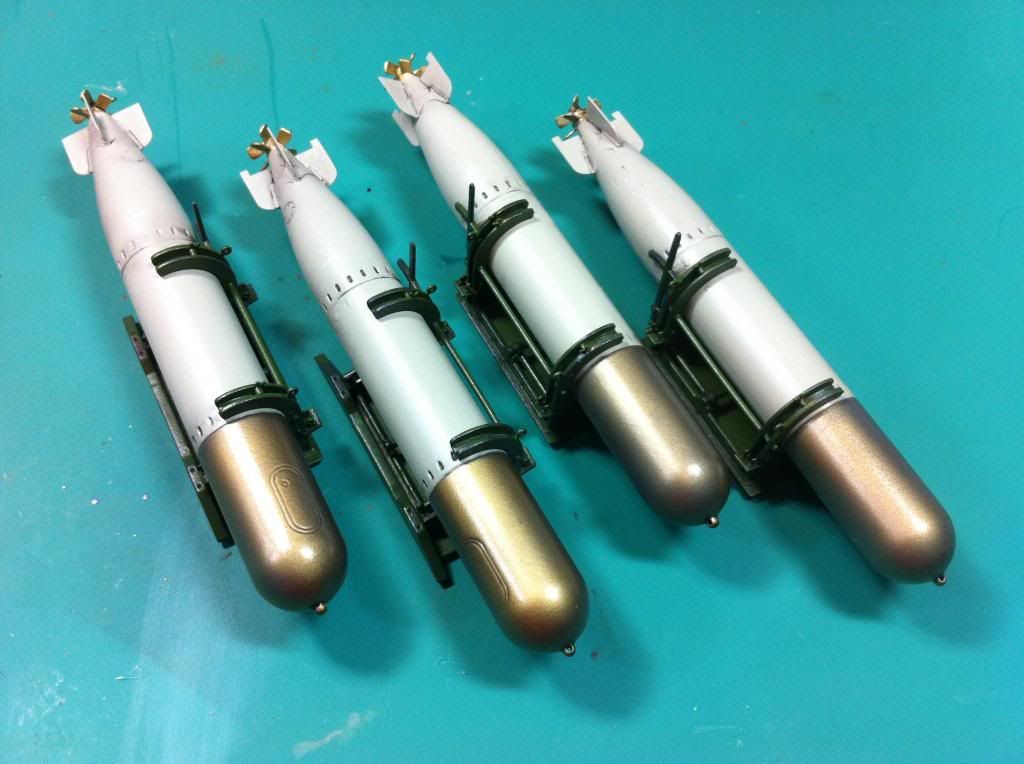 Last but not least, I hadn't mentioned the few decals on the boat were applied before the weathering. the 596 has her number and looks like she's about ready to sail off for a fight. Almost, but not quite. (I still have her props!) Also still need to finish the torpedo mounts, the forward .50 cal twin mount has to be re-built, and the mast needs some love. A number of other minor pieces and parts are still needed to accessorize the boat along with a final weathering. Hoping the next update will be a final. Thanks for looking in. Chips ahoy! 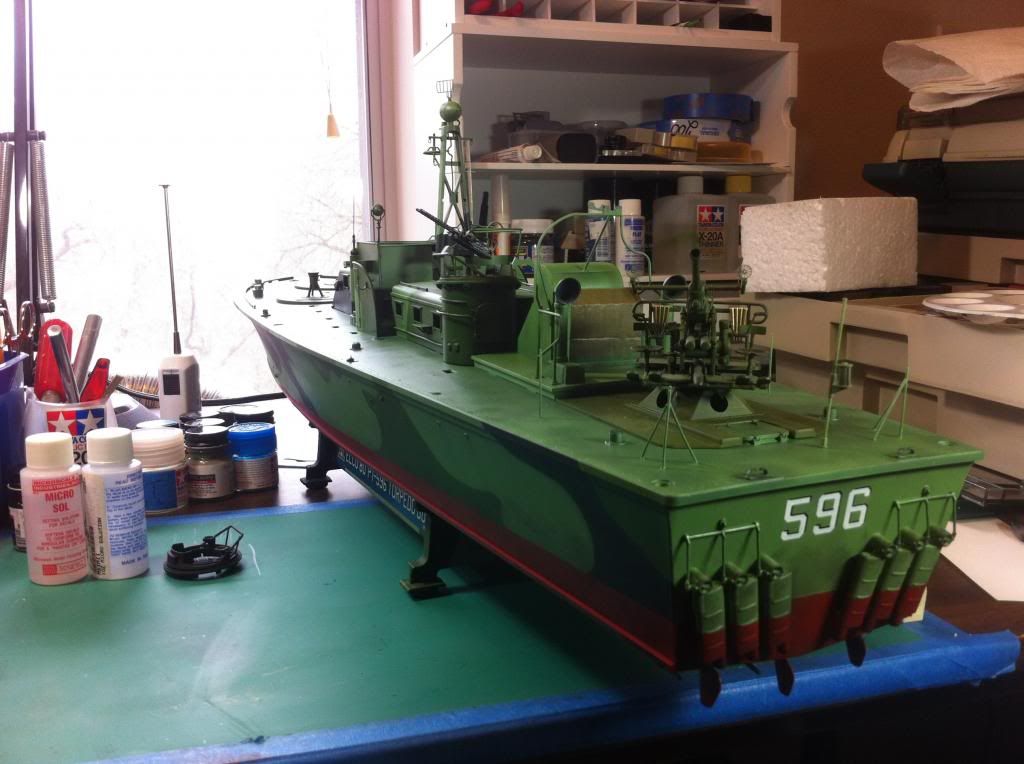 Rick |
|
Rick
Full Member
  
Member since: March 2013
what to build, what to build . . . Ok THAT one!
Posts: 854 
|
Post by Rick on Jul 19, 2014 7:57:10 GMT -5
Been focusing on the remaining parts yet to be added so a variety of items. First up is the heavy hitters, the torpedoes. All four racks and their load are now secured on deck. Visually, it makes a big difference to the project. I repainted the warheads copper from their previous dark gray. The torpedoes each had two cables that ran over them and were secured on the back of the racks. I can only assume they were additional security when the boat is travelling at high speed over rough water. The roll off racks themselves held the torpedoes securely until physically released by the crew. The cable attached through an eyelet on the back, passed over the top and through another eyelet at the bottom of the rack, then returns over the top to be secured at another eyelet on the back. The kit supplied cable were pieces of silver braided wire that were to thick to pass through the incredibly fragile eyelets. I had read horror stores of other builds where these were constantly being broken while trying to thread the wire. I decided to go with EZ Line since it was thinner, already black so no painting needed, and flexible. Worked perfectly and no breakage. Will finish up the torpedoes with a final weathering as a last step. 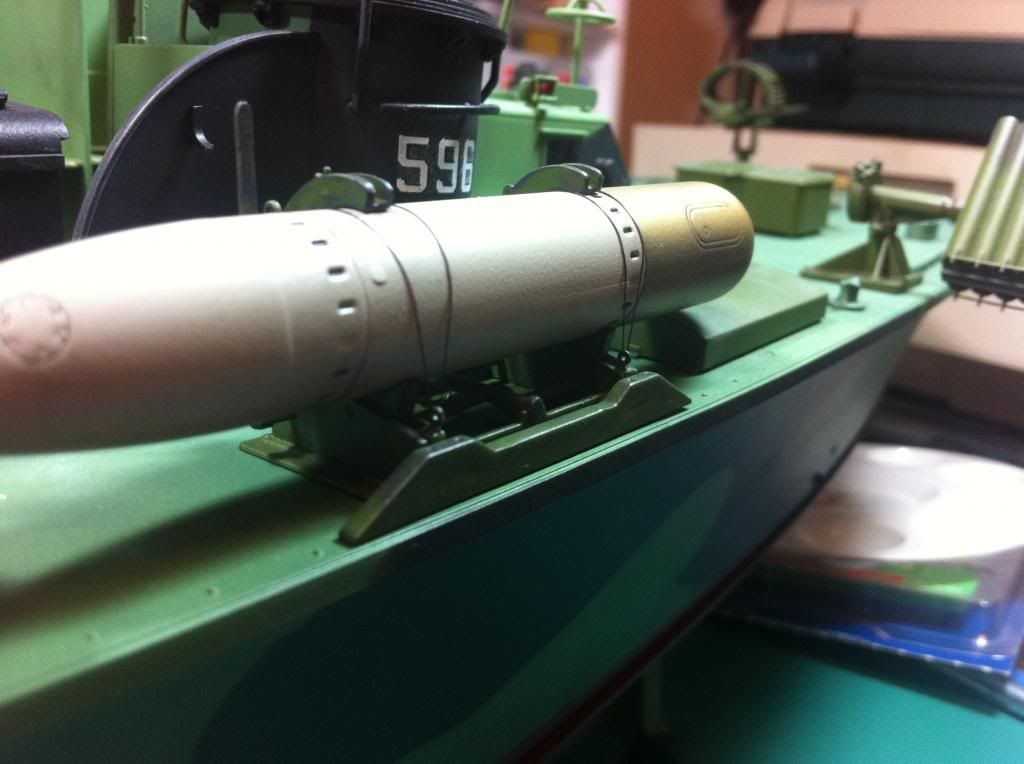 [/URL] 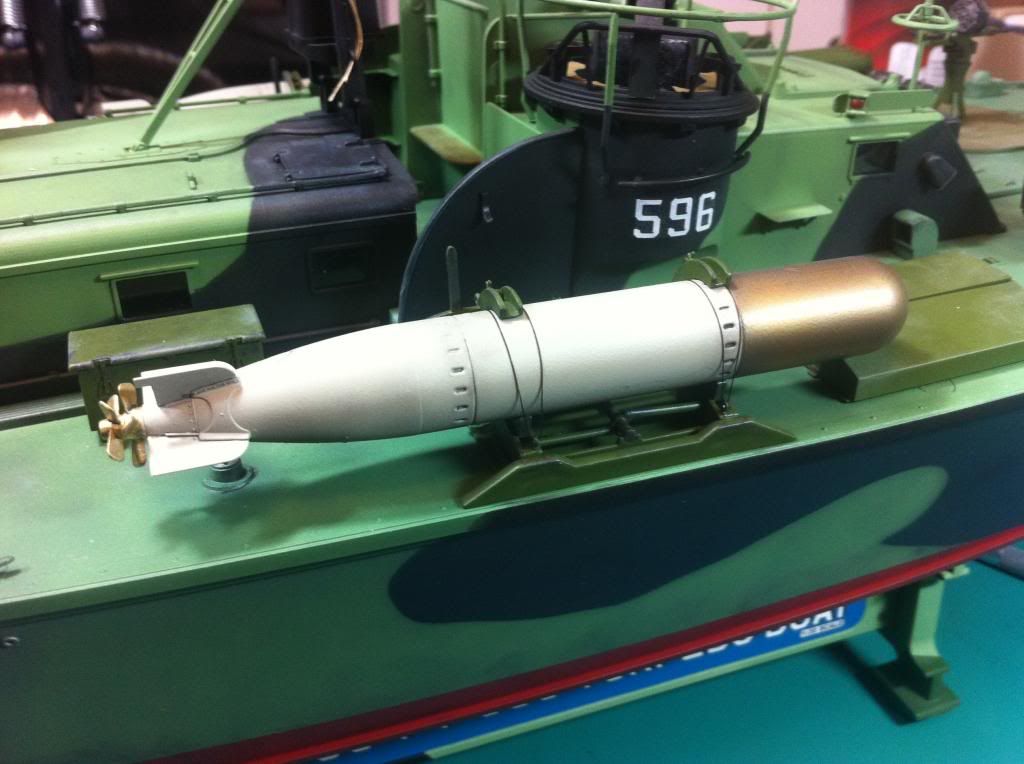 [/URL] Next up was to add the rope safety railing around the fantail. the rope attached to the rear torpedo rack and then passed around each of the stanchions until tying off on the last torpedo rack on the opposite side. To keep the rope from sagging, I extended each segment one at a time. I wrapped the rope and secured it with super glue then kept tension on the rope until the glue set. A plastic clamp sacrificed itself by going overboard to keep the tension on the rope. 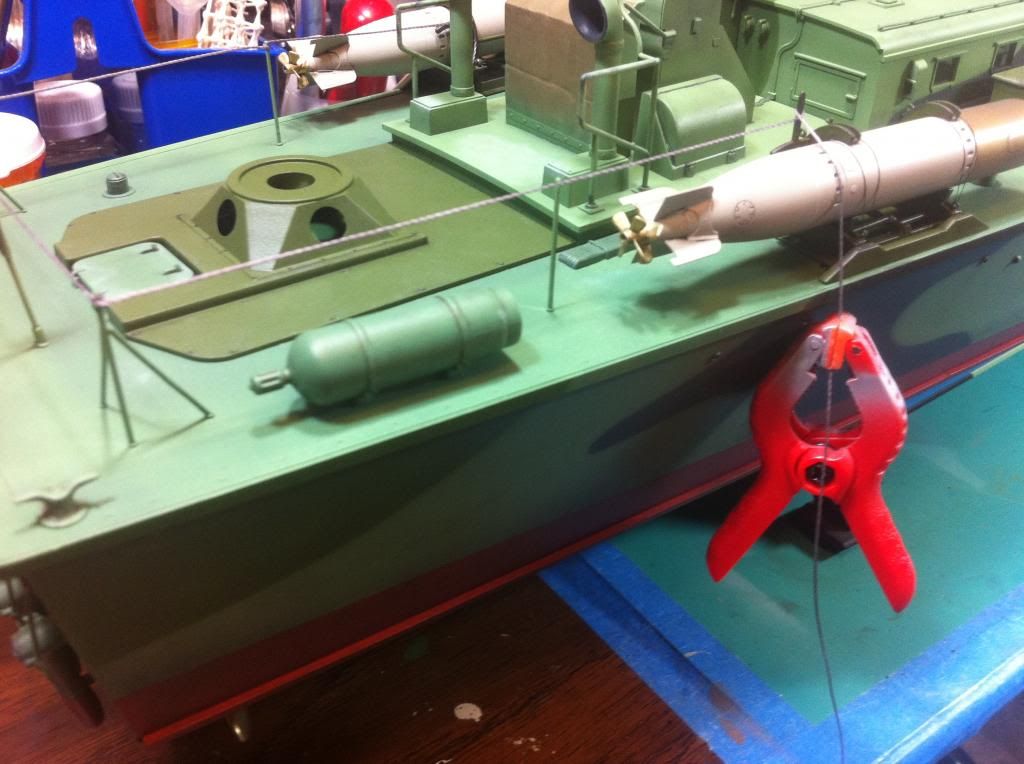 [/URL] The next rope attached was the bowline. This is a heavy line used for towing, anchoring, or tying up to a dock. Coiling the rope and making look decent was a bit of a challenge so I used my track-a-ma-jig that I built to align track links to hold a suitable piece of sprue to weave the rope into shape. The rope attached to the towing point on the lower bow and then to a cleave on the foredeck. 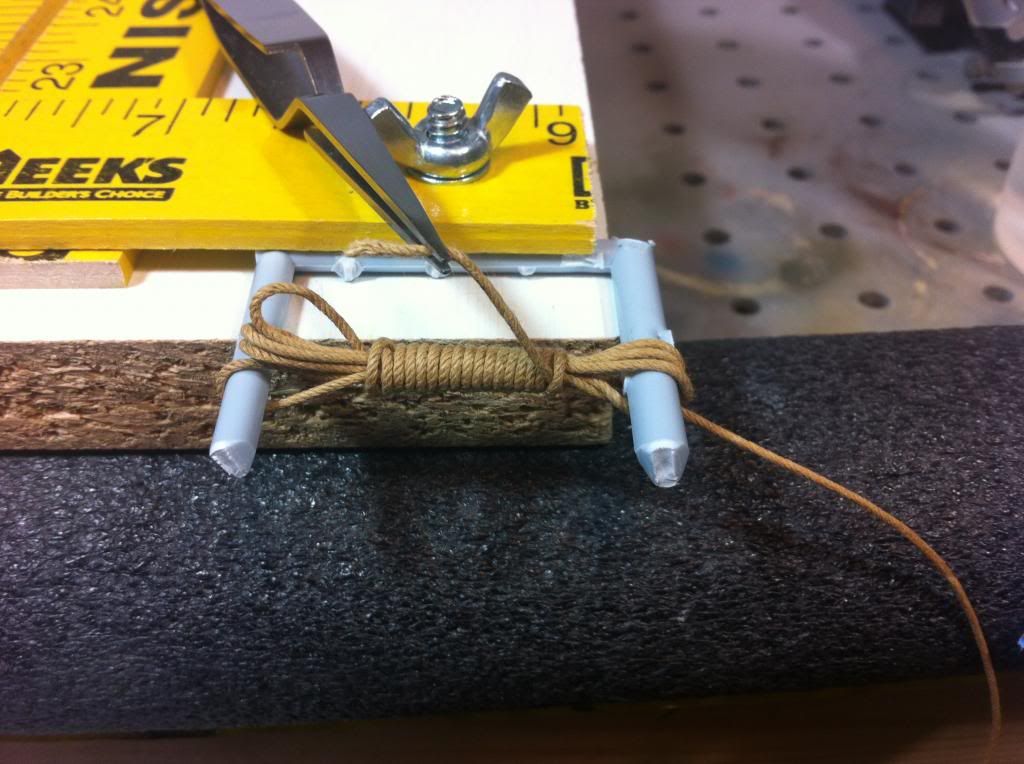 [/URL] 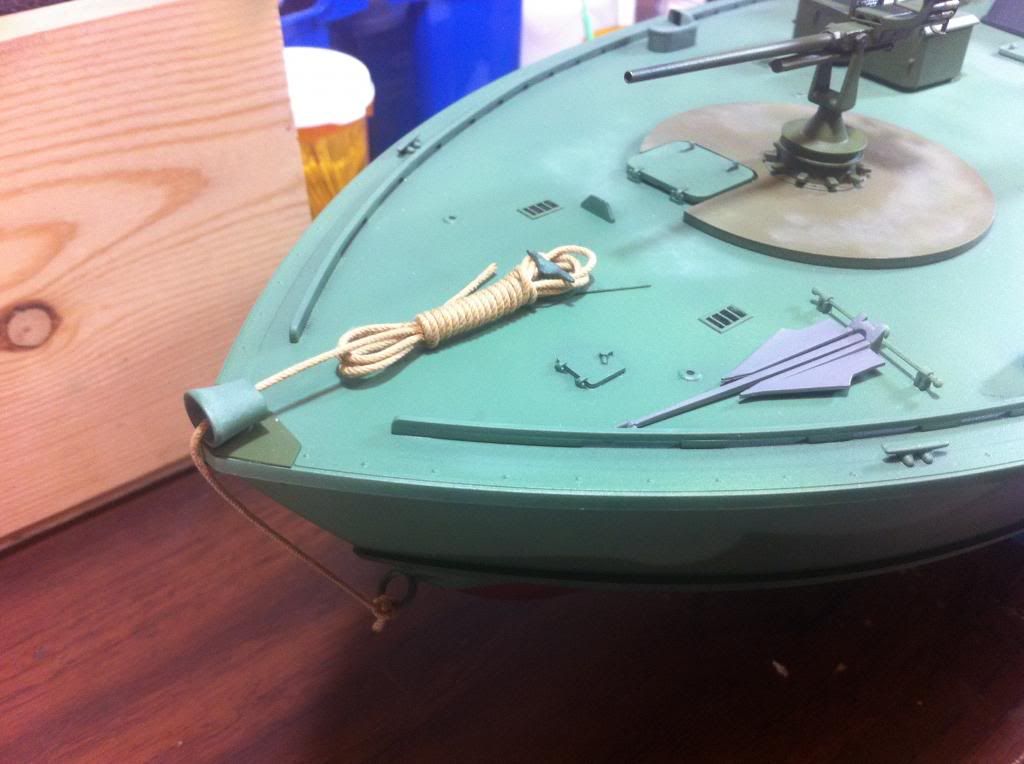 [/URL] I'm going to end this update here and be back shortly with part 2 of this update. Rick |
|
Rick
Full Member
  
Member since: March 2013
what to build, what to build . . . Ok THAT one!
Posts: 854 
|
Post by Rick on Jul 19, 2014 8:00:59 GMT -5
The twin .50 cal turrets had optional padded back rests for the gunners. These were field supplied so I created them using folded facial tissue saturated with diluted white glue. Once dry, they were trimmed to fit and painted black with highlights then glued to the back of the turret. May as well be comfortable while fighting a war I always say! 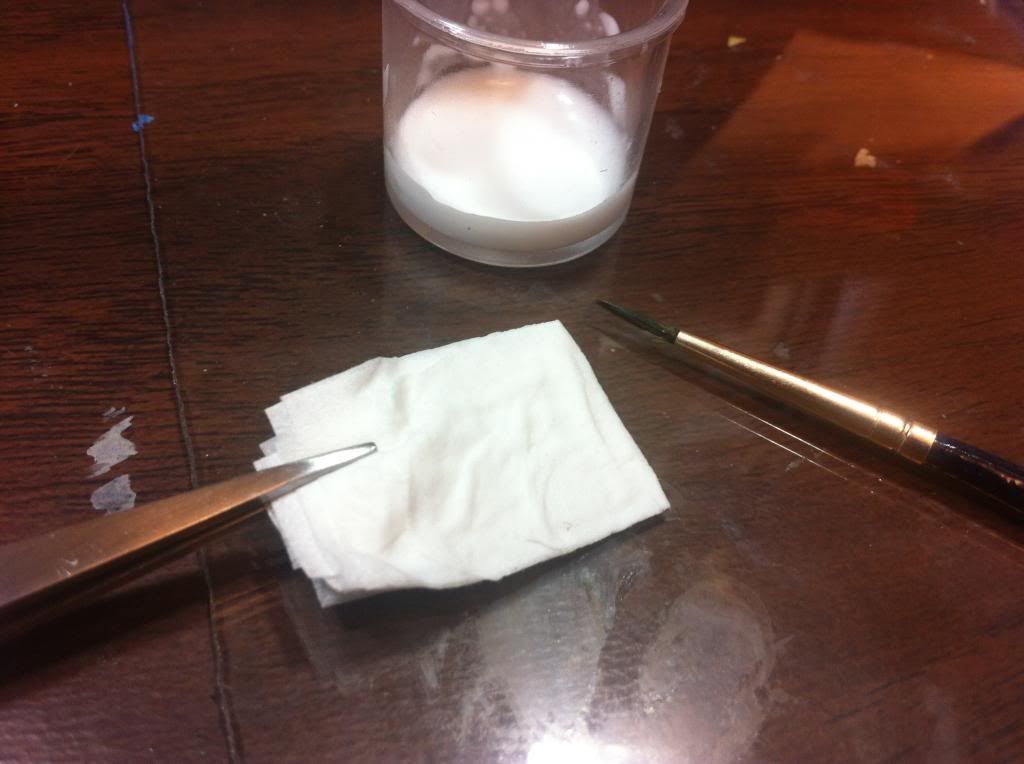 [/URL] Hard to see with my iphone pic but hopefully the top is visible. You can also see the "canvas" ammo box covers made from tissue earlier in the build. Directly under the twin .50's is a spent cartridge bucket scratch built with plastic card. Both turrets received the same treatment. I'll get some better pics when all is finished. Next up, is the life raft that will not comfortably hold the 14 crew members. This was a two piece affair. Painted it overall with dark gray followed with highlights of gull gray then spent a couple hours masking the canvas straps attaching the center frame. The straps and frame were painted a mix of olive drab and khaki drab then everything recieved a wash to grunge it up a bit. 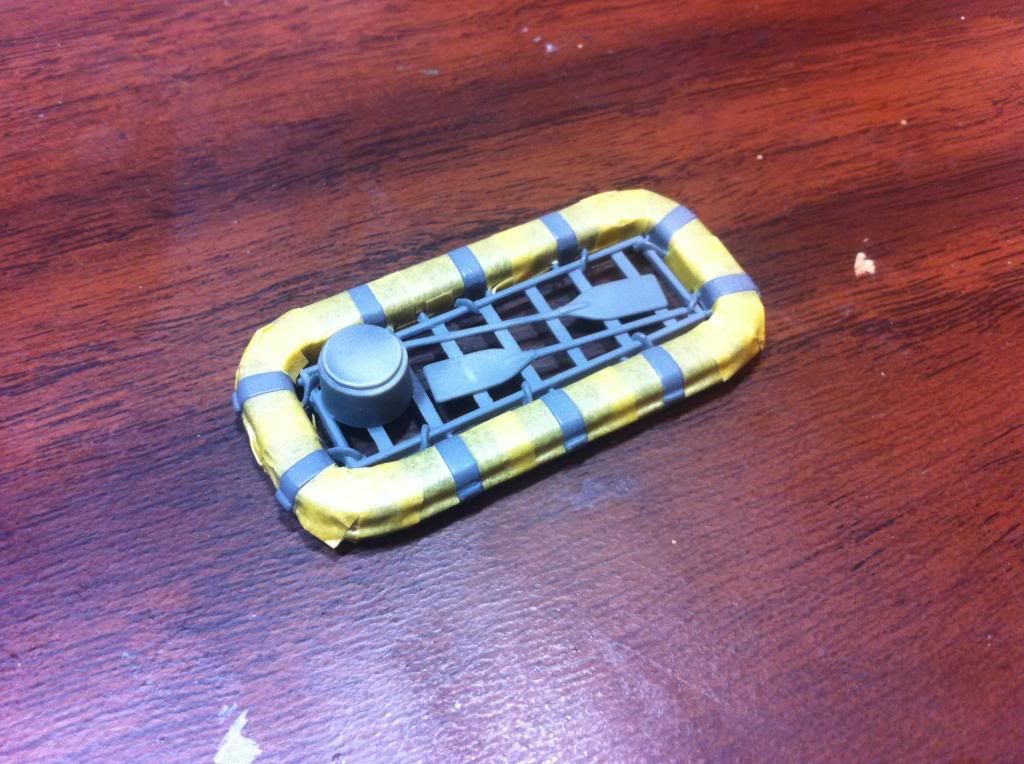 [/URL] 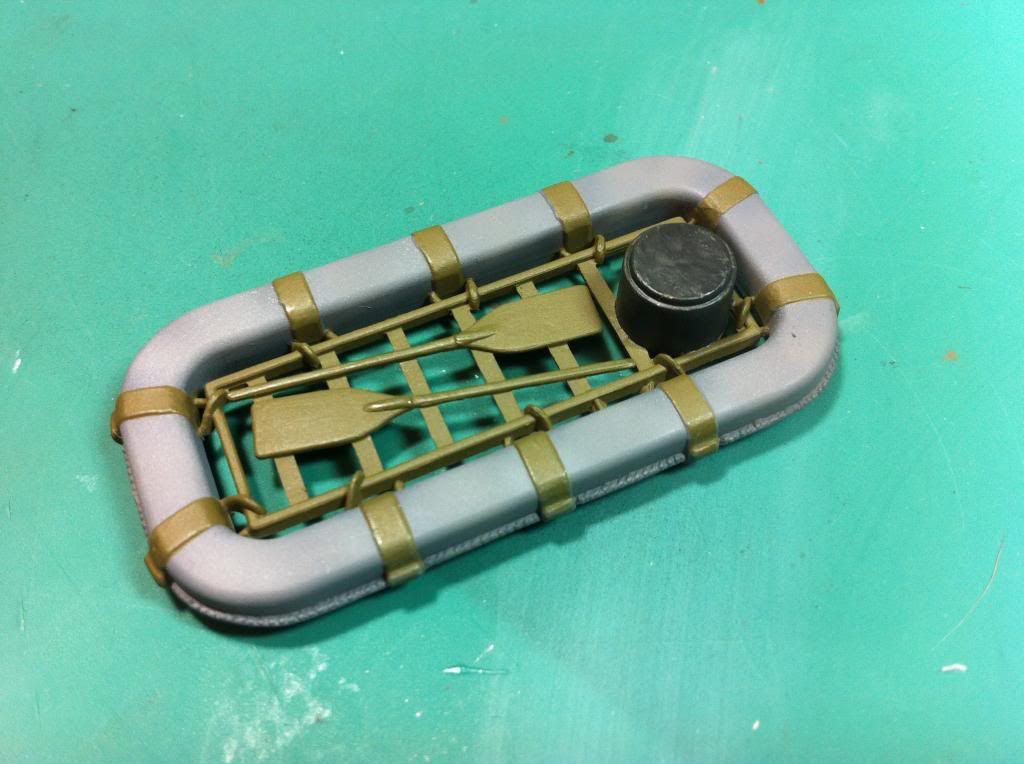 [/URL] The goofy looking round thing is supposed to represent container with emergency supplies. Weathering to come later. the remaining weapons and various deck mounted lockers and ammo bins have been added. This pic shows the 3 inch rocket launchers, one secured, the other in firing position where the rocket exhaust is aimed at the ocean rather than the plywood deck. Bow weapons include a 20mm Oerlikon and 37mm cannon that originally were salvaged from wrecked P39 airacobras. Because of their success, Elco began installing them standard in later Elco boats including the 596 boat. 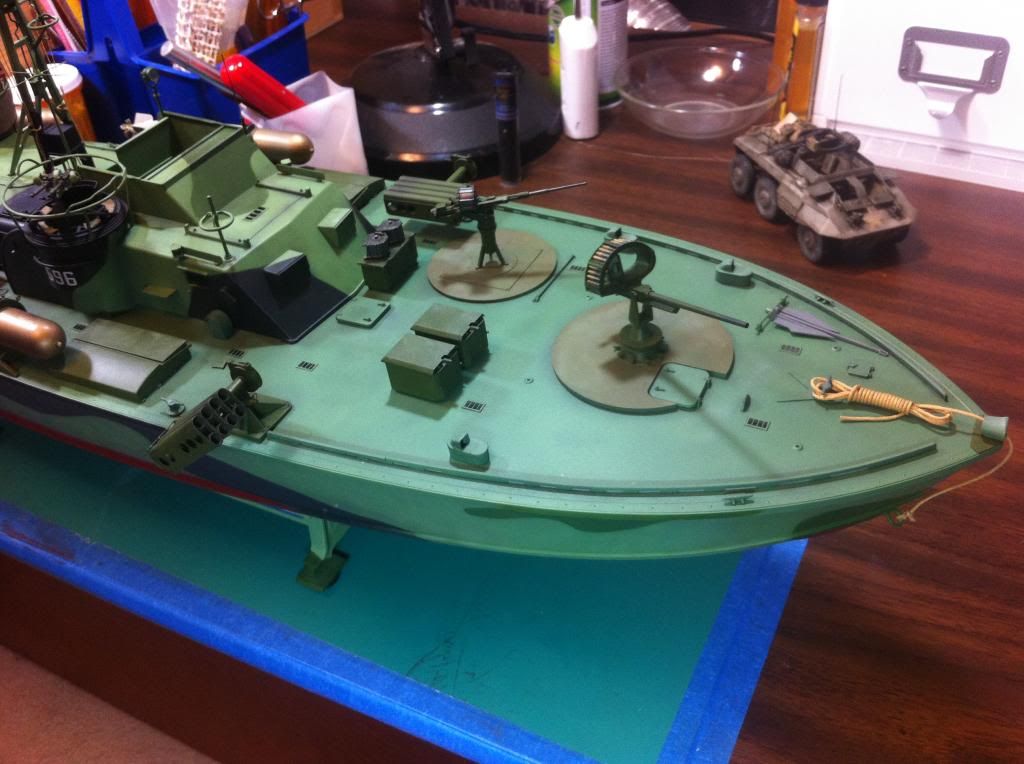 [/URL] That's it for now. Still have some work to do with the mast and over all weathering. Though navy crews worked diligently cleaning and taking care of their boats, the elements were harsh in the south pacific and took their toll on the boats. Weathering is not showing up well in these pics. Hopefully these details will be more visible once I can get the 596 under some photo lights and a real camera. |
|
Rick
Full Member
  
Member since: March 2013
what to build, what to build . . . Ok THAT one!
Posts: 854 
|
Post by Rick on Jul 19, 2014 8:04:11 GMT -5
LAST UPDATE!! I'm calling this recovery process complete. Goes to show the importance of researching subjects and not taking the instructions at face value. Italeri got the base green very wrong and I incorrectly assumed with washes I could tone it down. Ended up a complete re-paint of the camo and a number of components. I am much more pleased with the colors at this point. Could have weathered it a bit stronger, but as normal my preference is to go lighter than many just to ensure I don't botch it up and ruin it. One day I'll move past it I hope. Here's the final pics before the 596 is launched on her maiden voyage: Reconnaisance aircraft view before being shot down: 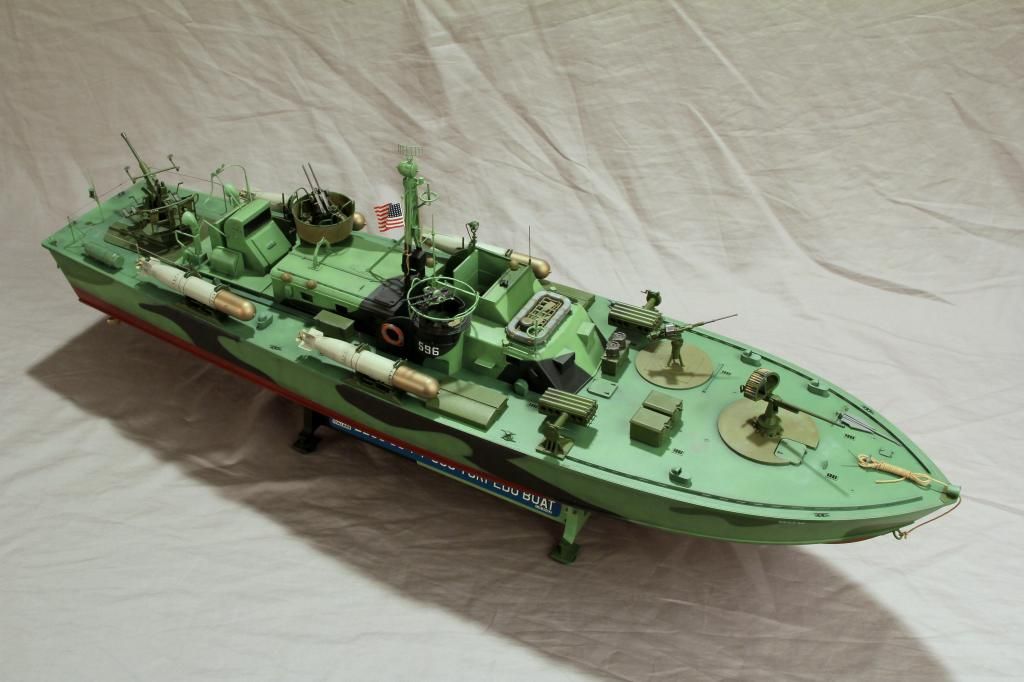 Full speed ahead: 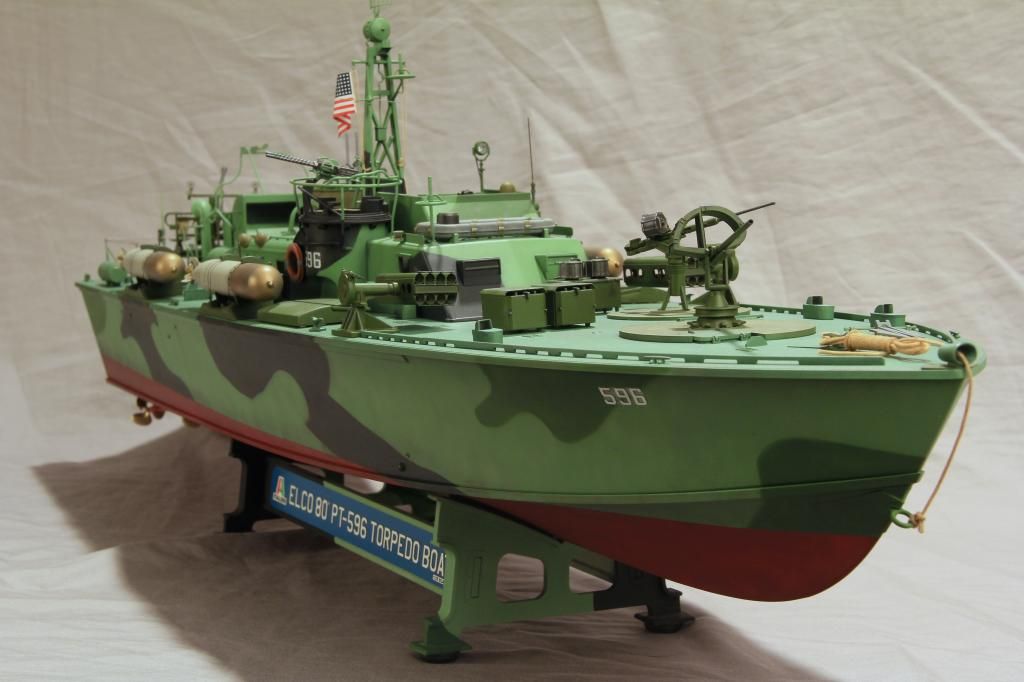 The foredeck: 37mm from a P39; 20mm Oerlikon; Port 3" Rocket tubes: 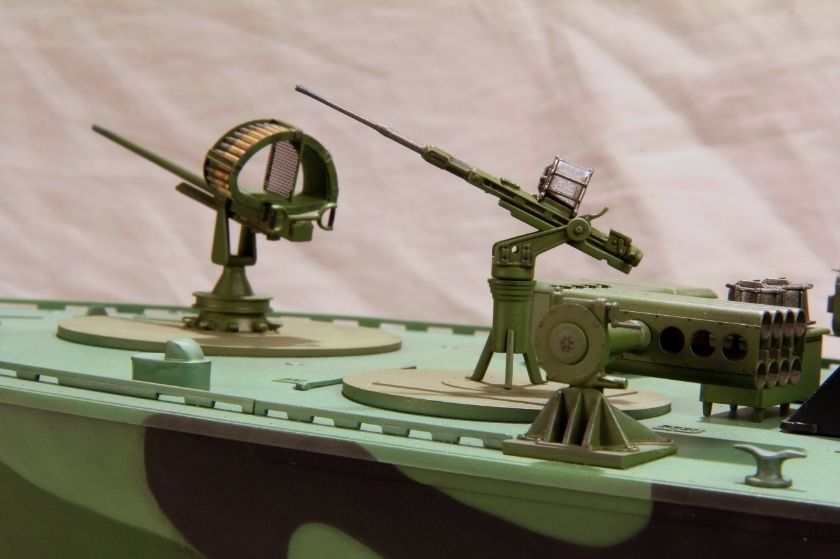 The Office: 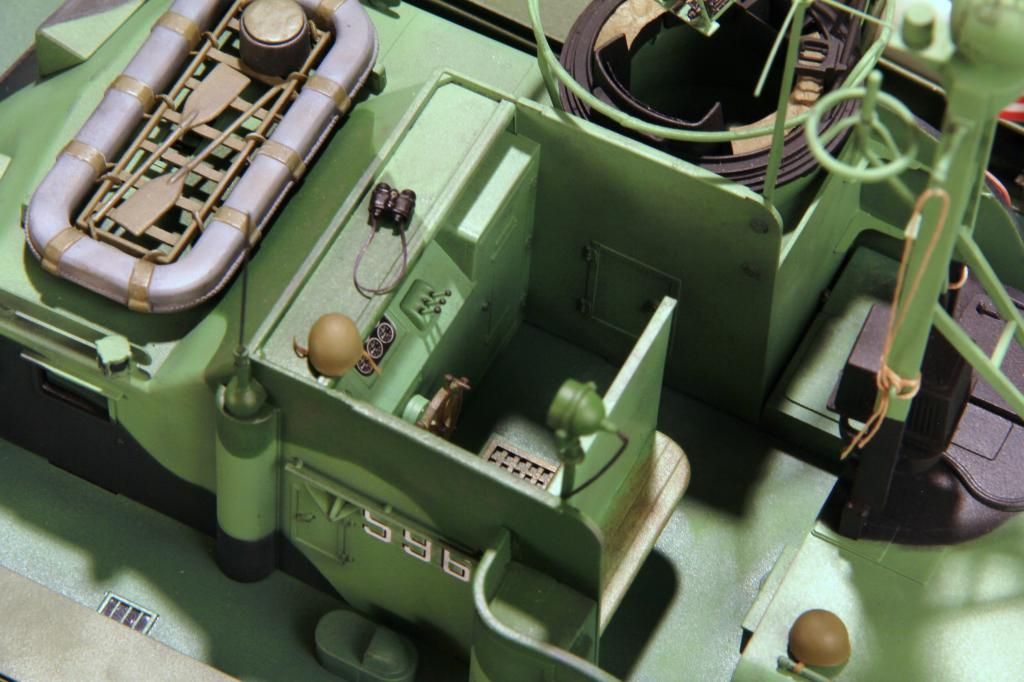 The Stern with 40mm Bofors: 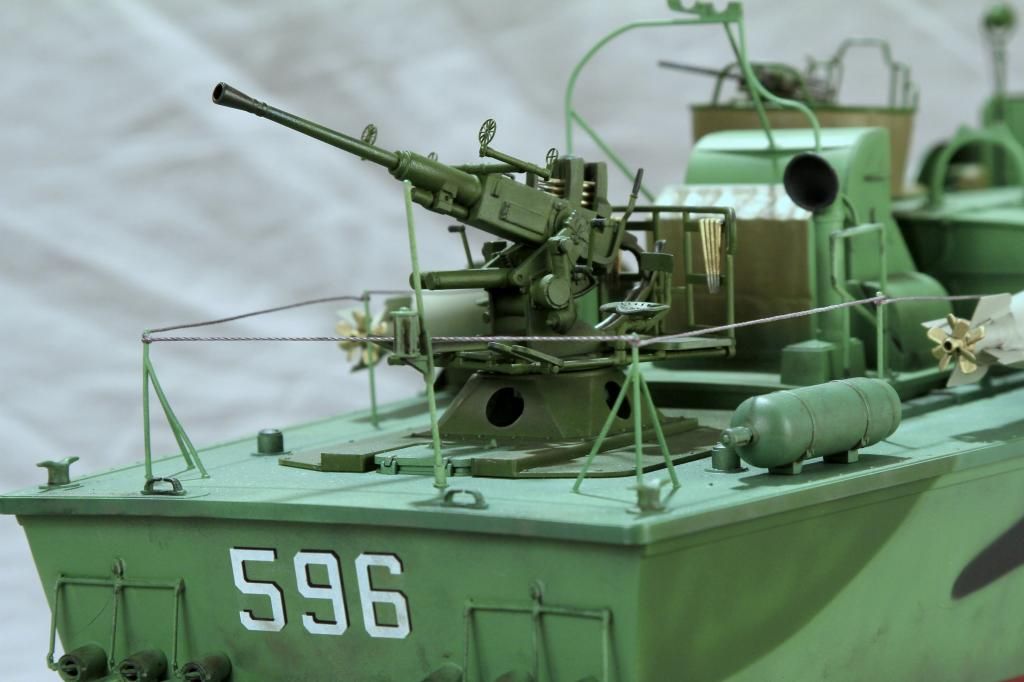 The Stern: 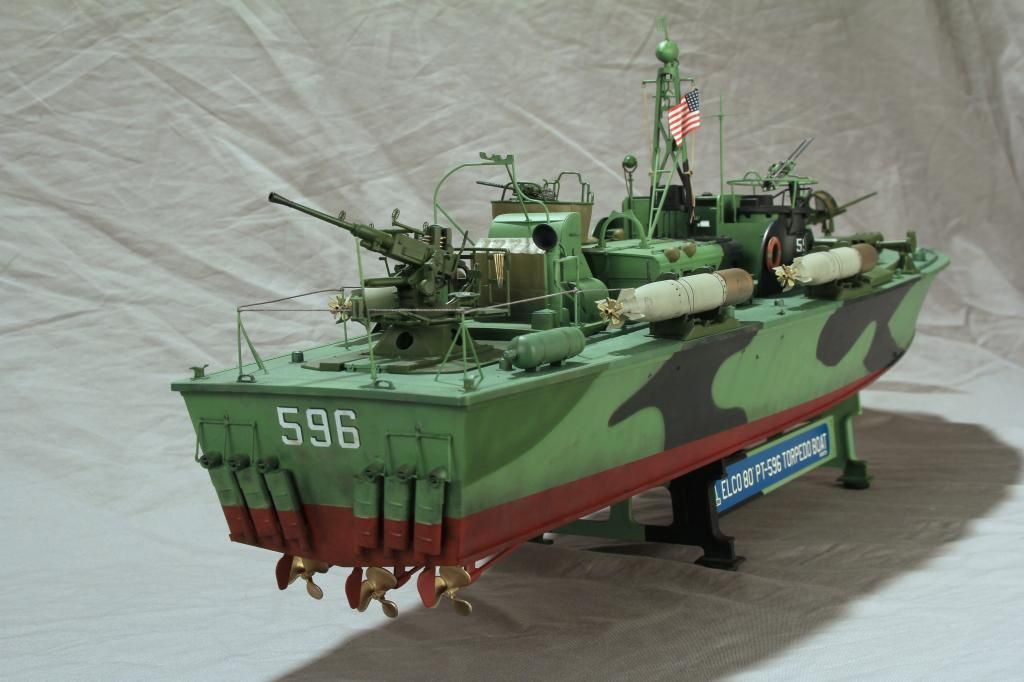 Thanks to all for the comments and support along the way. I appreciate everyone looking in. Rick |
|
|
|
Post by Leon on Jul 19, 2014 8:53:44 GMT -5
Awesome finish on the redo Rick.The 596 looks sweet.   |
|
|
|
Post by deafpanzer on Jul 20, 2014 16:39:10 GMT -5
Glad you got it done... it was blast following this build. Really like the color green on the PT very much... excellent work on the details as they have not been spared!
|
|




 ?"
?" 


 [/URL]
 [/URL]
 [/URL]
 [/URL]
 [/URL]
 [/URL]
 [/URL]
 [/URL]
 [/URL]


