|
|
Post by bullardino on Mar 30, 2014 3:40:30 GMT -5
Outstanding job on the engines, they are real  |
|
|
|
Post by bbd468 on Mar 30, 2014 9:37:27 GMT -5
DUDE....that is SICK!!! (That means cool, so im told  ) You never cease to impress Gagster.  |
|
danb
Reviews member  March 2013 MoM Winner
Member since: November 2011
Posts: 2,808
Nov 17, 2011 9:22:52 GMT -5
Nov 17, 2011 9:22:52 GMT -5
|
Post by danb on Mar 30, 2014 13:26:10 GMT -5
Outstanding work buddy them motors look brilliant keep up the hard work
Dan B
|
|
|
|
Post by wbill76 on Apr 1, 2014 14:24:29 GMT -5
Nice to see these coming together TNG! Very cool work on those engine pods.
|
|
thenylongag
Full Member
 Sept2013 MoM Winner
Member since: June 2012
Yes, we have 'NO' bananas
Posts: 304
Jun 7, 2012 11:20:57 GMT -5
Jun 7, 2012 11:20:57 GMT -5
|
Post by thenylongag on Apr 11, 2014 20:11:28 GMT -5
Evenin Everybody, Thanks for the feedback and very positive encouragement. Just for the record, some people have commented on my choice of viewing in the back ground, i think Bottom is one of the best TV shows of the 90's and still stands up today. But............moving on, I'm still finding it very difficult to come up with ideas this week, I've only managed to squeeze in a little bench time, and what I have done is a bit Meh, in my opinion But lets get to it anyhoooo Pix.. I had an aftermarket helmet in my stash and i wanted to make Colin's helmet a bit Stig-E-fyed so i added this nose piece and some filler to be shaped later  Very basic Colin fit with arm's.  Started the basic cockpit structure  Started detailing the dash board area      Stearing wheel, trimmed down a tank wheel     Everything dry fit together  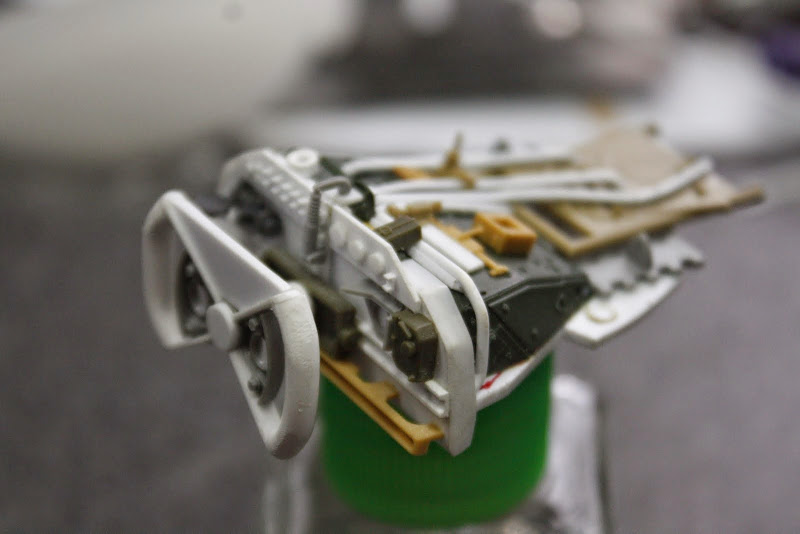  Everything ready for........?  Primer, Mmmmmmmmmmmmmmmmmmm.   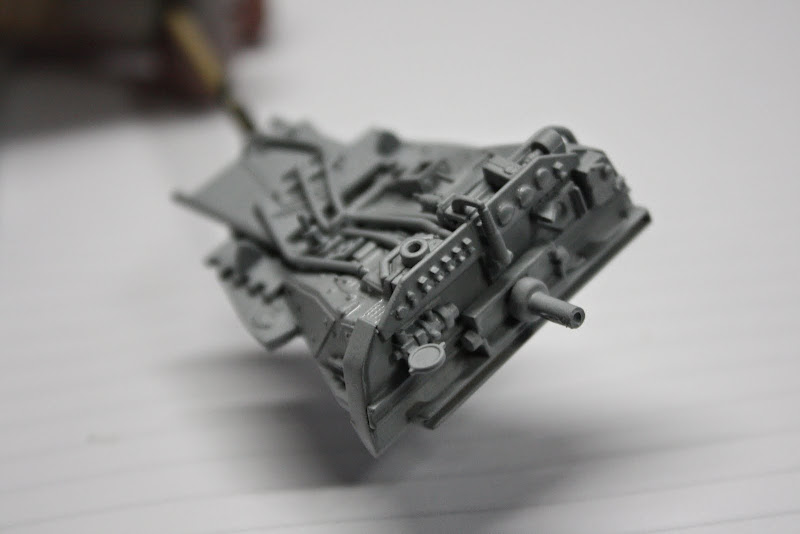 And that's about the size of it so far, So stay tuned until next time, Take care Gagsterman |
|
|
|
Post by fightnjoe on Apr 11, 2014 20:47:14 GMT -5
wow. a true master at work.
joe
|
|
|
|
Post by bullardino on Apr 12, 2014 2:10:46 GMT -5
As soon as I'll find my jaw, two stories below, I'll be able to properly comment this piece of art...
|
|
|
|
Post by Leon on Apr 12, 2014 6:22:42 GMT -5
Another awesome update Gag.Superb work on the pit and dashboard. |
|
|
|
Post by wbill76 on Apr 12, 2014 20:17:17 GMT -5
Got to love the use of 'found' materials...a tank wheel transformed into a steering yoke, love it! |
|
thenylongag
Full Member
Sept2013 MoM Winner
Member since: June 2012
Yes, we have 'NO' bananas
Posts: 304
Jun 7, 2012 11:20:57 GMT -5
Jun 7, 2012 11:20:57 GMT -5
|
Post by thenylongag on Apr 27, 2014 19:54:13 GMT -5
Evenin All, Thank you all, so so much for your comments guys, it really does mean a lot to me. Your positive feedback tells me that i'm going in the right direction. Down to buisness, lets go, lets go....move it, move it. Pix.. Decided three big sticking points i was having........ 1. Decided, unfortunately, to loose everybody's favourite driver, Colin, because i was losing so much time trying to fit the car around him, instead of him fitting into my car, plus he's modelled on a big fat 70's era driver, it's like when fat boy Micheal Andretti drove for McLaren and he couldn't fit in the car properly, well that was the reason he gave for his poor performance, anyhoo Colin was fighting me so i binned him, don't panic, i didn't literally bin him i just decided to take the oppertunity to detail the cockpit a bit more. 2. Decided that, yes, i was going to rob the williams seat belts. I will buy a an after market set. 3. Decided to cut the cockpit module in half so i had better access.  Gave the halves a quick sand  Installed the seat frame in the lower cockpit module.  Borrowed the front of a tank for the foot well  Also added side rails to the tub  Slotted the square stock to recieve the cockpit cover.   Cut a top plate and added some slots to also recieve the cockpit cover  Side plates  Added a few more wires to extend the detail panel a bit  Dry fit  Put some 'T' stock along the top edges of the slotted square stock   Epoxie sculpt seat and head rest    Another dry fit  Some side details  Rear bulkhead and fire prevention system 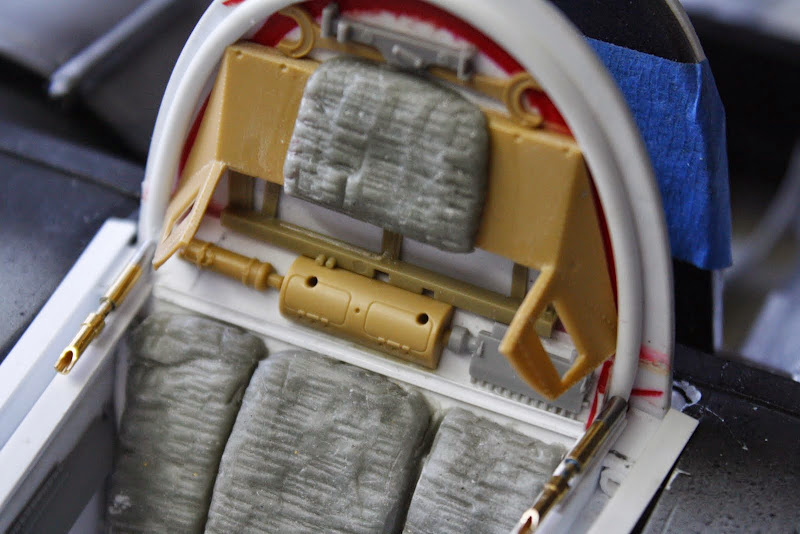 Dry fit with all cockpit components  Ready for............   You guessed it, Primer Mmmmmmmm primer, my favourite season     And that is the story so far, Next, who knows, i supose i should paint the cock pit. Still intend to put some details on the inside of the cockpit cover and i still haven't figured out how i'm going to make the windscreen. But, that's for another day Take care Gagster |
|
John Everett
Full Member
Member since: January 2012
July, 2016 MoM Winner
Posts: 1,278
Jan 17, 2012 0:53:48 GMT -5
Jan 17, 2012 0:53:48 GMT -5
|
Post by John Everett on Jul 15, 2014 0:37:32 GMT -5
The model is large enough that you might find a usable windscreen in the RC airplane section of the hobby shop. Do you have a vacuum former?
|
|
thenylongag
Full Member
Sept2013 MoM Winner
Member since: June 2012
Yes, we have 'NO' bananas
Posts: 304
Jun 7, 2012 11:20:57 GMT -5
Jun 7, 2012 11:20:57 GMT -5
|
Post by thenylongag on Aug 2, 2014 21:27:01 GMT -5
A very good evening to you all, Thanks for your interest my friends Well, July turned out to be quite interesting, Firstly, I had a small heart attack, then i won the All Open in the Big Spring Contest on ScaleModelAddict.com Wow Spent 4 days in the hospital after i passed out at work. Have to lay off the salt and work on my cardio vascular fitness and watch my colesterol I HATE geting old But anyhoo Whats been happening with the MK2 Magnito Skimmer Lets have a look..... So continued with the rear wing 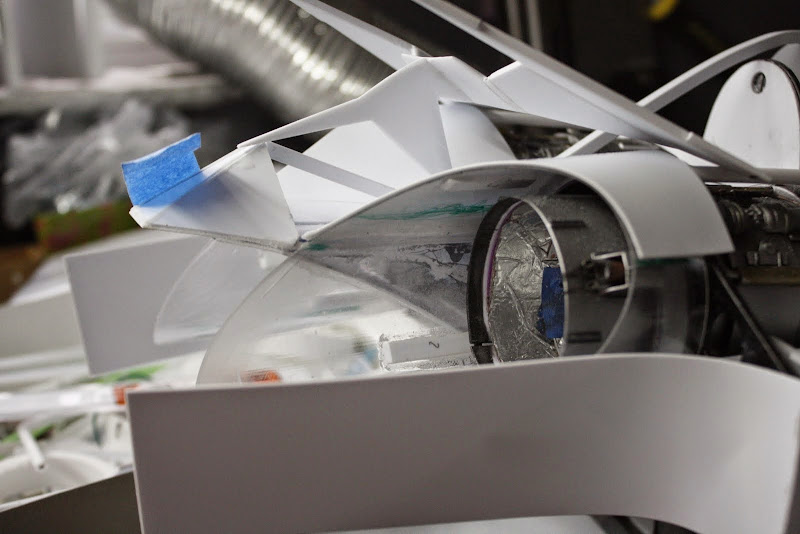 Side vanes  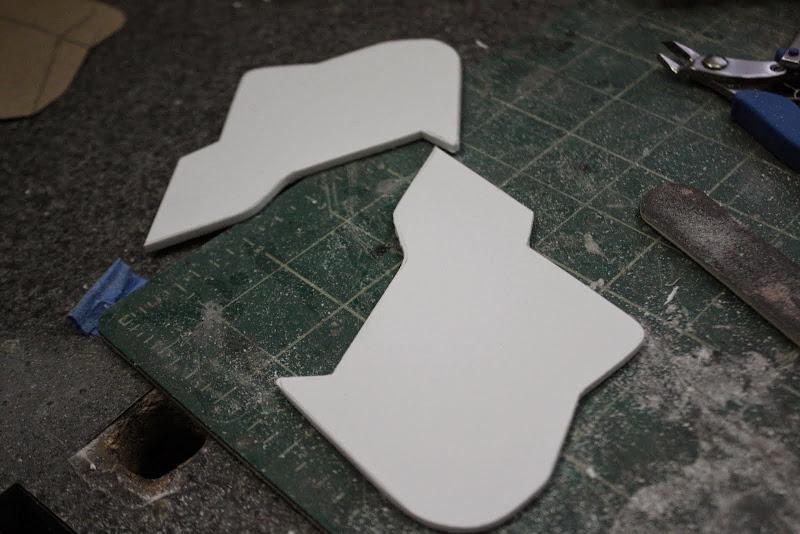 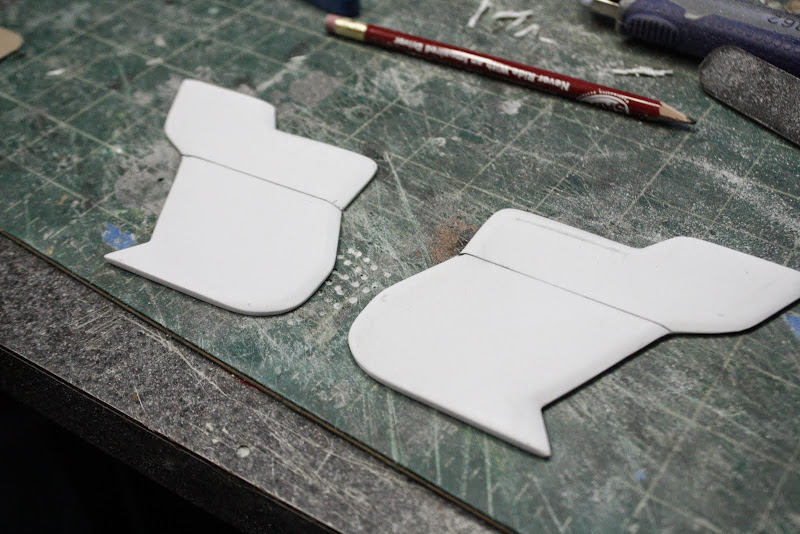 Added the down flaps 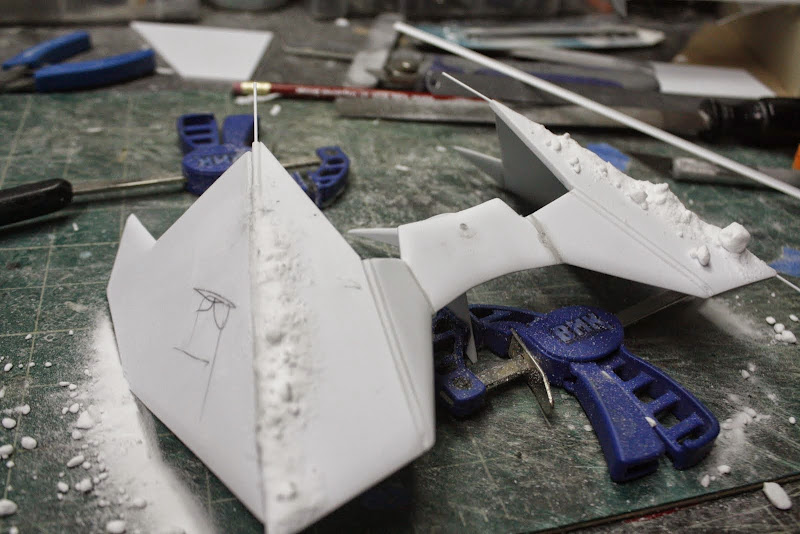 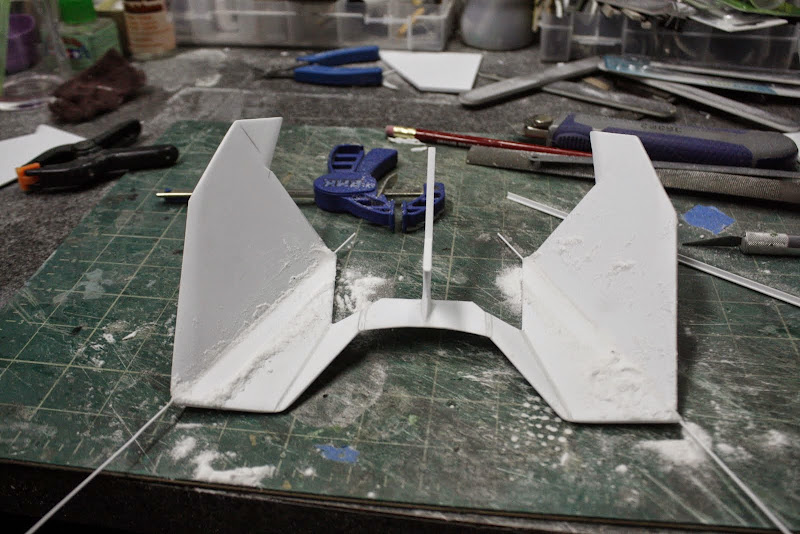 Top wing element 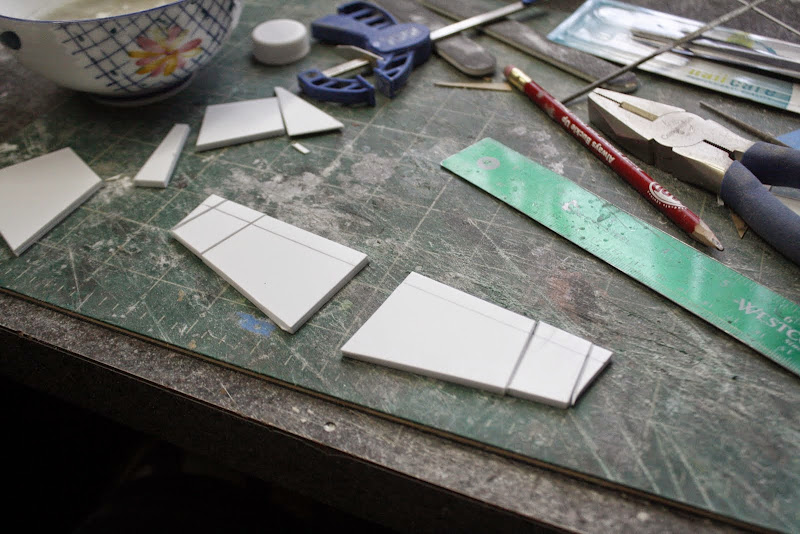 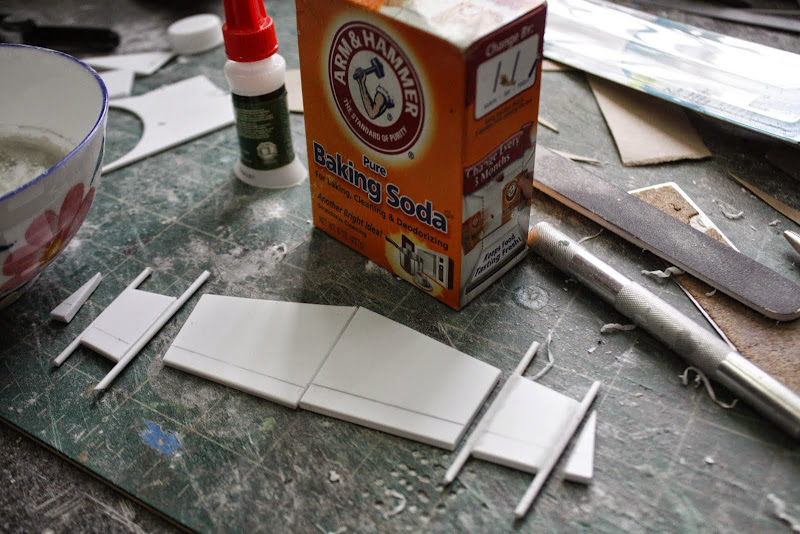 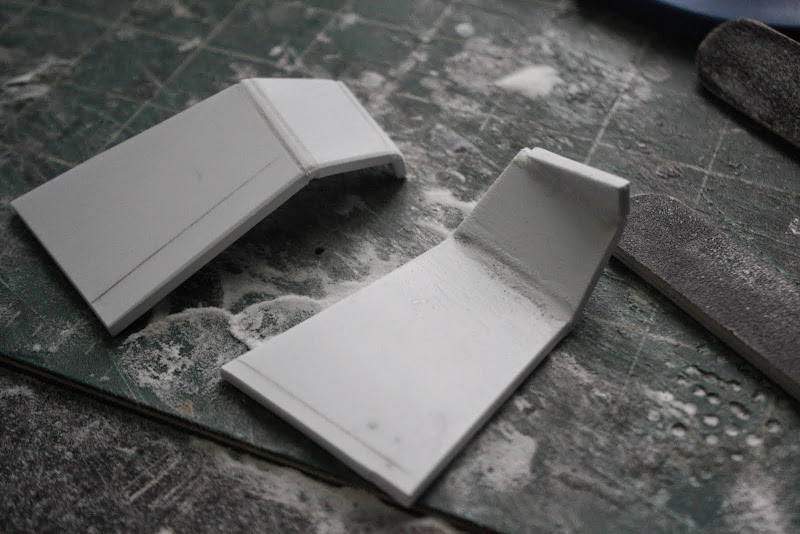 Shaped the top element and side elements  Attached everything together 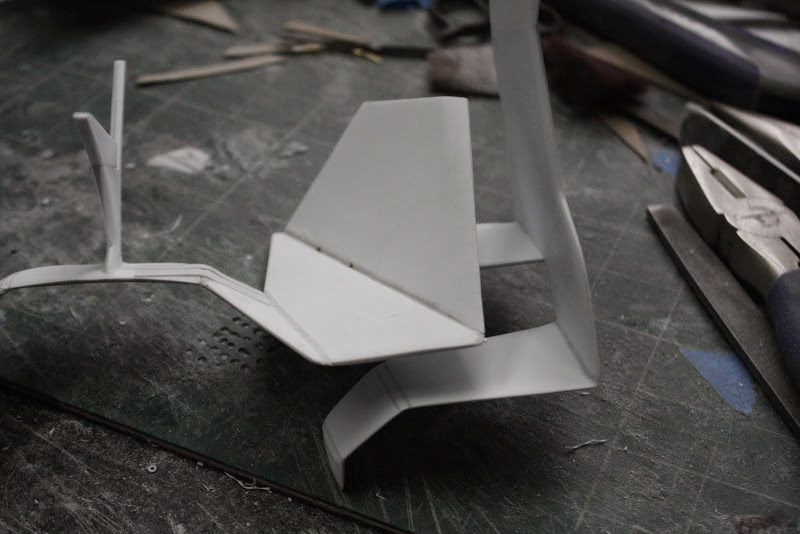 Drilled holes in the main wing 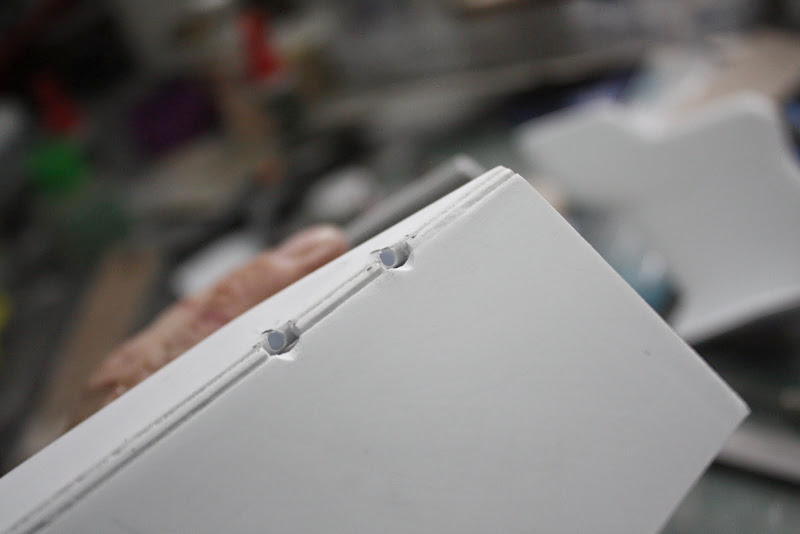 Drilled holes in the external wing element 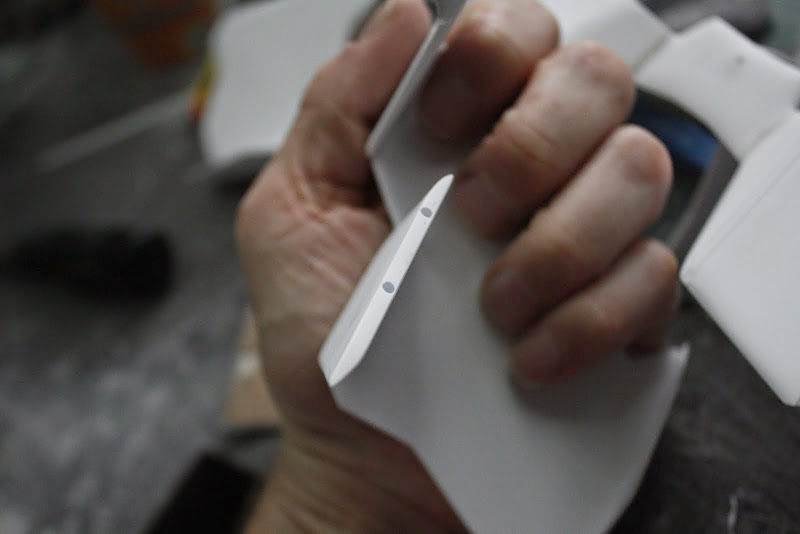 Pinned with brass rod and dry assembled 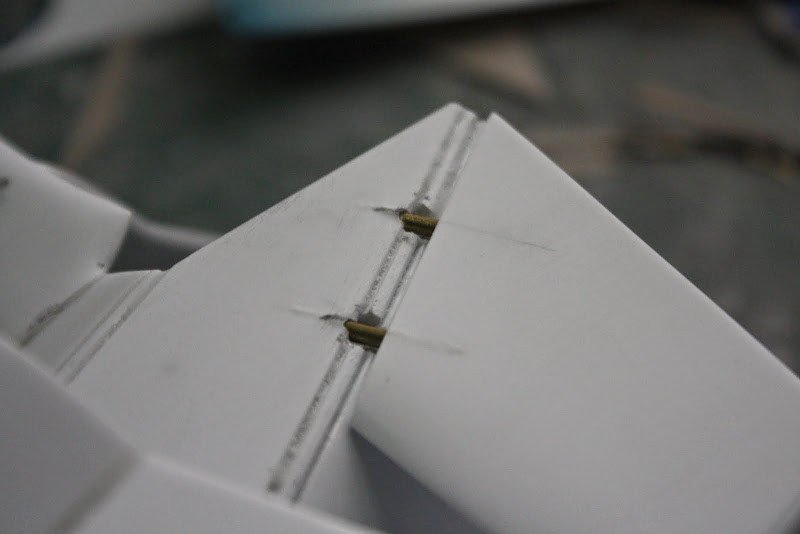 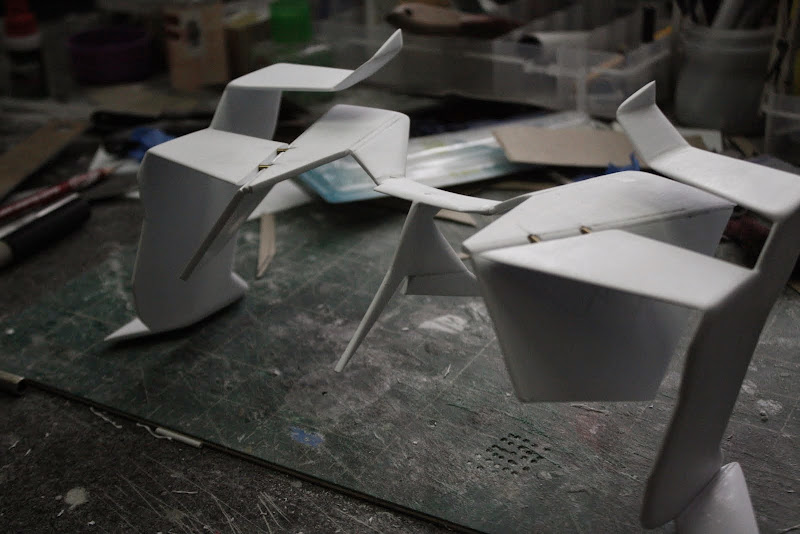  Drilled the rear assembly to receive the wing  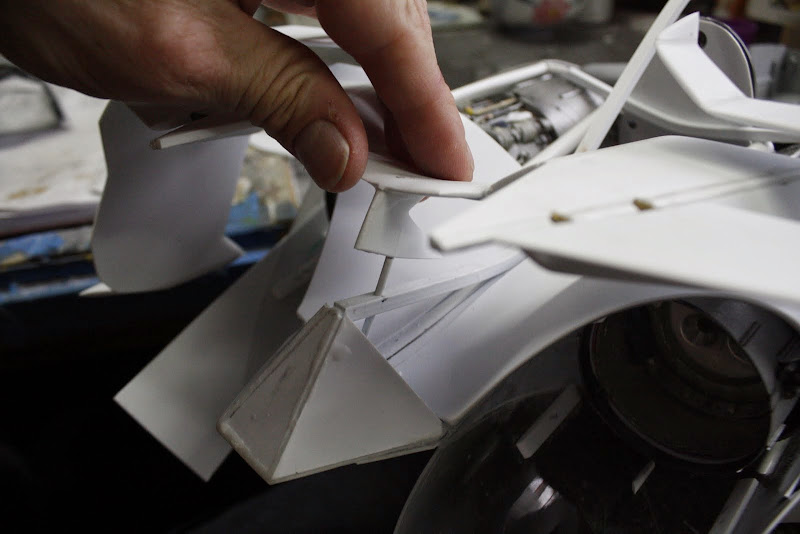 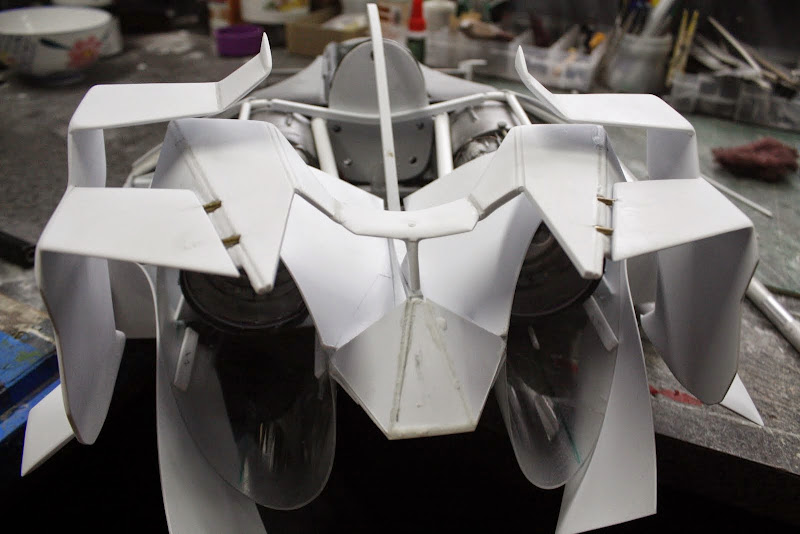 Then shaped and fitted the floor pan 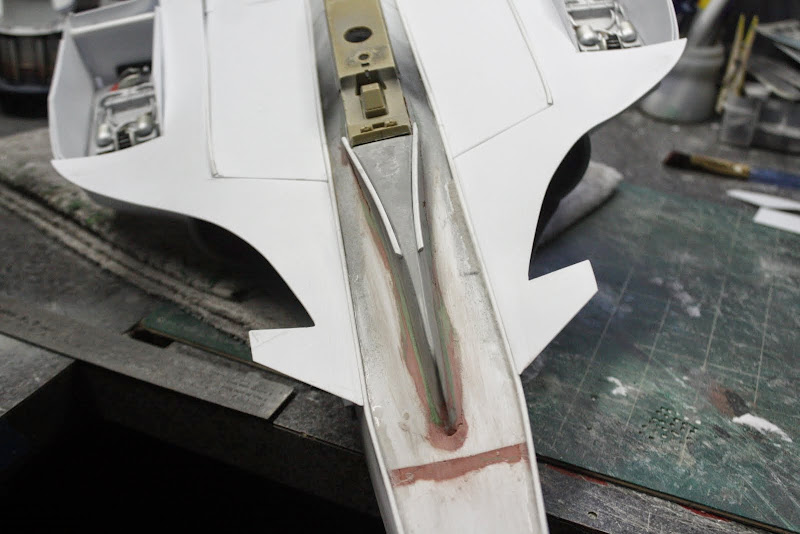 Primered, Mmmmmmmmm 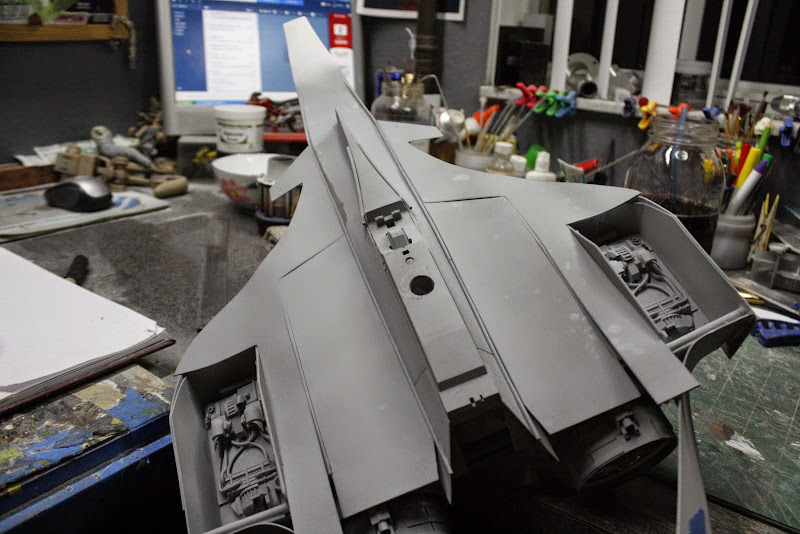 Filled 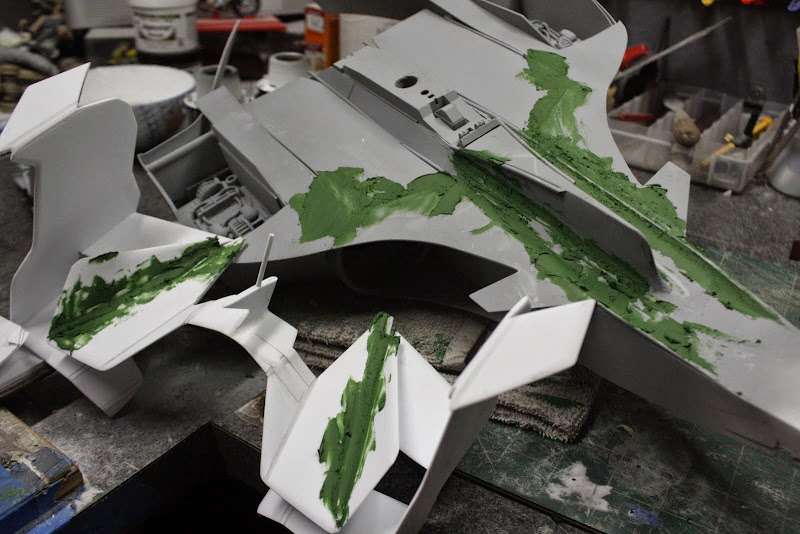 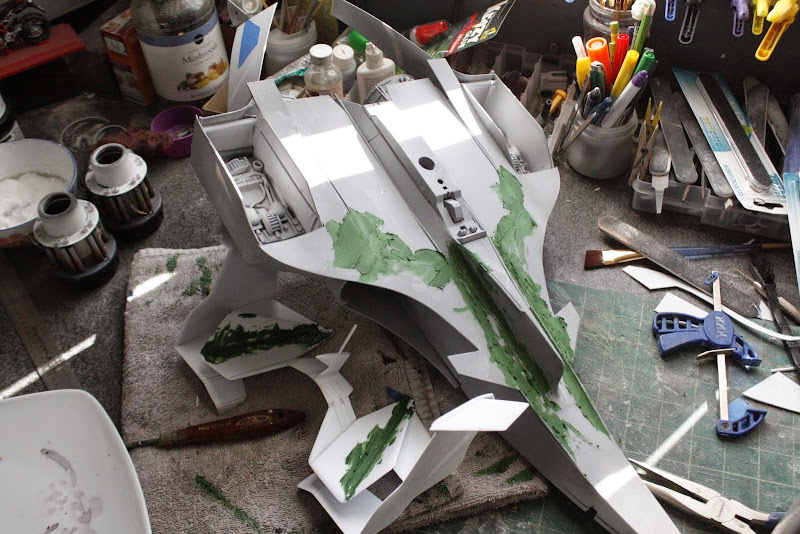 Sanded and re-filled  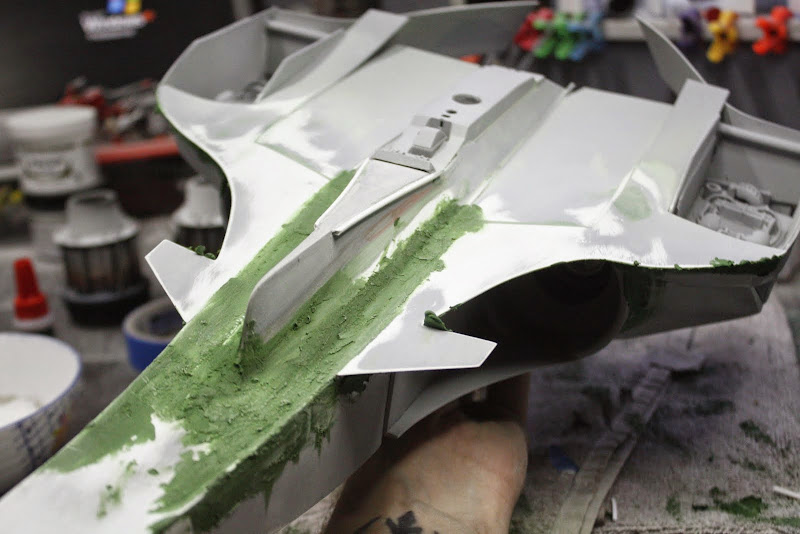  And thats about the size of it Still alive, just Still modelling, always Take care Gag |
|
|
|
Post by dupes on Aug 2, 2014 22:41:16 GMT -5
Exercising will take away less of your modeling time than being dead! Congrats on the SMA win, Gag! Oh, and nice work on this beast, too. |
|
|
|
Post by deafpanzer on Aug 2, 2014 22:42:53 GMT -5
AMAZING work as usual!!! Yikes, glad you are OK... take a good care of yourself.
|
|
John Everett
Full Member
Member since: January 2012
July, 2016 MoM Winner
Posts: 1,278
Jan 17, 2012 0:53:48 GMT -5
Jan 17, 2012 0:53:48 GMT -5
|
Post by John Everett on Aug 4, 2014 17:22:16 GMT -5
Don't pop your clogs just yet. We need to see how this model turns out!
Sorry about the heart thing. Hoping you've got it under control.
|
|
thenylongag
Full Member
Sept2013 MoM Winner
Member since: June 2012
Yes, we have 'NO' bananas
Posts: 304
Jun 7, 2012 11:20:57 GMT -5
Jun 7, 2012 11:20:57 GMT -5
|
Post by thenylongag on Aug 15, 2014 18:55:33 GMT -5
A Very good evening to everyone, Thanks for the well wishes and support my friends, it means a great deal to me that you guys are along for the ride. Doing much better now, visited the cardioligist this week and he explaned what I need to do to improve my health. No salt, lower my colesterol (no more fry ups, and I do love me a good fry up, hey, I'm English OK) and do some of that cardio vascular exercise stuff. Time to break out the Time Trial Bike again me thinks. It's been a while. In my 20's I could regularly do a sub 23 minute 10 mile time trial, but I ain't 20 no more. But anyhoo, so what's been happening on the bench. Been a bit distracted these last few weeks planning for my next big project, will tell all soon, but as for the MK2, lets have a gander. Its been fairly boring, fill, sand, fill, sand ,fill ,sand and repeat  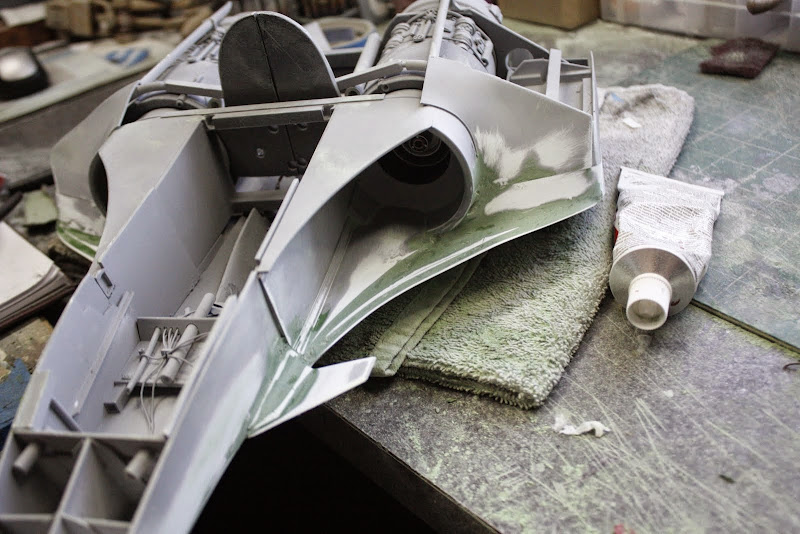  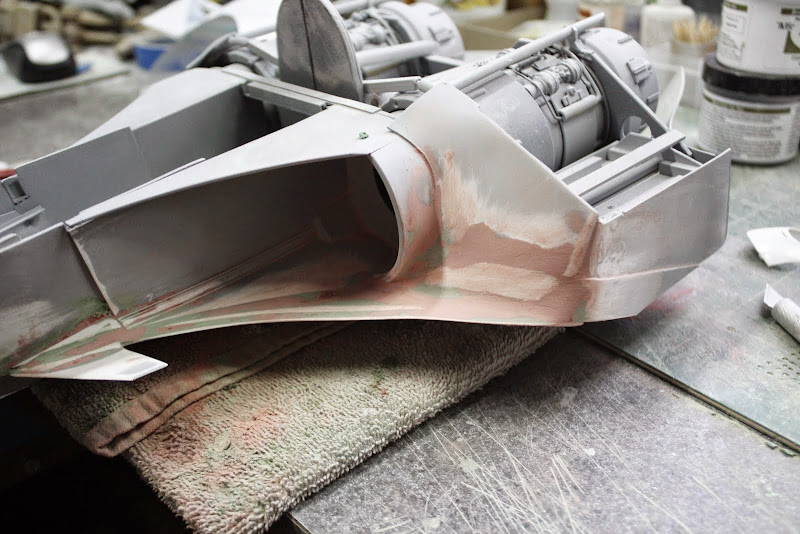  It's been the same thing for the rear wing, fill, sand fill, sand, break, repair, fill, sand, fill, sand,.......etc 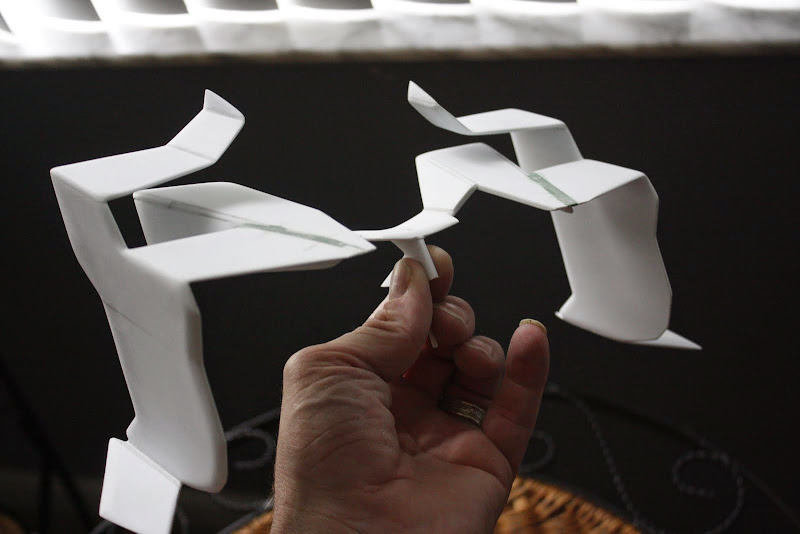 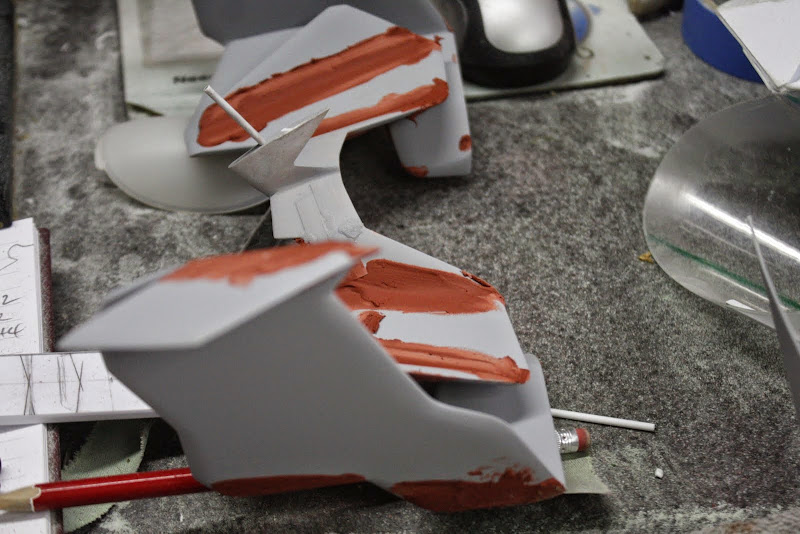 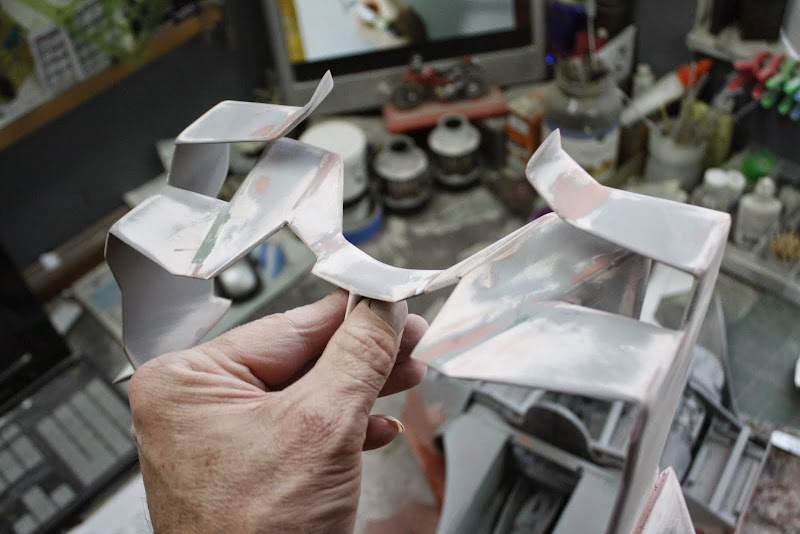 Mmmmmmmmmmmmmmmmmmmmmm Primer     And finally a few dry fit beauty pictures of the story so far.  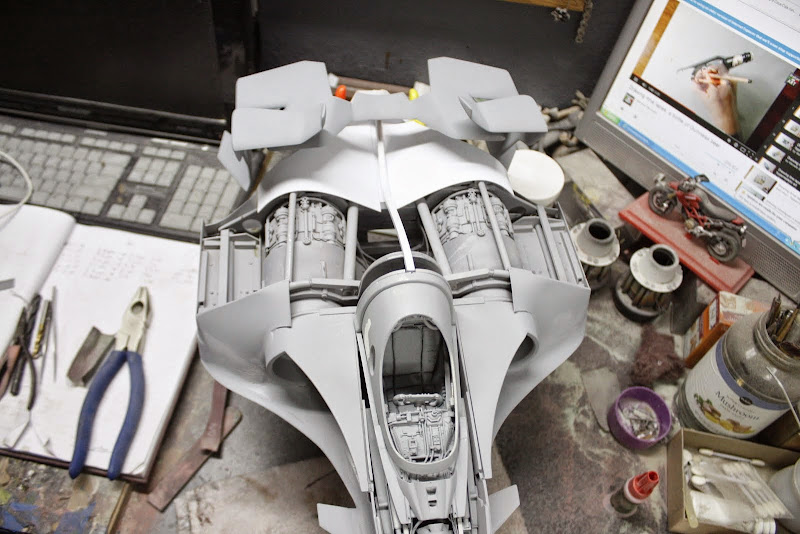  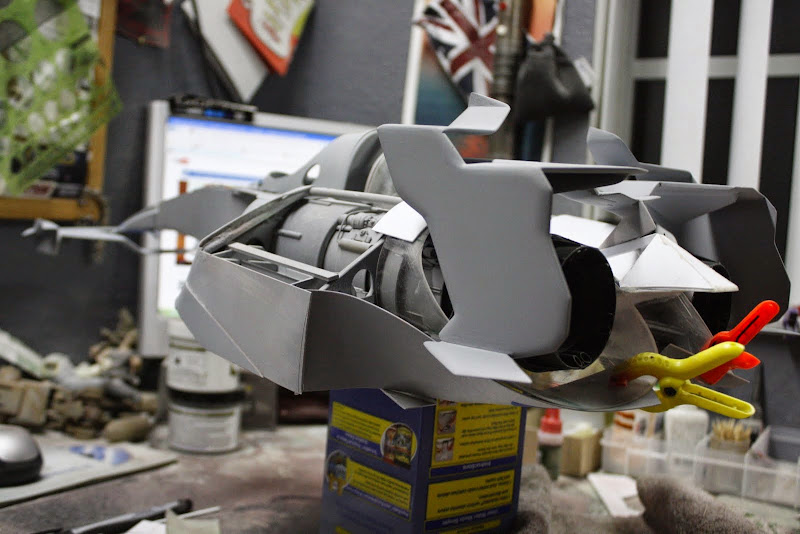 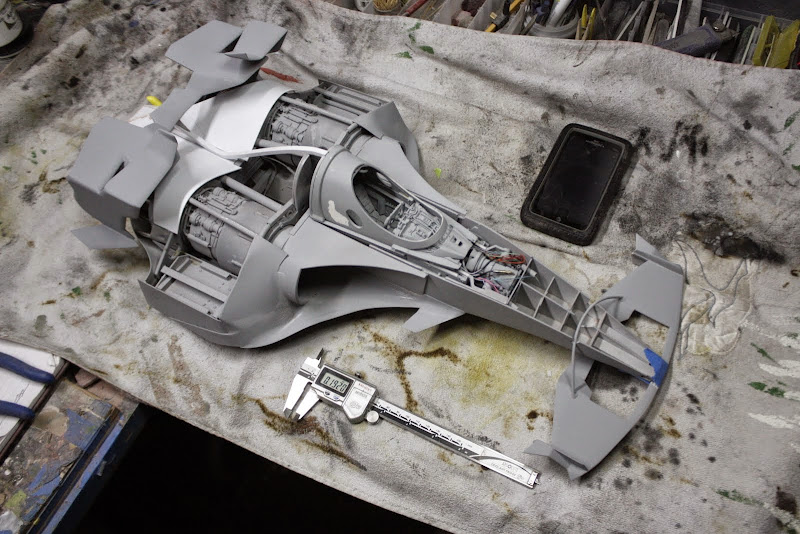 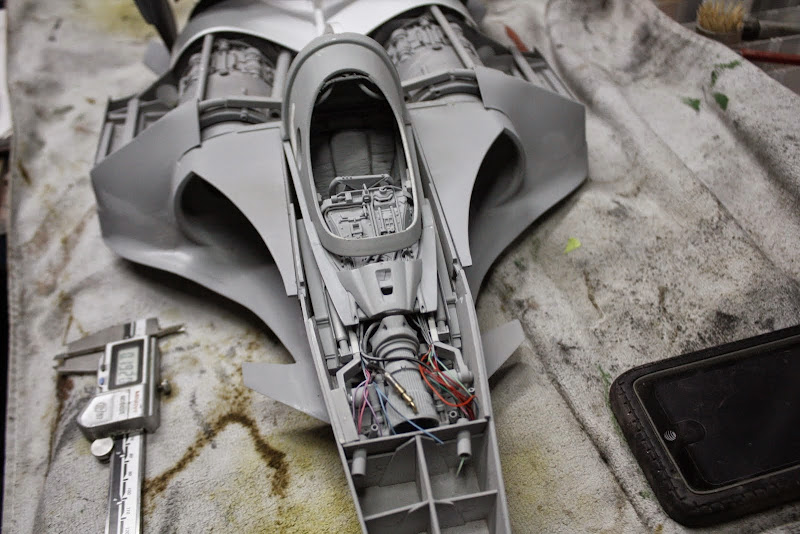 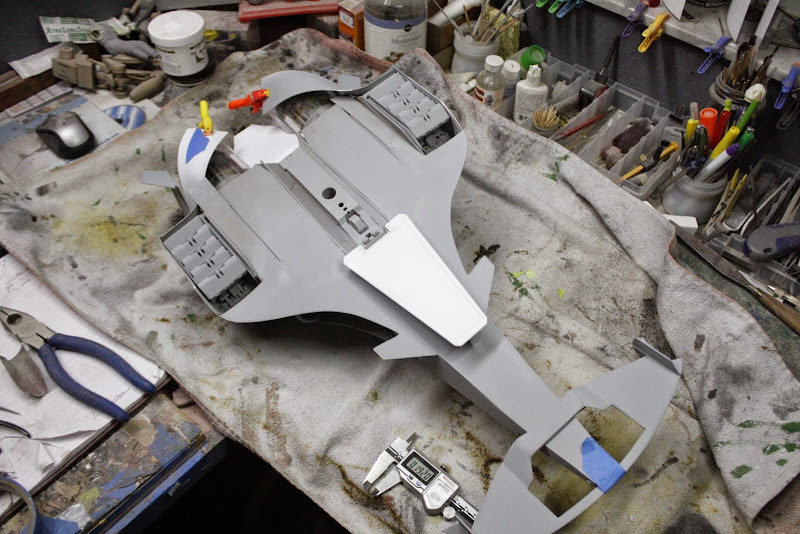 I'm now working on the top skin around the canopy, trying to get everything to open and close invisibly is prooving a bit tricky But, that's next time Stay tuned my friends Take care Gagstermansky RIP Robin Williams The world was a better place with you in it  |
|
|
|
Post by Leon on Aug 15, 2014 21:16:39 GMT -5
First off Glad to hear your doing ok Gag ;)and second nice to see you making more progress and looks great in primer. |
|
|
|
Post by dupes on Aug 15, 2014 21:47:42 GMT -5
A) The skimmer looks great, man! B) You were a TT MONSTER! Super solid time there...hope you can get it back. Time to break out the Time Trial Bike again me thinks. It's been a while. In my 20's I could regularly do a sub 23 minute 10 mile time trial, but I ain't 20 no more. |
|
|
|
Post by deafpanzer on Aug 17, 2014 21:52:57 GMT -5
WOW! DAMN! It is starting to look like a spaceship now...
|
|
thenylongag
Full Member
Sept2013 MoM Winner
Member since: June 2012
Yes, we have 'NO' bananas
Posts: 304
Jun 7, 2012 11:20:57 GMT -5
Jun 7, 2012 11:20:57 GMT -5
|
Post by thenylongag on Sept 11, 2014 19:56:03 GMT -5
Ello, Thanks for being with me friends Lost my Mojo, big time. This thing is really beginning to piss me off. It's one of those times when you really would appreciate an instruction book. No such luck The main issue was the transition between the cockpit cowel opening and hiding everything when closed, One night i just sat and cut card board, taped it on and then threw it in the bin after 10 minutes because it was "OFF". 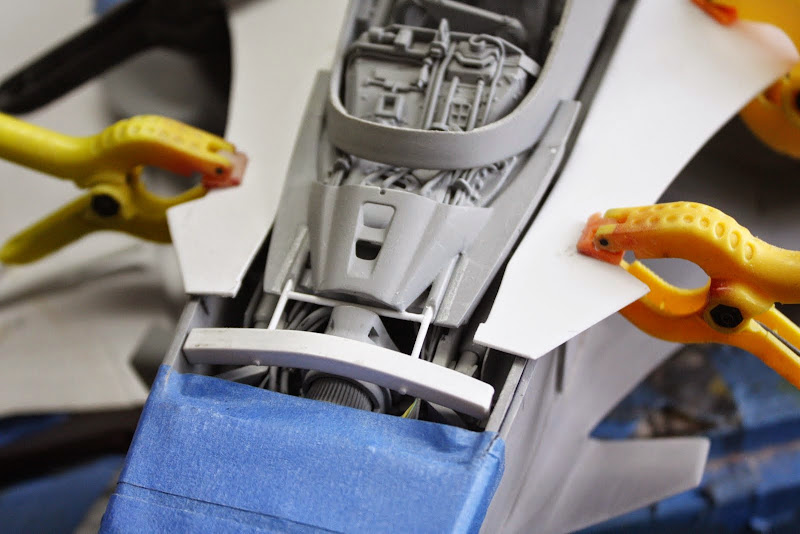 Gave up, for the time being, and gave the cockpit assemblies a base coat of Tamiya matt black, XF1   Also did a bit of pre-shading on the engines  And hit the detail in the floor 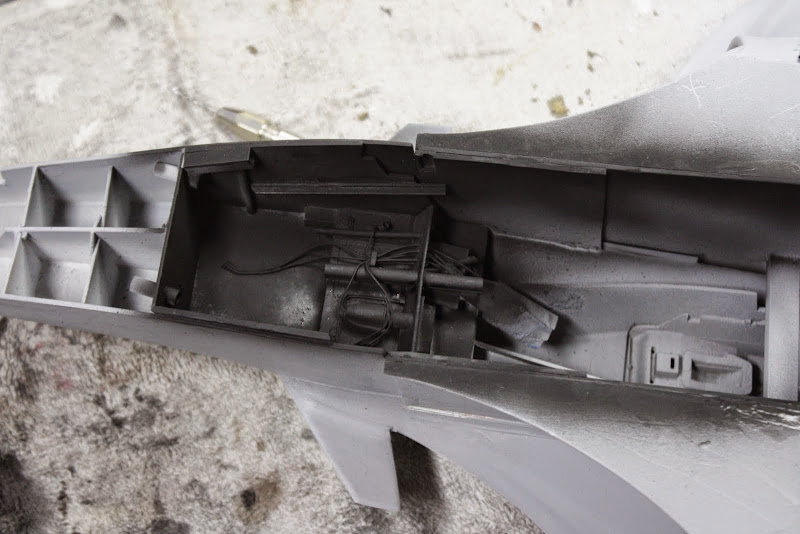 All of these areas will get hit with a silver/gun metal/crome conbination to add some additional depth Then moved back to the body work, side pod transition and cockpit canopy transition/blend,  removed clamps  sanded flush  Filled, with additional cockpit cowel in position  Added nose base plate 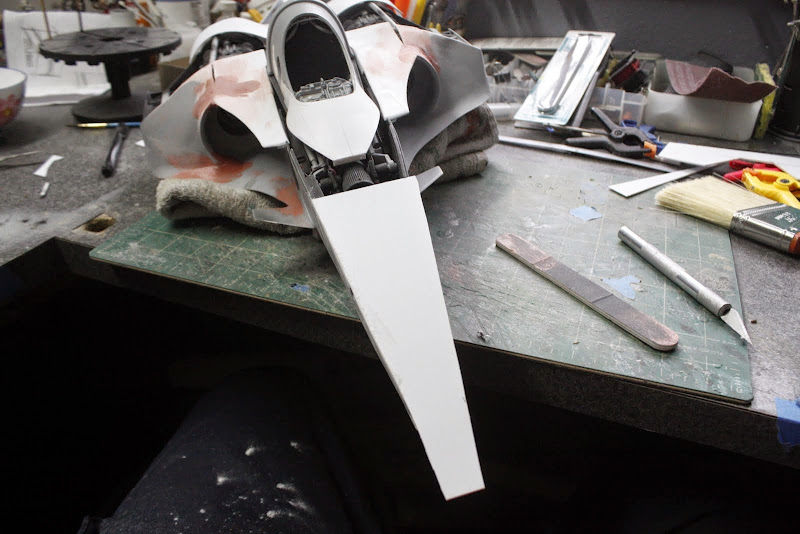   Was so pissed with this i even thought of selling it on e-bay but for now it seems i'm on it again unless of course someone has some free money to throw my way, no........ok, i'll try and finish it myself then. I love scratch building Gag |
|
|
|
Post by deafpanzer on Sept 11, 2014 22:12:40 GMT -5
WOW! You are still doing far better than what I would have come with... hang in there mojo will return eventually. I took a break for six weeks and now I am back at the bench hopefully it will stay that way.
|
|
|
|
Post by kaytermarram on Sept 12, 2014 15:36:11 GMT -5
This is beyond belief, like a real movie model, highly detailed. And yes, I know the pain you suffer from. When I sculpt some new figure I would LOVE to throw the stuff against any wall in my home. ANYTIME. But when nearly finished, I am happy to have stayed tuned and gone the road of pains.
Frank
|
|
thenylongag
Full Member
Sept2013 MoM Winner
Member since: June 2012
Yes, we have 'NO' bananas
Posts: 304
Jun 7, 2012 11:20:57 GMT -5
Jun 7, 2012 11:20:57 GMT -5
|
Post by thenylongag on Oct 12, 2014 15:11:37 GMT -5
Afternoon everyone, Thanks for the kind words guys Well after a few weeks away from the MK2 Skimmer i decided to do some painting and a few more body mods on the nose. I'm not sure if the detail will be seen or not as i am having difficulty making the transition between open and closed cockpit invisible, so i had a design rethink, First i started with some upper nose surface detail   I removed the front part of the cockpit frame so it will now be open  I then painted one of the cockpit detail assembly's   I dry brushed the under floor detail in the main body  I assembled the 5 point seat belts from my Tamiya 1/12th Williams FW14B  I then painted the main cockpit tub  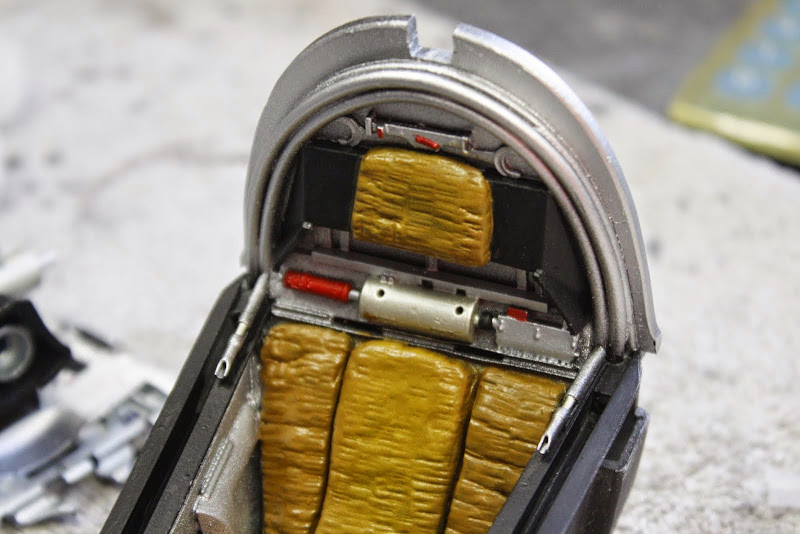  Did a little bit of dry brushing   I then fitted the belts   Then i gave the dash and steering wheel a coat of matt black (XF-1) ready for the detail paint  Thats all i've done so far A bit more excited to finish this now i have sorted the cockpit issues out Still a long way to go but i'm getting there Stay tuned Take care Gag |
|
|
|
Post by Leon on Oct 12, 2014 15:47:31 GMT -5
Glad to see to back at the bench and the cockpit issues sorted out Gag .The cockpit tub is looking fantastic. |
|
John Everett
Full Member
Member since: January 2012
July, 2016 MoM Winner
Posts: 1,278
Jan 17, 2012 0:53:48 GMT -5
Jan 17, 2012 0:53:48 GMT -5
|
Post by John Everett on Oct 12, 2014 20:54:18 GMT -5
Love the seat belts. The layer buildup on the nose will add a great visual interest.
|
|
|
|
Post by deafpanzer on Oct 13, 2014 9:05:06 GMT -5
Agree with John... those seat belts look great!
|
|
thenylongag
Full Member
Sept2013 MoM Winner
Member since: June 2012
Yes, we have 'NO' bananas
Posts: 304
Jun 7, 2012 11:20:57 GMT -5
Jun 7, 2012 11:20:57 GMT -5
|
Post by thenylongag on Oct 21, 2014 19:24:39 GMT -5
Evenin All Well, thanks for the support boys Still working on the front and did a bit on the underside/back area Lets have a look Gave the dash 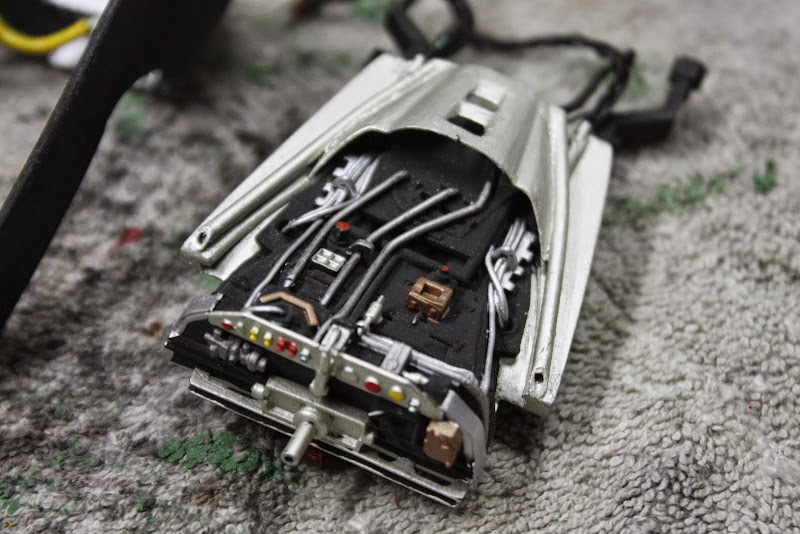 Cockpit hood 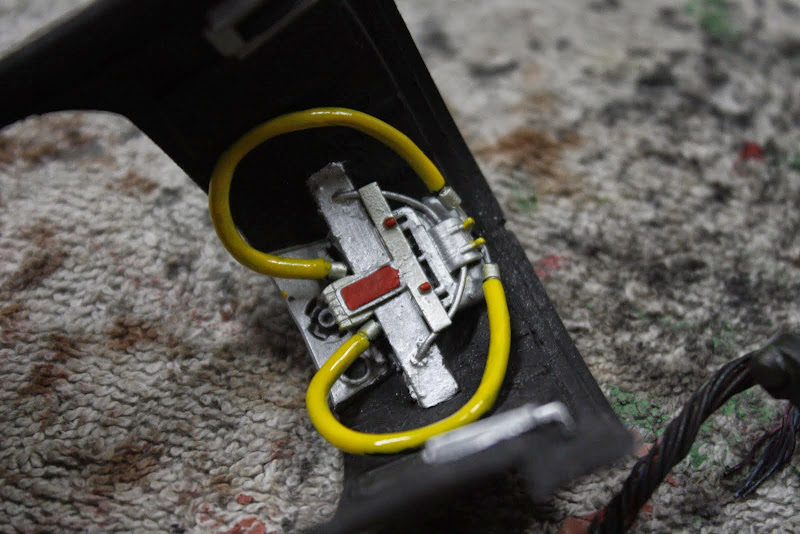 Steering wheel 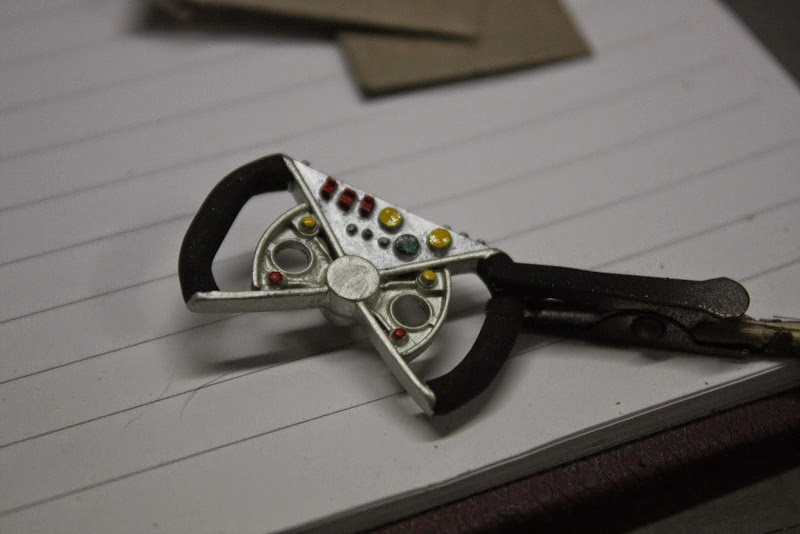 some paint then assembled the whole thing   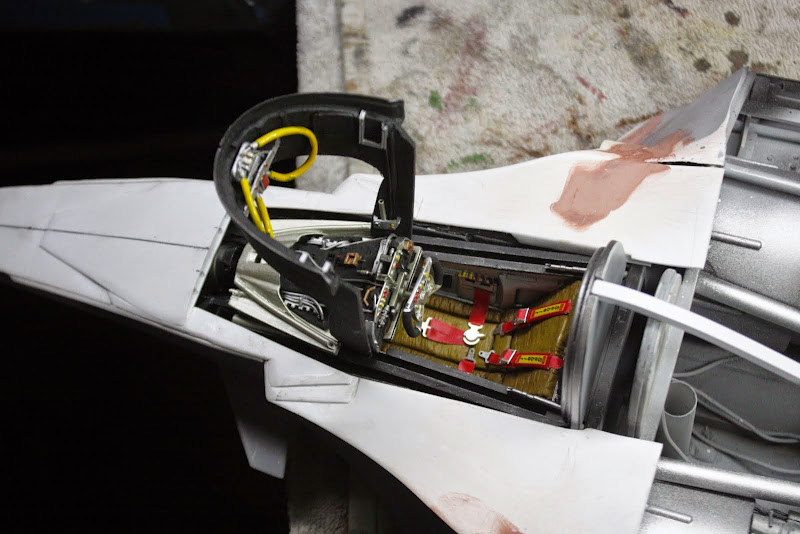 Made a frame work to cover front  Covered with 1mm styrene sheet 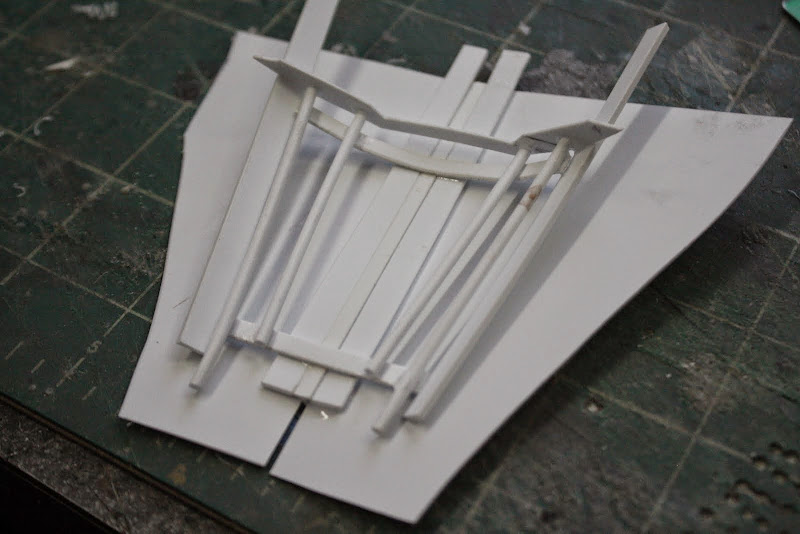 Black glossed  Added magnesium metallic to act as a base  Touched up the details  set a basic shape to the rear underpan  Started to shape the rear crash structure 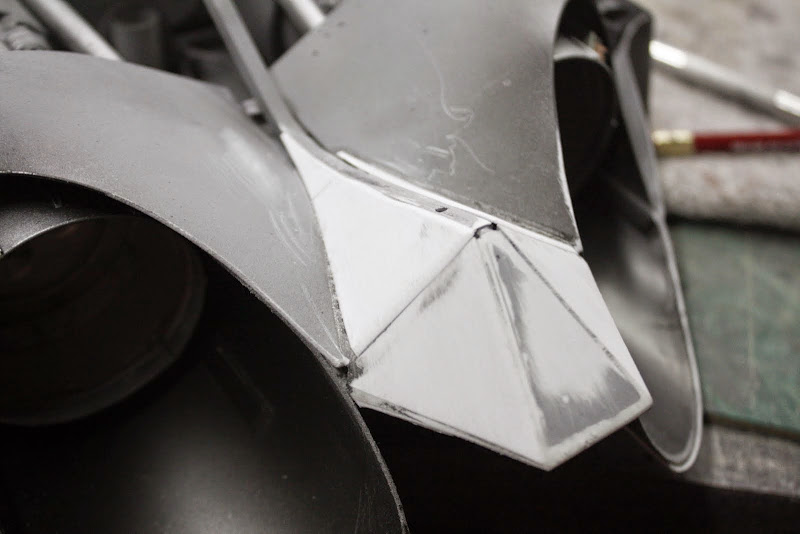 Glued front upper fairing  Added side cockpit edges  Basic first sanding 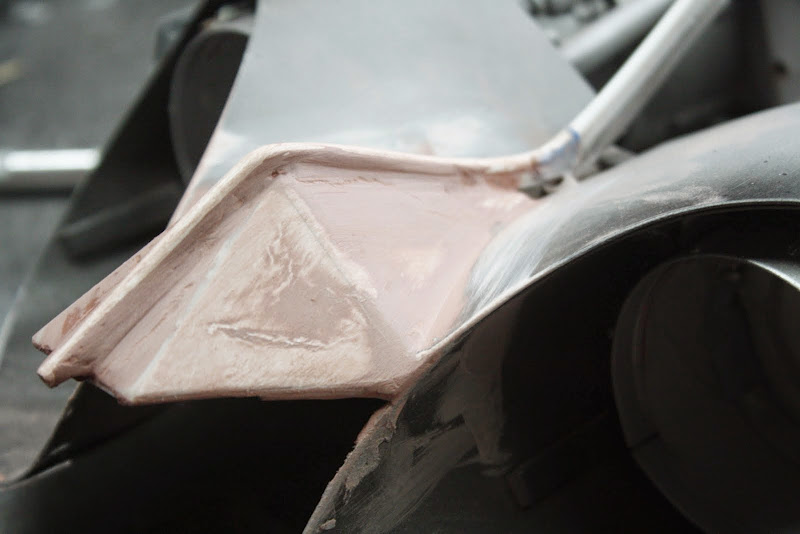 And re-application of filler    thats it so far Stay tuned Gag |
|
|
|
Post by Leon on Oct 21, 2014 19:30:43 GMT -5
Really starting to take shape Gag.
|
|
|
|
Post by dupes on Oct 22, 2014 6:30:41 GMT -5
Look at that...the stock price on Bondo just went up again! Excellent looking work despite your issues, Gag. |
|
thenylongag
Full Member
Sept2013 MoM Winner
Member since: June 2012
Yes, we have 'NO' bananas
Posts: 304
Jun 7, 2012 11:20:57 GMT -5
Jun 7, 2012 11:20:57 GMT -5
|
Post by thenylongag on Oct 26, 2014 17:36:36 GMT -5
Ello, Sand and fill and sand and fill and sand and fill............oh, and i cut the nose off. well not completely Had another idea for the front wing, so you have to go with the flow, still not sure...... 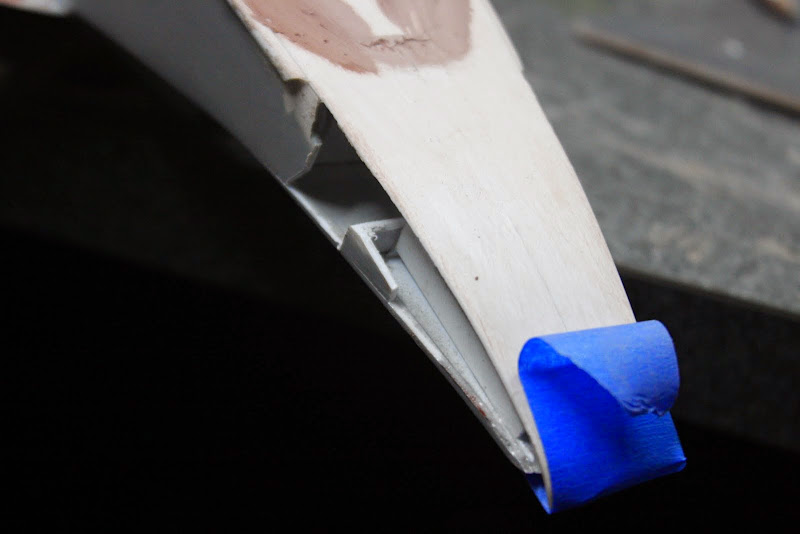  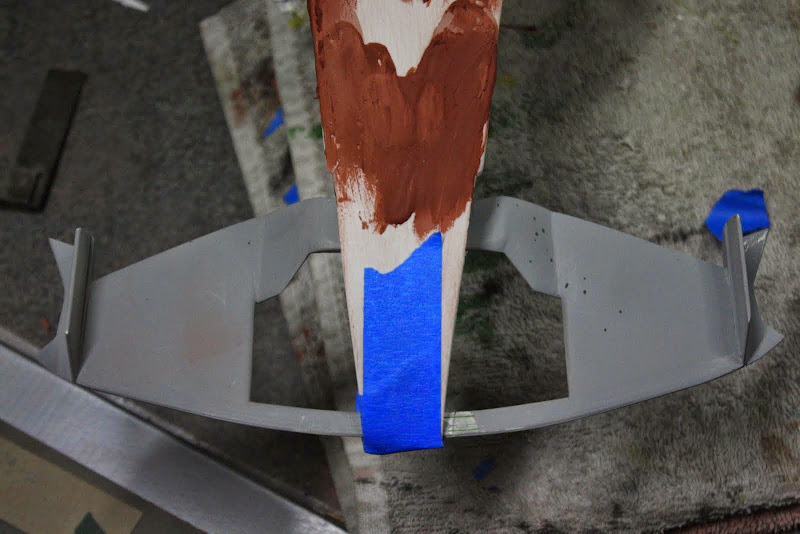 Sand and fill and sand and fill and sand and fill............ 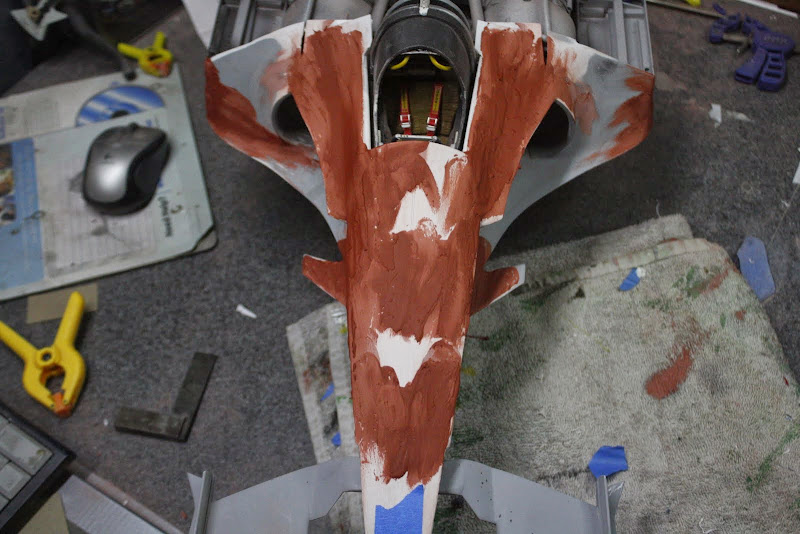 Wanted to add a last kicker to the cockpit rim, can you guess what its from? 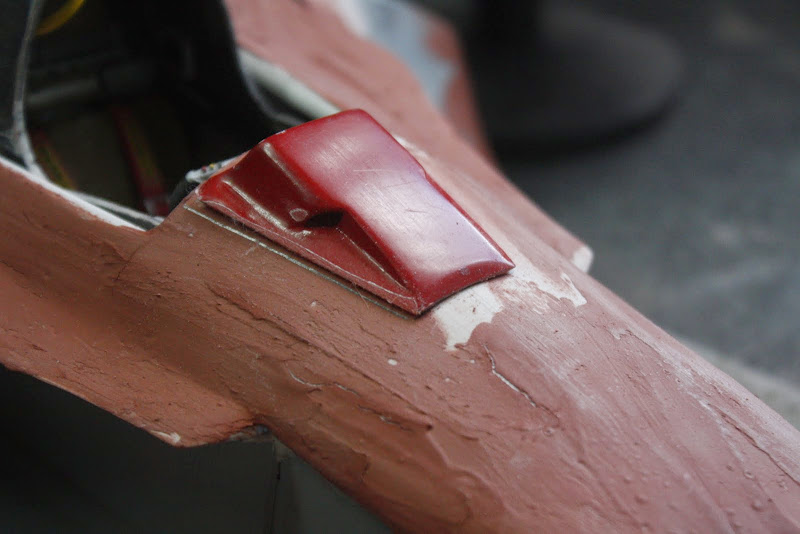 Hollowed out the back so we can see the details a bit better 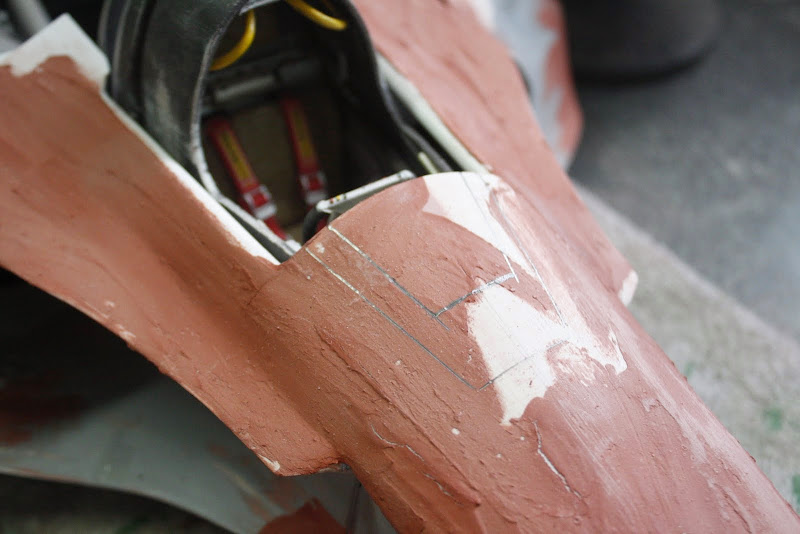 Added another layer of interest  Still have work to do on the underside  My old faithful voddy spout for one of the outside variable height magneto repeller nozzles  Added some blend tubes and then started to build up the top rear fairing 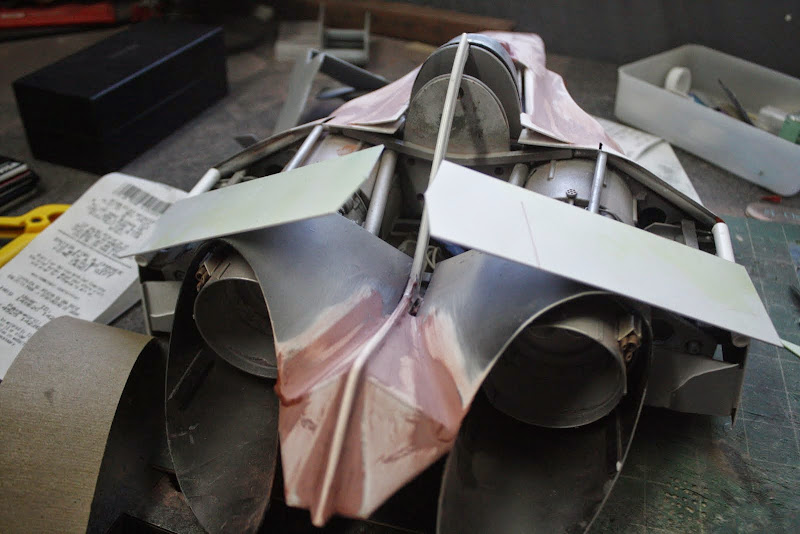 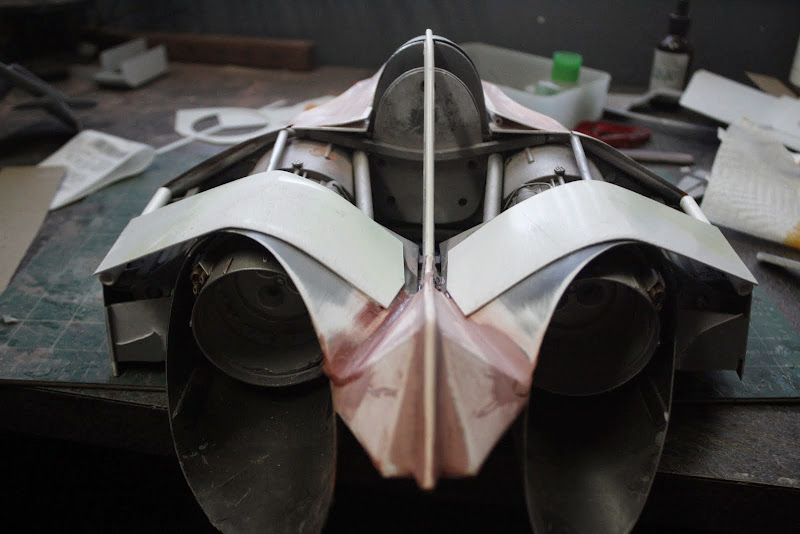 Fill and wait 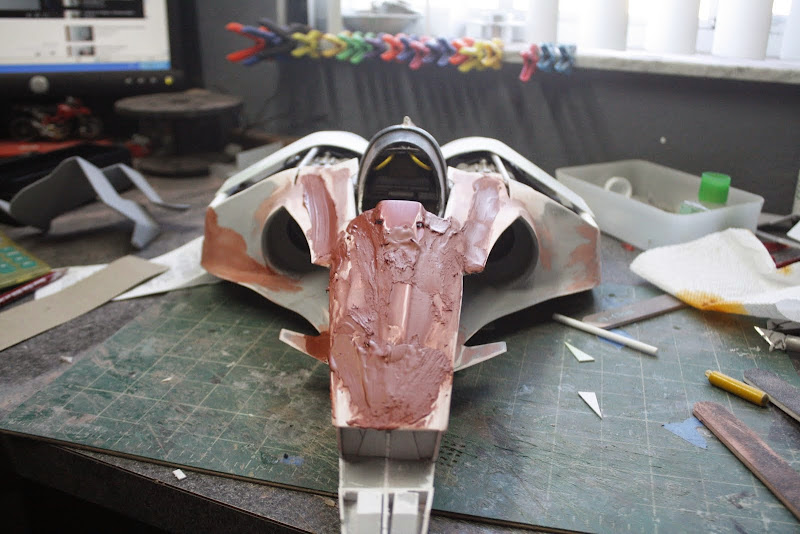 Full 360 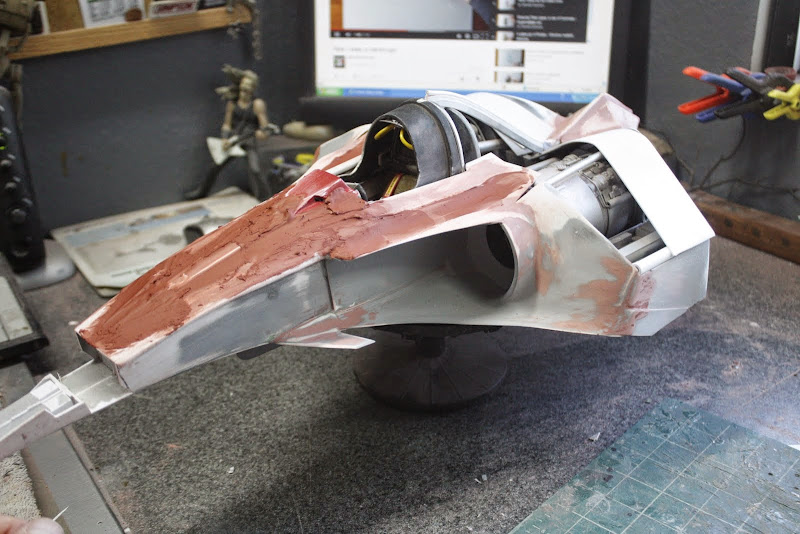 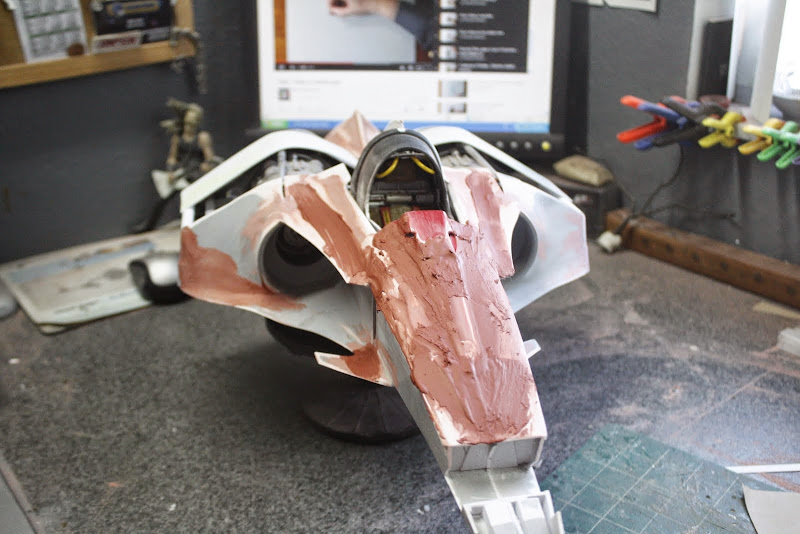 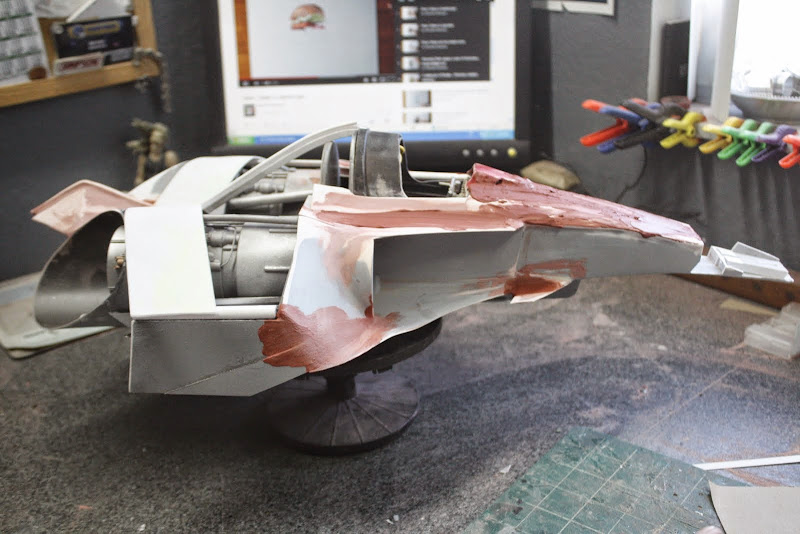 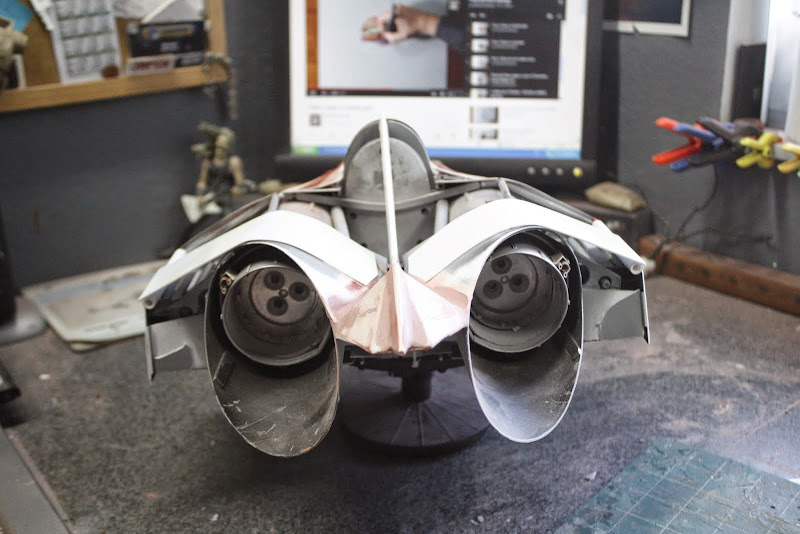 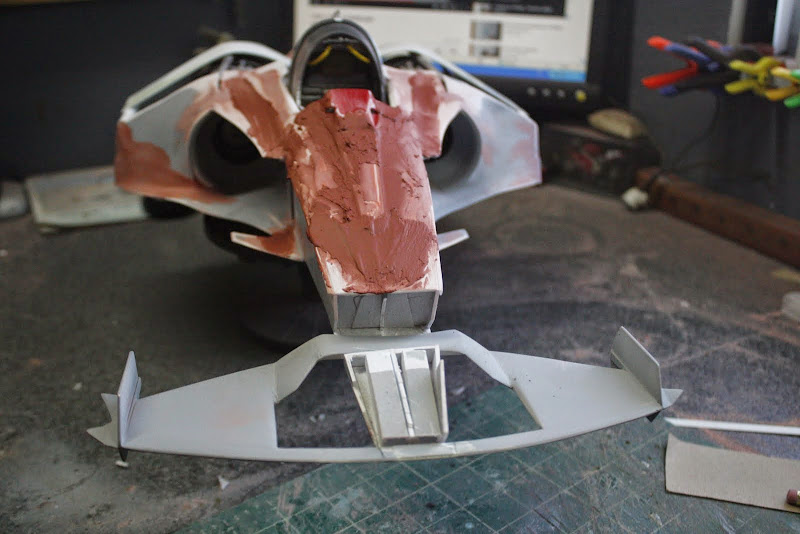 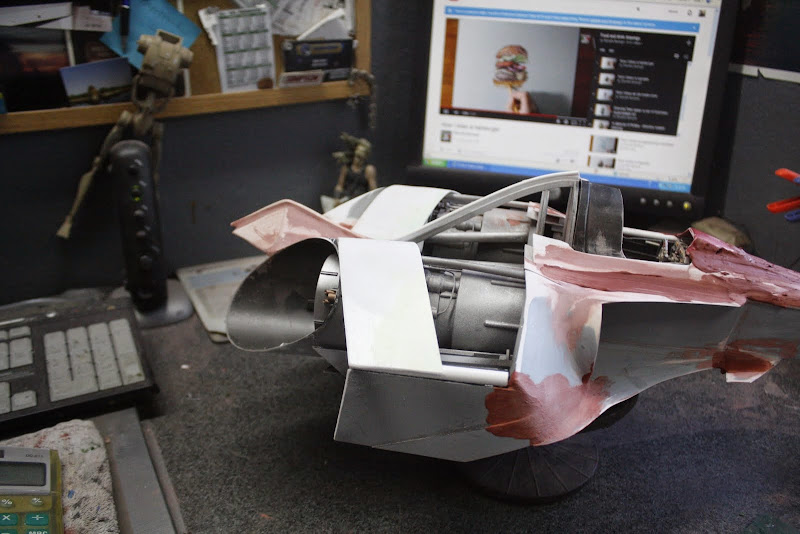 And thats about it, stay tuned take care Gag |
|


 ) You never cease to impress Gagster.